
Modern AI workflows increasingly rely on intelligent agents that interact seamlessly with your backend services. The Model Context Protocol (MCP) is a fast-growing open standard enabling AI agents to communicate with external servers, exposing tools, data, and context in a structured, programmatic way.
This comprehensive guide shows API developers and backend engineers how to build, deploy, and host an MCP server on Netlify—without managing dedicated infrastructure. Whether you're integrating with Claude, Cursor, Windsurf, or building your own agent tools, you'll learn how to deliver robust, scalable endpoints using Netlify Functions. We’ll also show how Apidog can streamline your API testing and contract validation throughout this process.
What is an MCP Server?
An MCP server is a backend service that exposes:
- Tools: Functions AI agents can invoke (e.g., send an email, run a query)
- Resources: Readable data or endpoints provided to clients
- Prompts: Templates or generators for AI responses
MCP clients—such as Windsurf, Claude, Cursor, and others—connect using HTTP or Server-Sent Events (SSE), sending JSON-RPC requests and receiving structured responses. This enables AI agents to perform real actions, fetch context, and interact intelligently—far beyond simple prompt completions.
Why use Netlify? Hosting MCP endpoints on Netlify gives you a serverless, scalable backend with zero infrastructure headaches. Deploy, update, and scale your MCP server via Git or CLI—perfect for fast-moving API teams.
Prerequisites
Before you start, ensure you have:
- Node.js 20+ (for MCP development & Netlify CLI): Download Node.js
- Netlify account (free or paid): Sign up at Netlify
- Netlify CLI: Install globally with
npm install -g netlify-cli - Git repository (GitHub, GitLab, or Bitbucket)—recommended for CI/CD
- MCP client for testing (e.g., Windsurf, Cursor, Claude)
Netlify natively supports serverless functions and easy deployments using Git or CLI workflows.
Step-by-Step: Build, Deploy & Host an MCP Server on Netlify
1. Initialize Your Project
Set up your project directory and install dependencies:
mkdir netlify-mcp-server
cd netlify-mcp-server
npm init -y
npm install @modelcontextprotocol/sdk
- Create a
/netlify/functionsdirectory for your serverless MCP code:
/netlify-mcp-server
  /netlify
    /functions
      mcp.js
- In Netlify, create a new site (from Git or manually). If you use Git, connect your repository for CI/CD.
2. Implement the MCP Server Function
Create mcp.js inside /netlify/functions to define your MCP server logic. Below is a practical example using the official SDK:
import { McpServer } from "@modelcontextprotocol/sdk/server/mcp.js";
import { StreamableHTTPServerTransport } from "@modelcontextprotocol/sdk/server/streamableHttp.js";

export const handler = async (event) => {
  const transport = new StreamableHTTPServerTransport({
    req: event,
    res: {}
  });

  const server = McpServer.http(transport)
    .serverInfo("Netlify MCP Server", "1.0.0")
    .capabilities({ tools: true, resources: true })
    .build();

  // Register an "echo" tool
  server.addTool({
    name: "echo",
    description: "Echo back provided text",
    schema: { type: "object", properties: { text: { type: "string" } }, required: ["text"] },
    handler: async ({ text }) => ({ result: text })
  });

  return server.handle();
};
Key points:
- Uses the MCP SDK for easy server definition
- Exposes an example "echo" tool (for testing)
- Expandable: Add your own tools, resources, or prompts as needed
See how to create a Java MCP server for sharing data and extending tools to Claude or Cursor.
3. Run Locally for Fast Development
-
Start the Netlify development server:
netlify devYour MCP endpoint is now live at:
http://localhost:8888/.netlify/functions/mcp -
Test with MCP Inspector:
Use the official inspector to verify your setup:npx @modelcontextprotocol/inspector npx mcp-remote@next http://localhost:8888/mcpOpen http://localhost:6274 to interactively explore your MCP server’s tools and resources.

4. Deploy Your MCP Server to Netlify
Option 1: Git-Based Deployment
- Push your project to GitHub/GitLab/Bitbucket.
- In Netlify, link the repository via Site Configuration > Build & Deploy.
- Netlify will auto-deploy on every push to
main.

Option 2: CLI Deployment
- Deploy directly from your terminal:
netlify deploy # For preview netlify deploy --prod # For production - Your live MCP endpoint becomes:
https://your-site-name.netlify.app/.netlify/functions/mcp
5. Connect MCP Clients to Your Netlify Endpoint
Point your favorite MCP-compatible client to your new endpoint:
For local testing:
{
  "mcpServers": {
    "my-netlify-mcp": {
      "command": "npx",
      "args": [
        "mcp-remote@next",
        "http://localhost:8888/mcp"
      ]
    }
  }
}
For your deployed server:
{
  "mcpServers": {
    "my-netlify-mcp": {
      "command": "npx",
      "args": [
        "mcp-remote@next",
        "https://your-site-name.netlify.app/mcp"
      ]
    }
  }
}
Replace your-site-name with your actual Netlify subdomain.
Client Setup Examples
-
Claude Desktop:
Settings → Developer → Edit Config → paste JSON → save and restart.
-
Cursor:
Settings → Tools & Integrations → Add Custom MCP Server → paste and save.
-
VS Code Copilot:
Settings → search “MCP” → enable under Features → Chat → Editsettings.json.
6. Test Your MCP Server End-to-End
Try a sample prompt in your MCP client, such as:
"Using the MCP Server on Netlify, can you run a report for the last 3 days?"
If you used the sample mcp.js, you should see the echo tool in action.

Expand your MCP server with real tools for advanced integrations—like API calls, database access, or workflow automation.
7. Inspect, Debug, and Secure
- Inspect your deployed endpoint:
npx @modelcontextprotocol/inspector npx mcp-remote@next https://your-site-name.netlify.app/mcp - Monitor logs: Use Netlify’s dashboard for function logs and analytics.
- Add authentication: Store API keys securely in Netlify Environment Variables (Site Settings → Build & Deploy → Environment).
- Ensure stateless logic: Netlify Functions are ephemeral—use external databases or caches as needed.
Best Practices for MCP Servers on Netlify
- Design stateless functions for scalability—avoid in-memory state.
- Secure secrets using Netlify’s environment variables.
- Prefer HTTPS/SSE transports for richer agent communication.
- Monitor performance with Netlify analytics and function logs.
- Use version control to enable safe, automated deployments.
How Apidog Accelerates API-Driven MCP Development
Building powerful MCP servers means exposing and testing many API endpoints. Apidog helps you:
- Test endpoints interactively and automatically
- Generate API test cases for CI/CD
- Validate API contracts to ensure reliability
Integrating Apidog into your MCP server workflow ensures your endpoints are robust, standards-compliant, and easily testable—minimizing regressions and accelerating development.
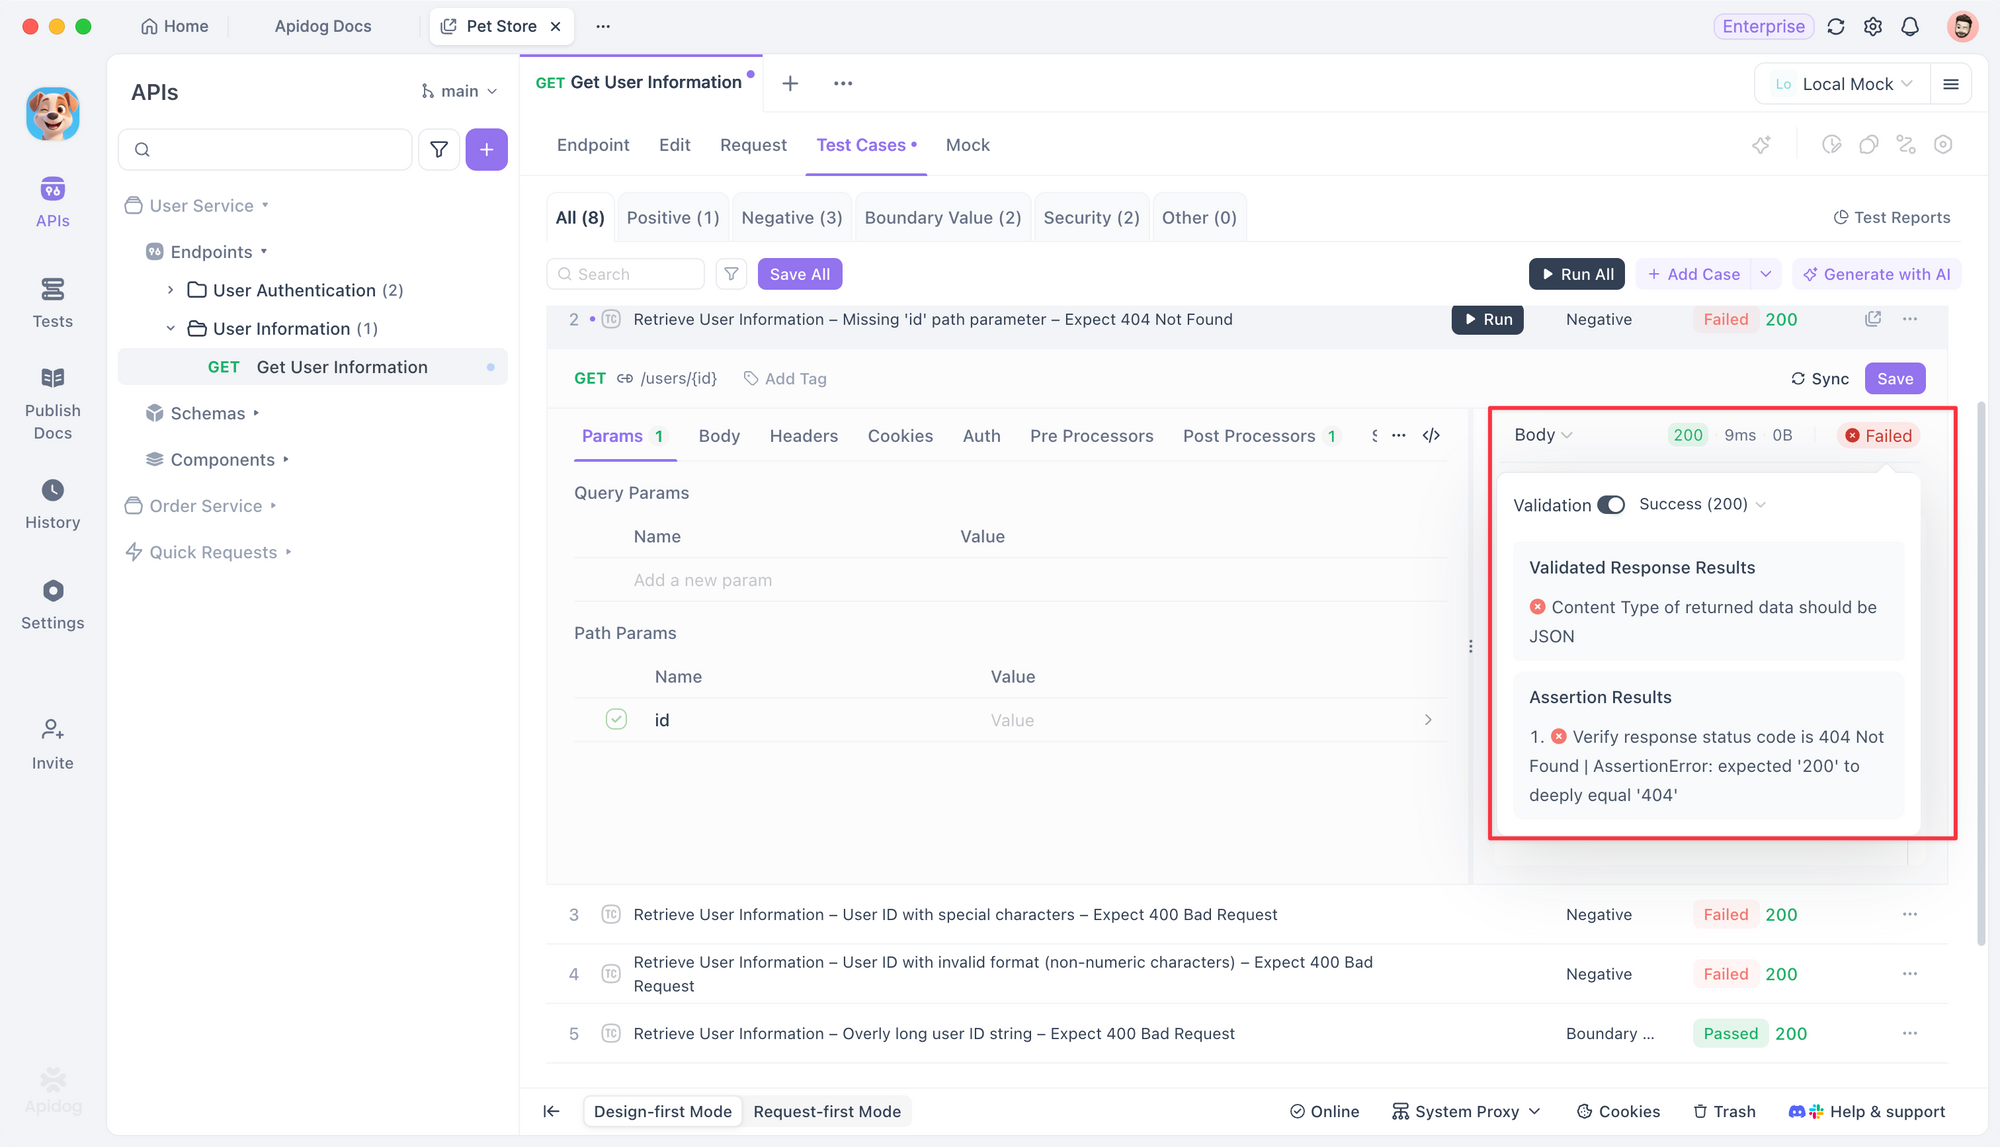
Example: API contract testing in Apidog
Frequently Asked Questions
Q1. What is the Model Context Protocol (MCP)?
A standardized protocol for AI agents to interact with backend servers exposing tools and resources.
Q2. Can Netlify host streaming MCP connections?
Netlify Functions support HTTP and, with compatible transports, Server-Sent Events (SSE) for streaming.
Q3. Do MCP servers require a UI?
No—MCP servers are backend services. UIs can be built separately if desired.
Q4. How should I store API keys?
Use Netlify Environment Variables and reference them in your function code.
Q5. Which MCP clients work with Netlify MCP servers?
Clients like Windsurf, Cursor, Claude, and VS Code Copilot are all compatible.
Conclusion
Hosting an MCP server on Netlify empowers API and backend teams to rapidly deliver structured, AI-accessible capabilities—without managing traditional infrastructure. With serverless deployment, instant scalability, and seamless client integration, Netlify is ideal for modern MCP workflows.
For API teams seeking reliability and confidence, using Apidog alongside your MCP server ensures every endpoint is thoroughly tested and contract-compliant.
Start building your Netlify-hosted MCP server today and unlock advanced AI-driven automation for your platform.


