Murf AI transforms text into natural-sounding speech with studio-quality voiceovers. Developers integrate the Murf AI API to build applications that narrate content, create audio versions of articles, power virtual assistants, and generate voiceovers at scale.
What is Murf AI API?
Murf AI provides a cloud-based text-to-speech service that converts written content into realistic human-like audio. Unlike robotic-sounding TTS engines, Murf uses AI-powered voice synthesis to produce natural intonation, proper emphasis, and authentic emotional expression.

The API exposes this functionality for developers. Key capabilities include:
- Voice Library - Access 120+ AI voices spanning different genders, ages, and accents
- Multi-language Support - Generate speech in 20+ languages including English, Spanish, French, German, and Hindi
- Voice Customization - Adjust pitch, speed, and emphasis for precise control
- Multiple Output Formats - Export audio as MP3, WAV, or FLAC
- SSML Support - Fine-tune pronunciation using Speech Synthesis Markup Language
Developers use Murf AI API for video narration, podcast production, IVR systems, audiobook generation, and accessibility features. The API handles both short snippets and long-form content, making it suitable for diverse use cases.
Getting Started with Murf AI API
Before making API calls, you need to set up authentication. Murf AI uses API keys for authorization, following standard REST conventions.
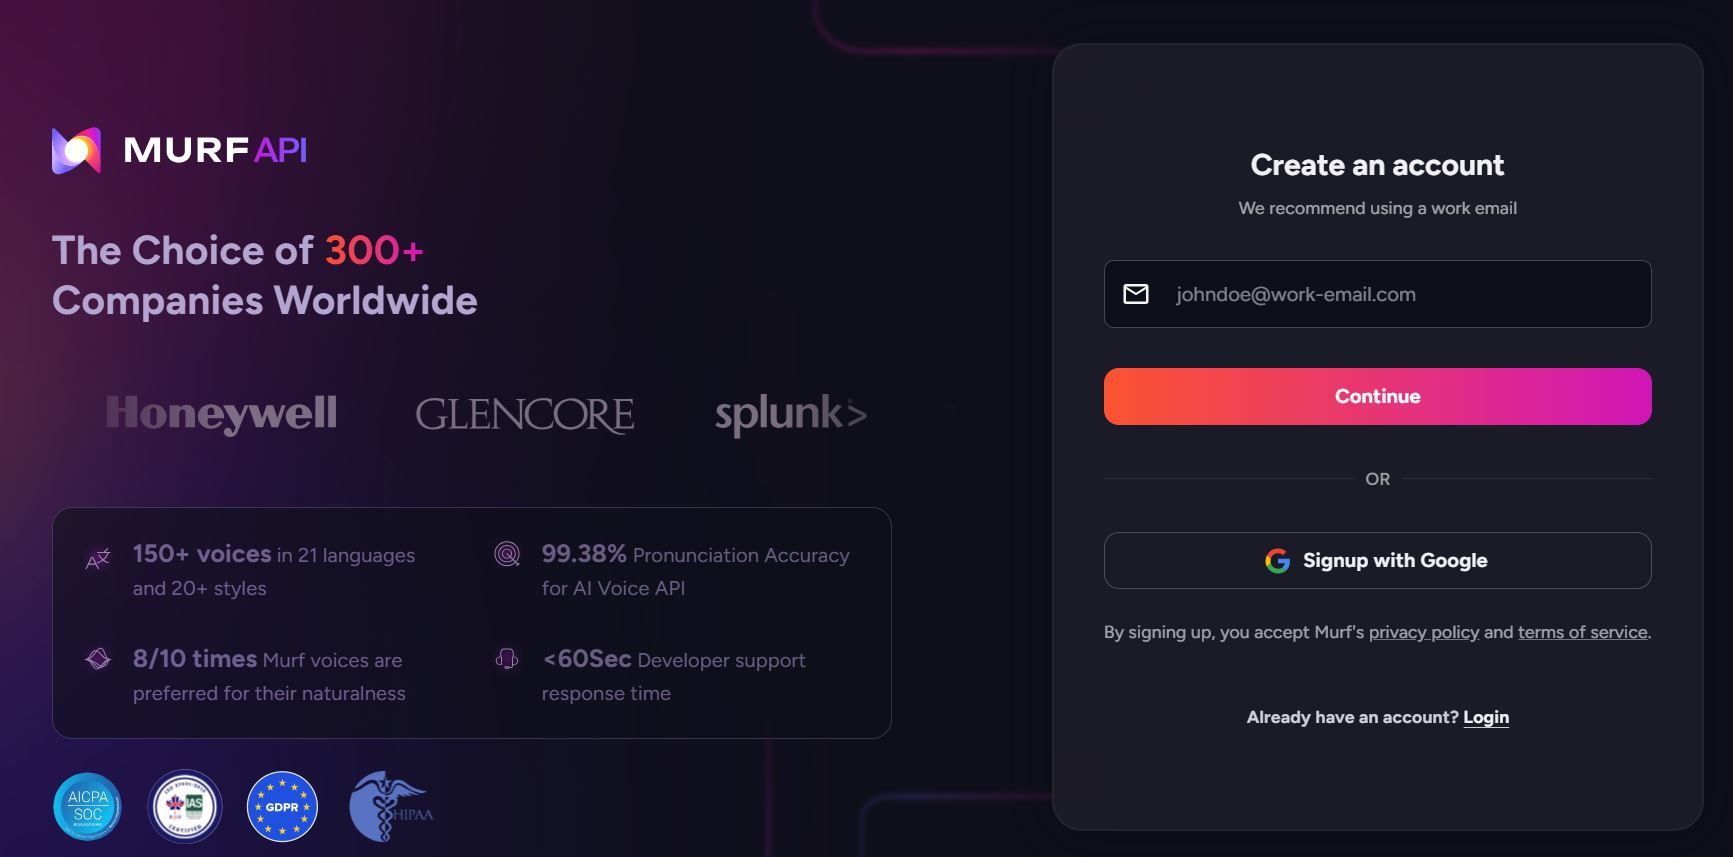
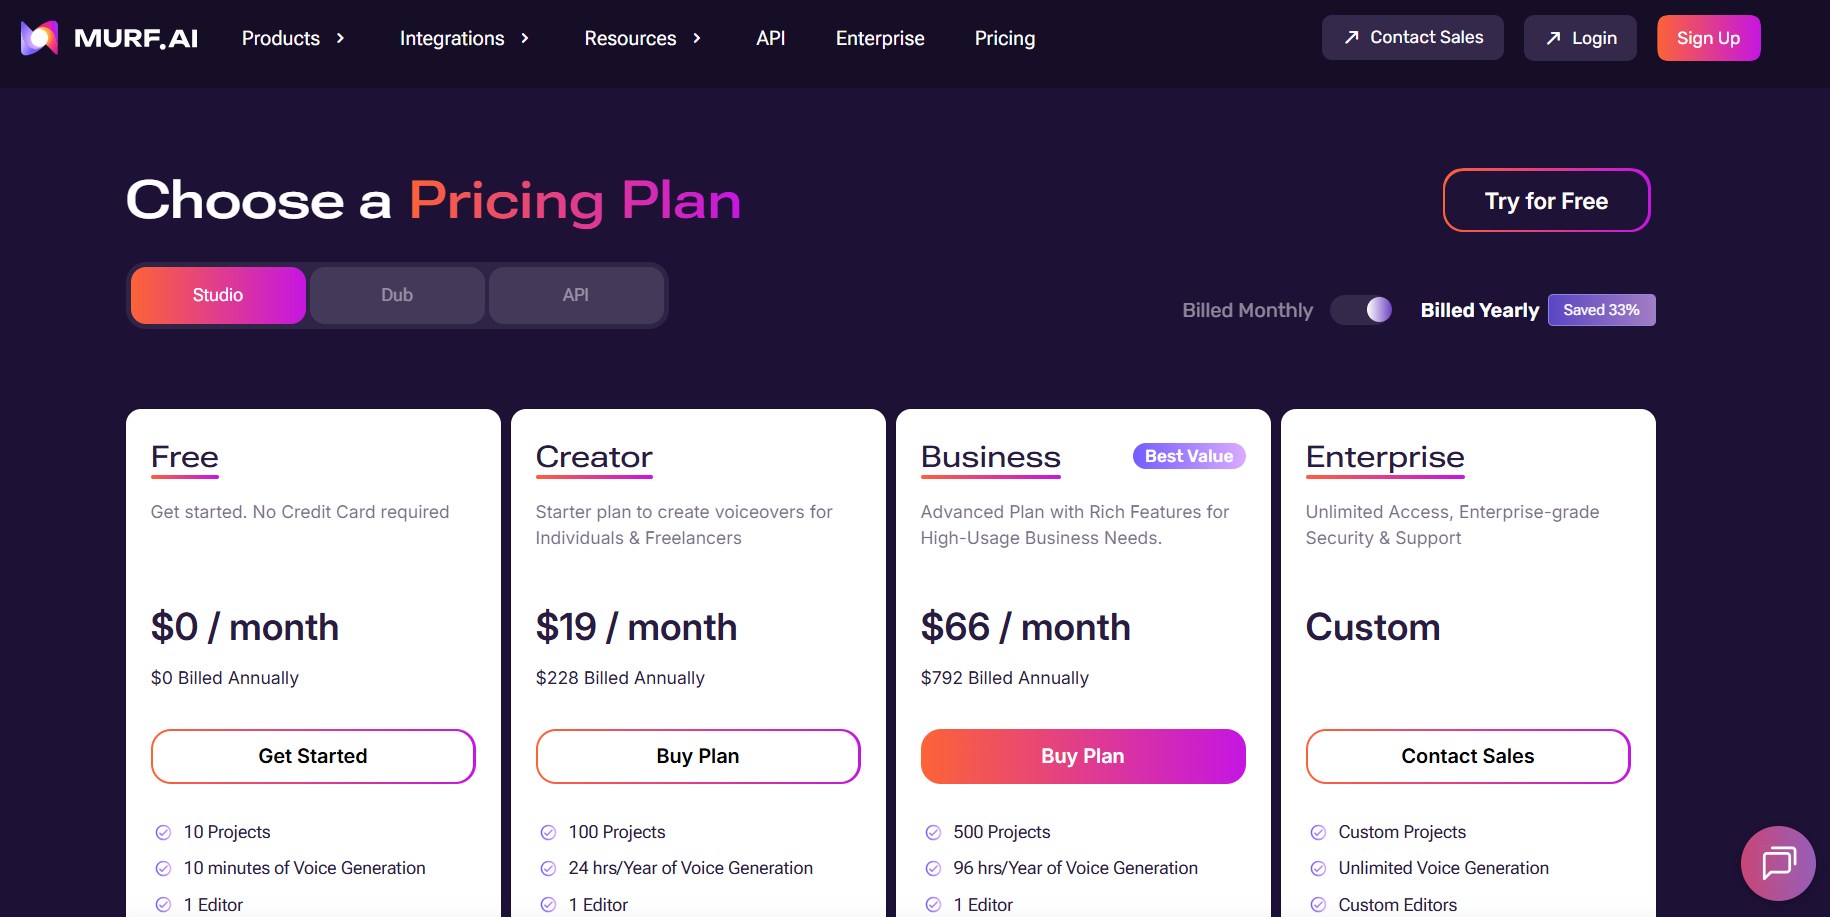
Step 1: Create a Murf AI Account
Visit murf.ai and sign up for an account. Murf offers a free tier with limited credits, which works well for testing the API. For production use, you'll need a paid plan that includes API access.
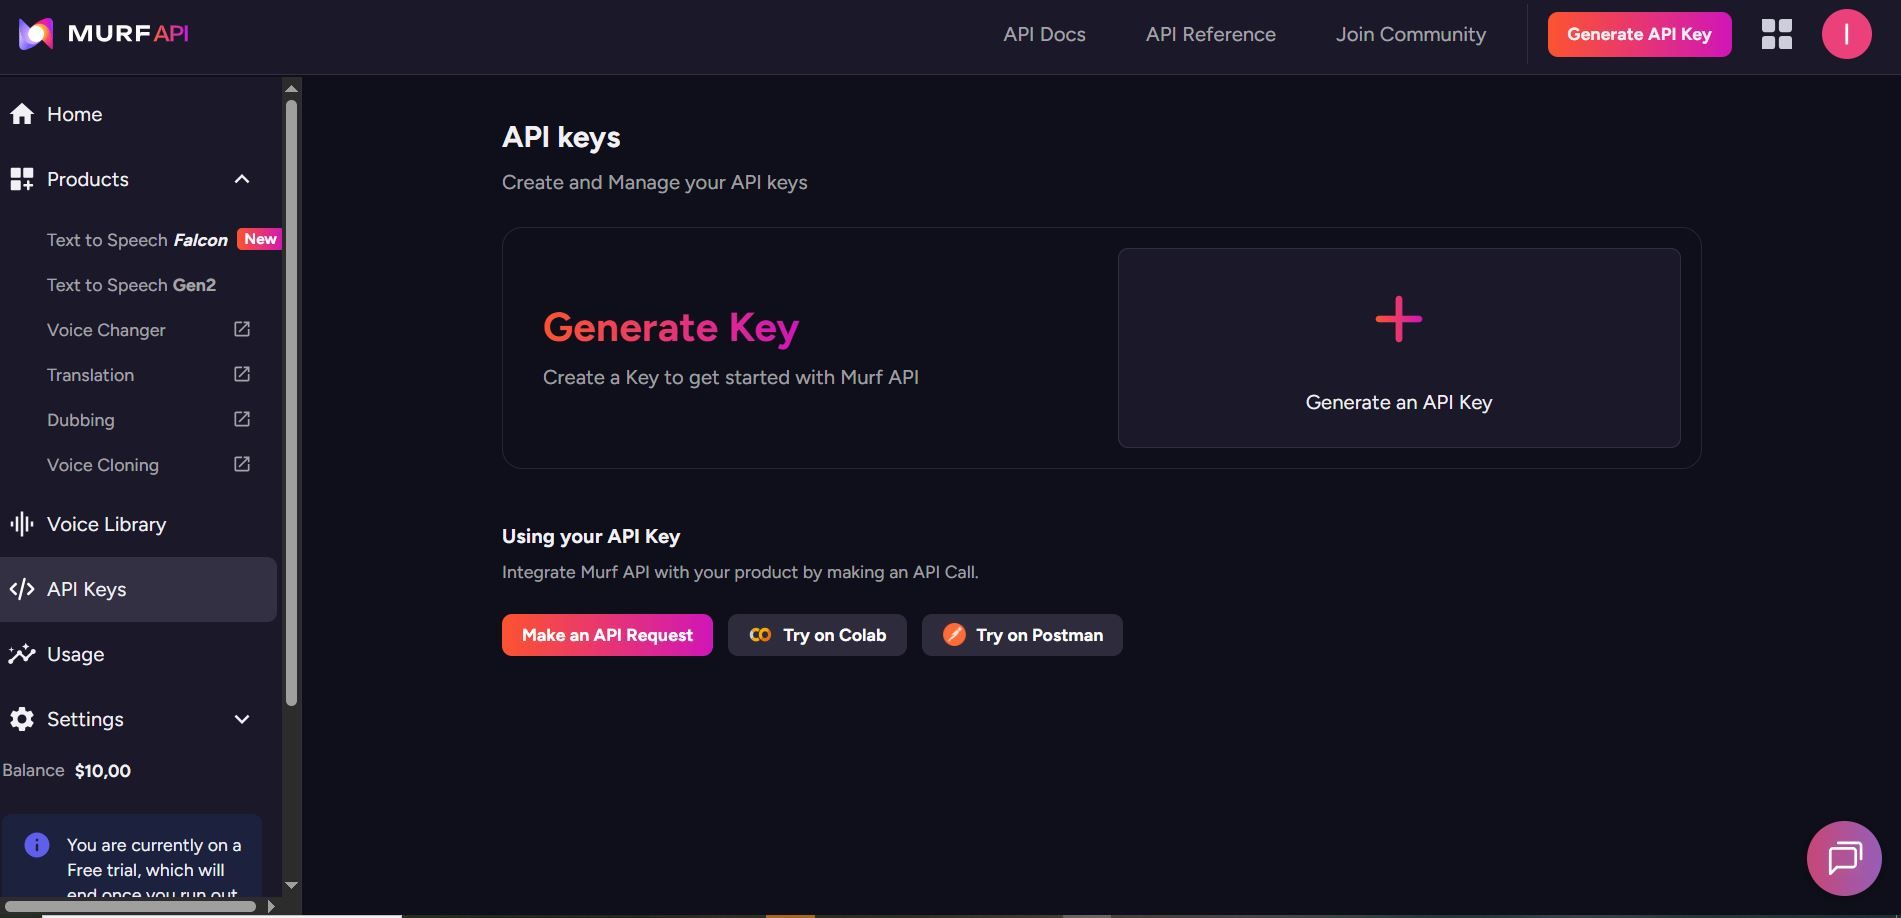
Step 2: Generate Your Murf AI API Key
Navigate to your account settings and locate the API section. Generate a new API key and store it securely. This key authenticates all your requests.
Keep your API key confidential. Never commit it to version control or expose it in client-side code.
Step 3: Understand the Murf AI API Base URL
All Murf AI API requests go to:
https://api.murf.ai/v1
The API follows RESTful conventions with JSON request and response bodies. Authentication happens via the api-key header.
Murf AI API Authentication
Every API request requires your API key in the request headers. The authentication header format is:
api-key: YOUR_API_KEY
Content-Type: application/json
Here's how authentication looks in different programming languages:
Python Authentication with Murf AI API
import requests

API_KEY = "your_murf_api_key"
BASE_URL = "https://api.murf.ai/v1"

headers = {
    "api-key": API_KEY,
    "Content-Type": "application/json"
}

# Test authentication by fetching available voices
response = requests.get(f"{BASE_URL}/voices", headers=headers)

if response.status_code == 200:
    print("Authentication successful!")
    voices = response.json()
    print(f"Available voices: {len(voices)}")
else:
    print(f"Authentication failed: {response.status_code}")
JavaScript Authentication with Murf AI API
const API_KEY = 'your_murf_api_key';
const BASE_URL = 'https://api.murf.ai/v1';

const headers = {
    'api-key': API_KEY,
    'Content-Type': 'application/json'
};

// Test authentication
fetch(`${BASE_URL}/voices`, { headers })
    .then(response => response.json())
    .then(data => console.log('Voices available:', data.length))
    .catch(error => console.error('Auth failed:', error));
cURL Authentication with Murf AI API
curl -X GET "https://api.murf.ai/v1/voices" \
  -H "api-key: YOUR_API_KEY" \
  -H "Content-Type: application/json"
A successful authentication returns a 200 status code. Invalid keys return 401 Unauthorized.
Fetching Available Voices with Murf AI API
Before generating speech, retrieve the list of available voices to select one that fits your use case. The /voices endpoint returns all accessible voices with their metadata.
List All Voices
import requests

API_KEY = "your_murf_api_key"
BASE_URL = "https://api.murf.ai/v1"

headers = {
    "api-key": API_KEY,
    "Content-Type": "application/json"
}

response = requests.get(f"{BASE_URL}/voices", headers=headers)
voices = response.json()

# Display voice information
for voice in voices[:5]:  # Show first 5 voices
    print(f"Name: {voice['name']}")
    print(f"Voice ID: {voice['voiceId']}")
    print(f"Language: {voice['language']}")
    print(f"Gender: {voice['gender']}")
    print(f"Accent: {voice.get('accent', 'N/A')}")
    print("---")
The response includes voice properties:
| Property | Description | Example |
|---|---|---|
| voiceId | Unique identifier for the voice | "en-US-marcus" |
| name | Display name of the voice | "Marcus" |
| language | Language code | "en-US" |
| gender | Voice gender | "male" or "female" |
| accent | Regional accent | "American", "British" |
| style | Voice style/tone | "conversational", "formal" |
Filter Voices by Language
# Filter for English voices
english_voices = [v for v in voices if v['language'].startswith('en')]
print(f"English voices available: {len(english_voices)}")

# Filter for Spanish voices
spanish_voices = [v for v in voices if v['language'].startswith('es')]
print(f"Spanish voices available: {len(spanish_voices)}")
Generating Speech from Text
The core functionality of Murf AI API is converting text to speech. The /speech endpoint accepts text and voice parameters, returning an audio file.
Basic Text-to-Speech Request
import requests

API_KEY = "your_murf_api_key"
BASE_URL = "https://api.murf.ai/v1"

headers = {
    "api-key": API_KEY,
    "Content-Type": "application/json"
}

payload = {
    "text": "Welcome to our application. This audio was generated using Murf AI.",
    "voiceId": "en-US-marcus",
    "format": "mp3",
    "sampleRate": 24000
}

response = requests.post(
    f"{BASE_URL}/speech",
    headers=headers,
    json=payload
)

if response.status_code == 200:
    # Save the audio file
    with open("output.mp3", "wb") as f:
        f.write(response.content)
    print("Audio saved to output.mp3")
else:
    print(f"Error: {response.status_code} - {response.text}")
Request Parameters
| Parameter | Type | Required | Description |
|---|---|---|---|
| text | string | Yes | The text to convert to speech |
| voiceId | string | Yes | ID of the voice to use |
| format | string | No | Output format: mp3, wav, flac (default: mp3) |
| sampleRate | integer | No | Audio sample rate: 8000, 16000, 24000, 48000 |
| speed | float | No | Speaking speed: 0.5 to 2.0 (default: 1.0) |
| pitch | float | No | Voice pitch adjustment: -10 to 10 |
Adjusting Voice Speed and Pitch
payload = {
    "text": "This text is spoken at a slower pace with a lower pitch.",
    "voiceId": "en-US-marcus",
    "format": "mp3",
    "speed": 0.8,    # 80% of normal speed
    "pitch": -2      # Slightly lower pitch
}

response = requests.post(f"{BASE_URL}/speech", headers=headers, json=payload)
Using SSML for Advanced Control
Speech Synthesis Markup Language (SSML) provides fine-grained control over pronunciation, pauses, emphasis, and more. Murf AI API supports SSML tags for professional-grade audio output.
SSML Example
ssml_text = """
<speak>
    Welcome to <emphasis level="strong">Murf AI</emphasis>.
    <break time="500ms"/>
    Our text-to-speech technology creates <prosody rate="slow">natural sounding</prosody> audio.
    <break time="300ms"/>
    The word <phoneme alphabet="ipa" ph="ˈdeɪtə">data</phoneme> is pronounced correctly.
</speak>
"""

payload = {
    "text": ssml_text,
    "voiceId": "en-US-julia",
    "format": "mp3",
    "ssml": True  # Enable SSML parsing
}

response = requests.post(f"{BASE_URL}/speech", headers=headers, json=payload)
Common SSML Tags
| Tag | Purpose | Example |
|---|---|---|
<break> | Insert pause | <break time="500ms"/> |
<emphasis> | Stress a word | <emphasis level="strong">important</emphasis> |
<prosody> | Adjust rate/pitch | <prosody rate="slow">text</prosody> |
<phoneme> | Custom pronunciation | <phoneme alphabet="ipa" ph="...">word</phoneme> |
<say-as> | Interpret as type | <say-as interpret-as="date">2026-01-29</say-as> |
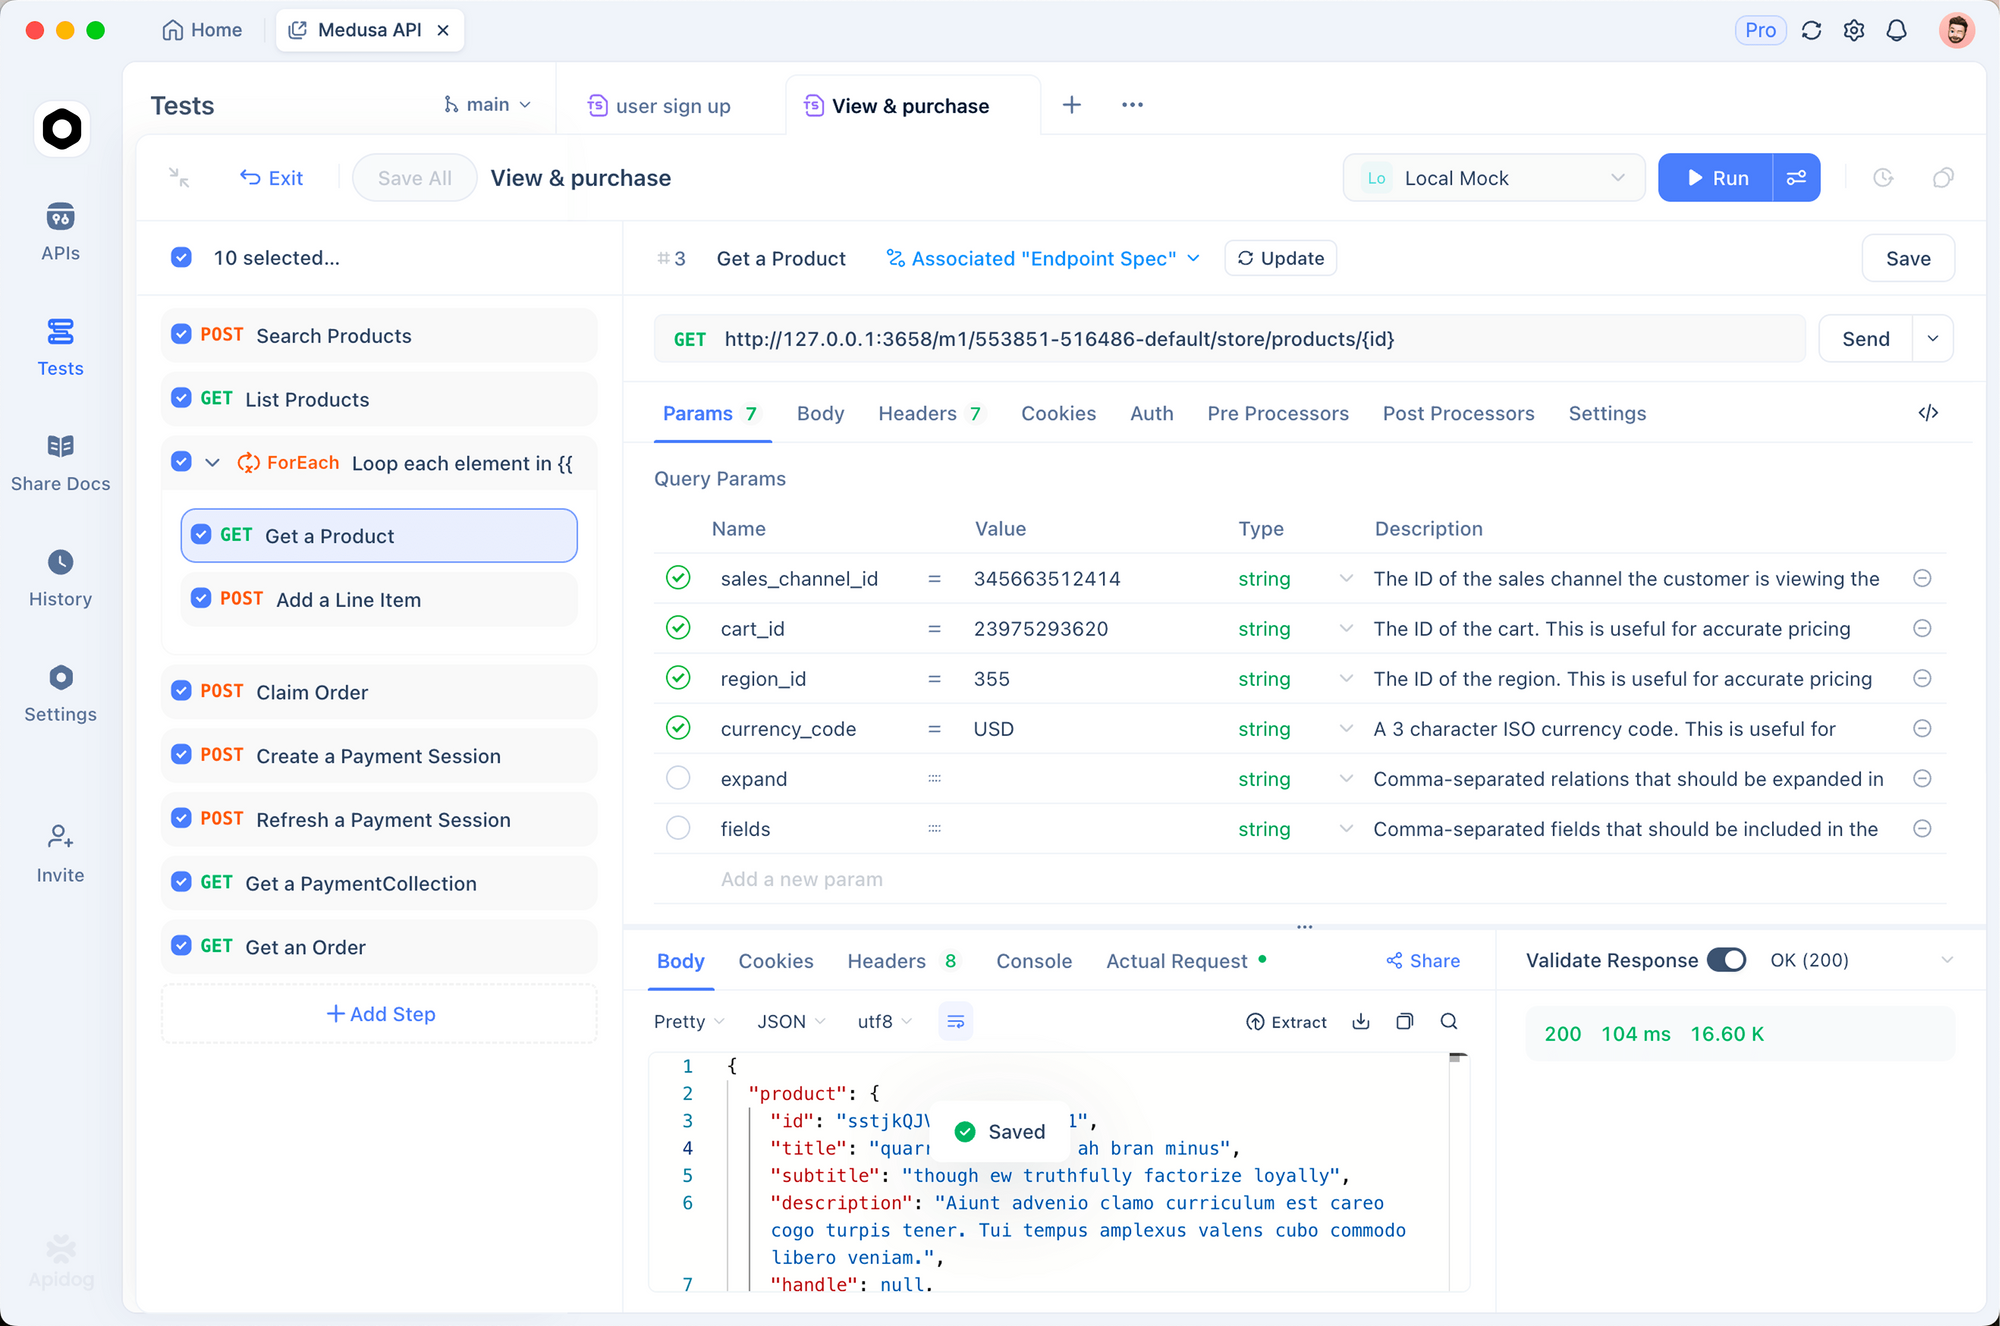
Testing Murf AI API with Apidog
Before writing integration code, test your API calls interactively. Apidog provides a visual interface for crafting requests, inspecting responses, and debugging issues.
Setting Up Apidog for Murf AI
1. Download and Install Apidog
Get Apidog for free. It supports Windows, Mac, Linux, and web browsers.
2. Create a New Project
Start a new project named "Murf AI Integration". This keeps your API endpoints organized.
3. Set Up Environment Variables
Create an environment with your API key:
{
    "baseUrl": "https://api.murf.ai/v1",
    "apiKey": "your_murf_api_key"
}
Environment variables keep sensitive data separate from request configurations.
4. Create Your First Request
Add a new POST request with these settings:
- URL:
{{baseUrl}}/speech - Headers:
api-key:{{apiKey}}Content-Type:application/json- Body (JSON):
{
    "text": "Testing Murf AI API with Apidog. This is a sample voiceover.",
    "voiceId": "en-US-marcus",
    "format": "mp3"
}
5. Send and Inspect Response
Click Send. Apidog displays the response status, headers, and allows you to download the generated audio file directly.
Debugging Common Issues with Apidog
| Issue | How Apidog Helps |
|---|---|
| 401 Unauthorized | Check the api-key header in request inspector |
| Invalid voiceId | Use GET /voices first to verify available IDs |
| Empty audio response | Inspect response headers for error messages |
| Rate limiting | Monitor request history for 429 status codes |
Apidog's request history feature lets you compare successful and failed requests side by side, making debugging straightforward.
Handling Long-Form Content with Murf AI API
For articles, blog posts, or book chapters, you may need to process text in chunks. Murf AI has character limits per request, so splitting content ensures reliable processing.
Chunking Strategy
import requests

API_KEY = "your_murf_api_key"
BASE_URL = "https://api.murf.ai/v1"

headers = {
    "api-key": API_KEY,
    "Content-Type": "application/json"
}

def chunk_text(text, max_chars=3000):
    """Split text into chunks at sentence boundaries."""
    sentences = text.replace('!', '.').replace('?', '.').split('.')
    chunks = []
    current_chunk = ""

    for sentence in sentences:
        sentence = sentence.strip()
        if not sentence:
            continue

        if len(current_chunk) + len(sentence) + 2 > max_chars:
            chunks.append(current_chunk.strip())
            current_chunk = sentence + ". "
        else:
            current_chunk += sentence + ". "

    if current_chunk.strip():
        chunks.append(current_chunk.strip())

    return chunks

def generate_long_audio(text, voice_id, output_prefix="output"):
    """Generate audio for long-form content."""
    chunks = chunk_text(text)
    audio_files = []

    for i, chunk in enumerate(chunks):
        payload = {
            "text": chunk,
            "voiceId": voice_id,
            "format": "mp3"
        }

        response = requests.post(
            f"{BASE_URL}/speech",
            headers=headers,
            json=payload
        )

        if response.status_code == 200:
            filename = f"{output_prefix}_{i+1}.mp3"
            with open(filename, "wb") as f:
                f.write(response.content)
            audio_files.append(filename)
            print(f"Generated: {filename}")
        else:
            print(f"Failed chunk {i+1}: {response.status_code}")

    return audio_files

# Example usage
long_text = """
Your long article or document content goes here.
It can span multiple paragraphs and pages.
The function splits it automatically at sentence boundaries.
"""

audio_files = generate_long_audio(long_text, "en-US-marcus", "article_audio")
print(f"Generated {len(audio_files)} audio files")
Concatenating Audio Files with Murf AI API
After generating chunks, combine them into a single file using FFmpeg or a Python library:
from pydub import AudioSegment

def concatenate_audio(file_list, output_file="final_audio.mp3"):
    """Combine multiple audio files into one."""
    combined = AudioSegment.empty()

    for filename in file_list:
        audio = AudioSegment.from_mp3(filename)
        combined += audio

    combined.export(output_file, format="mp3")
    print(f"Combined audio saved to {output_file}")
    return output_file

# Combine the chunks
concatenate_audio(audio_files, "complete_article.mp3")
Error Handling Best Practices with Murf AI API
Production applications need robust error handling. Murf AI API returns standard HTTP status codes with descriptive error messages.
Common Error Codes
| Status Code | Meaning | Solution |
|---|---|---|
| 400 | Bad Request | Check request body format and parameters |
| 401 | Unauthorized | Verify API key is correct and active |
| 403 | Forbidden | Check account permissions and plan limits |
| 429 | Rate Limited | Implement exponential backoff |
| 500 | Server Error | Retry after a short delay |
Robust API Client
import requests
import time
from typing import Optional

class MurfAPIClient:
    def __init__(self, api_key: str):
        self.api_key = api_key
        self.base_url = "https://api.murf.ai/v1"
        self.headers = {
            "api-key": api_key,
            "Content-Type": "application/json"
        }

    def _request(self, method: str, endpoint: str,
                 data: dict = None, retries: int = 3) -> Optional[requests.Response]:
        """Make API request with retry logic."""
        url = f"{self.base_url}/{endpoint}"

        for attempt in range(retries):
            try:
                if method == "GET":
                    response = requests.get(url, headers=self.headers)
                else:
                    response = requests.post(url, headers=self.headers, json=data)

                if response.status_code == 200:
                    return response
                elif response.status_code == 429:
                    # Rate limited - wait and retry
                    wait_time = 2 ** attempt
                    print(f"Rate limited. Waiting {wait_time}s...")
                    time.sleep(wait_time)
                elif response.status_code >= 500:
                    # Server error - retry
                    time.sleep(1)
                else:
                    # Client error - don't retry
                    print(f"Error {response.status_code}: {response.text}")
                    return None

            except requests.RequestException as e:
                print(f"Request failed: {e}")
                time.sleep(1)

        return None

    def get_voices(self) -> list:
        """Fetch available voices."""
        response = self._request("GET", "voices")
        return response.json() if response else []

    def generate_speech(self, text: str, voice_id: str,
                        format: str = "mp3", **kwargs) -> Optional[bytes]:
        """Generate speech from text."""
        payload = {
            "text": text,
            "voiceId": voice_id,
            "format": format,
            **kwargs
        }
        response = self._request("POST", "speech", payload)
        return response.content if response else None

# Usage
client = MurfAPIClient("your_api_key")
voices = client.get_voices()
audio = client.generate_speech(
    "Hello world!",
    "en-US-marcus",
    speed=1.0
)

if audio:
    with open("output.mp3", "wb") as f:
        f.write(audio)
Building a Voiceover Generation Service
Let's build a complete Flask API that wraps Murf AI for your applications:
from flask import Flask, request, jsonify, send_file
import requests
import os
import uuid

app = Flask(__name__)

MURF_API_KEY = os.environ.get("MURF_API_KEY")
MURF_BASE_URL = "https://api.murf.ai/v1"

headers = {
    "api-key": MURF_API_KEY,
    "Content-Type": "application/json"
}

@app.route("/api/voices", methods=["GET"])
def list_voices():
    """List available voices."""
    language = request.args.get("language")

    response = requests.get(f"{MURF_BASE_URL}/voices", headers=headers)

    if response.status_code != 200:
        return jsonify({"error": "Failed to fetch voices"}), 500

    voices = response.json()

    if language:
        voices = [v for v in voices if v["language"].startswith(language)]

    return jsonify(voices)

@app.route("/api/synthesize", methods=["POST"])
def synthesize():
    """Generate speech from text."""
    data = request.json

    if not data or "text" not in data:
        return jsonify({"error": "Missing 'text' field"}), 400

    if "voiceId" not in data:
        return jsonify({"error": "Missing 'voiceId' field"}), 400

    payload = {
        "text": data["text"],
        "voiceId": data["voiceId"],
        "format": data.get("format", "mp3"),
        "speed": data.get("speed", 1.0),
        "pitch": data.get("pitch", 0)
    }

    response = requests.post(
        f"{MURF_BASE_URL}/speech",
        headers=headers,
        json=payload
    )

    if response.status_code != 200:
        return jsonify({"error": "Speech generation failed"}), 500

    # Save to temp file
    filename = f"audio_{uuid.uuid4().hex}.mp3"
    filepath = os.path.join("/tmp", filename)

    with open(filepath, "wb") as f:
        f.write(response.content)

    return send_file(
        filepath,
        mimetype="audio/mpeg",
        as_attachment=True,
        download_name=filename
    )

if __name__ == "__main__":
    app.run(debug=True, port=5000)
This service exposes two endpoints: one to list voices and another to generate speech. You can extend it with caching, authentication, and queue-based processing for production use.
Rate Limits and Pricing Considerations for Murf AI API
Murf AI enforces rate limits based on your subscription plan. Understanding these limits helps you design efficient applications.
Optimizing API Usage
- Cache generated audio - Store results for repeated requests
- Batch similar requests - Combine short texts when possible
- Use lower sample rates - 16000 Hz works well for voice content
- Monitor with Apidog - Track usage patterns and optimize
Integrating with Popular Frameworks
Node.js Integration
const axios = require('axios');
const fs = require('fs');

const API_KEY = process.env.MURF_API_KEY;
const BASE_URL = 'https://api.murf.ai/v1';

async function generateSpeech(text, voiceId, options = {}) {
    try {
        const response = await axios.post(
            `${BASE_URL}/speech`,
            {
                text,
                voiceId,
                format: options.format || 'mp3',
                speed: options.speed || 1.0,
                pitch: options.pitch || 0
            },
            {
                headers: {
                    'api-key': API_KEY,
                    'Content-Type': 'application/json'
                },
                responseType: 'arraybuffer'
            }
        );

        return Buffer.from(response.data);
    } catch (error) {
        console.error('Error:', error.response?.data || error.message);
        throw error;
    }
}

// Usage
(async () => {
    const audio = await generateSpeech(
        'Hello from Node.js!',
        'en-US-marcus'
    );

    fs.writeFileSync('output.mp3', audio);
    console.log('Audio saved!');
})();
React Frontend Integration
import React, { useState } from 'react';

function VoiceGenerator() {
    const [text, setText] = useState('');
    const [voiceId, setVoiceId] = useState('en-US-marcus');
    const [audioUrl, setAudioUrl] = useState(null);
    const [loading, setLoading] = useState(false);

    const generateAudio = async () => {
        setLoading(true);

        try {
            const response = await fetch('/api/synthesize', {
                method: 'POST',
                headers: { 'Content-Type': 'application/json' },
                body: JSON.stringify({ text, voiceId })
            });

            const blob = await response.blob();
            const url = URL.createObjectURL(blob);
            setAudioUrl(url);
        } catch (error) {
            console.error('Generation failed:', error);
        } finally {
            setLoading(false);
        }
    };

    return (
        <div className="voice-generator">
            <textarea
                value={text}
                onChange={(e) => setText(e.target.value)}
                placeholder="Enter text to convert to speech..."
            />

            <select value={voiceId} onChange={(e) => setVoiceId(e.target.value)}>
                <option value="en-US-marcus">Marcus (US Male)</option>
                <option value="en-US-julia">Julia (US Female)</option>
                <option value="en-GB-oliver">Oliver (UK Male)</option>
            </select>

            <button onClick={generateAudio} disabled={loading}>
                {loading ? 'Generating...' : 'Generate Audio'}
            </button>

            {audioUrl && (
                <audio controls src={audioUrl}>
                    Your browser does not support audio playback.
                </audio>
            )}
        </div>
    );
}

export default VoiceGenerator;
Conclusion
The Murf AI API opens up powerful text-to-speech capabilities for developers. From simple voiceovers to complex multi-voice productions, the API handles diverse requirements with natural-sounding output. Key takeaways:
- Authentication - Use API keys in request headers for all calls
- Voice Selection - Explore 120+ voices across languages and accents
- Customization - Adjust speed, pitch, and use SSML for precise control
- Error Handling - Implement retries and exponential backoff for production
- Testing - Use Apidog to debug and optimize your integration
Start with the free tier to experiment, then scale up as your application grows. The combination of high-quality voices and developer-friendly API design makes Murf AI a solid choice for voice-enabled applications.
Ready to build? Download Apidog to test your Murf AI API calls and streamline your development workflow.