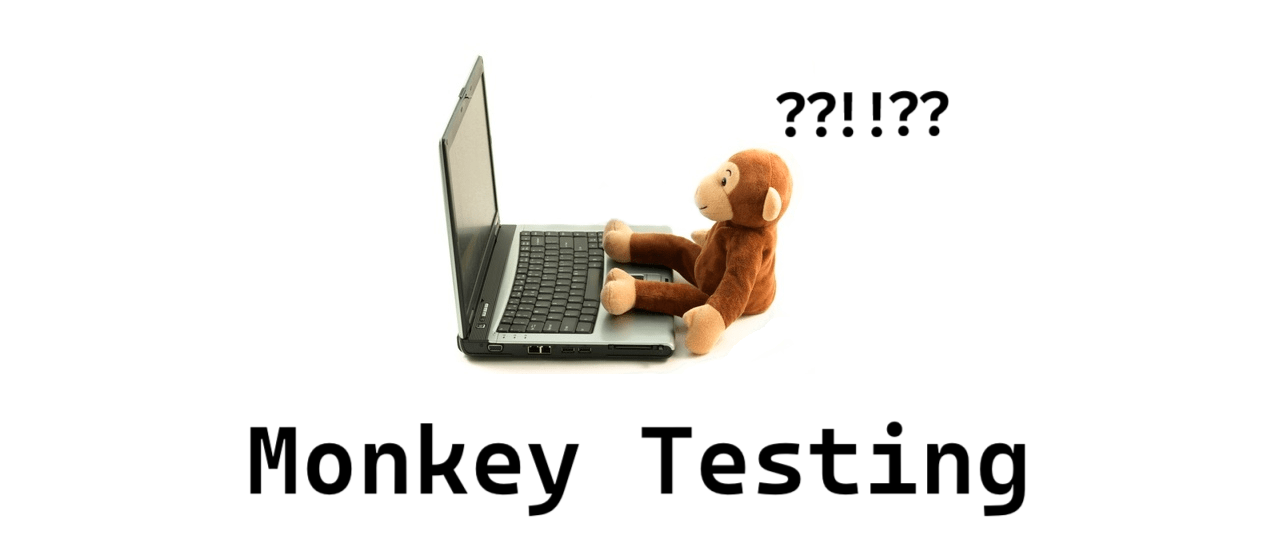
If you’ve ever handed over your smartphone to a toddler and watched them tap every button, swipe randomly, and somehow manage to crash your app in 30 seconds, then you’ve just witnessed Monkey Testing in its purest form. It seems chaotic, almost irresponsible, but yet it's this very chaos that reveals bugs which structured testing misses. The randomness that makes monkey testing look undisciplined is exactly what makes it valuable.
Professional Quality Assurance teams use Monkey Testing strategically, not carelessly. They deploy it to discover memory leaks, unhandled exceptions, and system crashes that emerge only when the software faces unpredictable input sequences. This guide will show you how to harness monkey testing properly, understand its types, and integrate it wisely into your QA strategy.
What Exactly is Monkey Testing?
Monkey Testing is a software testing technique where you provide random, unexpected, or invalid inputs to an application and observe how it behaves. The name comes from the infinite monkey theorem: if a monkey types randomly on a keyboard for long enough, it will eventually produce meaningful text. In testing, the “monkey” is a program or human tester that exercises the application without following predetermined test cases.
Unlike structured testing, monkey testing doesn’t validate requirements. It asks a simpler but critical question: can the application handle chaos without crashing? This approach excels at finding:
- Memory leaks from repeated operations
- Unhandled exceptions from invalid data combinations
- Race conditions in asynchronous processes
- UI freezes from rapid user interactions
- Security vulnerabilities from malformed inputs
The technique is particularly valuable for mobile apps, web applications, and APIs that face unpredictable user behavior in production.
The Three Types of Monkey Testing: Dumb, Smart, and Brilliant
Not all Monkey Testing is created equal. The technique exists on a spectrum from completely random to intelligently guided.
1. Dumb Monkey Testing
Dumb monkey testing is pure randomness. The test tool knows nothing about the application. It clicks random coordinates, enters gibberish text, and sends malformed data. It can’t recognize errors, navigate intentionally, or adapt its behavior.
Pros: Requires minimal setup, finds unexpected crashes, low maintenance
Cons: Misses critical paths, generates many irrelevant tests, can’t verify correctness
Best For: Stress testing UI robustness, early exploratory testing
A dumb monkey might click the “Submit” button 1,000 times without filling any fields, revealing a form validation bug that crashes the server.
2. Smart Monkey Testing
Smart monkey testing knows about the application’s structure. It understands valid input formats, navigational constraints, and expected state transitions. It still acts randomly within those boundaries but avoids obviously invalid actions.
Pros: More relevant test scenarios, higher bug detection rate, respects business rules
Cons: Requires initial configuration, needs updated mappings when UI changes
Best For: Regression testing, validating workflow robustness
A smart monkey knows that a credit card field accepts 16 digits. It will enter random 16-digit numbers (some valid, some not) but won’t type letters or special characters.
3. Brilliant Monkey Testing
Brilliant monkey testing combines randomness with learning. It observes application behavior, remembers which actions led to crashes in the past, and biases future tests toward those vulnerable areas. It’s the most sophisticated form of Monkey Testing, often using AI or genetic algorithms.
Pros: Highly efficient, adapts to application changes, finds deep bugs
Cons: Complex setup, requires specialized tools, higher resource consumption
Best For: Mature products needing deep stability testing, security fuzzing
A brilliant monkey might discover that opening a modal, closing it, then rapidly rotating the device causes a memory leak. It will then repeat this pattern with variations to confirm the vulnerability.
| Type | Knowledge of Application | Setup Effort | Bug Detection Rate | Best Use Case |
|---|---|---|---|---|
| Dumb | None | Very Low | Low | Crash testing |
| Smart | Structure & Rules | Medium | Medium | Workflow testing |
| Brilliant | Self-learning | High | High | Deep stability testing |
Pros and Cons of Monkey Testing
Like any other technique, Monkey Testing has trade-offs.
Pros:
- Finds edge cases humans miss: Randomness explores combinations testers wouldn’t think to test
- Reveals robustness issues: Exposes memory leaks, crashes, and hangs under stress
- Low initial cost for dumb testing: Can start with minimal configuration
- Scalable: Automated monkeys run 24/7 without fatigue
- Good for security: Fuzzing with malformed data finds injection vulnerabilities
Cons:
- Unpredictable coverage: Can’t guarantee all features are tested
- Many false positives: Random failures may not represent real user issues
- No requirement validation: Doesn’t confirm software meets business needs
- Difficult to reproduce: Random test failures can be hard to replicate and debug
- Limited documentation: Hard to prove what was tested to auditors
Note: Monkey Testing should never be your only testing strategy. It’s a powerful complement to structured testing, not a replacement!
Where Monkey Testing Shines: Real-World Applications
Monkey Testing is most valuable in these scenarios:
- Mobile App Testing: Users tap randomly, rotate devices, switch apps, and interrupt network connections. Monkeys simulate this chaos effectively, finding crashes that structured tests miss.
- API Resilience Testing: APIs receive malformed requests, incomplete payloads, and unexpected headers. Monkey testing with random data structures reveals unhandled exceptions and security flaws.
- UI Stress Testing: Rapid clicking, window resizing, and menu navigation can expose threading issues and UI freeze conditions.
- Game Testing: Players perform unexpected sequences. A monkey might jump, shoot, and pause simultaneously, revealing a rendering bug.
- IoT Device Testing: Devices face unpredictable network conditions and user interactions. Monkeys simulate connection drops and button mashing.
Monkey Testing vs Guerrilla Testing vs Adhoc Testing
These terms often get confused. Here’s how they differ:
- Monkey Testing: Systematic randomness, often automated, focused on robustness.
- Guerrilla Testing: Quick, informal testing with real users in their natural environment (e.g., testing a coffee shop app in an actual coffee shop).
- Adhoc Testing: Unstructured, exploratory testing guided by tester intuition rather than scripts.
| Aspect | Monkey Testing | Guerrilla Testing | Adhoc Testing |
|---|---|---|---|
| Approach | Random, automated | Real-world observation | Intuitive exploration |
| Goal | Find crashes/hangs | Validate real usage | Discover unexpected issues |
| Environment | Lab/CI/CD | Production-like | Any |
| Who Performs | Automated tools or testers | End users | Experienced testers |
| Documentation | Minimal | Observational notes | Session notes |
All three are exploratory in nature, but Monkey Testing is the only one that uses deliberate randomness as its core strategy.
How Apidog Helps with Monkey Testing for APIs
While Monkey Testing traditionally is focused on UI, APIs need monkey testing too! Random requests with unexpected parameters, headers, and payloads can crash your backend. Apidog brings monkey testing principles to API testing in a controlled, reproducible way.
During the Test Case Development phase of your Software Testing Life Cycle, Apidog can generate “smart monkey” test scenarios for your API endpoints. Instead of pure randomness, it understands your API specification and creates variations that test robustness:
// Apidog generates these monkey testing scenarios automatically:
1. POST /api/users with valid JSON → Expect 201
2. POST /api/users with missing required field → Expect 400
3. POST /api/users with extra unknown field → Expect 200 (should ignore)
4. POST /api/users with SQL injection in email → Expect 400/500 (should not crash)
5. POST /api/users with 10MB JSON payload → Expect 413
6. POST /api/users with malformed JSON → Expect 400
7. Rapid-fire 100 requests with random data → System should not crash
Apidog’s AI understands data types and constraints, generating random but plausible values. It creates boundary tests, injection attempts, and payload mutations that mimic a “smart monkey” probing your API for weaknesses.
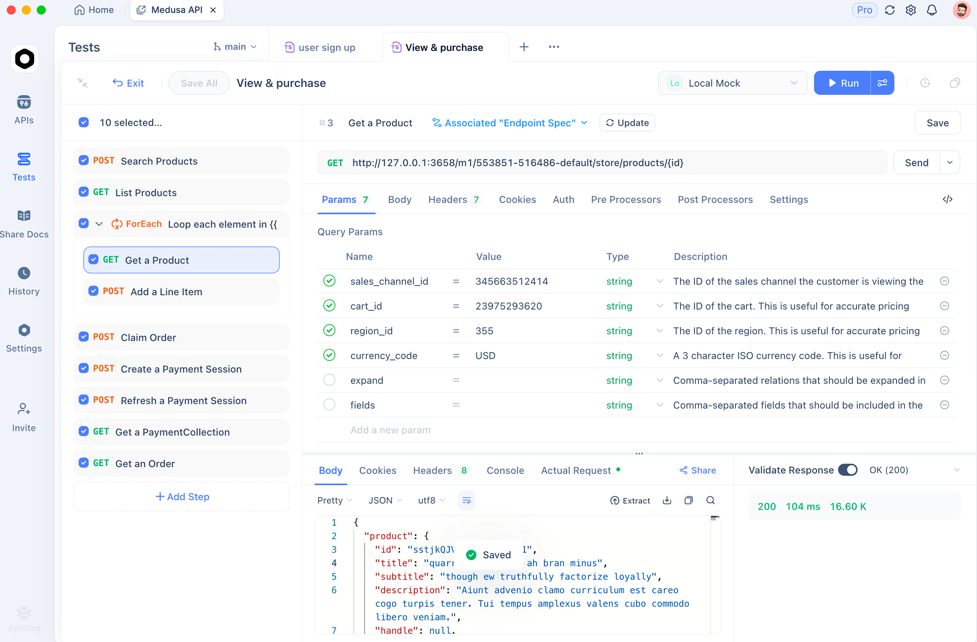
During Test Execution, you can run these monkey tests automatically as part of your CI/CD pipeline. Apidog provides:
- Fuzzing capabilities: Send thousands of random requests to find breaking points
- Load simulation: Combine random requests with concurrent execution to test both robustness and performance
- Detailed logging: Capture exact request/response pairs for reproducible debugging
- Security scanning: Identify which random inputs create vulnerabilities
This approach gives you the benefits of Monkey Testing (finding unexpected failures) without the drawbacks (unreproducible results and no coverage tracking).

Best Practices for Implementing Monkey Testing
To use Monkey Testing effectively without wasting time, follow these guidelines:
- Start with Smart Monkeys: Dumb monkeys generate too much noise. Begin with a tool like Apidog that understands your application structure and generates relevant random variations.
- Set Time Boundaries: Run monkey tests for fixed durations (e.g., 2 hours overnight) to limit scope while still finding bugs.
- Monitor System Health: Use application performance monitoring (APM) tools alongside monkey testing to detect memory leaks and CPU spikes that indicate underlying issues.
- Log Everything: Record all random actions so you can reproduce failures. Apidog’s detailed request logs make this automatic.
- Integrate with CI/CD: Run monkey tests on nightly builds to catch stability regressions without slowing development.
- Don’t Rely on Monkeys Alone: Use monkey testing as 20% of your strategy, complementing structured functional and regression testing.
Frequently Asked Questions
Q1: Is Monkey Testing the same as fuzzing?
Ans: Fuzzing is a specific type of Monkey Testing focused on security. It deliberately sends malformed, unexpected, or random data to find vulnerabilities like buffer overflows or injection flaws. All fuzzing is monkey testing, but not all monkey testing is fuzzing.
Q2: Can Monkey Testing completely replace manual testing?
Ans: No. Monkey Testing finds crashes and robustness issues but can’t validate that software meets business requirements or provides good user experience. It complements manual testing, especially for edge case discovery, but never replaces structured test case execution.
Q3: How long should I run Monkey Tests?
Ans: For UI testing, 30-60 minutes of random interaction often reveals major stability issues. For API testing with Apidog, run fuzzing tests for 2-4 hours or 10,000 requests, whichever comes first. The goal is statistical confidence, not infinite testing.
Q4: What’s the best tool for Monkey Testing mobile apps?
Ans: For Android, the UI/Application Exerciser Monkey is built into the SDK. For iOS, tools like FastMonkey provide similar capabilities. For cross-platform, consider Appium with custom random script generators. For API monkey testing, Apidog is the most efficient option.
Q5: How do I measure Monkey Testing effectiveness?
Ans: Track these metrics: crash count per 1,000 actions, unique defects found, code coverage achieved during monkey runs, and time-to-first-failure. If your monkey tests find critical bugs within the first hour, they’re providing value.
Conclusion
Monkey Testing deserves a place in your quality strategy—not as a chaotic last resort, but as a disciplined technique for finding bugs that structured testing misses. By understanding the differences between dumb, smart, and brilliant monkeys, and by following best practices for implementation, you can harness randomness to improve software robustness.
For API testing, modern tools like Apidog bring monkey testing principles into a controlled, automated framework. You get the chaos-finding power without the reproducibility nightmare. The tool generates intelligent variations, executes them at scale, and provides the logs you need to fix what breaks.
Start small. Add a 30-minute monkey test to your nightly build. Track what it finds. You’ll likely discover crashes, memory leaks, or security issues that would have embarrassed you in production. Monkey Testing isn’t about being reckless—it’s about being thorough in ways that methodical test cases can’t achieve. Embrace the chaos, and your software will be stronger for it.