
Imagine a world where connecting your AI model to various data sources is as seamless as plugging a USB-C port into a device. This is the vision behind the Model Context Protocol (MCP)—an open standard designed to streamline interactions between AI systems and diverse datasets. In this blog post, we'll explore what MCP is, its significance in the AI landscape, and why developers integrating AI into their workflows find tools like Apidog invaluable for testing and refining these connections. If you've ever felt the frustration of building custom connectors for each AI data source, you'll understand why both MCP and proper API testing tools have become game-changers for AI developers.
Understanding the Model Context Protocol (MCP)
The Model Context Protocol is an open protocol that standardizes how applications provide context to Large Language Models (LLMs). Think of MCP as a universal connector, much like USB-C, but for AI applications. It offers a standardized way to link AI models to different data sources and tools, simplifying the integration process and enhancing the capabilities of AI assistants.
Why Was MCP Developed?
Before MCP, integrating AI models with various datasets required custom coding for each data source, leading to fragmented and inefficient workflows. MCP addresses this challenge by providing:
- Standardized Integrations: Developers can integrate their AI tools once using MCP and connect to multiple data sources without additional custom code.
- Flexibility: MCP allows for seamless switching between different LLM providers and vendors, promoting adaptability in AI applications.
- Security: By maintaining context within the protocol, MCP ensures secure interactions between AI systems and data sources.
For example, using the Claude desktop app configured with MCP, developers can connect directly to GitHub, create a new repository, and make a pull request in under an hour. This efficiency showcases MCP's potential to revolutionize AI integrations.
Core Architecture of MCP
At its core, MCP follows a client-server architecture comprising:
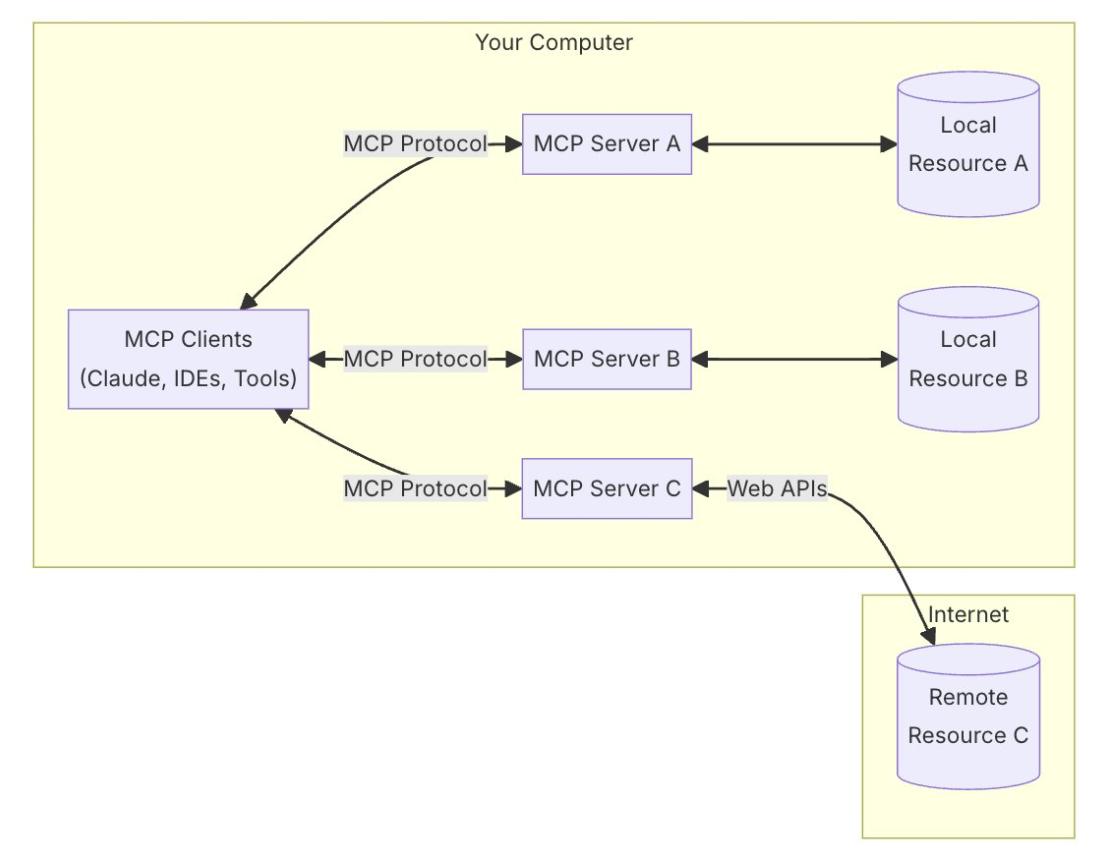
- MCP Hosts: Applications like Claude Desktop, Integrated Development Environments (IDEs), or AI tools that access data through MCP.
- MCP Clients: Protocol clients maintaining one-to-one connections with servers.
- MCP Servers: Lightweight programs exposing specific capabilities through the standardized protocol.
- Local Data Sources: Files, databases, and services on your computer that MCP servers can securely access.
- Remote Services: External systems available over the internet (e.g., through APIs) that MCP servers can connect to.
This architecture ensures that AI systems can maintain context as they interact with different tools and datasets, replacing fragmented integrations with a more sustainable framework.
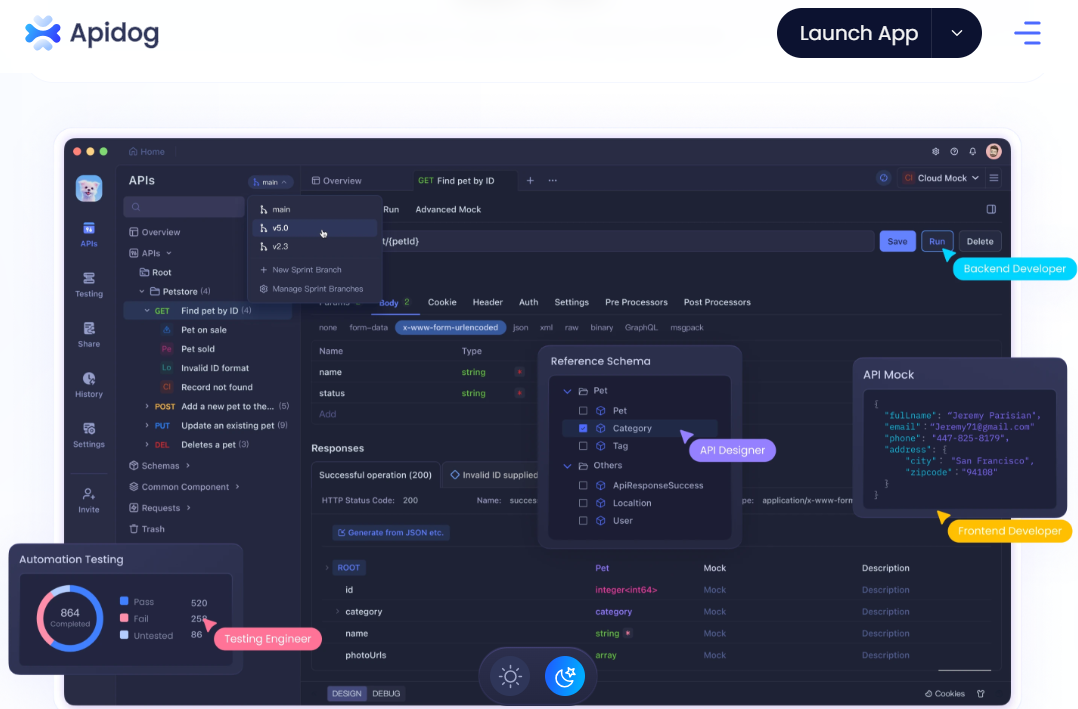
While MCP brilliantly solves the standardization challenge between AI models and data sources, there's another critical piece to the puzzle that developers often discover the hard way: how do you efficiently test, debug and document these integrations before deploying them? This is where I've found tools like Apidog to be indispensable companions to MCP. When building my first MCP-powered application, I spent countless hours manually testing API connections until I discovered how Apidog's automated testing and documentation features could cut that time down.
What is Apidog?
Apidog is my go-to platform for navigating the often overwhelming world of API development—especially when working with sophisticated protocols like MCP. If you've ever stayed up late debugging why your AI model can't properly access your GitHub repository through MCP, you'll appreciate how Apidog brings clarity to the entire process. It connects every stage of the API lifecycle, from design to testing to documentation, eliminating those frustrating 'it works on my machine' moments that plague teams implementing new integration standards like MCP.
Apidog combines multiple tools into one, eliminating the need for repetitive tasks and streamlining the API development process. Key features of Apidog include: Smart Mock Server, Online API Documentation, Automated Testing Tools, API Development Toolkit.
By integrating Apidog into your workflow, you can ensure that your APIs are robust, well-documented, and ready to interact seamlessly with AI models using MCP. Try it out for FREE!
Step-by-Step Guide to Setting Up MCP
The MCP servers you will learn to create serve as bridges between an AI tool (Claude Desktop) and external data sources or services.
Step 1: Install Claude Desktop
- Visit claude.ai and download the version for your operating system (Mac or Windows).
- Install the application by dragging it to your Applications folder (Mac) or following the installation prompts (Windows).
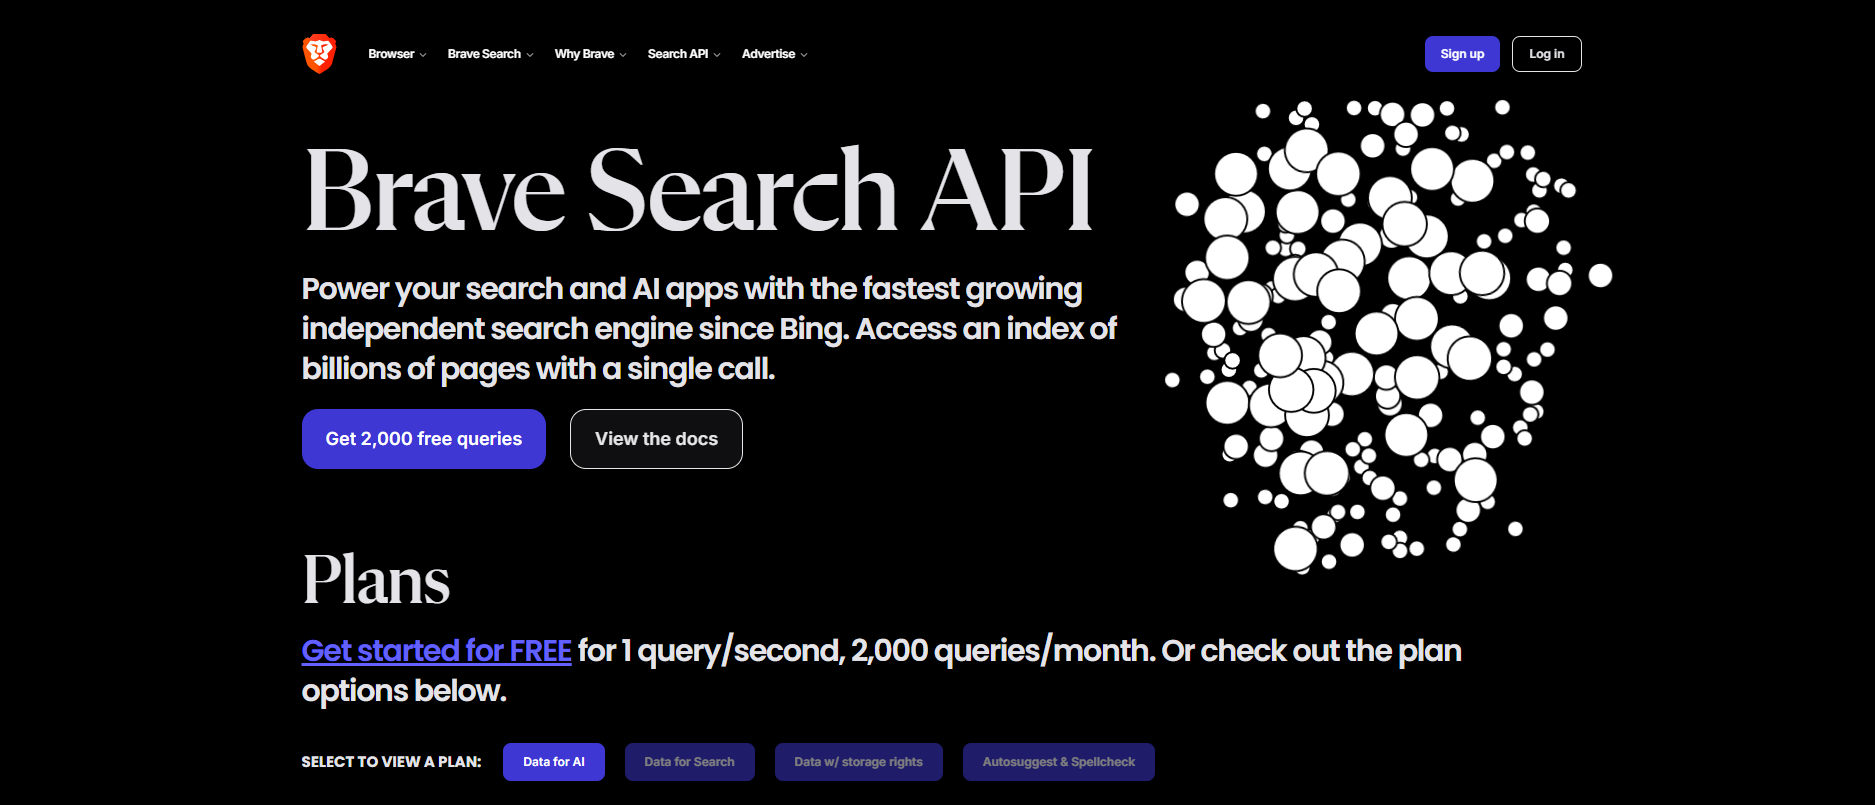
Step 2: Get API Keys
a. Brave Search API Key: This server connects Claude Desktop to the Brave Search API, allowing the AI tool to perform web searches directly from the application.
- Go to Brave Search API and create an account.
- Sign up for a free subscription and generate an API key.
- Save the API key in a secure location.
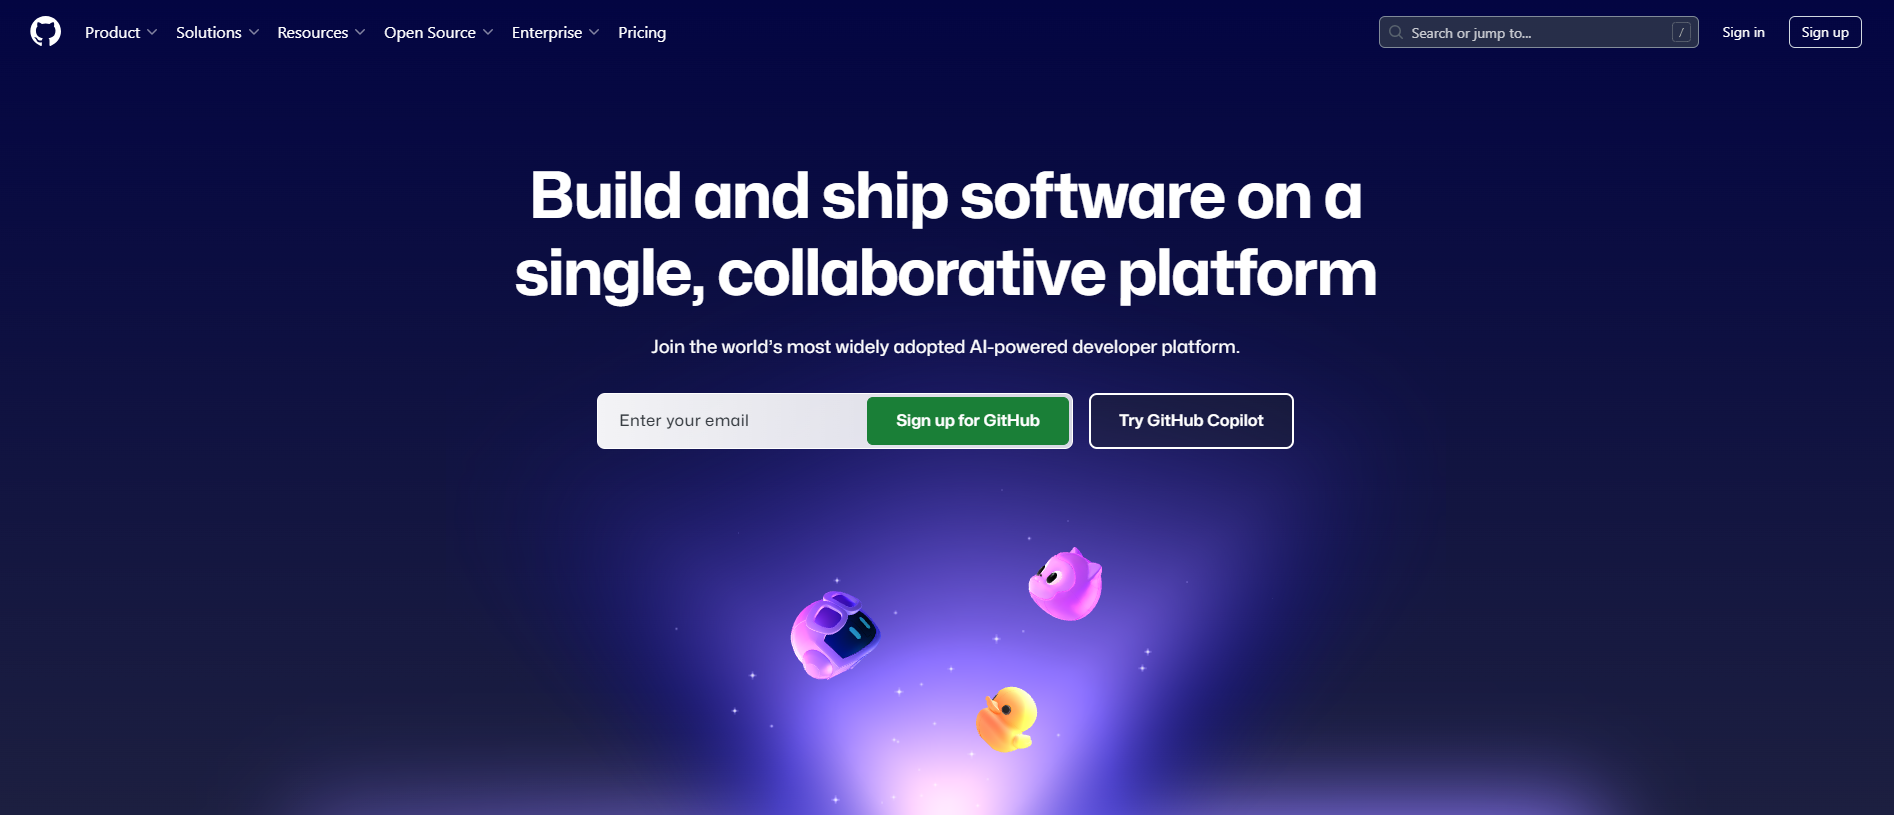
b. GitHub Personal Access Token: This server connects Claude Desktop to GitHub, enabling the AI tool to interact with repositories and perform tasks like creating repositories, pushing code, or managing workflows.
- Create a GitHub account at github.com.
- Go to Settings > Developer Settings > Personal Access Tokens. Then generate a new token with the following permissions: Repo access, Workflow, Write packages, and Copilot.
- Finally, save the token in a secure location.
Step 3: Install Node.js and Homebrew (Mac Users)
For Mac Users:
1. Open Terminal (Command + Space, type "Terminal," and hit Enter).
2. Install Homebrew by running:
/bin/bash -c "$(curl -fsSL https://raw.githubusercontent.com/Homebrew/install/HEAD/install.sh)"
3. Add Homebrew to your system PATH:
echo 'eval "$(/opt/homebrew/bin/brew shellenv)"' >> ~/.zshrc
source ~/.zshrc
4. Verify the installation:
brew --version
5. Verify Node.js installation:
node --version
npm --version
For Windows Users:
- Download and install Node.js from the official Node.js website.
Verify the installation by opening Command Prompt or PowerShell and running:
node --version
npm --version
Step 4: Create the MCP Configuration File
For Mac Users:
Create the required folder and file:
mkdir -p ~/.claude/servers
touch ~/.claude/servers/claude-desktop-config.json
Open the file in a text editor:
nano ~/.claude/servers/claude-desktop-config.json
Add the following JSON configuration:
{
  "mcpServers": {
    "brave-search": {
      "command": "npx",
      "args": ["-y", "@modelcontextprotocol/server-brave-search"],
      "env": {
        "BRAVE_API_KEY": "YOUR-BRAVE-KEY"
      }
    },
    "github": {
      "command": "npx",
      "args": ["-y", "@modelcontextprotocol/server-github"],
      "env": {
        "GITHUB_PERSONAL_ACCESS_TOKEN": "YOUR-GITHUB-KEY"
      }
    }
  }
} - Replace
YOUR-BRAVE-KEYandYOUR-GITHUB-KEYwith your actual API keys. - Save and exit (CTRL+O, Enter, then CTRL+X).
For Windows Users:
- Open Command Prompt or PowerShell.
Create the required folder and file:
mkdir %USERPROFILE%\.claude\servers
type nul > %USERPROFILE%\.claude\servers\claude-desktop-config.json
- Open the file in a text editor (e.g., Notepad) and add the same JSON configuration as above.
- Replace the placeholders with your API keys and save the file.
Step 5: Install MCP Servers
Install the Brave Search MCP server:
npm install -g @modelcontextprotocol/server-brave-search
Install the GitHub MCP server:
npm install -g @modelcontextprotocol/server-github After installation, you will need to close Claude Desktop completely, and then reopen Claude Desktop to load the new configuration.
Step 6: Verify MCP Tools
Open Claude Desktop and look for the MCP Tools indicator and then test the tools:
- Brave Search: Search the web for the latest AI trends.
- GitHub Integration: Create a GitHub repository called "Test-Repo."
As a developer who's set up MCP multiple times, I can't stress enough how important it is to properly test your integrations before relying on them. While Claude Desktop shows when tools are loaded, you'll want deeper visibility into the API requests and responses flowing through your MCP servers. This is where Apidog saved me countless headaches—I could capture actual API traffic between Claude and the GitHub/Brave APIs, inspect the payloads, and troubleshoot authentication issues that weren't obvious from the Claude interface alone. Simply create a new project in Apidog, import the API endpoints your MCP servers are using, and you'll gain invaluable insights into how your AI assistant is communicating with these services.
What Can You Do with MCP?
Once MCP is set up, you can use Claude Desktop to perform advanced tasks like:
- Searching the web for real-time information.
- Creating and managing GitHub repositories.
- Analyzing local files on your computer.
- Automating workflows with minimal input.
Conclusion
Setting up Model Context Protocol (MCP) might seem a bit technical at first, but once you’re done, you’ll have a powerful tool that can supercharge your AI workflows. Whether you’re searching the web, managing GitHub repositories, or analyzing local files, MCP makes it all possible with just a few clicks.
As you embark on your MCP journey, remember that the quality of your AI integrations will only be as good as your ability to test and refine them. I've found that pairing MCP with Apidog creates a powerful workflow—MCP standardizes how your AI connects to data sources, while Apidog gives you the visibility and testing capabilities to ensure those connections work flawlessly. Whether you're debugging why Claude can't access your GitHub repository or trying to optimize your Brave search results, Apidog's intuitive interface for API testing has become my indispensable companion for MCP development. Download it for free and experience the confidence that comes from thoroughly tested AI integrations.


