In modern web development, React.js applications often rely on APIs for data. However, what happens when these APIs aren't ready or available during development? This is where API mocking becomes crucial. By using tools like Apidog, developers can simulate API responses, enabling efficient development and testing.
This guide will walk you through the process of using mock data in your React.js projects with Apidog, ensuring smooth development even when backend services are unavailable.
What is Mock API in React JS?
API mocking involves creating a simulated version of an API that mimics the behavior of a real API. This mock API can return predefined responses, allowing developers to work independently of the actual API. By using mock APIs, developers can continue building and testing their applications without delays.
Should you mock API tests for React JS? What Are the Benefits?
- Continuous Development: Developers can work on their code without waiting for the actual API to be ready. This ensures that both front-end and back-end teams can work in parallel, speeding up the development process.
- Isolated Testing: By using mock APIs, you can test your application in isolation, ensuring that tests are not affected by external factors such as network issues or changes in the live API.
- Simulating Different Scenarios: Mock APIs allow you to simulate various scenarios, including success, failure, and edge cases. This ensures comprehensive testing and helps in identifying potential issues early.
- Performance Testing: You can use mock APIs to simulate high loads and test how your application handles large volumes of requests. This is essential for ensuring that your application performs well under stress.
- Cost and Resource Efficiency: Mock APIs reduce the need for extensive backend resources during the early stages of development, saving time and costs associated with setting up and maintaining a full-fledged backend environment.
Setting Up Apidog with Mock Data for React Project
Apidog is a powerful API design, testing, and mocking tool. With it, you can mock or generate realistic data that you can customize or edit to suit your needs.

Step 1. Create an Apidog Account
To get started, you can use the web version of Apidog, you can download Apidog onto your machine to start the mocking.
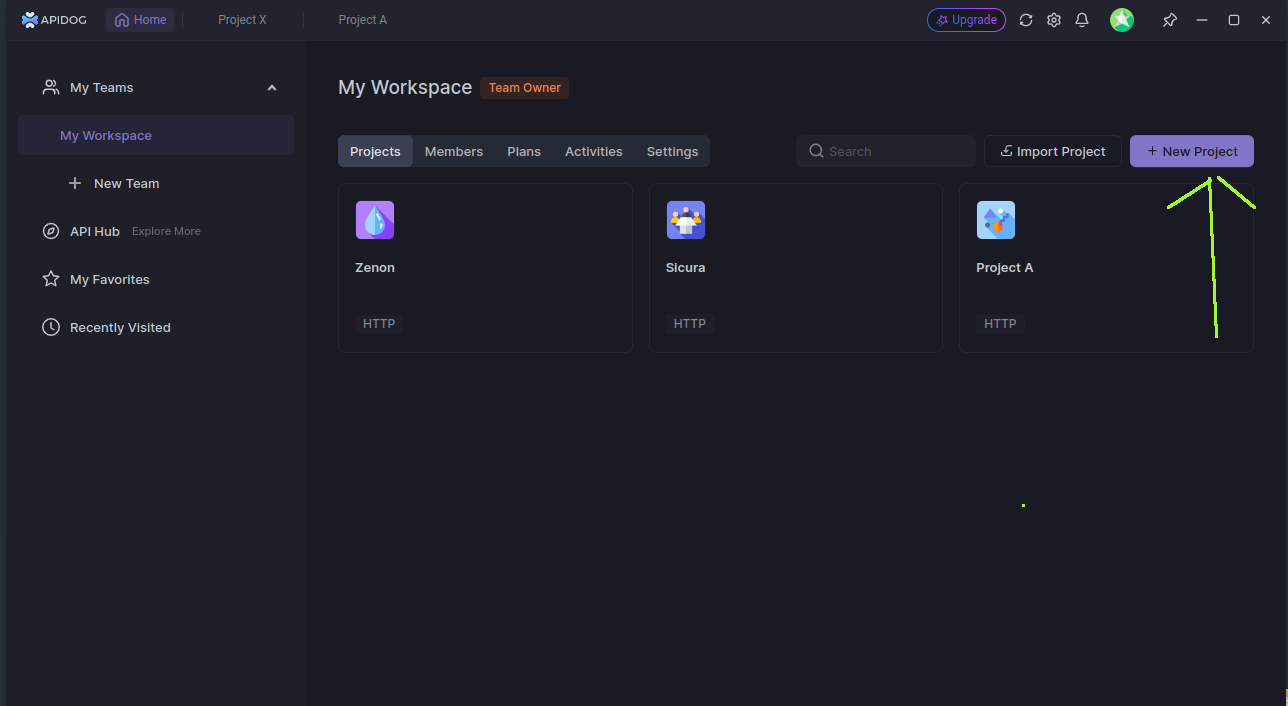
Step 2. Create a New Project
Once you've created your account, the next step will be for you to create a new project. Projects are like folders, which keep all your files in one place. Create a new Project using the following example;
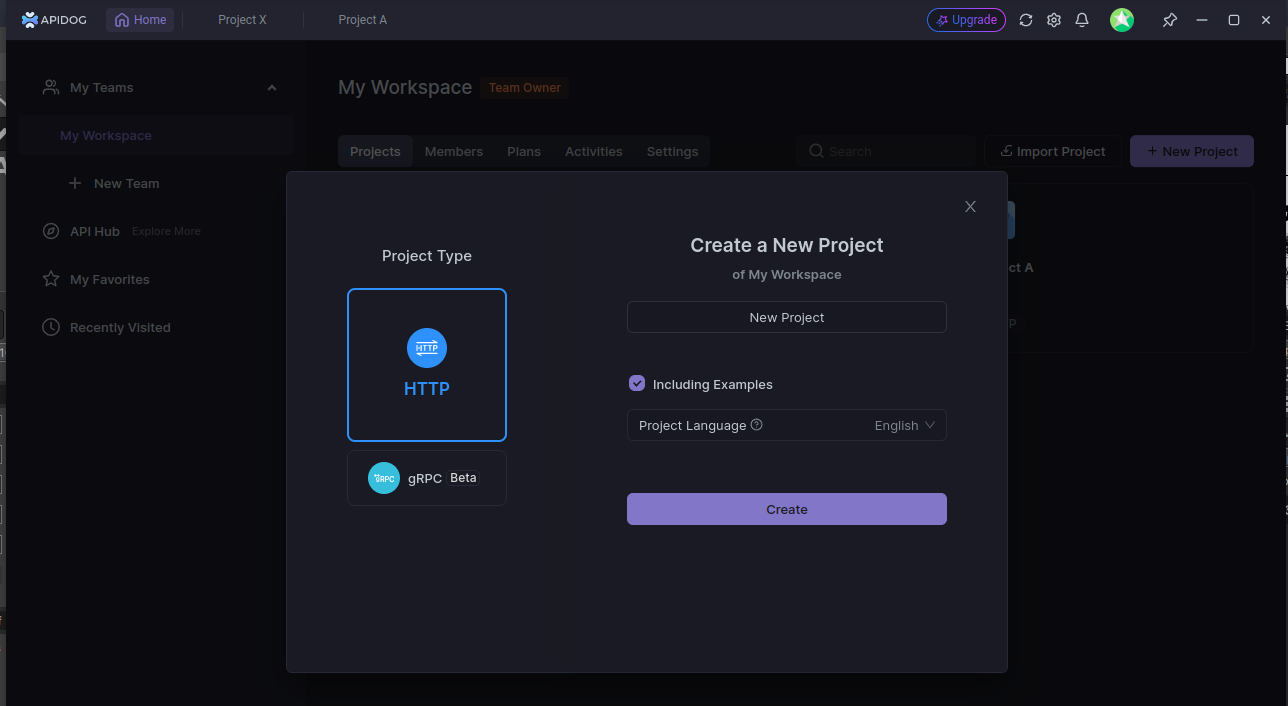
While creating your project, Apidog provides some examples that you can instantly use. Make sure to check the 'Including Examples" box so that those examples will be generated for you. Once you're done with that, click on the Create button, and tada!!!!! You're now all set!
Step 3. Configure Mock API Endpoints
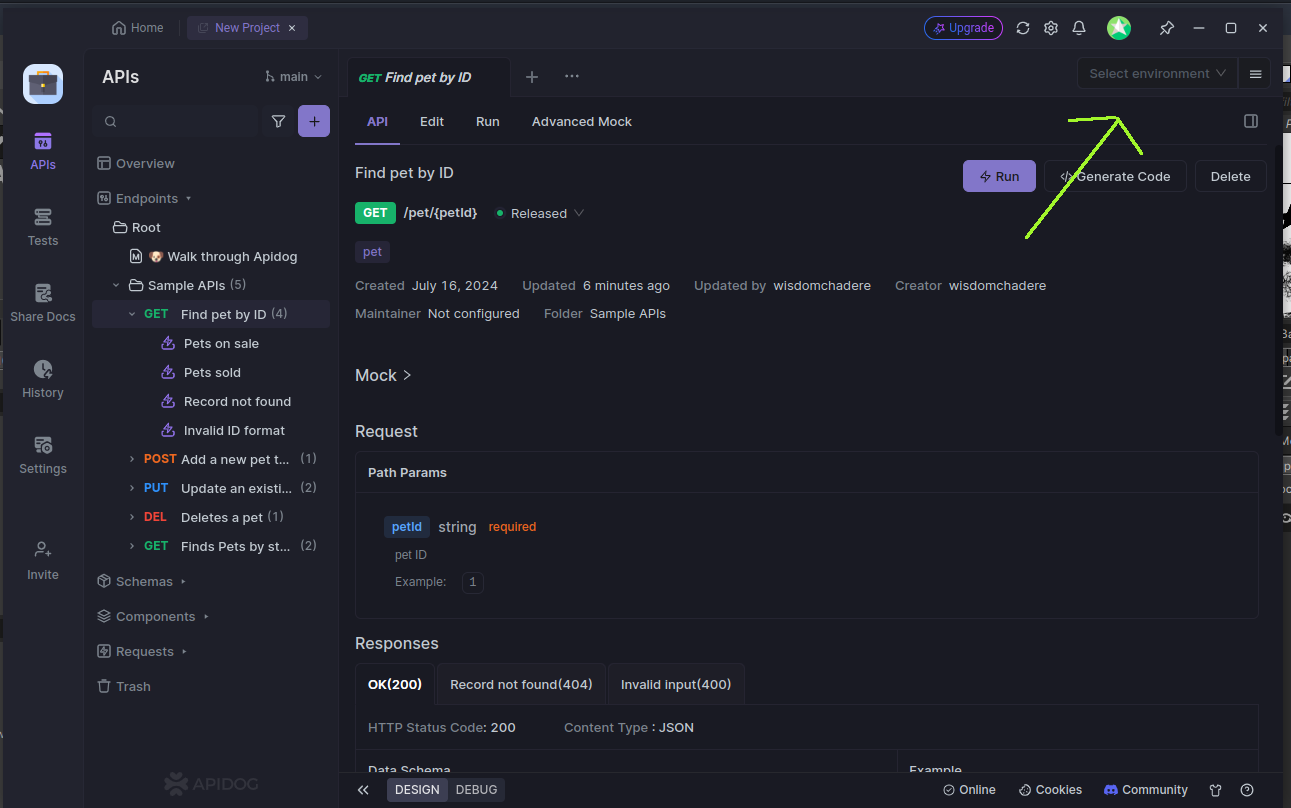
The dummy data that Apidog generated for us is already packed with API specifications, data, and all of the things we need to test it.
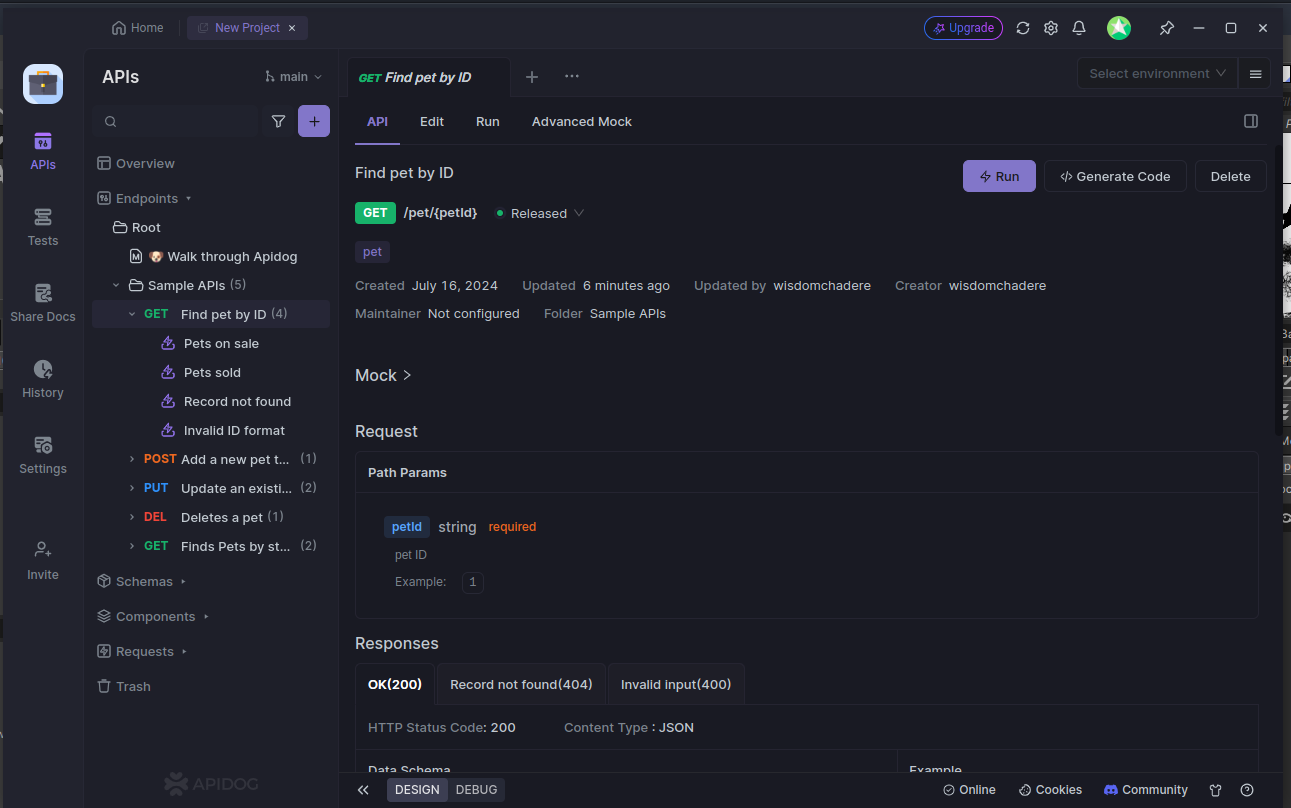
You can edit these API, play around with the settings of this project, & change a few things. When you're done, let's hit the Run button.
Step 4. Test Your Mock API
If you hit the Run button at the top of the screen, you'll likely see a little popup close to it that asks you to create an environmental variable :)
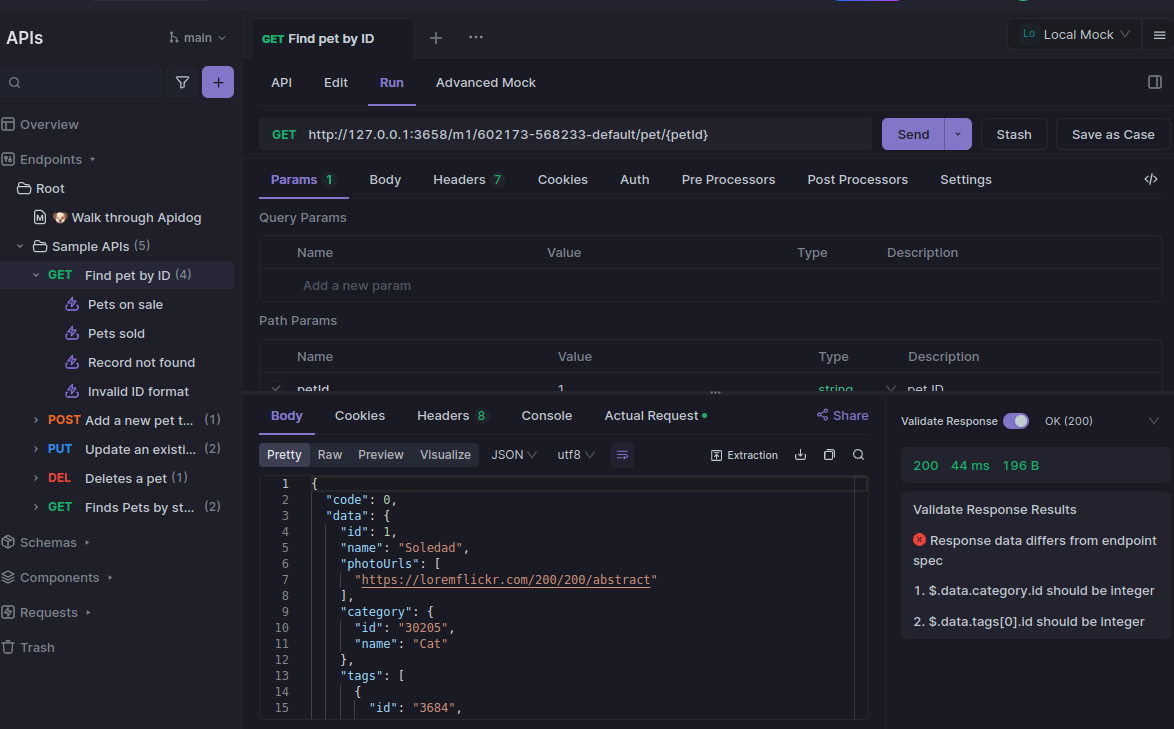
Step 5. Enable Local Mock Server
Click on the select Environment variable and select Local Mock. With Local Mock you can use the local URL provided by Apidog to test your data.
Using Mock Data in a React.js Application
Now, let's integrate the mock data from Apidog into a React.js application. We'll walk through a simple example of fetching user details from the mock API.
Step 1: Set Up a React Application
If you haven't already, set up a new React application using Create React App:
npx create-react-app mock-data-example
cd mock-data-example
npm start
Step 2: Create a Service to Fetch Data
Create a new file apiService.js to handle the API requests:
// src/apiService.js

const API_BASE_URL = "http://127.0.0.1:3658/m1/602173-568233-default";

export const fetchPetData = async (id) => {
  try {
    const response = await fetch(`${API_BASE_URL}/pet/${id}`);
    if (!response.ok) {
      throw new Error(`HTTP error! status: ${response.status}`);
    }
    const data = await response.json();
    return data;
  } catch (error) {
    console.error("Failed to fetch pet data:", error);
    throw error;
  }
};
Step 3: Use the Mock Data in a React Component
Create a React component to fetch and display the user data:
// src/components/PetProfile.js

import React, { useEffect, useState } from "react";
import { fetchPetData } from "../apiService";

const PetProfile = ({ petId }) => {
  const [pet, setPet] = useState(null);
  const [loading, setLoading] = useState(true);
  const [error, setError] = useState(null);

  useEffect(() => {
    const getPetData = async () => {
      try {
        setLoading(true);
        const petData = await fetchPetData(petId);
        setPet(petData);
      } catch (err) {
        setError(err.message);
      } finally {
        setLoading(false);
      }
    };

    getPetData();
  }, [petId]);

  if (loading) return <div>Loading pet data...</div>;
  if (error) return <div>Error: {error}</div>;
  if (!pet) return <div>No pet data available</div>;

  return (
    <div>
      <h2>Pet Profile</h2>
      <p>Name: {pet.name}</p>
      <p>Status: {pet.status}</p>
      {pet.photoUrls && pet.photoUrls.length > 0 && (
        <img src={pet.photoUrls[0]} alt={pet.name} style={{ maxWidth: '200px' }} />
      )}
    </div>
  );
};

export default PetProfile;
Step 4: Use the Component in Your Application
Modify the App.js file to include the UserProfile component:
// src/App.js

import React from "react";
import PetProfile from "./components/PetProfile";

function App() {
  return (
    <div className="App">
      <h1>Pet Store Mock API Demo</h1>
      <PetProfile petId="1" />
    </div>
  );
}

export default App;
Start your React application:
You can start the react application by running npm start. Your React application should now fetch and display pet data using the mock API provided by Apidog.
The full source code of the above file can be found on CodeSandBox . Make sure to clone and change the URL to your own server URL else it won't fetch!
Best Practices for API Mocking with React Apps

- Keep Mocks Up-to-Date: Ensure that your mock APIs are regularly updated to reflect changes in the actual API. This prevents discrepancies and ensures accurate testing.
- Use Realistic Data: Populate your mock responses with realistic data to mimic real-world scenarios as closely as possible. Unlike other tools, Apidog does this very well.
- Automate Mock Creation: Where possible, automate the creation and management of mock APIs to reduce manual effort and minimize errors.
- Integrate with CI/CD Pipelines: Incorporate mock APIs into your continuous integration and continuous deployment (CI/CD) pipelines to ensure seamless testing throughout the development lifecycle.
For more robust data fetching, consider using libraries like React Query or SWR. These tools provide caching, automatic refetching, and other advanced features that can enhance your application's performance and user experience.
Conclusion
Using mock data is a powerful technique to ensure your React.js application is robust and reliable, even before the actual backend is ready. By leveraging Apidog to create and manage mock APIs, you can streamline your development and testing workflows. Start using Apidog for your mock data needs and enhance your development process today.
FAQs about Mocking Rest API from React.js
Q1. How to mock REST API in React?
To mock a REST API in React, you can:
- Use a library like Mirage JS or MSW (Mock Service Worker) to intercept network requests and return mock data.
- Create a mock API service using JSON Server, which allows you to quickly set up a fake REST API using a JSON file.
- Implement custom mock functions that return promises with mock data, simulating asynchronous API calls.
- Use axios-mock-adapter to mock axios requests in your tests.
Q2. Can you make a REST API with React?
React itself is a frontend library and cannot create a REST API. However, you can:
- Use a backend framework like Express.js alongside React to create a full-stack application with a REST API.
- Utilize serverless functions (e.g., with Next.js API routes) to create API endpoints that work with your React frontend.
- Use a Backend-as-a-Service (BaaS) solution like Firebase or Supabase to handle API functionality for your React app.
Q3. What is mock data in React?
Mock data in React refers to fake or sample data used during development and testing. It allows developers to:
- Simulate API responses without a working backend
- Test components with various data scenarios
- Develop UI components independently of backend services
- Demonstrate functionality in prototypes or demos
Mock data is typically stored in JSON format and can be used to populate components, test state management, and verify rendering logic.
Q4. How to create mock REST API?
To create a mock REST API:
Use JSON Server:
- Create a JSON file with your mock data
- Install JSON Server:
npm install -g json-server - Run the server:
json-server --watch db.json
Use Express.js:
- Set up an Express server
- Define routes that return mock data
- Implement CRUD operations with in-memory data or a file-based database
Use online services:
- Utilize platforms like Mockapi.io or Mocky to create mock endpoints quickly
Use Mirage JS:
- Install Mirage JS in your project
- Define models, factories, and routes
- Intercept network requests and respond with mock data
These methods allow you to create a functional mock API that your React application can interact with during development and testing phases.


