
Unlock the full potential of large language models (LLMs) like Claude by connecting them to real-time, external data and tools. The Model Context Protocol (MCP) brings modular, structured context integration to your LLM workflows—enabling smarter automation, context-rich responses, and seamless tool interaction.
In this guide, you’ll learn how to build an MCP server in TypeScript, integrate it with Claude Desktop, and leverage Apidog to streamline your API design and testing process.
What Is Model Context Protocol (MCP)?
The Model Context Protocol (MCP) is an open standard for connecting LLM-based applications with external tools, APIs, and data sources. MCP enables structured, secure, and scalable integration—ideal for local desktop environments like Claude Desktop or Sourcegraph Cody.
MCP establishes four key roles:
- Hosts: The LLM-powered app (e.g., Claude Desktop)
- Clients: Modules embedded with the host to manage MCP connections
- Servers: Providers of external tools, data, or services
- Transports: The communication layer (commonly JSON-RPC over stdin/stdout, HTTP, or custom transports)
With MCP, you can add external capabilities to your LLM without hardcoding context or relying on copy-paste hacks.
Why MCP Matters for API-Focused Teams
Traditional context-passing methods (manual copy-paste, fixed integrations) limit flexibility and scalability. MCP solves these challenges:
- Dynamic tool discovery and capability negotiation
- Consistent JSON-RPC messaging across all platforms
- Clear separation between the LLM and external tools
- Real-time context injection for smarter, more interactive AI
💡 Tip: Apidog is a robust platform for designing, testing, and documenting APIs. It integrates seamlessly with your API workflows, making MCP server development and testing far more efficient.
Prerequisites
To follow this guide, you’ll need:
- Node.js (v18+)
- TypeScript
- Familiarity with JSON-RPC
- Claude Desktop installed
Step 1: Set Up Your TypeScript MCP Server Project
-
Initialize your project:
mkdir mcp-ts-server cd mcp-ts-server npm init -y npm install typescript ts-node @modelcontextprotocol/server-core npx tsc --init -
Create your source directory:
mkdir src
touch src/index.ts
Step 2: Implement a Simple MCP Server in TypeScript
Let’s build a basic MCP server that offers a “greet_user” tool. This tool returns a friendly greeting based on user input.
import { createServer, Server } from '@modelcontextprotocol/server-core';

const server: Server = createServer();

const GREETING_TOOL = {
  name: 'greet_user',
  description: 'Returns a friendly greeting message.',
  inputSchema: {
    type: 'object',
    properties: {
      name: { type: 'string', description: 'Name of the user' }
    },
    required: ['name']
  }
};

// Register the tool
server.setRequestHandler('ListTools', async () => {
  return { tools: [GREETING_TOOL] };
});

// Handle tool requests
server.setRequestHandler('CallTool', async (request) => {
  const name = request.args.name || 'there';
  return {
    content: [{ type: 'text', text: `Hello, ${name}! Welcome to MCP.` }],
    isError: false
  };
});

// Start the server
server.listen();
Run your server with:
npx ts-node src/index.ts
Step 3: Register Your MCP Server with Claude Desktop
Each MCP server requires a unique URI, such as:
tool://greet_user/greet_user
Claude Desktop discovers MCP servers using a Stdio transport—meaning it communicates via standard input/output. No HTTP server required!
Step 4: Connecting Your MCP Server to Claude Desktop
To connect your new MCP server:
- Open Claude Desktop.
- Go to Settings > Tool Providers.
- Add a new tool provider:
- Transport: Stdio
- Tool URI: (e.g.,
tool://greet_user/greet_user) - Command:
npx ts-node src/index.ts
Claude Desktop will launch your server and communicate via JSON-RPC over stdin/stdout.
Using Claude Desktop's Config File for MCP Integration
For more advanced configuration—such as passing environment variables or setting custom commands—edit the Claude Desktop config file:
Path:
~/Library/Application Support/Claude/claude_desktop_config.json
⚠️ Do not edit config.json in the same directory.
Example Configuration:
{
  "mcpServers": {
    "brave_search": {
      "command": "npx",
      "args": ["@modelcontextprotocol/server-brave-search"],
      "env": {
        "BRAVE_API_KEY": "your-api-key"
      }
    }
  }
}
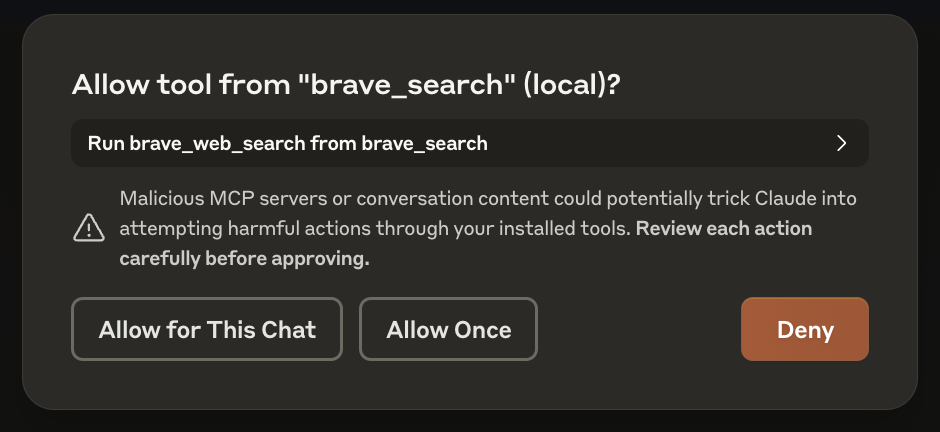
- This tells Claude Desktop to recognize a tool named
brave_search, launch it vianpx, and inject your API key. - Save and restart Claude Desktop. On first use, Claude will request permission—click "Allow for This Chat" to proceed.
Enhance API Automation with Apidog MCP Server Integration
Take your LLM workflows further by integrating Apidog projects as MCP servers. This enables Claude (or other hosts) to interact directly with your API specs for live exploration, code generation, and structured model creation.
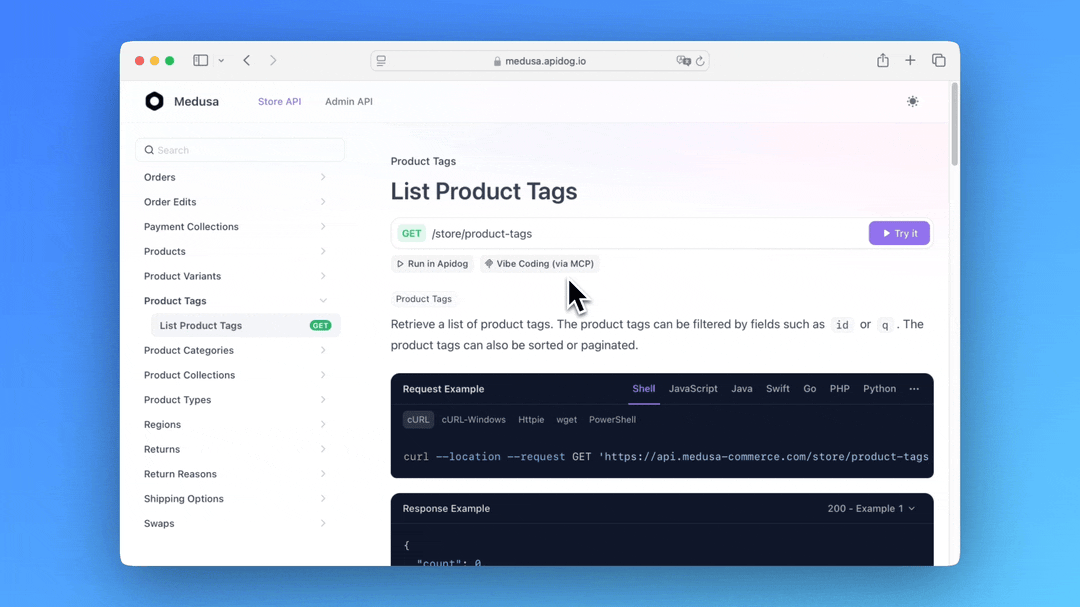
Whether you're prototyping a simple greeting or connecting to advanced web search APIs, pairing Apidog with MCP unlocks powerful, context-rich automation for your team.
How MCP Message Flow Works
Understanding the MCP protocol's message flow helps you debug and extend your integration:
- Initialization: Claude (host) sends an initialize request with protocol info.
- Capability Negotiation: Your MCP server replies with supported features.
- Tool Discovery: Claude issues a
ListToolsrequest; your server responds with available tools and input schemas. - Tool Call: When triggered, Claude sends a
CallToolrequest with user arguments. Your server processes and returns the result.
Step 5: Expand Your MCP Tooling Ecosystem
Once your server is running, add more capabilities:
- Web Search: Integrate APIs like Brave Search
- Filesystem Access: Enable secure file operations
- Collaboration Tools: Connect to Slack, GitHub, or Google Drive
Example: Brave Search Tool
const WEB_SEARCH_TOOL = {
  name: 'brave_web_search',
  description: 'Search the web using Brave.',
  inputSchema: {
    type: 'object',
    properties: {
      query: { type: 'string' },
      count: { type: 'number', default: 10 }
    },
    required: ['query']
  }
};
Transport Options
- Stdio: Best for local and desktop environments.
- HTTP + SSE: Ideal for web apps or remote MCP servers.
- Custom Transports: Extend with your own adapters—all using JSON-RPC 2.0 for message encoding.
Debugging and Testing Your MCP Server
For robust testing, try the open-source MCP Inspector:
git clone https://github.com/modelcontextprotocol/inspector
This tool allows you to trace messages, simulate requests, and debug tool behavior in real time.
Real-World MCP Use Cases
MCP is already powering advanced developer workflows:
- Sourcegraph Cody: Context-rich code search for developers
- Zed Editor: IDE extensions for smarter coding
- Claude Desktop: Local, private LLM operations with tool plugins
These integrations showcase how MCP enables developers and teams to customize and scale LLM-powered automation with ease.
Conclusion
MCP brings structure, modularity, and scalability to LLM integrations—making it easy for API and backend engineers to build smarter tools. By following this guide, you can:
- Build a TypeScript MCP server from scratch
- Integrate with Claude Desktop for seamless LLM interaction
- Extend your server with additional APIs and tools
- Enhance your workflow with Apidog for API integration and testing
Mastering MCP is a key step for any technical team building the next generation of AI-driven applications.
Further Resources:


