In today's fast-paced development environment, the journey from API specification to working code often resembles a complex translation process. Developers must interpret documentation, understand endpoints, and manually implement client code—a process prone to errors and misinterpretations. What if there was a direct bridge that connected your API specifications to your coding environment, allowing AI to understand and implement your APIs with precision?
Enter Apidog MCP Server—a groundbreaking solution that transforms how developers interact with API specifications. By creating a seamless connection between your API documentation and AI-powered coding tools, MCP eliminates the traditional gap between design and implementation, revolutionizing the development workflow.
This article explores how Apidog MCP Server works, how to set it up, and the transformative impact it can have on your development process. Whether you're building microservices, integrating third-party APIs, or maintaining complex systems, MCP offers a faster, more accurate path from specification to implementation.
How Apidog MCP Server Works
Apidog MCP Server functions as an intelligent intermediary between your API specifications and AI coding tools, creating a seamless bridge that transforms static documentation into actionable development resources. At its core, the MCP Server operates by establishing a local server that reads, processes, and caches your API specifications, making them available to AI assistants through a standardized protocol. When you configure the MCP Server, it connects to one of three possible data sources: an Apidog project via API tokens, published Apidog documentation through site IDs, or OpenAPI/Swagger files from local or remote locations. Once connected, the server indexes all endpoints, schemas, parameters, and descriptions, creating a comprehensive knowledge base that AI tools can query.
When you prompt an AI assistant in your IDE with a request related to your API, the assistant communicates with the MCP Server to retrieve relevant specification details. For example, if you ask the AI to "generate a client for the /users endpoint," it queries the MCP Server for the endpoint's HTTP method, URL parameters, request body schema, response formats, and any associated documentation. This information is then used to generate accurate, specification-compliant code tailored to your programming language and framework preferences.
Step-by-Step Guide: Connecting API Specifications to AI with Apidog MCP
Apidog MCP Server creates a direct bridge between your API specifications and AI coding tools, enabling faster development and improved code quality. Here's how to set it up and start leveraging AI-assisted API development:
Step 1: Prepare Your Environment
Before connecting your API specifications to AI, ensure you have:
- Node.js installed (version 18 or higher, latest LTS recommended)
- An IDE that supports MCP:
- Cursor
- VS Code with Cline extension
- Other MCP-compatible editors
Step 2: Choose Your API Specification Source
Apidog MCP Server supports three different data sources:
| Source Type | Best For | Requirements |
|---|---|---|
| Apidog Project | Teams working within Apidog | API access token, Project ID |
| Published Apidog Documentation That Enables MCP | Public API consumers | Documentation site ID |
| OpenAPI/Swagger Files | Independent developers | Local or online OAS files |
Step 3: Configure MCP Server
For Apidog Project integration:
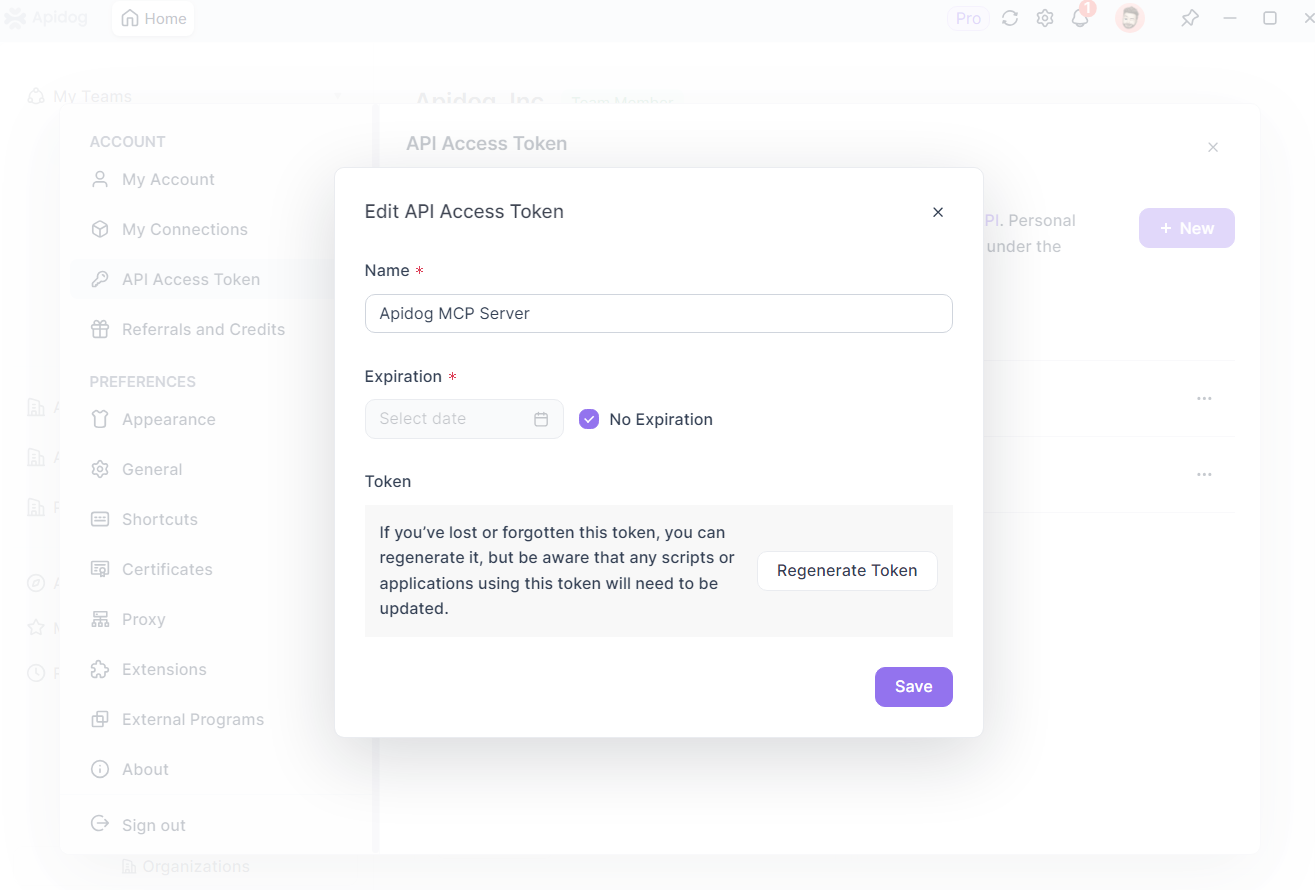
Generate an API access token:
- Navigate to Account Settings → API Access Token in Apidog
- Create a new token with appropriate permissions
Locate your Project ID:
- Open your project in Apidog
- Find the Project ID in Project Settings → Basic Settings

Configure your MCP client:
- In Cursor: Open Settings → MCP → Add new global MCP server
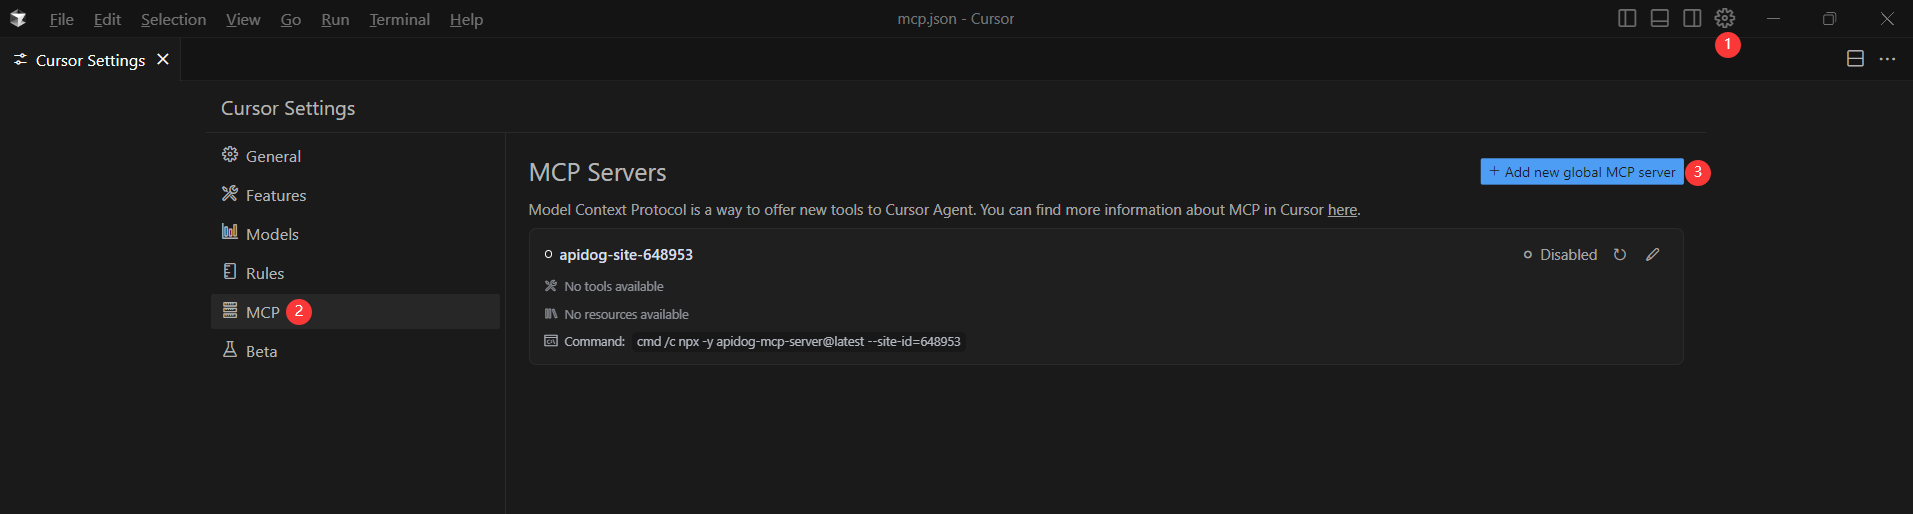
- Add the configuration with your access token and project ID
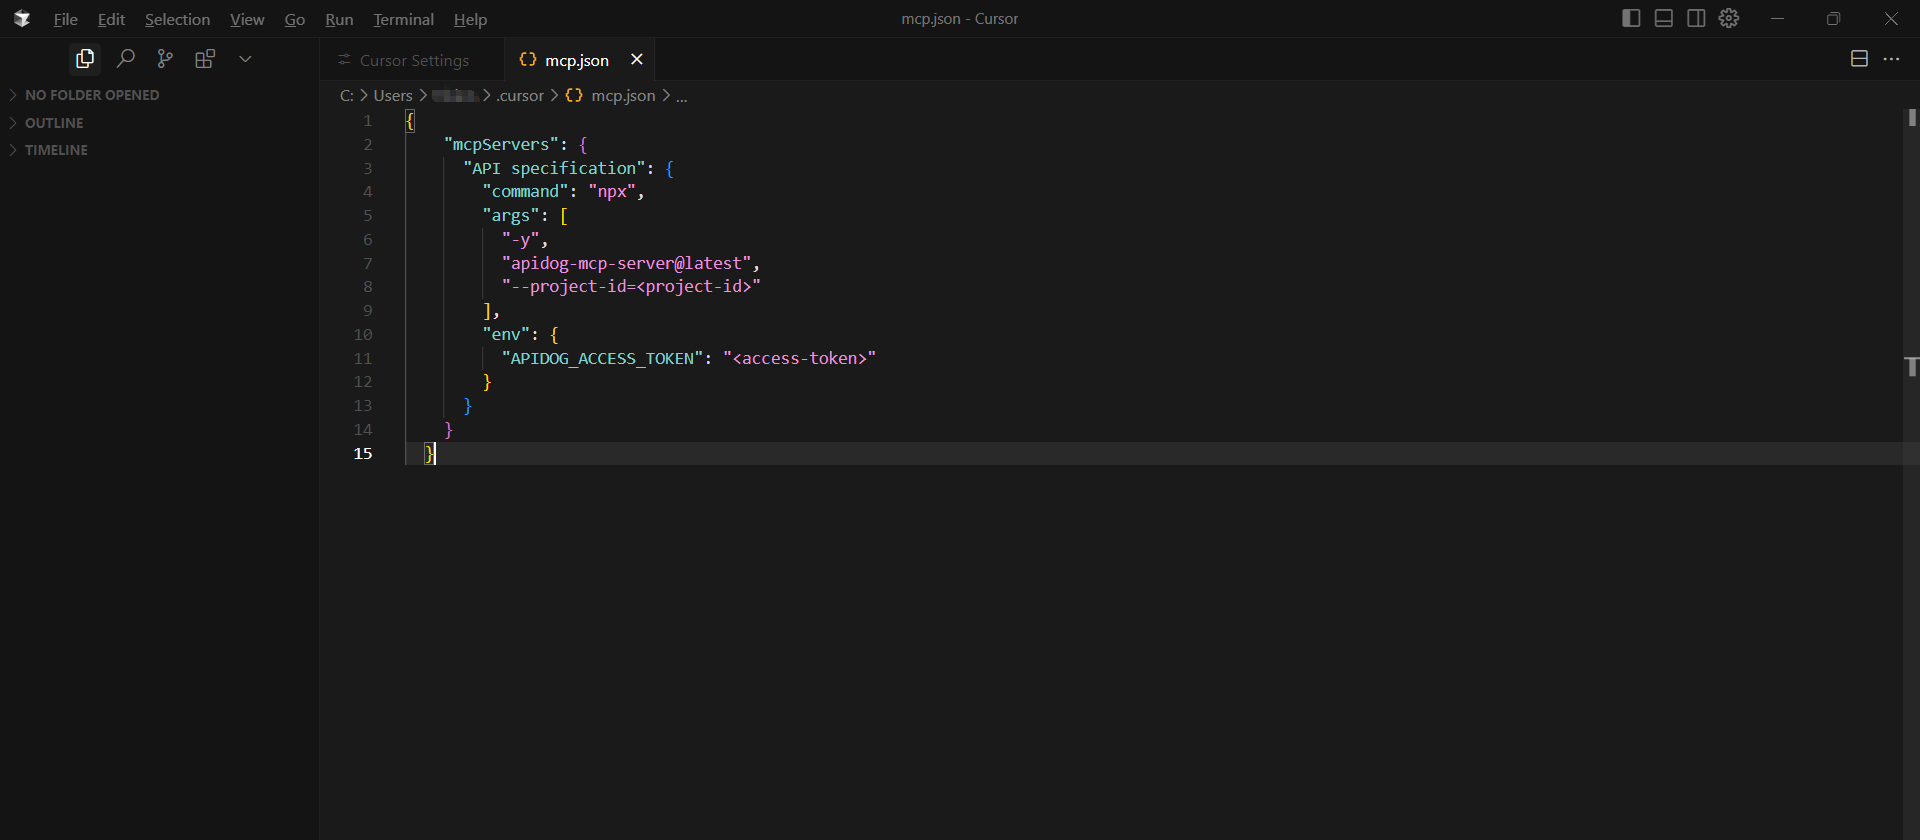
{
  "mcpServers": {
    "API specification": {
      "command": "npx",
      "args": [
        "-y",
        "apidog-mcp-server@latest",
        "--project=<your-project-id>"
      ],
      "env": {
        "APIDOG_ACCESS_TOKEN": "<your-access-token>"
      }
    }
  }
}
Step 4: Start Using AI with Your API Specifications
Once configured, you can immediately start leveraging AI to work with your API specifications:
Generate code based on endpoints:
"Use MCP to fetch the API specification and generate Java records for the 'Product' schema"Update existing code to match specification changes:
"Based on the API specification, update the 'User' DTO with the new fields"Create complete implementations:
"Generate all the MVC code related to the endpoint '/users' according to the API specification"Add documentation:
"Add comments for each field in the 'Product' class based on the API specification"Step 5: Refresh When Specifications Change
When your API specifications are updated:
- Ask the AI to refresh the cache: "Please refresh the API specification"
- Request updates to affected code: "Update the client code to match the new API specification"
Official Apidog Help Docs:
- Conntect API Specification within Apidog Project to AI via Apidog MCP Server
- Conntect Online API Documentation Published by Apidog to AI via Apidog MCP Server
- Conntect OpenAPI Files to AI via Apidog MCP Server
Benefits of Bridging API Specs to AI
By connecting your API specifications directly to AI through Apidog MCP Server, you gain:
- 40-60% faster development with automatic code generation
- Reduced errors through consistent implementation of specifications
- Better synchronization between documentation and code
- Simplified onboarding for new team members
This direct bridge eliminates the traditional gap between API design and implementation, creating a more efficient and accurate development workflow.
Conclusion: Transforming API Development with Apidog MCP
The gap between API specifications and code implementation has long been a source of friction in the development process. Apidog MCP Server represents a significant leap forward in bridging this divide, creating a seamless connection between your API documentation and AI-powered development tools.
By enabling AI to directly access and understand your API specifications, MCP transforms static documentation into an active resource that guides and enhances the development process. This direct connection eliminates the manual translation between specifications and code, reducing errors, improving consistency, and dramatically accelerating development cycles.