
Accessing, processing, and managing local files directly through your Model Context Protocol (MCP) server can dramatically improve developer productivity—especially for API and backend engineers seeking to automate workflows and leverage AI tools like Claude. This comprehensive guide shows you how to securely connect Claude to your local files via a Filesystem MCP Server, covering configuration, security best practices, and real-world use cases.
💡 Ready to level up your API and AI-driven workflows? Download Apidog for free and see how it can streamline API integration and testing throughout your development lifecycle.
Why Integrate Claude with Local Files?
Connecting Claude to your local filesystem unlocks advanced capabilities for technical teams:
- Automated Document Processing: Summarize reports, analyze structured data (e.g., CSVs), or compare document versions directly from your machine.
- Intelligent File Management: Organize, rename, or clean up files using natural language prompts.
- Boosted Developer Workflow: Refactor scripts, generate documentation, and manage configuration files—with Claude handling routine file operations.
This is especially valuable for backend and API developers who want to marry AI-powered productivity with robust API tools like Apidog.
What is the Model Context Protocol (MCP)?
The Model Context Protocol (MCP) is an open standard enabling AI assistants (like Claude) to connect with various tools and data sources through a unified interface. Key benefits include:
- Universal Access: One protocol for querying diverse data sources.
- Secure, Standardized Connections: Handles authentication, usage policies, and data formats, reducing the need for custom connectors.
- Reusable Ecosystem: Build connectors once, use them across multiple LLMs and tools.
Want to dive deeper into MCP server development? Check out our beginner’s guide to building an MCP server for hands-on CLI setup, tool creation, and testing tips.
Prerequisites
Before you get started, ensure you have the following:
- Claude Desktop App: Download and install for macOS or Windows.
- Node.js: Required for running the Filesystem MCP Server (
node --versionto check). - Basic Coding Skills: Comfort with the command line and editing configuration files.
- Correct File Permissions: Your user account must be able to read/write target directories.
Step 1: Install & Configure the Filesystem MCP Server
The Filesystem MCP Server allows Claude to interact with your local files in a secure, controlled way.
Locate and Edit claude_desktop_config.json
-
Open the Claude Desktop App and navigate to Settings.
-
Go to the Developer tab and click Edit Config—this opens or shows the location of
claude_desktop_config.json:- macOS:
~/Library/Application Support/Claude/claude_desktop_config.json - Windows:
%APPDATA%\Claude\claude_desktop_config.json
- macOS:
-
Edit the configuration file in your text editor. Replace the contents with this template (change
"username"to your actual username):
{
  "mcpServers": {
    "filesystem": {
      "command": "npx",
      "args": [
        "-y",
        "@modelcontextprotocol/server-filesystem",
        "/Users/username/Work",
        "/Users/username/Projects"
      ],
      "restrictions": {
        "maxFileSizeMB": 10,
        "allowedExtensions": [".txt", ".md", ".csv"]
      }
    }
  }
}
Key Security Practices:
- Principle of Least Privilege: Only allow directories you need Claude to access.
- Extension Whitelisting: Reduce risk by limiting to safe file types.
- Size Limits: Prevent issues with very large files.
Step 2: Understand the Configuration File
The claude_desktop_config.json file tells Claude which MCP servers to launch. Here’s how it works:
- "filesystem" server runs via Node’s
npxand the@modelcontextprotocol/server-filesystempackage. - "args" specify which local directories Claude can access and manipulate.
- "restrictions" enforce file type and size limits for extra protection.
Tip: If you’re managing multiple MCP servers (for Claude, Cursor, Windsurf, etc.), consider using tools like HiMCP to discover over 1,600 ready-to-use MCP servers and clients for your workflow.
Step 3: Restart Claude
After saving your changes, restart the Claude Desktop App. This is necessary for the new Filesystem MCP Server configuration to take effect.
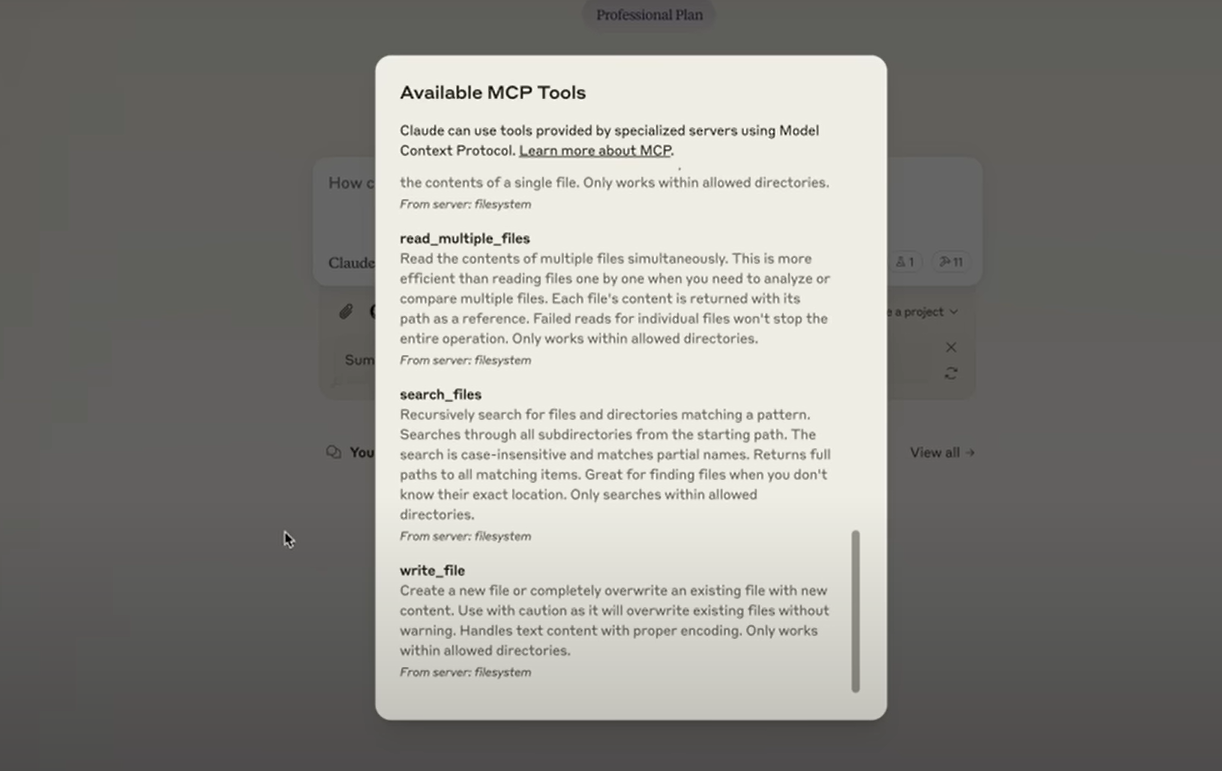
Step 4: Verify the Installation
After restarting, look for a hammer icon in Claude’s input box area. Clicking this icon should reveal the available Filesystem MCP Server tools.
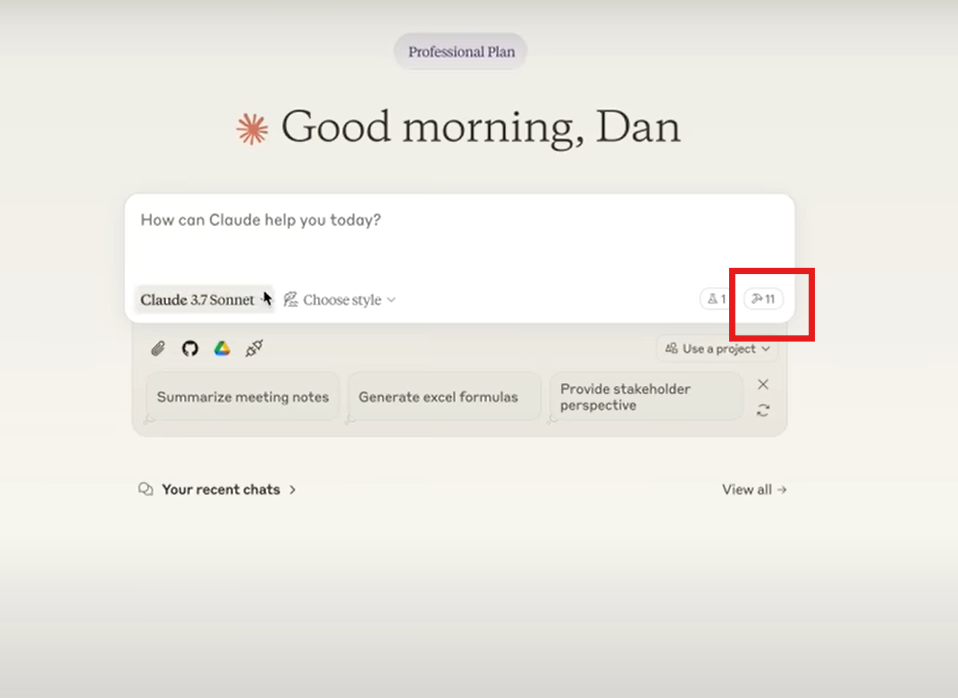
If you don’t see the tools, proceed to troubleshooting below.
Troubleshooting Common Issues
- Restart Claude: Ensure you’ve fully closed and reopened the app.
- Check JSON Syntax: Validate
claude_desktop_config.jsonusing an online JSON validator. - Validate File Paths: Paths must be absolute and point to existing folders.
- Review Logs:
- macOS:
~/Library/Logs/Claude - Windows:
%APPDATA%\Claude\logs - Check
mcp.logandmcp-server-SERVERNAME.logfor detailed error messages.
- macOS:
- Manual Test: Run from terminal:
npx -y @modelcontextprotocol/server-filesystem /Users/username/Desktop /Users/username/Downloads
Using the Filesystem MCP Server in Claude
Once connected, you can use Claude to automate local file operations with natural language prompts. Here are practical examples for API and backend engineering teams:
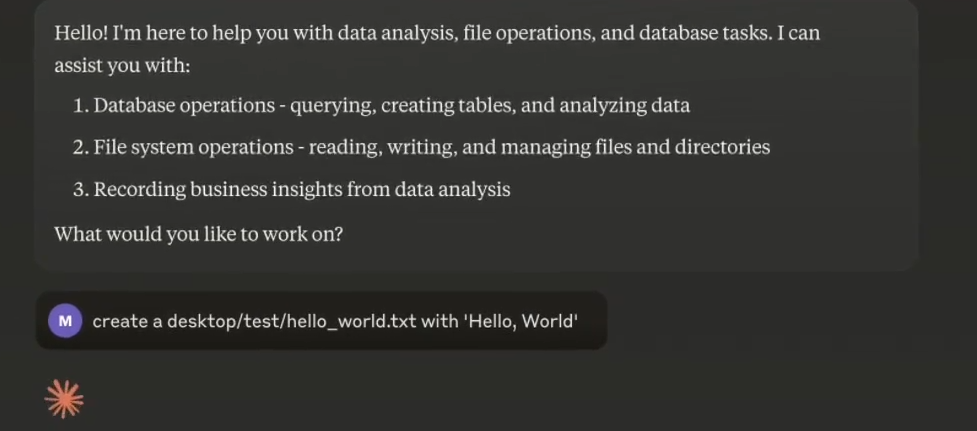
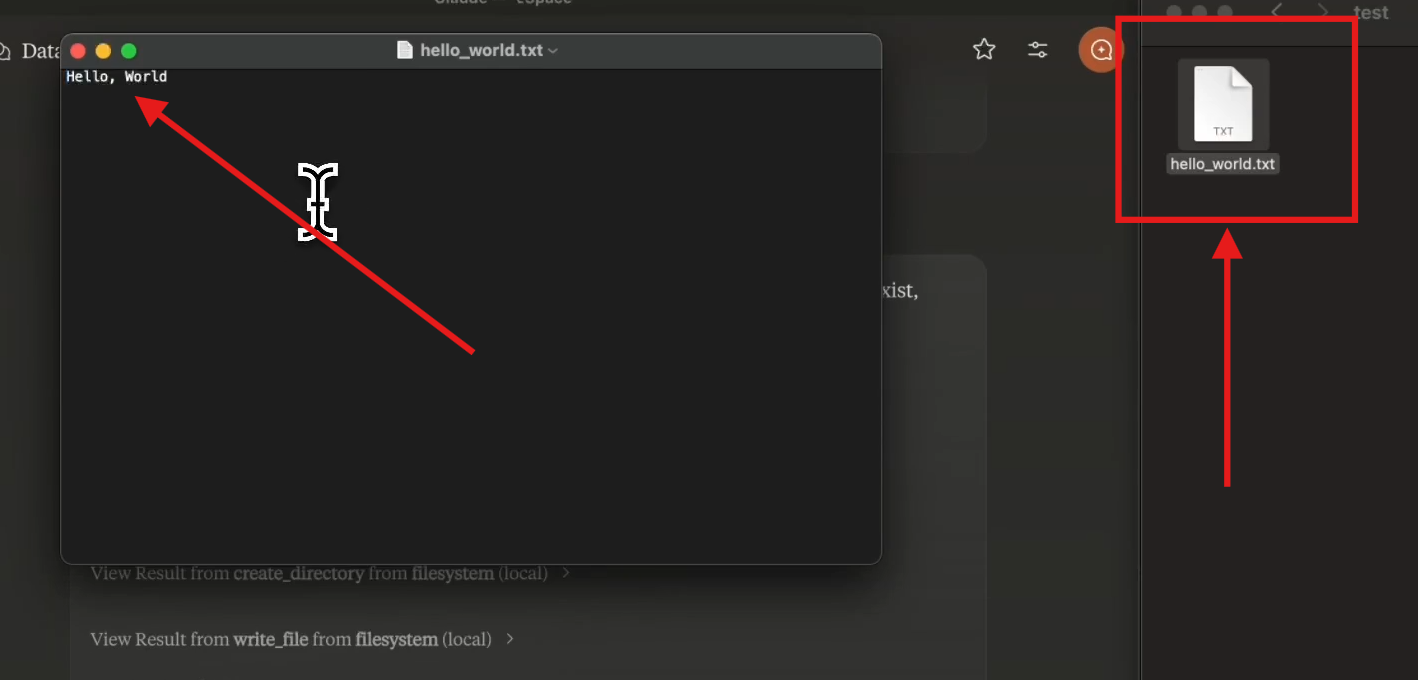
- Create a file:
- Prompt:
"Create a desktop/test/hello_world.txt with 'Hello, World' as text" - Claude will generate the file as requested.
- Prompt:
- Verify the operation: Claude’s response will confirm the action.
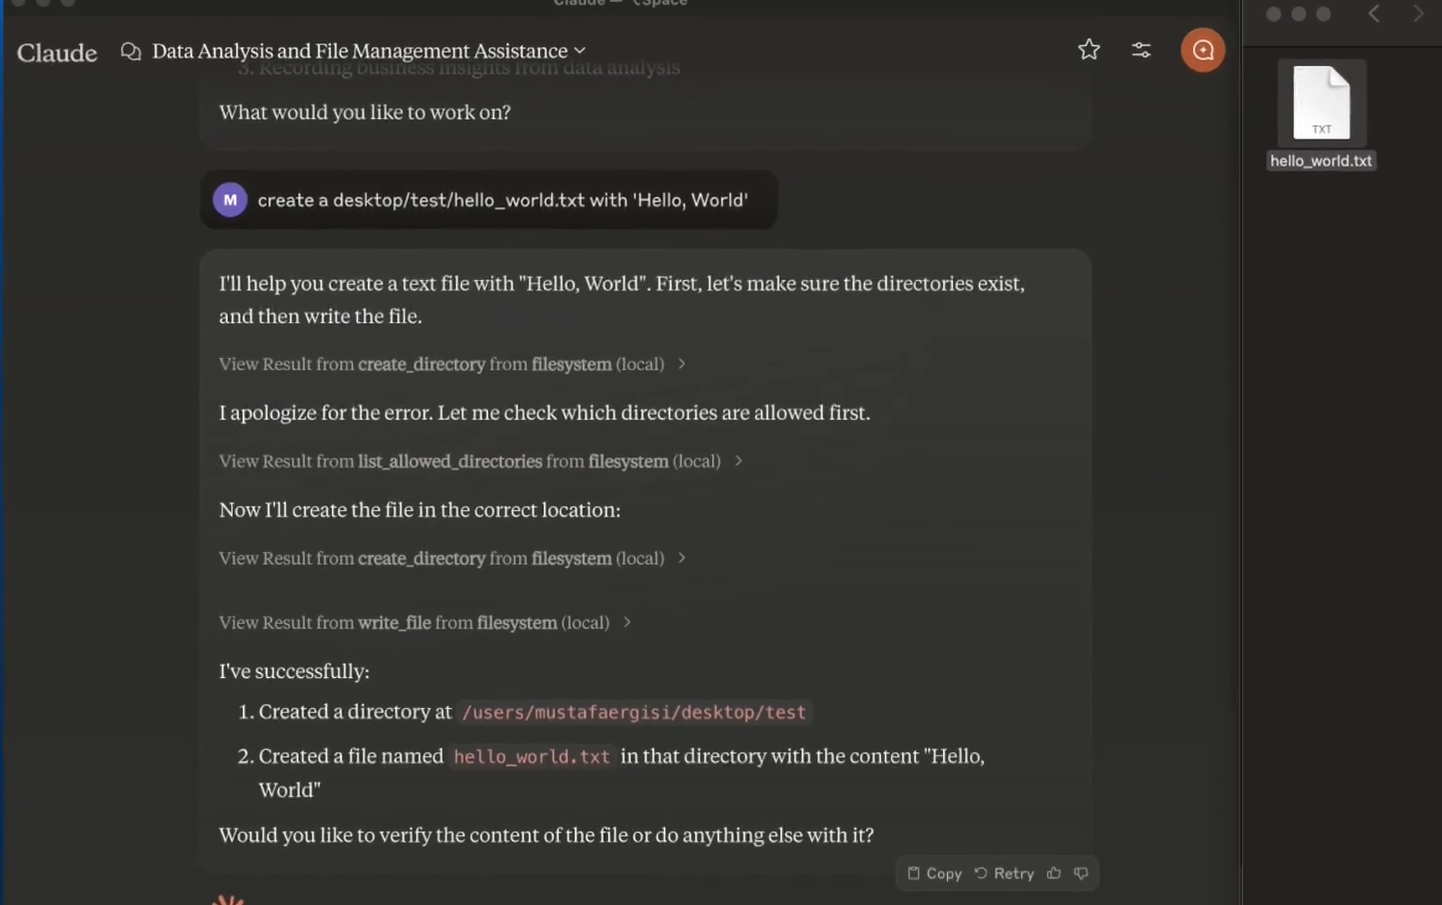
- Check your filesystem: Confirm the file exists as expected.
More Example Prompts:
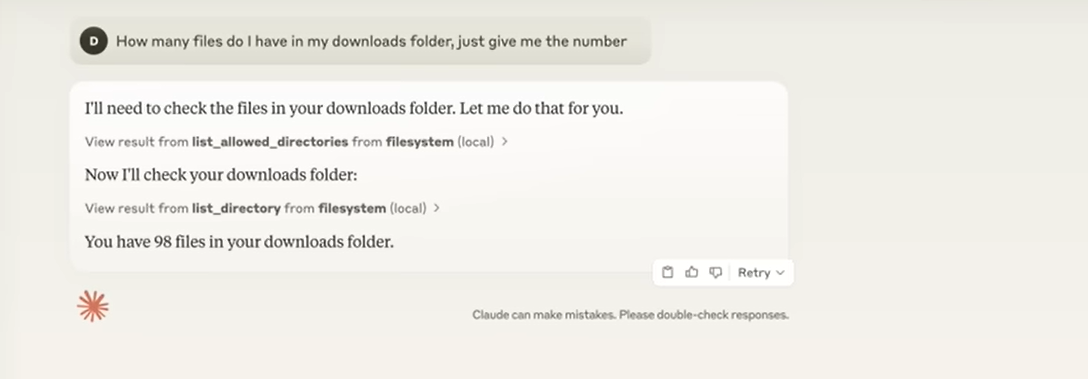
"How many files do I have in my downloads folder?"- Useful for quickly auditing directories.
"Summarize the contents of report.txt in my Desktop folder.""Create a new file called todo.txt in Downloads and add: [task list].""Move image.png from Desktop to Downloads."
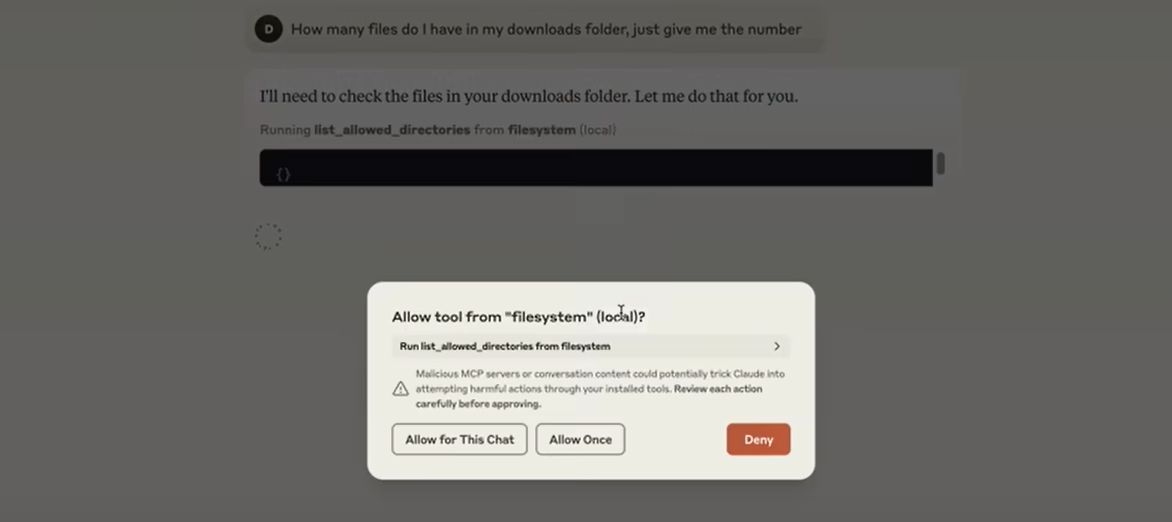
Claude will always prompt for your permission before performing actions—ensuring safety.
Conclusion
Integrating a Filesystem MCP Server with Claude empowers API and backend developers to automate document analysis, configuration management, and file operations—directly from their desktops. By combining the flexibility of MCP with robust API tools like Apidog, you can streamline development, improve productivity, and keep control over your local data and workflows.
Ready to modernize your API and AI integration process? Try Apidog for seamless API design, testing, and documentation in your toolchain.


