
Ready to make logging into your website a breeze? Dive into our step-by-step guide on integrating Google OAuth 2.0 for third-party website login. We'll walk you through the process, making it easy to enhance user experience and boost security.
Before we begin, let's first understand what OAuth 2.0 is.
What is OAuth 2.0?
OAuth 2.0 is an open standard authorization protocol that allows third-party applications to access protected resources without providing the user's username and password. It allows users to authorize third-party applications to access their protected resources without directly revealing their credentials. OAuth 2.0 is widely used in web and mobile applications to provide a secure authorization mechanism.
The OAuth 2.0 protocol involves the following roles:
- Resource Owner: Usually the user, who owns the protected resources, such as photos, personal profiles, etc.
- Client: The third-party application that wants to access the resource owner's protected resources.
- Authorization Server: The server responsible for authenticating the resource owner and authorizing the client to access the resources.
- Resource Server: The server that stores the protected resources and provides APIs to access them.
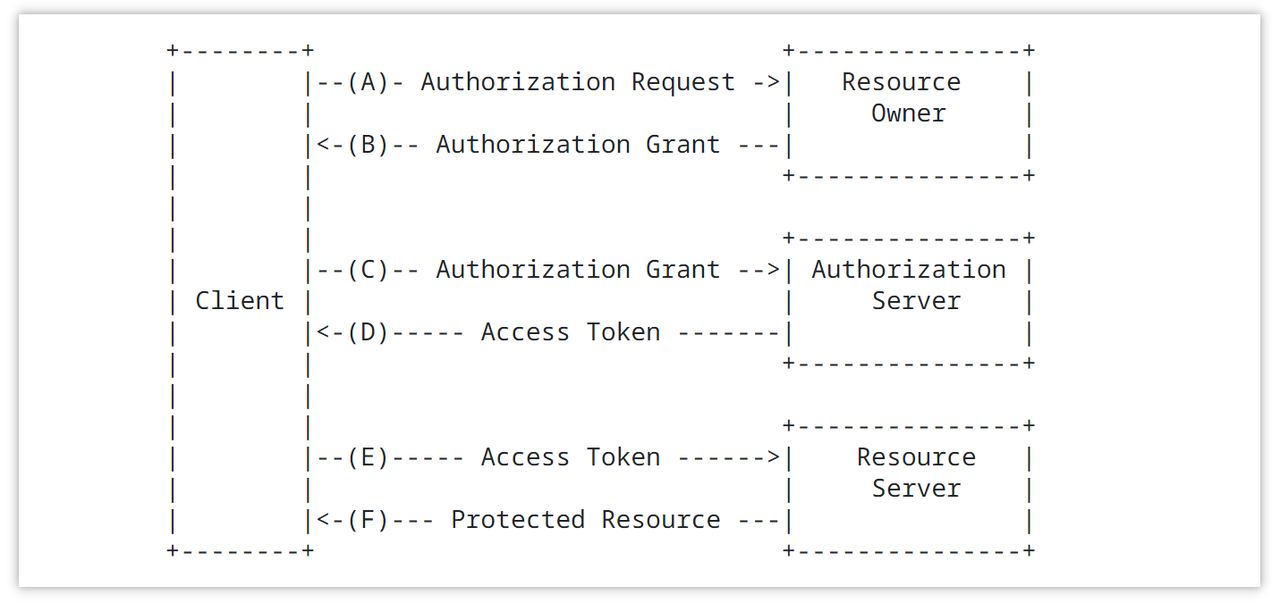
OAuth 2.0 protocol achieves authorization through the Authorization Flow. Common authorization flows include:
- Authorization Code Grant: The client redirects the user to the authorization server, the user logs in and authorizes, and the authorization server returns an authorization code to the client, which the client then uses to exchange for an access token.
- Resource Owner Password Credentials Grant: The resource owner directly provides the username and password to the client, and the client uses these credentials to request an access token from the authorization server.
- Client Credentials Grant: The client uses its own credentials to directly request an access token from the authorization server, suitable for cases where the client itself needs to access the resources.
- Implicit Grant: Used to directly obtain an access token from the client in a browser-based application.
Google OAuth 2.0 Implicit Grant: Implementation & Apidog Debugging
Google uses the Implicit Grant flow for OAuth 2.0 authorization on the web, so let's take a look at how to implement it and how to debug it in Apidog.
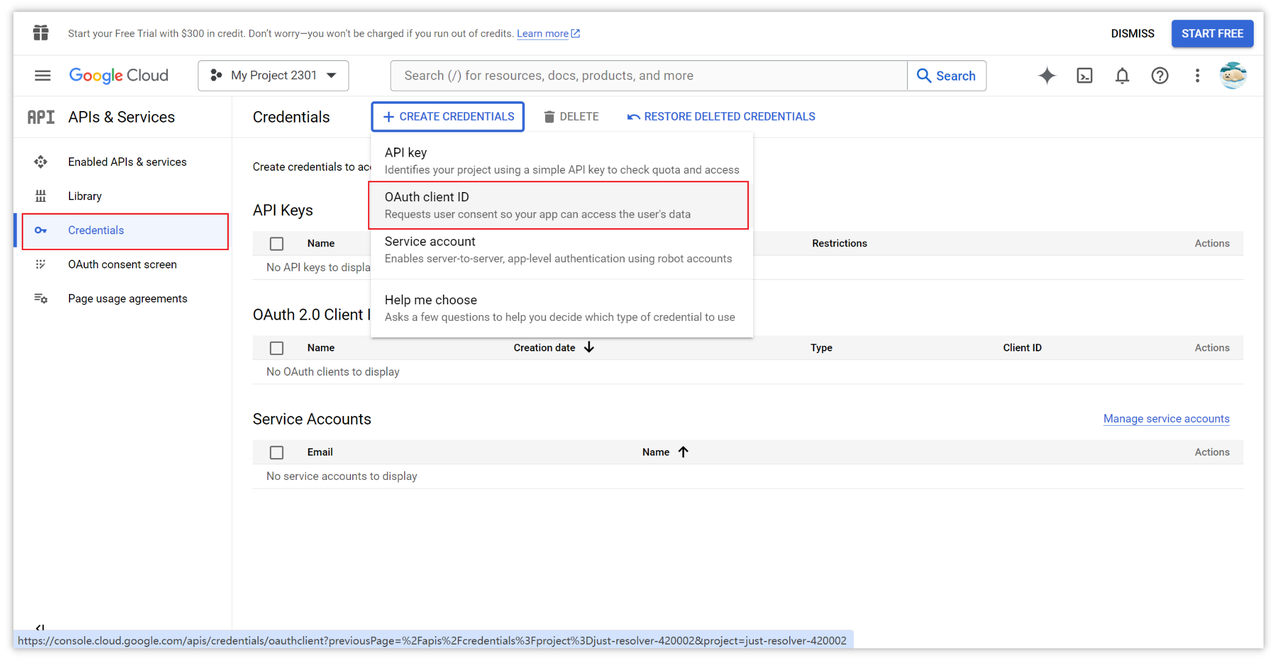
Step 1: Configure the Client ID and Redirect URL
We first need to visit the Google API Console to obtain the OAuth 2.0 credentials. Click on the "Credentials" option in the left sidebar, then create an OAuth client ID.
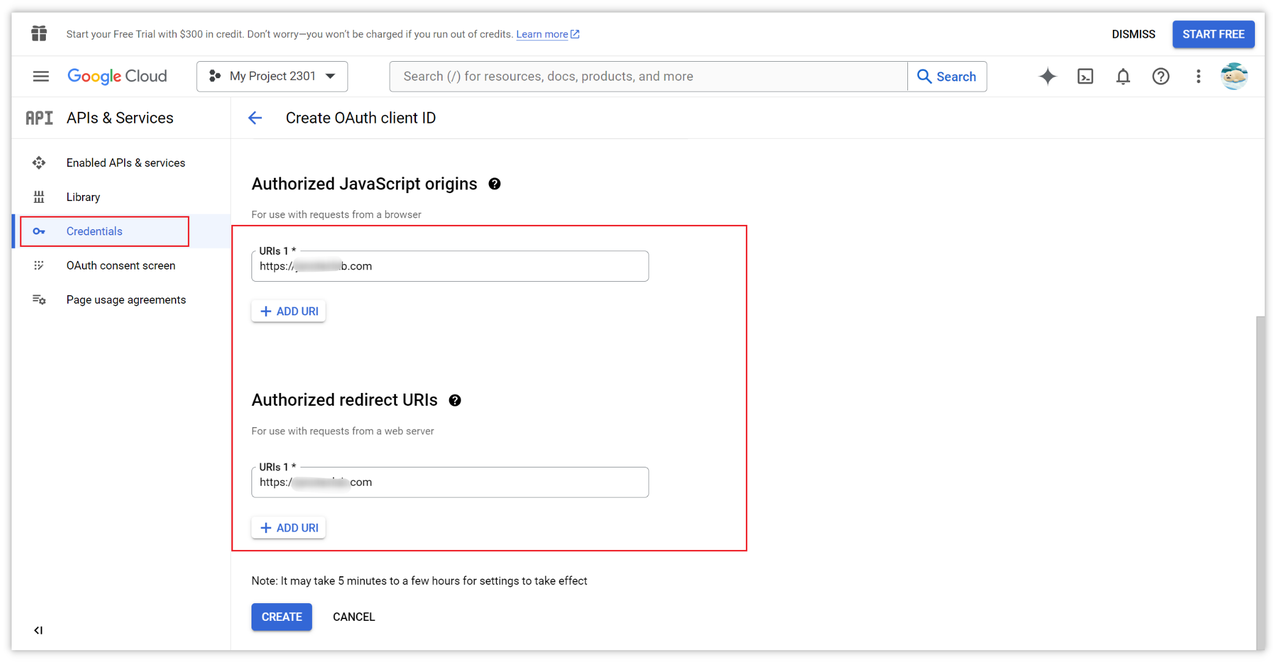
Then select your application type, which can be a web site, Android, or iOS app, depending on your business. Next, in the "Authorized JavaScript origins" field, enter your website domain.
If it's a local debug, usually set it to http://localhost or http://localhost:8000 if there's a port. The purpose is to let Google know the HTTP source where your website is hosted. Then, in the "Authorized redirect URIs" field, enter your redirect address, which is usually your login path or any other domain that you can access.
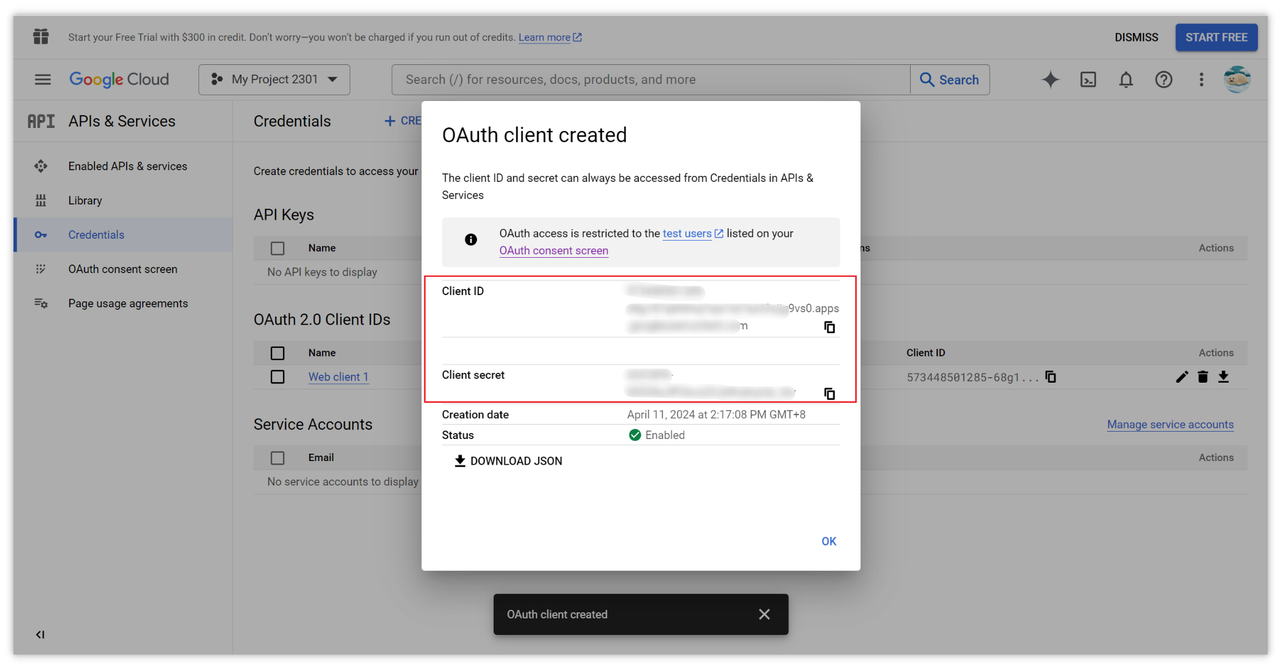
After configuring all the relevant options, click the "CREATE" button to save them. This will generate the Client ID and Client secret, which we'll need to use later.
Step 2: Configure the OAuth Permission Request Page
On the page, click the "OAuth consent screen" option on the left sidebar to create an application.
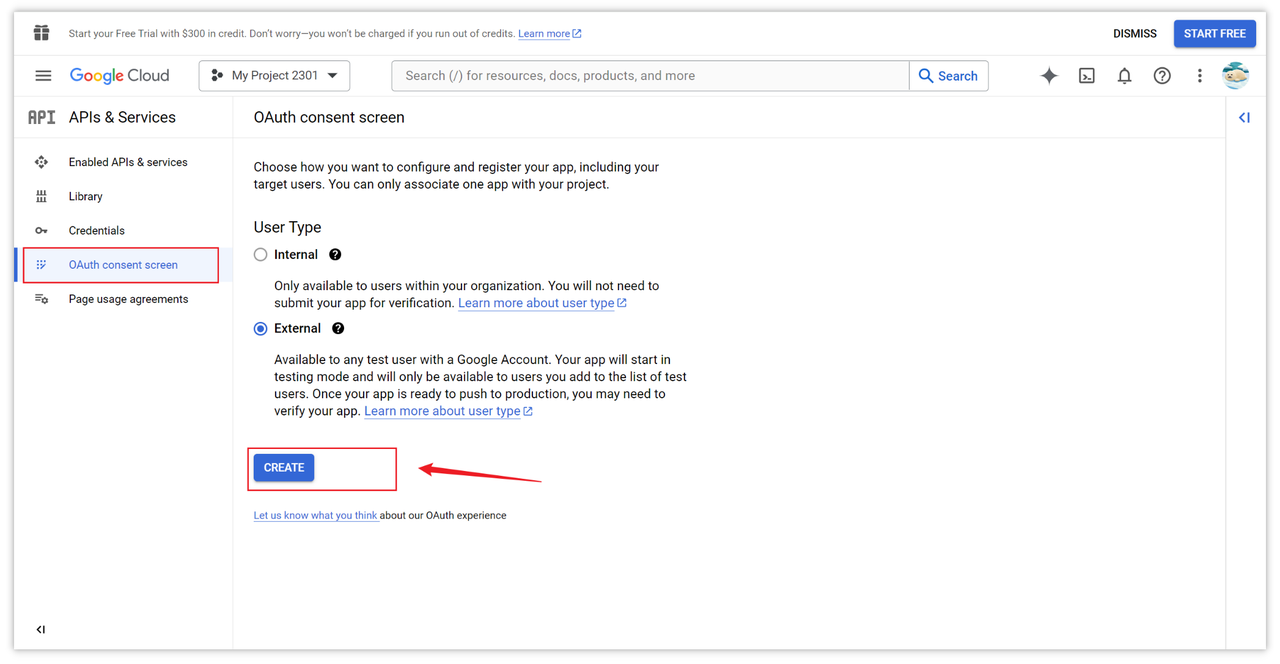
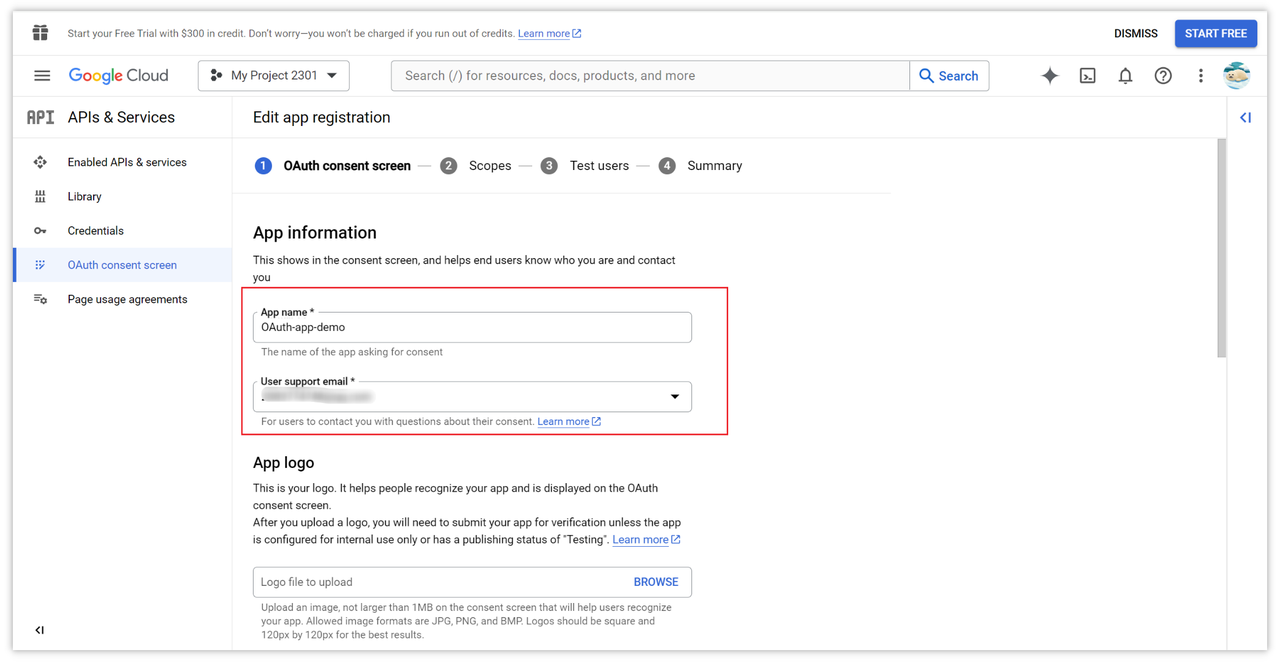
Configure the OAuth consent screen
In this page, fill in the basic information of the application, such as the name, email, and domain. This page information will be displayed in the pop-up authorization login box, which can help the end-user understand who you are and how to contact you.
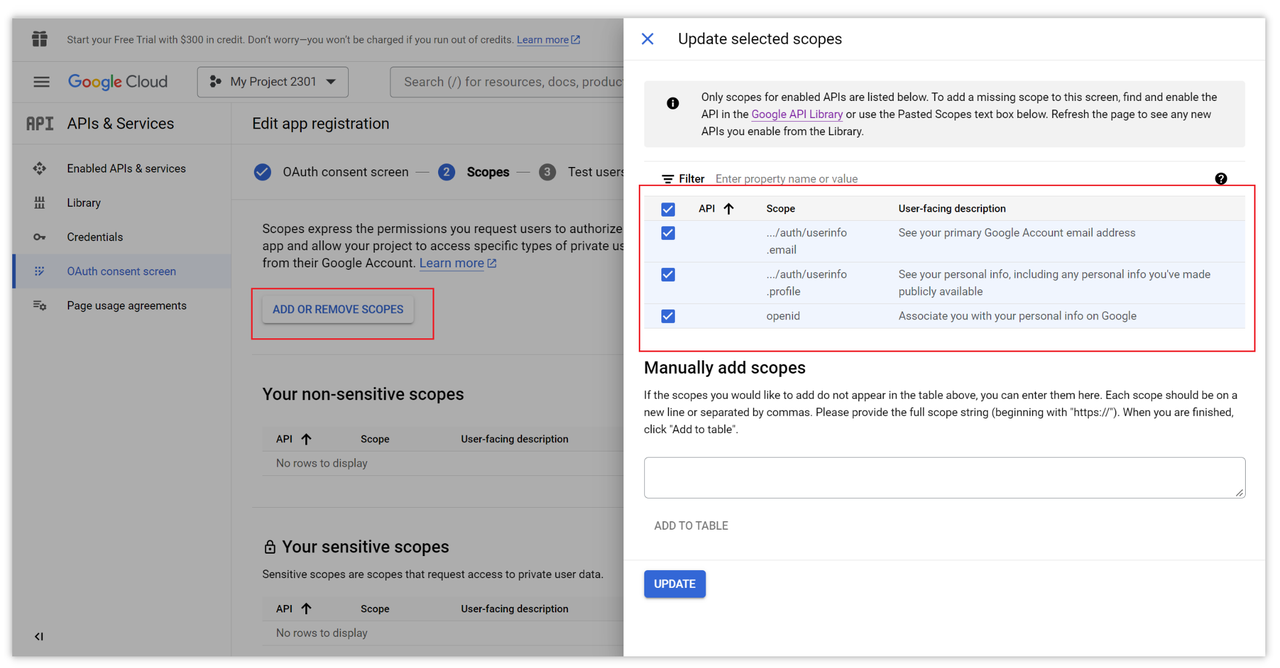
Next, configure the scopes. Go to the next step and select the permissions you want to access, then save them.
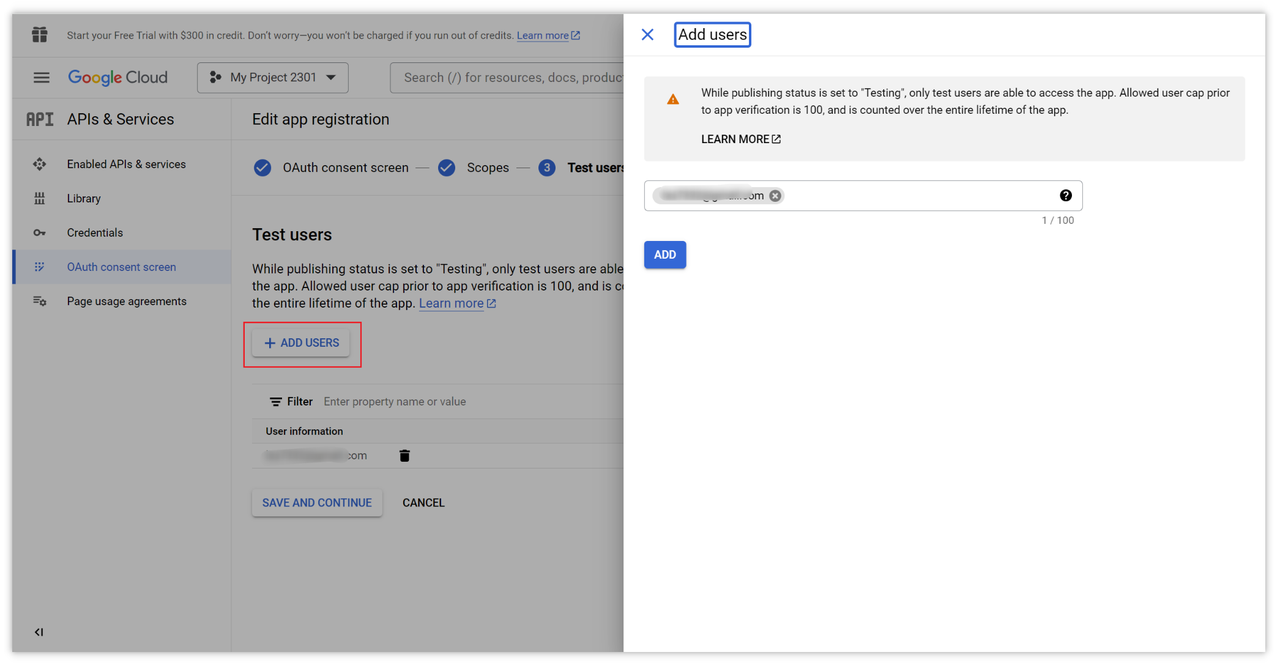
You can also add a test account, which is an email account that can perform OAuth 2.0 login before the official launch, with a limit of up to 100 allowed users.
After completing the above configuration, we can officially enter the main flow of OAuth 2.0 authorization.
Step 3: Obtain the Access Token
Once the first and second steps are ready, we can go to request the access token. To demonstrate this step, we'll use Apidog, an excellent API debugging and management tool. You can directly obtain the token in Apidog.
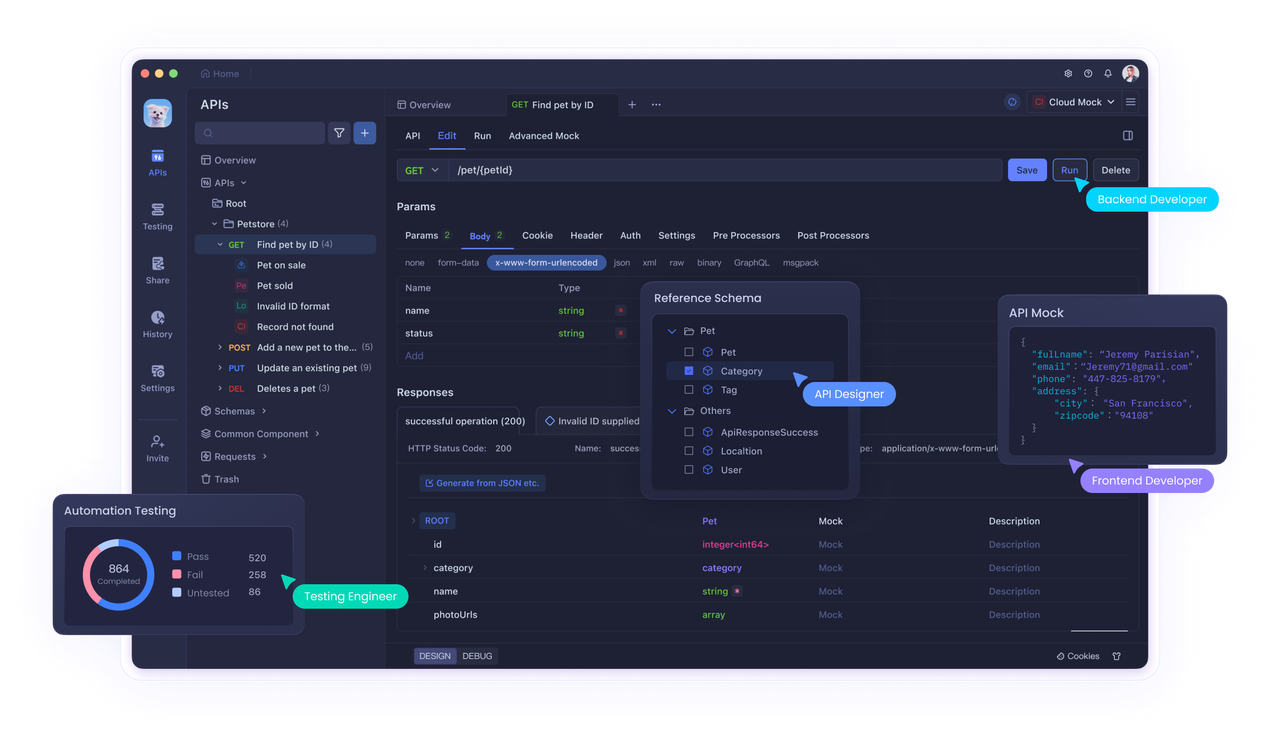
Apidog's key features in implementing the Google OAuth 2.0 login flow:
- Simplified configuration: Apidog provides a centralized configuration interface, allowing developers to easily enter the client ID, redirect URL, and other key parameters, without the need to manually construct complex authorization request URLs.
- Smart authorization mode selection: Apidog supports automatic identification of Google's authorization mode and provides the ability to select the Implicit Grant mode, eliminating the hassle of switching between different authorization modes.
- One-click access token acquisition: Apidog can guide developers through the entire authorization flow and automatically obtain the access token, greatly reducing the difficulty of token acquisition.
- Automatic token management: Apidog will automatically add the obtained access token to the request header or query parameters, without requiring the developer to manually handle token transmission.
- Seamless resource access: With the access token provided by Apidog, developers can directly use it to access Google's open resources, without the need for additional complex authorization.
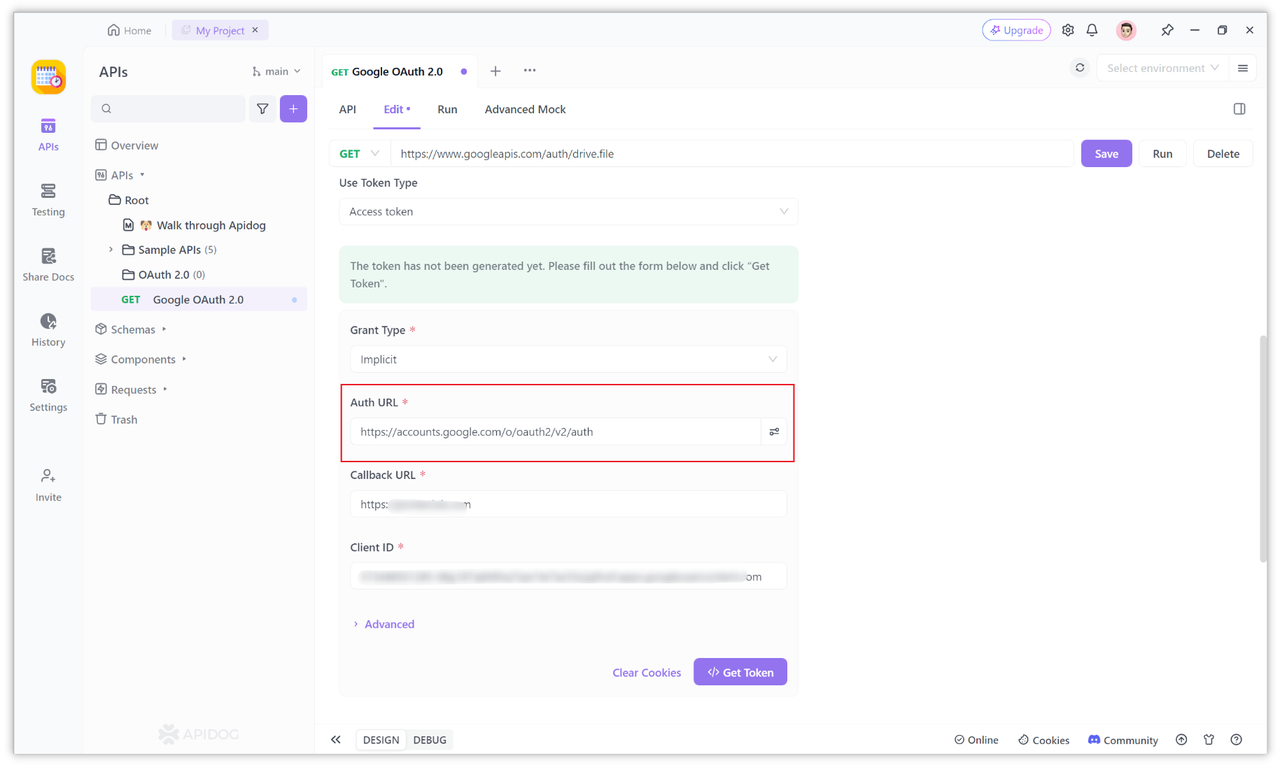
In Apidog, create a new HTTP project, then create a new request and select the "Edit Document -> Auth -> OAuth 2.0" option.
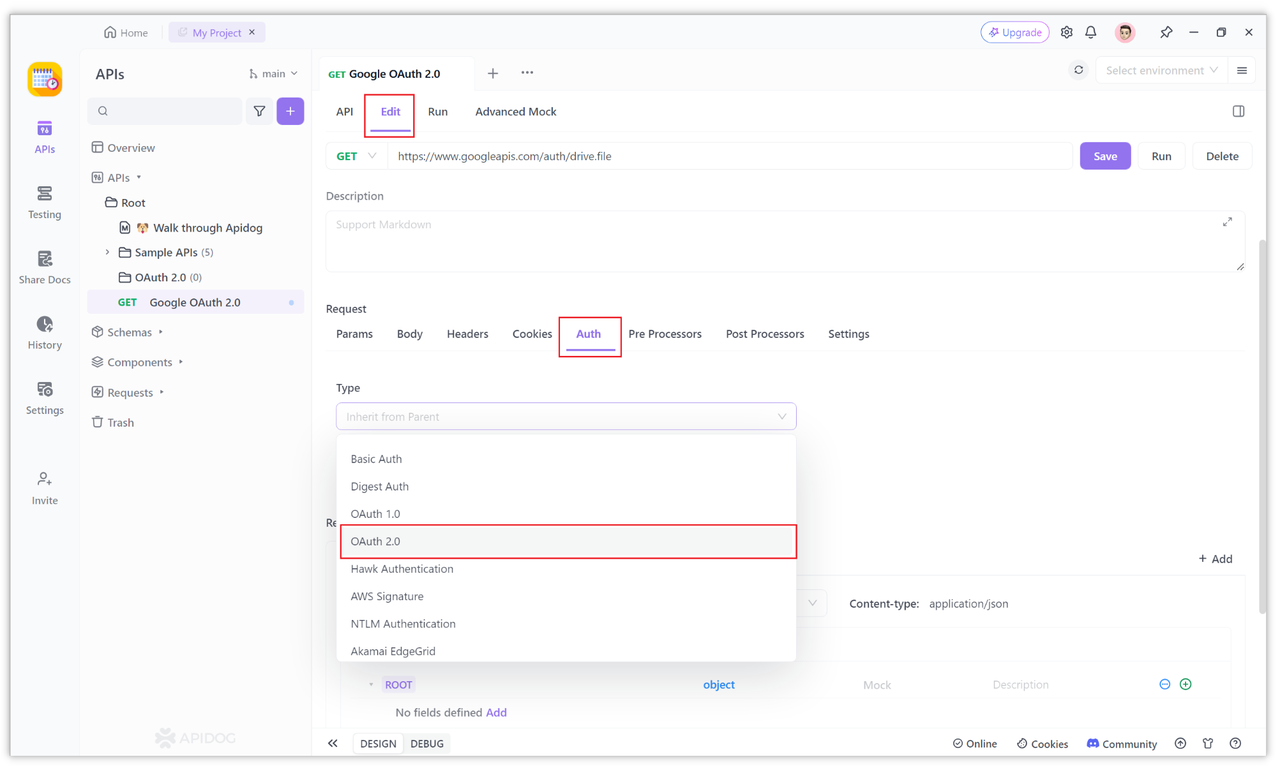
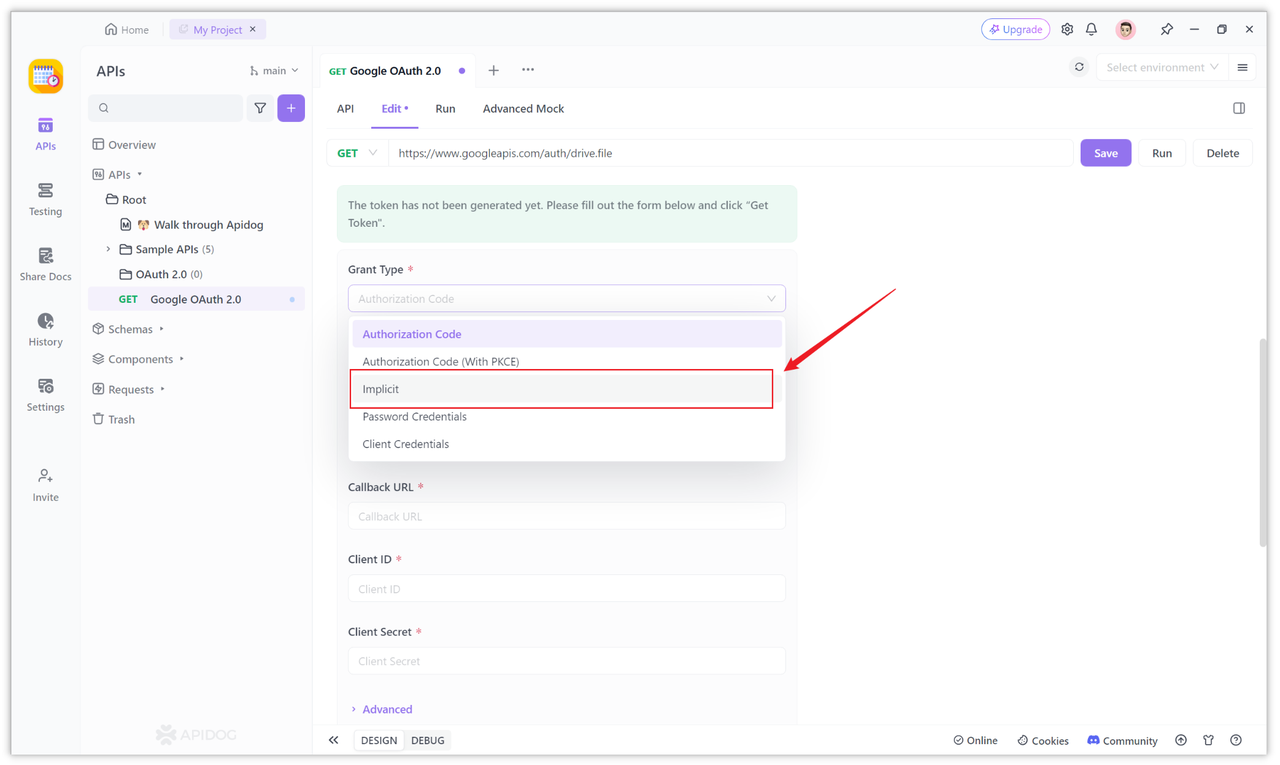
Select the "Implicit" authorization mode, as Google's "OAuth 2.0 for Client-side Web Applications" uses the Implicit Grant.
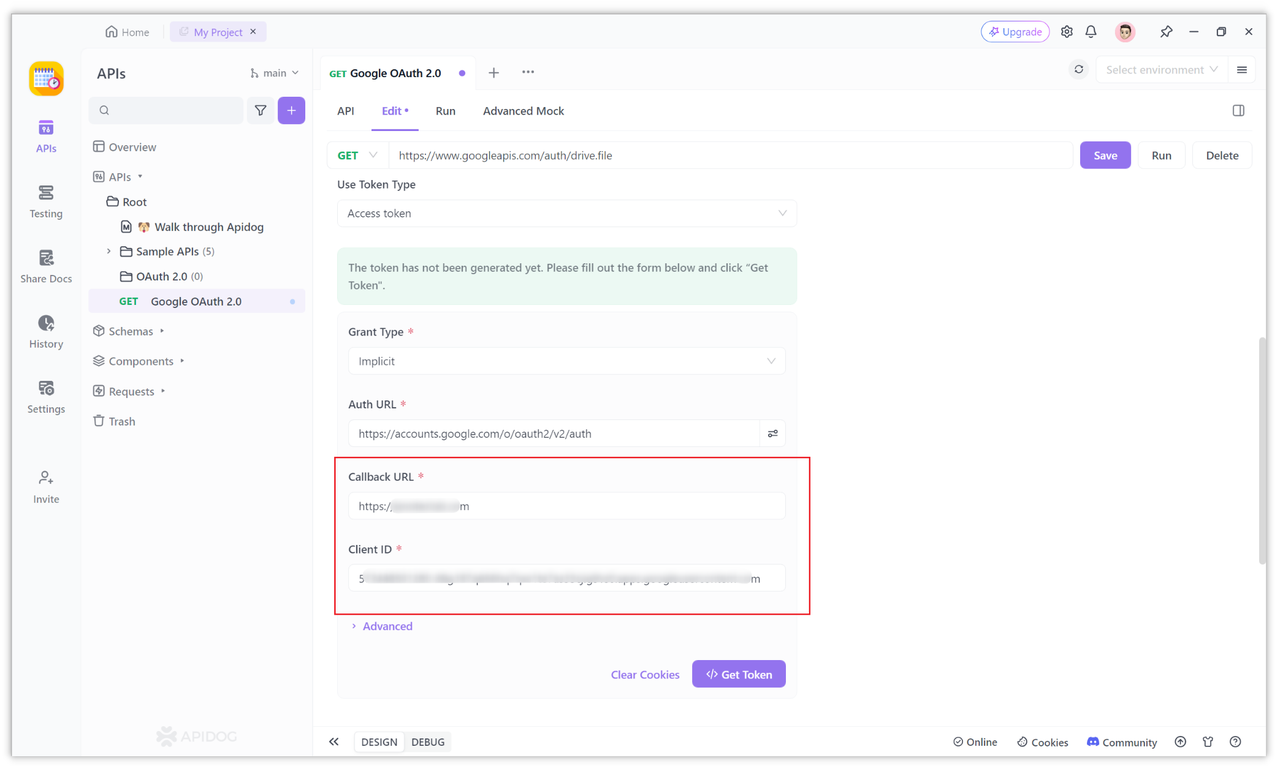
Enter the client ID and redirect URL. The Google OAuth 2.0 service parameters you configured in the first step.
Obtaining an Access Token
According to the official Google documentation, to apply for an access token, the URL to request is:
https://accounts.google.com/o/oauth2/v2/auth
You can fill in this address in the "Auth URL" input field.
The Google official documentation also requires additional parameters to be included in the URL path, such as:
https://accounts.google.com/o/oauth2/v2/auth?
scope=https%3A//www.googleapis.com/auth/drive.metadata.readonly&
include_granted_scopes=true&
response_type=token&
state=state_parameter_passthrough_value&
redirect_uri=https%3A//oauth2.example.com/code&
client_id=client_id
Note: In actual applications, no line breaks are needed.
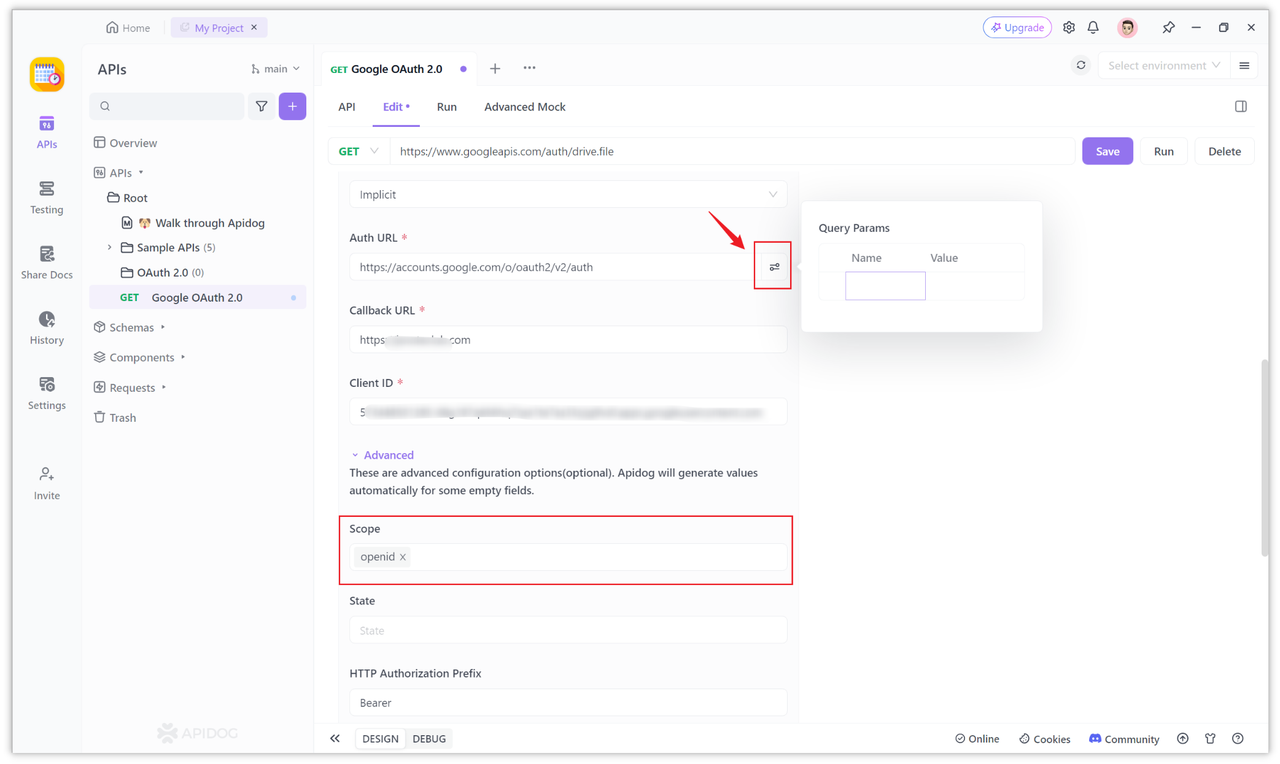
However, in Apidog, this is generally not necessary, as the required parameters have been configured separately in other options.
If you want to configure them, you can click the icon next to the "Auth URL" to configure, or click "More" to expand other configuration items, such as adding the openid value to the "Scope" here, which is the permission selected in the "Step 2" above.
After all the configuration items above are set, you can click the "Get Token" button to obtain the token. After clicking, if it's the first time logging in, a window will pop up for you to authorize, and you can fill in the information.
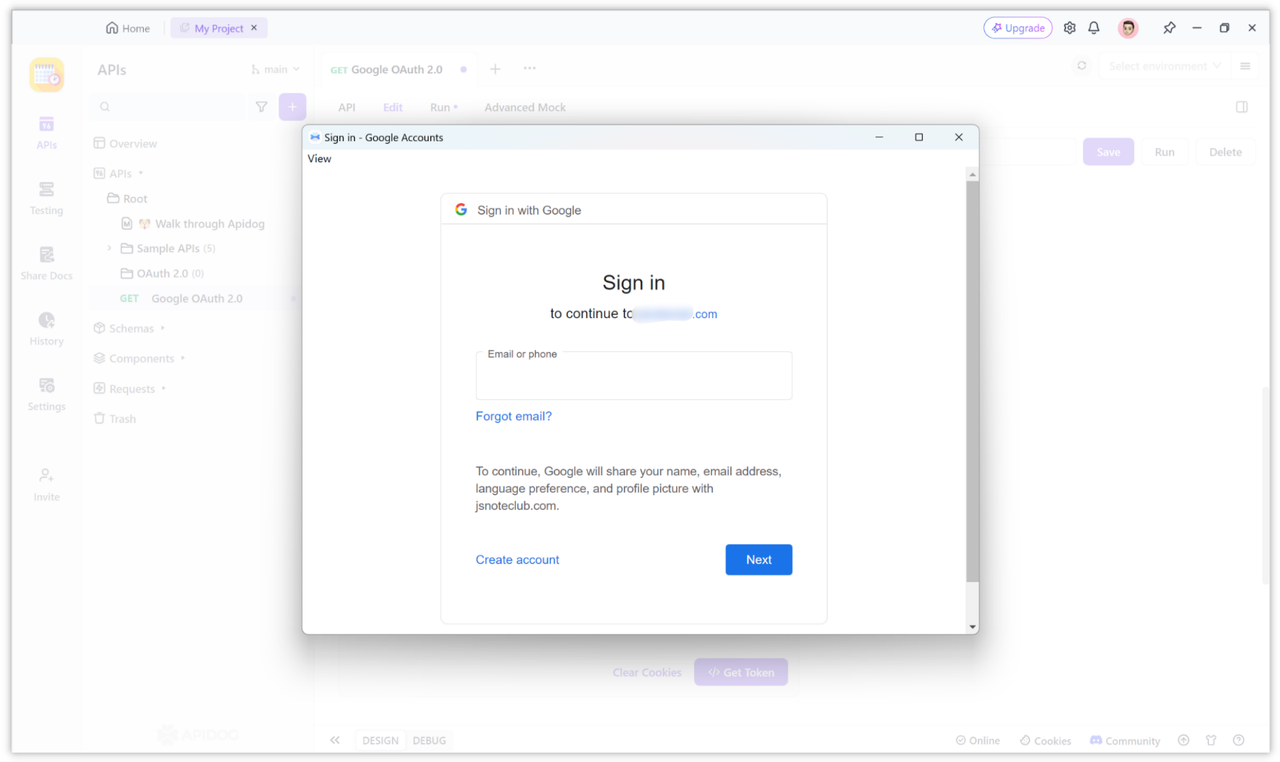
After entering the username and password, you may receive a text message verification code to verify your account, or you can directly associate the account and obtain the access token.
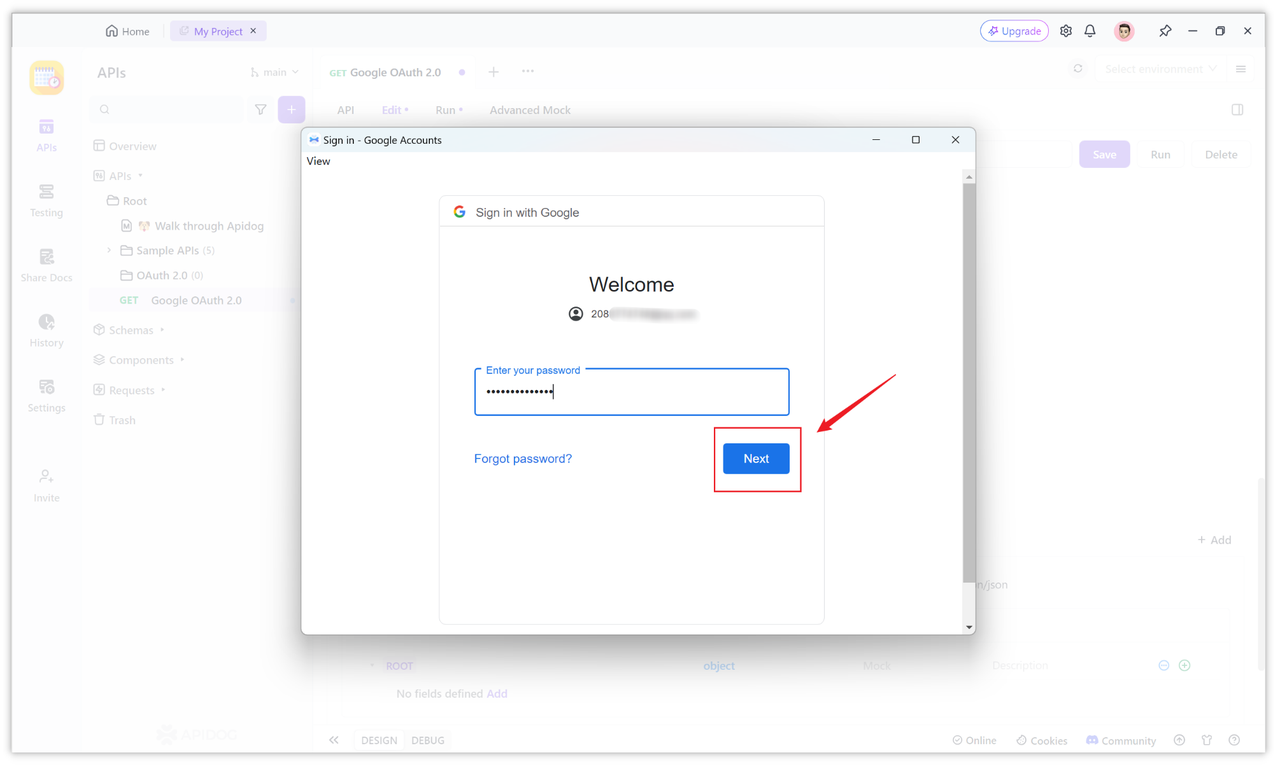
Once the authorization is complete, the access token will be automatically obtained and displayed on the page, and other information returned by Google will also be parsed and displayed.

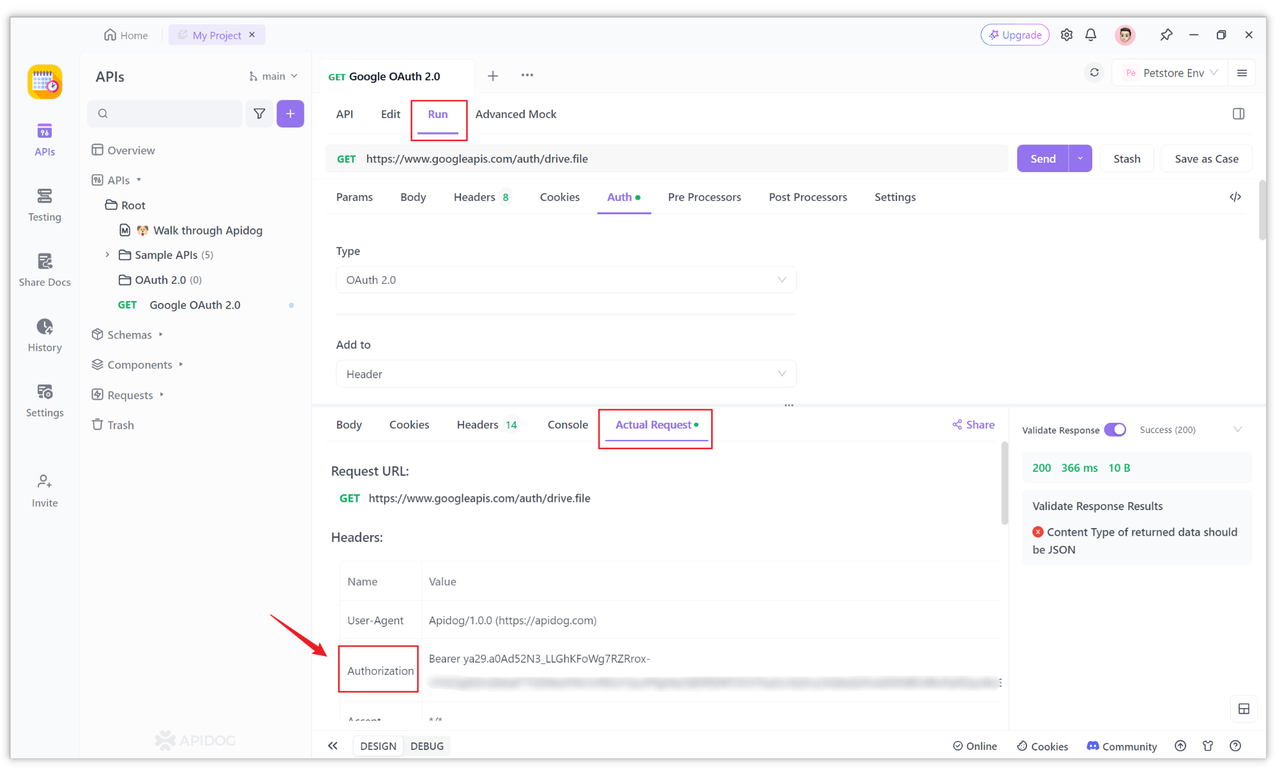
Step 4: Access Open Resources Based on the Token
With the obtained access token, you can now use it to access Google's open resources. You can explore all the available Google APIs and their permission scopes in the OAuth 2.0 Playground.
When sending requests, Apidog will automatically attach the token to the Authorization header as a Bearer token. If you want to include the token in the URL, you can modify the "Token Add Position" option in the Apidog settings to "Query Params".
Conclusion
In summary, the implementation of Google OAuth 2.0 login consists of four main steps. First, in step 1, you need to configure the client ID and redirect URL to obtain the OAuth 2.0 credentials. Then, in step 2, you need to determine the scope of access permissions and create an application, configuring the relevant information, including the accessible permissions and test accounts.
Next, in step 3, you can obtain the access token through the token request, with the help of a tool like Apidog. Finally, in step 4, you can use the obtained access token to access Google's open resources.


