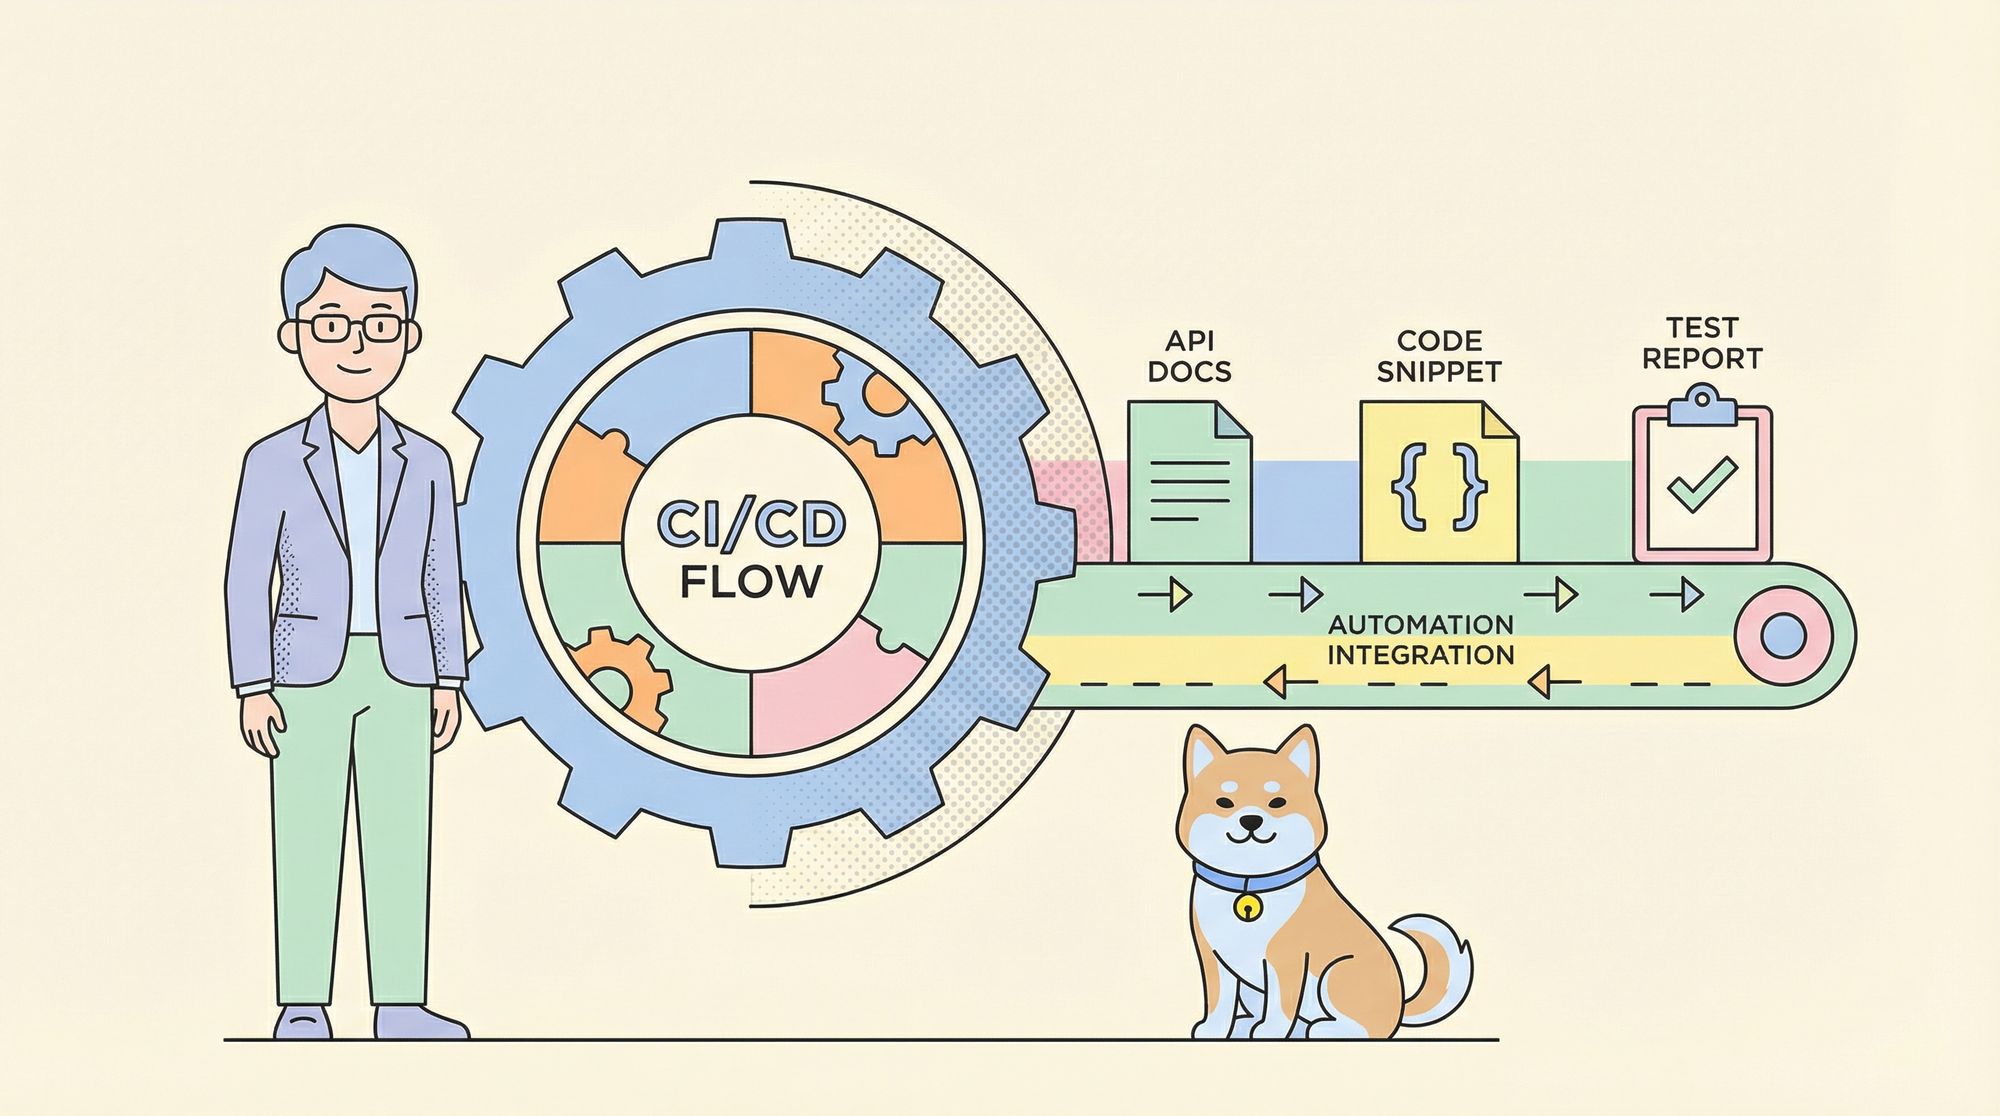
The main object of CI/CD (Continuous Integration/Continuous Delivery) in API testing is to automate the process of verifying that APIs are functional and prepared for production before deployment. By using continuous integration, functional tests are automatically run whenever API definitions are updated, which helps identify potential issues early on.
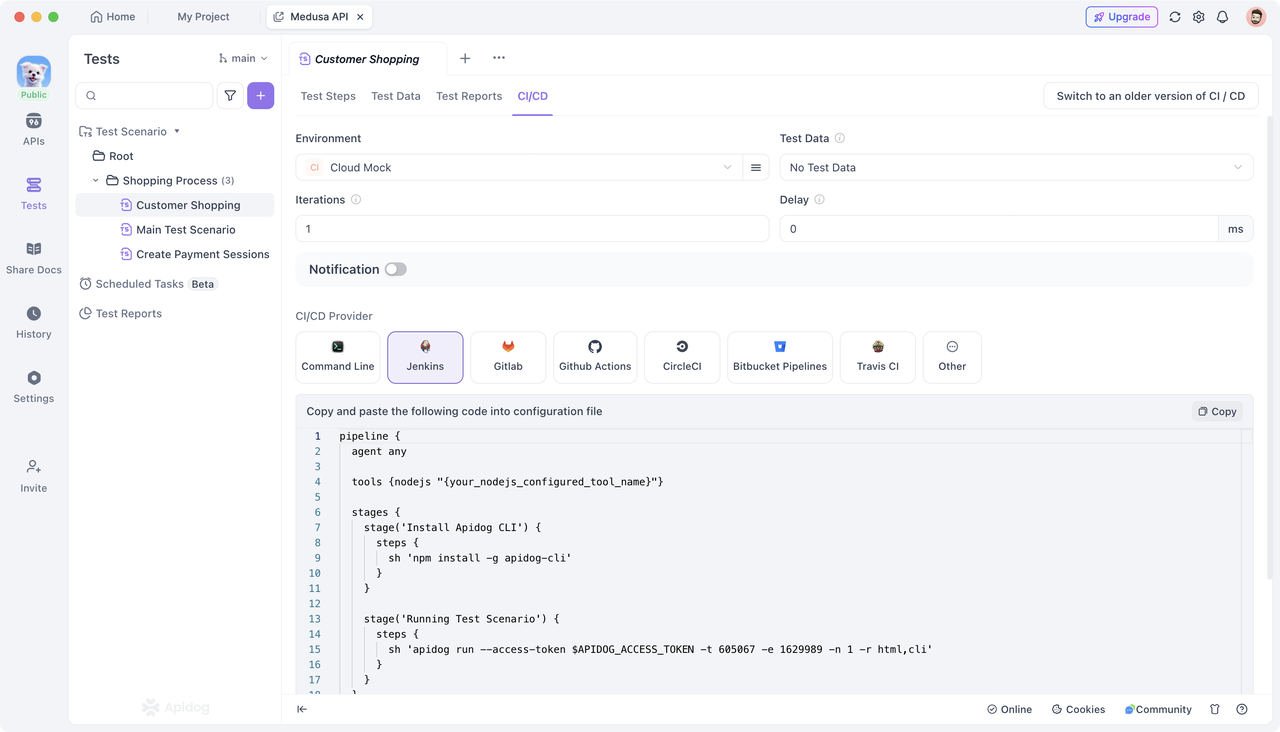
Apidog integrates seamlessly with several CI/CD platforms, including Jenkins, GitLab, and GitHub Actions. You can find code snippets for integration in the CI/CD module of Apidog's automated tests. Adding these snippets to your CI/CD workflow allows you to smoothly incorporate Apidog automated testing into your existing processes. This article focuses on integrating Apidog with Jenkins and provides detailed steps on how to do so.
Step 1: Install Jenkins
For installation instructions compatible with different operating systems, refer to the official Jenkins documentation.

Once installed, Jenkins can be accessed via its visual user interface at http://{your-public-IP}:8080.

Step 2: Configure Node.js Environment
Install the NodeJS Plugin
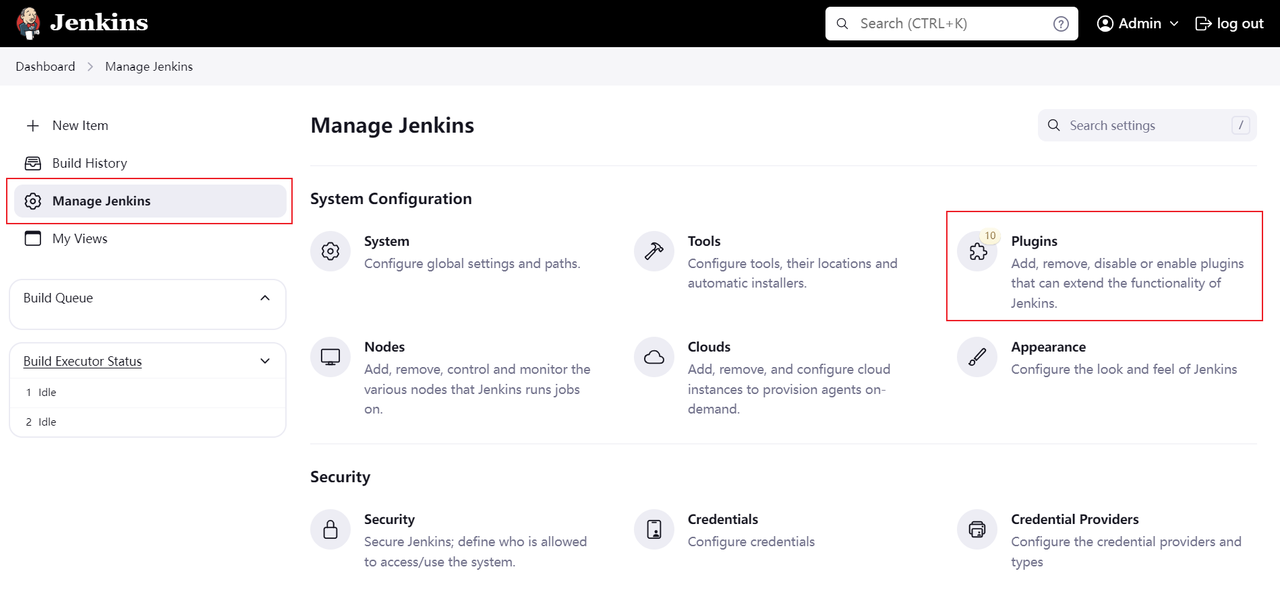
- On the Jenkins management page, click "Manage Jenkins" and then "Manage Plugins" to access the plugin management page.
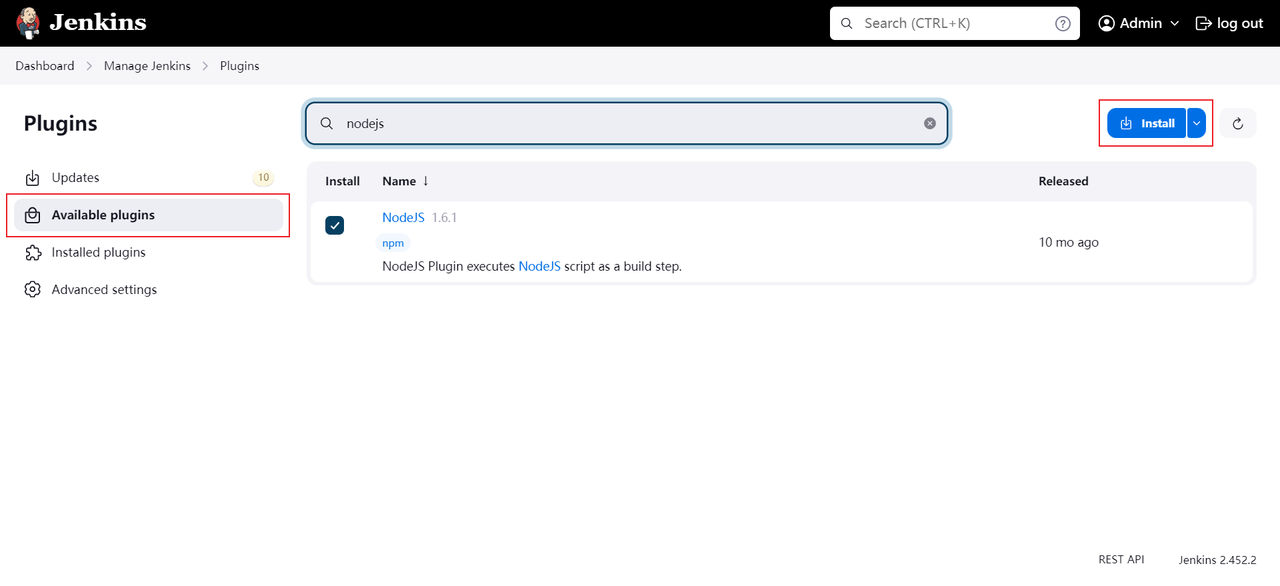
- Under the "Available plugins" tab, search for and install the NodeJS plugin, then restart Jenkins.
Configure NodeJS and Global npm Packages
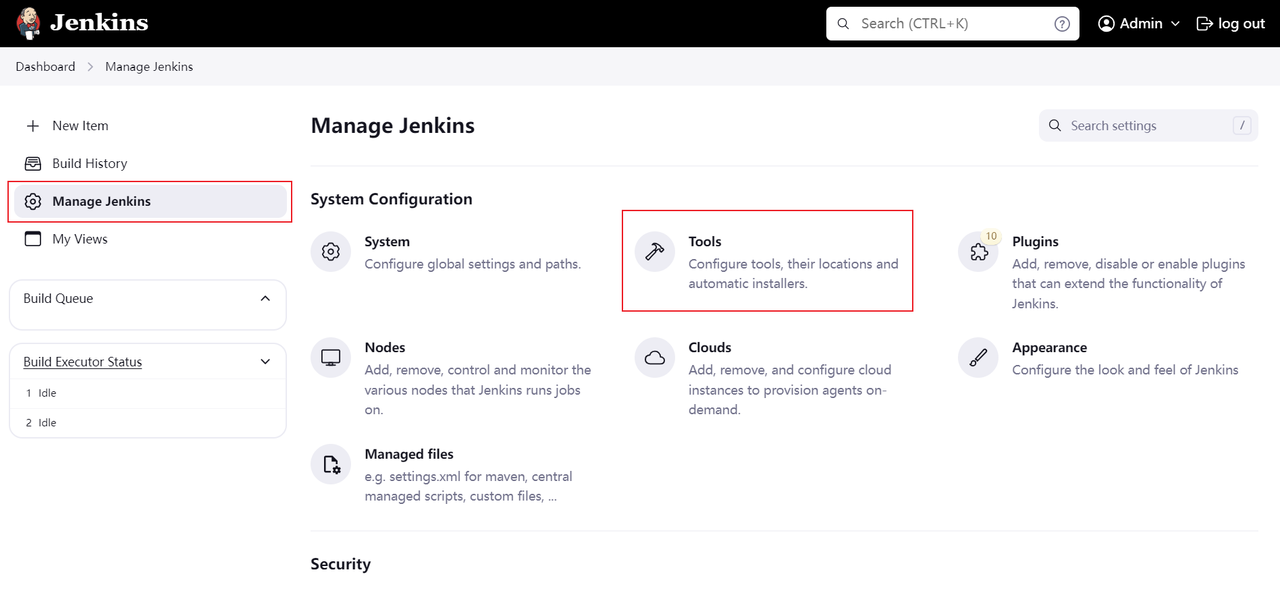
- After the NodeJS plugin installation, return to "Manage Jenkins" and select "Tools" to configure global tools.
- In the NodeJS module, click "Add NodeJS", provide an alias like nodejs18, choose a NodeJS version above v14.20.1, and list Apidog-cli under "Global npm packages to install".
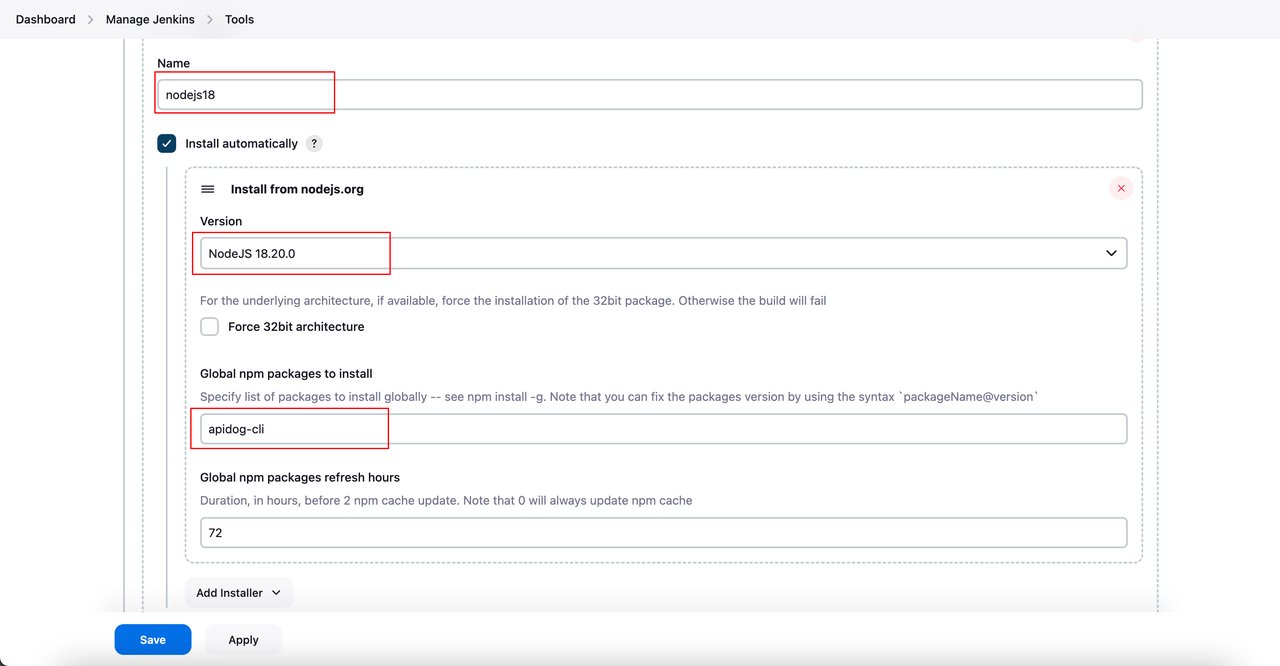
- Ensure the "Install automatically" option is checked to have the package installed during build, and save your settings.
Step 3: Create a Continuous Integration Pipeline
There are two methods to build a pipeline in Jenkins to achieve continuous integration: Pipeline and Freestyle Project. Below are the details for both methods.
Option 1: Building a Pipeline
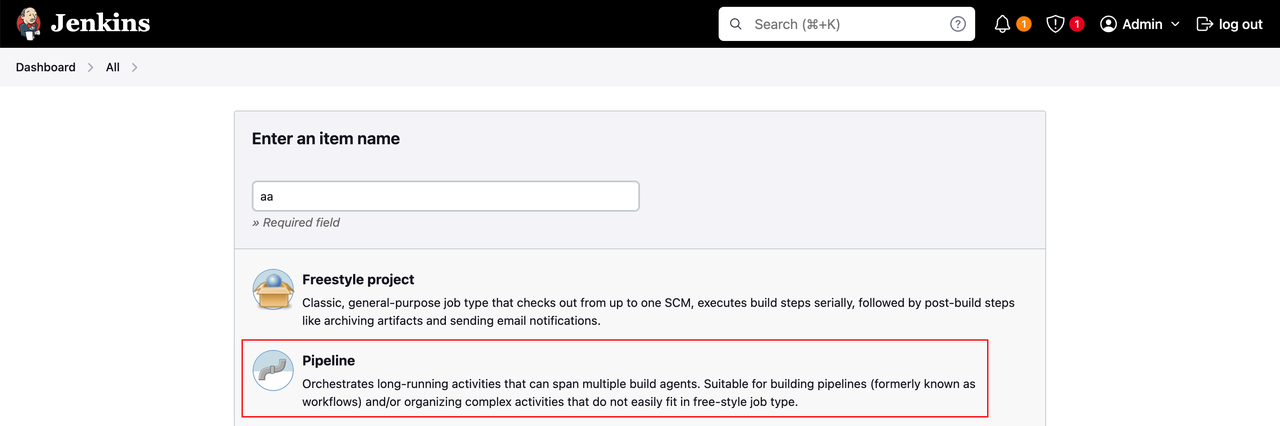
- Create a Pipeline Project: On the Jenkins homepage, click “New Item,” enter a project name, select “Pipeline,” and click “OK.”
- Configuring the Pipeline: On the project configuration page, locate the “Pipeline” option and select “Pipeline script” from the “Definition” dropdown.
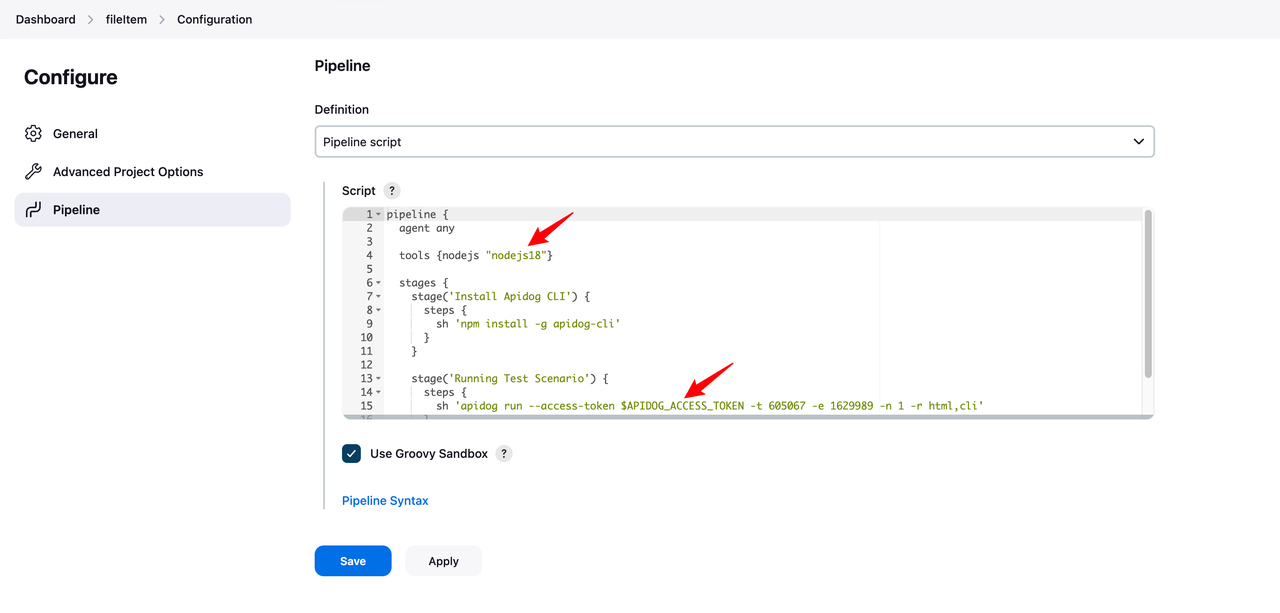
- Enter the following Pipeline script from Apidog in the Script box and save the configuration.
pipeline {
  agent any

  tools {nodejs "nodejs18"}

  stages {
    stage('Install Apidog CLI') {
      steps {
        sh 'npm install -g apidog-cli'
      }
    }

    stage('Running Test Scenario') {
      steps {
        sh 'apidog run --access-token $APIDOG_ACCESS_TOKEN -t 605067 -e 1629989 -n 1 -r html,cli'
      }
    }
  }
}
This Pipeline script is available in the CI/CD module in Apidog Tests.
To save build time and resources, you can streamline the script by excluding the Apidog CLI installation as it's pre-configured in the Global Tools settings.
pipeline {
agent any
tools {nodejs "nodejs18"}
stages {
stage('Running Test Scenario') {
steps {
sh 'apidog run --access-token $APIDOG_ACCESS_TOKEN -t 605067 -e 1629989 -n 1 -r html,cli'
}
}
}
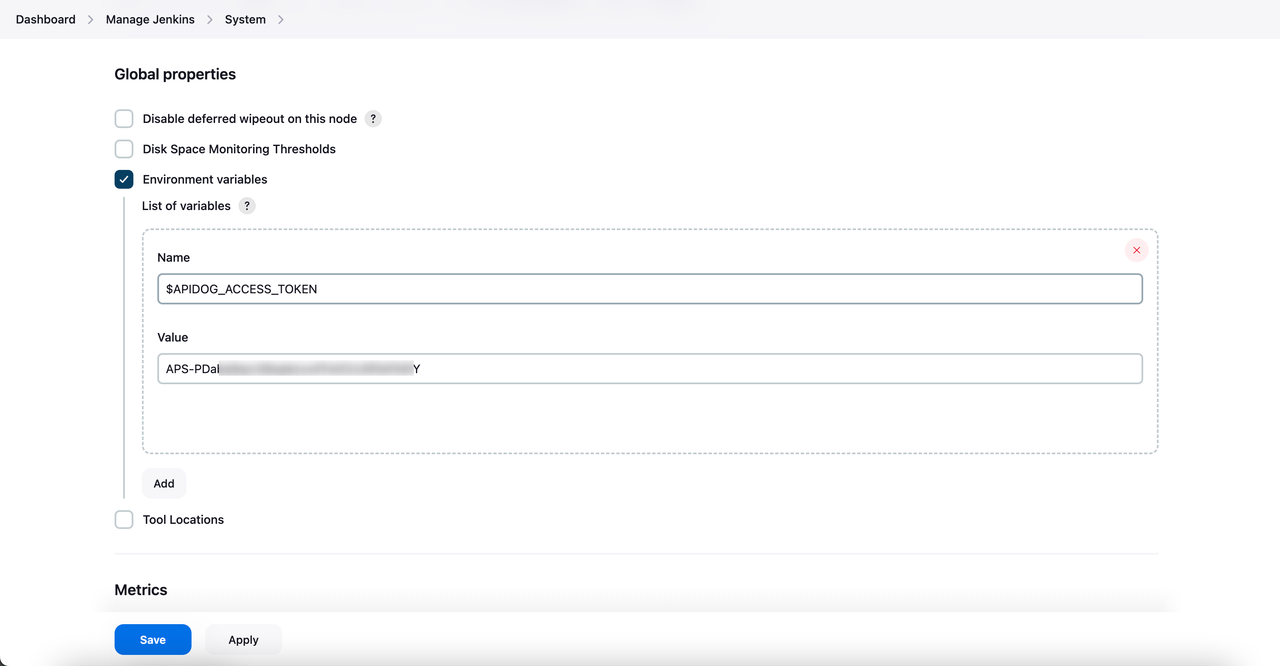
}If you're using the latest version of the CI/CD command that includes a variable in the command line, make sure to replace the placeholder APIDOG_ACCESS_TOKEN with your actual access token in your code. Alternatively, you can set up an environment variable named APIDOG_ACCESS_TOKEN in Jenkins by navigating to "Dashboard -> Manage Jenkins -> System" and entering your access token as its value. This configuration allows the system to automatically access your token during pipeline execution.
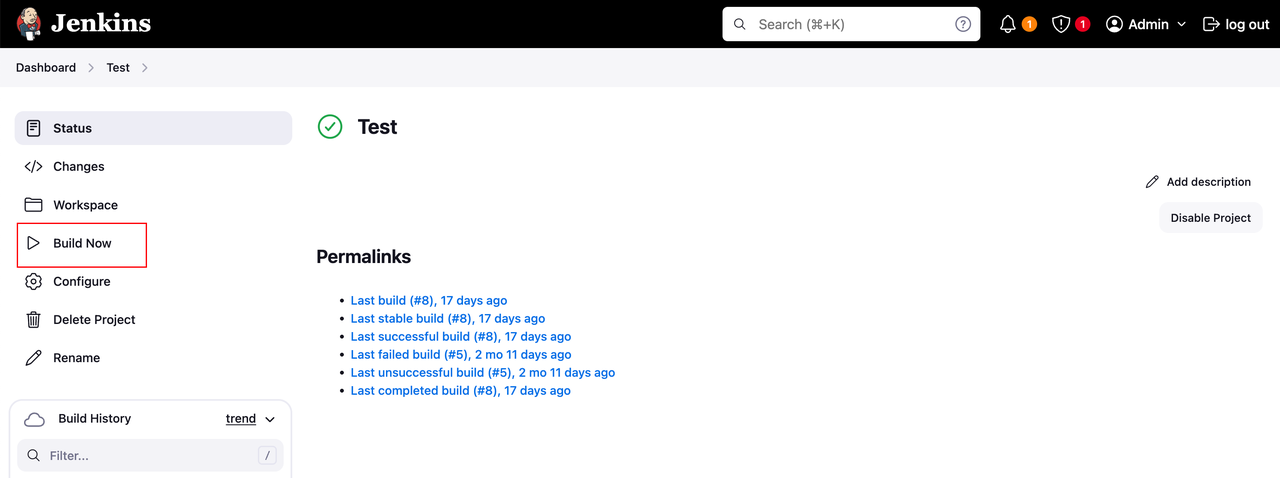
- Executing the Build: On the project page, click “Build Now” to start the execution pipeline.
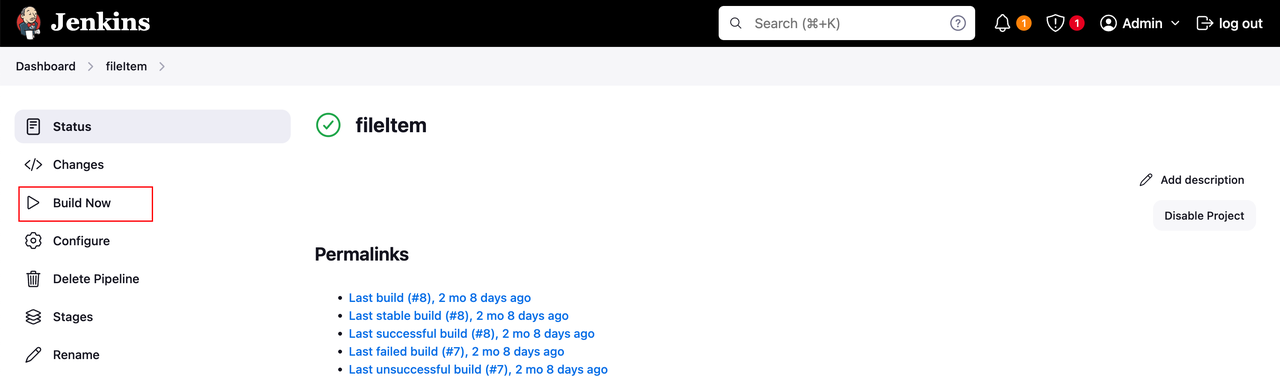
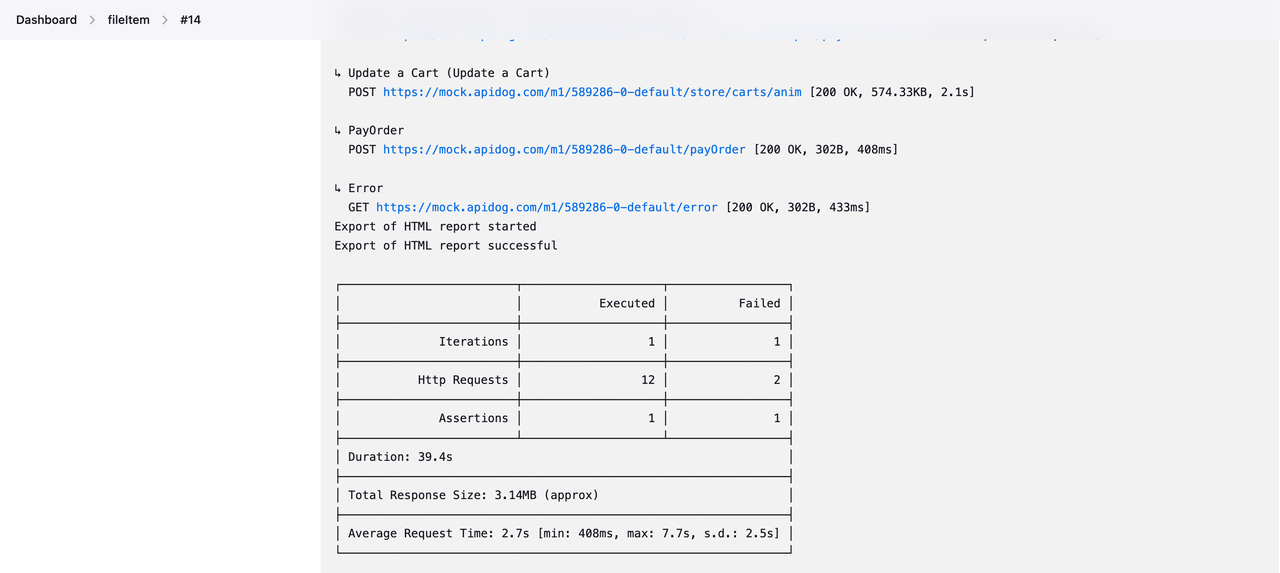
You can view the progress and results of a build in the Build History.
Option 2: Building a Freestyle Project
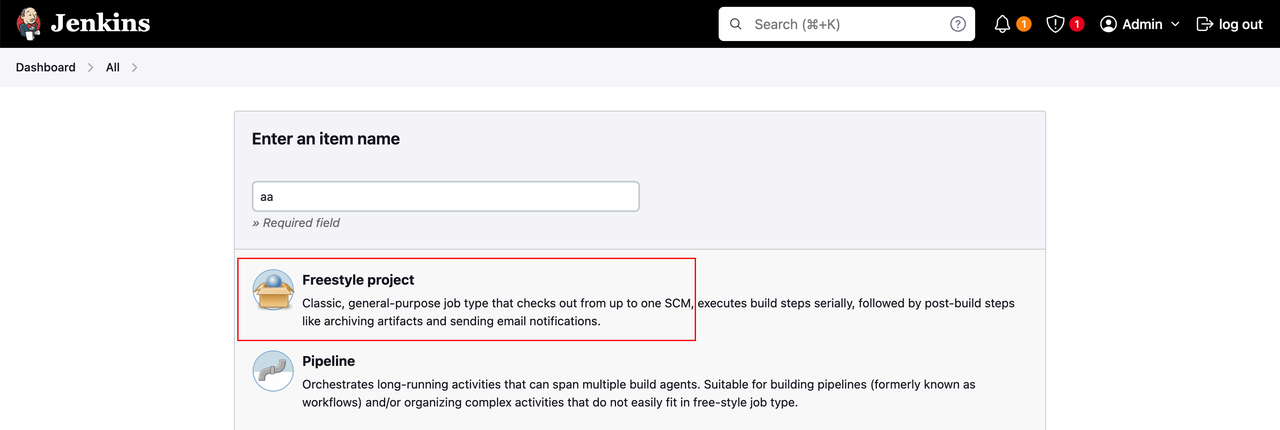
- Create a Freestyle Project: On the Jenkins homepage, click “New Item,” enter the project name, select “Freestyle project,” and click “OK.”
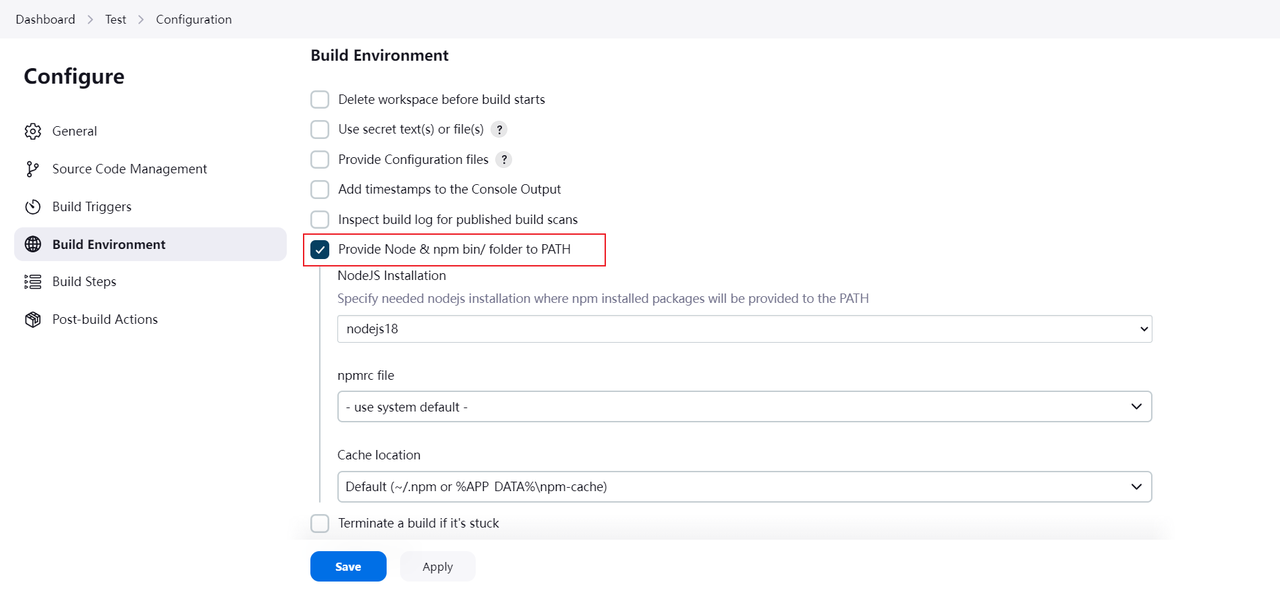
- Configure Build Environment: In the project configuration page, under the “Build Environment” section, check “Provide Node & npm bin/ folder to PATH,” and select the NodeJS version you configured earlier (e.g., nodejs18).
- Add Build Steps: After setting the build environment, navigate to the “Build Steps” section, click “Add build step,” and select “Execute Shell” (or “Execute Windows Batch Command” if on a Windows server).
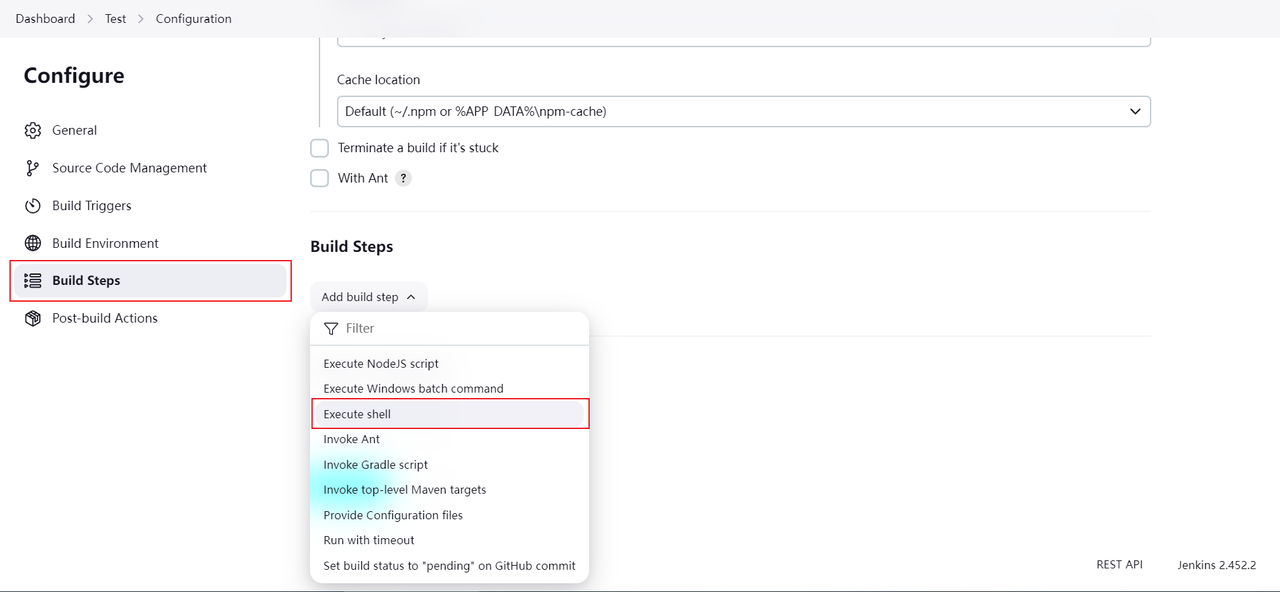
Paste the Apidog CLI commands into the provided field and save your settings.
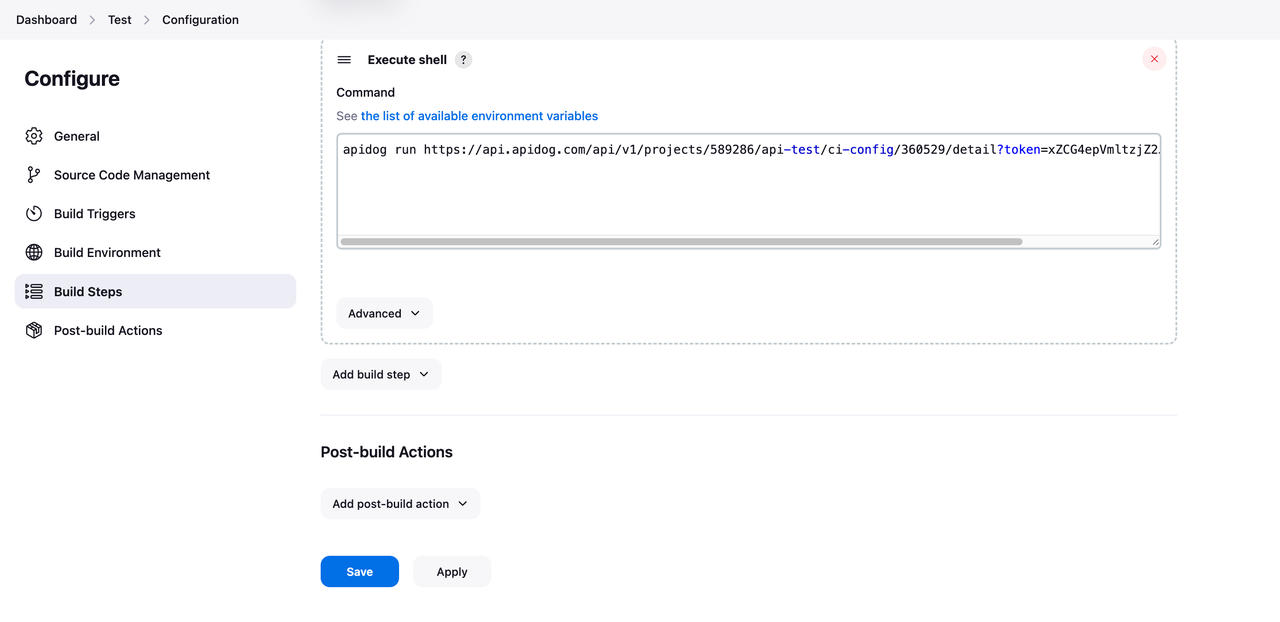
- Execute the Build: Click "Build Now" on the project page to start the build process.
Step 4: Sending Build Results to Third-Party Applications
The results of CI builds can be sent to third-party applications, such as Slack, Jenkins, Webhook and Email. To configure notifications, go to Apidog’s Project Settings -> Notifications, where you can set up the desired notification events.
Frequently Asked Questions
1. How to Upload Files During a Build?
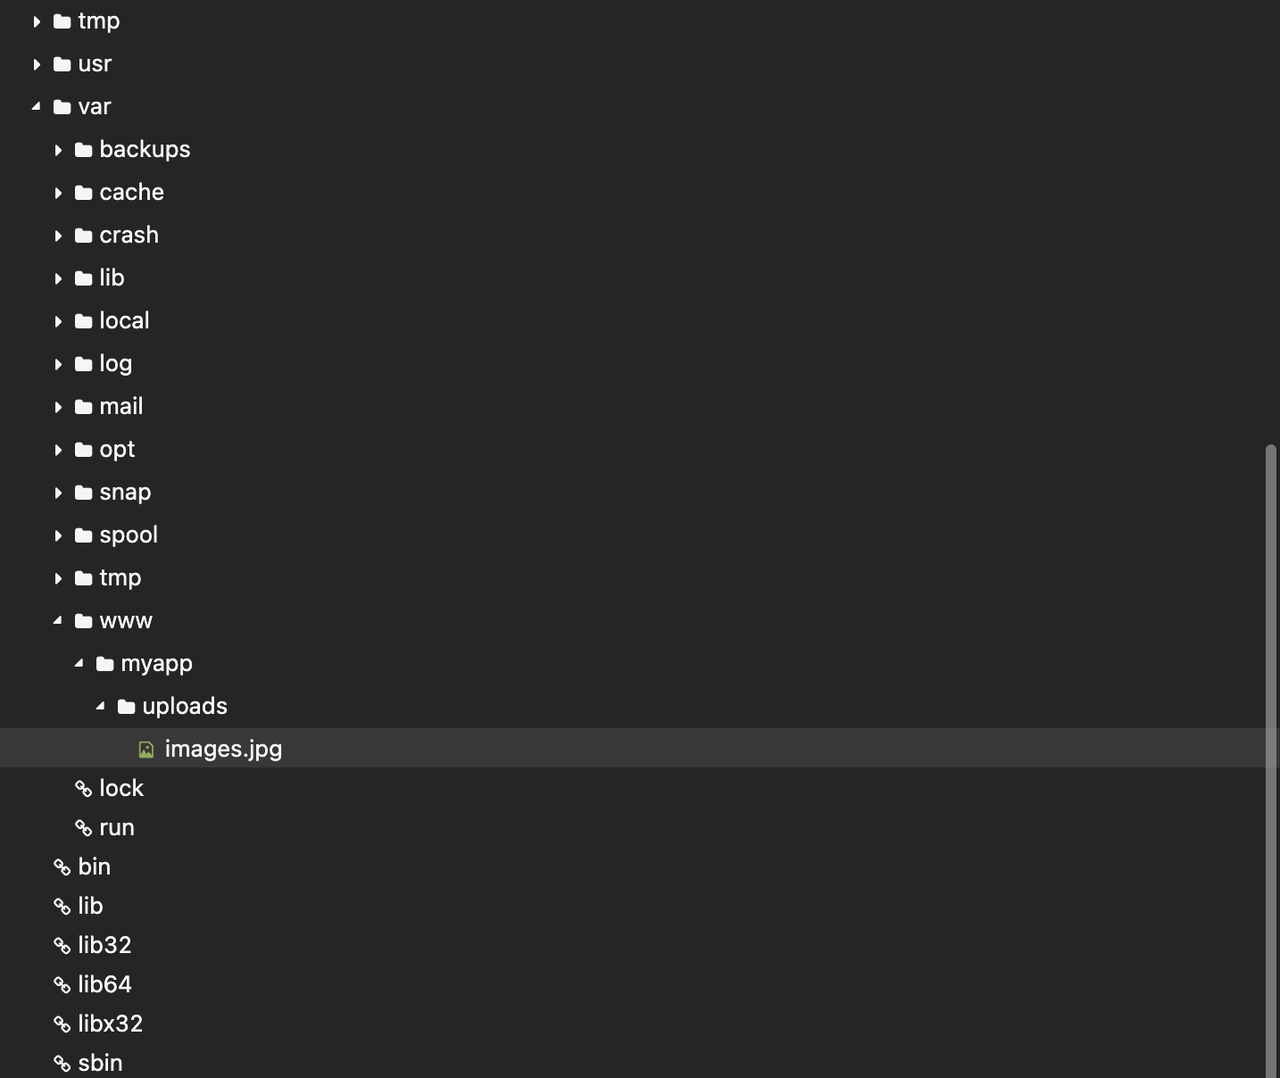
You can upload the required files to the machine running the CLI (i.e. the host where Jenkins is running) beforehand, e.g. this image file: images.jpg, by copying down the path to it.
Navigate to the test step in Apidog where the endpoint needs the file upload and click the “Bulk Edit” button.
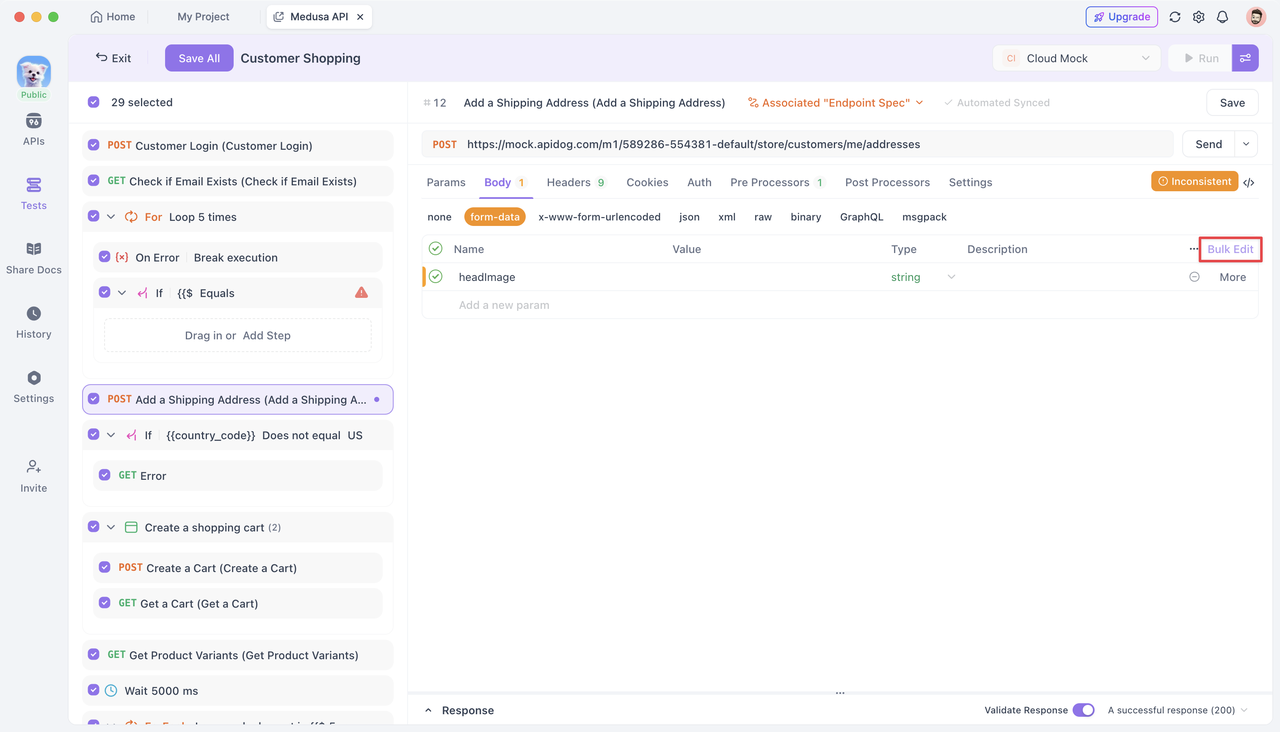
Enter the file path to the uploaded file in the "Parameter Value" field, so that it automatically retrieves the actual file during the build.
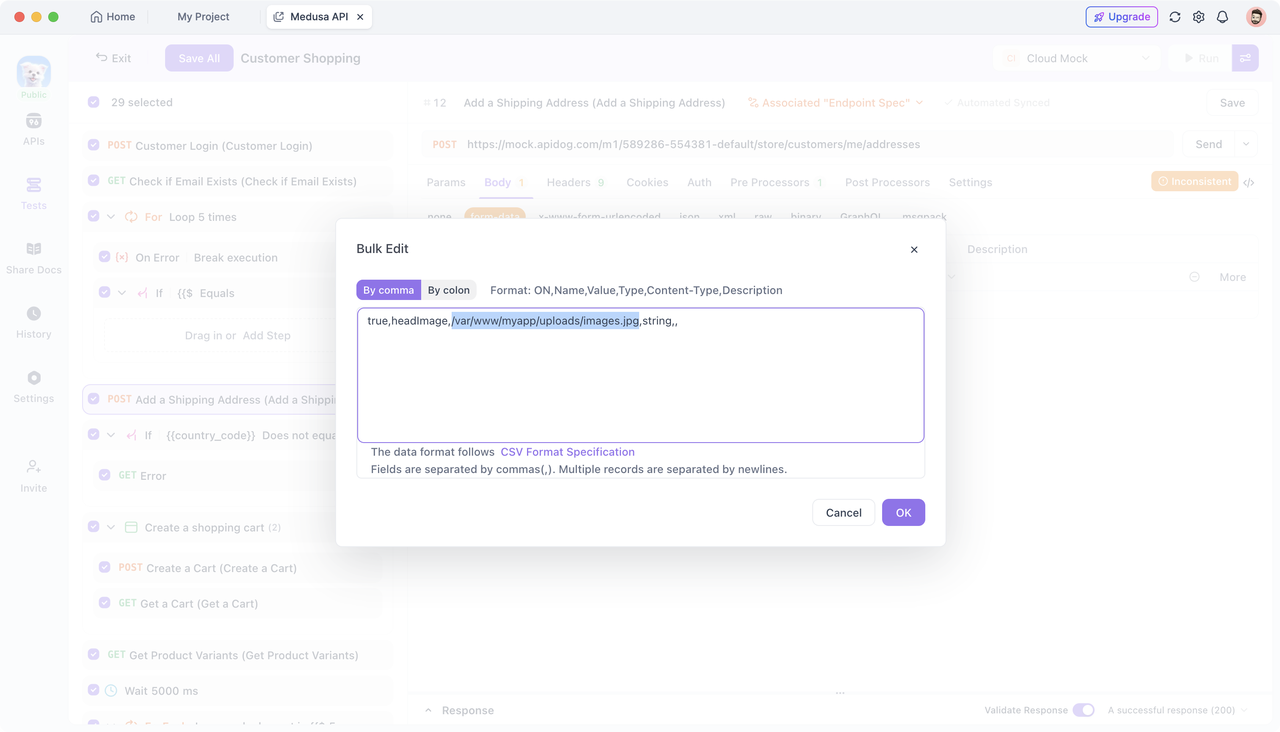
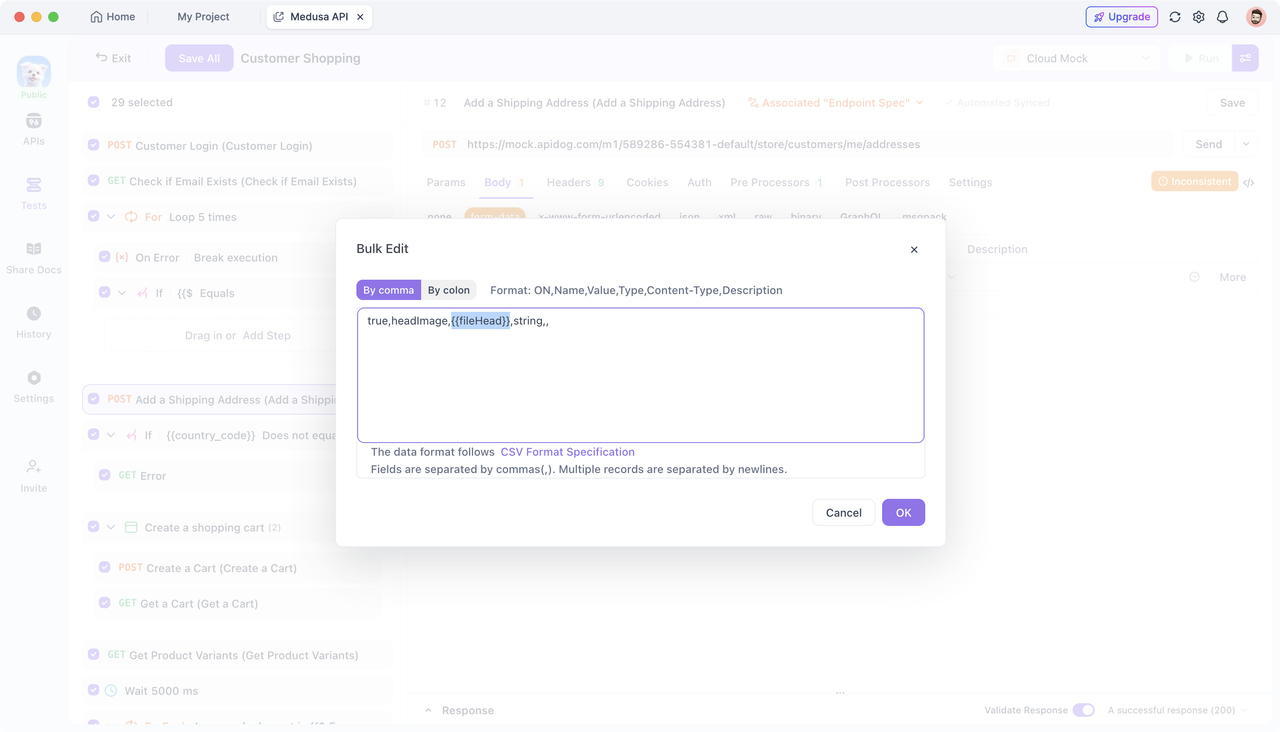
In addition, you can put the path to the file in the “Initial value” of the environment variable.
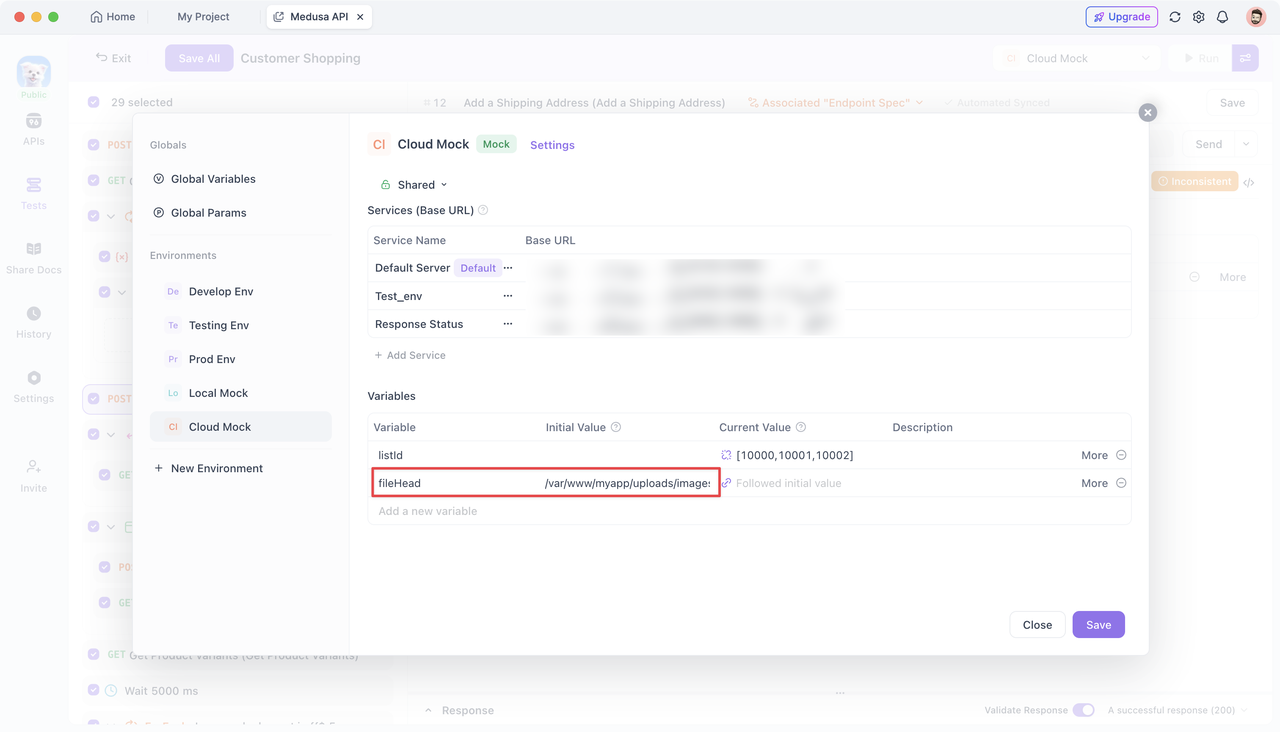
Then in “Bulk Edit”, you can refer to the file path by variable, so that you can also get the actual file by the file path when you build it.
2. How to set up a scheduled build in Jenkins?
Apidog currently supports the use of scheduled tasks. You can scheduled tasks for more information.
If you want to set up scheduled tasks in Jenkins, you can do it by configuring the “Build Triggers” of the project, and use Unix-like cron expressions to specify the time and frequency of the build.
On the Jenkins project configuration page, find the “Build Triggers” module, check the “Build periodically” option, and in the text box that appears, enter a cron expression to define the build time and frequency.

Conclusion
This guide outlines how to integrate Apidog automated testing with Jenkins. Regardless of the chosen build method, ensure that the Apidog CLI is installed beforehand, either by automatic installation during the build or by pre-installation on the Jenkins host (using the command npm install -g Apidog-cli).