The OpenAI Agents SDK is a Python library engineered to simplify the development of AI agents powered by OpenAI’s language models. It equips developers with tools to create task-specific agents, integrate external functionalities, manage inter-agent task delegation, enforce input/output validation, and monitor execution flows. This guide delivers a detailed, technical walkthrough of installing, configuring, and leveraging the SDK effectively, ensuring a minimum of 2000 words with a focus on precision and practical application.
Introduction
The OpenAI Agents SDK provides a structured framework for building multi-agent systems where each agent is tailored to perform specific tasks. These agents can interact with users, execute actions via integrated tools, and collaborate by passing tasks to other agents. Key components of the SDK include:
- Agents: Instances of language models configured with specific instructions and roles.
- Tools: Functions or services (e.g., web search, custom Python code) that extend agent capabilities.
- Handoffs: Mechanisms enabling agents to delegate tasks to other agents seamlessly.
- Guardrails: Validation layers to ensure inputs and outputs meet defined criteria.
- Tracing: Execution logs for debugging and performance analysis.
This guide is designed for developers with a basic understanding of Python and API interactions, providing detailed explanations, code examples, and best practices to create a robust and comprehensive resource.
Installation and Configuration
Proper setup is critical to using the OpenAI Agents SDK effectively. This section covers prerequisites, environment setup, installation, and verification.
Prerequisites
Before proceeding, ensure the following:
- Python 3.8+: Verify your Python version with
python --version. Install from python.org if needed.
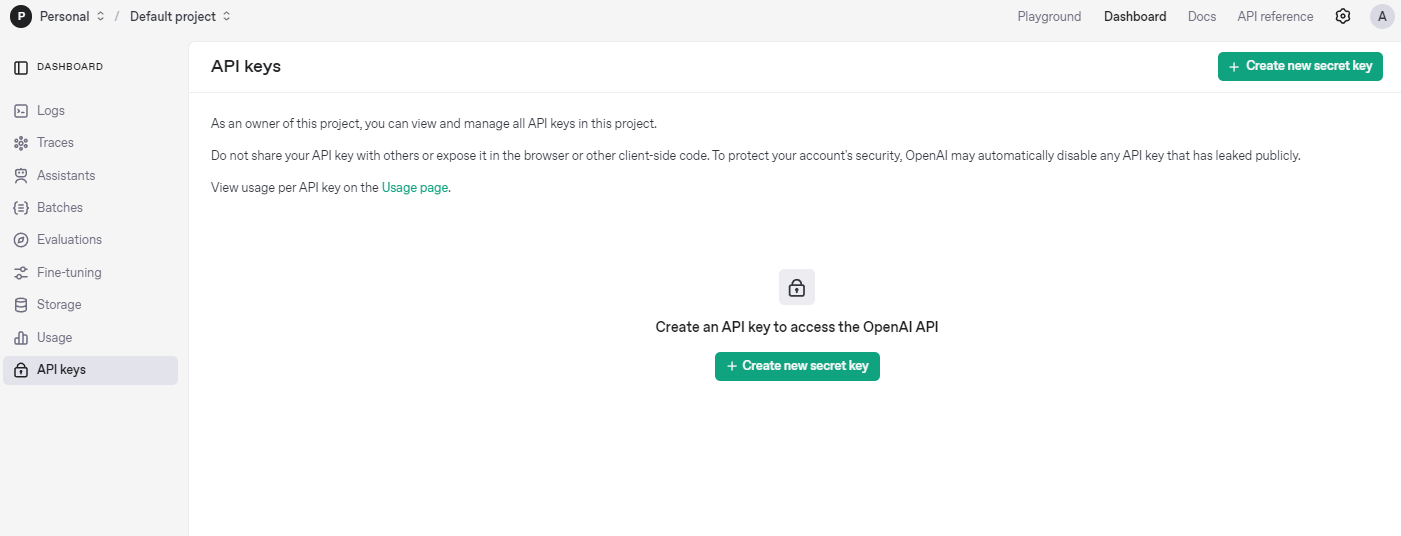
- OpenAI API Key: Obtain your key from platform.openai.com under your account settings. This key authenticates requests to OpenAI’s servers.
Step 1: Set Up a Virtual Environment
A virtual environment isolates project dependencies, preventing conflicts with other Python projects. To create and activate one:
- Linux/macOS:
python -m venv agents_env
source agents_env/bin/activate
- Windows:
python -m venv agents_env
agents_env\Scripts\activate
Once activated, your terminal prompt should reflect the environment (e.g., (agents_env)). This step is a best practice for Python development, ensuring a clean workspace.
Step 2: Install the SDK
With the virtual environment active, install the SDK using pip:
pip install openai-agents
This command fetches the latest version of the SDK and its dependencies from PyPI. To confirm the installation, run:
pip show openai-agents-python
This displays metadata, including the version number, confirming the package is installed.
Step 3: Configure the API Key
The SDK requires an OpenAI API key to function. Set it as an environment variable to avoid embedding it in your code, which enhances security:
- Linux/macOS:
export OPENAI_API_KEY='your-api-key'
- Windows:
set OPENAI_API_KEY='your-api-key'
To make this persistent across sessions, add the command to your shell configuration file (e.g., .bashrc or .zshrc on Unix systems). Alternatively, you can set it programmatically in Python, though this is less secure:
import os
os.environ["OPENAI_API_KEY"] = "your-api-key"
Step 4: Verify Installation
Test the setup with a minimal agent to ensure everything works:
from agents import Agent, Runner

agent = Agent(name="TestAgent", instructions="Return 'Setup successful'")
result = Runner.run_sync(agent, "Run test")
print(result.final_output)  # Expected output: "Setup successful"
If this prints "Setup successful," your installation is functional. Common issues include:
- Invalid API Key: Double-check the key and ensure no extra spaces or typos.
- Network Errors: Verify your internet connection and OpenAI’s server status.
Creating Agents
Agents are the fundamental building blocks of the SDK, each defined by a unique role and behavior.
Agent Initialization
The Agent class is used to instantiate agents. Key parameters include:
name: A string identifier (e.g., "MathAgent").instructions: A string specifying the agent’s purpose (e.g., "Solve math problems").model: The OpenAI model to use (default:gpt-4).temperature: A float between 0 and 1 controlling output randomness (default: 0.7).
Example: Basic Agent
Here’s a simple agent for arithmetic:
from agents import Agent, Runner

agent = Agent(
    name="MathAgent",
    instructions="Solve arithmetic expressions."
)
result = Runner.run_sync(agent, "Calculate 10 * 2")
print(result.final_output)  # Output: "20"
The Runner.run_sync method executes the agent synchronously, returning a result object with the final_output attribute.
Advanced Configuration
Customize agents for specific needs by adjusting parameters:
agent = Agent(
    name="CreativeWriter",
    instructions="Write a short story based on the prompt.",
    model="gpt-4",
    temperature=0.9
)
result = Runner.run_sync(agent, "A robot in a distant galaxy")
print(result.final_output)  # Output: A creative story
- Model:
gpt-4offers superior reasoning, whilegpt-3.5-turbois faster and cheaper for simpler tasks. - Temperature: Lower values (e.g., 0.2) yield predictable outputs; higher values (e.g., 0.9) increase creativity.
Multiple Agents Example
Create distinct agents for different tasks:
support_agent = Agent(
    name="SupportBot",
    instructions="Answer technical support questions."
)
code_agent = Agent(
    name="CodeHelper",
    instructions="Generate Python code snippets."
)

support_result = Runner.run_sync(support_agent, "How do I install Python?")
code_result = Runner.run_sync(code_agent, "Write a function to add two numbers")
print(support_result.final_output)  # Output: Installation instructions
print(code_result.final_output)     # Output: "def add(a, b): return a + b"
This demonstrates the SDK’s flexibility in handling diverse roles.
Integrating Tools
Tools enhance agents by enabling them to perform external actions. The SDK supports hosted tools, custom function tools, and agent-based tools.
Using Hosted Tools
Hosted tools, like web_search, are pre-built and ready to use:
from agents import Agent, Runner, web_search

agent = Agent(
    name="ResearchAgent",
    instructions="Answer questions using web search.",
    tools=[web_search]
)
result = Runner.run_sync(agent, "What is the capital of France?")
print(result.final_output)  # Output: "The capital of France is Paris."
The agent automatically invokes web_search to fetch real-time data.
Creating Custom Function Tools
Define custom tools with the @function_tool decorator. Tools must accept and return strings.
Example: Data Fetching Tool
from agents import Agent, Runner, function_tool

@function_tool
def fetch_data(id: str) -> str:
    """Return data for the given ID."""
    # Simulated database lookup
    return f"Data for ID {id}: active"

agent = Agent(
    name="DataAgent",
    instructions="Retrieve data using the tool.",
    tools=[fetch_data]
)
result = Runner.run_sync(agent, "Fetch data for ID 123")
print(result.final_output)  # Output: "Data for ID 123: active"
Integrating External APIs
Tools can connect to external services. Here’s a weather tool example:
import requests
from agents import function_tool, Agent, Runner

@function_tool
def get_weather(city: str) -> str:
    """Get the current weather for a city."""
    api_key = "your-weather-api-key"  # Replace with a real key
    url = f"http://api.weatherapi.com/v1/current.json?key={api_key}&q={city}"
    response = requests.get(url)
    if response.status_code == 200:
        data = response.json()
        return f"The weather in {city} is {data['current']['condition']['text']}."
    return "Weather data unavailable."

agent = Agent(
    name="WeatherAgent",
    instructions="Provide weather updates using the tool.",
    tools=[get_weather]
)
result = Runner.run_sync(agent, "What's the weather in Tokyo?")
print(result.final_output)  # Output: "The weather in Tokyo is Sunny." (example)
Sign up for a free API key at weatherapi.com to test this.
Combining Multiple Tools
Agents can use multiple tools simultaneously:
@function_tool
def log_entry(text: str) -> str:
    """Log a message."""
    return f"Logged: {text}"

agent = Agent(
    name="MultiToolAgent",
    instructions="Use tools to search and log.",
    tools=[web_search, log_entry]
)
result = Runner.run_sync(agent, "Search for AI trends and log the query")
print(result.final_output)  # Output includes search results and log confirmation
Agent Handoffs
Handoffs allow agents to delegate tasks, enabling complex workflows.
Setting Up Handoffs
Define a primary agent with access to secondary agents via the handoffs parameter:
from agents import Agent, Runner

english_agent = Agent(
    name="EnglishHelper",
    instructions="Respond in English only."
)
spanish_agent = Agent(
    name="SpanishHelper",
    instructions="Respond in Spanish only."
)
triage_agent = Agent(
    name="LanguageRouter",
    instructions="Detect the language and hand off to the appropriate agent.",
    handoffs=[english_agent, spanish_agent]
)

result = Runner.run_sync(triage_agent, "Hola, ¿qué tal?")
print(result.final_output)  # Output: "¡Bien, gracias!" (or similar)
The triage_agent analyzes the input and delegates to the appropriate language-specific agent.
Handoff Logic
The handoff decision relies on the primary agent’s instructions. For example:
- "If the input contains Spanish words, hand off to SpanishHelper."
- "For English inputs, use EnglishHelper."
Test with an English input:
result = Runner.run_sync(triage_agent, "How are you?")
print(result.final_output)  # Output: "I'm good, thanks!"
Nested Handoffs
For deeper workflows, agents can hand off to other agents with handoffs:
analysis_agent = Agent(
    name="AnalysisBot",
    instructions="Analyze data and hand off for reporting."
)
report_agent = Agent(
    name="ReportBot",
    instructions="Generate a report from analysis."
)
main_agent = Agent(
    name="WorkflowManager",
    instructions="Start with analysis.",
    handoffs=[analysis_agent, report_agent]
)

result = Runner.run_sync(main_agent, "Analyze sales data")
print(result.final_output)  # Output: A generated report
Implementing Guardrails
Guardrails enforce constraints on inputs and outputs using Pydantic models.
Defining a Guardrail
Create a model to validate output structure:
from pydantic import BaseModel
from agents import Agent, Runner

class QuestionCheck(BaseModel):
    is_question: bool
    reason: str

guard_agent = Agent(
    name="QuestionGuard",
    instructions="Determine if the input is a question.",
    output_type=QuestionCheck
)

result = Runner.run_sync(guard_agent, "What is the capital of France?")
print(result.final_output)  # Output: {"is_question": true, "reason": "Ends with a question mark"}
Workflow Integration
Use guardrails to filter inputs:
task_agent = Agent(
    name="TaskProcessor",
    instructions="Process questions only.",
    handoffs=[guard_agent]
)
result = Runner.run_sync(task_agent, "Tell me a story")
print(result.final_output)  # Output indicates it’s not a question
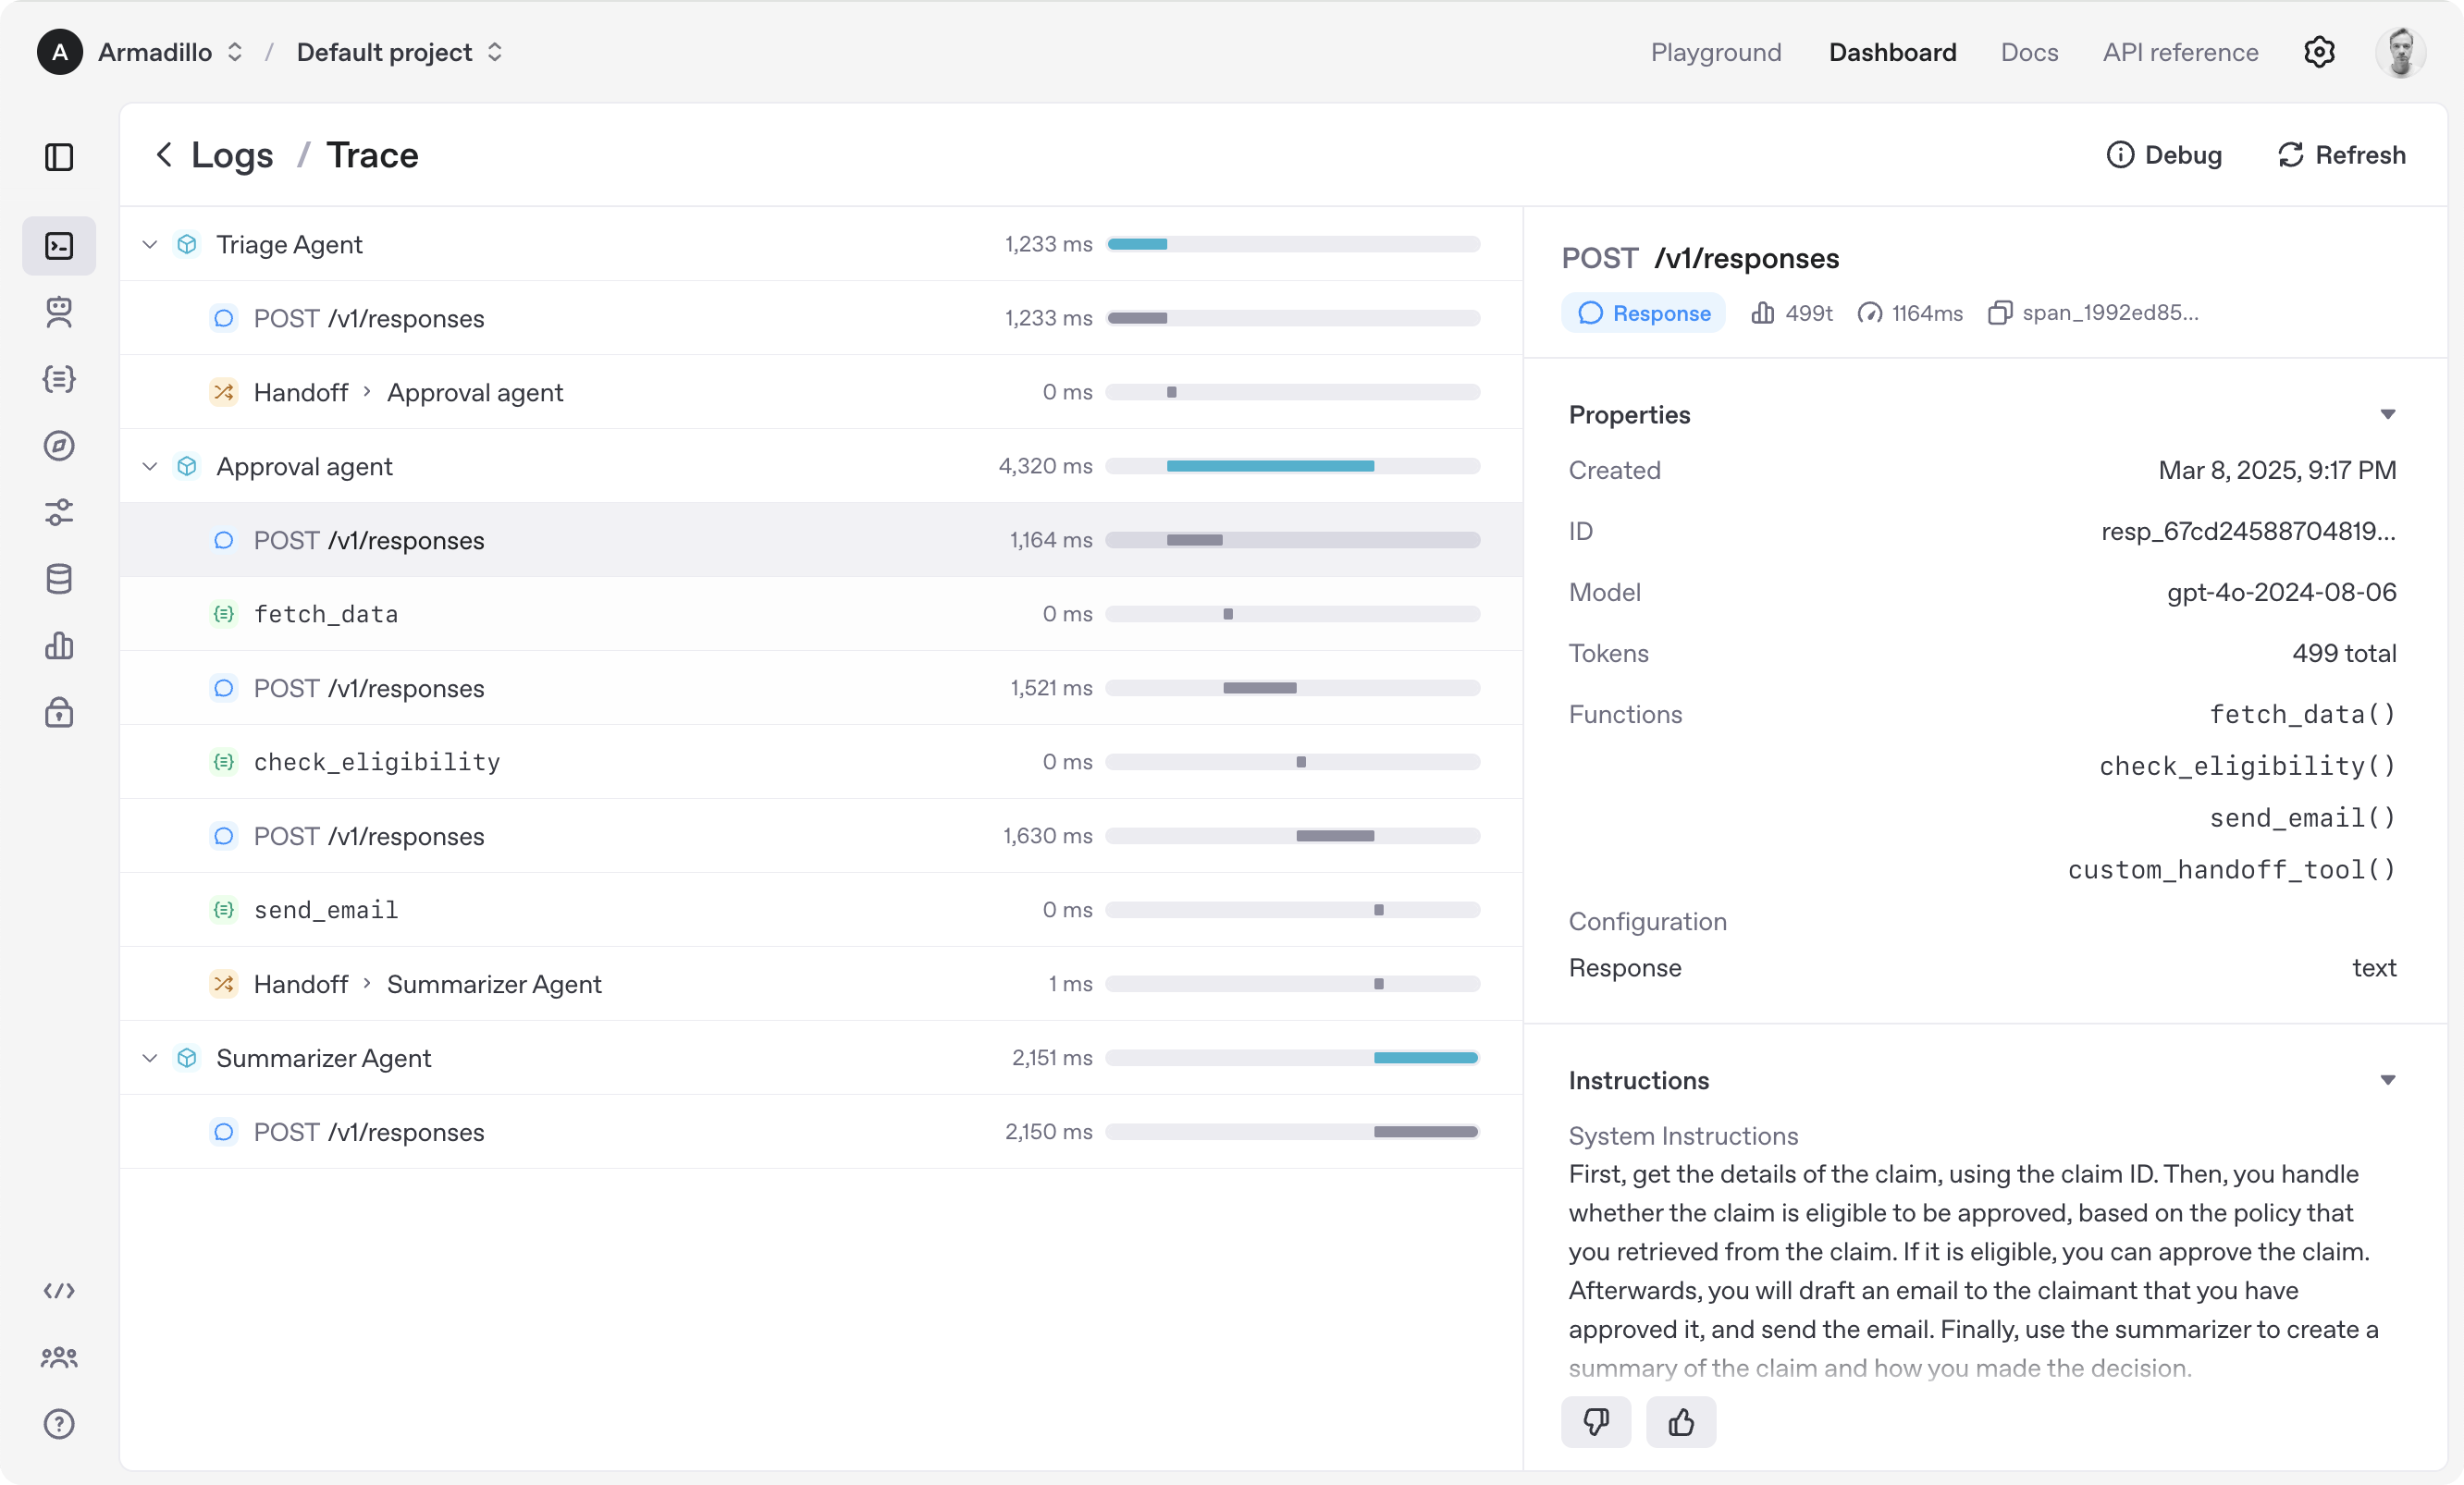
Tracing and Debugging
Tracing logs agent execution details, accessible via the OpenAI Dashboard.
Enabling Tracing
Tracing is automatic. Each run generates a trace with:
- Input/output data
- Tool calls
- Handoff events
- Errors
Debugging Example
If an agent fails, review the trace to identify:
- Incorrect tool parameters
- Handoff misrouting
- API errors
Best Practices
Performance Optimization
- Model Choice: Use
gpt-3.5-turbofor speed,gpt-4for complex reasoning. - Temperature: 0.2 for precision, 0.9 for creativity.
- Async Execution: Use
Runner.run_asyncfor parallel tasks.
Error Handling
- Tools: Return clear error messages (e.g., "Invalid ID").
- Handoffs: Include a fallback agent for failures.
Workflow Design
- Modularity: Split tasks across agents.
- Clarity: Write unambiguous instructions.
- Validation: Apply guardrails at key stages.
Conclusion
The OpenAI Agents SDK empowers developers to build sophisticated AI systems with specialized agents, integrated tools, and collaborative workflows. This guide provides a technical foundation to harness its full potential, complete with examples and best practices.
So, what’s next? Start experimenting! Play with different instructions, tools, and workflows. And if you hit a snag, tools like Apidog can help with API testing grab it free.