
In digital landscape, network automation has become crucial for businesses to maintain efficiency and scalability. Cisco Meraki, a leader in cloud-managed IT solutions, offers a powerful API that allows developers and network administrators to programmatically manage and monitor their Meraki networks. This comprehensive guide will walk you through the process of using the Meraki API, from setting up your environment to executing advanced operations.

Understanding the Meraki API
Before diving into the practical aspects, it's essential to grasp what the Meraki API is and why it's so valuable. The Meraki Dashboard API is a RESTful interface that enables users to interact with their Meraki networks programmatically. This means you can automate tasks, retrieve data, and make changes to your network configuration without manually logging into the Meraki dashboard.
Key Benefits of Using Meraki API
- Automation: Streamline repetitive tasks and save time.
- Scalability: Manage large networks more efficiently.
- Integration: Connect Meraki with other systems and applications.
- Custom Solutions: Build tailored tools for specific network management needs.
Getting Started with Meraki API
To begin using the Meraki API, you'll need to follow a few initial steps:
1. Generate an API Key
First and foremost, you need to generate an API key. This key acts as your authentication token for making API requests. Here's how to generate one:
- Log in to the Meraki Dashboard.
- Navigate to your profile by clicking on your username in the top-right corner.
- Scroll down to the API Access section.
- Click on "Generate new API key".
Remember to keep this key secure, as it provides full access to your Meraki organization.
2. Choose Your Development Environment
You can interact with the Meraki API using various programming languages and tools. Some popular choices include:
- Python (with the requests library)
- cURL for command-line interactions
- Postman for API testing and exploration
For this guide, we'll focus on using Python, as it's widely used and has excellent library support.
3. Set Up Your Python Environment
If you haven't already, install Python on your system. Then, install the necessary libraries:
pip install requests
Making Your First API Request
Now that you've set up your environment, let's make your first API request. We'll start with a simple GET request to retrieve information about your organizations.
import requests

API_KEY = "your_api_key_here"
BASE_URL = "<https://api.meraki.com/api/v1>"

headers = {
    "X-Cisco-Meraki-API-Key": API_KEY,
    "Content-Type": "application/json"
}

response = requests.get(f"{BASE_URL}/organizations", headers=headers)

if response.status_code == 200:
    organizations = response.json()
    for org in organizations:
        print(f"Organization Name: {org['name']}, ID: {org['id']}")
else:
    print(f"Error: {response.status_code}, {response.text}")
This script will list all the organizations you have access to with your API key.
Common API Operations
Let's explore some common operations you can perform with the Meraki API:
Retrieving Network Information
To get information about a specific network, you can use the following endpoint:
network_id = "your_network_id"
response = requests.get(f"{BASE_URL}/networks/{network_id}", headers=headers)
Listing Devices in a Network
To retrieve a list of devices in a network:
response = requests.get(f"{BASE_URL}/networks/{network_id}/devices", headers=headers)
Updating Device Settings
You can update device settings using a PUT request. For example, to update a device's name:
device_serial = "your_device_serial"
new_name = "New Device Name"

data = {
    "name": new_name
}

response = requests.put(f"{BASE_URL}/devices/{device_serial}", headers=headers, json=data)
Advanced API Usage
As you become more comfortable with the basics, you can explore more advanced features of the Meraki API:
Pagination
When dealing with large datasets, the API uses pagination. You'll need to handle this in your code:
def get_all_pages(url):
    all_data = []
    while url:
        response = requests.get(url, headers=headers)
        data = response.json()
        all_data.extend(data)
        url = response.links.get('next', {}).get('url')
    return all_data

# Example: Get all clients across all networks
all_clients = get_all_pages(f"{BASE_URL}/organizations/{org_id}/clients")
Error Handling
Proper error handling is crucial when working with APIs. Always check the response status and handle errors gracefully:
try:
    response = requests.get(f"{BASE_URL}/networks/{network_id}", headers=headers)
    response.raise_for_status()  # Raises an HTTPError for bad responses
    network_info = response.json()
except requests.exceptions.RequestException as e:
    print(f"An error occurred: {e}")
Rate Limiting
Meraki API has rate limits to prevent overuse. Be sure to implement proper rate limiting in your code:
import time

def rate_limited_request(url, method="GET", data=None):
    while True:
        response = requests.request(method, url, headers=headers, json=data)
        if response.status_code != 429:  # 429 is the status code for rate limiting
            return response
        retry_after = int(response.headers.get('Retry-After', 1))
        print(f"Rate limited. Waiting for {retry_after} seconds.")
        time.sleep(retry_after)
Best Practices for Using Meraki API
To ensure you're using the Meraki API effectively and responsibly, follow these best practices:
- Use Asynchronous Requests: For large-scale operations, consider using asynchronous requests to improve performance.
- Implement Proper Error Handling: Always handle errors gracefully to prevent your scripts from crashing.
- Respect Rate Limits: Implement proper rate limiting to avoid overloading the API.
- Secure Your API Key: Never hardcode your API key in your scripts. Use environment variables or secure vaults.
- Use Webhooks for Real-Time Updates: Instead of constantly polling the API, use webhooks for real-time notifications.
- Keep Your Code DRY: Create reusable functions for common operations to keep your code clean and maintainable.
- Stay Updated: Regularly check the Meraki API documentation for updates and new features.
Integrating Meraki API with Other Systems
One of the most powerful aspects of the Meraki API is its ability to integrate with other systems. Here are some integration ideas:
SIEM Integration
Integrate Meraki with your Security Information and Event Management (SIEM) system to centralize security monitoring:
def send_to_siem(event_data):
    siem_url = "your_siem_endpoint"
    requests.post(siem_url, json=event_data)

# Example: Send security events to SIEM
security_events = get_all_pages(f"{BASE_URL}/organizations/{org_id}/securityEvents")
for event in security_events:
    send_to_siem(event)
Automated Reporting
Create automated reports by pulling data from the Meraki API and generating custom reports:
import csv

def generate_device_report(network_id):
    devices = get_all_pages(f"{BASE_URL}/networks/{network_id}/devices")
    with open('device_report.csv', 'w', newline='') as file:
        writer = csv.DictWriter(file, fieldnames=["name", "model", "serial"])
        writer.writeheader()
        for device in devices:
            writer.writerow({
                "name": device['name'],
                "model": device['model'],
                "serial": device['serial']
            })

# Generate reports for all networks
networks = get_all_pages(f"{BASE_URL}/organizations/{org_id}/networks")
for network in networks:
    generate_device_report(network['id'])
Troubleshooting Common Issues
When working with the Meraki API, you might encounter some common issues. Here's how to troubleshoot them:
Authentication Errors
If you're getting 401 Unauthorized errors, double-check your API key and ensure it's being sent correctly in the headers.
Incorrect Endpoints
Make sure you're using the correct API version and endpoint. The Meraki API documentation is your best resource for verifying endpoints.
Data Format Issues
When sending data in POST or PUT requests, ensure your JSON is correctly formatted. Use a JSON validator if necessary.
Rate Limiting
If you're hitting rate limits frequently, consider implementing exponential backoff in your rate limiting logic:
import time
import random

def exponential_backoff(attempt):
    return min(300, (2 ** attempt) + random.uniform(0, 1))

def rate_limited_request(url, method="GET", data=None, max_attempts=5):
    attempt = 0
    while attempt < max_attempts:
        response = requests.request(method, url, headers=headers, json=data)
        if response.status_code != 429:
            return response
        wait_time = exponential_backoff(attempt)
        print(f"Rate limited. Waiting for {wait_time:.2f} seconds.")
        time.sleep(wait_time)
        attempt += 1
    raise Exception("Max retry attempts reached")
Future of Meraki API
As Meraki continues to evolve, so does its API. Stay informed about upcoming features and changes:
- New Endpoints: Meraki regularly adds new endpoints to support new features and products.
- API Versioning: Be prepared for potential version changes and deprecations.
- Enhanced Security Features: Expect more advanced security features like OAuth 2.0 support in the future.
- Expanded Webhook Support: More events and data types may become available via webhooks.
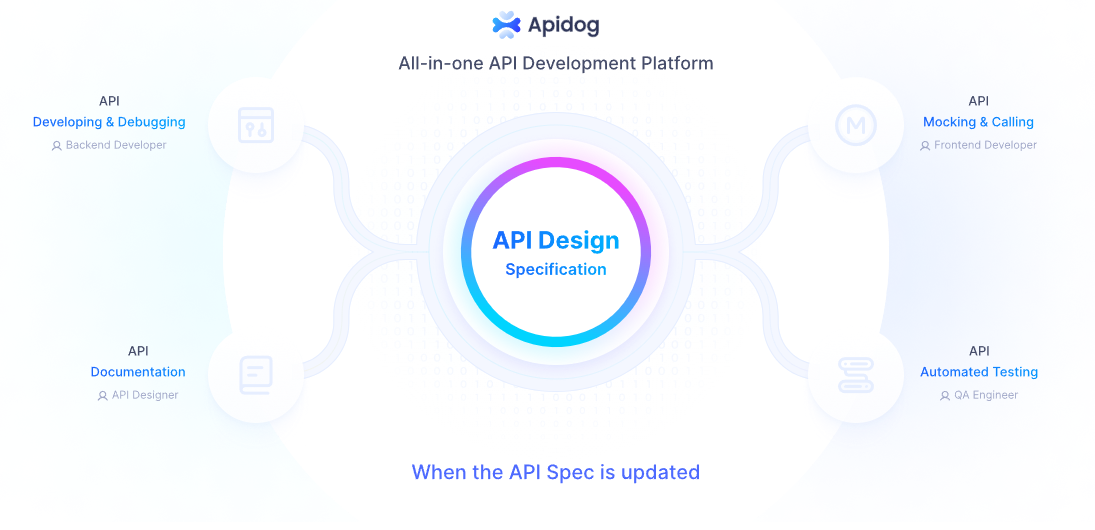
How Apidog Enhances API Development for Meraki API
As you continue your journey with the Meraki API, consider exploring other API management tools like Apidog to enhance your API development workflow. Apidog is an integrated platform for API lifecycle management. It offers tools for API design, debugging, development, mocking, and testing. Apidog supports multiple protocols including HTTP, REST, GraphQL, SOAP, and WebSocket. It features automated testing, documentation generation, and team collaboration tools. While not specific to Meraki, Apidog can be a valuable companion tool for developers working with various APIs, including Meraki's, by providing a comprehensive environment for API development and management.
Conclusion
The Meraki API is a powerful tool that opens up a world of possibilities for network automation and integration. By following this guide and best practices, you'll be well-equipped to leverage the Meraki API effectively in your projects. Remember to always refer to the official Meraki API documentation for the most up-to-date information and keep exploring new ways to innovate with your network management.


