Visual language models (VLMs) have revolutionized AI's ability to understand and reason about visual content. Among these innovations, Moonshot AI's Kimi VL Thinking model stands out as particularly impressive—combining advanced reasoning capabilities with remarkable efficiency. This tutorial will guide you through understanding Kimi VL Thinking's capabilities and how to use it for free through OpenRouter's platform.
Kimi VL Thinking Benchmarks
Kimi VL Thinking (officially called Kimi-VL-A3B-Thinking) is an advanced visual language model developed by Moonshot AI. What makes this model special is its Mixture-of-Experts (MoE) architecture that activates only 2.8 billion parameters per inference step, while containing approximately 16 billion parameters in total. This allows it to deliver sophisticated reasoning with relatively efficient computation.
Kimi VL Thinking is specifically designed for advanced reasoning tasks, particularly those requiring step-by-step thinking and mathematical analysis of visual inputs. It was created by fine-tuning the Kimi VL base model with chain-of-thought (CoT) supervised learning and reinforcement learning techniques.
Key Highlights of Kimi VL Thinking Model
- Long Context Window: Supports up to 128K tokens, allowing for extensive multi-turn conversations and processing of long documents.
- Native-Resolution Vision: Uses the MoonViT encoder to process high-resolution visual inputs with excellent detail recognition.
- Advanced Reasoning: Especially strong at mathematical visual reasoning and step-by-step problem solving.
- Efficient Computation: Despite its powerful capabilities, the model activates only 2.8B parameters, making it more accessible than larger alternatives.
- Open Source: Available under MIT license, allowing for broad academic and commercial applications.
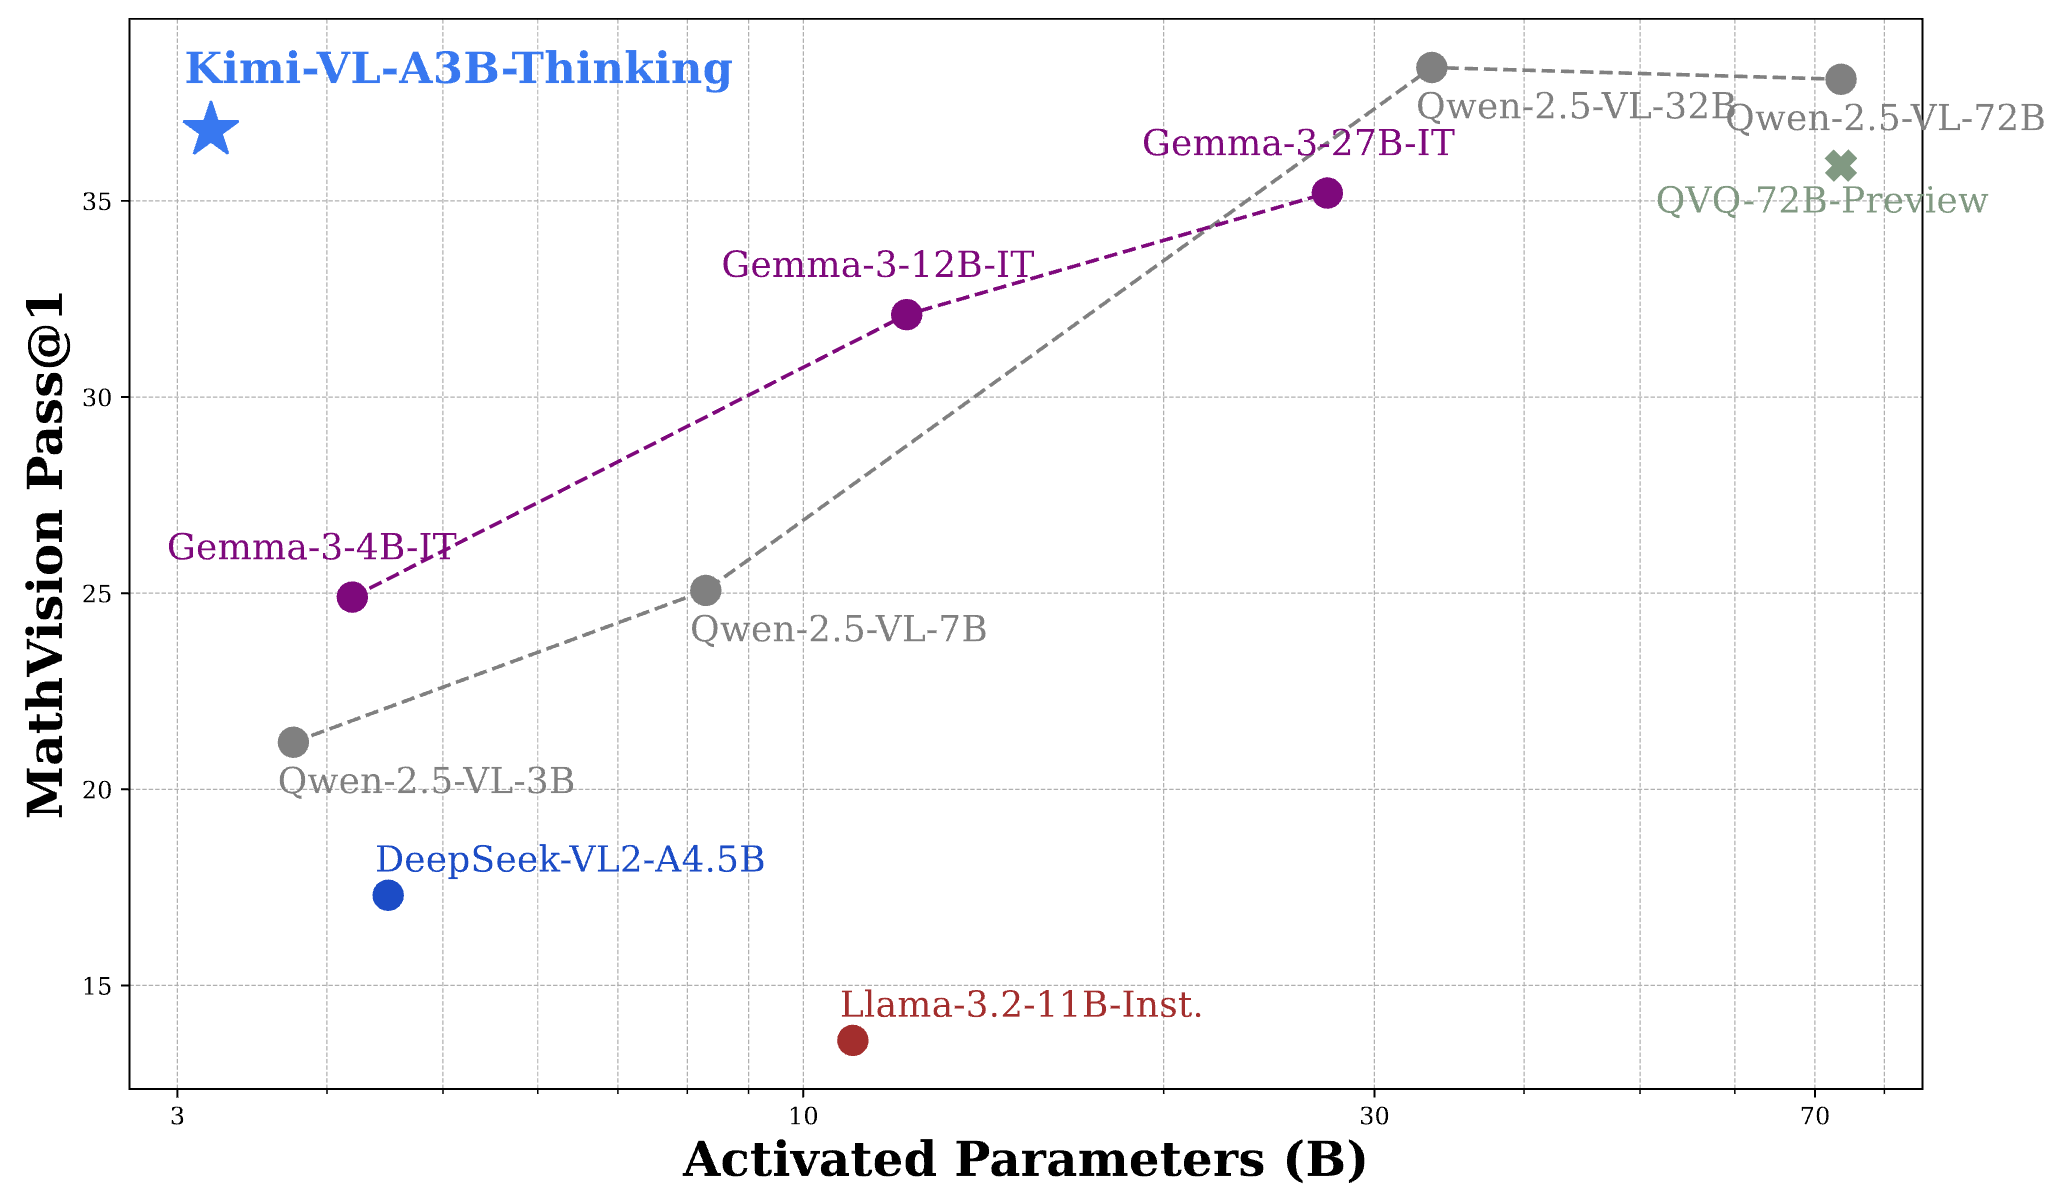
Kimi VL Thinking Benchmark Performance
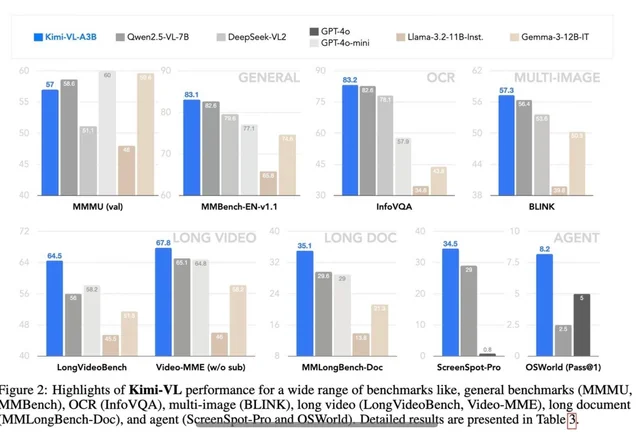
Kimi VL Thinking demonstrates impressive performance across several challenging benchmarks, often rivaling or exceeding much larger models:
- MathVision: Achieves a score of 36.8 (Pass@1), comparable to models like Gemma-3-27B (35.5) and approaching Qwen2.5-VL-72B (38.1).
- MathVista: Scores 71.3 on the mini benchmark, outperforming models like GPT-4o-mini (56.7) and Gemma-3-12B (56.4).
- MMMU (Multimodal Massive Multitask Understanding): Reaches 61.7 on the validation set, demonstrating strong capabilities in complex multimodal tasks.
To put these results in perspective, Kimi VL Thinking's performance is remarkable considering it activates only 2.8B parameters, while competing against models that use 7B, 12B, or even 70B+ parameters. This positions it as one of the most efficient reasoning-capable VLMs available.
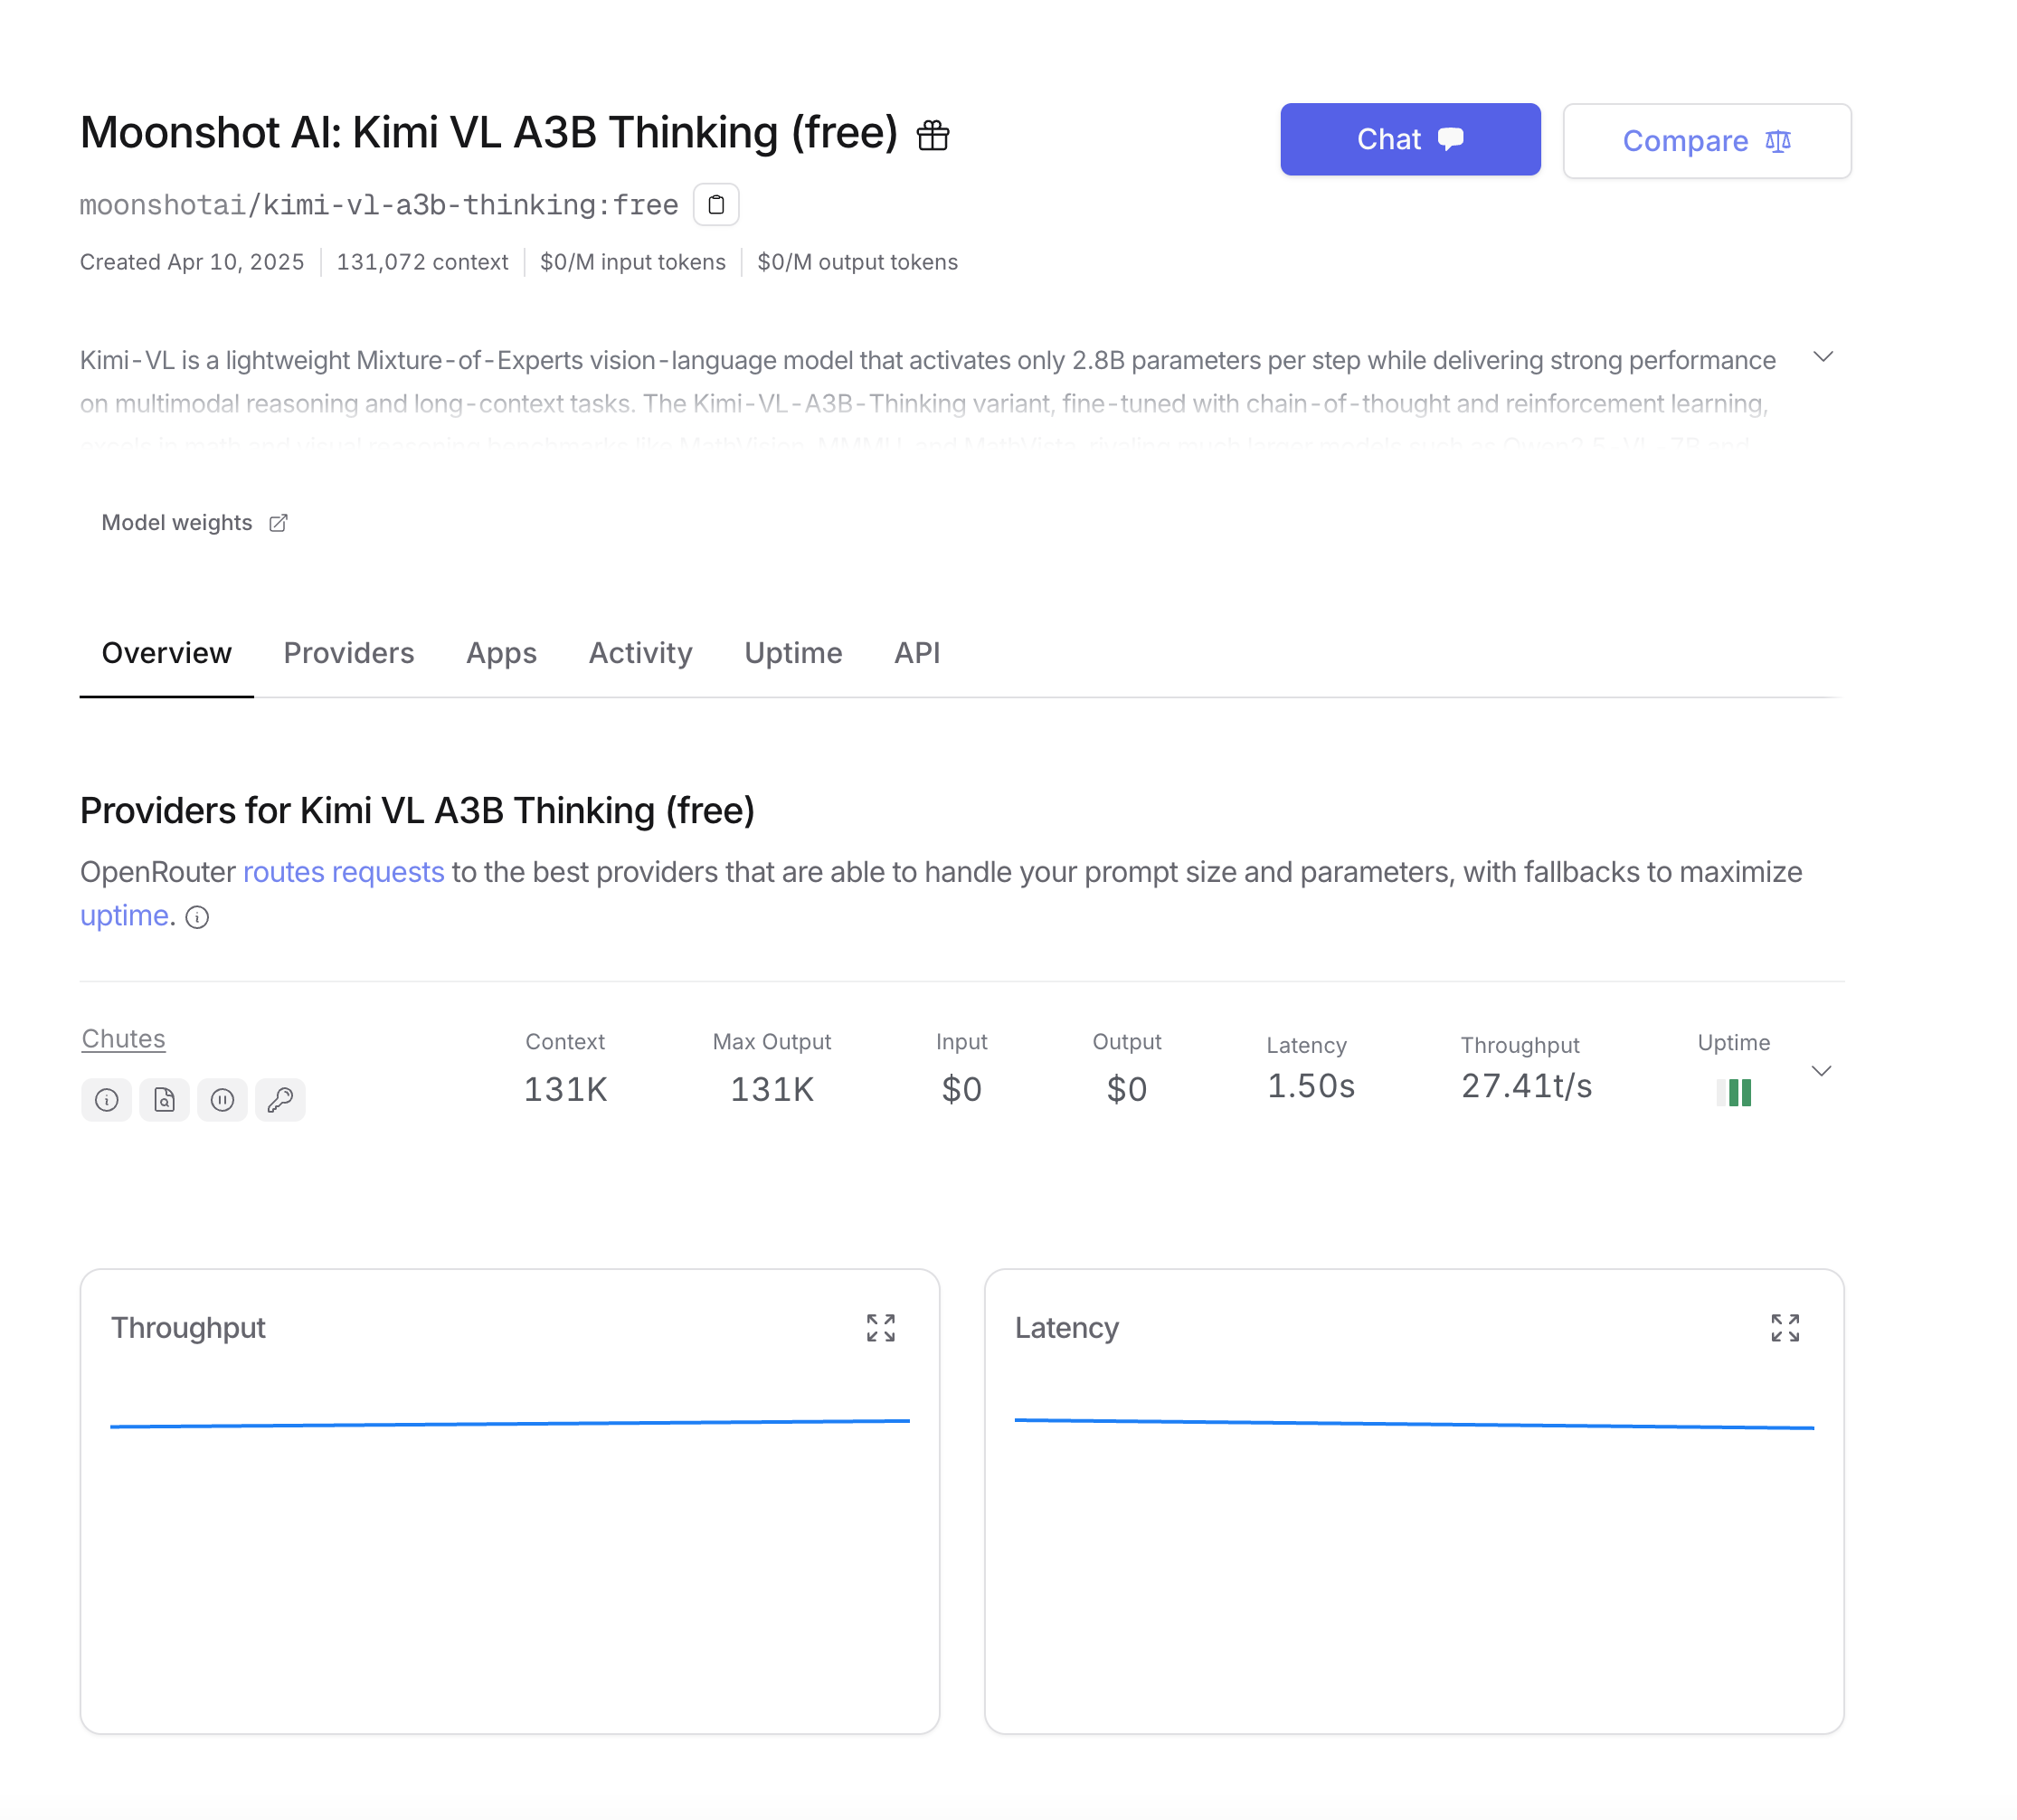
How to Use Kimi VL Thinking Free Through OpenRouter
OpenRouter provides a convenient way to access Kimi VL Thinking without needing to deploy the model yourself. Their free tier allows you to experiment with the model without any cost. Here's how to get started:
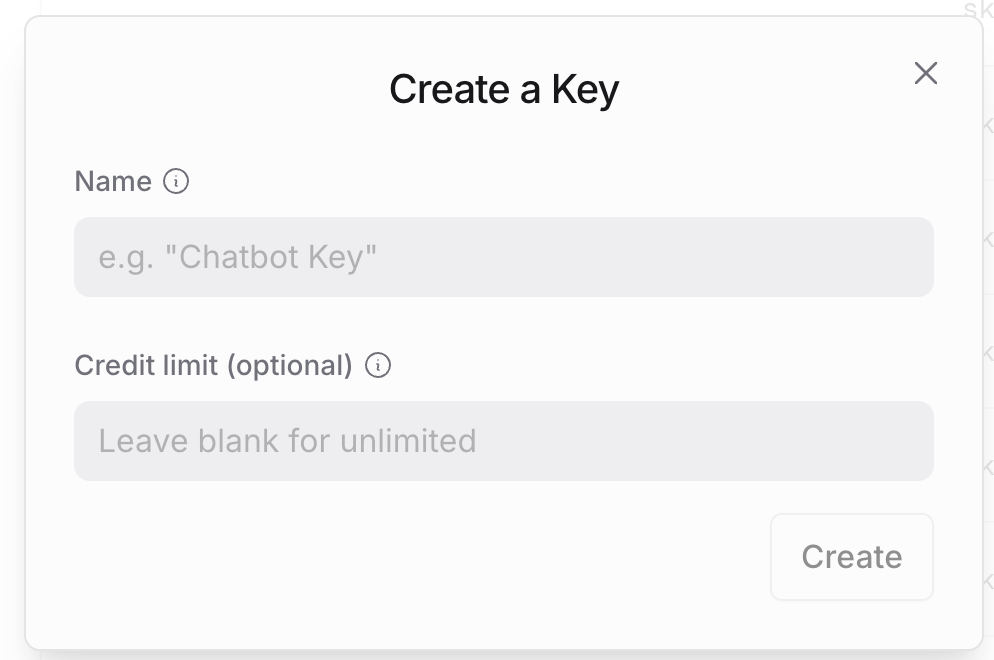
Step 1: Create an OpenRouter Account
- Visit OpenRouter's website and sign up for an account if you don't already have one.
- After registration, navigate to your account settings to generate an API key.
- Store this API key securely, as you'll need it for all API calls.
Step 2: Understanding the OpenRouter API Structure
OpenRouter's API is designed to be compatible with the OpenAI API format, making it easy to integrate if you're already familiar with OpenAI's services. The key differences are:
- The base URL:
https://openrouter.ai/api/v1 - The model name:
moonshotai/kimi-vl-a3b-thinking:free - Additional optional headers for analytics
Step 3: Making Your First API Call
For Python users, set up your environment with these dependencies:
pip install openai requests pillow
Let's start with a basic example using the OpenAI SDK, which is the most straightforward approach:
from openai import OpenAI
from base64 import b64encode
from PIL import Image
import io

# Initialize the client with OpenRouter's base URL
client = OpenAI(
    base_url="<https://openrouter.ai/api/v1>",
    api_key="your_openrouter_api_key_here",
)

# Function to encode images
def encode_image(image_path):
    with open(image_path, "rb") as image_file:
        return b64encode(image_file.read()).decode('utf-8')

# Load and encode your image
image_path = "path_to_your_image.jpg"
base64_image = encode_image(image_path)

# Create the API request
completion = client.chat.completions.create(
    extra_headers={
        "HTTP-Referer": "your_site_url",  # Optional for analytics
        "X-Title": "your_app_name",       # Optional for analytics
    },
    model="moonshotai/kimi-vl-a3b-thinking:free",
    messages=[
        {
            "role": "user",
            "content": [
                {
                    "type": "image",
                    "image_url": {
                        "url": f"data:image/jpeg;base64,{base64_image}"
                    }
                },
                {
                    "type": "text",
                    "text": "Please examine this mathematical problem and solve it step by step."
                }
            ]
        }
    ],
    max_tokens=1024
)

print(completion.choices[0].message.content)
If you prefer to use direct API calls without the SDK:
import requests
import json
from base64 import b64encode

# Function to encode images
def encode_image(image_path):
    with open(image_path, "rb") as image_file:
        return b64encode(image_file.read()).decode('utf-8')

# Load and encode your image
image_path = "path_to_your_image.jpg"
base64_image = encode_image(image_path)

# Create the API request
response = requests.post(
    url="<https://openrouter.ai/api/v1/chat/completions>",
    headers={
        "Authorization": "Bearer your_openrouter_api_key_here",
        "Content-Type": "application/json",
        "HTTP-Referer": "your_site_url",  # Optional for analytics
        "X-Title": "your_app_name",       # Optional for analytics
    },
    data=json.dumps({
        "model": "moonshotai/kimi-vl-a3b-thinking:free",
        "messages": [
            {
                "role": "user",
                "content": [
                    {
                        "type": "image",
                        "image_url": {
                            "url": f"data:image/jpeg;base64,{base64_image}"
                        }
                    },
                    {
                        "type": "text",
                        "text": "Please examine this mathematical problem and solve it step by step."
                    }
                ]
            }
        ],
        "max_tokens": 1024
    })
)

print(response.json()["choices"][0]["message"]["content"])
For long responses or better user experience, you might want to stream the model's output:
from openai import OpenAI
from base64 import b64encode

client = OpenAI(
    base_url="<https://openrouter.ai/api/v1>",
    api_key="your_openrouter_api_key_here",
)

# Function to encode images
def encode_image(image_path):
    with open(image_path, "rb") as image_file:
        return b64encode(image_file.read()).decode('utf-8')

# Load and encode your image
image_path = "path_to_your_image.jpg"
base64_image = encode_image(image_path)

# Create a streaming request
stream = client.chat.completions.create(
    model="moonshotai/kimi-vl-a3b-thinking:free",
    messages=[
        {
            "role": "user",
            "content": [
                {
                    "type": "image",
                    "image_url": {
                        "url": f"data:image/jpeg;base64,{base64_image}"
                    }
                },
                {
                    "type": "text",
                    "text": "Please examine this mathematical problem and solve it step by step."
                }
            ]
        }
    ],
    stream=True,
    max_tokens=1024
)

# Process the streaming response
for chunk in stream:
    if chunk.choices[0].delta.content:
        print(chunk.choices[0].delta.content, end="", flush=True)
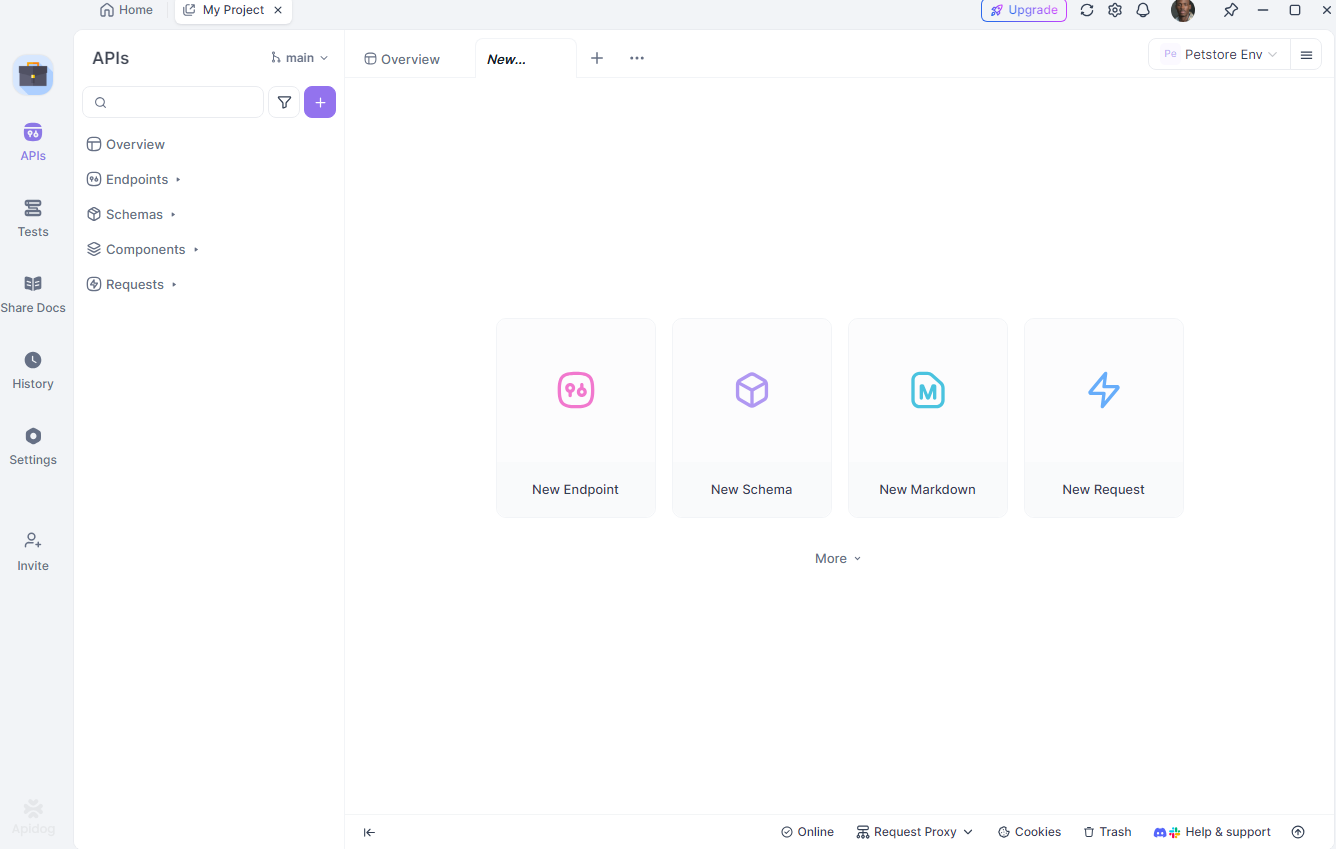
Testing Kimi VL Thinking API with Apidog
Apidog is a comprehensive API testing tool that simplifies the process of interacting with APIs like Kimi VL Thinking. Its features, such as environment management and scenario simulation, make it ideal for developers. Let’s see how to use Apidog to test the Kimi VL Thinking API.
Set Up Apidog
First, download and install Apidog from apidog.com. Once installed, create a new project and add the Kimi VL Thinking API endpoint: https://openrouter.ai/api/v1/chat/completions.
Configure Your Environment
Next, set up different environments (e.g., development and production) in Apidog. Define variables like your API key and base URL to easily switch between setups. In Apidog, go to the “Environments” tab and add:
api_key: Your OpenRouter API keybase_url:https://openrouter.ai/api/v1
Create a Test Request
Now, create a new POST request in Apidog.

Set the URL to {{base_url}}/chat/completions, add your headers, and input the JSON body:
{
    "model": "quasar-alpha",
    "messages": [
        {"role": "user", "content": "Explain the difference between let and const in JavaScript."}
    ],
    "max_tokens": 300
}
In the headers section, add:
Authorization:Bearer {{api_key}}Content-Type:application/json
Run and Analyze the Test
Finally, send the request and analyze the response in Apidog’s visual interface. Apidog provides detailed reports, including response time, status code, and token usage. You can also save this request as a reusable scenario for future testing.

Apidog’s ability to simulate real-world scenarios and generate exportable reports makes it a powerful tool for debugging and optimizing your interactions with the Kimi VL Thinking API. Let’s wrap up with some best practices.
Optimizing Prompts for Kimi VL Thinking
Kimi VL Thinking excels at step-by-step reasoning, so structure your prompts to take advantage of this capability:
- Be Explicit About Reasoning: Ask the model to "think step by step" or "reason through this problem carefully."
- One Task at a Time: For complex problems, break them down into manageable steps rather than asking for everything at once.
- Provide Context: When relevant, give background information that might help the model understand the problem better.
- Use Clear Instructions: Specify exactly what you want the model to analyze in the image.
Conclusion
Kimi VL Thinking represents an impressive achievement in efficient yet powerful visual language models. Its ability to perform advanced reasoning while activating only 2.8B parameters makes it accessible to a broader range of users than traditional large models.
By leveraging OpenRouter's free tier, you can experiment with this cutting-edge technology without cost barriers. Whether you're working on educational applications, data analysis, or technical documentation, Kimi VL Thinking offers a powerful tool for understanding and reasoning about visual content.
As you become more comfortable with the model, you can explore more complex use cases and potentially integrate it into production applications. Remember that the free tier is perfect for experimentation, but for production use cases with high volumes, you might consider upgrading to a paid tier for better reliability and performance guarantees.
Start exploring Kimi VL Thinking today and discover how advanced visual reasoning capabilities can enhance your projects!