Unlocking advanced AI coding tools is now easier than ever. Grok 3, one of the most powerful models for code generation and technical reasoning, is accessible for free through OpenRouter — no direct xAI subscription needed. This practical guide covers how API developers, QA engineers, and technical leads can set up and use Grok 3 within two standout AI-powered coding environments: Cursor and Cline.
💡 When building or testing API-driven applications, developer teams often streamline their workflow using Apidog, a robust Postman alternative that accelerates the entire API development lifecycle.

What Makes Grok 3 Stand Out for Developers?
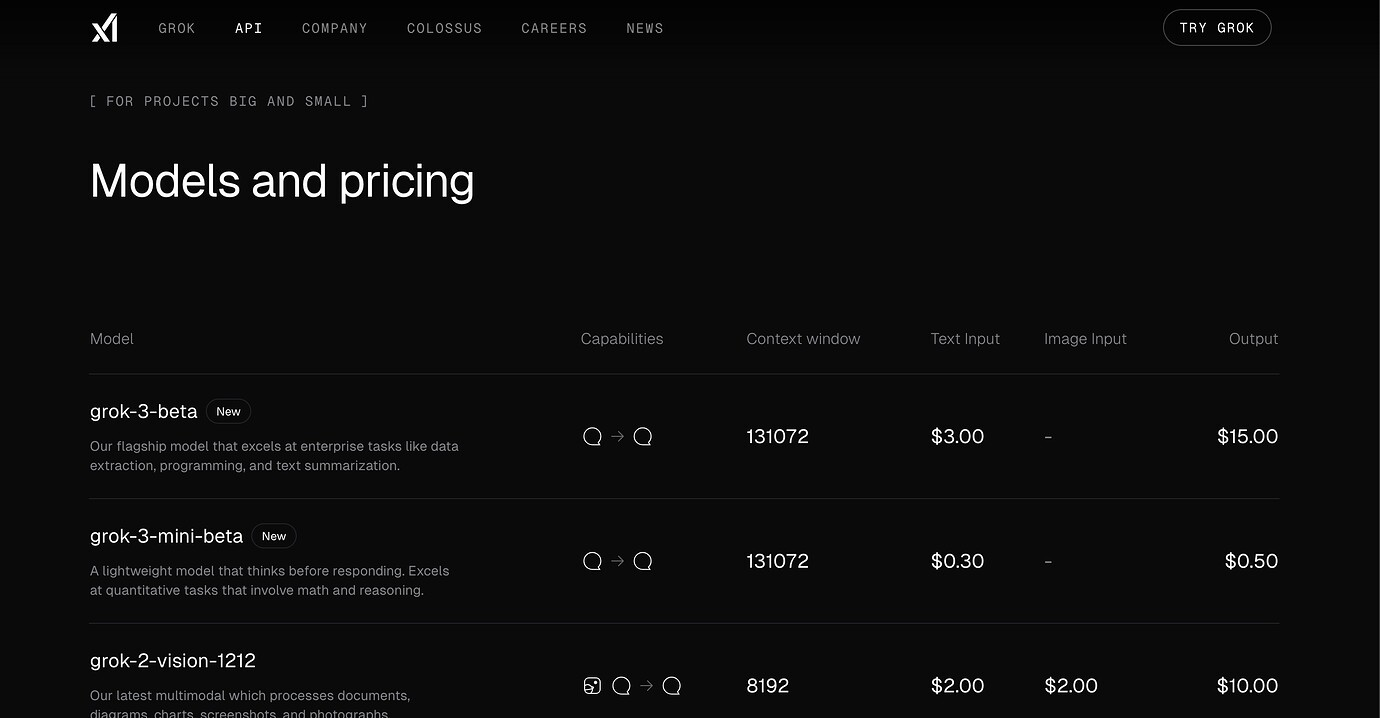
Grok 3, introduced by xAI, is designed for complex technical tasks, offering significant improvements in autonomous reasoning, multi-step problem-solving, and code completion. Both the main Grok 3 model and its cost-efficient sibling, Grok 3 Mini, are optimized for high performance in mathematics, coding, and reasoning benchmarks.
Grok 3 and Grok Mini: Key Benchmark Results
[ ]
]
- Mathematics: Grok 3 solves over 90% of advanced math problems, including AIME-level challenges.
- Coding: Scores 80.4% on LiveCodeBench, outperforming many AI rivals.
- Reasoning: Excels at multi-step logic and technical analysis.
Grok 3 Mini, with a lighter footprint, still achieves 95.8% on AIME 2024 and matches Grok 3’s coding score — making it highly efficient for day-to-day development and testing tasks.
[ ]
]
For API-focused teams, the robust reasoning and code generation of Grok 3 models translate into faster prototyping, more reliable debugging, and improved automation in the development pipeline.
OpenRouter: Seamless Access to Grok 3 (No xAI Subscription Required)
OpenRouter aggregates leading AI models behind a single API. Developers receive free credits upon signup, which can be used to try Grok 3 and other advanced models — ideal for experimentation and proof-of-concept work without upfront cost.
Getting Started:
[ ]
]
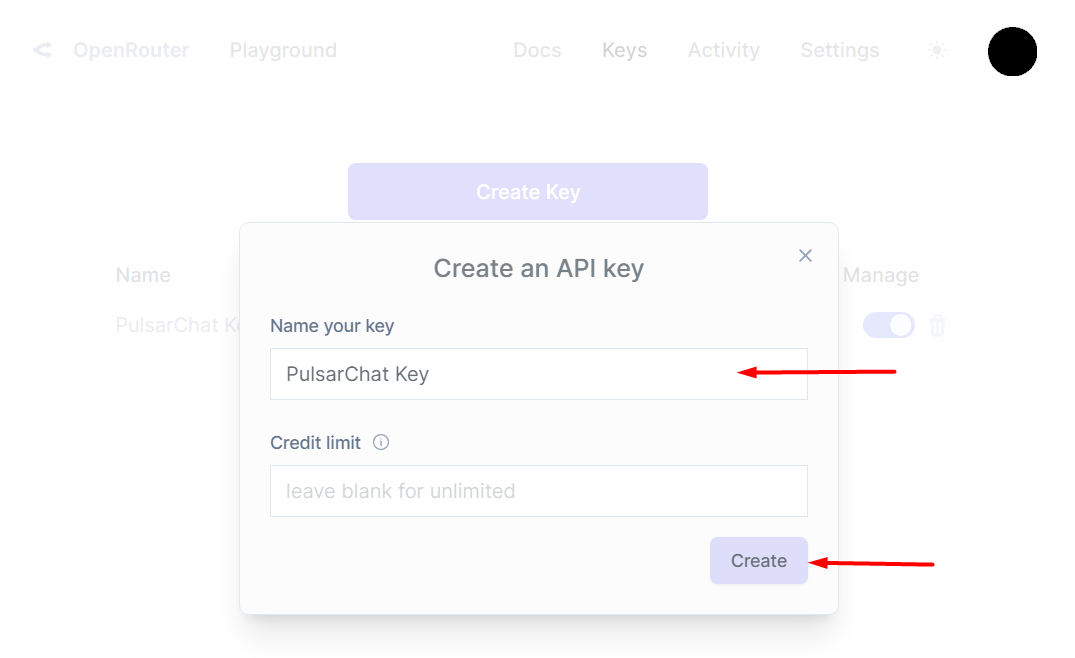
- Go to OpenRouter.ai and sign up.
- Generate an API key from your settings page.
- Save the key — you'll need it to connect with your IDE.
How to Use Grok 3 in Cursor IDE
Cursor is a modern code editor built on VS Code, offering direct AI model integration. Here’s how to set up Grok 3 via OpenRouter:
Step-by-Step Setup
1. Install Cursor IDE
- Download from cursor.com and install on your OS.
- Launch Cursor and sign in or create an account.
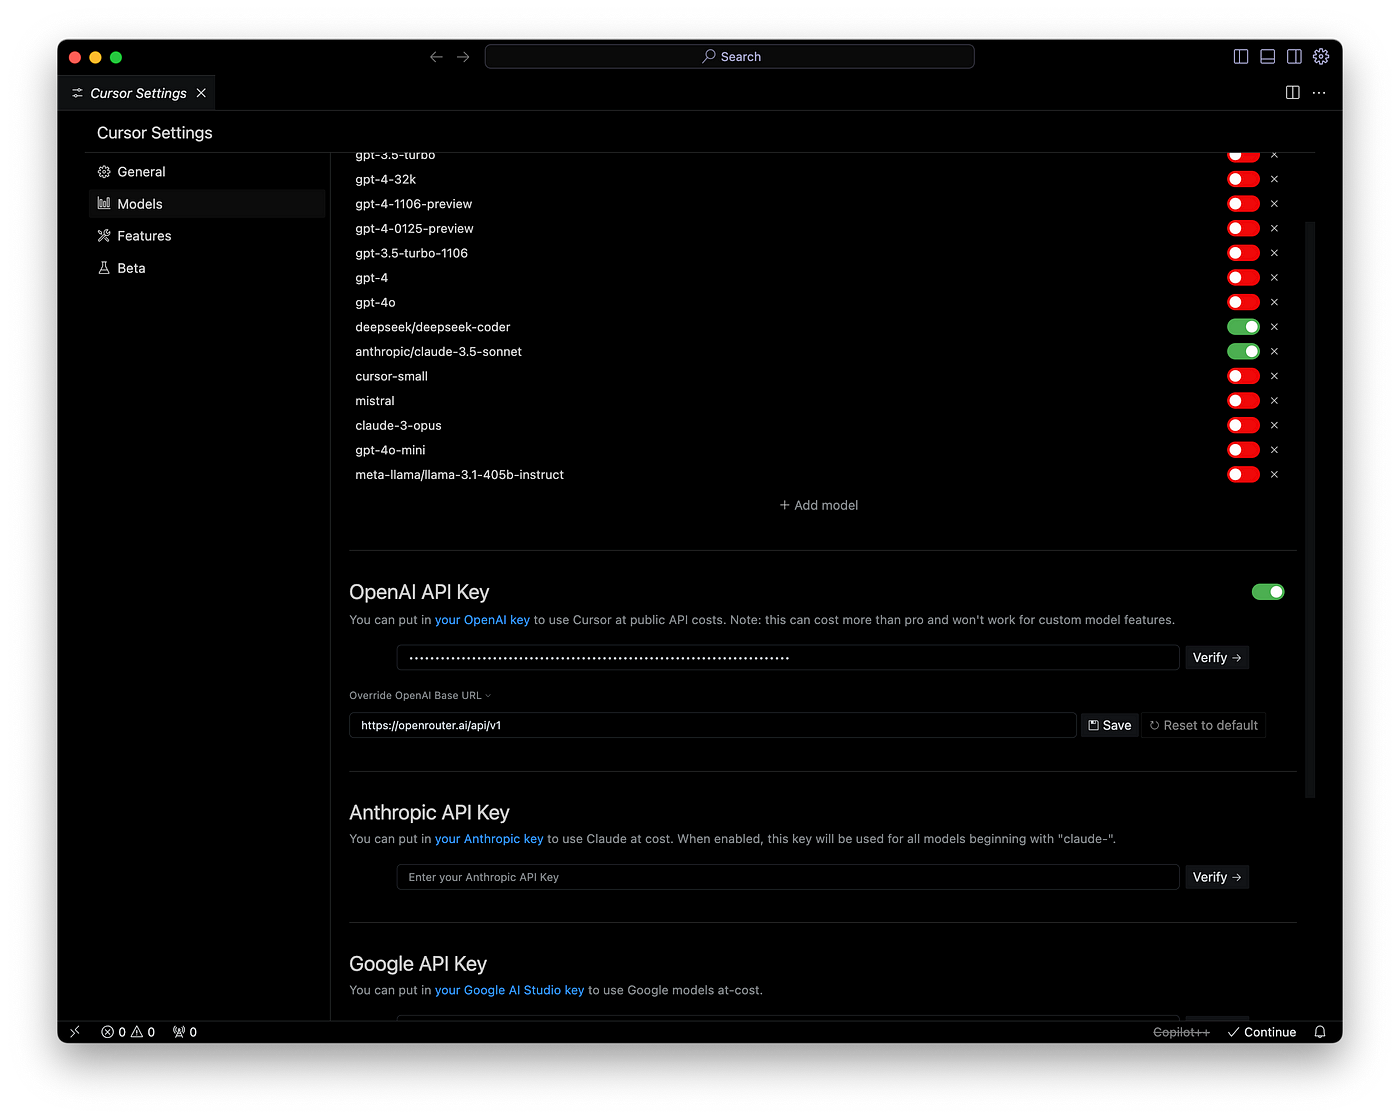
2. Connect OpenRouter API
- Click the gear icon (bottom left) to open Settings.
- Search “AI” to filter related options.
- Enter your OpenRouter API key under “OpenAI API Key.”
- Save the configuration.
[ ]
]
3. Add Grok 3 Model
- Open the Command Palette (
Cmd/Ctrl + Shift + P). - Search “Configure AI Models.”
- Add a new model with:
- Name: Grok 3
- Model ID: x-ai/grok-3
- Base URL: https://openrouter.ai/api/v1
- Context limit: 100,000 tokens
4. Set Grok 3 as Default
- Reopen the Command Palette.
- Choose “Set Default AI Model” and select Grok 3.
5. Test Your Setup
- Open a code file and press
Ctrl+Kto trigger the AI prompt. - Enter a coding or debugging request.
- Grok 3 should now generate responses via OpenRouter.
Tip: Use Cursor’s chat sidebar (Alt+L) to discuss multi-step problems or review reasoning with Grok 3.
Using Grok 3 in Cline (VS Code Extension)
Cline transforms VS Code into an AI-powered coding agent that edits files, runs commands, and even interacts with browsers — ideal for backend and API automation.
Quick Integration Guide
1. Install Cline Extension
- In VS Code, open Extensions (
Ctrl+Shift+X). - Search for "Cline" by Saoud Rizwan, then install.
2. Configure OpenRouter in Cline
[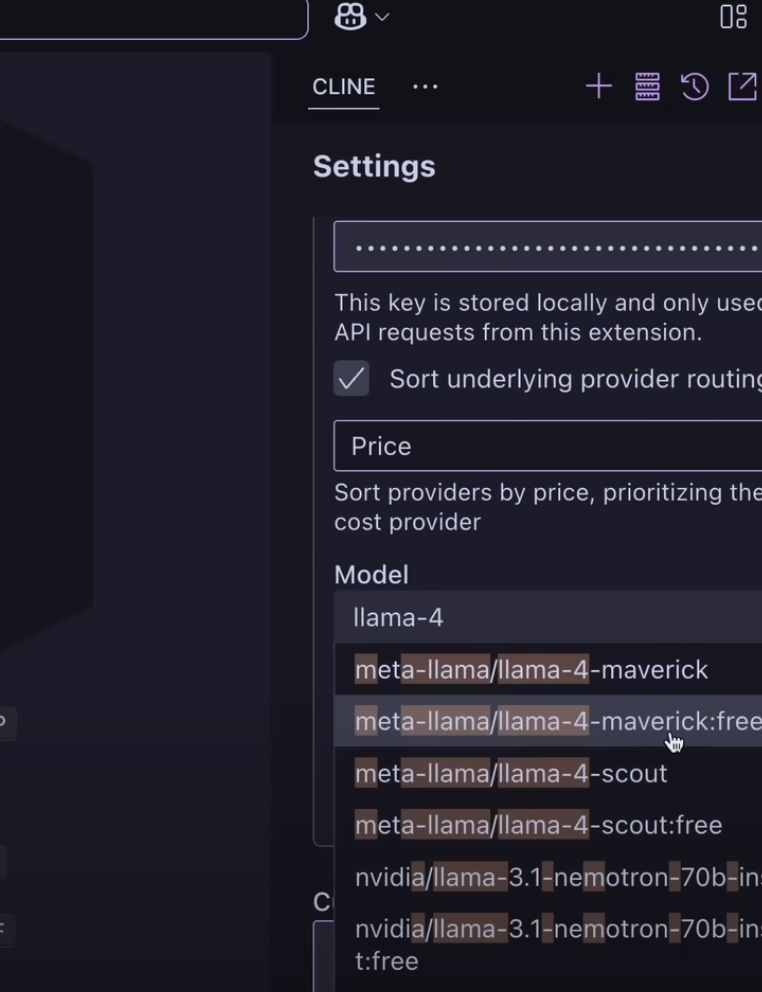 ]
]
- Click Cline’s icon in the VS Code activity bar.
- Choose “Configure API Provider,” or run
Cline: Configure API Providerfrom the command palette. - Select OpenRouter and enter your API key.
- Save the settings.
3. Select Grok 3 as the Model
- In the Cline panel, use the model dropdown to select
x-ai/grok-3. - If missing, click “Refresh Models.”
4. Validate the Integration
- Type a coding task in Cline’s input field.
- Press Enter — responses should now come from Grok 3.
- Monitor token usage and estimated cost directly in Cline.
5. Explore Advanced Features
- Ask Cline to create or edit files (“create a new file”, “edit [filename]”).
- Approve safe terminal commands for end-to-end automation.
- Use browser interaction to test APIs or debug web apps.
Cline’s Model Context Protocol lets you extend Grok 3 with custom tools, empowering sophisticated workflows for API and backend engineering.
Tips for Maximizing Free Grok 3 Credits
- Prioritize complex tasks: Use Grok 3 for high-value reasoning and coding, not basic completions.
- Opt for Grok 3 Mini: For routine dev work, its efficiency saves tokens.
- Prompt efficiently: Provide clear, concise context to minimize unnecessary API calls.
- Track usage: Both Cursor and Cline display token consumption—monitor to avoid surprises.
- Leverage caching: Some IDEs store recent results, reducing duplicate requests.
Cursor vs. Cline for Grok 3: Which Should You Choose?
-
Cursor:
- Best for teams wanting a familiar, VS Code-like experience with simple AI integration.
- Great for API design, backend coding, and collaborative editing.
-
Cline:
- Suited for power users seeking autonomous AI agents.
- Enables Grok 3 to edit files, run scripts, and test APIs end-to-end — ideal for complex workflows and automation.
Enhance API Development with Apidog
While Grok 3 accelerates coding and debugging, a specialized tool like Apidog can further streamline your API lifecycle. Apidog combines API design, testing, documentation, and mock services in one developer-friendly platform, helping teams move from code to tested endpoint faster.
Conclusion
Harnessing Grok 3 via OpenRouter in Cursor and Cline offers developers a powerful edge in code generation, automation, and complex reasoning — all without upfront costs. Choose the IDE that fits your team’s workflow, and maximize your free credits by focusing on the hardest challenges.
As AI models rapidly evolve, integrating these tools alongside proven API platforms like Apidog keeps your team at the forefront of efficient, reliable software delivery.