In this step-by-step guide, we will walk through obtaining your Deepseek API key and demonstrate how to utilize the key to interact with the Deepseek API for debugging purposes.
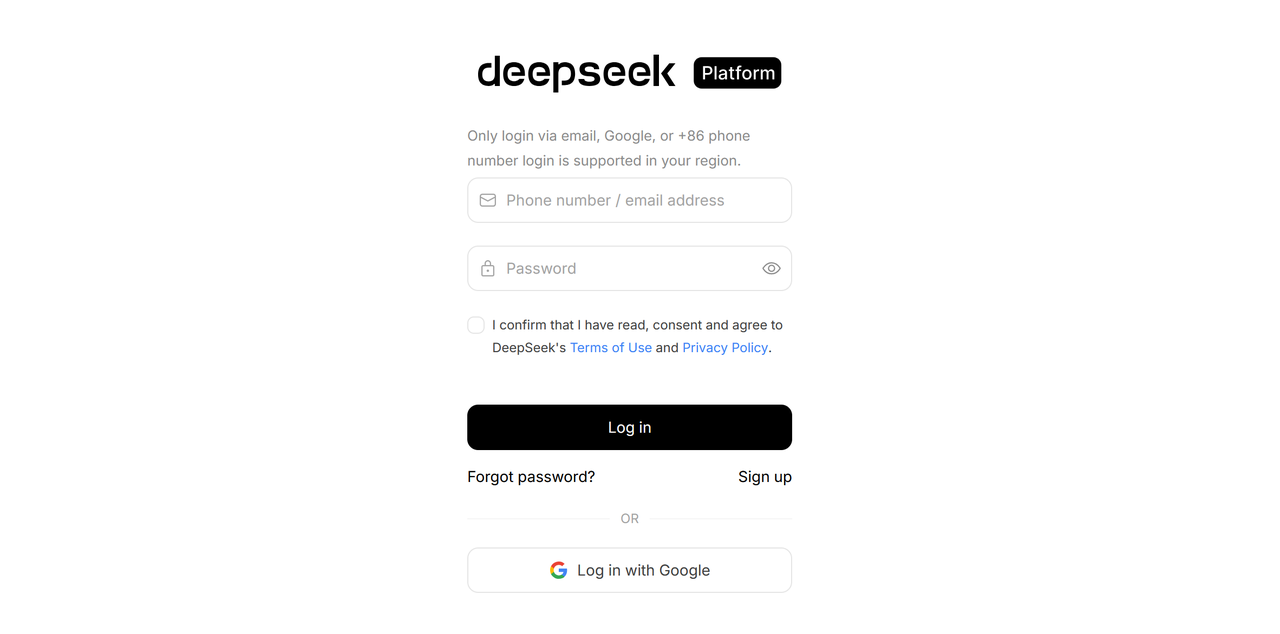
Login to Deepseek Open Platform
First, log in to the Deepseek Open Platform to obtain the API key.
Create and Copy the API Key
On the left sidebar of the Deepseek Open Platform, find the "API Keys" section. Click on it to create an API key. Once created, copy this key and store it in a secure location that only you have access to.
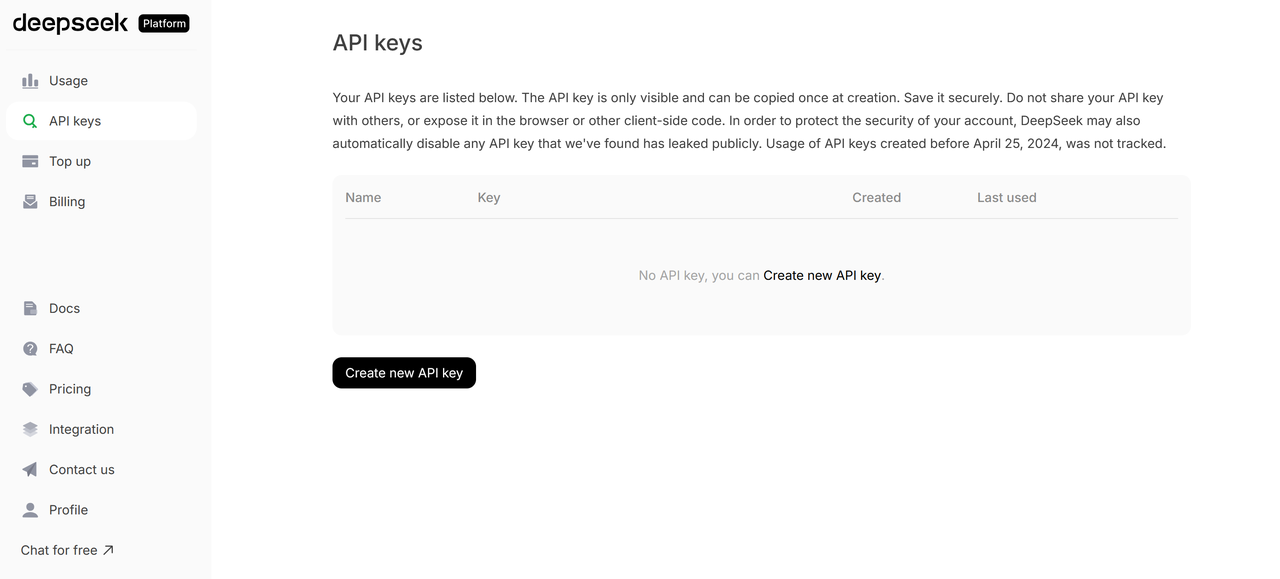
Please keep this API key in a safe and easily accessible place. For security reasons, you will not be able to view it again through the Deepseek Open Platform interface. If you lose this key, you will need to create a new one.
Calling Deepseek API
Once you have the API key, you can begin making API calls. The official Deepseek API documentation is available here: https://api-docs.deepseek.com/.
Below, we will use Apidog to test the API and stream the messages returned by the AI model.
Or output the entire response.
model='deepseek-chat'.You can invoke DeepSeek-R1 by specifying
model='deepseek-reasoner'.
If you haven't used Apidog yet, we highly recommend it. It is an integrated collaboration platform that combines API documentation, debugging, design, testing, mock, and automated testing all in one. With Apidog’s user-friendly interface, you can easily test and manage your DeepSeek API. Use the out-of-box DeeepSeek API in Apidog to get started quickly.

Set Up API Key
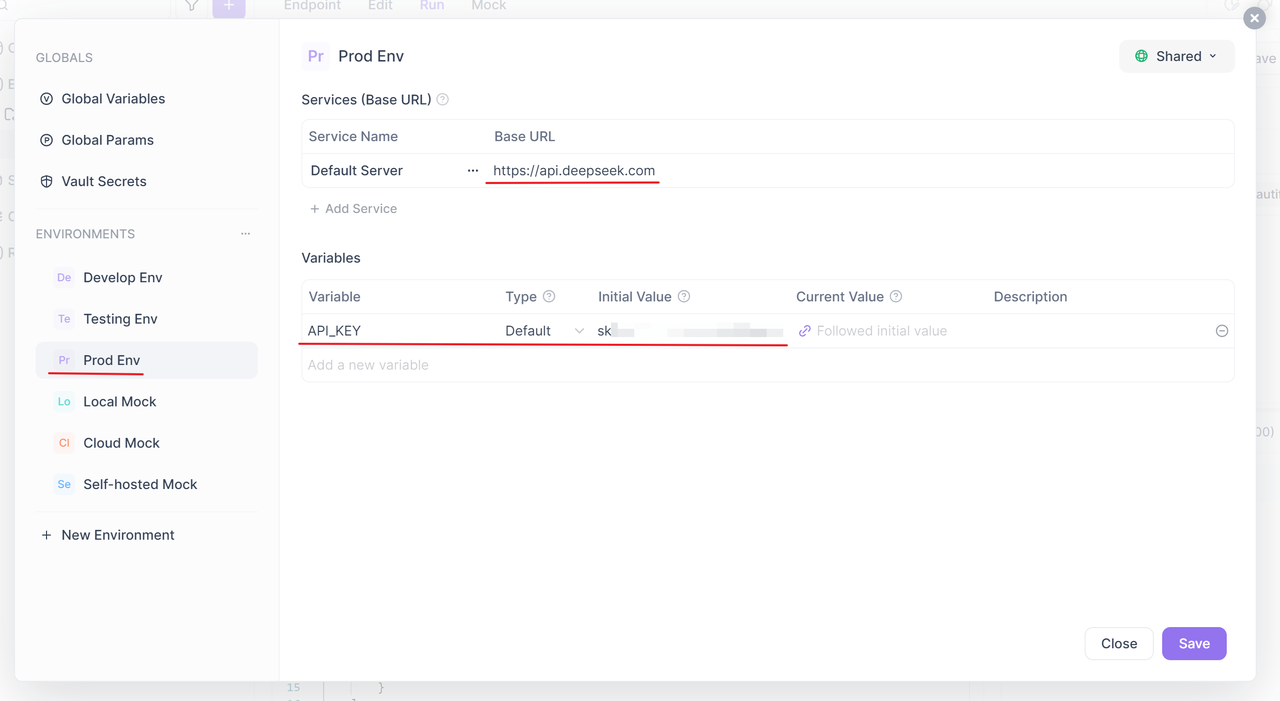
Log in to Apidog and create a new HTTP project. After that, go to the "Environment Management" section in the upper-right corner of the project. Click on "Prod Env" and in the Service Base URL field, enter https://api.deepseek.com. Then, add an environment variable named API_KEY with the value of the Deepseek API key you created earlier. After adding, save the changes.
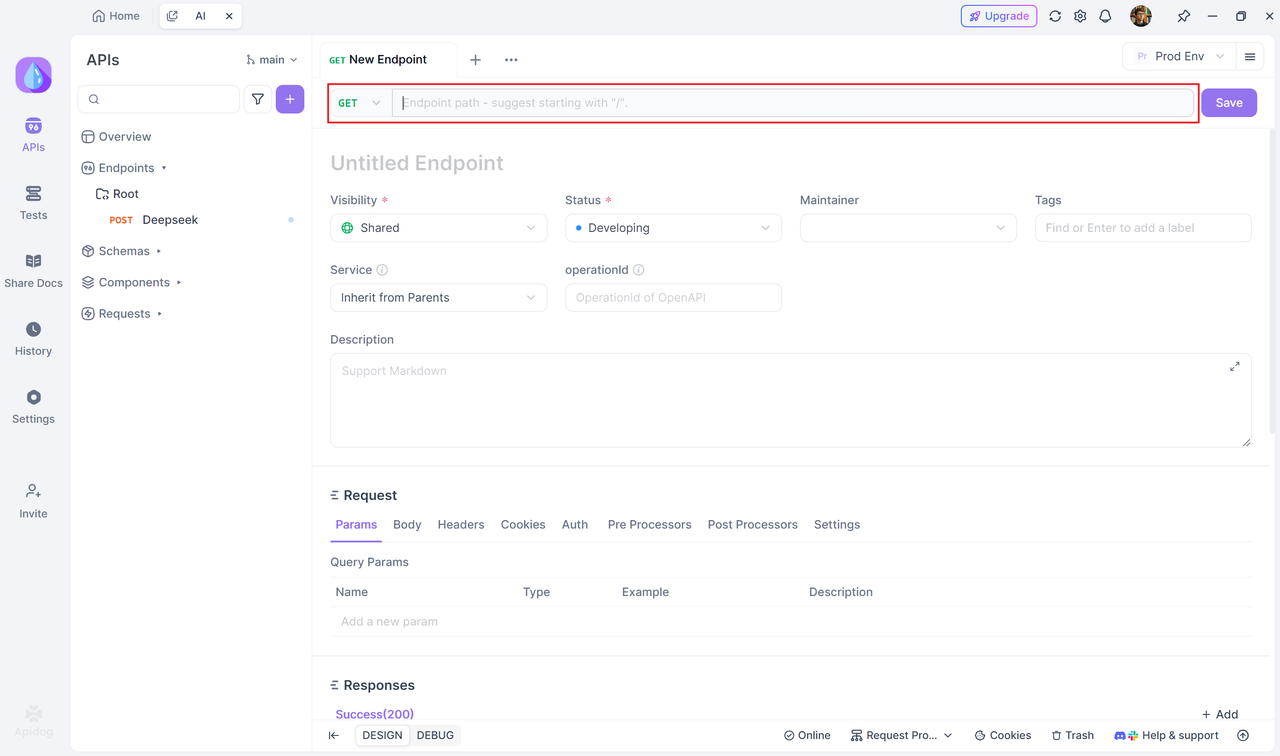
Create a New Endpoint
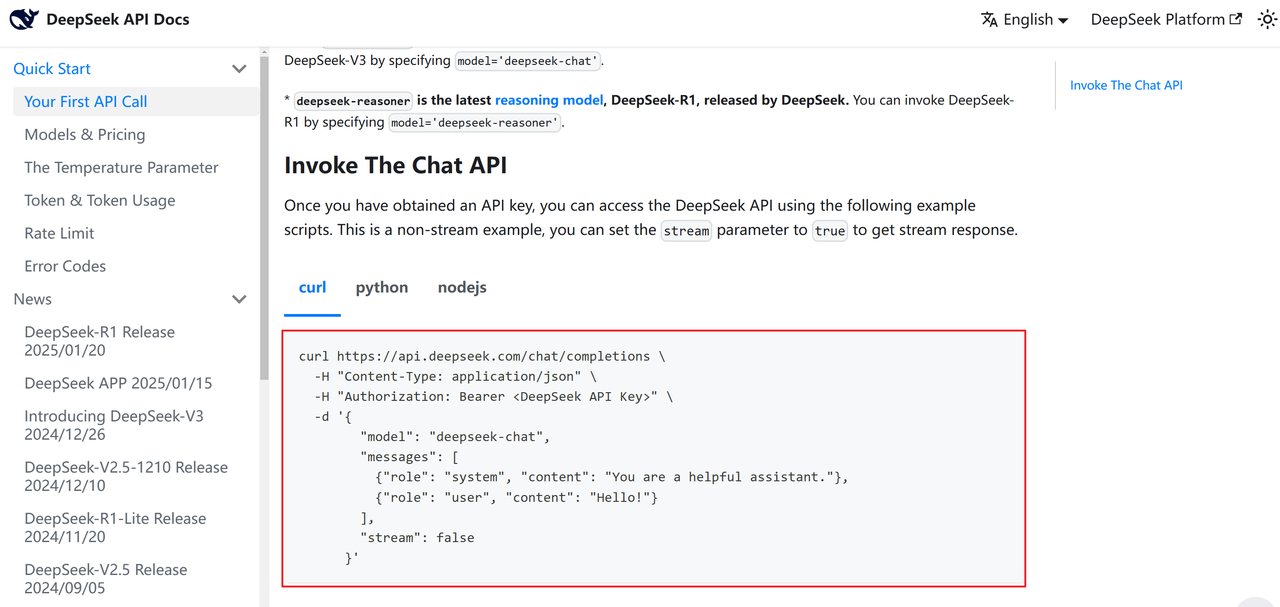
Once the API key is set up, create a new endpoint in your project. Then, copy the cURL command for the conversation API from the Deepseek API documentation.
Go back to Apidog, and simply paste the cURL directly into the endpoint path by pressing "Ctrl + V." Apidog will automatically parse the cURL.
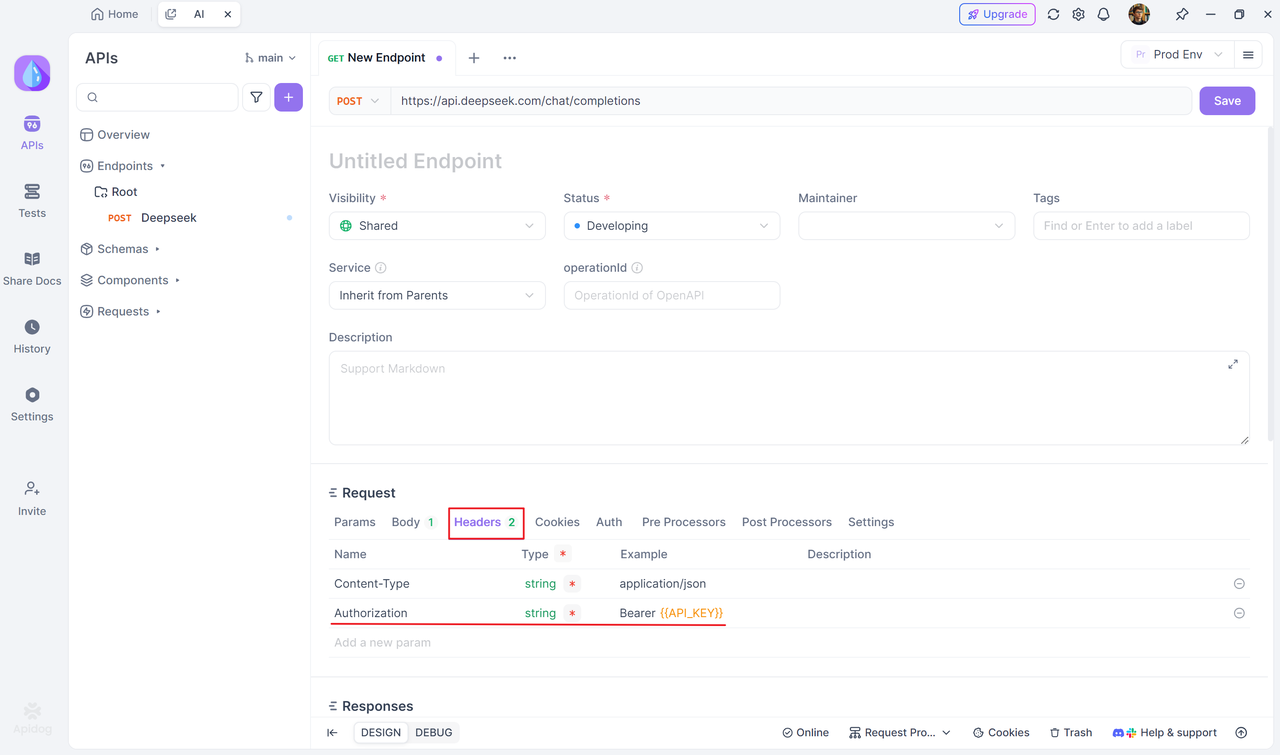
In the parsed endpoint, click on "Headers" and modify the Authorization parameter. Change its value to Bearer {{API_KEY}}, so that the API request will include the API key stored in the environment variable.
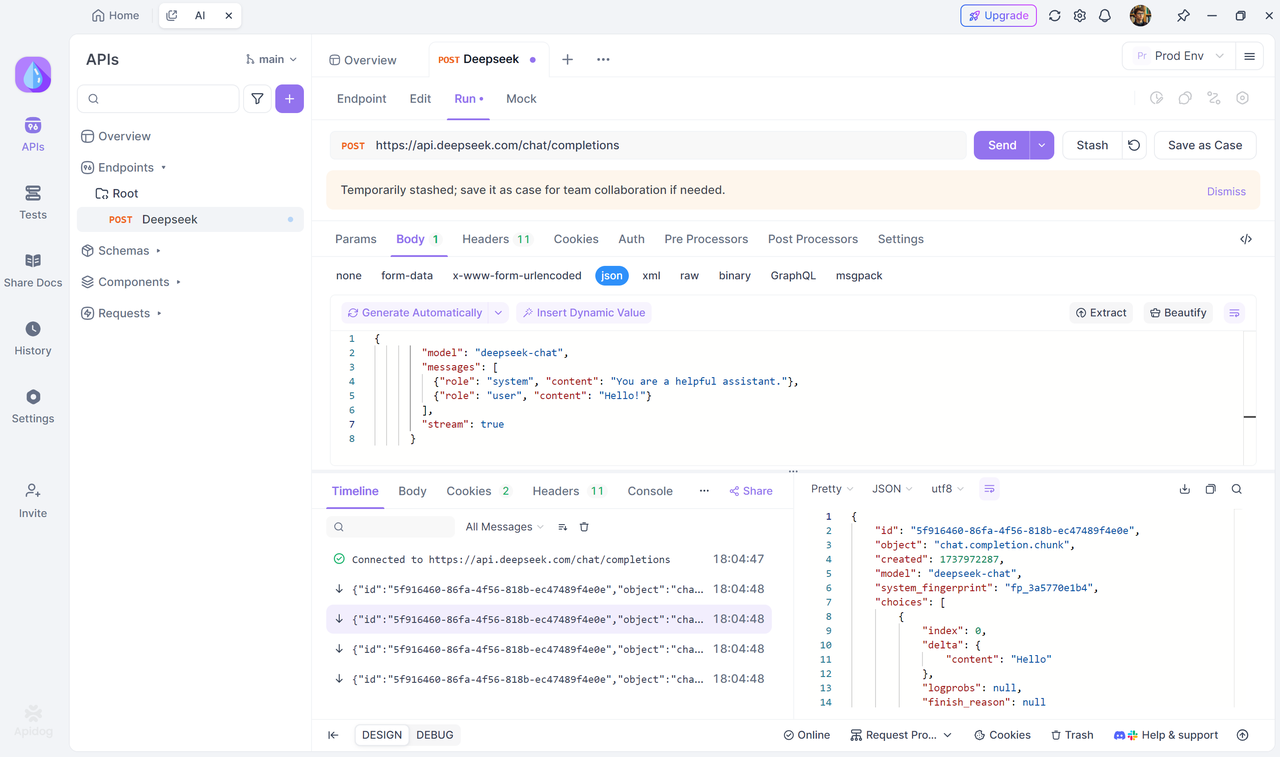
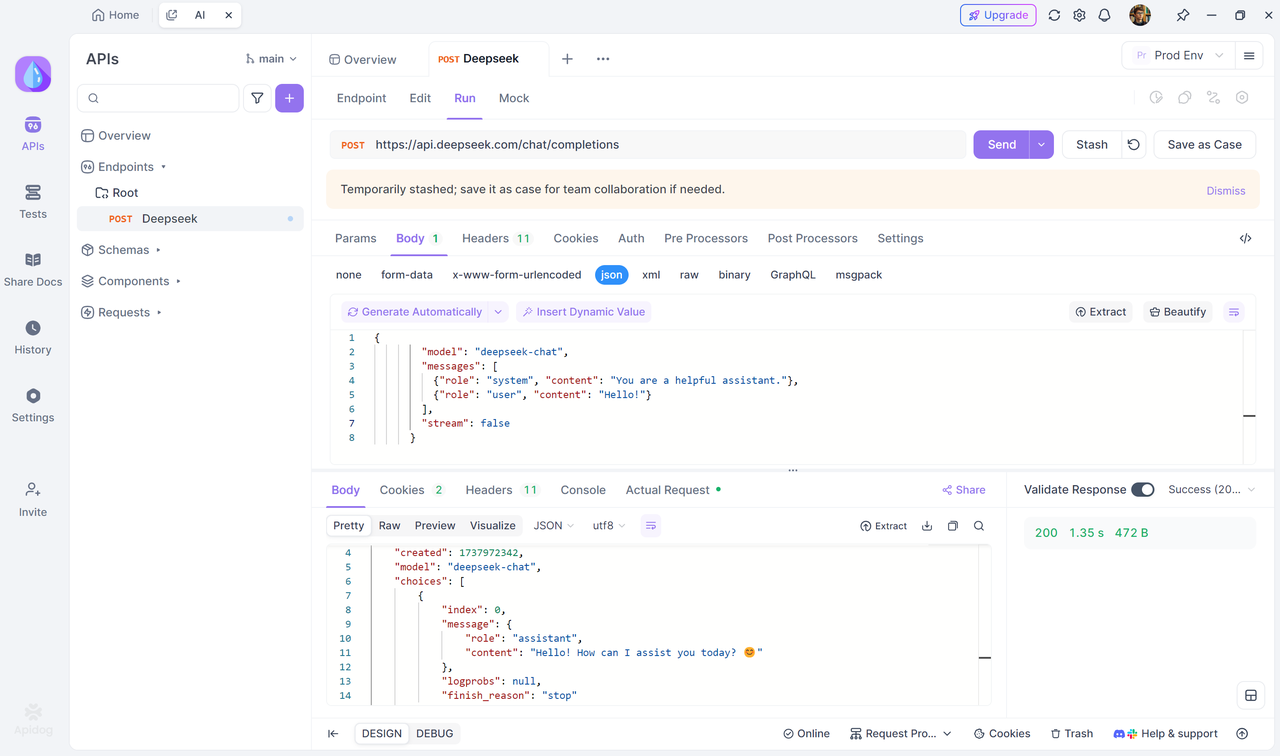
Debugging the Endpoint
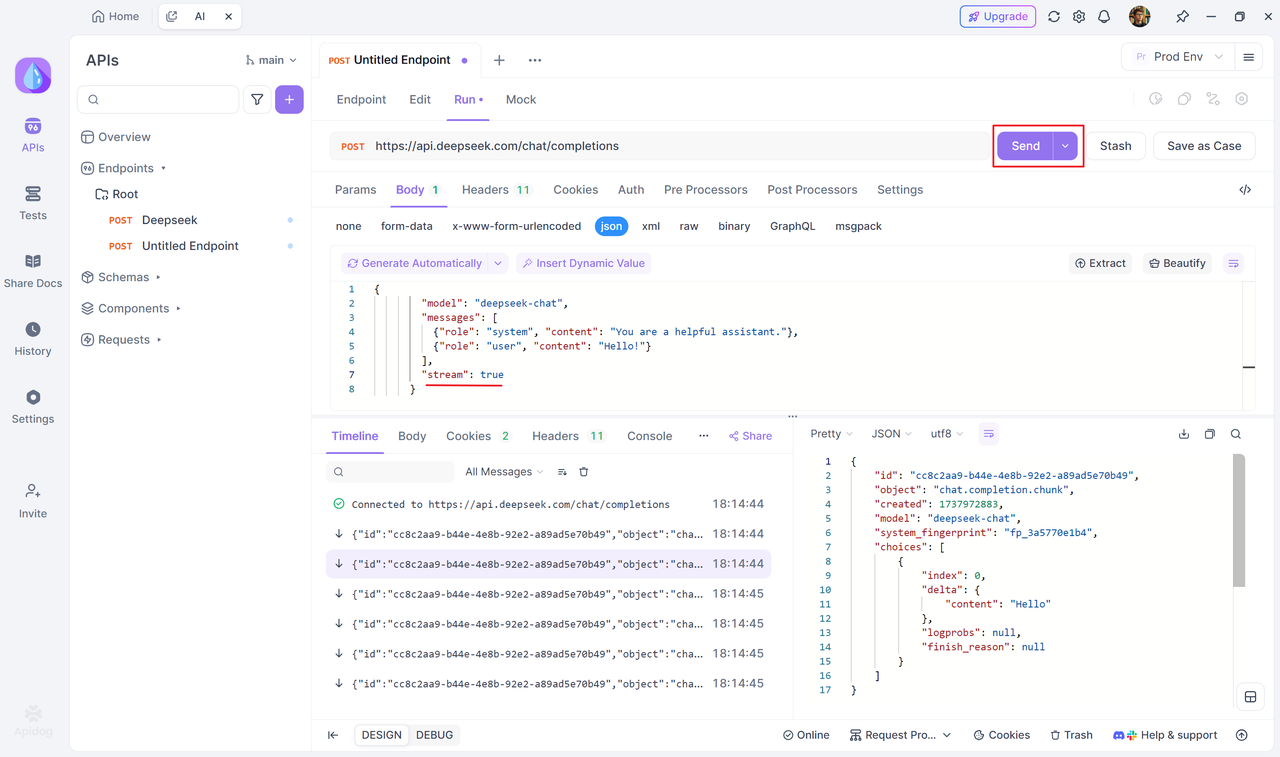
Switch the environment to "Prod Env" in the upper-right corner under "Environment Management." Then, click the "Send" button to send the request. You will receive the response from the endpoint. By modifying the content of the messages in the Body, you can simulate different conversations.
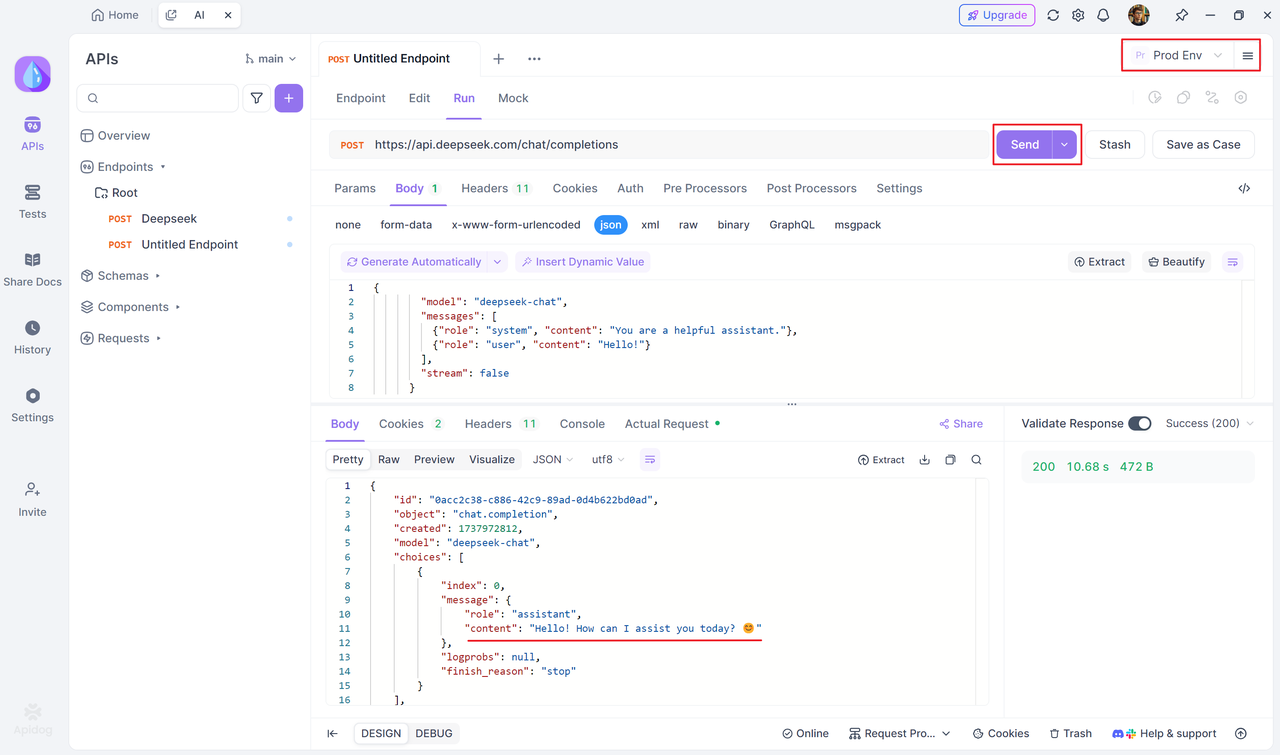
To enable streaming output, set the stream value to true.
model='deepseek-chat'.You can invoke DeepSeek-R1 by specifying
model='deepseek-reasoner'.
Summary
After logging into the Deepseek Open Platform, create an API key and save it in a secure location. By integrating Deepseek API with Apidog, you can quickly complete API debugging. After configuring the environment variables, import the cURL provided by Deepseek into Apidog and set the Authorization to Bearer {{API_KEY}}. Then, switch to the production environment to send requests and modify the parameters as needed to enable conversations. Streaming or full output is supported, improving development efficiency.


