
DeepSeek is a powerful AI model that provides advanced natural language processing capabilities. With the latest DeepSeek V3, you can access high-quality AI-driven chat responses, making it a great choice for various applications such as AI chatbots, automation, and content generation. The best part? You can use the DeepSeek API for free via OpenRouter. Whether you're building a chatbot, automating tasks, or generating creative content, the DeepSeek API can be a game-changer for your applications.
In this detailed guide, we’ll take you through every step you need to get started with the DeepSeek API, including:
- How to obtain an OpenRouter API key and set up your environment.
- How to make API requests in Python, one of the easiest ways to integrate DeepSeek into your projects.
- How to use the DeepSeek API with VS Code to build and test your Python applications.
- How to use Apidog, a powerful API management tool, to integrate and test DeepSeek API with ease.
By the end of this guide, you’ll have the tools and knowledge to integrate DeepSeek into your projects efficiently and start leveraging AI for a variety of use cases.
Getting Started with the DeepSeek API
Before you can start using DeepSeek in your applications, you'll need to get access to the API. Fortunately, OpenRouter makes it easy for developers to access DeepSeek for free. The process is straightforward, and we’ll walk you through it.
Step 1: Get Your OpenRouter API Key
To interact with the DeepSeek API, you’ll first need an API key from OpenRouter, which is a platform that provides an OpenAI-compatible API endpoint. Here’s how you can get it:
- Visit the OpenRouter website at https://www.openrouter.ai.
- Sign up or log in to your OpenRouter account.
- Once logged in, navigate to the API section of the dashboard.
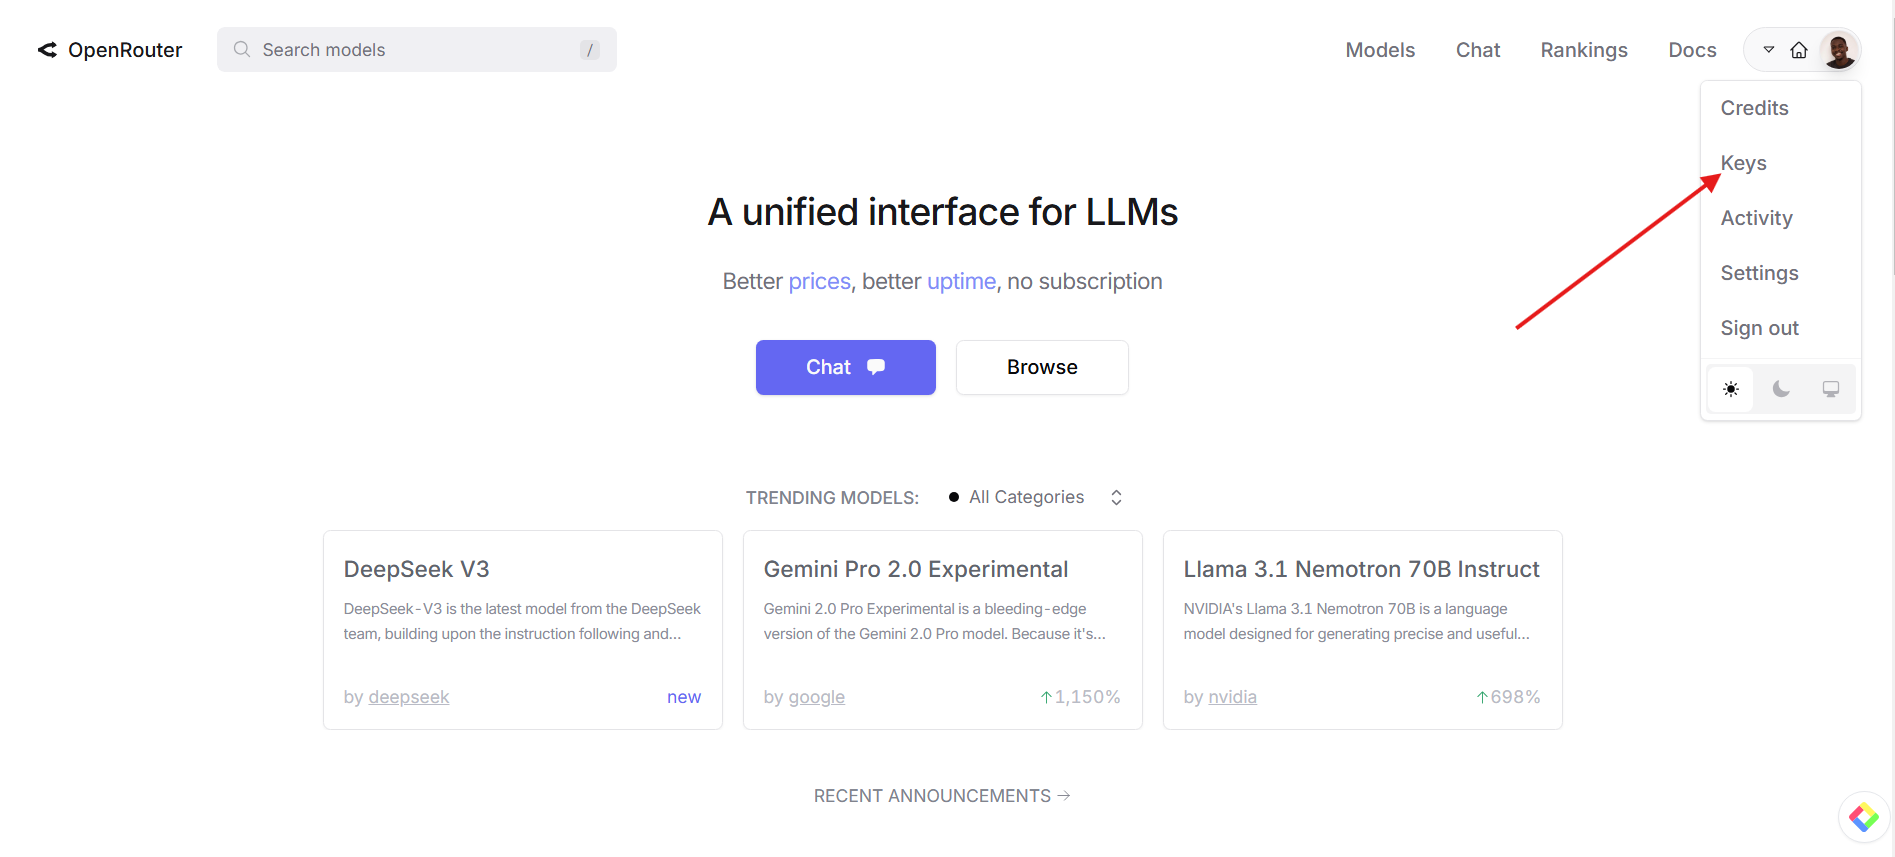
4. Click on the Create Key button. This will generate a unique API key that you’ll need to authenticate your requests.
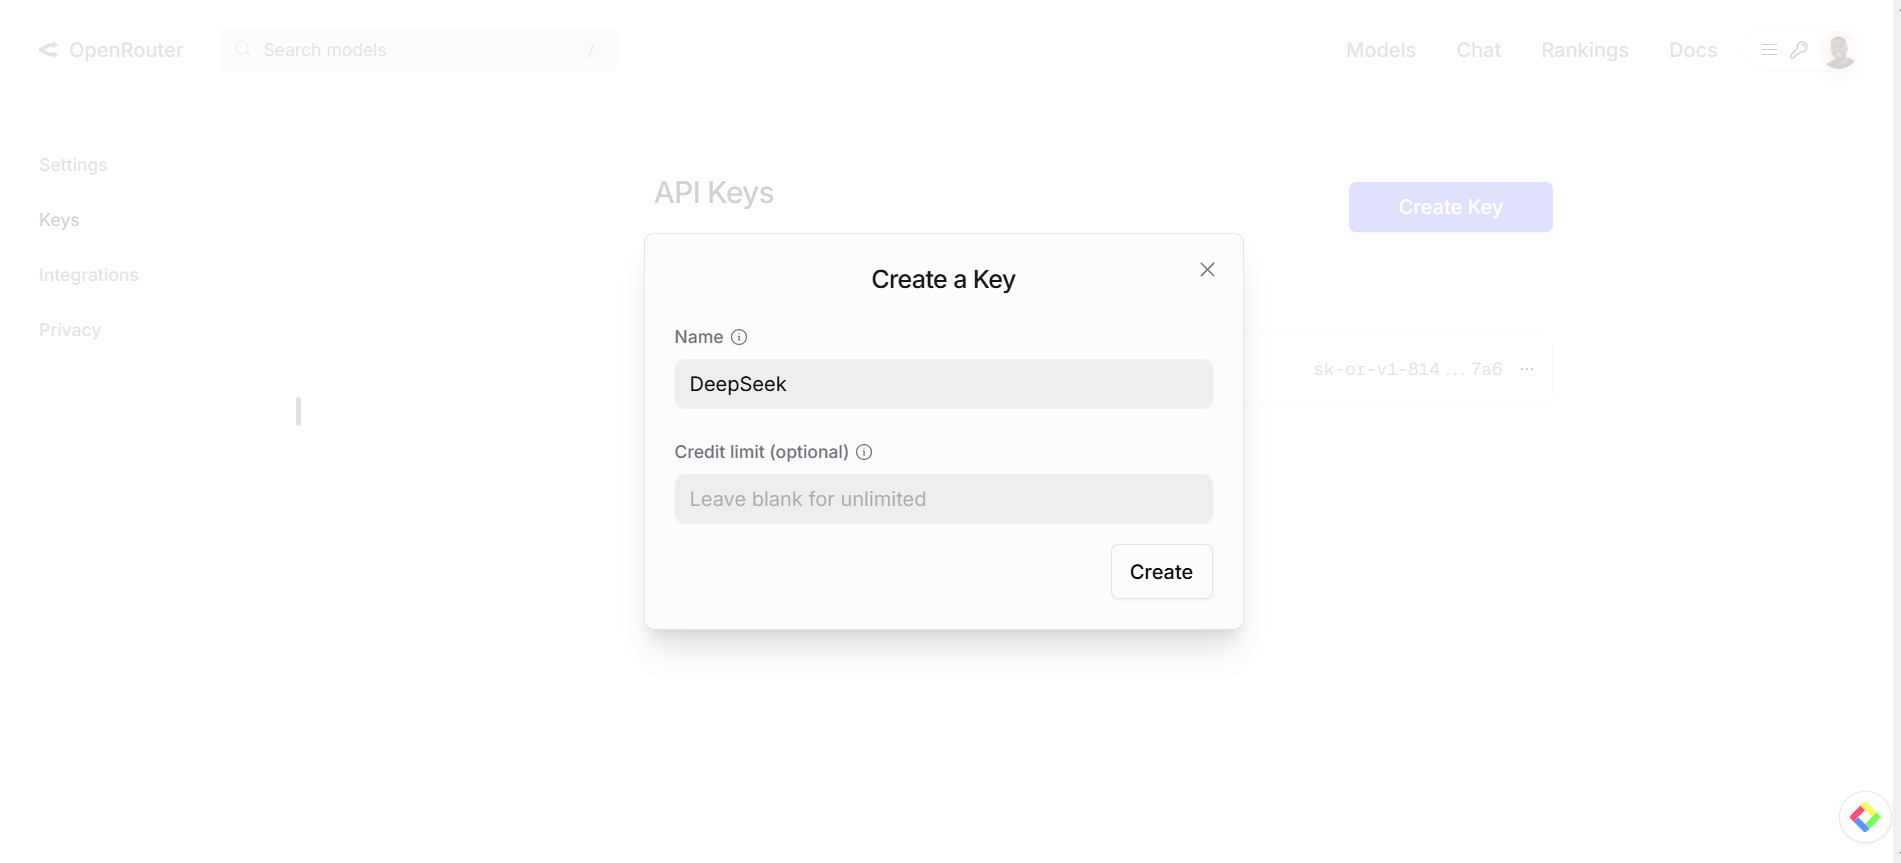
5. Copy the API key and save it in a secure location, as you'll need it for all future API requests.
Step 2: Install Required Libraries
To interact with the API in Python, you’ll need the requests library, which simplifies sending HTTP requests. If you don’t have it installed yet, you can easily do so by running the following command in your terminal:
pip install requests
This will install the requests library, which is necessary for making API calls in Python. You can also install additional libraries later if your project requires them.
Making API Requests with Python
Now that you have your API key and necessary dependencies, you’re ready to start making API requests to DeepSeek. Here’s a simple example of how to do that in Python.
Step 1: Create Your Python Script
Open your code editor (such as Visual Studio Code) and create a new Python file. Let’s name it deepseek.py. In this file, you’ll write the code to send a request to the DeepSeek API.
Step 2: Add the Code
Below is the basic Python script that sends a request to the DeepSeek API using the requests library.
import requests

# Replace with your OpenRouter API key
API_KEY = 'your_openrouter_api_key'
API_URL = 'https://openrouter.ai/api/v1/chat/completions'

# Define the headers for the API request
headers = {
    'Authorization': f'Bearer {API_KEY}',
    'Content-Type': 'application/json'
}

# Define the request payload (data)
data = {
    "model": "deepseek/deepseek-chat:free",
    "messages": [{"role": "user", "content": "What is the meaning of life?"}]
}

# Send the POST request to the DeepSeek API
response = requests.post(API_URL, json=data, headers=headers)

# Check if the request was successful
if response.status_code == 200:
    print("API Response:", response.json())
else:
    print("Failed to fetch data from API. Status Code:", response.status_code)
Step 3: Run the Script
Once you’ve added the code, save the file and open your terminal or command prompt. Navigate to the directory where your deepseek.py file is located, and run the script using:
python deepseek.py
If everything is set up correctly, you should see a response from DeepSeek in your terminal.
Using DeepSeek API with Apidog
Apidog is a popular API management and testing tool that makes it easy to manage, test, and debug APIs. If you prefer a GUI-based approach to testing your API requests, Apidog is a great tool to use. Here's how you can integrate the DeepSeek API with Apidog.

Step 1: Install Apidog
- Go to Apidog’s website and sign up for a free account.
- Download and install Apidog on your system.
Step 2: Create a New API Request
Once you've installed Apidog, follow these steps to test the DeepSeek API:
- Open Apidog and create a new API Request.
- Set the HTTP method to POST.
- In the URL field, enter the API endpoint:
https://openrouter.ai/api/v1/chat/completions.
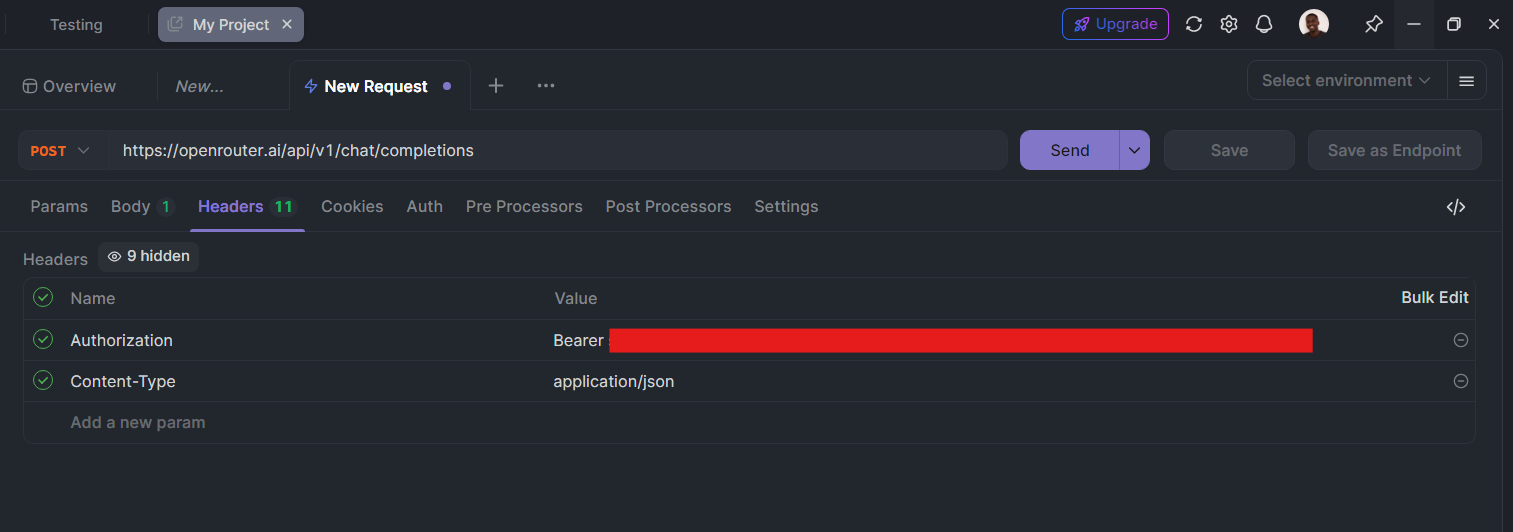
Step 3: Configure Headers
In the Headers section, add the following headers:
Authorization:Bearer your_openrouter_api_keyContent-Type:application/json
Step 4: Add the Request Body
In the Body section, select the JSON format and add the following data:
{
  "model": "deepseek/deepseek-chat:free",
  "messages": [{"role": "user", "content": "What life after death?"}]
}

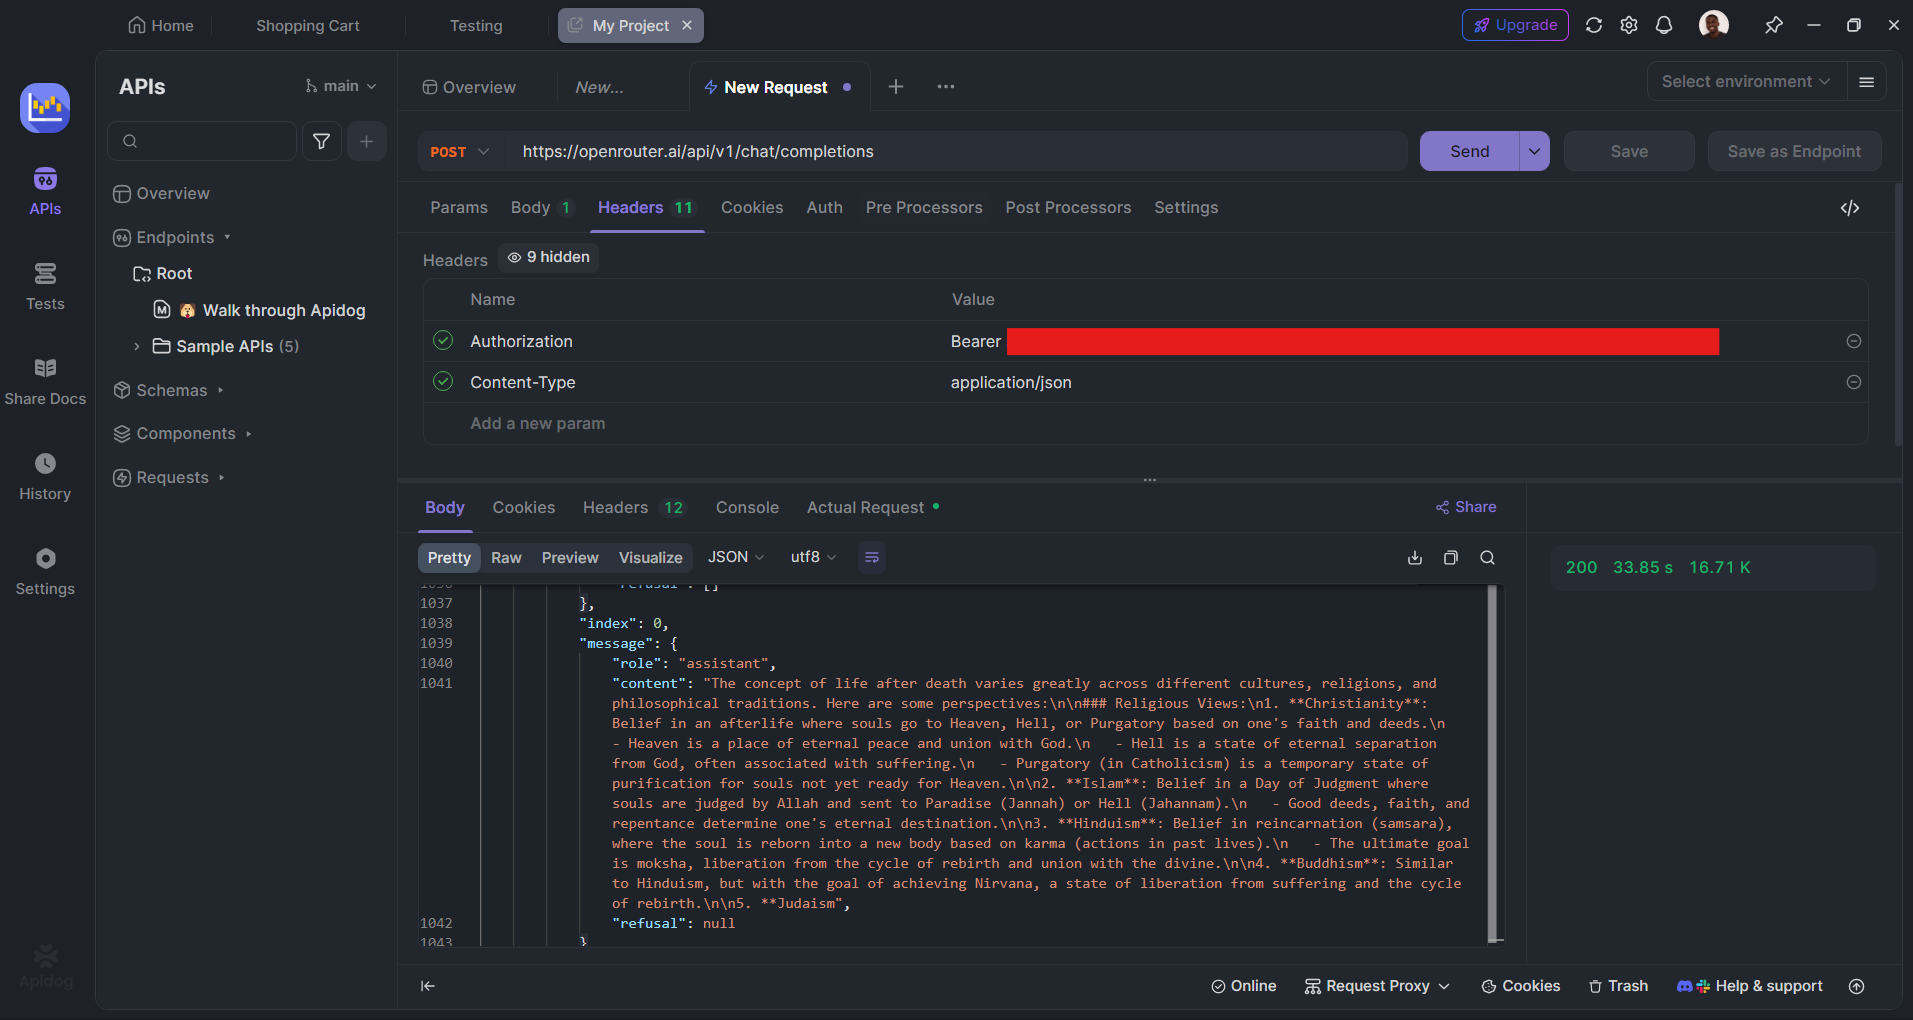
Step 5: Send the Request
Click Send to make the request. If everything is configured correctly, you’ll receive a response from DeepSeek, and you can analyze the results directly within Apidog.
Using DeepSeek API in Visual Studio Code (VS Code)

Visual Studio Code (VS Code) is an excellent choice for Python development due to its rich features and extensions. Here's how to set up your environment in VS Code to use the DeepSeek API.
Step 1: Install VS Code and Python
If you haven't already, you’ll need to download and install both VS Code and Python:
- Download VS Code from here.
- Install Python from python.org.
Step 2: Install the Python Extension in VS Code
Once you have VS Code installed, open it and follow these steps:
- Press
Ctrl+Shift+Xto open the Extensions marketplace. - In the search bar, type Python and install the official Python extension from Microsoft.
- This extension will make coding with Python much easier, providing features like syntax highlighting, code linting, and IntelliSense.
Step 3: Create and Run Your Python Script
- Open the folder where you want to save your Python script in VS Code.
- Create a new file and name it
deepseek.py. - Copy and paste the Python code from Step 2.
- Open the terminal in VS Code (press
Ctrl + ~), and run the script by typing:
python deepseek.py
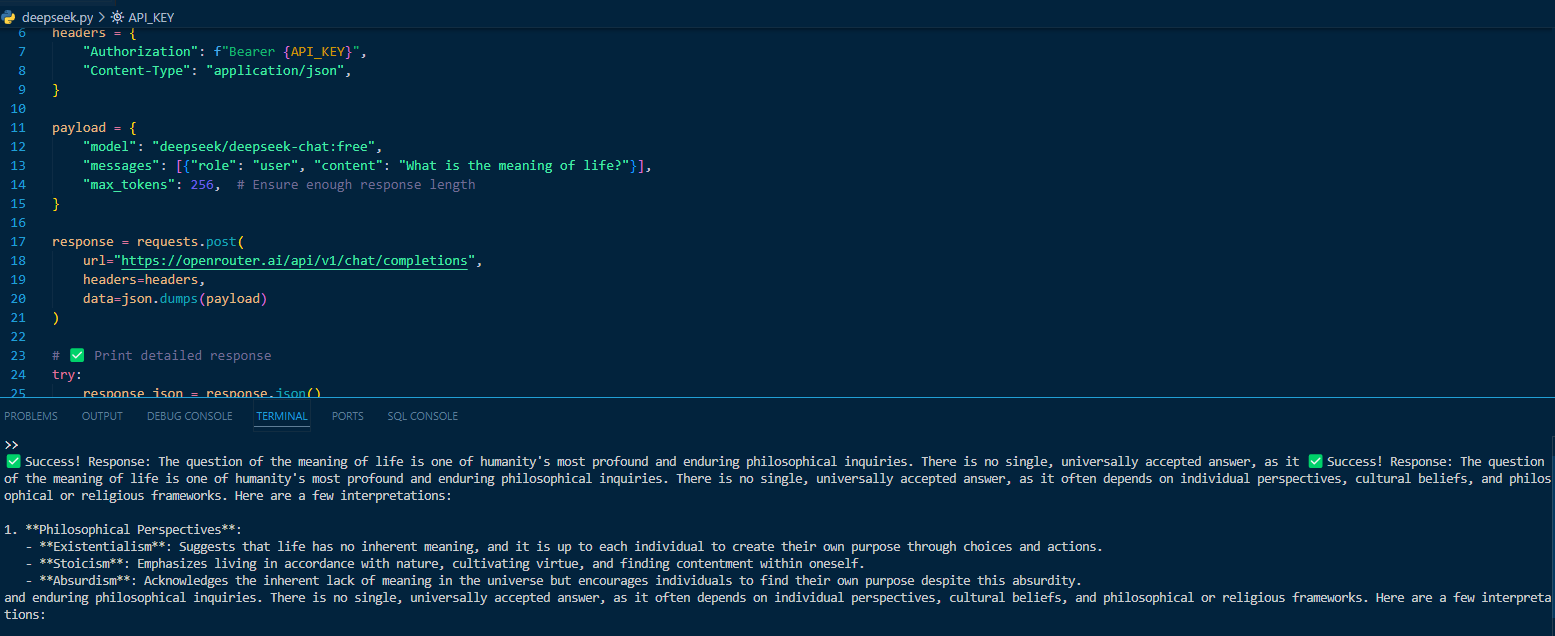
You should see the response from DeepSeek in the VS Code terminal.
Conclusion
DeepSeek is a powerful tool for anyone looking to integrate AI-driven natural language processing into their applications. With OpenRouter, you can access DeepSeek's capabilities for free and start building AI-powered solutions right away.
In this guide, we’ve covered:
- How to get an API key from OpenRouter and set up your environment.
- How to send API requests using Python.
- How to work with DeepSeek in Visual Studio Code.
- How to test and manage API requests with Apidog.
By following these steps, you’ll be able to integrate DeepSeek seamlessly into your projects and unlock the full potential of AI-driven chat responses, automation, and content generation.


