
As a seasoned QA engineer who has seen firsthand how rapid software updates and increasingly complex systems can pose significant challenges for testing teams. That's why I'm excited to share this step-by-step guide on how to effectively test APIs using Apidog, a powerful API testing tool that can streamline your workflow and improve your testing efficiency.
What is Apidog?
Apidog is a comprehensive automated testing platform designed to streamline API testing processes and improve overall software quality. It offers a range of features that address common challenges in modern software development, particularly in automation testing.

Automation testing features designed to streamline API development and quality assurance processes. Here's an introduction to its key capabilities:
- Visual API Management: Apidog provides an intuitive interface for managing API endpoints, making it easy to organize and maintain your API documentation.
- Automated Test Case Generation: The platform can quickly create test cases that match the core logic of your APIs, saving time in test preparation.
- Drag-and-Drop Test Flow Design: Users can visually arrange API test sequences through a simple drag-and-drop interface, allowing for easy creation of complex test scenarios.
- CI/CD Integration: With embedded commands for CI/CD pipelines, Apidog enables seamless integration into existing development workflows. CLI tools are provided to integrate Apidog's testing capabilities into existing CI/CD workflows.
- Data Synchronization: The platform supports both automatic and manual synchronization between API documentation and test cases, ensuring consistency.
- Scenario Simulation: Advanced test flows can be created using features like grouping, loops, conditionals, and wait times to simulate real-world scenarios.
- External Data Integration: Apidog allows linking to securely isolated data sets, enabling dynamic testing with sensitive information.
- Reusable Scenario Instances: Multiple run configurations can be saved for efficient parameterization and reuse across different test scenarios.
- Visual Reporting: The platform generates comprehensive, exportable test reports for easy analysis of test results.
A Step-by-Step Guide to Test APIs in Apidog
Having just introduced you to one of the most important features in Apidog, automated testing, the next step will be to show you how to execute automated tests in Apidog.
Step 1: Download and Set Up Your Apidog.
Install the Apidog desktop application. Create an account on Apidog's platform.
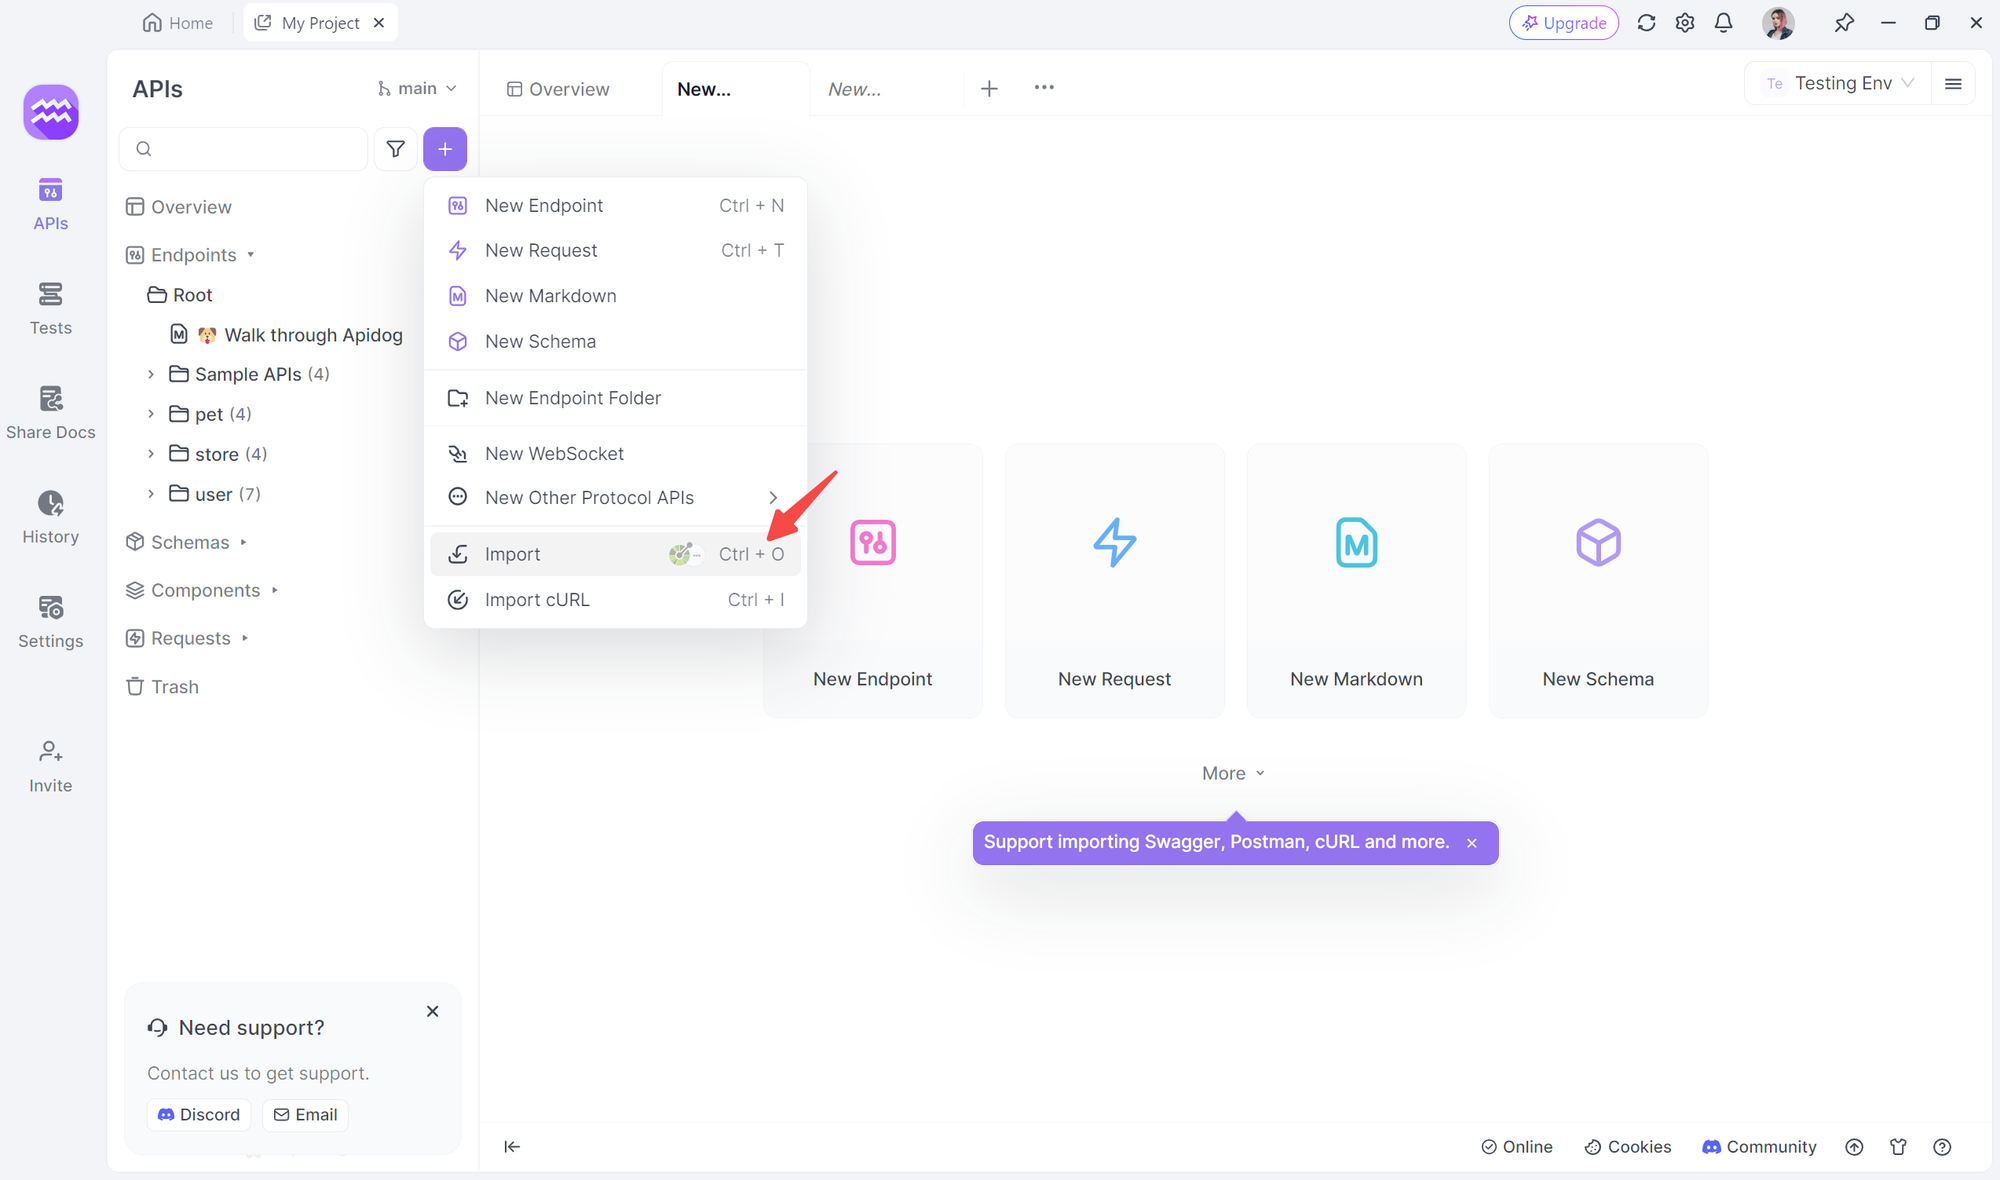
Step 2: Import or Create Your API Documentation
If you have existing Swagger or OpenAPI documentation, import it into Apidog. Alternatively, create new API endpoints directly in Apidog's interface. Organize your APIs into logical groups or projects for easier management.
Step 3: Design Your Test Cases/Create a new test scenario in Apidog.
Add individual API requests to your test scenario. Set up request parameters, headers, and authentication as needed. Define expected responses and add assertions to validate API behavior.

Step 4: Implement Data-Driven Testing
Create a data set with multiple test cases (e.g., CSV or JSON file). Link your data set to your test scenario in Apidog. Use variables to dynamically inject test data into your requests.
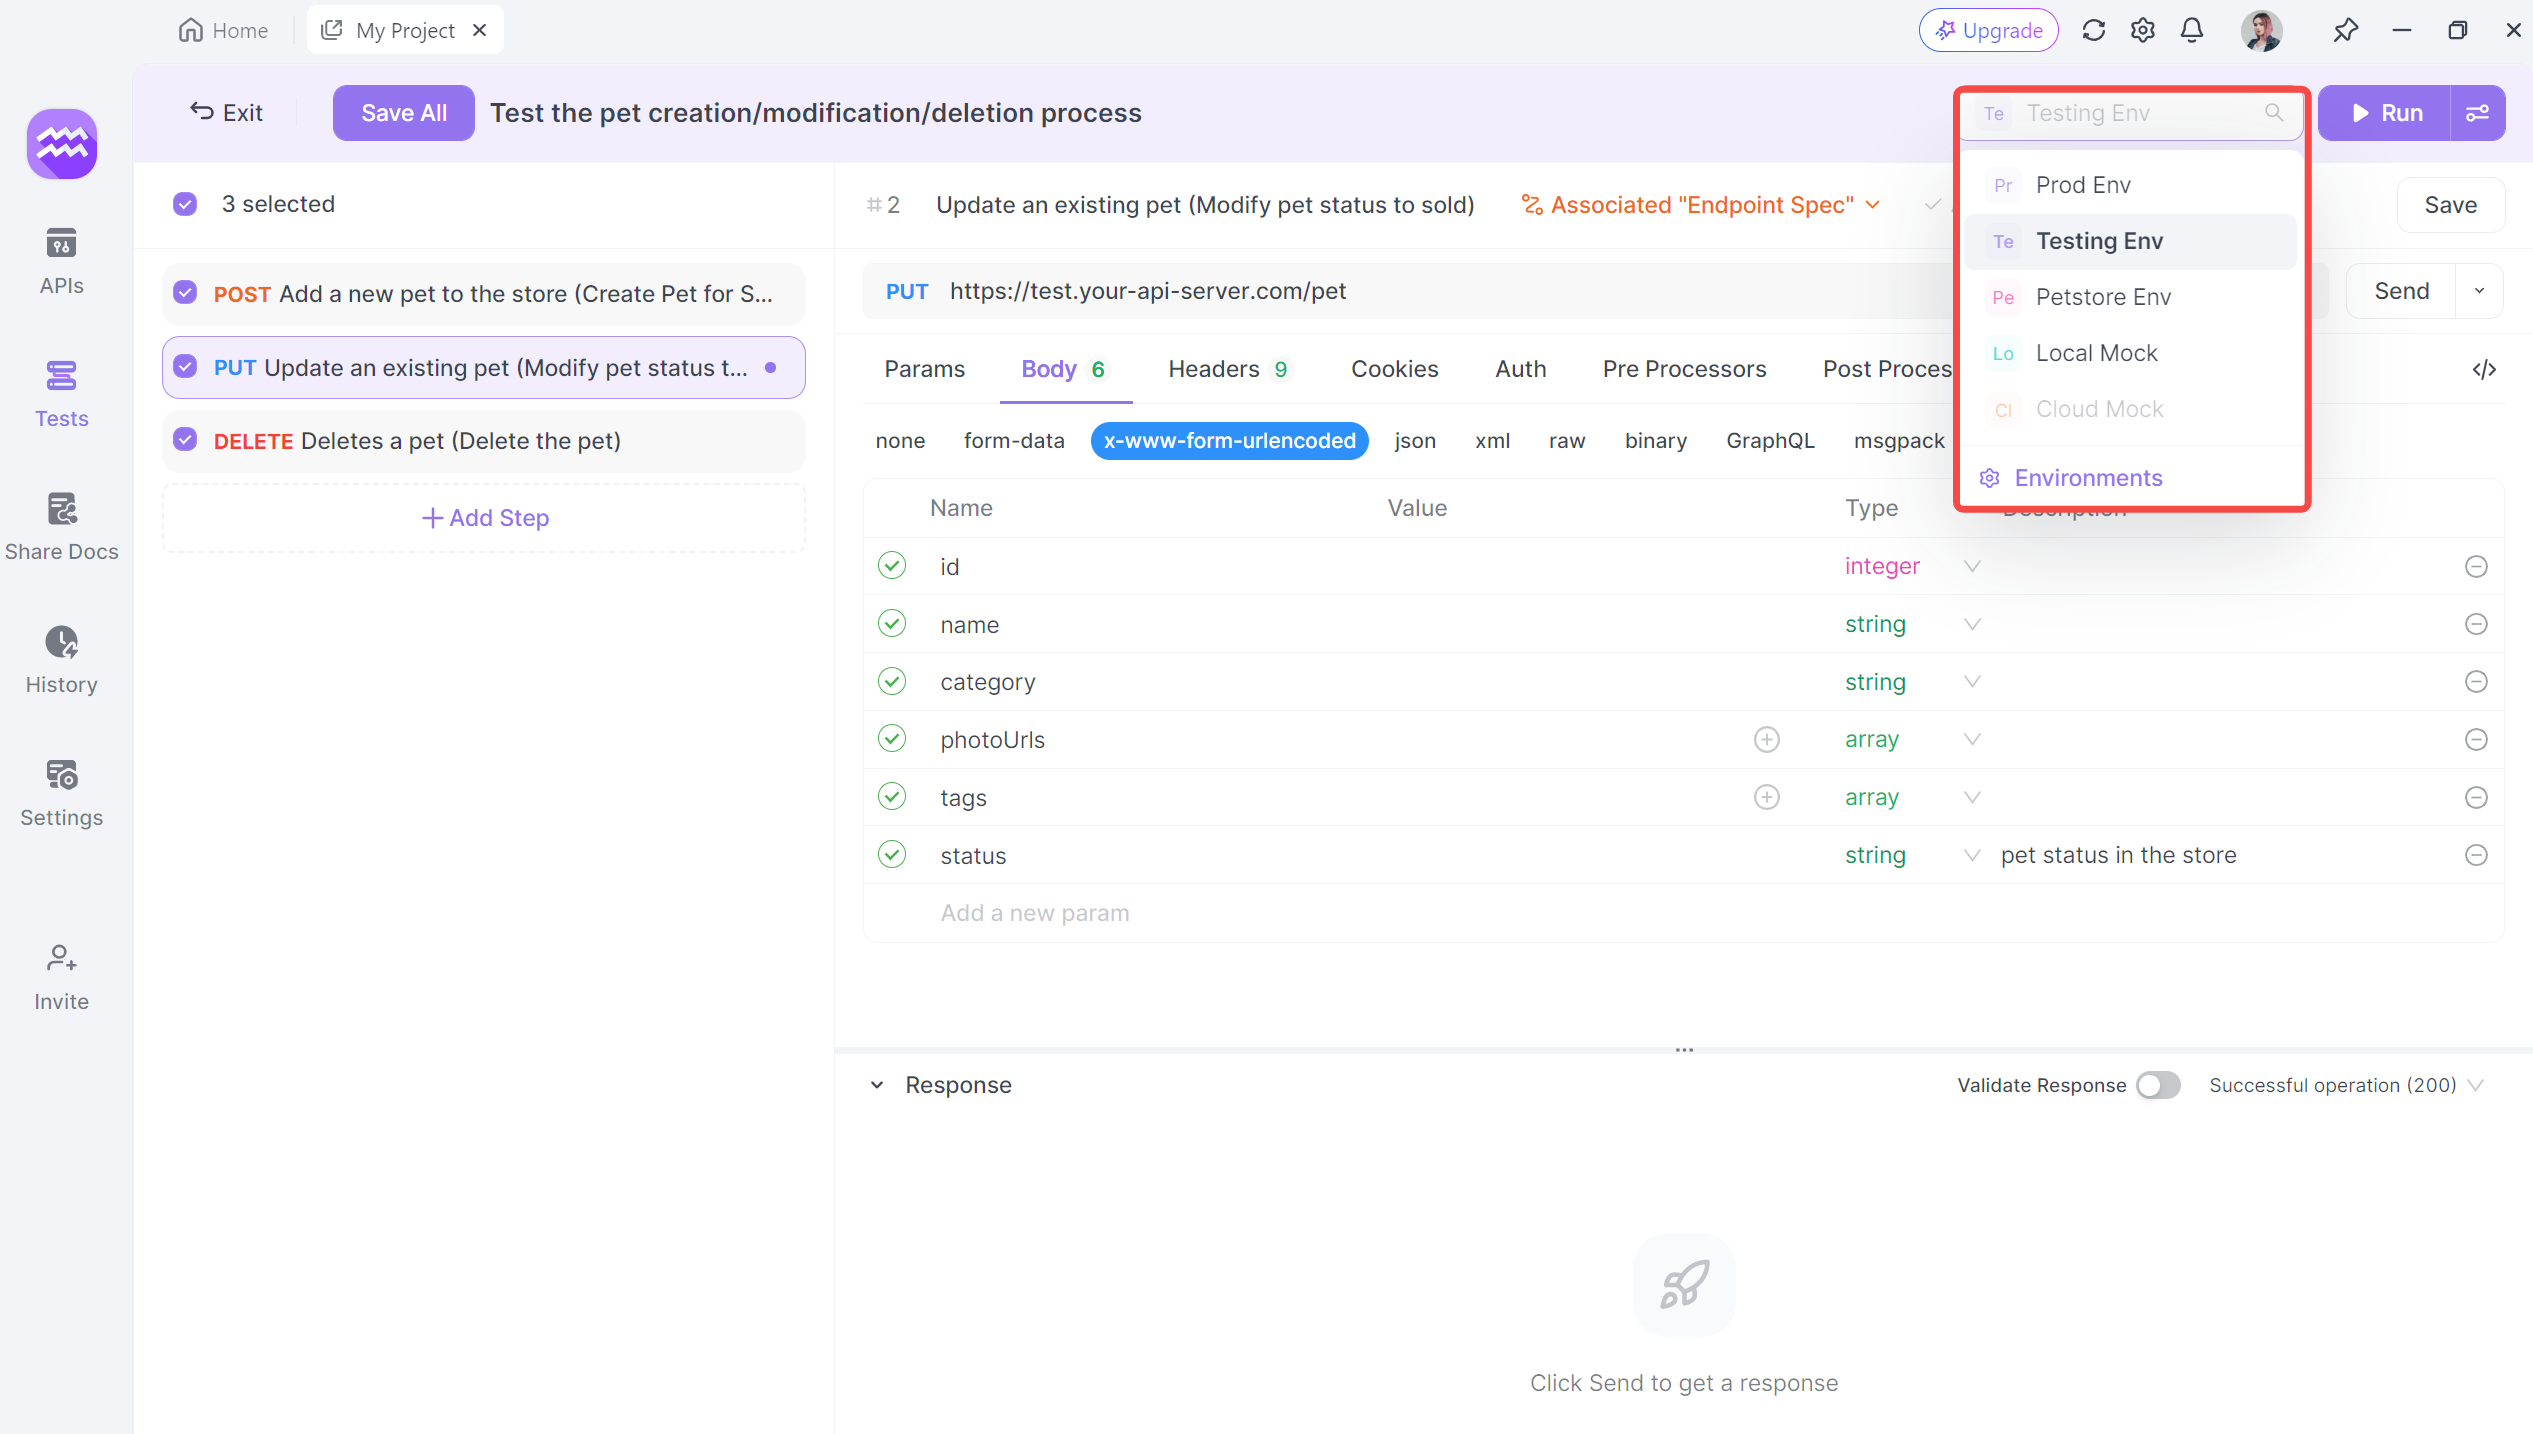
Step 5: Set Up Environment Variables
Create different environments (e.g., development, testing, and production). Define environment-specific variables (e.g., base URLs, API keys). Easily switch between environments for testing.
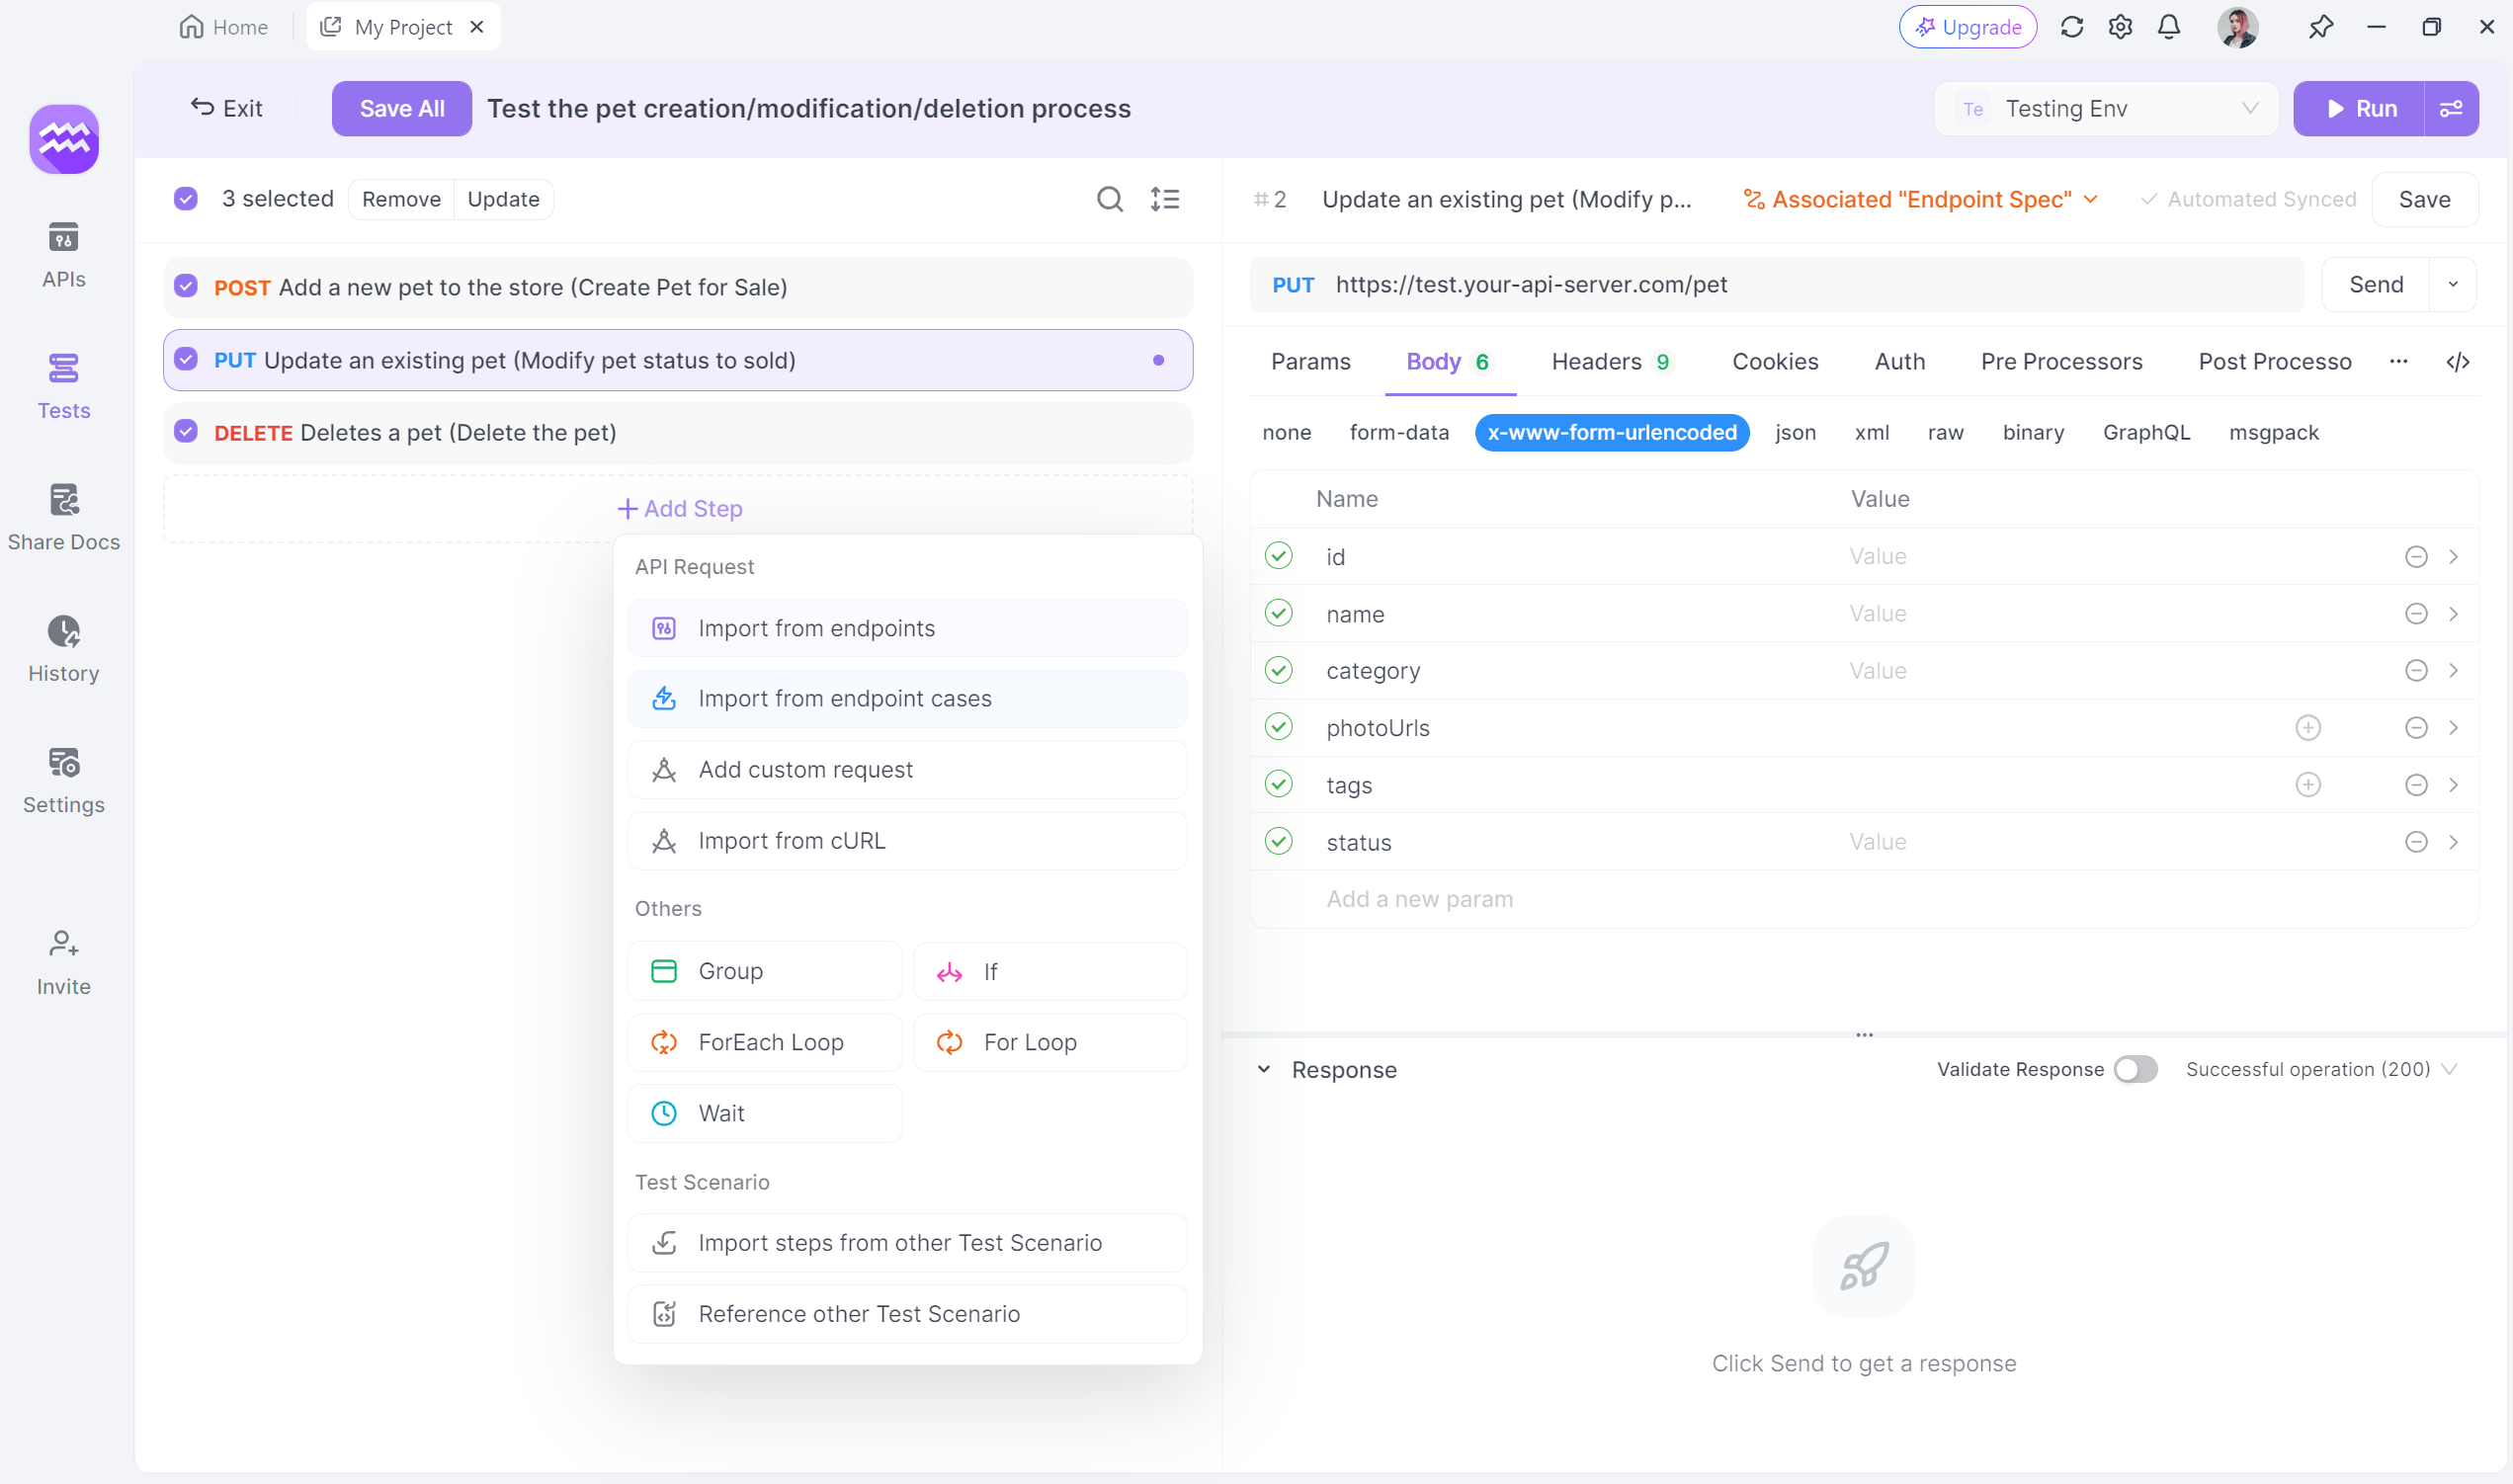
Step 6: Implement Test Flow Control
Use Apidog's flow control features to create realistic user scenarios. Add conditions, loops, and wait times to simulate complex workflows. Group related API calls for better organization and reusability.
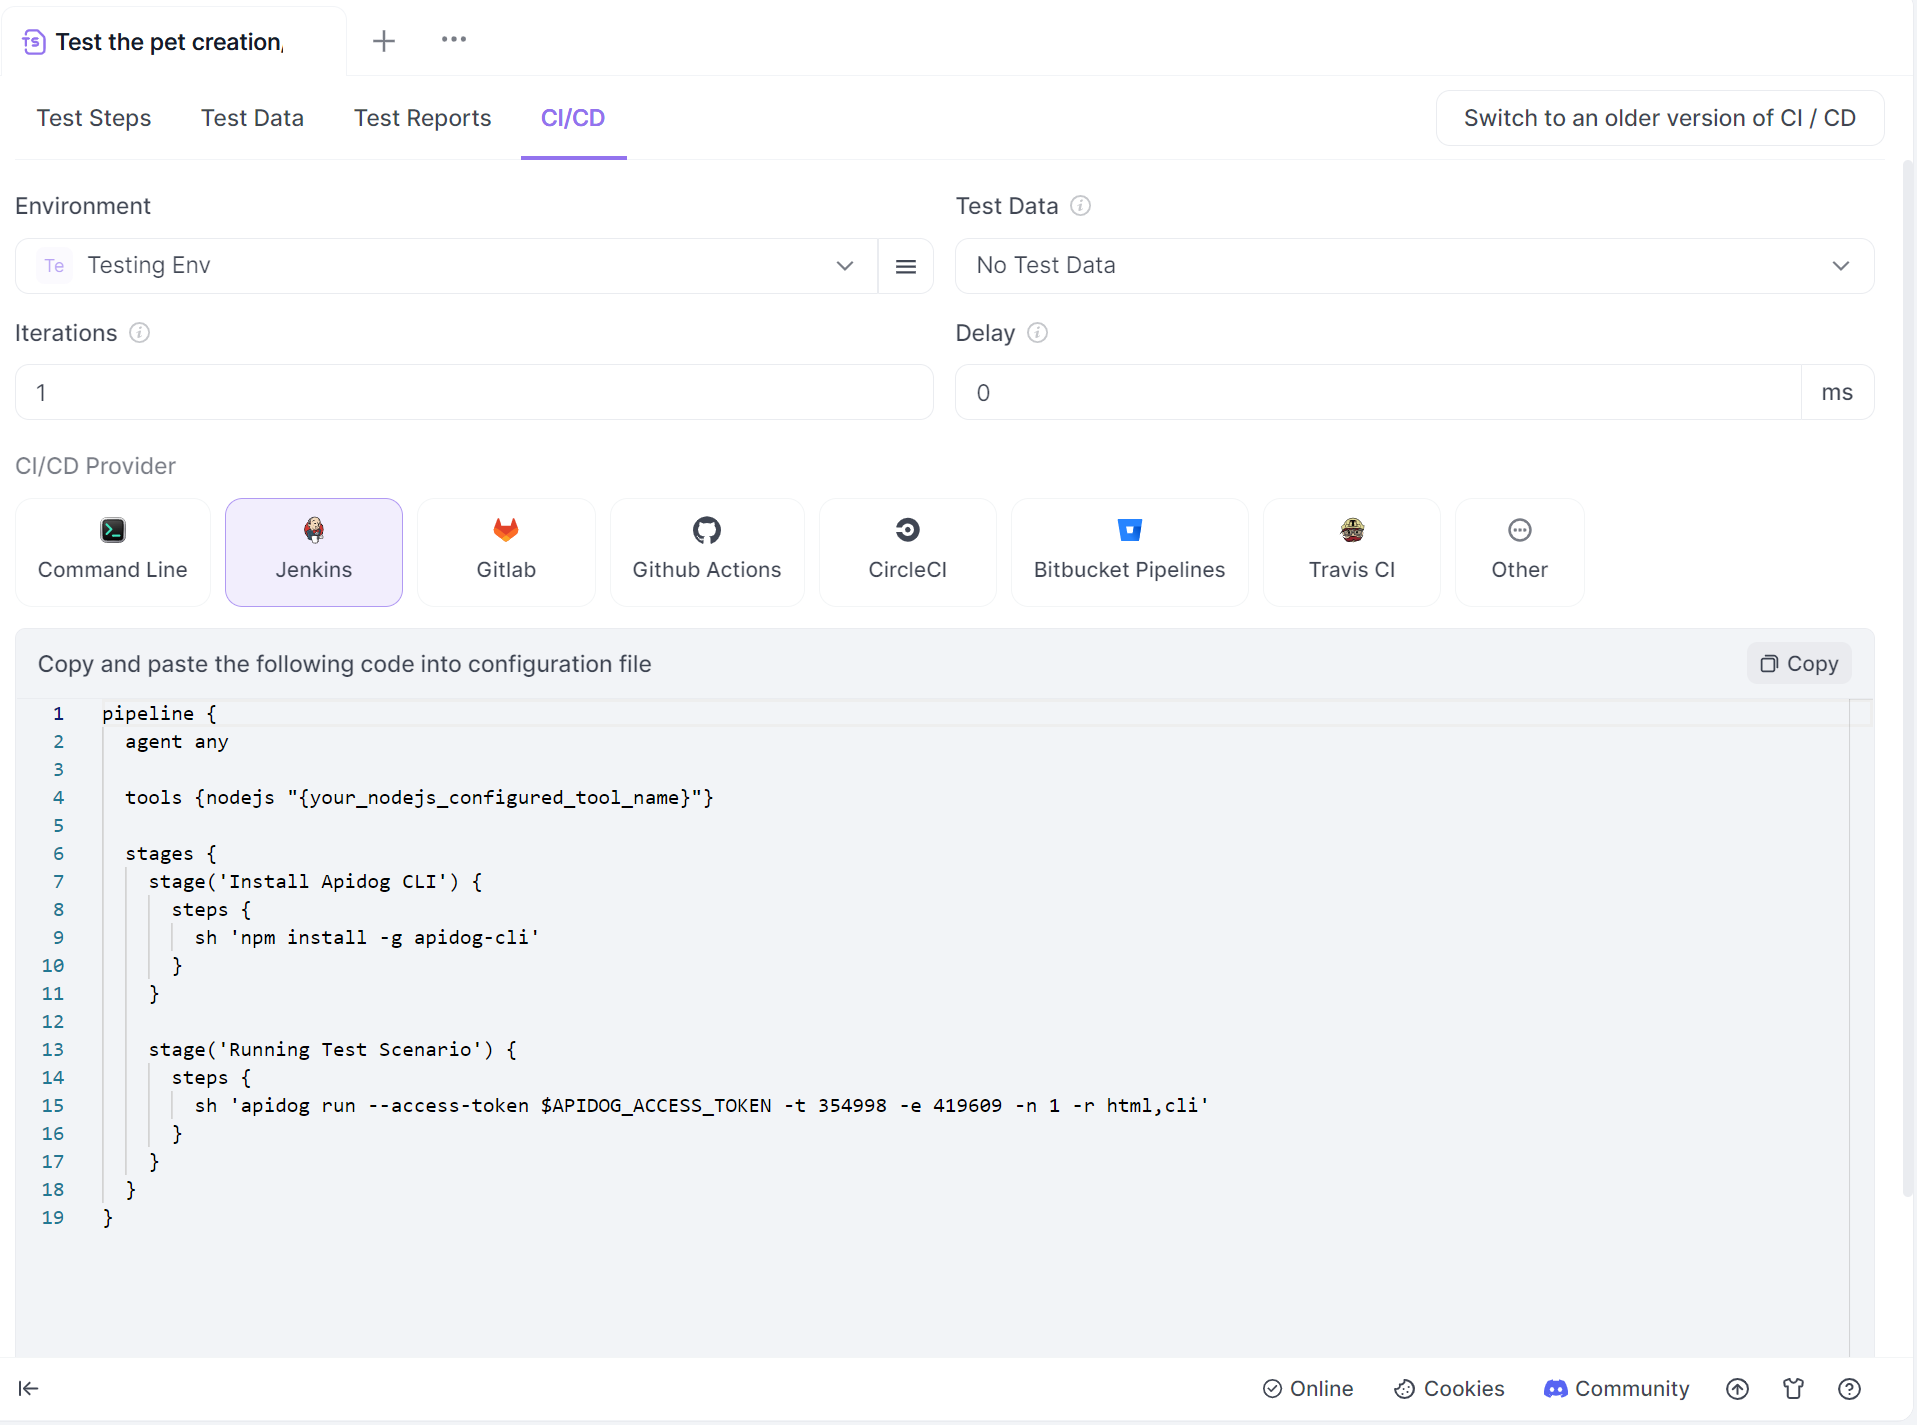
Step 7: Run Your API Tests
Execute your test scenarios manually through the Apidog interface. Schedule automated test runs at regular intervals. Integrate Apidog with your CI/CD pipeline for continuous testing
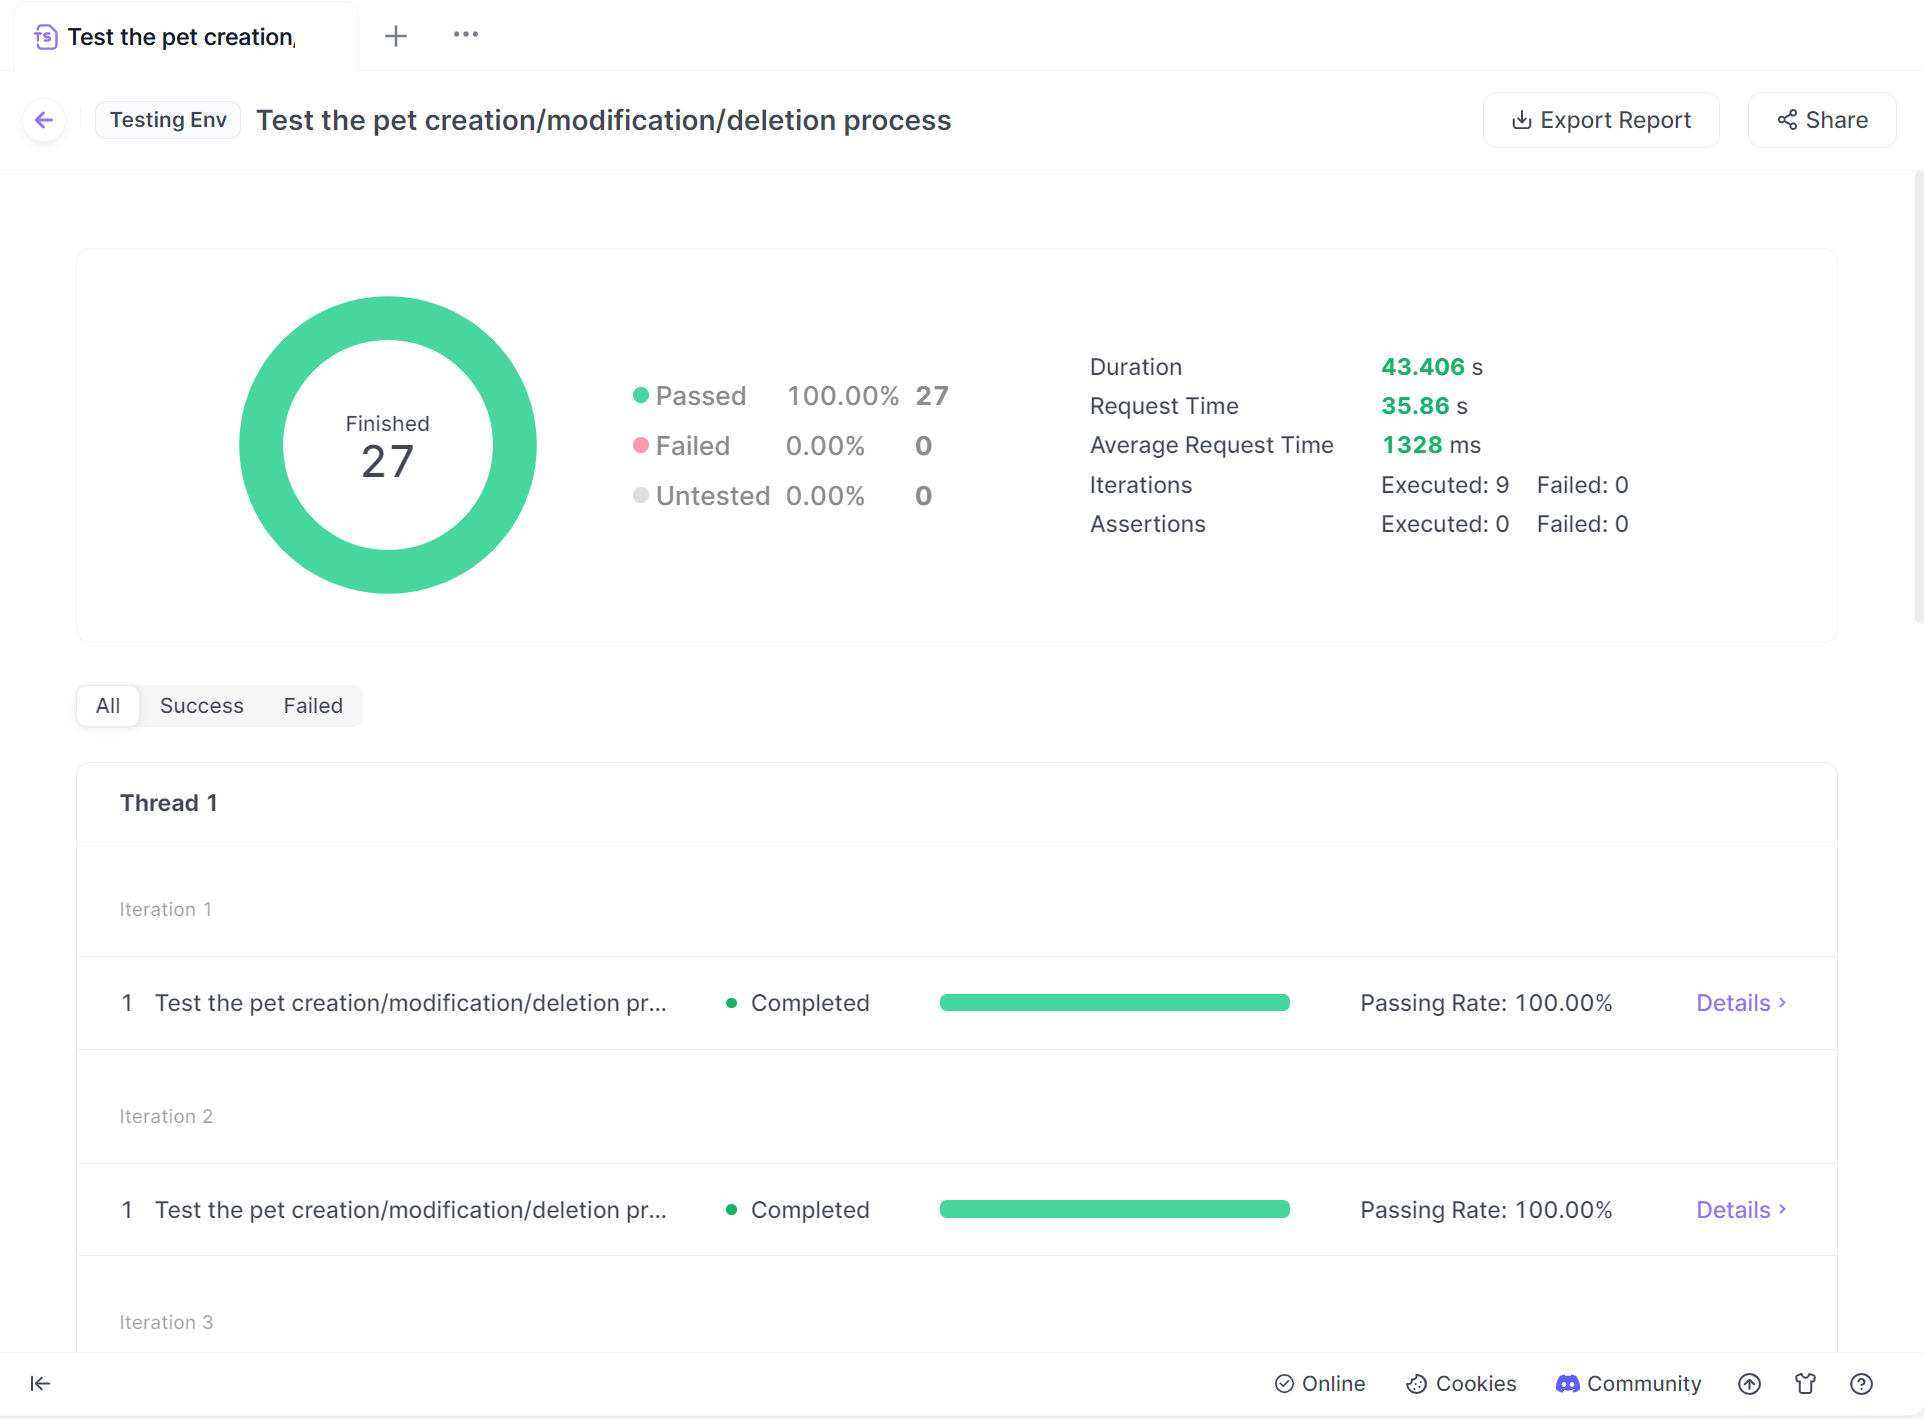
Step 8: Analyze Test Results
Review the detailed test reports generated by Apidog. Identify failed tests and investigate the root causes. Use Apidog's visualization tools to spot trends and patterns in your API performance
Step 9: Collaborate with Your Team
Export test report, then share your API documentation and test scenarios with team members. Use Apidog's collaboration features to assign tasks and track progress. Implement version control to manage changes to your API tests over time
Conclusion:
By following this step-by-step guide, you can leverage Apidog's powerful features to create comprehensive, efficient, and maintainable API tests. This approach will help you catch issues early, ensure consistent API behavior across environments, and ultimately deliver higher-quality software to your users.


