
APIs are the backbone of modern applications, connecting different software systems together and enabling them to communicate seamlessly. Whether you are a seasoned developer or a tester diving into the world of APIs, understanding how to make a POST request is crucial. In this guide, we will walk you through the process of making a POST request for API testing using Apidog, a powerful tool designed for testing and documenting APIs. With a conversational tone and clear steps, you’ll be ready to take on API testing like a pro.
What Is Apidog and Why Should You Use It?
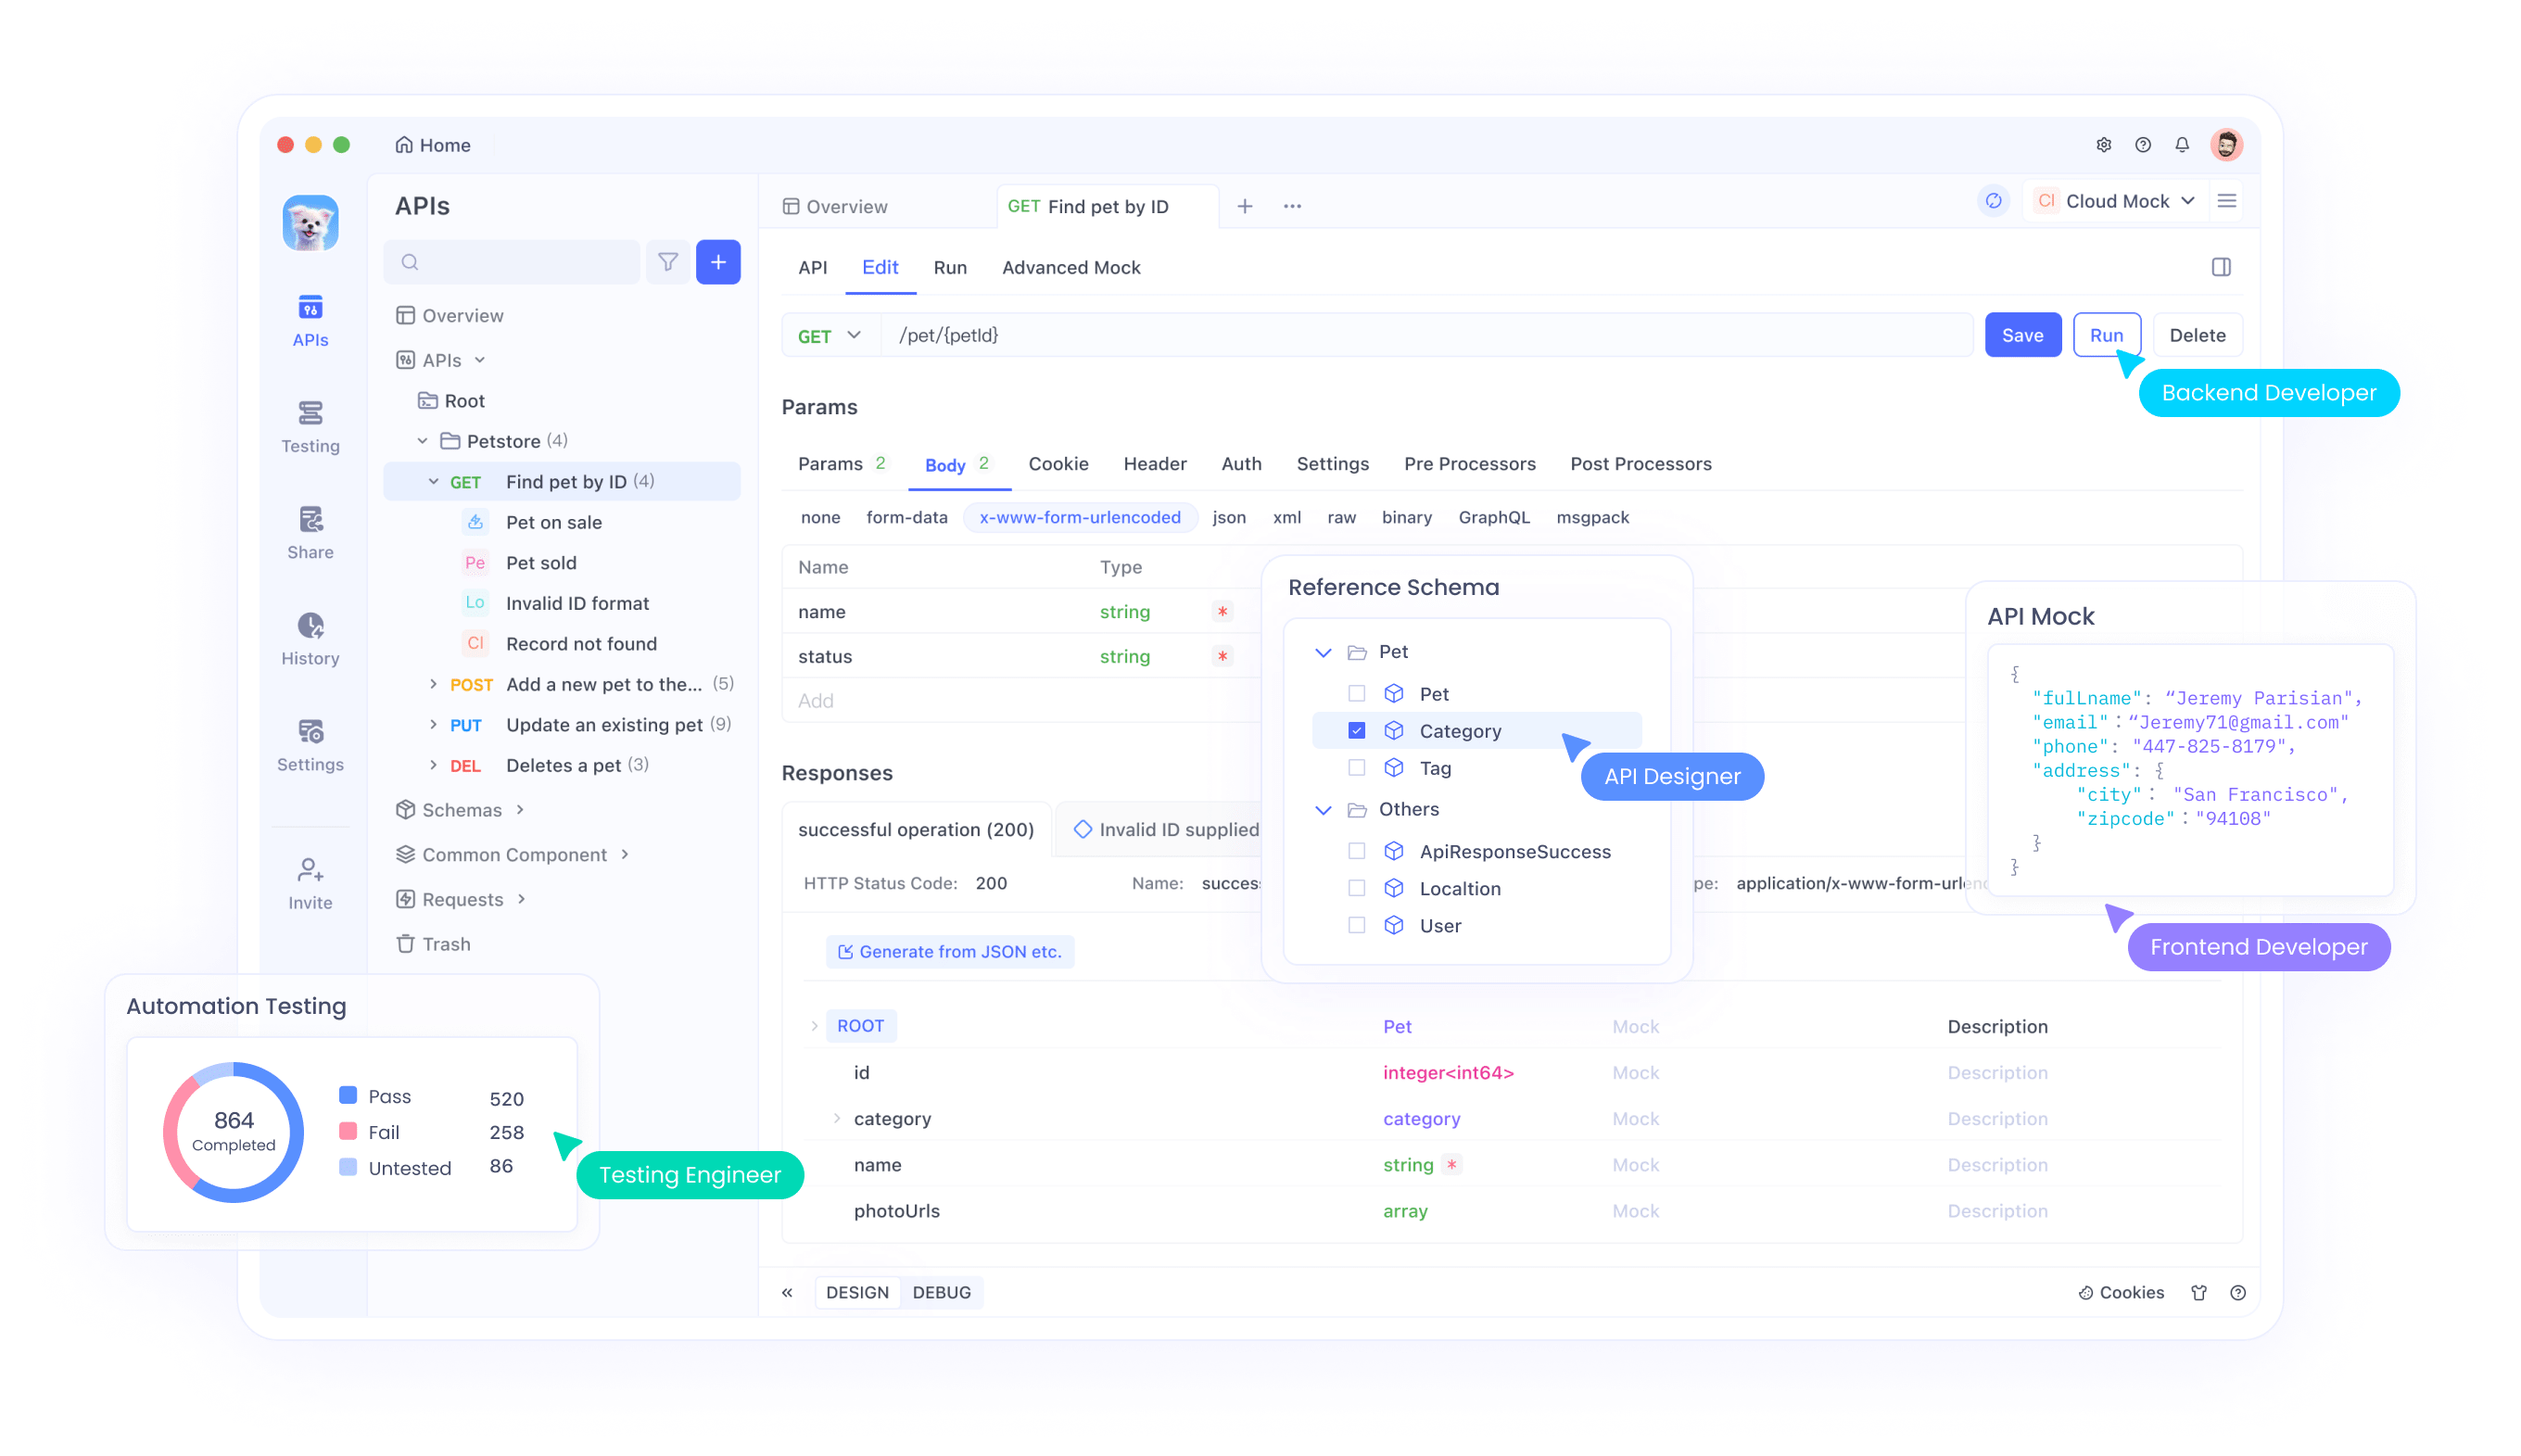
Before diving into the steps of making a POST request, let's talk about Apidog. Apidog is an all-in-one tool that allows you to create, test, and document your APIs effortlessly. It’s user-friendly and provides an intuitive interface for API testing. When you’re dealing with API requests like GET, POST, PUT, or DELETE, Apidog streamlines the entire process. If you’re tired of complex setups or just want a tool that makes API testing easier, Apidog is your go-to choice.
Understanding POST Requests
Before getting into the details of making a POST request with Apidog, let’s clarify what a POST request actually is.
What Is a POST Request?
A POST request is one of the HTTP methods used to send data to a server. In simple terms, it's used when you want to create or update a resource on the server. When you make a POST request, you're essentially sending data, such as a JSON object or form data, to the API, which then processes the data and performs the requested action.
For example, if you're registering a new user, you would send the user details (like name, email, and password) in a POST request to the server, which will create a new user record.
Difference Between GET and POST Requests
Understanding the difference between GET and POST requests is essential. Here’s a brief overview:
- GET Request: Fetches data from the server. It doesn’t change any data on the server. Think of it as reading data.
- POST Request: Sends data to the server to create or update a resource. It changes the server's state by adding new information.
Why Use Apidog for API Testing?
Apidog stands out as an API testing tool because of its user-friendly interface, comprehensive features, and seamless experience for beginners and experts alike. Here’s why you should use Apidog:
- No Setup Hassles: Apidog eliminates the hassle of configuring complex testing environments. You can start testing immediately.
- Built-in Tools for Documentation: Easily generate documentation based on your API requests.
- User-Friendly Interface: The UI is intuitive, allowing even beginners to start testing APIs with minimal learning curve.
- Supports Multiple Request Types: Whether you need to make a POST, GET, PUT, or DELETE request, Apidog has you covered.
Step-by-Step Guide to Making a POST Request Using Apidog
Now that you understand what a POST request is and why Apidog is a great tool for API testing, let’s walk through the steps of making a POST request using Apidog.
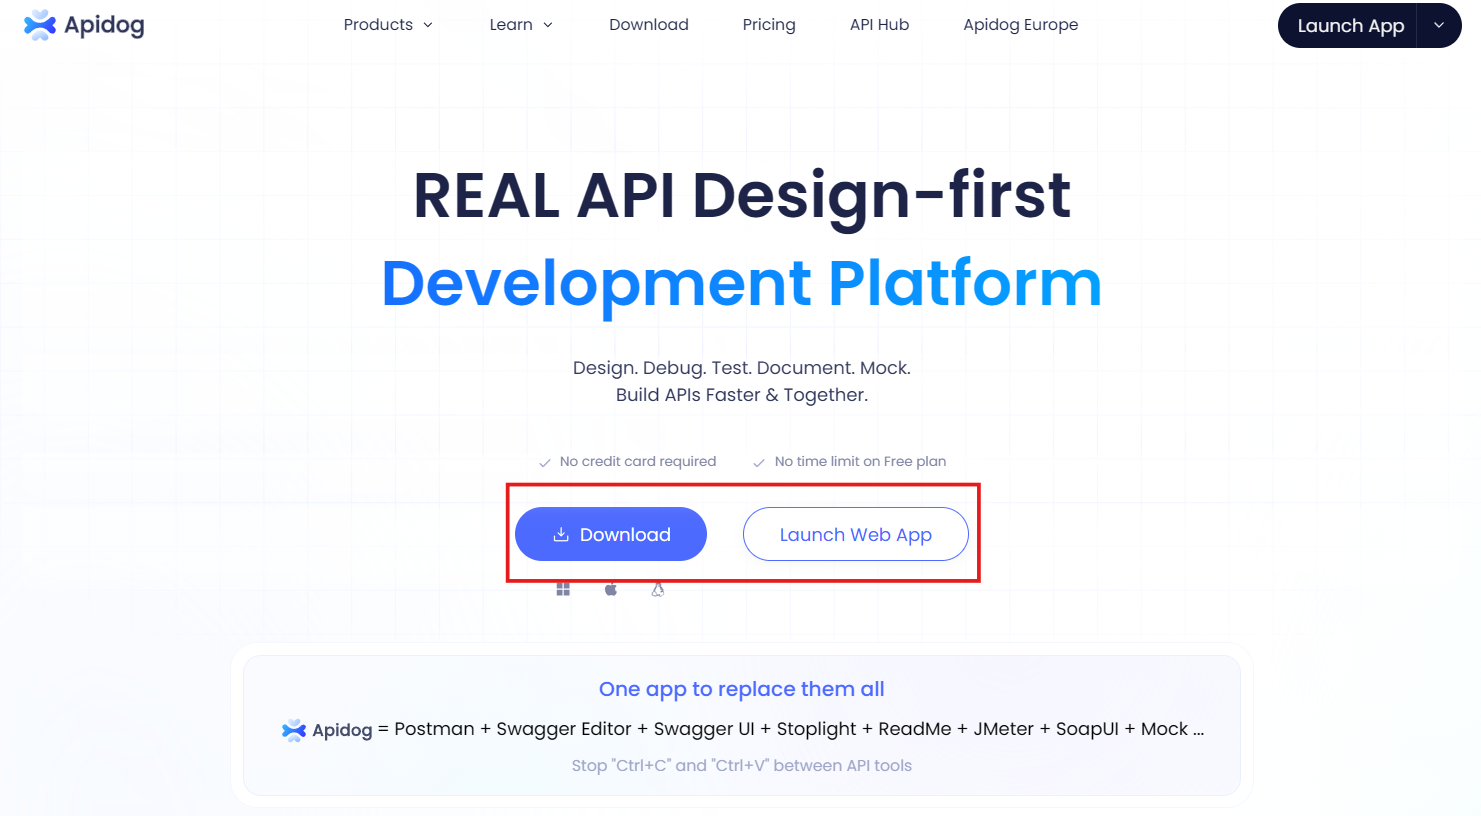
Step 1: Download and Install Apidog
The first step is to download and install Apidog if you haven’t already. You can download Apidog from the official Apidog website. The installation process is straightforward; just follow the on-screen instructions to complete the setup.
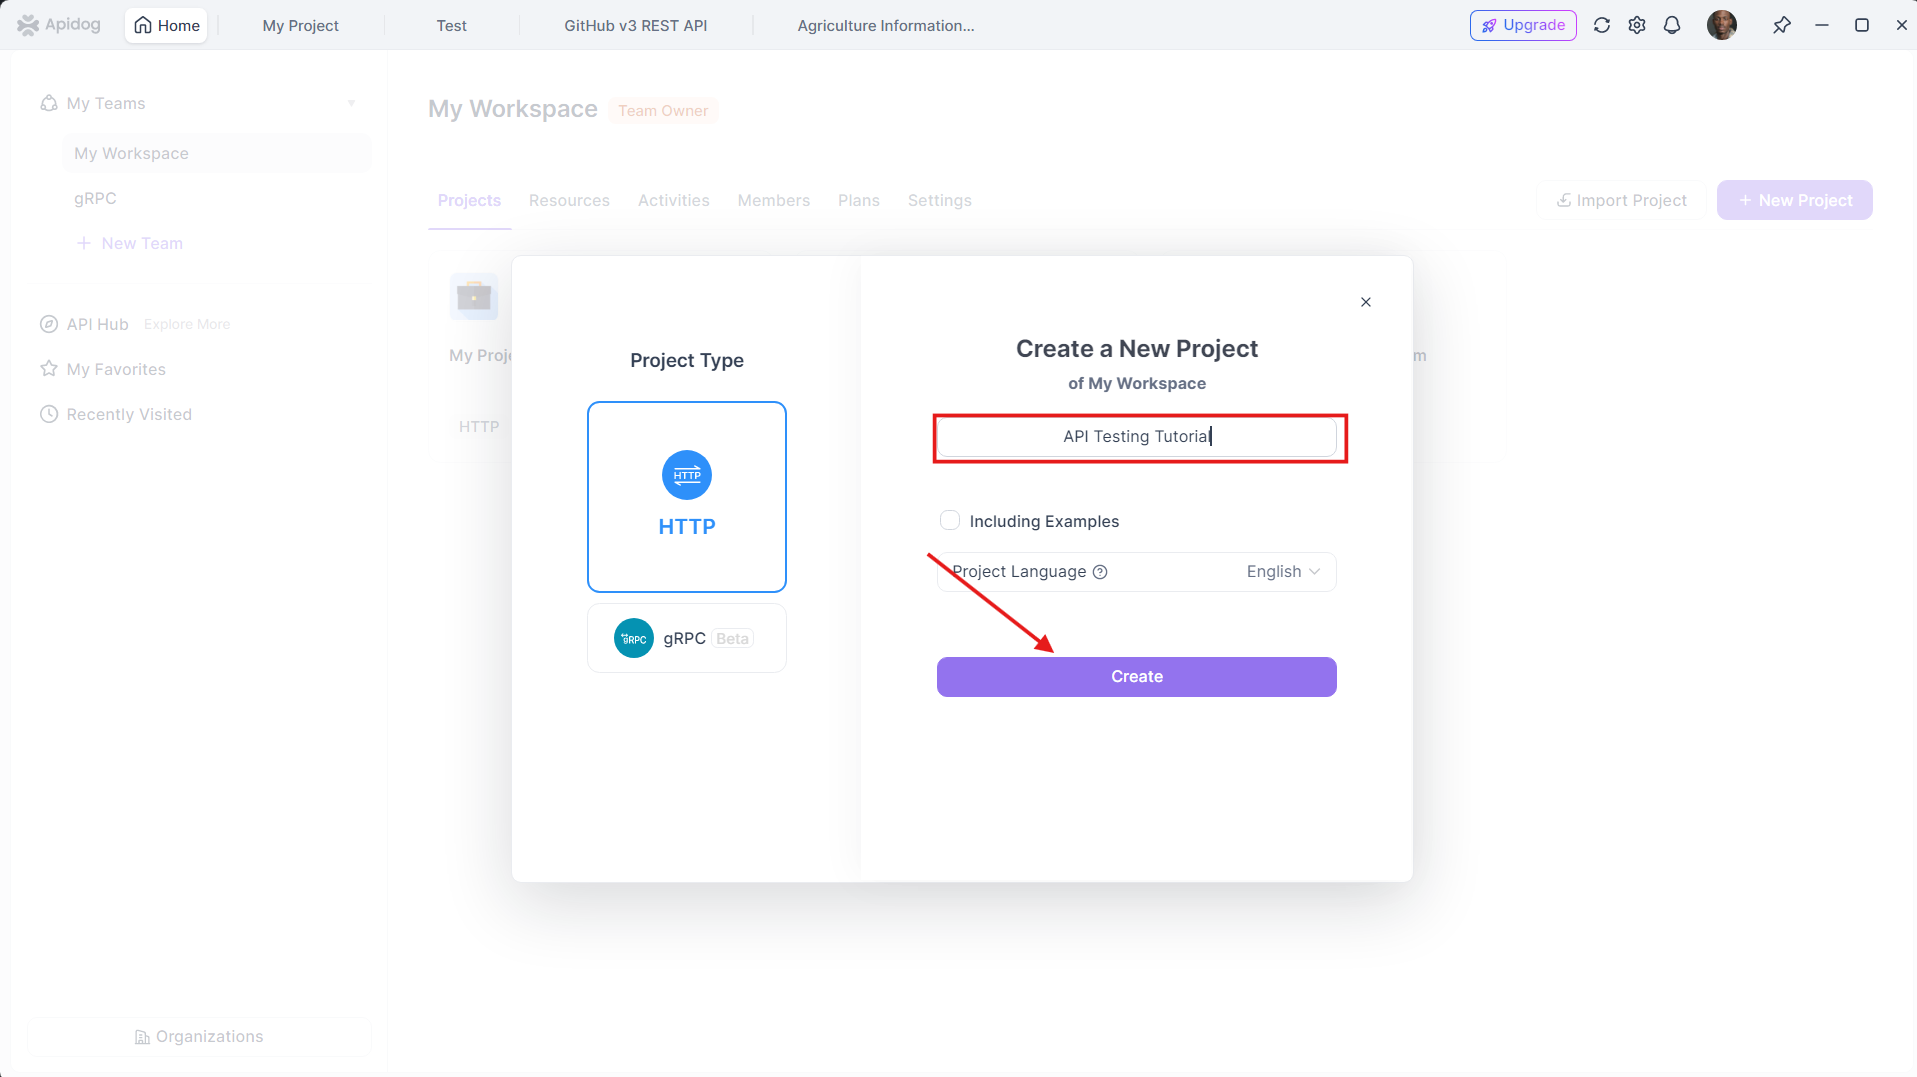
Step 2: Open Apidog and Create a New Project
Once you have Apidog installed, open the application. You’ll be greeted with the home screen where you can create a new project. Click on the "New Project" button and give your project a name (e.g., "API Testing Tutorial"). This will help you keep your API testing organized.
Step 3: Add a New API Request
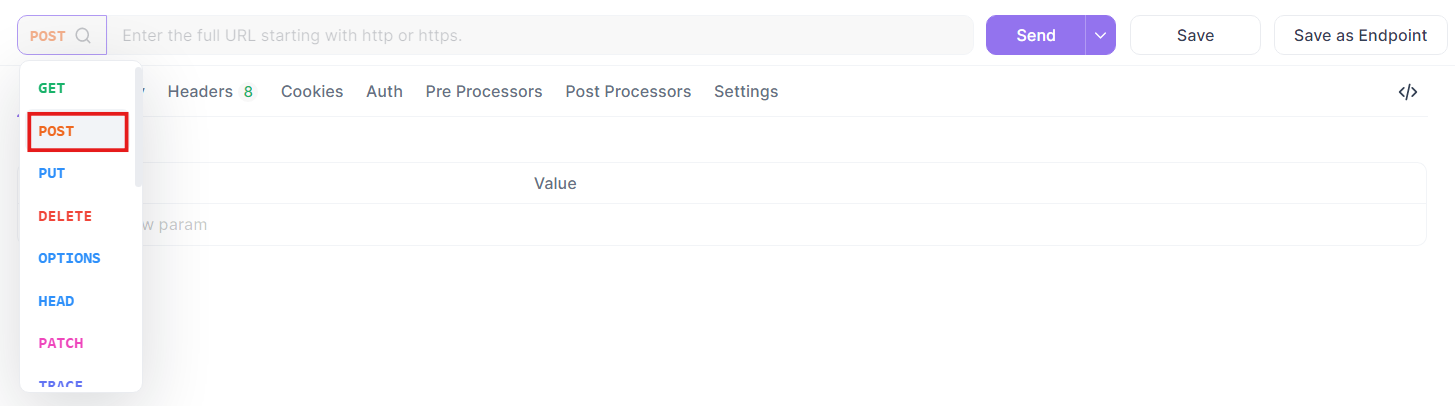
With your project set up, it’s time to add a new API request. Click on the "New Request" button.
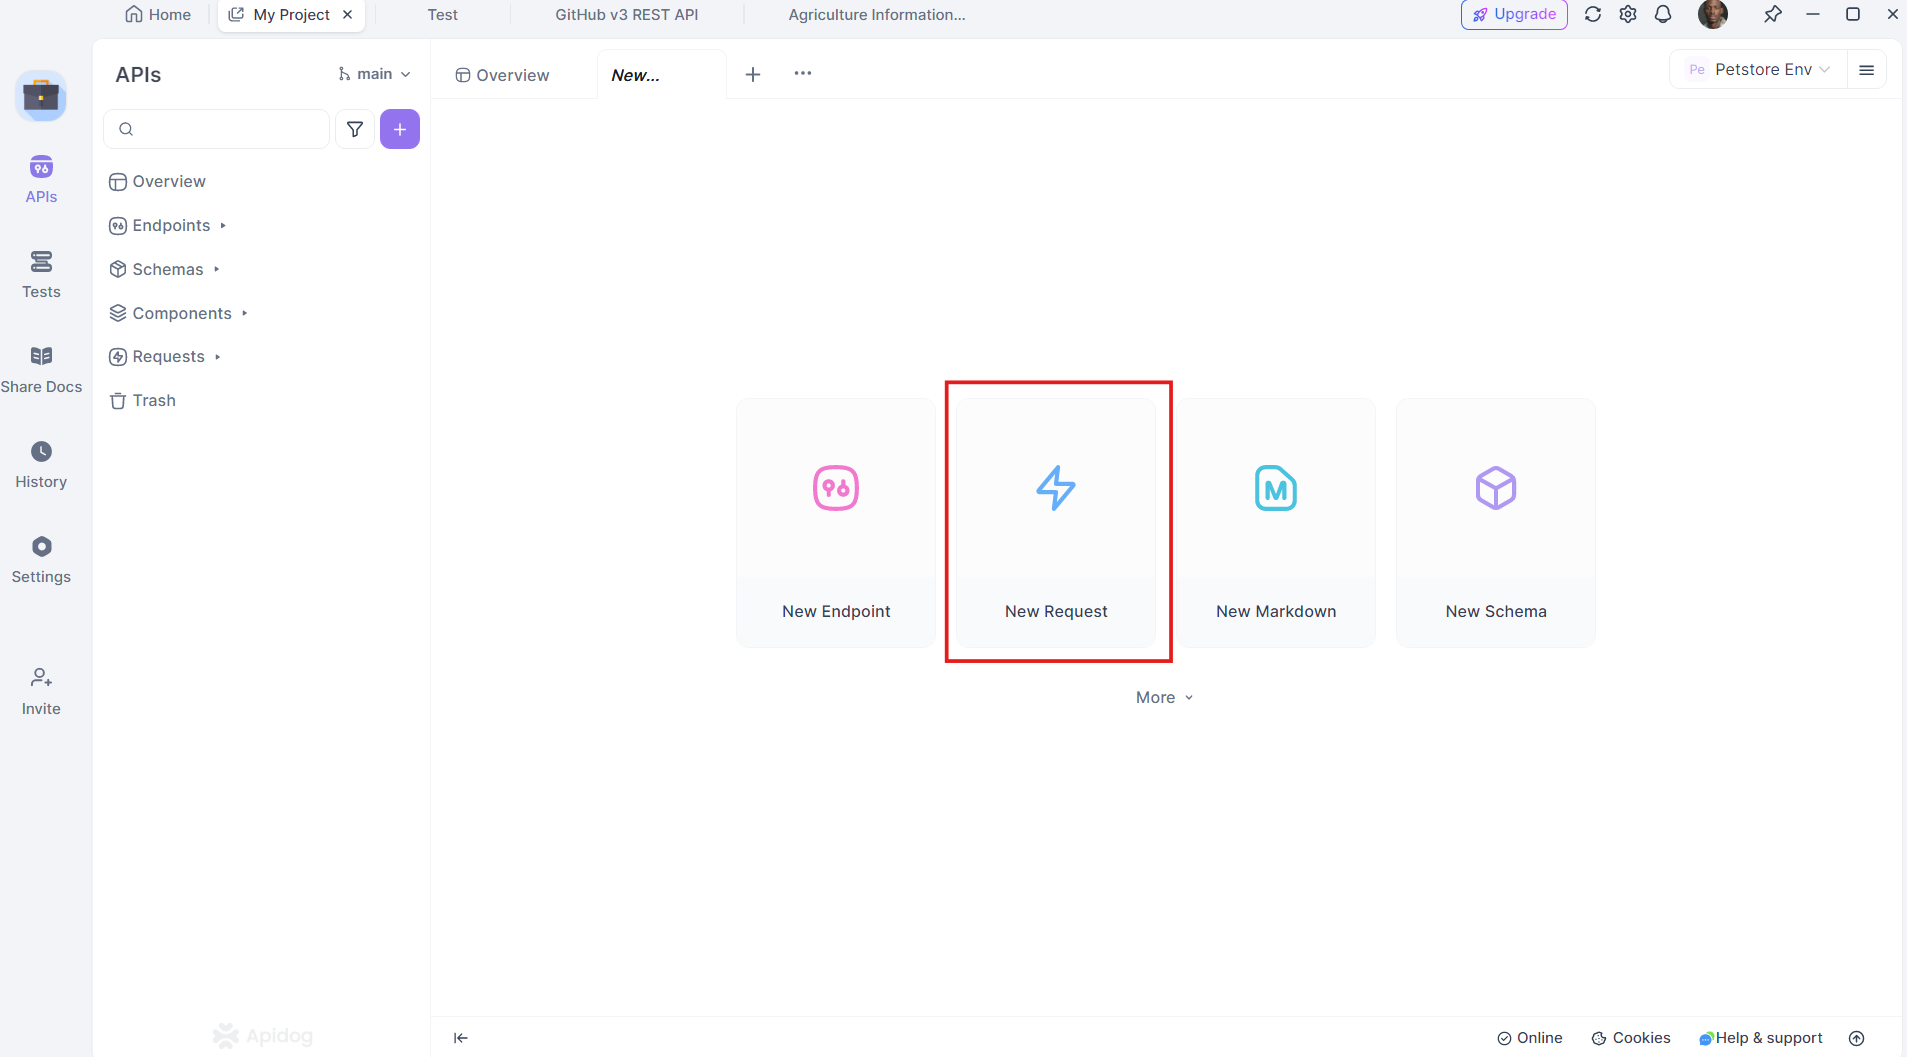
And select "POST" as the request type. Apidog will then present you with an interface where you can enter the details of your request.
Step 4: Enter the Request URL
In the provided field, enter the API endpoint URL where you want to send the POST request. For instance, if you’re testing a mock API that allows you to create a new user, the URL might look something like this:
https://petstore-demo.apidog.com/pet/{petId}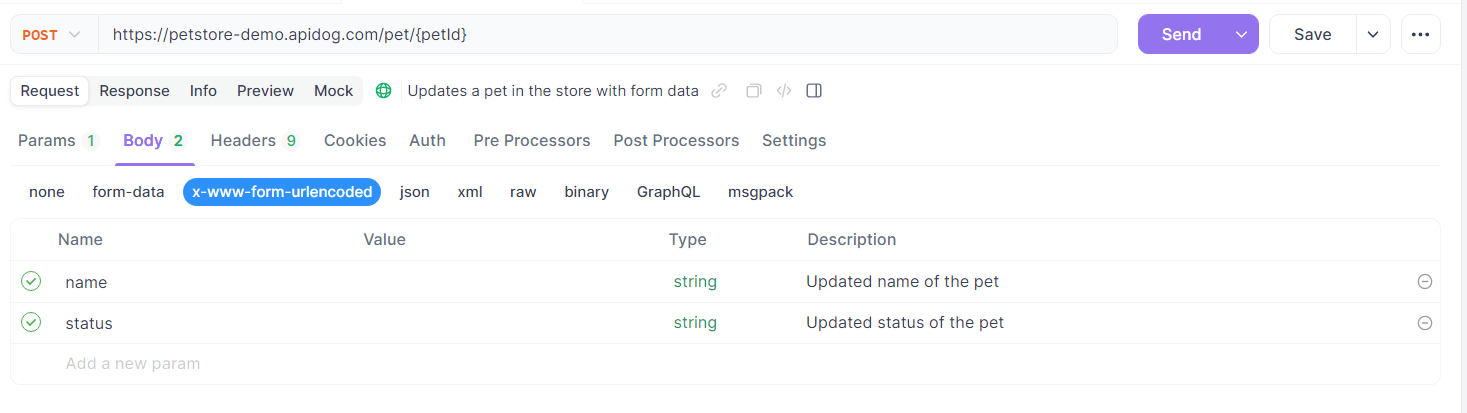
Step 5: Set Up the Request Headers
API requests often require headers to provide context or authentication details. In the "Headers" section of Apidog, you can add the necessary headers.

Step 6: Add the Request Body
The body of a POST request contains the data you want to send to the server. In Apidog, you can choose the format of the request body, such as JSON, form-data, or raw. Most APIs commonly use JSON format.
Step 7: Send the POST Request
Once you’ve set up the request headers and body, it’s time to send the request. Click on the "Send" button in Apidog.
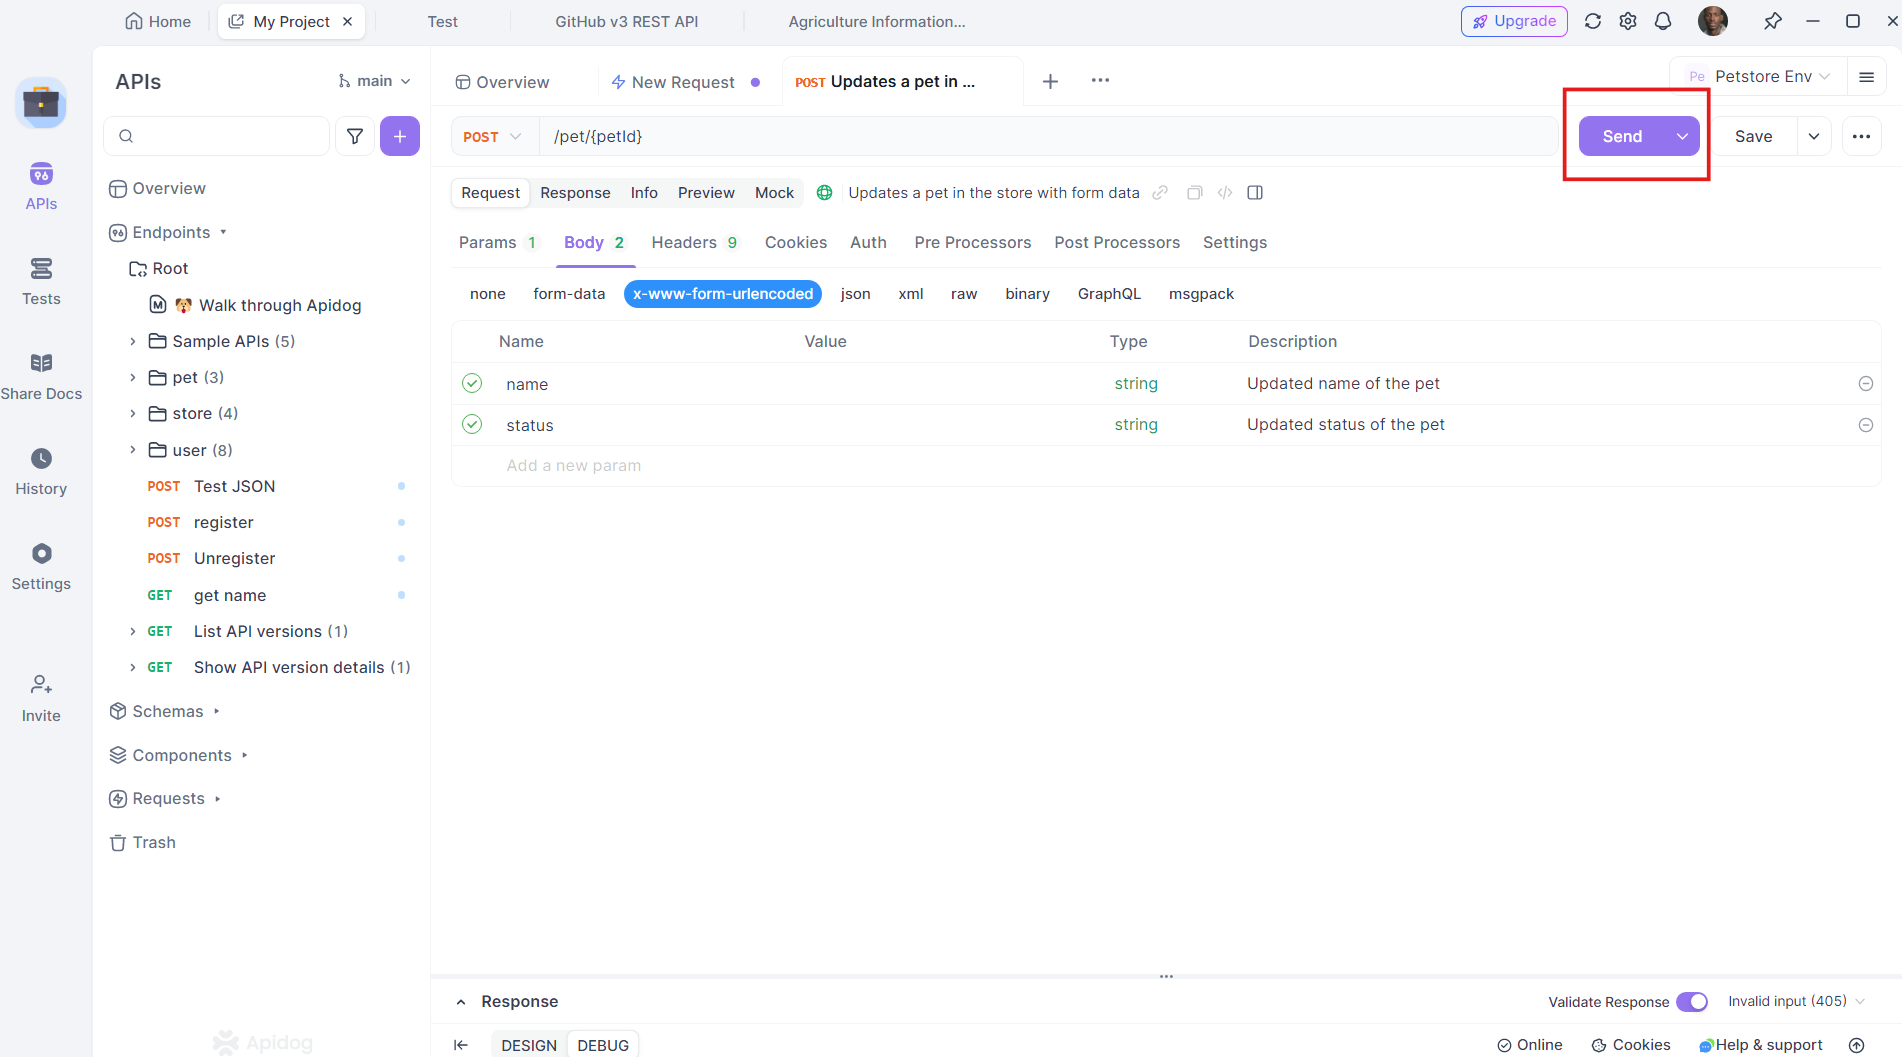
If everything is configured correctly, you should see the server's response. The response might include a status code (e.g., 201 for a successful creation), a message, or the data that was created.
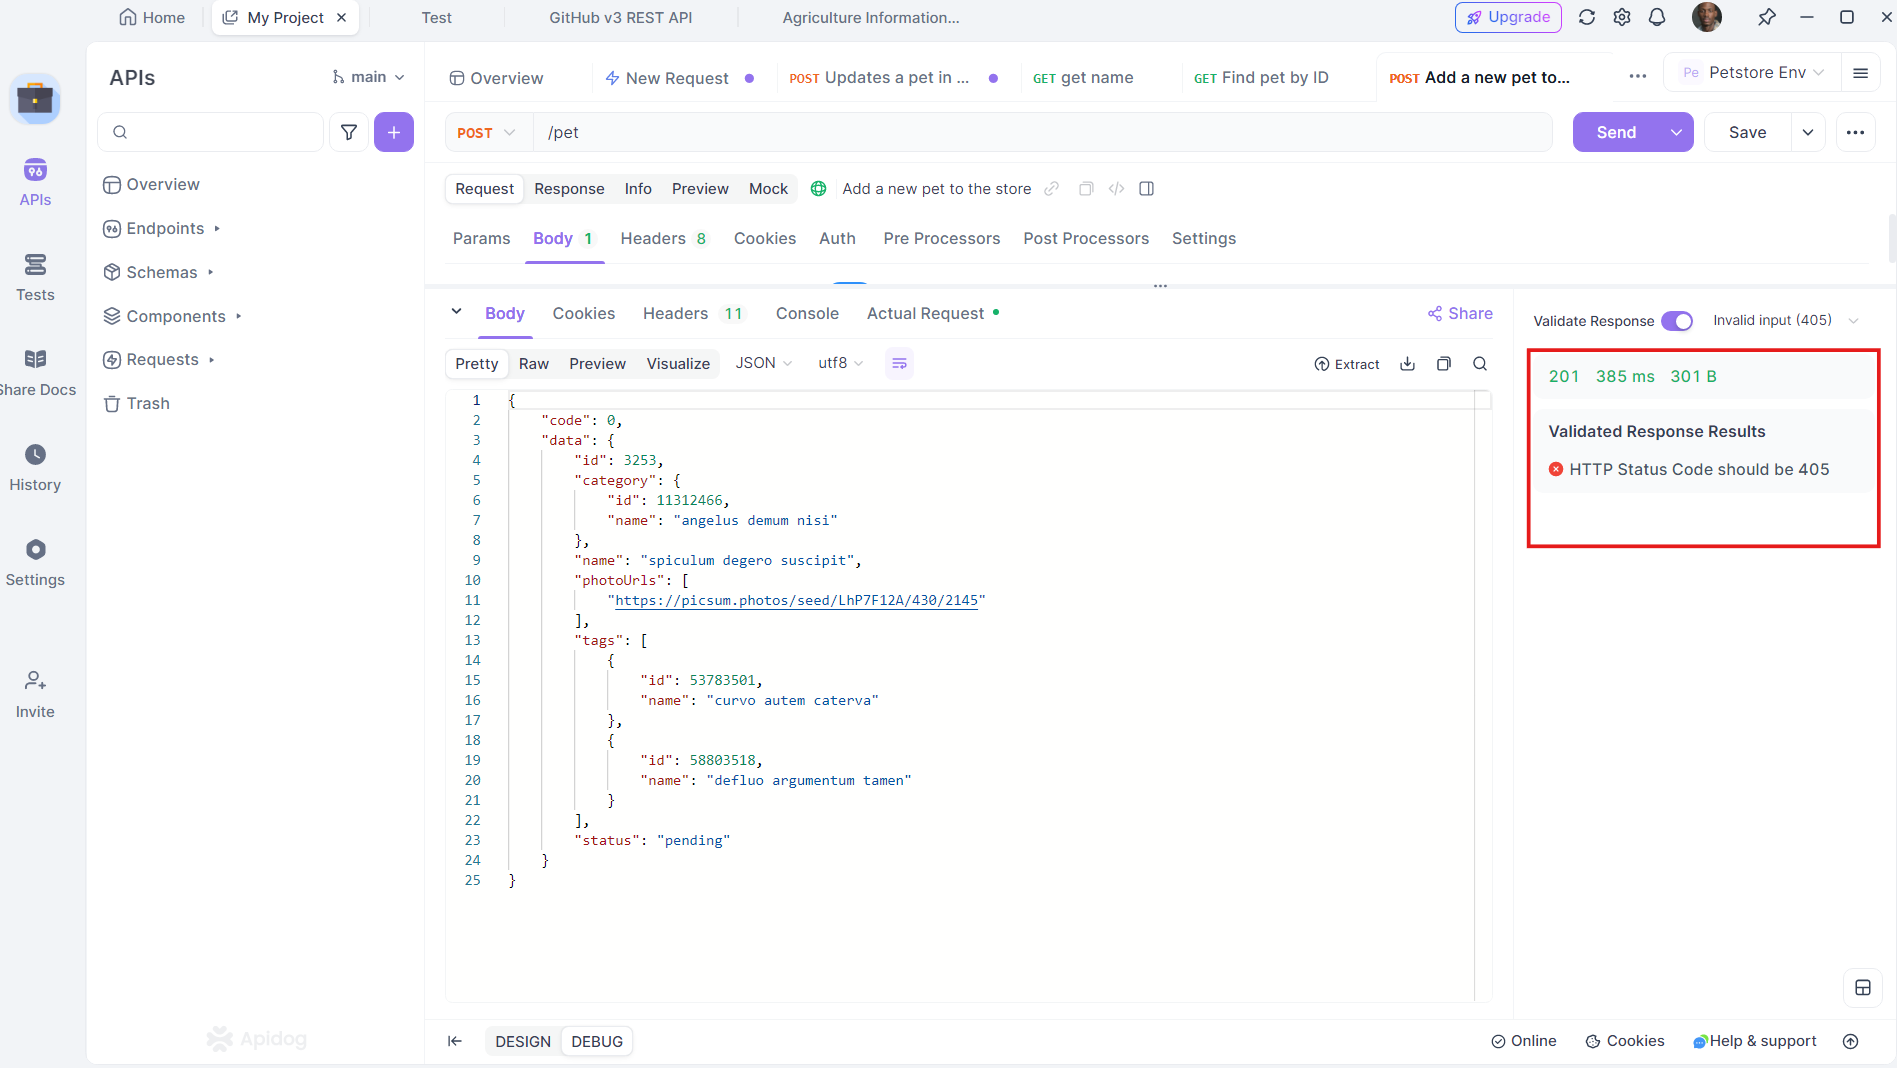
Interpreting the Response
When you send a POST request, the server's response provides valuable information about the result of your request. Here’s how to interpret the most common elements in a response:
- Status Code: Indicates the outcome of the request. For a successful POST request, you might see codes like
200(OK),201(Created), or202(Accepted). - Response Body: This is the data returned by the server. It could be a confirmation message, an error message, or the created/updated resource data.
- Headers: Sometimes, the server returns important metadata in the headers, such as the rate limit for the API or the location of the created resource.
If the request fails, Apidog will still show you the response, including error messages or details about what went wrong, making debugging easier.
Common Use Cases for POST Requests
To help solidify your understanding, let's look at some practical scenarios where POST requests are commonly used in API testing.
1. User Registration
Creating a new user account is a classic example of a POST request. The data sent in the request would typically include details like username, email, password, and perhaps other information like age or gender.
2. Submitting a Form
Whenever you fill out and submit a form on a website, a POST request is typically used to send the form data to the server for processing.
3. Uploading a File
If you’ve ever uploaded a file to a website, like a photo to social media or a document to a file-sharing platform, a POST request is used to send that file to the server.
4. Creating a New Resource
Whether it’s adding a new product in an e-commerce application or creating a new blog post on a content management system, POST requests are used to send the necessary data to the server.
Troubleshooting Common POST Request Issues
Even with a powerful tool like Apidog, things can sometimes go wrong. Here are some common issues you may encounter and tips for resolving them.
1. Incorrect URL or Endpoint
If the server responds with a 404 error, it usually means the endpoint is incorrect or doesn’t exist. Double-check the URL to ensure it’s correct.
2. Missing or Incorrect Headers
If you get a 401 Unauthorized or 403 Forbidden error, it could indicate missing or incorrect authentication headers. Make sure the "Authorization" header is properly set up.
3. Invalid Request Body
A 400 Bad Request error often indicates that the request body is not formatted correctly. If you’re sending JSON, make sure it’s properly structured.
4. Server Issues
If the server responds with a 500 or 503 error, it could be an issue on the server's side. In such cases, there's little you can do besides reporting the problem to the server administrators.
Advanced Features: Taking Your API Testing to the Next Level with Apidog
Now that you’ve made a basic Post Request, let’s explore some advanced features that can help you get the most out of Apidog.
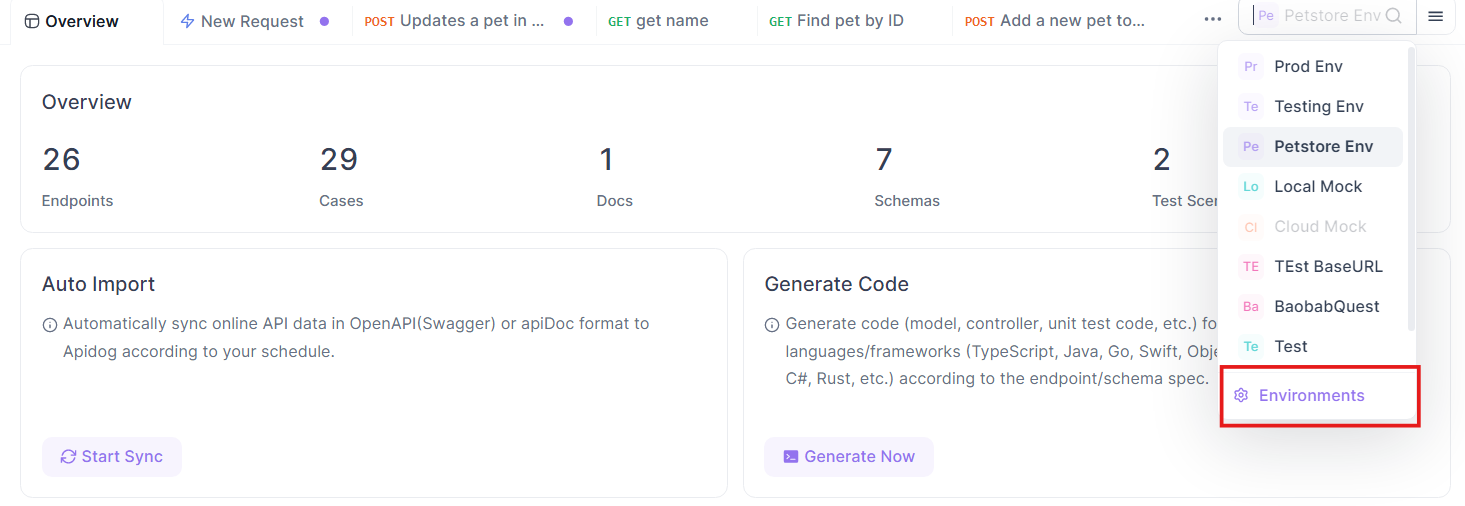
1. Using Variables and Environments
Variables in Apidog let you parametrize your requests. This is especially useful if you need to test different scenarios or switch between environments like development, staging, and production.
- Create a variable: Go to the "Environments" section in Apidog and add a variable such as
{{base_url}}.
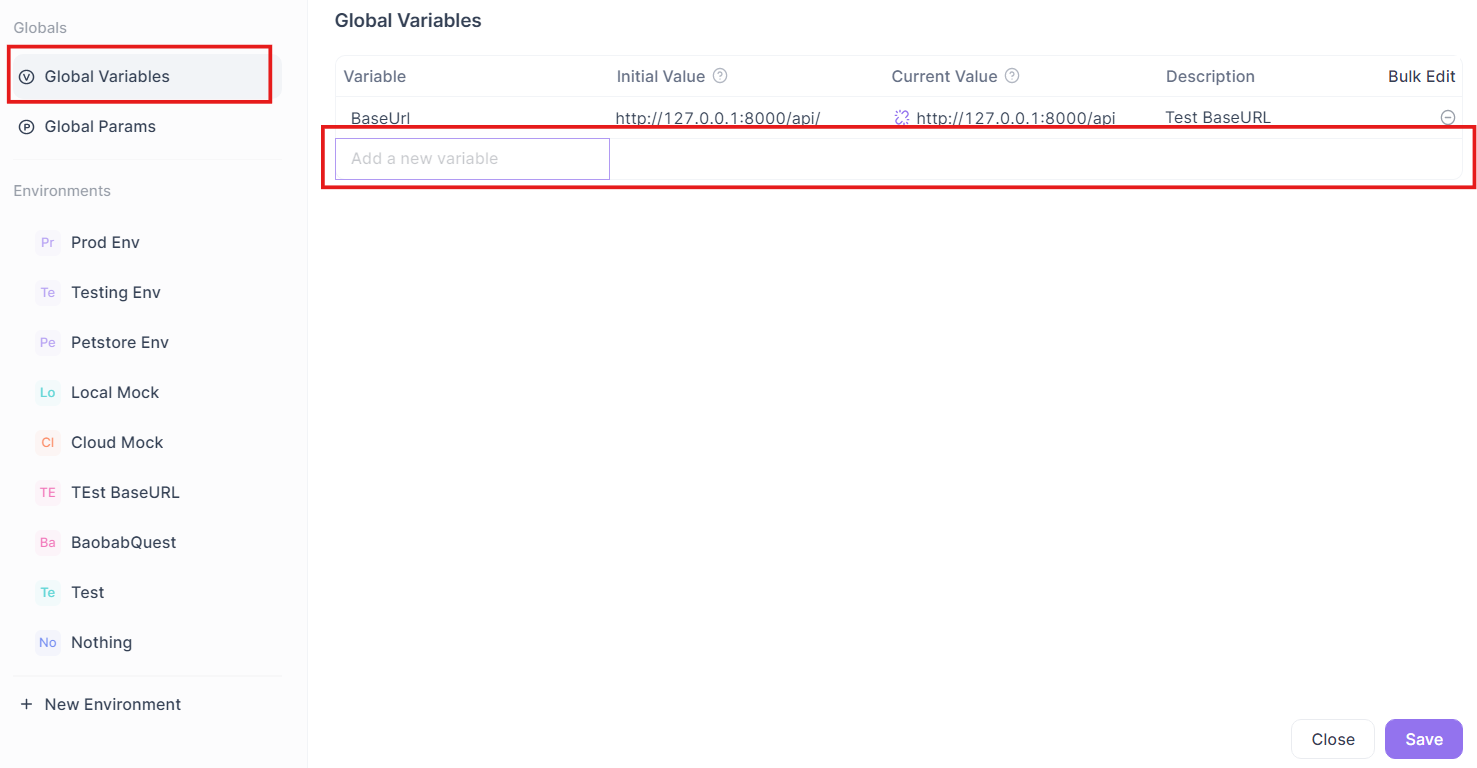
- Use the variable in your requests: Replace hardcoded values with
{{base_url}}/register, for example.

2. Automating Tests with Scripts
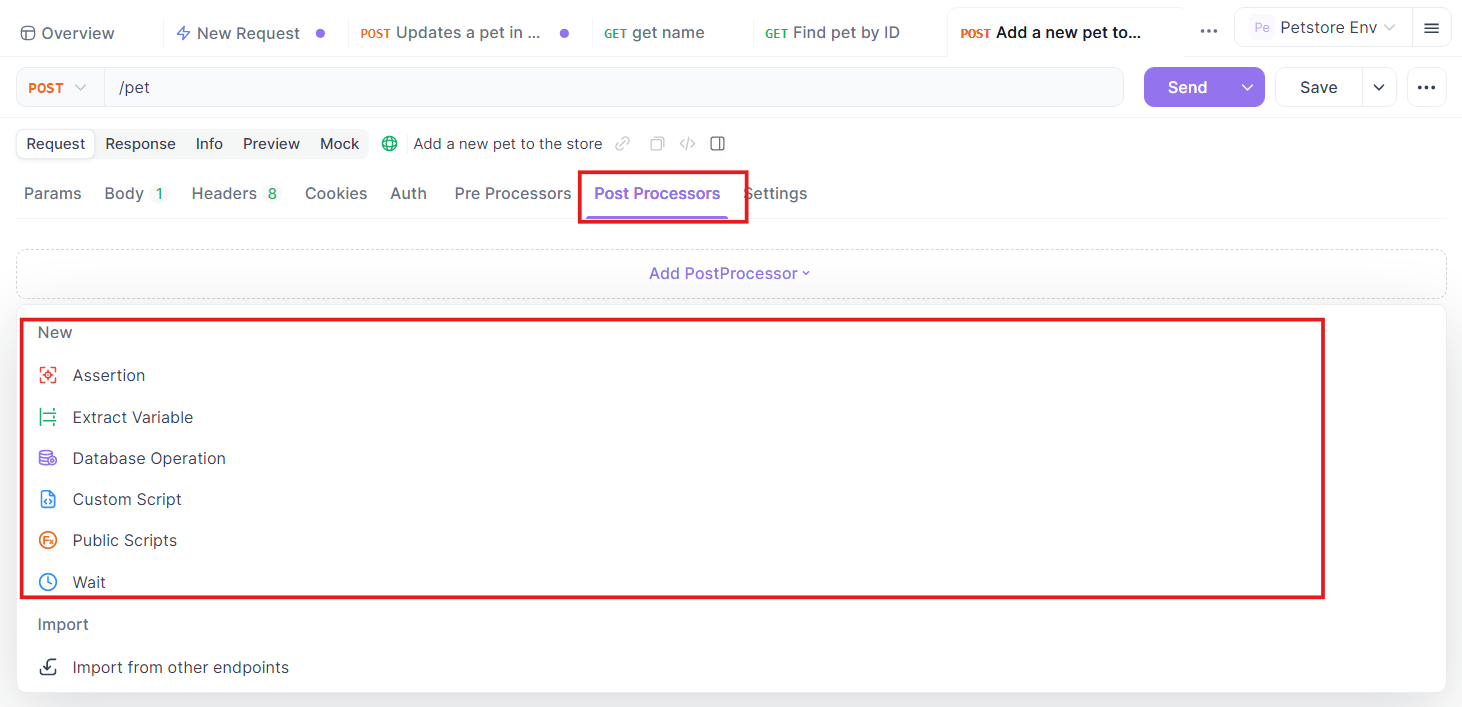
Apidog allows you to write scripts to automate testing. These scripts can be added before or after sending the request to validate the response or set up conditions.
- Pre-Processors: Run before the request is sent (e.g., to set a token in the headers).
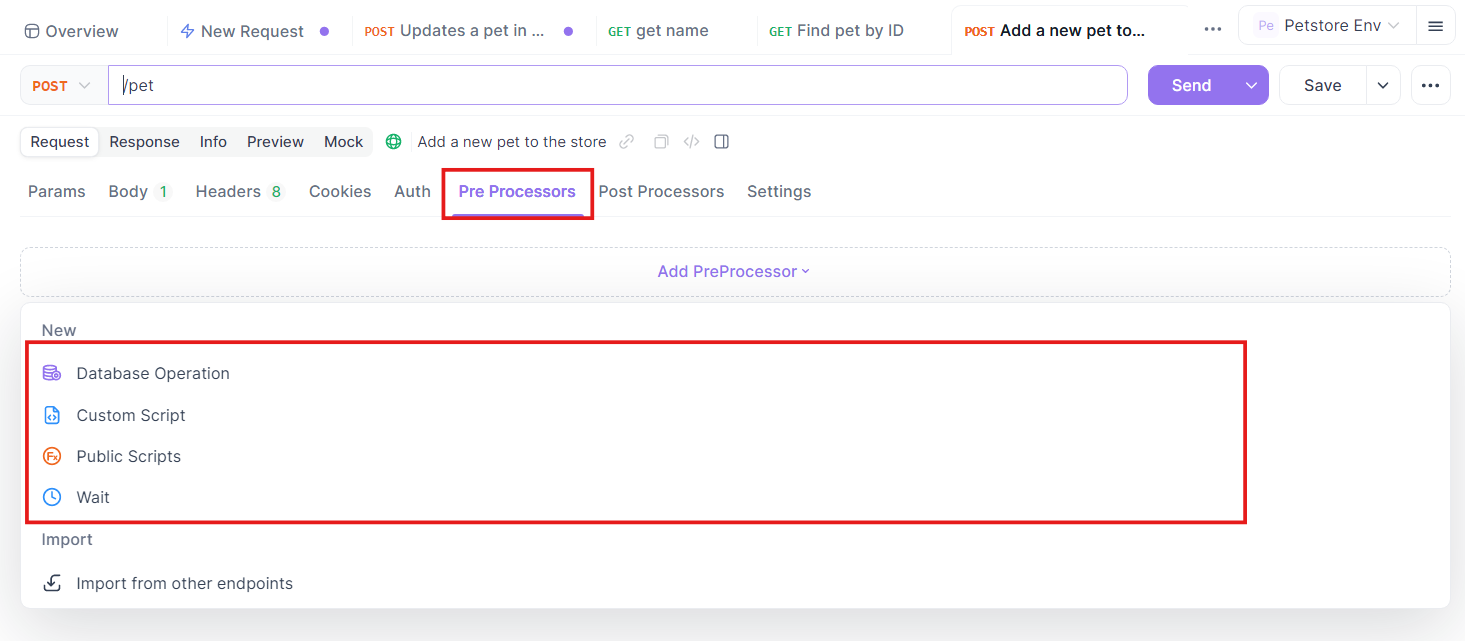
- Post-Processors: Run after receiving the response (e.g., to check if the status code is 200).
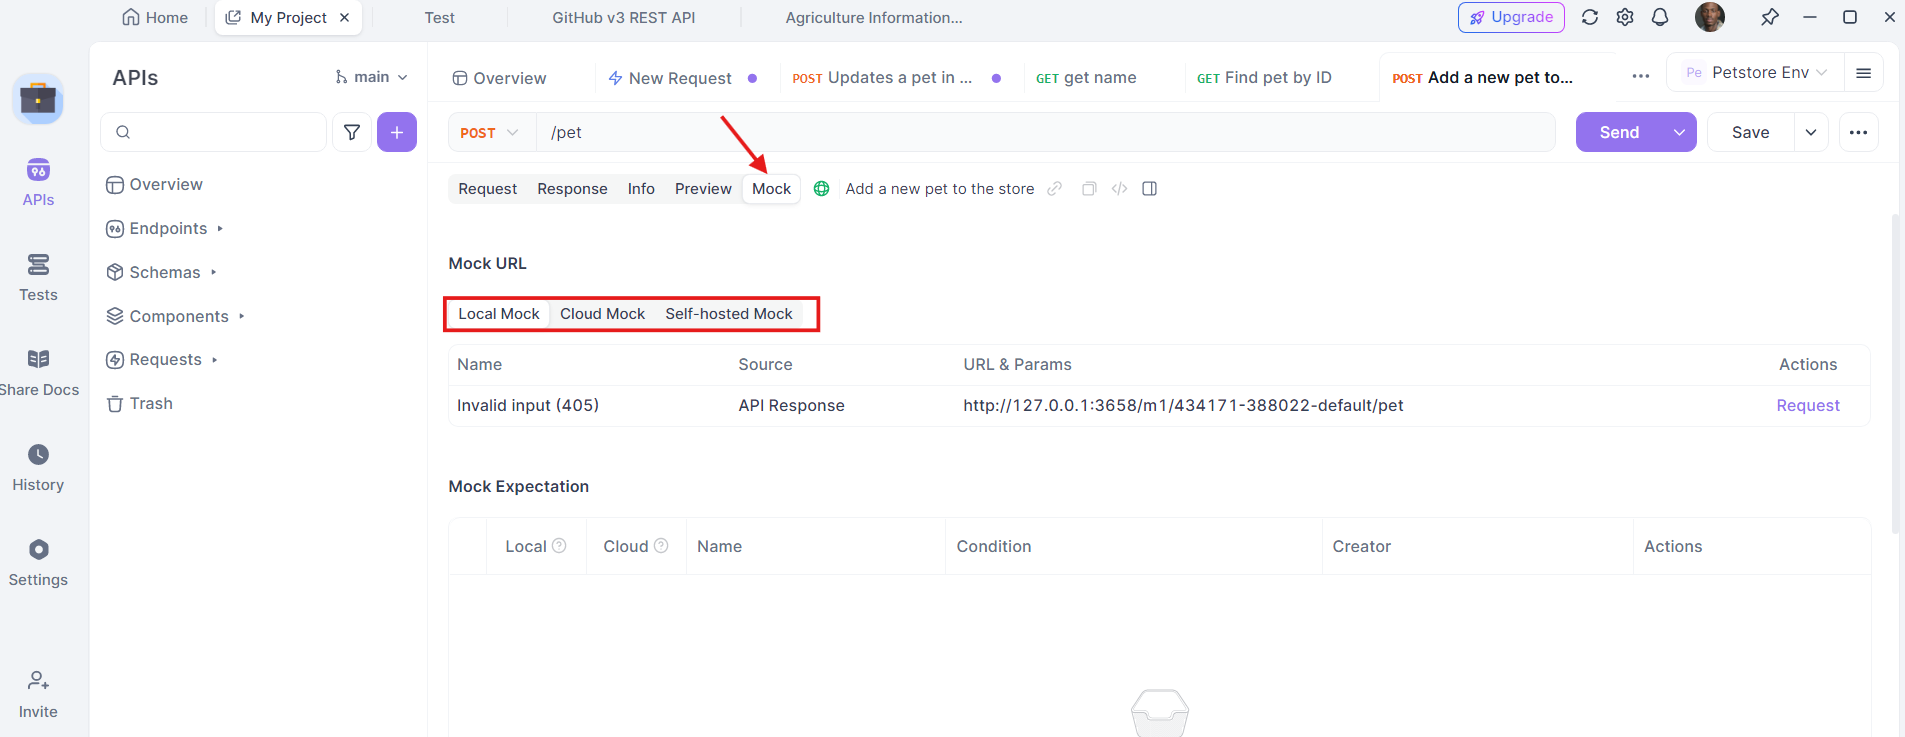
3. Mocking APIs
If the backend is still under development, you can mock the API in Apidog. This feature allows you to create mock responses based on the API specification, which helps in testing the front end even before the server is ready.
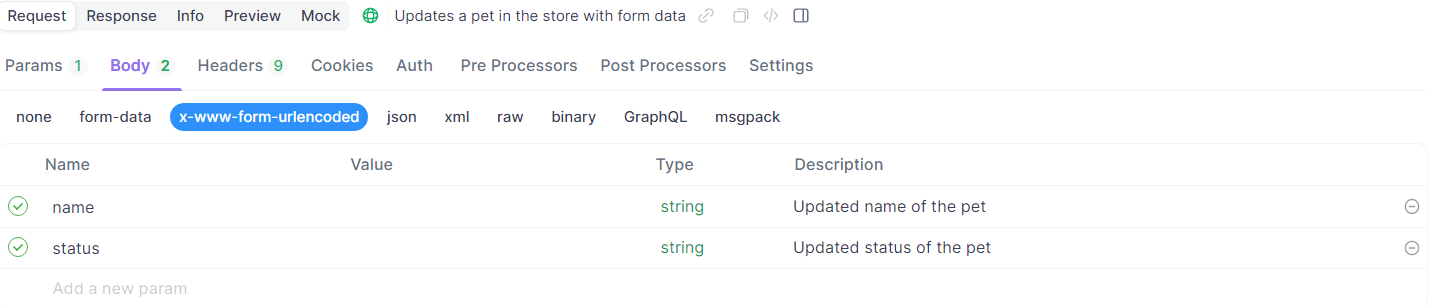
The body format you select shapes how the server parses your POST request, so it's worth understanding when to use x-www-form-urlencoded versus JSON before settling on a payload structure.
Conclusion
Making a Post Request for API testing using Apidog is a straightforward process that offers a wide range of features to streamline your API development and testing workflow. From setting up environments to sending requests and validating responses, Apidog provides everything you need in one intuitive interface. Whether you’re testing a simple endpoint or managing complex APIs with various parameters, Apidog makes it easy to stay organized and efficient.
As you continue to test APIs, you’ll discover how Apidog can simplify and enhance your development process. So, whether you're a beginner learning the ropes or an experienced developer looking to improve your workflow, Apidog is a powerful tool to have in your arsenal.


