GitHub is an essential platform for developers around the world, providing a space for collaboration, code sharing, and version control. While GitHub's web interface offers robust functionality, there are many scenarios where you might want to interact with GitHub programmatically. This is where the GitHub API comes into play.
The GitHub API allows developers to automate workflows, retrieve data, and integrate GitHub's powerful features directly into their applications. Whether you're looking to fetch user information, list repositories, or manage issues and pull requests, the GitHub API provides a flexible and efficient way to interact with GitHub programmatically, and in this guide, we'll learn how to use it!
Prerequisites
Before diving into using the GitHub API with Node.js, there are a few prerequisites you need to have in place. This section will outline the basic requirements and knowledge you'll need to follow along with this guide.
1. Basic Knowledge of JavaScript and Node.js
To effectively use the GitHub API with Node.js, you should have a fundamental understanding of JavaScript, particularly asynchronous programming and promises, as these concepts are frequently used when making HTTP requests. Familiarity with Node.js, including setting up a project and installing dependencies, is also essential.
2. GitHub Account
You need a GitHub account to access the GitHub API. If you don't have one already, you can sign up for free on GitHub. Additionally, you'll need to create a personal access token to authenticate your requests. We’ll cover how to generate this token in a later section.
3. Node.js Installed on Your System
Ensure you have Node.js installed on your machine. If you haven’t installed it yet, you can download the latest version from the official Node.js website. This tutorial will use Node.js, so having it installed is crucial to run the code examples provided.
4. Basic Understanding of RESTful APIs
Since the GitHub API is a RESTful API, having a basic understanding of how REST APIs work will be beneficial. This includes understanding HTTP methods (GET, POST, PUT, DELETE), status codes, and how to handle JSON responses.
5. A Code Editor
A code editor or integrated development environment (IDE) like Visual Studio Code, Sublime Text, or Atom will help you write and manage your code efficiently. Any code editor you're comfortable with will work fine for this tutorial.
Setting Up Your Environment
Before we can start making requests to the GitHub API, we need to set up our development environment. In this section, we’ll cover the steps to set up Node.js, initialize a new project, and install the necessary libraries.
Step 1: Install Node.js
If you haven’t installed Node.js yet, download the latest version from the official Node.js website. Follow the installation instructions specific to your operating system. To verify that Node.js is installed correctly, open your terminal or command prompt and run:
node -v
This command should display the version number of Node.js installed on your machine.
Step 2: Initialize a New Node.js Project
Next, we’ll create a new directory for our project and initialize it with npm (Node Package Manager). Open your terminal and run the following commands:
mkdir github-api-tutorial
cd github-api-tutorial
npm init -y
The npm init -y command creates a package.json file with default settings, which is necessary to manage the project's dependencies.
Step 3: Install Required Libraries
To interact with the GitHub API, we need both express and an HTTP client library. In this tutorial, we'll use axios, a promise-based HTTP client for Node.js. Install axios by running:
npm install express axios
Additionally, we may need dotenv to manage environment variables securely. This package allows us to load environment variables from a .env file into process.env, which is useful for storing sensitive information like API tokens. Install dotenv by running:
npm install dotenv
Step 4: Create a .env File
Create a .env file in the root of your project directory to store your GitHub personal access token. This file should not be committed to version control to keep your sensitive information secure.
GITHUB_TOKEN=your_personal_access_token_here
Replace your_personal_access_token_here with your actual GitHub personal access token. We will cover how to generate this token in a later section.
Step 5: Set Up the Project Structure
Create a new file named index.js in the root directory of your project. This file will serve as the main entry point for our Node.js application.
You can also set up a basic folder structure if you plan to expand your project further. A simple structure might look like this:
github-api-tutorial/
├── node_modules/
├── .env
├── index.js
├── package.json
└── package-lock.json
Creating a GitHub Personal Access Token
To access authenticated endpoints and increase your API rate limits, you need a GitHub personal access token. Github has a cool guide on how to create an access token, which you can find below;

The steps are also outlined below for your to easily follow along :)
- Log in to your GitHub account and navigate to Settings.
- In the left sidebar, click Developer settings.
- Click Personal access tokens and then Tokens (classic).
- Click the Generate new token button.
- Provide a note to describe the purpose of the token (e.g., "GitHub API Tutorial").
- Select the scopes or permissions you want to grant this token. For this tutorial, select
repo(for repository access) anduser(for accessing user information). You can adjust the scopes based on your specific needs. - Click Generate token.
- Copy the generated token and store it in your
.envfile as described earlier. Note: Treat this token like a password and never share it publicly.
Setting Up an Express Application with Routes for GitHub API Requests
Let's create a basic Express server with two routes: one to fetch a GitHub user's profile and another to fetch their repositories.
Here's how your index.js file could look:
// Import required modules
require('dotenv').config();
const express = require('express');
const axios = require('axios');

const app = express();

// Middleware to parse JSON and URL-encoded data
app.use(express.json());
app.use(express.urlencoded({ extended: true }));

// Route to fetch GitHub user profile
app.get('/user/profile', async (req, res) => {
    try {
        const response = await axios.get('https://api.github.com/user', {
            headers: {
                'Authorization': `Bearer ${process.env.GITHUB_TOKEN}`
            }
        });
        res.json(response.data);  // Send the user profile data as JSON response
    } catch (error) {
        res.status(500).json({ error: 'Error fetching user profile', details: error.message });
    }
});

// Route to fetch GitHub user repositories
app.get('/user/repos', async (req, res) => {
    const username = req.query.username || 'irorochad'; // Default to 'irorochad' if no username is provided
    try {
        const response = await axios.get(`https://api.github.com/users/${username}/repos`, {
            headers: {
                'Authorization': `Bearer ${process.env.GITHUB_TOKEN}`
            }
        });
        res.json(response.data);  // Send the user repositories data as JSON response
    } catch (error) {
        res.status(500).json({ error: 'Error fetching user repositories', details: error.message });
    }
});

// Start the server
const PORT = process.env.PORT || 3000;
app.listen(PORT, () => {
    console.log(`Server is running on http://localhost:${PORT}`);
});
You can even consider using controllers to make it more readable.
Explanation of the Code:
-
Import Required Modules:
- We import
dotenvto load environment variables from a.envfile,expressto create the server, andaxiosto make HTTP requests to the GitHub API.
- We import
-
Set Up Middleware:
express.json()andexpress.urlencoded()middleware are used to parse incoming requests with JSON payloads and URL-encoded data, respectively.
-
Create Routes:
GET /user/profile: This route fetches the authenticated GitHub user's profile using theaxioslibrary. The profile data is returned as a JSON response.GET /user/repos: This route fetches the public repositories of a specified GitHub user. The username is provided as a query parameter (e.g.,/user/repos?username=irorochad). If no username is specified, it defaults to'irorochad'.
-
Error Handling:
- If an error occurs during the API request, the server responds with a 500 status code and a JSON object containing the error details.
-
Start the Server:
- The server listens on a specified port (defaulting to 3000 if not set in the environment) and logs a message when it starts.
3. Update Your .env File
Ensure your .env file contains the following:
GITHUB_TOKEN=your_personal_access_token_here
PORT=3000
Replace your_personal_access_token_here with your actual GitHub personal access token.
4. Running Your Application
To run your Express application, use the following command:
node index.js
Your server should now be running on http://localhost:3000, and it's time to now test our endpoints!!!
- Fetch User Profile: Visit
http://localhost:3000/user/profileto get the authenticated user's profile. - Fetch User Repositories: Visit
http://localhost:3000/user/repos?username=<GitHubUsername>(replace<GitHubUsername>with the desired GitHub username) to get the user's repositories.
Testing Our Endpoints Using Apidog
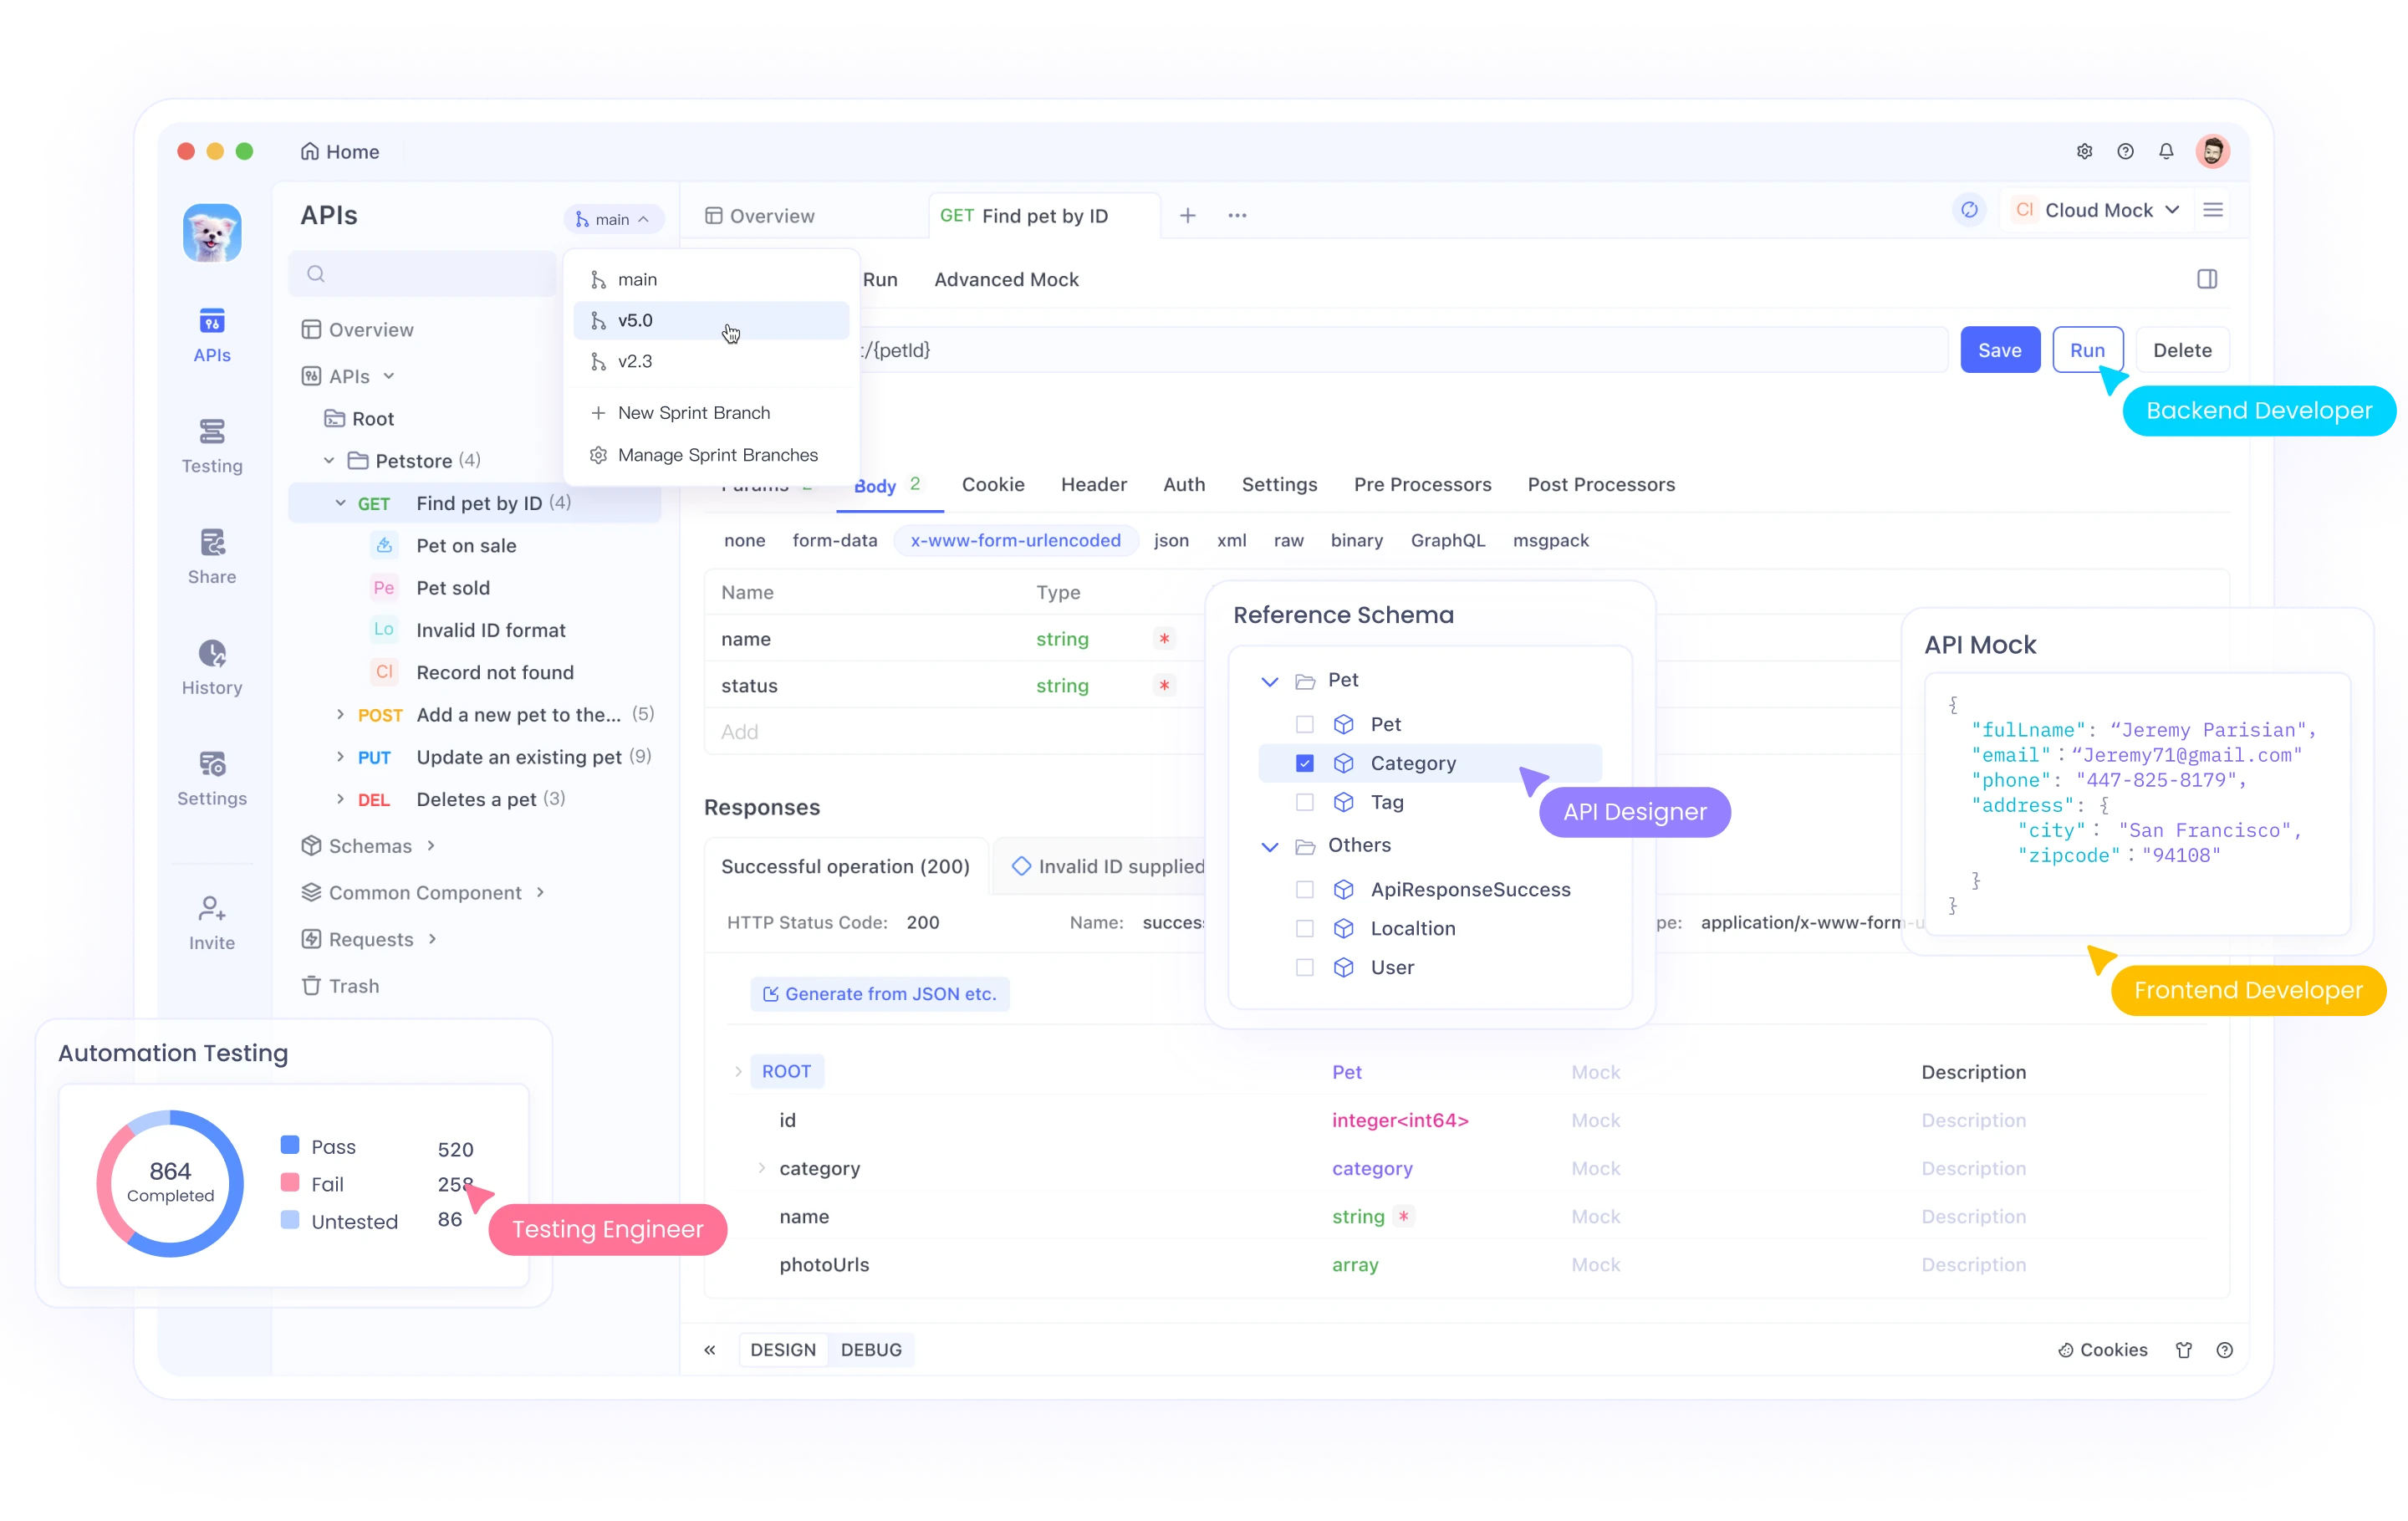
Apidog enhances API security by offering robust documentation, automated testing, and real-time monitoring. Apidog also aids in compliance with industry standards like GDPR and HIPAA, ensuring your APIs protect user data effectively.
Additionally, Apidog supports team collaboration, fostering a security-focused development environment. By integrating Apidog, you can build secure, reliable, and compliant APIs, protecting your data and users from various security threats.
Once you have Apidog or the web version installed, you can start by creating a new project and sending your first request.
Testing Fetch User Endpoint:
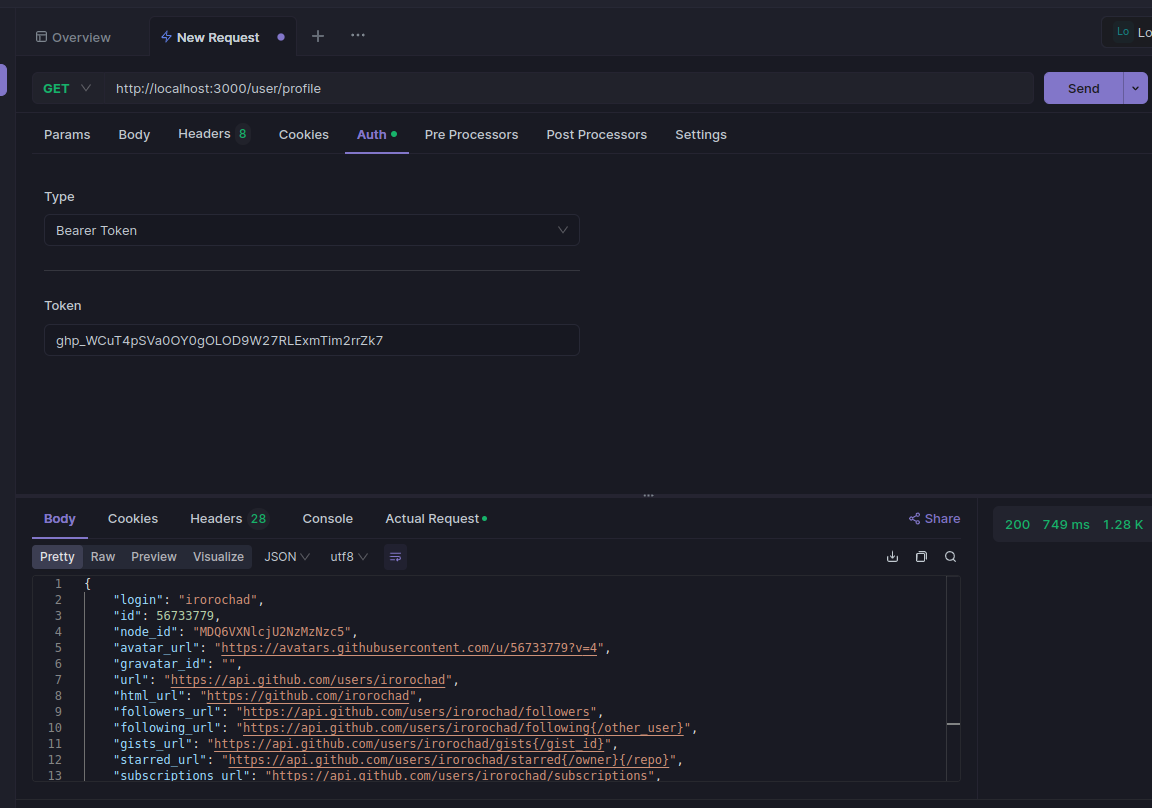
Before we can call this endpoint, we'll need to tell Apidog that the endpoint requires an access token, and we need to provide the access token to Apidog to enable it to make the request.
We can do so by navigating to the Auth section of the request page, and inserting the token in the field where it's needed as shown below;
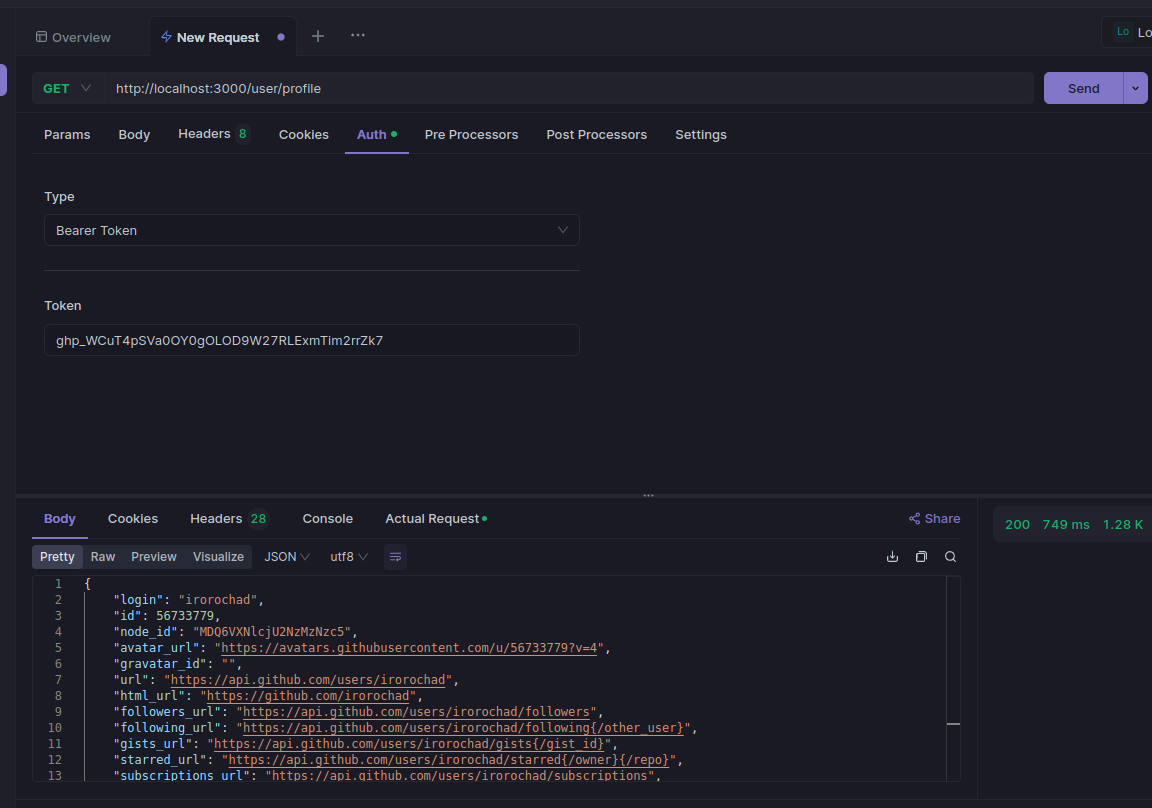
As you can see from the screenshot above, the fetch user endpoint is working well as expected, and that's because our server is up and running, and we also passed the access token to Apidog. Without the access token the request will fail, and we'll not be able to see the responses about that request.
Testing Fetch Repo Endpoint:
Just like the fetch users endpoints, the fetch repo endpoint also needs an access token to make the call.
Conclusion
Integrating the GitHub API with a Node.js application opens up a world of possibilities for developers looking to automate workflows, analyze data, or enhance their applications with GitHub's powerful features. In this guide, we walked through the process of setting up an Express server and creating routes to fetch user profile information and repositories from GitHub.
By following the steps outlined, you now have a foundational understanding of how to interact with the GitHub API using Node.js and Express. You can easily expand upon this by adding more routes to explore different endpoints, such as managing issues, pull requests, and more.


