
In this article, we’ll cover everything you need to know about setting up DeepSeek Free API and integrating it with Apidog. Each step will be explained in a conversational yet technical tone, ensuring that regardless of your experience with AI or API development, you can still follow along and get your projects up and running in no time.
What is DeepSeek Free API?
DeepSeek Free API is an advanced interface that lets you tap into the capabilities of the DeepSeek language models. These models are designed to handle complex NLP tasks such as text generation, summarization, translation, and even code completion. The API is available for free (with usage limits) so that developers, startups, and AI hobbyists can experiment and build innovative applications without significant financial investment.
Key Features of DeepSeek Free API
- OpenAI Compatibility:
DeepSeek API uses an API format that is compatible with OpenAI. This means you can use the OpenAI SDK or any software that works with the OpenAI API to access DeepSeek’s powerful language models. - Flexible Base URL Configuration:
You have the option to set your base URL to eitherhttps://api.deepseek.comorhttps://api.deepseek.com/v1. The latter is recommended for compatibility with OpenAI, although note that the “v1” here does not reflect the model’s version. - Multiple Models in One API:
The API supports different models for various tasks. For instance, thedeepseek-chatmodel (upgraded to DeepSeek-V3) is used for conversational tasks, while thedeepseek-reasonermodel (DeepSeek-R1) is designed for advanced reasoning tasks. - Scalability and Versatility:
Whether you are looking to build a conversational agent or perform complex reasoning, DeepSeek’s models provide scalable performance for a wide range of applications.
How to Get Started with DeepSeek Free API
Getting started with DeepSeek Free API is simple if you follow these steps. We’ll cover the entire process from account creation to making your first API call.
Sign Up and Account Creation on the DeepSeek Platform
- Visit the DeepSeek Website:
Head over to DeepSeek's official website and click on the “Sign Up” button. You can register using your email or via your GitHub account for quicker access. - Fill Out the Registration Form:
Provide your name, email, and create a secure password. Once you complete the registration form, you will receive a verification email. - Verify Your Email:
Click on the link in the verification email to activate your account. This step is crucial as it confirms your identity and unlocks access to the developer dashboard.
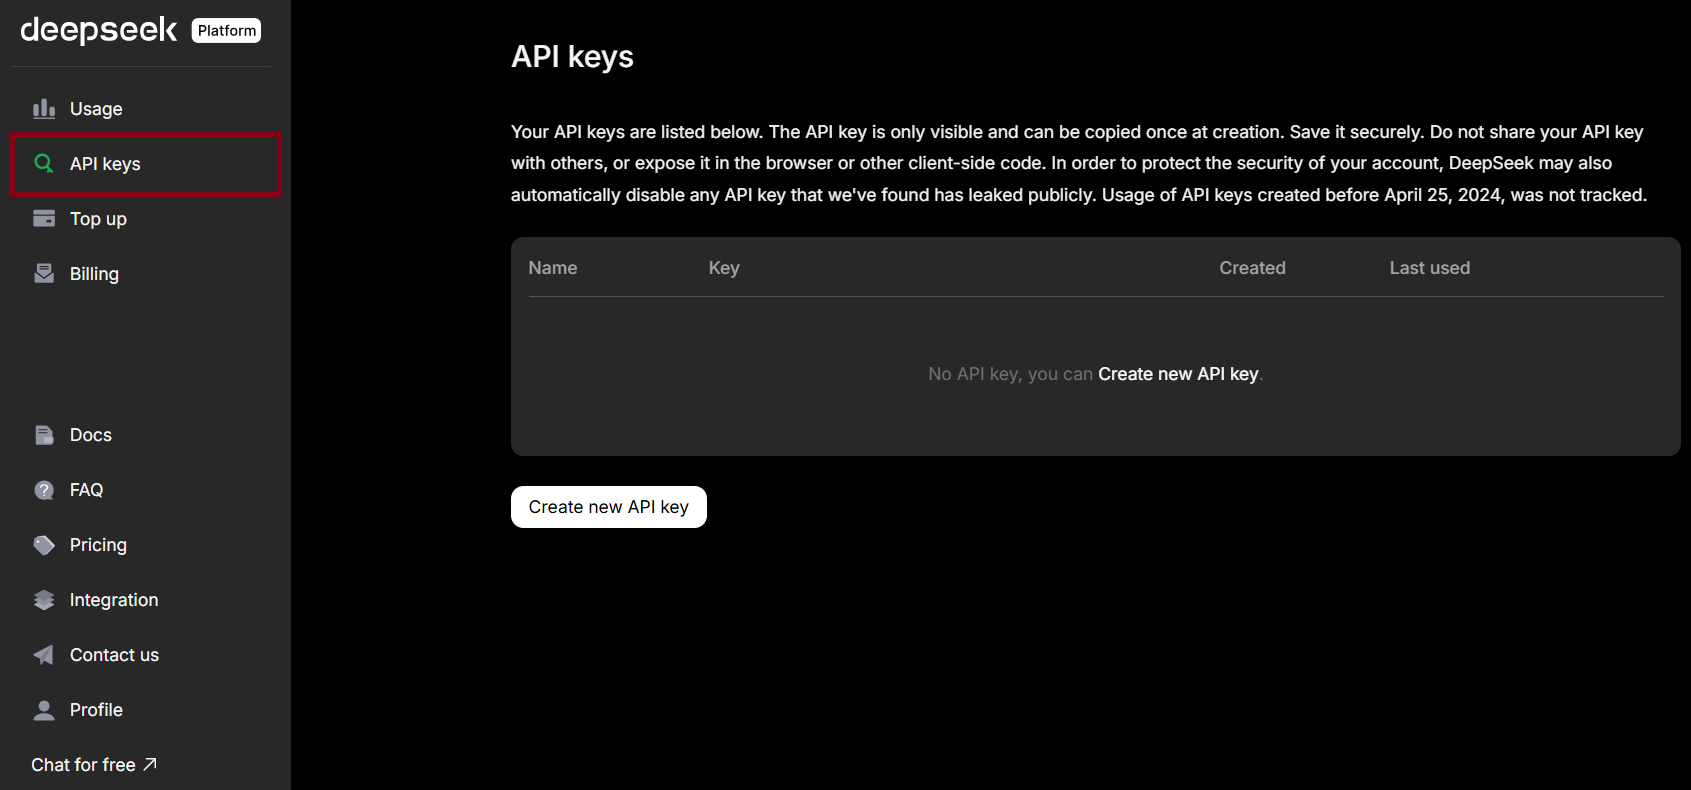
Generating Your Free DeepSeek API Key
After your account is verified, the next step is to generate your unique API key:
- Log into the API Platform:
Navigate to the dashboard where all API-related functionalities are managed. - Locate the API Keys Section:
Within the dashboard, you’ll find an “API Keys” section. Click on “Generate API Key” to create a new key. - Copy and Secure the API Key:
Make sure to copy your API key and store it securely. You will need this key to authenticate your requests to the DeepSeek API.
Configuring Your API Client
One of the best aspects of DeepSeek API is its compatibility with the OpenAI API format. This means you can use the OpenAI SDK to interact with DeepSeek. Here’s how to set it up:
Install the OpenAI SDK:
If you haven’t already, install the OpenAI SDK by running:
pip3 install openai- Set Up Your Configuration:
When configuring your client, specify the base URL and API key. DeepSeek recommends usinghttps://api.deepseek.comorhttps://api.deepseek.com/v1(the latter for OpenAI compatibility). Note that the “v1” does not indicate the version of the model.
Specify the Model:
- For conversational tasks, use the model parameter
model="deepseek-chat". This invokes the latest version of the chat model, now known as DeepSeek-V3. - For reasoning tasks, use
model="deepseek-reasoner"to call DeepSeek-R1, the latest reasoning model.
Invoking the DeepSeek Chat API
Now, let’s see how you can make a basic API call using the OpenAI SDK to interact with DeepSeek. Below is an example Python script:
from openai import OpenAI

# Initialize the client with your DeepSeek API key and base URL
client = OpenAI(api_key="your_api_key_here", base_url="https://api.deepseek.com")

# Make a non-streaming chat completion request using the deepseek-chat model
response = client.chat.completions.create(
	model="deepseek-chat",
    messages=[
    	{"role": "system", "content": "You are a useful assistant"},
        {"role": "user", "content": "Can you explain how DeepSeek API works?"}
	],
    stream=False  # Set to True for a streaming response
)

# Print the response content
print(response.choices[0].message.content)
This script demonstrates how easy it is to interact with DeepSeek API. By using the OpenAI SDK, you leverage the familiar format while accessing DeepSeek’s powerful language capabilities. Adjust the prompt and parameters as needed to suit your application’s requirements.
Why DeepSeek API is a Must-Have for Developers
DeepSeek Free API offers a host of benefits that make it an indispensable tool for modern developers and AI enthusiasts:
- Advanced NLP Capabilities: Easily integrate text generation, translation, summarization, and reasoning into your apps without building complex models from scratch.
- Cost-Effective Access: A free tier lets startups and solo developers experiment and prototype without breaking the bank.
- Seamless Integration: Its OpenAI-compatible format ensures smooth adoption into existing workflows using familiar tools and SDKs.
- Scalable Performance: Grow from small chatbots to enterprise-level solutions with consistent, reliable performance.
- Versatility: Pick the right model for your project—DeepSeek-V3 (chat) for conversations or R1 (reasoner) for advanced logic.
Apidog: The Future of API Development
Apidog is an all-in-one API development platform designed to simplify API design, testing, debugging, and documentation. With its intuitive interface and powerful automation features, Apidog is quickly becoming a favorite among developers looking for a more streamlined alternative to traditional tools.
Pairing DeepSeek API with Apidog
Combining the advanced capabilities of DeepSeek Free API with the robust features of Apidog can transform your development workflow. In this section, we’ll explain how to integrate and test DeepSeek API within Apidog, ensuring that your API development process is smooth and efficient.
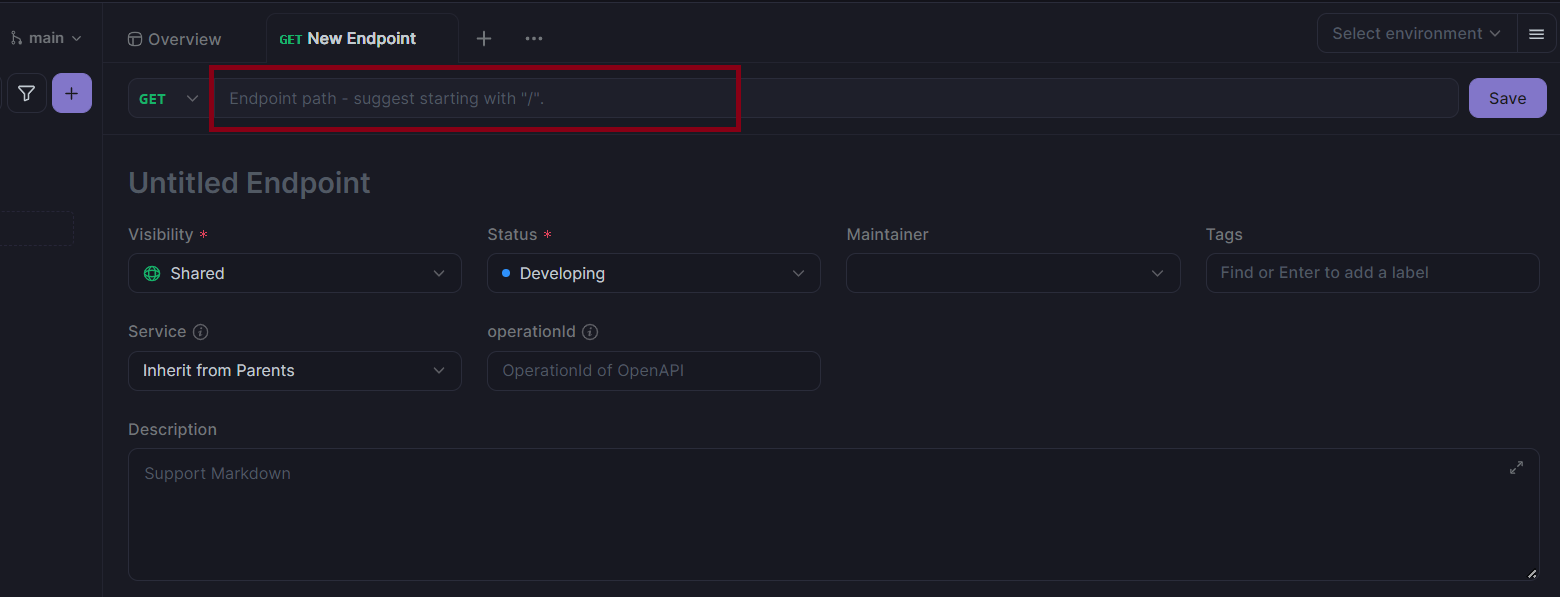
Importing Your DeepSeek API into Apidog
- Log into Apidog:
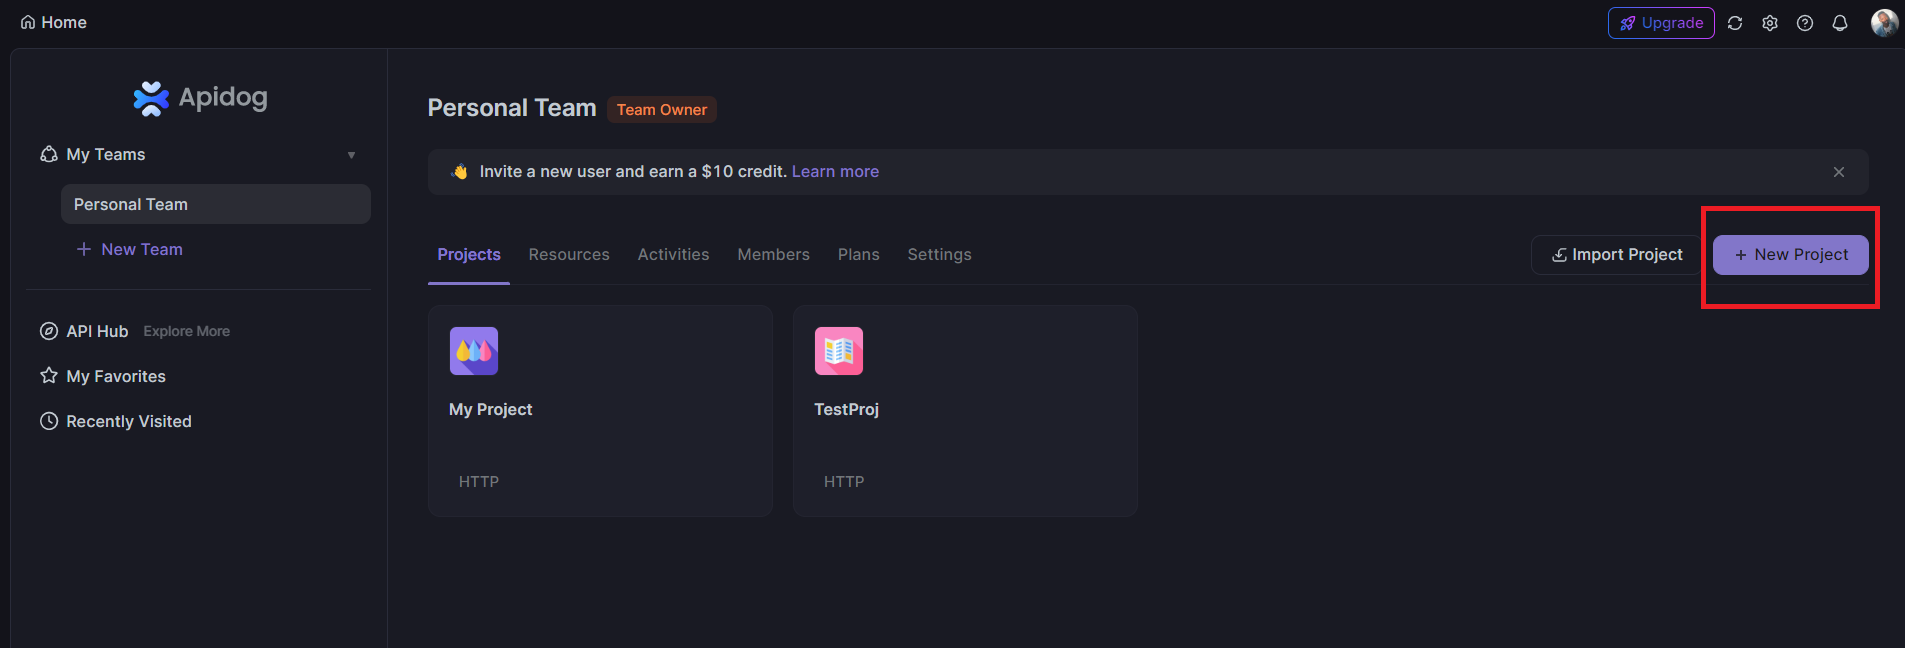
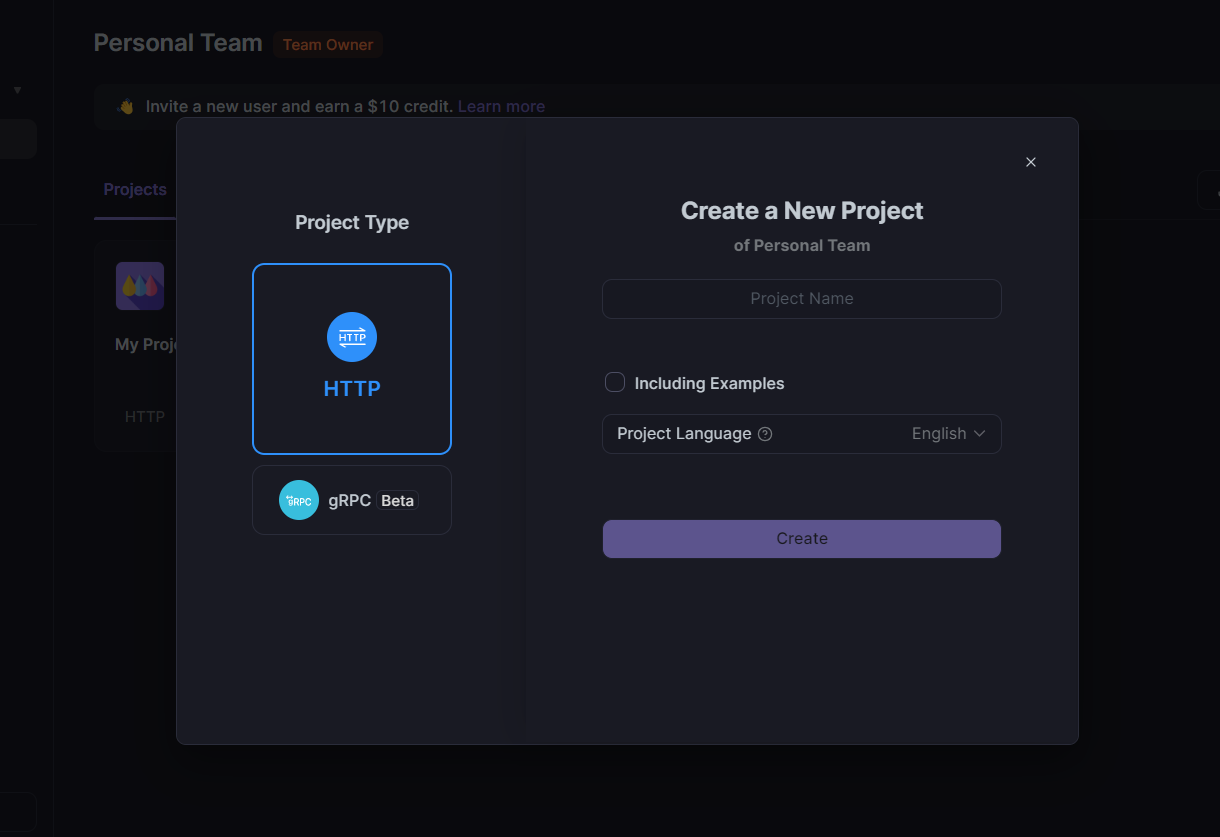
Start by visiting Apidog’s official website and signing up for an account if you haven’t already. - Create a New API Project:
From the Apidog dashboard, click on “New Project” and give it a descriptive name such as “DeepSeek API Integration.” - Import the API Specification:
If DeepSeek provides an OpenAPI (Swagger) specification, you can import it directly into Apidog. Simply paste the URL or upload the specification file, and Apidog will automatically generate the endpoints for you. - Configure Authentication:
In the project settings, add your DeepSeek API key under the authentication section. This ensures that all API requests sent from Apidog are properly authenticated.
Testing and Debugging Your API Calls
After importing DeepSeek API into Apidog, test your endpoints with ease:
- Run Sample Requests: Test endpoints like chat completion and view responses, status codes, and errors.
- Inspect Responses: Analyze headers, body, and latency to understand API performance.
- Automate Testing: Set up scheduled tests for critical endpoints to ensure functionality during updates.
- Debugging Tools: Use Apidog’s logs and error messages to quickly resolve issues.
Collaborative Documentation and Workflow Automation
Apidog enhances teamwork and efficiency:
- Interactive Docs: Auto-generate and share API documentation for seamless collaboration.
- Version Control: Track API changes easily, ideal for team projects.
- Workflow Automation: Automate tasks like testing, reporting, and doc updates to keep your API robust and current.
Apidog simplifies testing, debugging, and collaboration—making API development faster and more efficient.
Why Apidog is a Better Alternative for Developers
While tools like Postman have been popular, Apidog stands out with key advantages:
- All-in-One Platform: Combines design, testing, debugging, and documentation in one place, saving time and reducing errors.
- Better Collaboration: Auto-generated, interactive docs keep teams aligned and simplify onboarding.
- Automated Testing: Easy setup and CI/CD integration help catch issues early and maintain code quality.
- Multi-Protocol Support: Works with REST, GraphQL, SOAP, and WebSocket, perfect for modern, complex apps.
- Affordable Pricing: Free tiers and budget-friendly plans make it accessible for everyone, from solo developers to large teams.
Step-by-Step Guide to Getting Started with Apidog
Ready to take your API development workflow to the next level? Follow these steps to get started with Apidog:
Step 1: Sign Up for Apidog
- Visit the Apidog Website:
Navigate to Apidog’s official website and click on “Sign Up.” - Register Your Account:
Fill in the required details using your email, or sign up with your GitHub or Google account for quick access.
Step 2: Familiarize Yourself with the Dashboard
- Explore the Interface:
Once logged in, spend some time exploring the dashboard. Familiarize yourself with the sections for API management, testing, documentation, and collaboration. - Create a New Project:
Click on “New Project” and name your project (e.g., “DeepSeek API Integration”). This project will house all your API endpoints and related configurations.
Step 3: Import and Configure Your API
- Import API Specifications:
If you have an OpenAPI (Swagger) file for DeepSeek, upload it to Apidog. Otherwise, manually add the API endpoints based on DeepSeek’s documentation. - Configure Authentication:
Add your DeepSeek API key in the appropriate section to ensure that all requests are authenticated properly. - Set the Base URL:
Configure the base URL as eitherhttps://api.deepseek.comorhttps://api.deepseek.com/v1to maintain OpenAI API compatibility. Remember, the “v1” suffix is for compatibility purposes and does not represent the model version.
Step 4: Test Your API Endpoints
- Send Test Requests:
Choose an endpoint (for instance, the chat API endpoint) and send a test request. Examine the response in Apidog’s detailed view. - Debug and Iterate:
Use the debugging tools to inspect request headers, response times, and error messages. Adjust your configuration as needed to optimize performance.
Step 5: Automate and Collaborate
- Set Up Automated Tests:
Configure automated test cases for critical endpoints to ensure reliability over time. - Generate Interactive Documentation:
Leverage Apidog’s documentation features to create up-to-date, interactive API documentation that you can share with your team. - Collaborate:
Invite team members to your project so you can work together in real time. Use comments and version control features to keep everyone aligned.
Conclusion: DeepSeek + Apidog = Developers Dream
The DeepSeek Free API opens doors to cutting-edge AI capabilities, however, pairing it with Apidog not only boosts your productivity but also ensures that your applications are reliable, scalable, and ready for real-world deployment. This takes development to a whole new level! As you explore these tools, remember that innovation is a continuous journey. Be sure to embrace these technologies, experiment with different configurations, and keep refining your processes.
Ready to get started? Deploy your DeepSeek API today and supercharge your workflow with Apidog’s modern toolkit. The future of API development is here—and you could get started for free!


