
Accelerate your AI-driven code development by integrating custom API keys in Cursor. This guide walks backend and API engineers through configuring OpenAI, Anthropic, Google, and Azure keys for full control and scalability.
Why Configure Custom API Keys in Cursor?
For API developers and technical teams, leveraging your own API keys in Cursor provides key advantages:
- Cost Management: Directly monitor and control AI usage expenses via your provider accounts.
- Higher Throughput: Access higher rate limits than with Cursor’s shared keys, supporting demanding workflows.
- Model Choice: Unlock access to the latest or specialized models tailored to your projects.
- Data Privacy: Maintain tighter control over how code and prompts are processed.
If you’re building or testing APIs, pairing Cursor with Apidog streamlines your workflow. Apidog offers robust tools for API design, testing, and documentation, supporting seamless collaboration and automation.
How Custom API Keys Work in Cursor
When you add a custom API key, Cursor uses it to send requests to your chosen LLM provider. Key points to understand:
- Billing: Usage is billed by the provider (OpenAI, Anthropic, etc.), not Cursor.
- Key Handling: Each request includes your API key, but Cursor does not permanently store it.
- Prompt Processing: Cursor still builds and processes prompts via its backend.
Note: Some features, like Tab Completion, require specific models and may not be available with custom API keys. Only standard models from supported providers are enabled.
Step-by-Step: Setting Up Custom API Keys in Cursor
1. Open Cursor Settings
- Launch the Cursor app on your machine.
- Click the Settings icon (usually in the side menu).
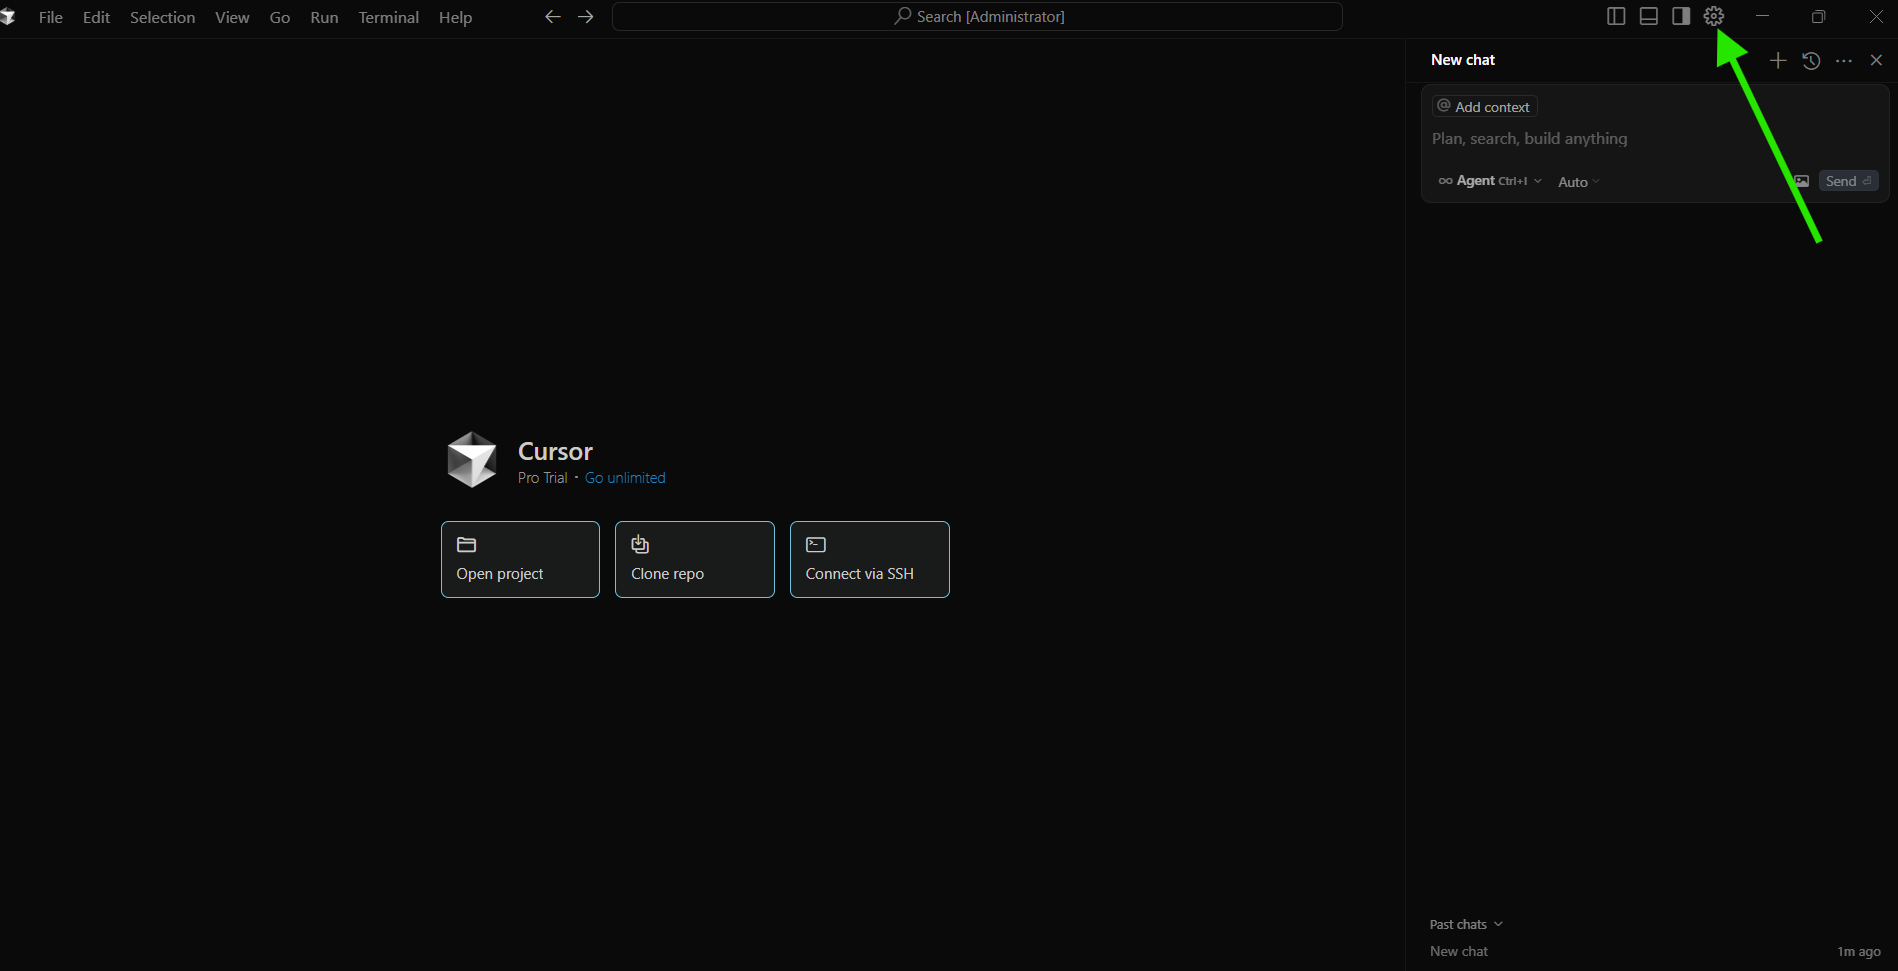
- In the Settings menu, select Models to access the API key configuration panel.
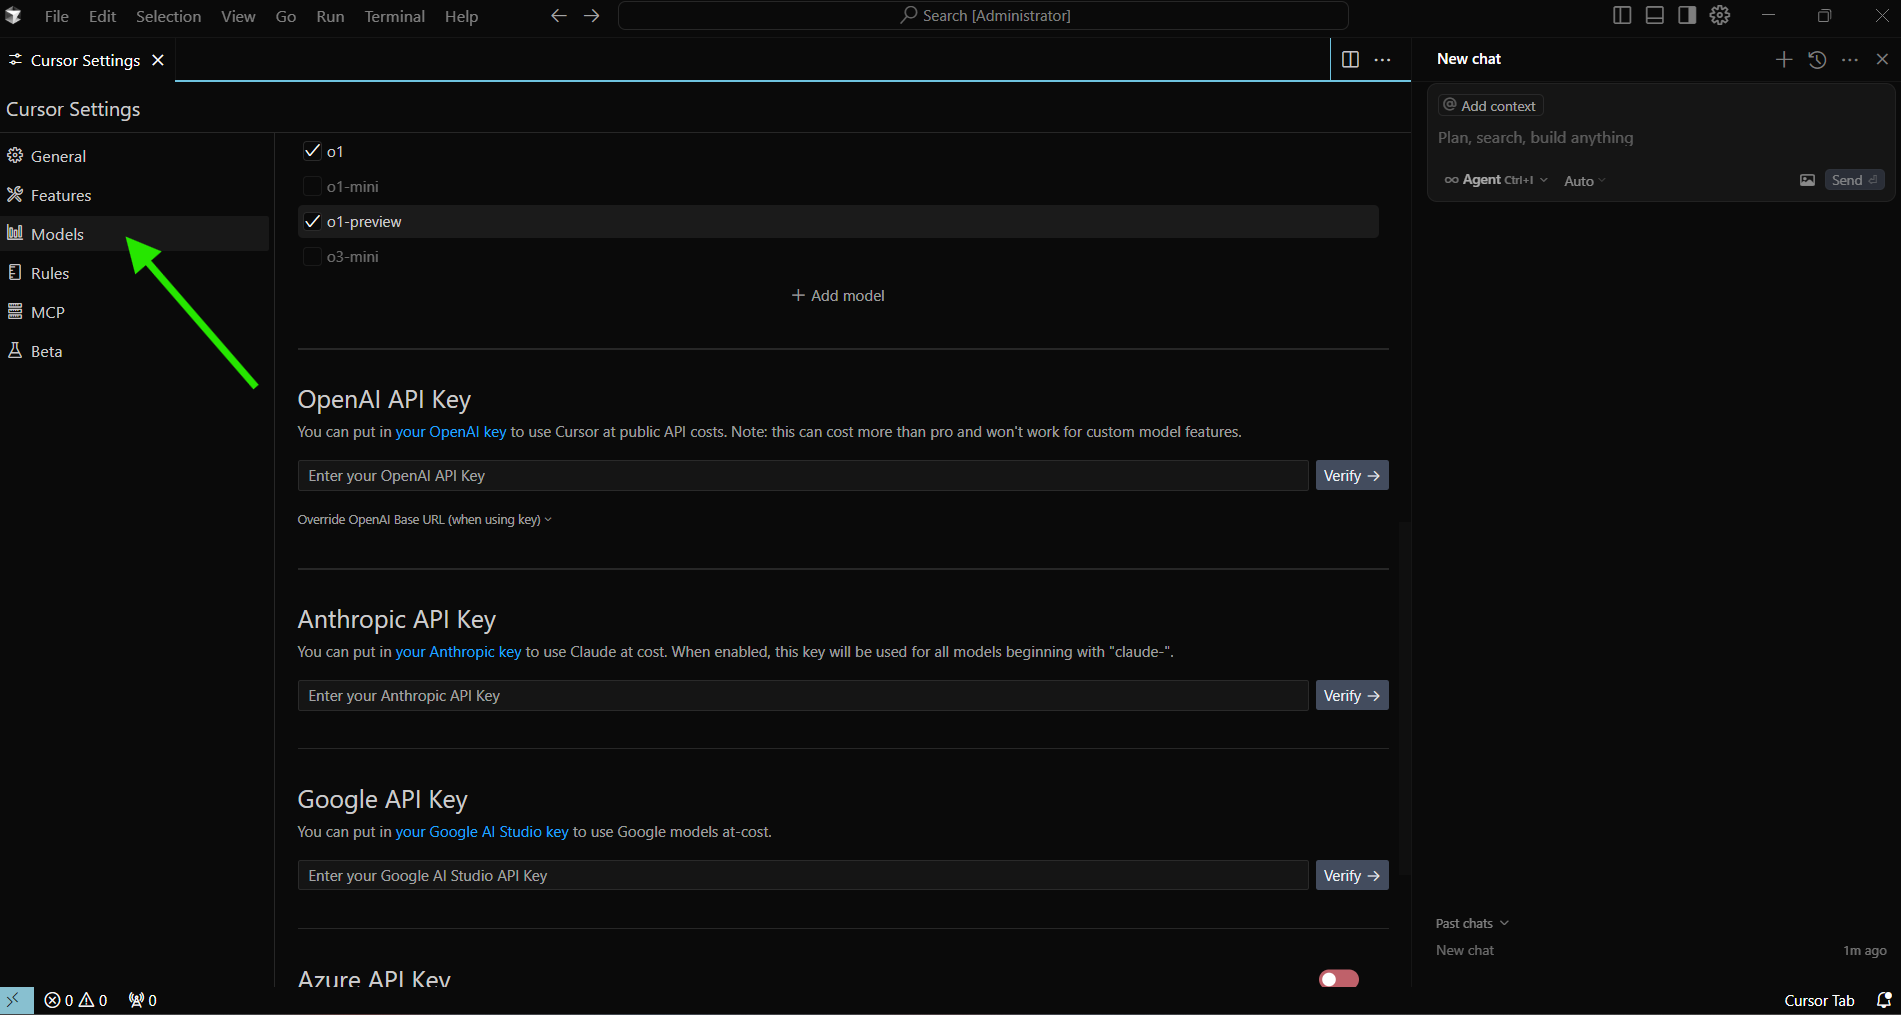
2. Add an OpenAI API Key
OpenAI’s models (GPT-4, GPT-3.5) are widely used for AI-powered coding.
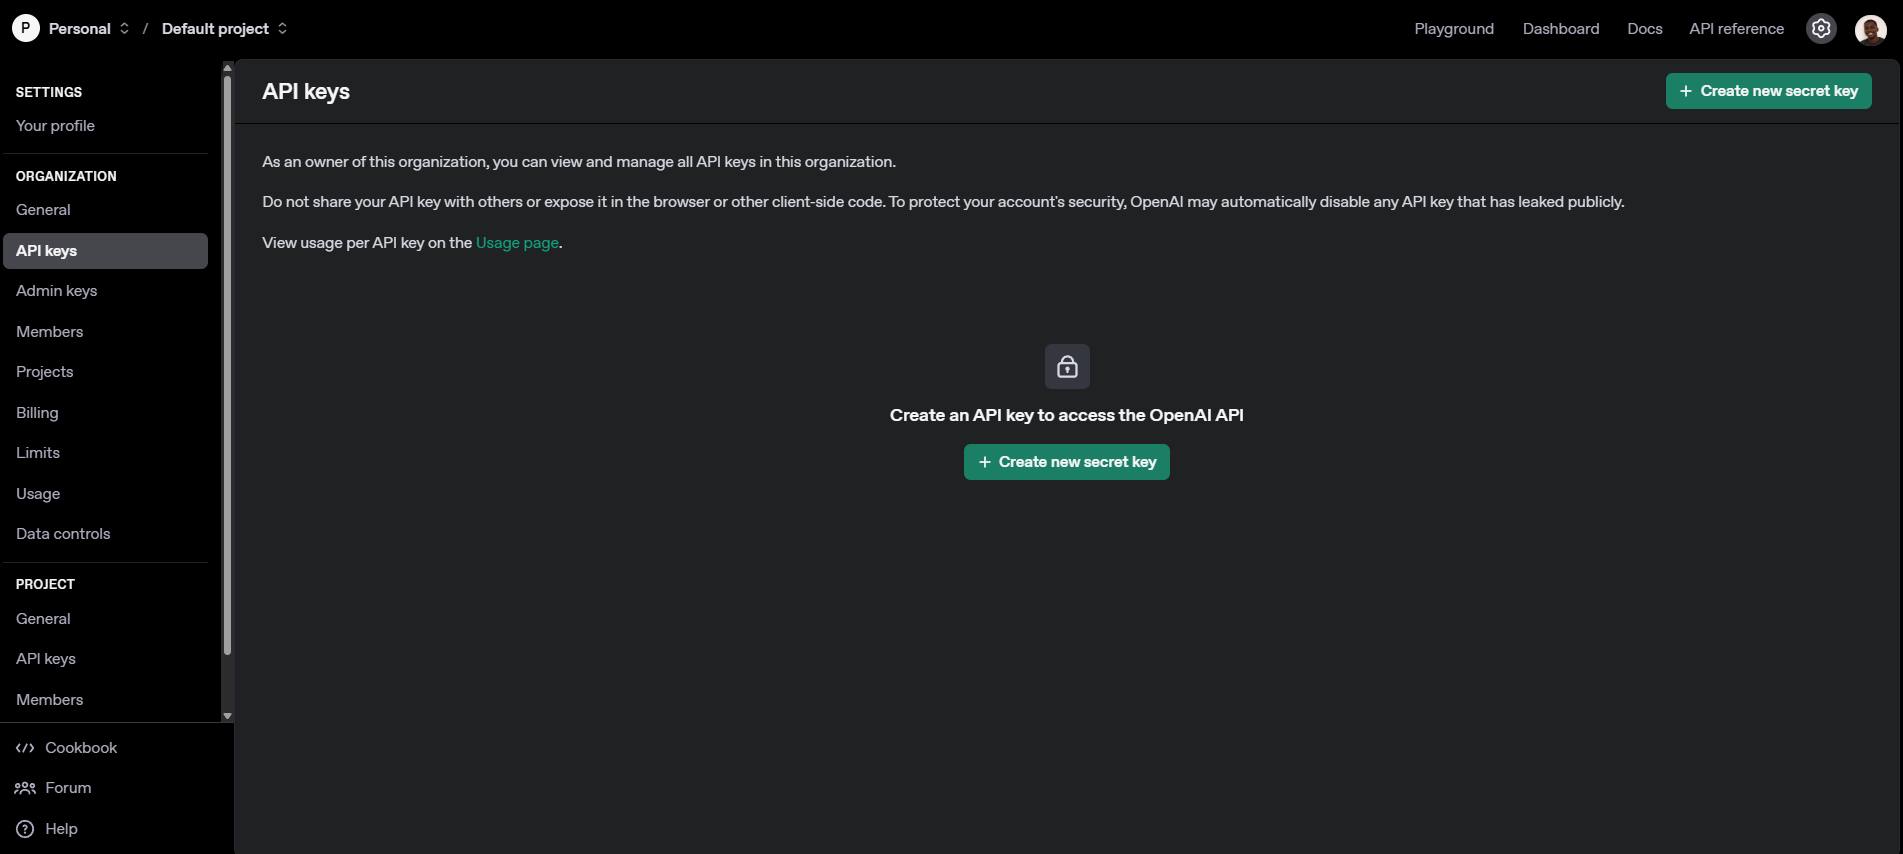
- Log in to your OpenAI account.
- Navigate to the API section and generate a new key.
- Copy the API key (it is shown only once).
- In Cursor, find the OpenAI API Keys section.
- Paste the key, then click Verify.
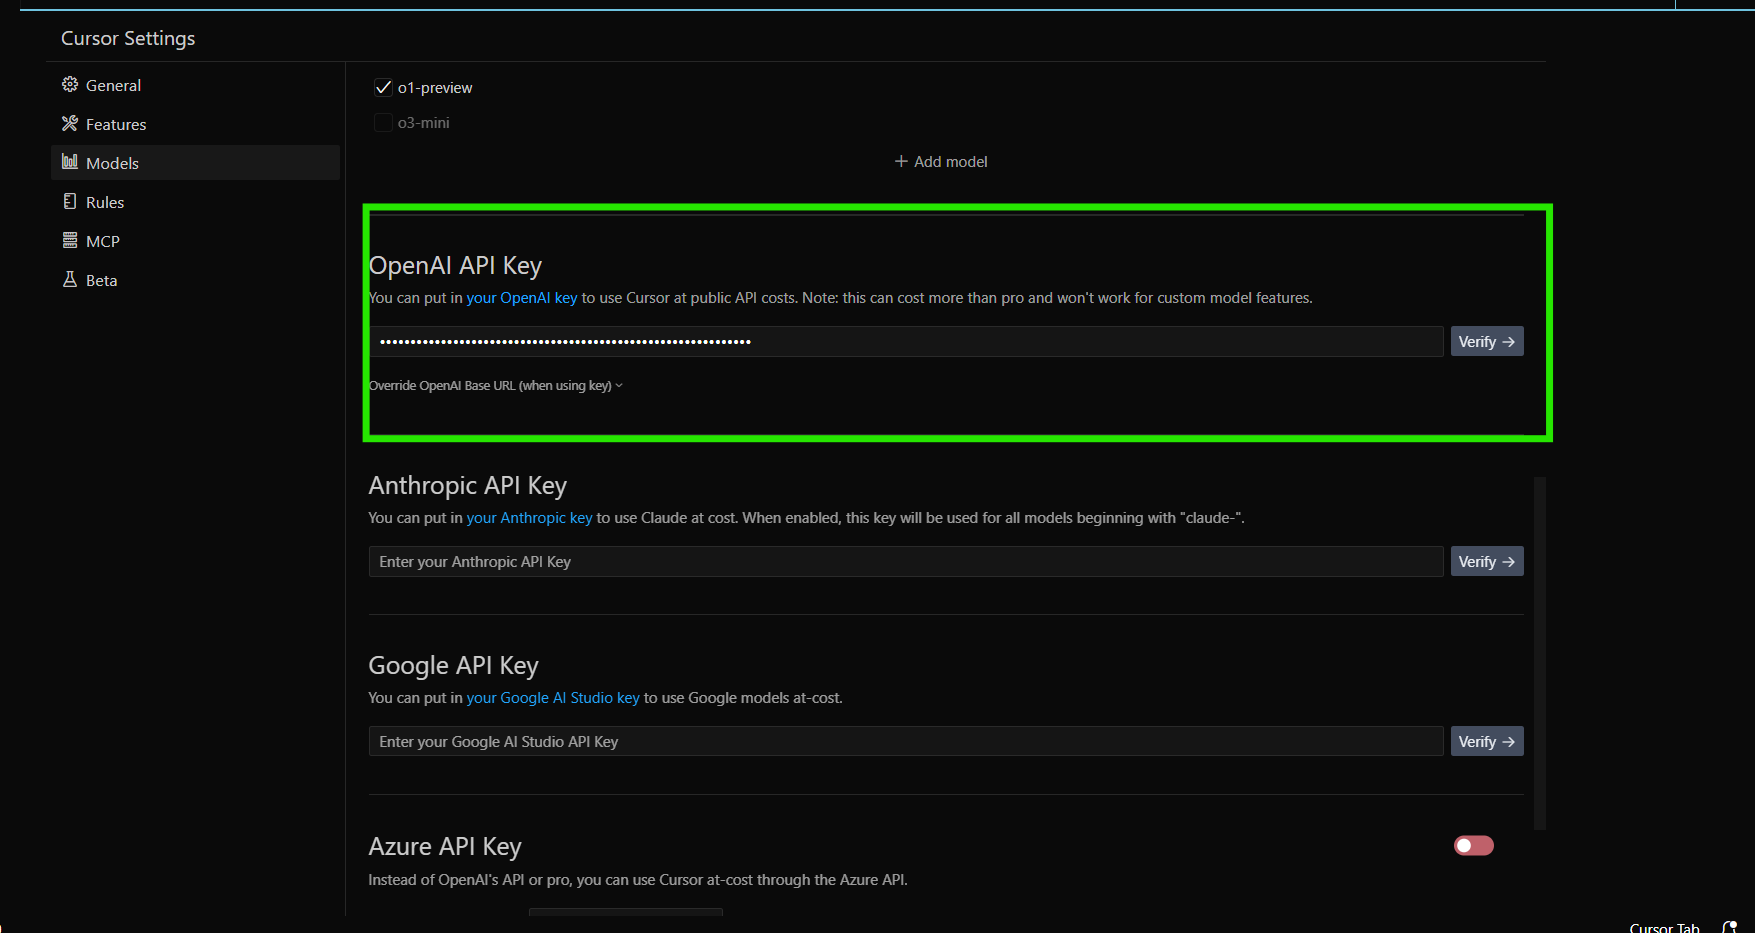
Tip: OpenAI’s o1, o1-mini, and o3-mini models require extra configuration and aren’t supported with custom keys.
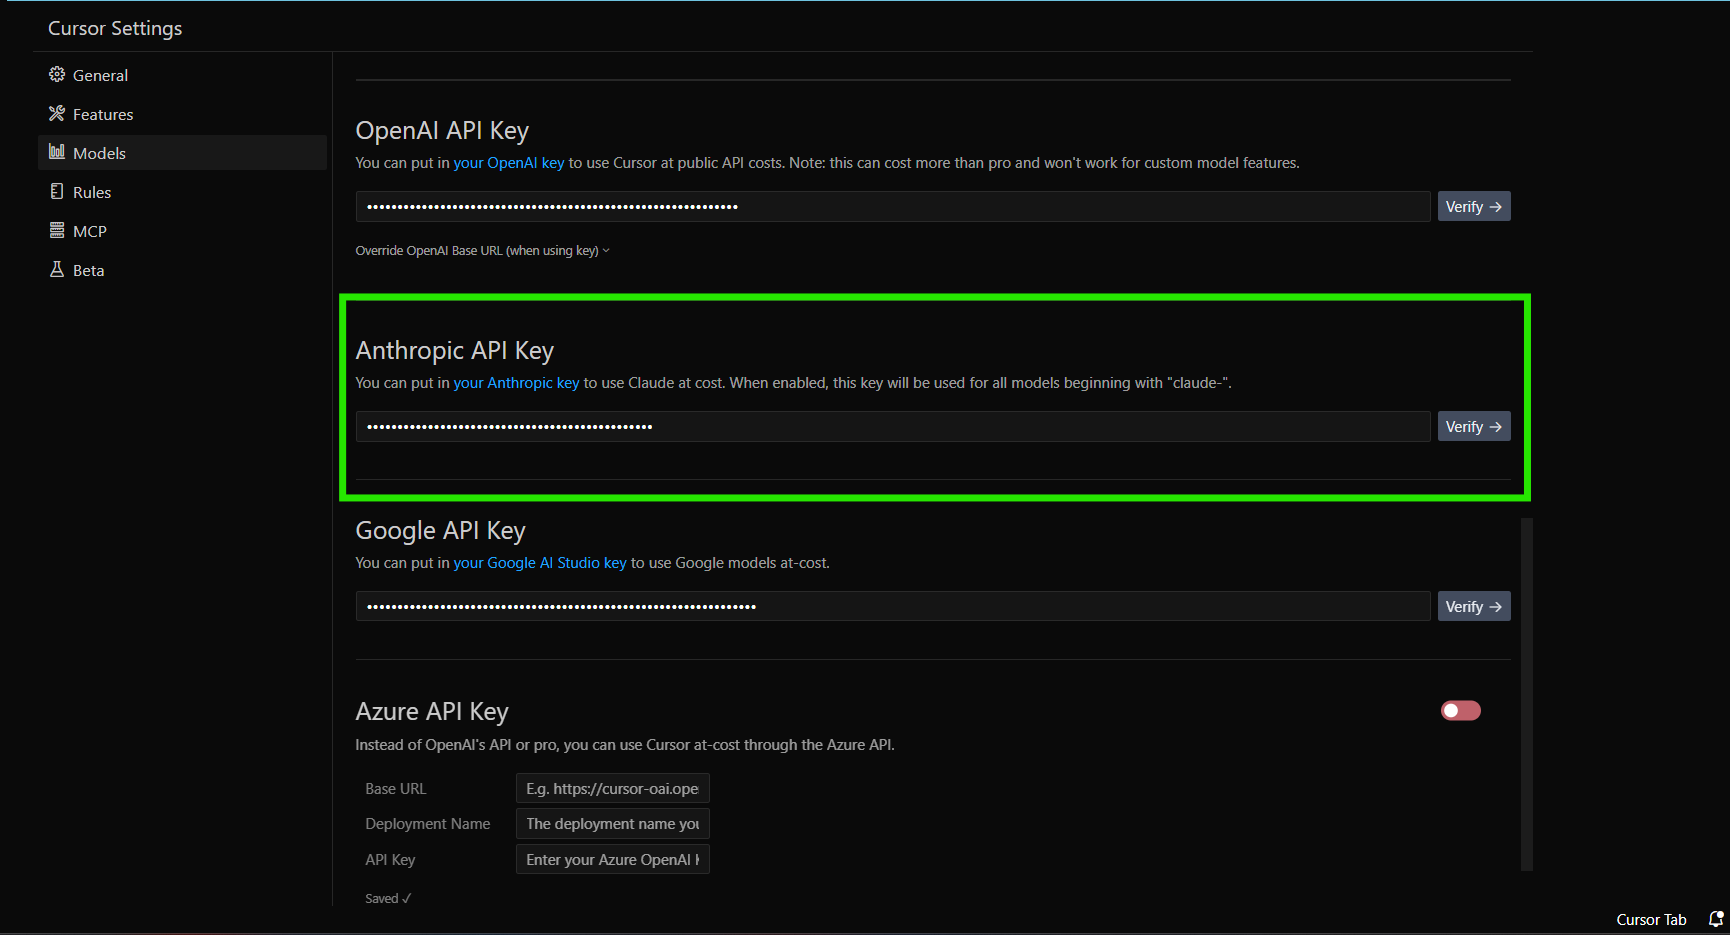
3. Integrate Anthropic API Key
For Claude models:
-
Access your Anthropic developer platform.
-
Generate a new API key and copy it.
-
In Cursor’s settings, locate Anthropic API Keys.
-
Paste your key and click Verify.
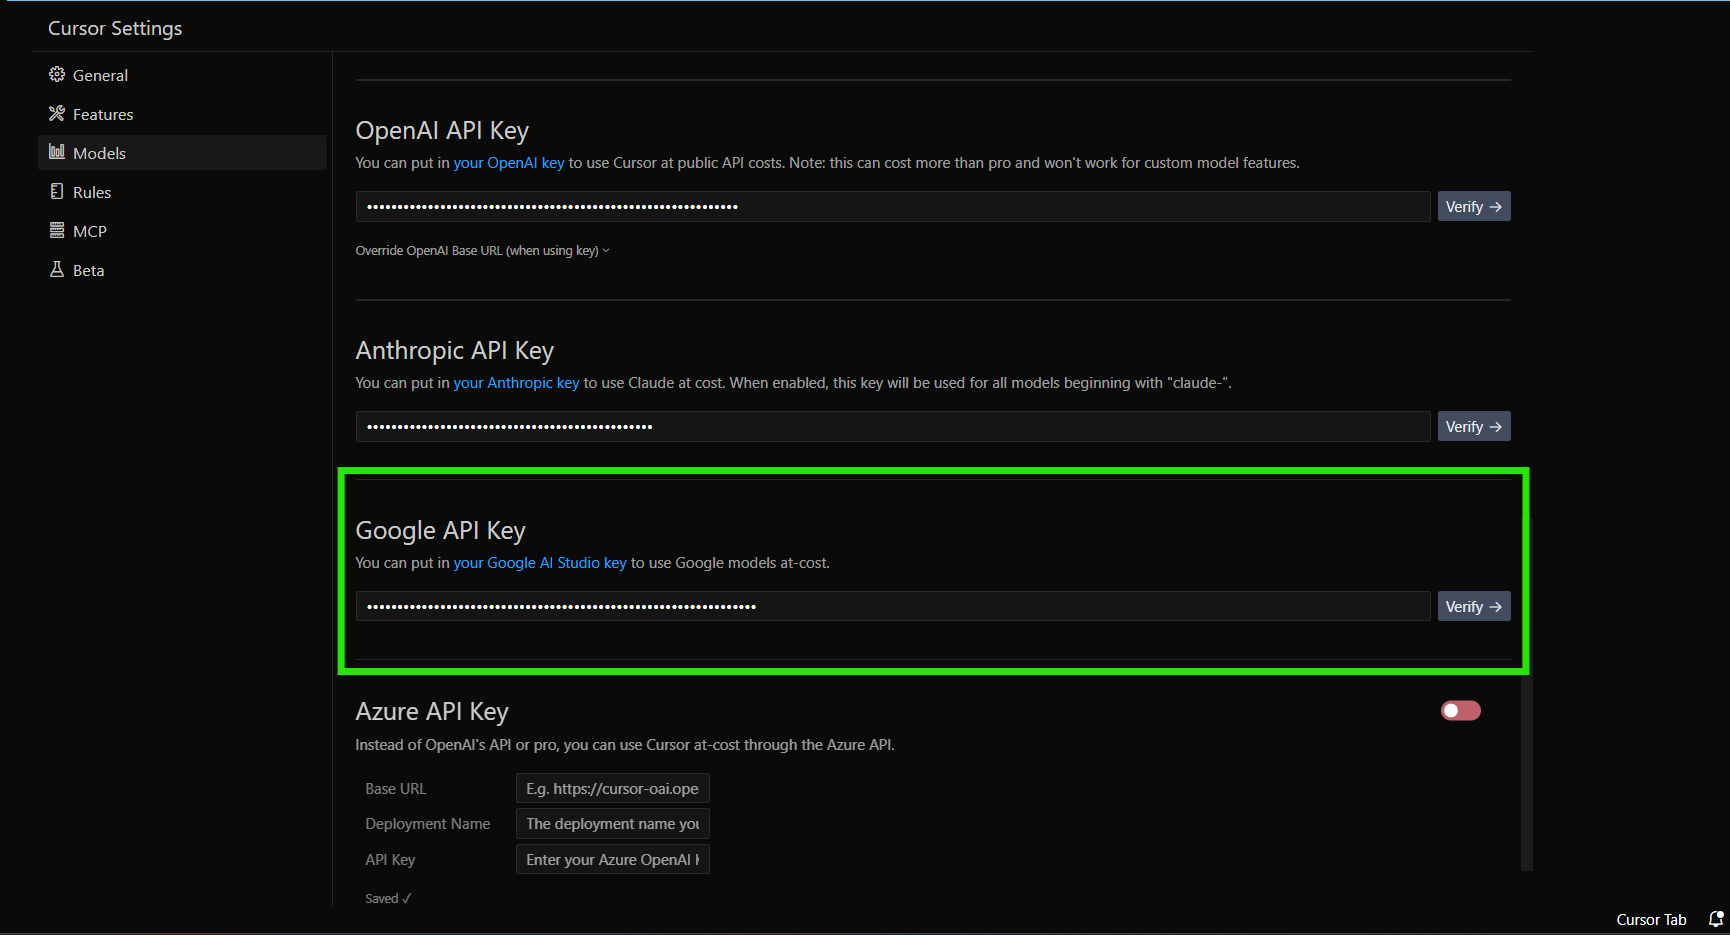
4. Configure Google API Key
For Gemini models:
- Sign in to Google AI Studio or Google Cloud Platform.
- Create an API key with permissions for Gemini usage.
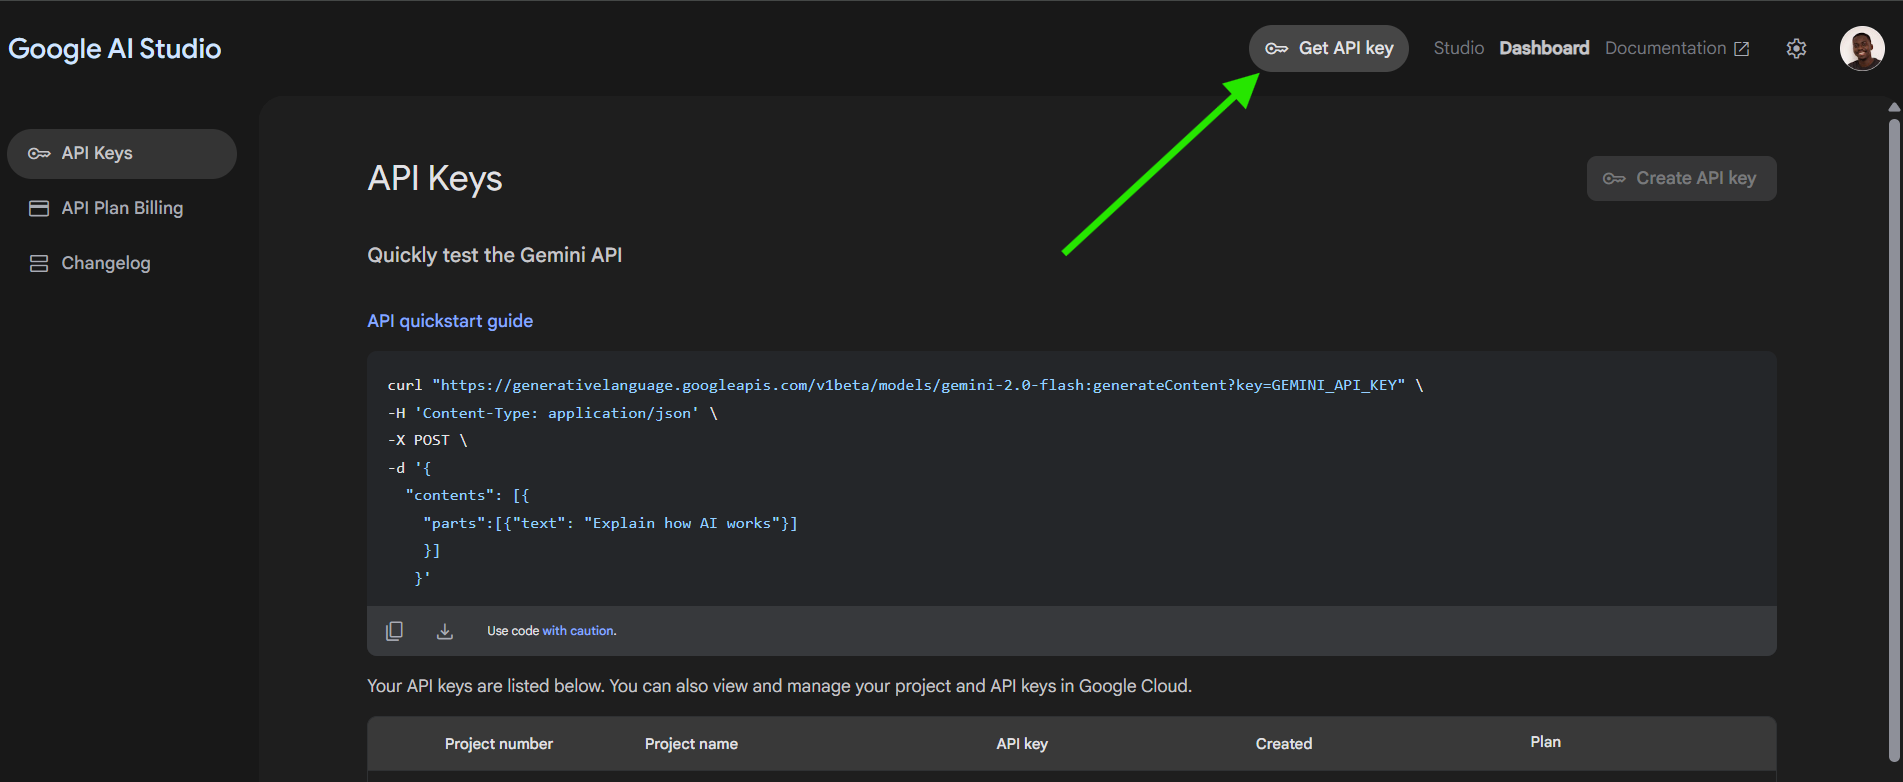
- In Cursor, find Google API Keys.
- Enter your key and click Verify.
Models like
gemini-1.5-flash-500kare supported through this integration.
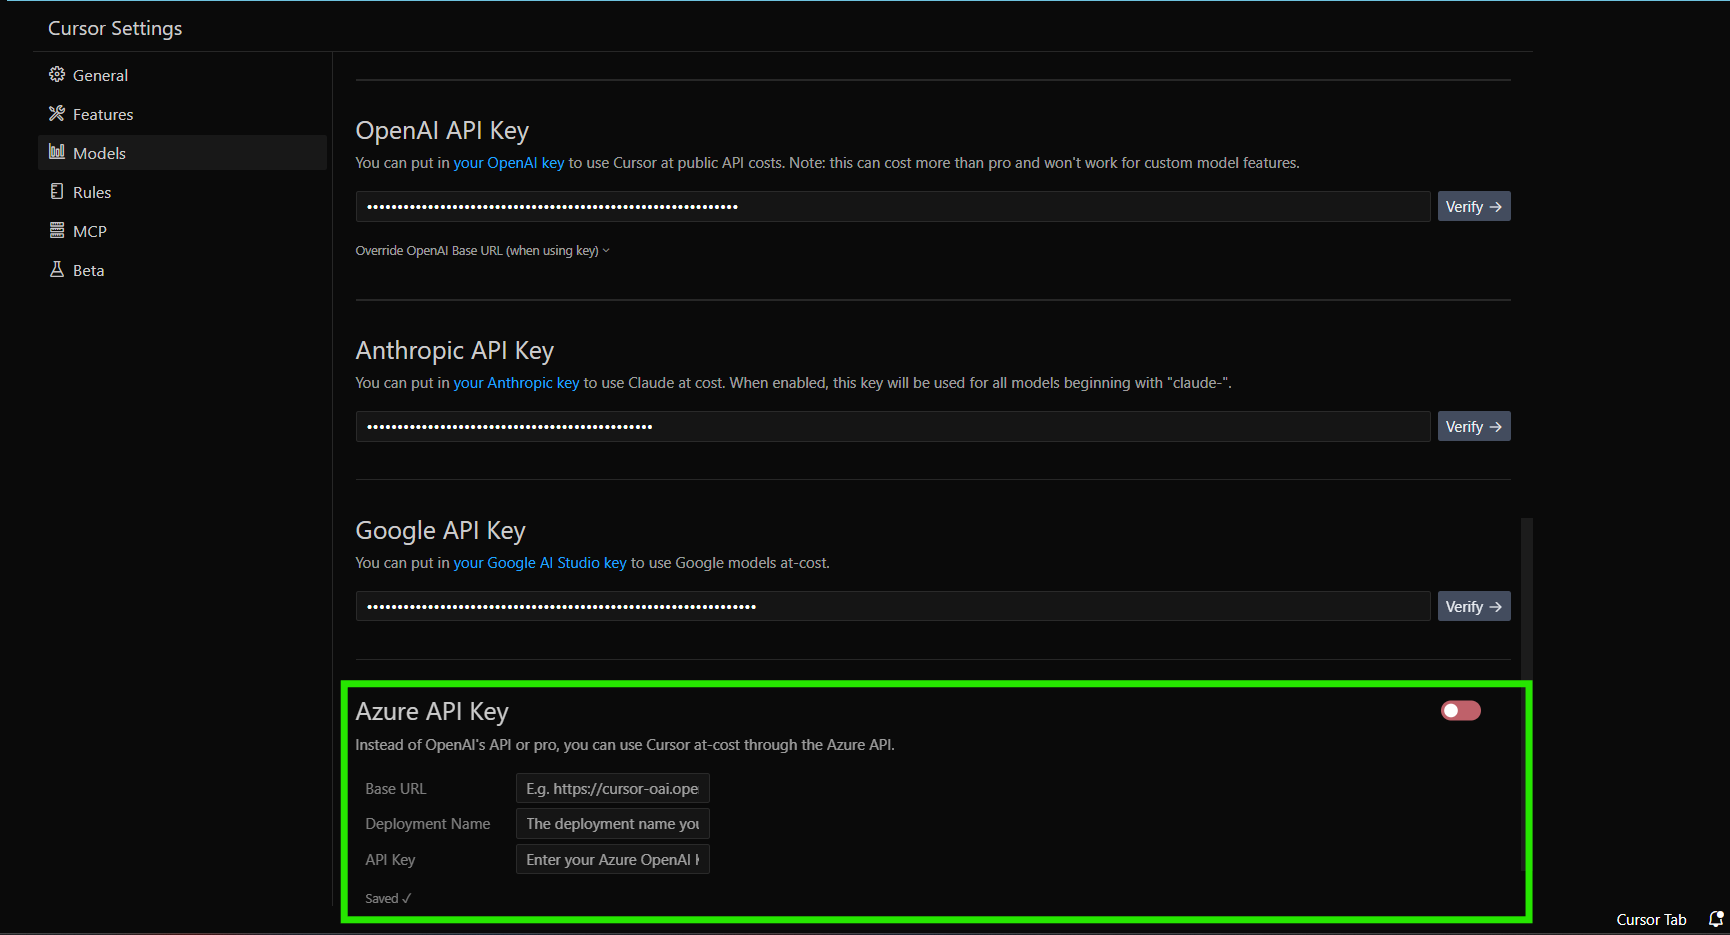
5. Set Up Azure Integration
For organizations using Azure OpenAI:
-
In the Azure portal, create an Azure OpenAI resource.
-
Deploy desired models and obtain your API key and endpoint.
-
In Cursor, select Azure Integration.
-
Enter the API key and endpoint details.
-
Configure any extra Azure settings if needed.
-
Click Verify.
Managing and Securing Your API Keys
Monitor Usage
- Check billing dashboards (OpenAI, Anthropic, Google, Azure) regularly.
- Set spending alerts with your provider to avoid surprise costs.
- Review usage patterns to optimize which models/features you use.
Secure Your Keys
- Use minimal permissions: Only grant necessary access.
- Rotate keys: Update them periodically in Cursor.
- Monitor for unauthorized use: Watch for unexpected activity.
- Keep keys private: Never share or commit them to code repositories.
Troubleshooting: Common Issues
Verification Fails
- Double-check for typos and extra spaces.
- Ensure your provider account is active and funded.
- Watch for temporary rate limits.
- Try the process from a different device or network if issues persist.
Feature Support Limitations
- Tab Completion: Not available with custom API keys.
- Model Availability: Only provider-enabled models are accessible.
- Provider-Specific Features: Some advanced features may require Cursor’s built-in keys.
Frequently Asked Questions
Will Cursor store or transmit my API key?
Your key is never stored long-term by Cursor, but each AI request is routed through Cursor’s backend with your key for prompt processing.
Which LLM providers are supported?
Cursor officially supports OpenAI, Anthropic, Google, and Azure. Providers using the OpenAI API format (such as OpenRouter) are also compatible. Local LLMs or other API formats are not supported.
Can I switch back to Cursor’s default AI service?
Yes. You can disable your custom keys anytime to revert to Cursor’s included models, subject to your account plan.
Extend Automation with Apidog MCP Server Integration
For API-focused teams, connecting Cursor to the Apidog MCP Server lets your AI assistant interact directly with your Apidog project specifications. This integration enables:
- Seamless API exploration
- Automatic code generation from structured API models
- Integrated documentation and testing workflows
Integrating Apidog with Cursor helps you build, test, and document APIs faster, while leveraging advanced AI features.
One caveat once your own key is wired in: providers enforce their own quotas, and if requests start failing you'll want our breakdown of the "API key rate limit exceeded" error in Cursor.
Once you've wired in your own API key,running Gemini 2.5 Flash inside Cursor and Clineis a cost-effective way to get fast responses on most coding tasks without burning through your credits.
Conclusion
Configuring custom API keys in Cursor unlocks unlimited, scalable access to AI models from leading providers. By following this guide, developers and teams can take full control over their AI-assisted workflows, manage costs, and maintain security best practices.
For teams building and managing APIs, combining Cursor with Apidog enhances automation, collaboration, and code quality—empowering you to move faster and smarter.


