Ever wondered how to create a powerful API that lets clients ask for exactly what they need? That's the magic of GraphQL, and with Apollo Server, building one is simpler than you might think! If you're tired of REST's rigid endpoints, GraphQL offers flexibility, and Apollo Server is the go-to tool to make it happen. In this conversational tutorial, we'll walk through setting up a GraphQL server using Apollo Server, from project initialization to testing queries and mutations. Whether you're using JavaScript or TypeScript, you'll have a running server in no time. Let's dive in and build something awesome with GraphQL and Apollo Server!
Want an integrated, All-in-One platform for your Developer Team to work together with maximum productivity?
Apidog delivers all your demands, and replaces Postman at a much more affordable price!
Why Choose GraphQL and Apollo Server?
Before we roll up our sleeves, let's chat about why GraphQL and Apollo Server are such a dynamic duo. GraphQL, developed by Facebook in 2012 and open-sourced in 2015, is a query language for APIs that lets clients request specific data, reducing over-fetching and under-fetching common in REST APIs. Instead of multiple endpoints, you have one smart endpoint that serves tailored responses. It's efficient, flexible, and perfect for modern apps with complex data needs.
Enter Apollo Server, an open-source, community-driven GraphQL server from Apollo GraphQL. It's production-ready, supports Node.js, and integrates seamlessly with databases like MongoDB or PostgreSQL. With features like schema stitching, caching, and real-time subscriptions, it's a one-stop shop for building scalable APIs. Plus, it's beginner-friendly yet powerful for pros. Compared to alternatives like Express-GraphQL, Apollo Server offers better performance monitoring and easier setup. If you're building a blog, e-commerce site, or mobile backend, this combo will save you time and headaches. Excited? Let's set up our project!
Setting Up Your Project in JavaScript or TypeScript
Let's start by creating the foundation. We'll set up a Node.js project and install the necessary packages. You can choose JavaScript for simplicity or TypeScript for type safety—both work great with Apollo Server.
Step 1: Initialize the Project
Create a New Folder:
- Open your terminal and create a project directory:
mkdir graphql-apollo-server
cd graphql-apollo-server
Initialize Node.js:
- Run the following commands:
npm init -y
npm pkg set type="module"- This creates a
package.jsonfile for managing dependencies and sets up a project using ES Modules.
Step 2: Install Dependencies
Apollo Server requires two main packages: @apollo/server for the server and graphql for the core GraphQL library. For TypeScript, we'll add types and a build step.
Install dependencies:
npm install @apollo/server graphql
For JavaScript:
Simply replace the default scripts entry in your package.json file with these type and scripts entries:
{
	// ...etc.
	"type": "module",
    "scripts": {
    	"start": "node index.js"
    }
    // other dependencies
}
For TypeScript (Recommended):
1. Initialize TypeScript:
npm install --save-dev typescript @types/node- Create a
tsconfig.jsonfile in your root directory and edit it to include:
{
"compilerOptions": {
"rootDirs": ["src"],
"outDir": "dist",
"lib": ["es2023"],
"target": "es2023",
"module": "esnext",
"moduleResolution": "node",
"esModuleInterop": true,
"types": ["node"]
}
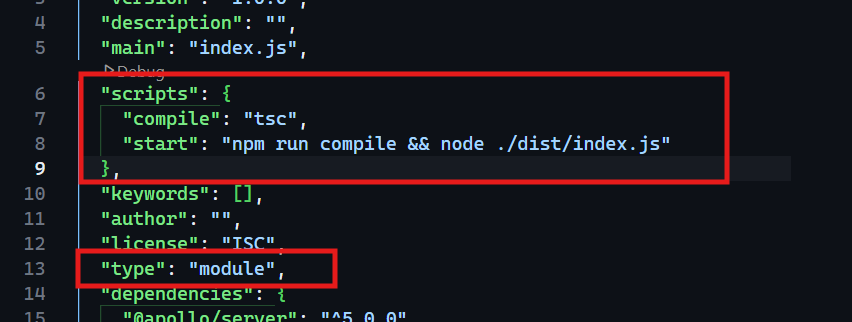
}2. Finally, replace the scripts entry in your package.json file with the following type and scripts entries:
{
	// ...etc.
    "type": "module",
    "scripts": {
    	"compile": "tsc",
    	"start": "npm run compile && node ./dist/index.js"
    }
	// other dependencies
}
Pro Tip: If you're new to TypeScript, it adds type safety to your schema and resolvers, catching errors early. JavaScript is quicker for prototypes—pick based on your project's scale.
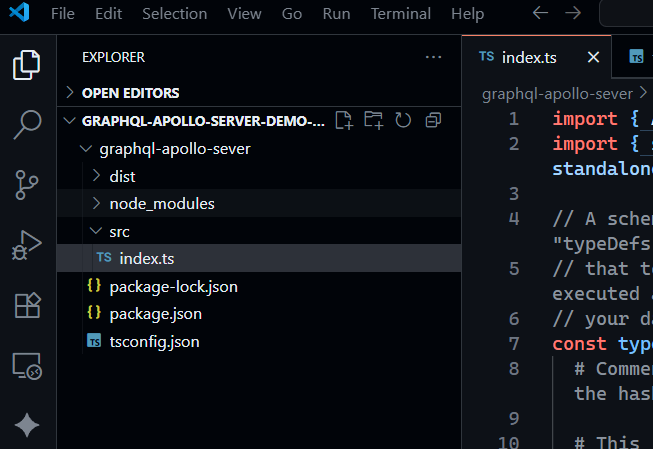
Step 3: Create the Server File
Create a src folder in your project root and add an index.ts (or index.js for JavaScript) file in the new folder. This is where we'll define the schema and resolvers.
Testing Out a Simple Query
Let's build our first query—a simple "hello" message. This introduces GraphQL's type definitions (schema) and resolvers (functions that fetch data).
Define the GraphQL Schema
The schema is the blueprint of your API. Use the gql tag from graphql-tag (included with @apollo/server) to define it.
In index.ts (or index.js):
import { ApolloServer } from '@apollo/server';
import { startStandaloneServer } from '@apollo/server/standalone';


// Define GraphQL schema
const typeDefs = `
  type Query {
    hello: String
  }
`;

// Define resolvers
const resolvers = {
  Query: {
    hello: () => "Hello! Welcome to my server",
  },
};

// Create and start the server
const server = new ApolloServer({ typeDefs, resolvers });

const { url } = await startStandaloneServer(server, {
  listen: { port: 4000 },
});

console.log(`🚀  Server ready at: ${url}`);
For JavaScript, import types:
const { ApolloServer } from '@apollo/server';
const { startStandaloneServer } from '@apollo/server/standalone';

// Rest is the same
Run the Server
Start your server:
node index.js  # For JavaScript
npm start  # For TypeScript
Visit http://localhost:4000 in your browser. You'll see the GraphQL Playground—a web-based IDE for testing queries.
Test the Query
In the Playground, run this query on the left panel:
query {
  hello
}
Click "Execute." On the right, you'll see:
{
  "data": {
    "hello": "Hello! Welcome to my server"
  }
}
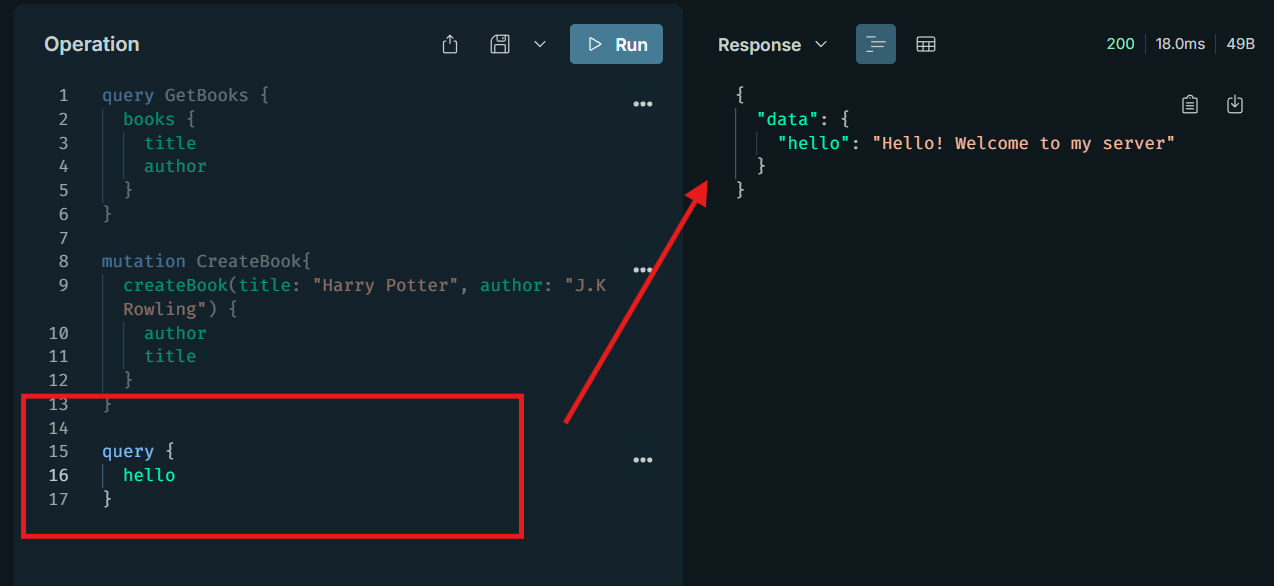
Success! This simple query demonstrates GraphQL's basics: a Query type with a hello field returning a string. Resolvers are the "brains" that provide the data—in this case, a static message. It's a great starting point to verify your setup.
Testing a Query with a Complex Type
Now, let's add some depth with a custom type. We'll create a Book type and a query to fetch a list of books. This shows how GraphQL handles structured data.
Update the Schema
Modify typeDefs to include a Book type:
const typeDefs = gql`
  type Book {
    title: String
    author: String
  }

  type Query {
    books: [Book]
  }
`;
Add Sample Data
Below the typeDefs add the following sample data for our new Book type:
// Sample data
const books = [
  {
    title: 'The Awakening',
    author: 'Kate Chopin',
  },
  {
    title: 'City of Glass',
    author: 'Paul Auster',
  },
];
Update Resolvers
Replace the resolver content with the following for books type:
const resolvers = {
  Query: {
    books: () => books
  }
};
Restart the server and head back to the Playground.
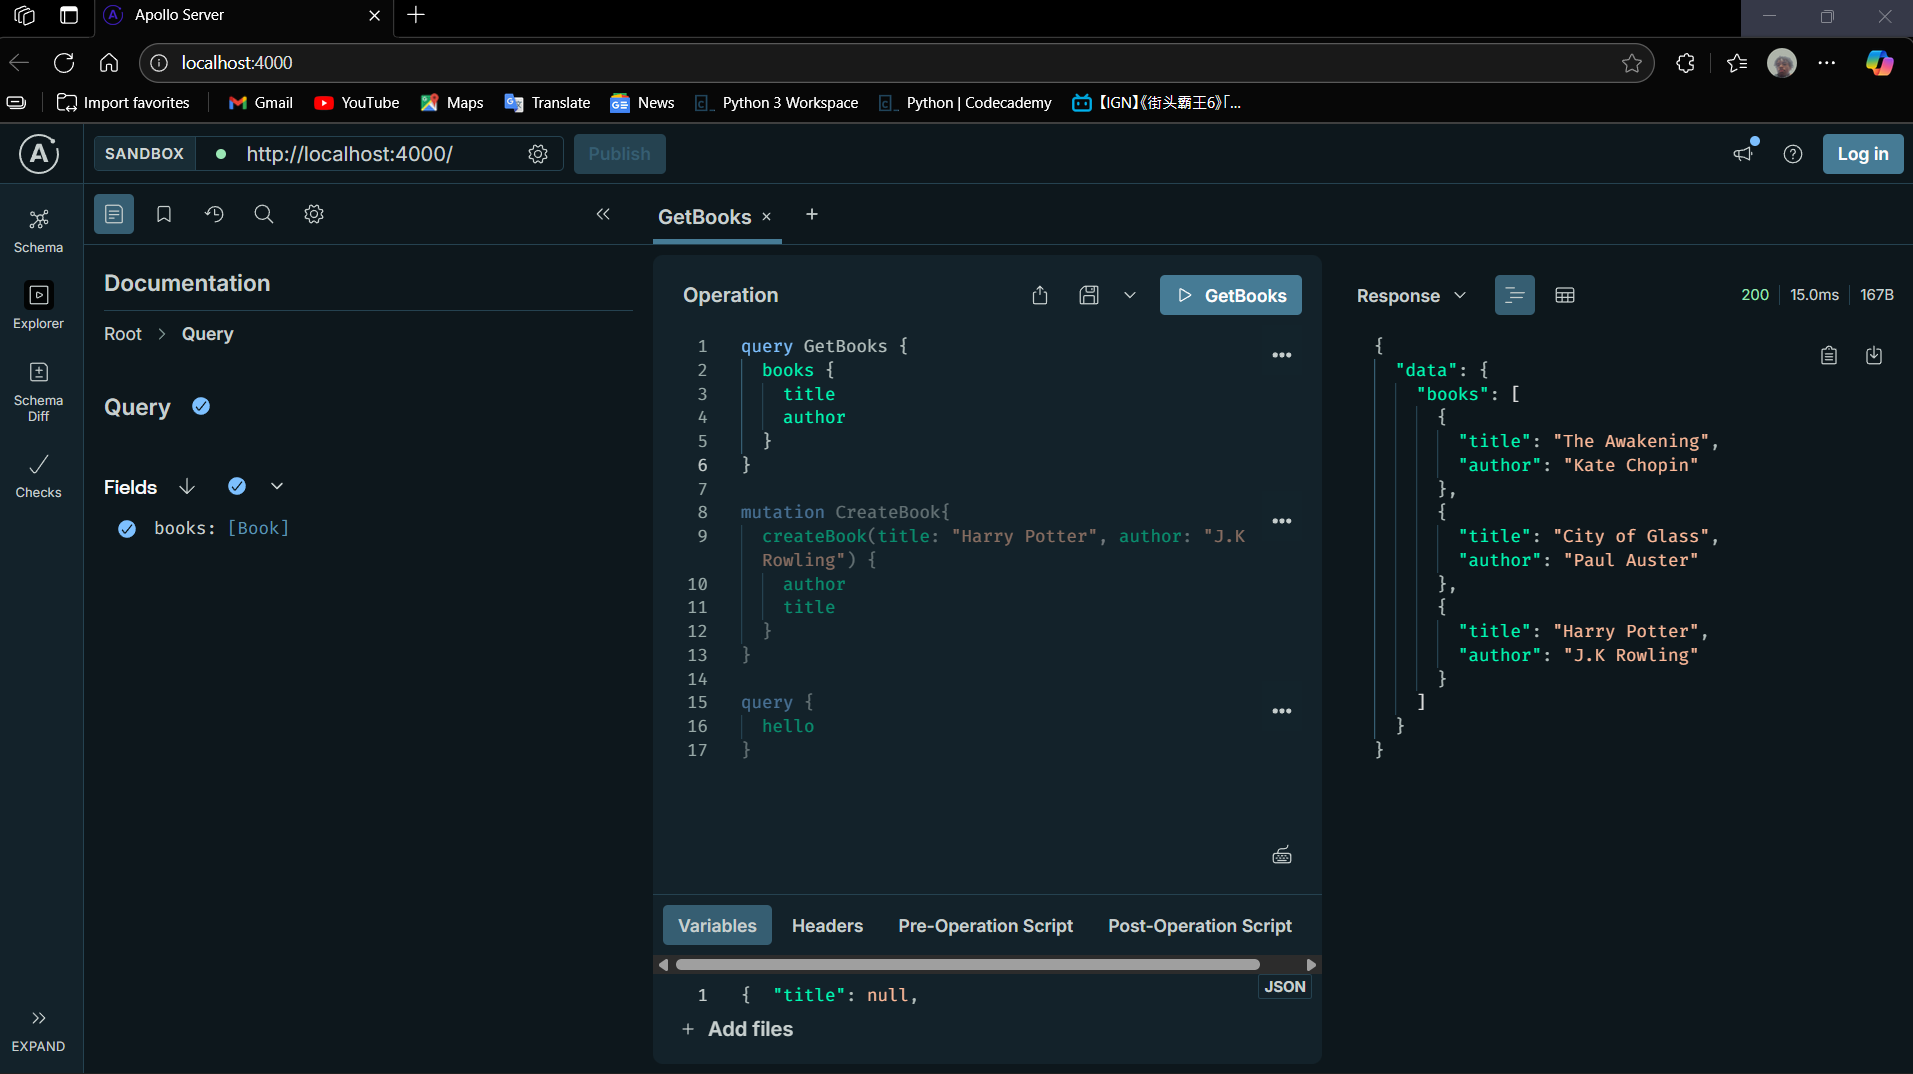
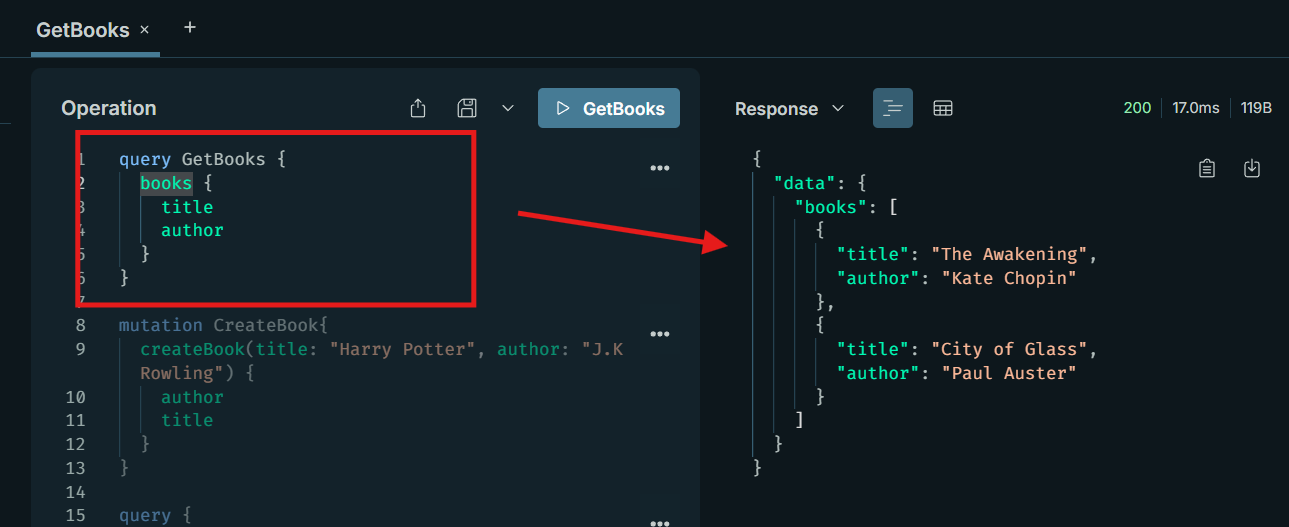
Test the Query
Run:
query GetBooks {
  books {
    title
    author
  }
}
Result:
{
  "data": {
    "books": [
      {
        "title": "The Awakening",
        "author": "Kate Chopin"
      },
      {
        "title": "City of Glass",
        "author": "Paul Auster"
      }
    ]
  }
}
Cool, right? This query fetches an array of Book objects. GraphQL lets clients specify exactly what fields they want—no more, no less. If you omit author, it only returns titles. This flexibility is why GraphQL beats REST for data-heavy apps.
Testing a Mutation to Add Data
Queries are for reading, but mutations are for writing. Let's add a mutation to create a new book, demonstrating how GraphQL handles data creation.
Update the Schema
Add a Mutation type:
const typeDefs = `
  type Book {
    title: String
    author: String
  }

  type Query {
    books: [Book]
  }

  type Mutation {
    createBook(title: String!, author: String!): Book
  }
`;
The ! means required fields.
Update Resolvers
const resolvers = {
  Query: {
    books: () => books,
  },
  Mutation: {
    createBook: (_: any, { title, author }: { title: string; author: string }) => {
      const newBook = { title, author };
      books.push(newBook);
      return newBook;
    }
  }
};
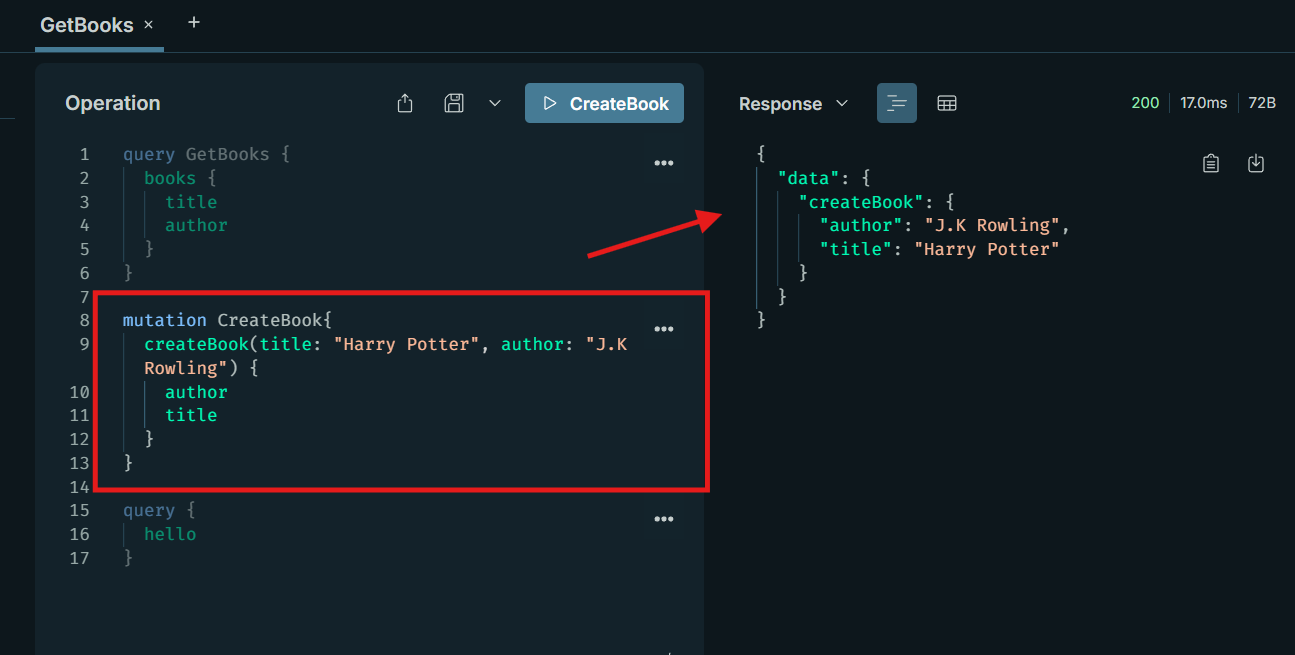
Test the Mutation
In the Playground, run:
mutation CreateBook{
  createBook(title: "Harry Potter", author: "J.K Rowling") {
    author
    title
  }
}
Result:
{
  "data": {
    "createBook": {
      "title": "Harry Potter",
      "author": "J.K Rowling"
    }
  }
}
To confirm, rerun the GetBooks query:
query GetBooks {
  books {
    title
    author
  }
}
Result:
{
  "data": {
    "books": [
      {
        "title": "The Awakening",
        "author": "Kate Chopin"
      },
      {
        "title": "City of Glass",
        "author": "Paul Auster"
      },
      {
        "title": "Harry Potter",
        "author": "J.K Rowling"
      }
    ]
  }
}
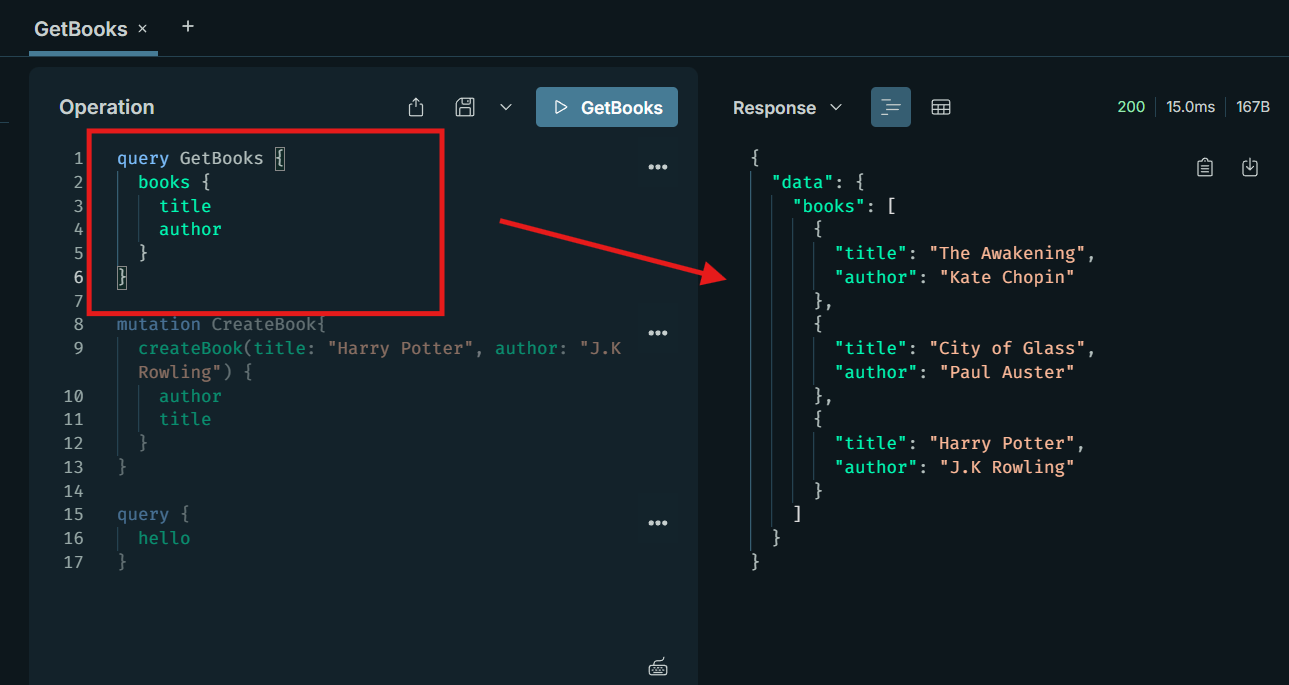
The new book is added! Mutations return the created data, letting clients get immediate feedback. In production, connect to a DB like MongoDB for persistence.
JavaScript vs TypeScript: Which to Choose? For quick prototypes, JavaScript is fine—less boilerplate. But for larger projects, TypeScript shines with type safety for schemas and resolvers. TS catches errors early, making your GraphQL server more robust.
Adding More Complexity: IDs and Queries with Arguments
To make it real, add IDs to books and a query to fetch by title.
Update schema:
const typeDefs = `
    type Book {
      id: ID!
      title: String
      author: String
    }

    type Query {
      books: [Book]
      book(title: String!): Book
    }

    type Mutation {
      createBook(title: String!, author: String!): Book
    }
`;
Update data and resolvers:
// Sample data
const books = [
  {
    id: 1,
    title: 'The Awakening',
    author: 'Kate Chopin',
  },
  {
    id: 2,
    title: 'City of Glass',
    author: 'Paul Auster',
  },
];

// Resolvers
const resolvers = {
  Query: {
    books: () => books,
    book: (_: any, { title }: { title: string }) => books.find(book => book.title === title),
  },
  Mutation: {
    createBook: (_: any, { title, author }: { title: string; author: string }) => {
      const newBook = { id: books.length + 1, title, author };
      books.push(newBook);
      return newBook;
    }
  }
};
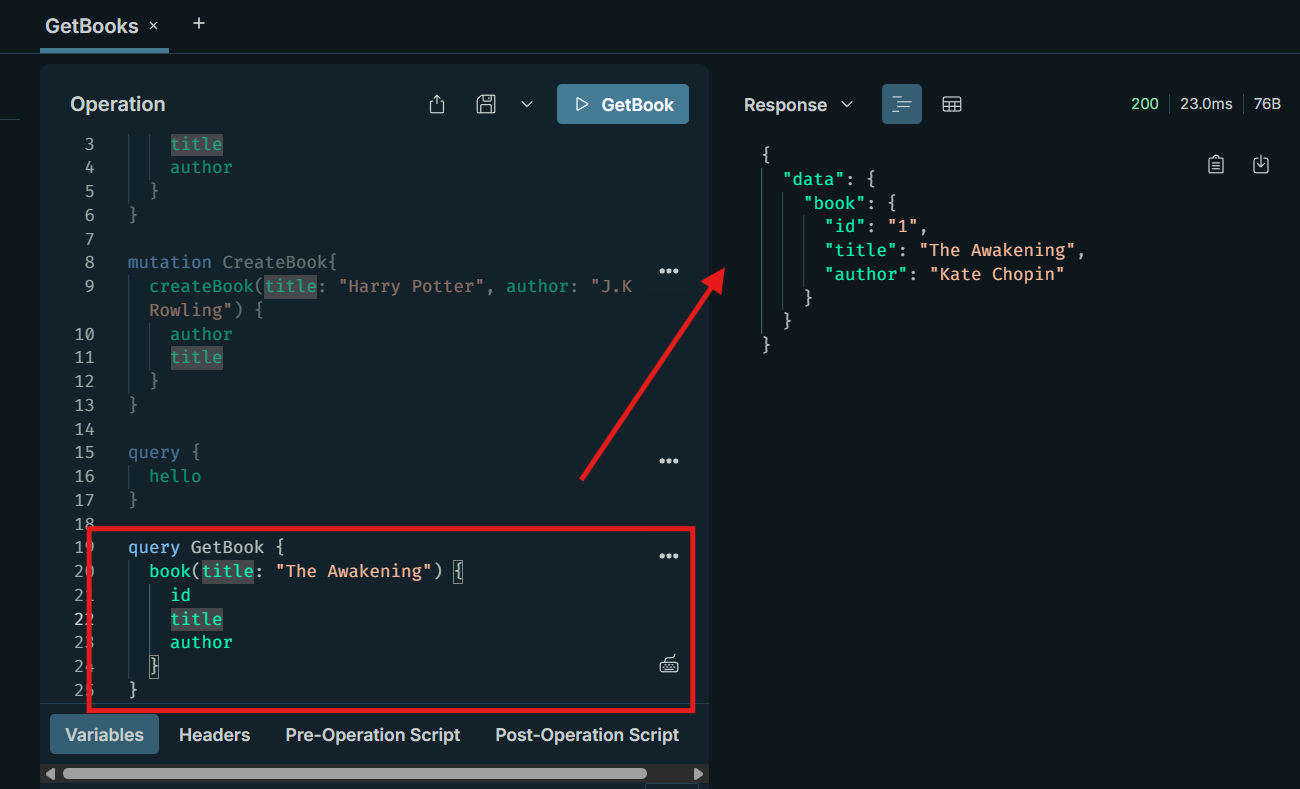
Test the query:
query GetBook {
  book(title: "The Awakening") {
    id
    title
    author
  }
}
Result:
{
  "data": {
    "book": {
      "id": "1",
      "title": "The Awakening",
      "author": "Kate Chopin"
    }
  }
}
This shows arguments in queries, letting clients filter data efficiently.
Best Practices for GraphQL with Apollo Server
- Schema Design: Keep it modular with multiple files.
- Error Handling: Use
ApolloErrorfor custom errors. - Performance: Enable caching with
@apollo/cache-control. - Subscriptions: Add real-time with
apollo-server-express. - Monitoring: Use Apollo Studio for metrics.
Troubleshooting Common Issues
- Server Not Starting? Check Node version (14+) and dependencies.
- Query Errors? Verify schema/resolver matching.
- CORS Problems? Add
{ cors: { origin: '*' } }to server options. - TS Errors? Install
@types/graphqland@types/node.
Conclusion
We've built a robust GraphQL server with Apollo Server, from hello queries to mutations. Whether in JS or TS, you're set to create flexible APIs. Experiment, add subscriptions, and deploy to Heroku. GraphQL and Apollo Server are your ticket to efficient APIs!
Apidog also supports testing with GraphQL, so be sure to check it out completely FREE!