The integration of advanced AI models like GPT-5 into development workflows marks a significant leap forward in productivity for developers. With the recent release of the Cursor CLI, users now have access to powerful command-line tools that leverage cutting-edge AI.
This guide gives a technical, step-by-step walkthrough for using GPT-5 via Cursor CLI to generate API designs and server code, then importing and validating those artifacts with Apidog. You’ll get exact commands, practical prompt examples, automation patterns for CI, and hardening tips. Wherever possible, I link to official docs and examples so you can reproduce every step.
Understanding Cursor CLI and GPT-5 Integration
The Cursor CLI represents a new frontier in AI-assisted development, bringing the capabilities of the Cursor platform directly to your terminal. Launched as an early beta, it allows seamless interaction between your command-line interface (CLI) and editor, supporting multiple AI models, including the newly introduced GPT-5 from OpenAI. GPT-5, known for its enhanced reasoning and coding capabilities, promises to handle complex tasks with greater precision than its predecessors.

The integration of GPT-5 into the Cursor CLI enables developers to execute commands, automate workflows, and generate code directly from the terminal. The interface, as shown in the X post images, includes options like loading artwork from APIs, triggering playback, and outputting change summaries, with GPT-5 powering the command execution. This setup offers a flexible environment where developers can switch models and manage tasks efficiently.
Install Cursor CLI and verify
Step 1 — install (one line):
curl https://cursor.com/install -fsS | bash
This is the official install line documented by Cursor for the CLI. After that, the CLI commands become available (for example, cursor-agent). (Cursor)
Step 2 — verify installation and version:
cursor-agent --version
cursor-agent status
The CLI supports --version and status commands (the latter shows authentication state and endpoint configuration). (Cursor)
Step 3 — authenticate (two options)
Browser flow (recommended for dev machines):
cursor-agent login
# This opens your browser and completes auth.
cursor-agent status
API key (recommended for scripts / CI):
Create an API key in your Cursor dashboard.
Export it:
export CURSOR_API_KEY="sk_XXXX..."
# or pass it inline for single commands:
cursor-agent --api-key sk_XXXX... "refactor the auth module"
The CLI accepts --api-key or the CURSOR_API_KEY env var for non-interactive automation.
Safety note: Cursor Agent can read, modify, and run shell commands — run it only in trusted contexts or safe CI runners. The CLI docs explicitly call out evolving security safeguards.
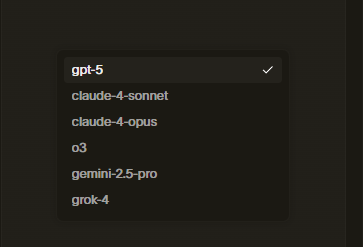
Confirm GPT-5 access and model flags
Cursor CLI exposes a -m, --model flag to select models. Example models include sonnet-4, sonnet-4-thinking, and gpt-5. You can also switch models inside interactive sessions via the /model slash command. Use the -m flag for scripts.
Quick check (list models interactively):
Start the CLI, then use /model:
cursor-agent
# inside session, type:
/model
# or use:
cursor-agent -m gpt-5 "print available models and confirm access"
Also note: Cursor announced GPT-5 availability inside Cursor; expect to see gpt-5 listed.
A concrete use case: generate an OpenAPI 3.0 spec with GPT-5 (step-by-step)
We’ll ask GPT-5 (via Cursor CLI) to produce an OpenAPI YAML file for a simple payments API. Then we’ll import that file into Apidog and run tests.
Step 3.1 — author a strict prompt (format control matters)
When generating machine-readable artifacts, instruct the model to only output the file contents (no markdown fences, no commentary). Use few-shot examples to force schemas and consistent naming. The OpenAI Cookbook and Cursor docs recommend strict system prompts and response formatting to avoid undesired wrapper text.
Example prompt (concise and explicit):
Generate an OpenAPI 3.0.3 YAML spec named openapi.yaml for a Payments API. Only return raw YAML (no markdown fences, no explanatory text). The API must include:Security: Bearer token Authorization (HTTP bearer)
Endpoints:
POST /payments — create payment; request body application/json; response 201
GET /payments/{paymentId} — get payment by id; response 200 or 404
PUT /payments/{paymentId} — update metadata; response 200
DELETE /payments/{paymentId} — cancel; response 204
Components/schemas for PaymentRequest, PaymentResponse, and an Error schema
Example bodies for requests and responses
Use USD and include amount as integer cents
Keep paths, operationIds, and descriptions minimal but valid. Use components.securitySchemes for Bearer auth. Follow OpenAPI 3.0.3 syntax.Step 3.2 — call Cursor CLI non-interactively and capture YAML
Use -m gpt-5 to pick GPT-5 and -p to print responses (non-interactive). Redirect stdout to openapi.yaml.
# Set your API key in CI or locally:
export CURSOR_API_KEY="sk_..."

# Non-interactive generation with model selection and print mode
cursor-agent -m gpt-5 -p "Generate OpenAPI 3.0.3 YAML for a Payments API (see prompt above)" > openapi.yaml
Explanation:
-m gpt-5 forces GPT-5 usage.
-p prints the model response, which you redirect into a file for later use. The Cursor CLI supports --output-format and -p for scripting.
If the model accidentally includes wrapper text, re-run with stricter wording: Respond only with YAML, starting with 'openapi:' — this reduces garbage.
Validate the generated YAML locally (quick sanity checks)
Before you upload or import:
YAML lint:
npm i -g yaml-cli # optional
yaml validate openapi.yaml
OpenAPI linter (Speccy / Spectral):
npm install -g @stoplight/spectral
spectral lint openapi.yaml
Fix any reported schema issues (GPTs sometimes misuse type: integer vs format: int64, omit required, or misplace components). These are fast manual edits.
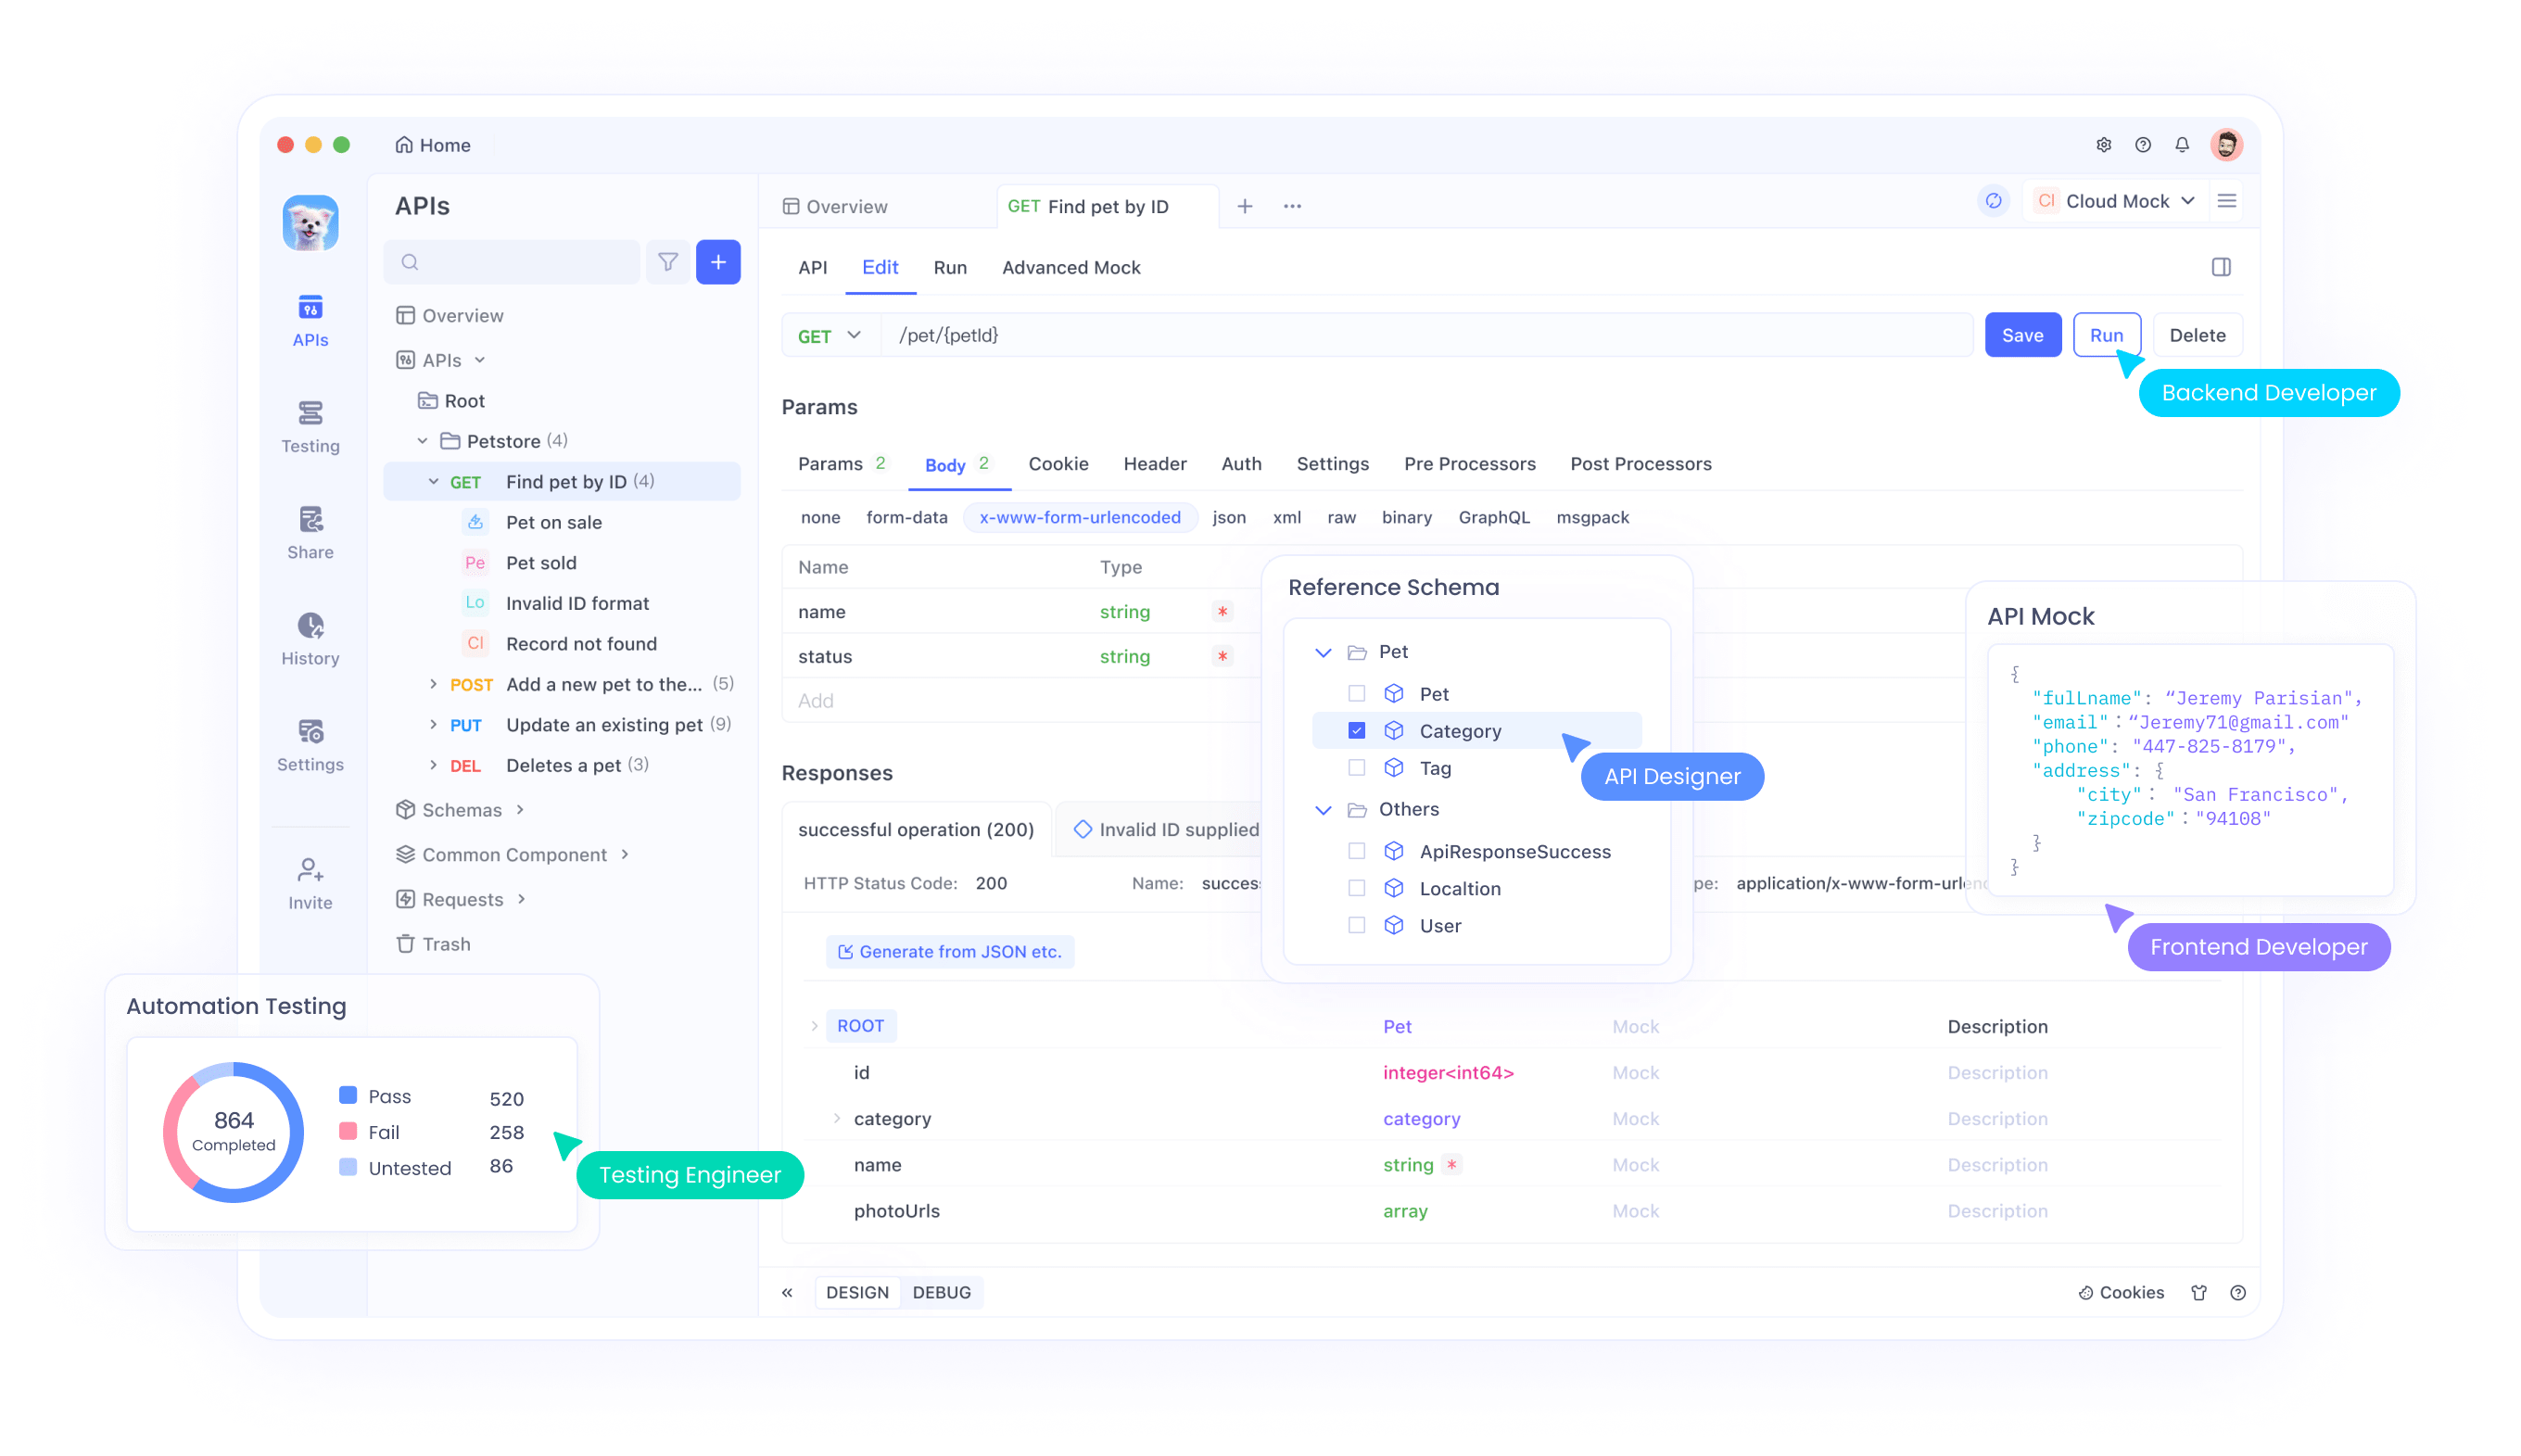
Import the OpenAPI spec into Apidog (two options)
Apidog supports manual import via UI or API import (POST /v1/projects/{projectId}/import-openapi) for programmatic workflows. Choose the approach that fits your pipeline.
Option A — Manual UI import (fast, recommended for first iteration)
Open Apidog → Create Project → Project Settings → Import Data → OpenAPI.
You can either drag and drop yourJSON orYAML files into the area shown below, or simply click the area to browse and select the desired file from your system’s file manager.
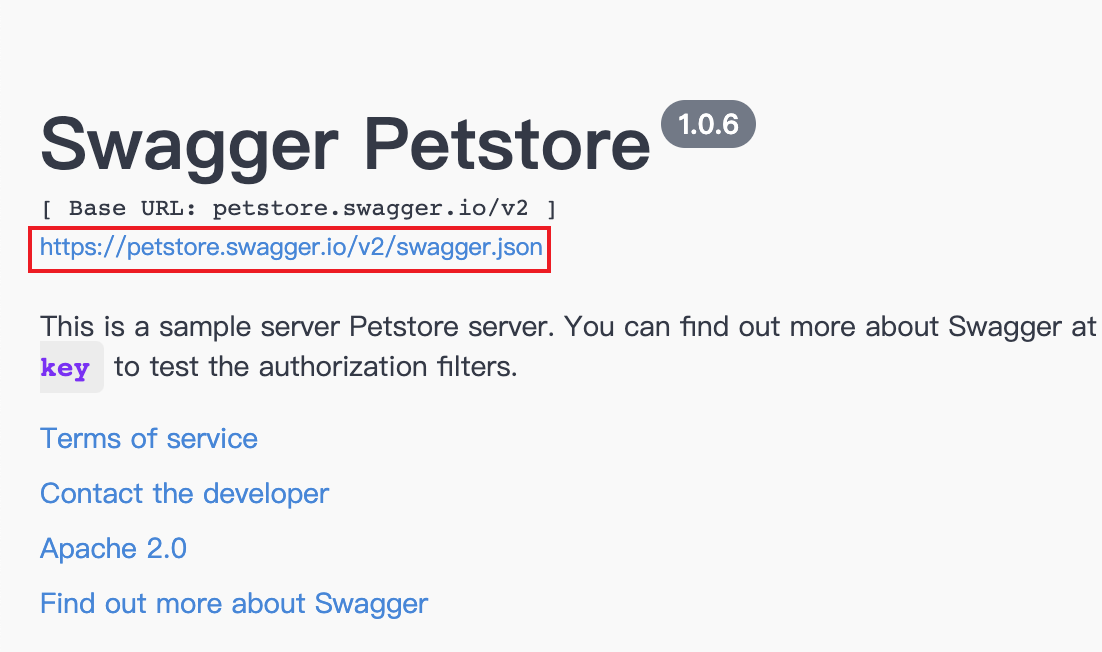
When using URL import, please provide the direct URL to theJSON orYAML data file, not the Base URL of the Swagger UI.
Import - Advanced Settings
Option B — Programmatic import (CI / automation)
If you host openapi.yaml at a stable URL (S3, raw GitHub), call the OpenAPI import endpoint:
# Example: import via Apidog API (requires APIDOG_ACCESS_TOKEN and projectId)
curl --location -g --request POST "https://api.apidog.com/v1/projects/${APIDOG_PROJECT_ID}/import-openapi?locale=en-US" \
  --header "Authorization: Bearer ${APIDOG_ACCESS_TOKEN}" \
  --header "Content-Type: application/json" \
  --data-raw '{
    "input": {"url": "https://my-bucket.s3.amazonaws.com/openapi.yaml"},
    "options": {
      "targetEndpointFolderId": 0,
      "endpointOverwriteBehavior": "OVERWRITE_EXISTING"
    }
  }'
Response gives counters for created/updated endpoints and schemas — use that to assert success in CI. The API doc includes this POST endpoint and example.
Create tests in Apidog or import endpoint cases (quick guide)
Once the OpenAPI spec is in Apidog:
Use Apidog’s UI to auto-generate request templates and example bodies.
Configure an Environment (staging base URL + API token env var).
Create a Test Scenario: sequence the standard lifecycle tests (create → read → update → delete). Apidog supports test scenario creation and automated assertions via the Tests module. (docs.apidog.com)
If you prefer to automate test creation, you can script Appdog API calls to create test scenarios programmatically (Apidog offers an OpenAPI to its own API). See Apidog API docs for endpoints. (openapi.apidog.io)
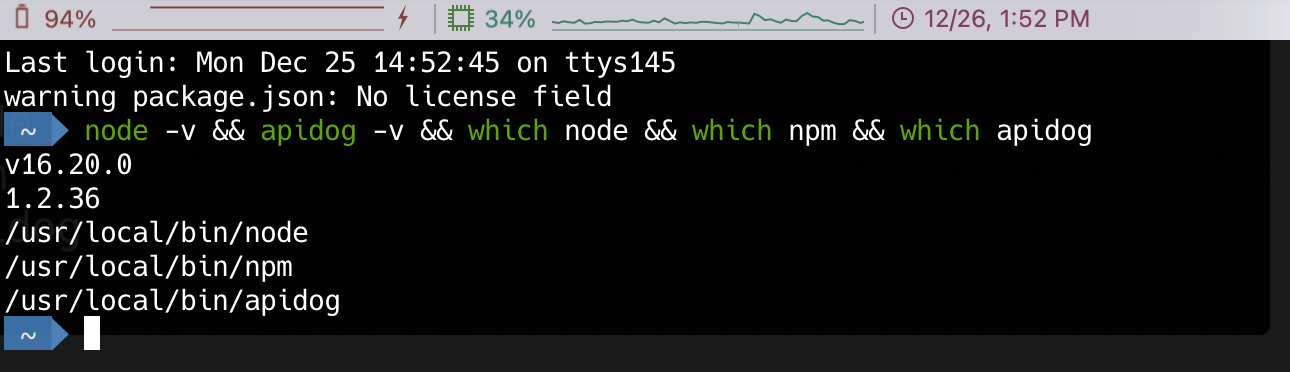
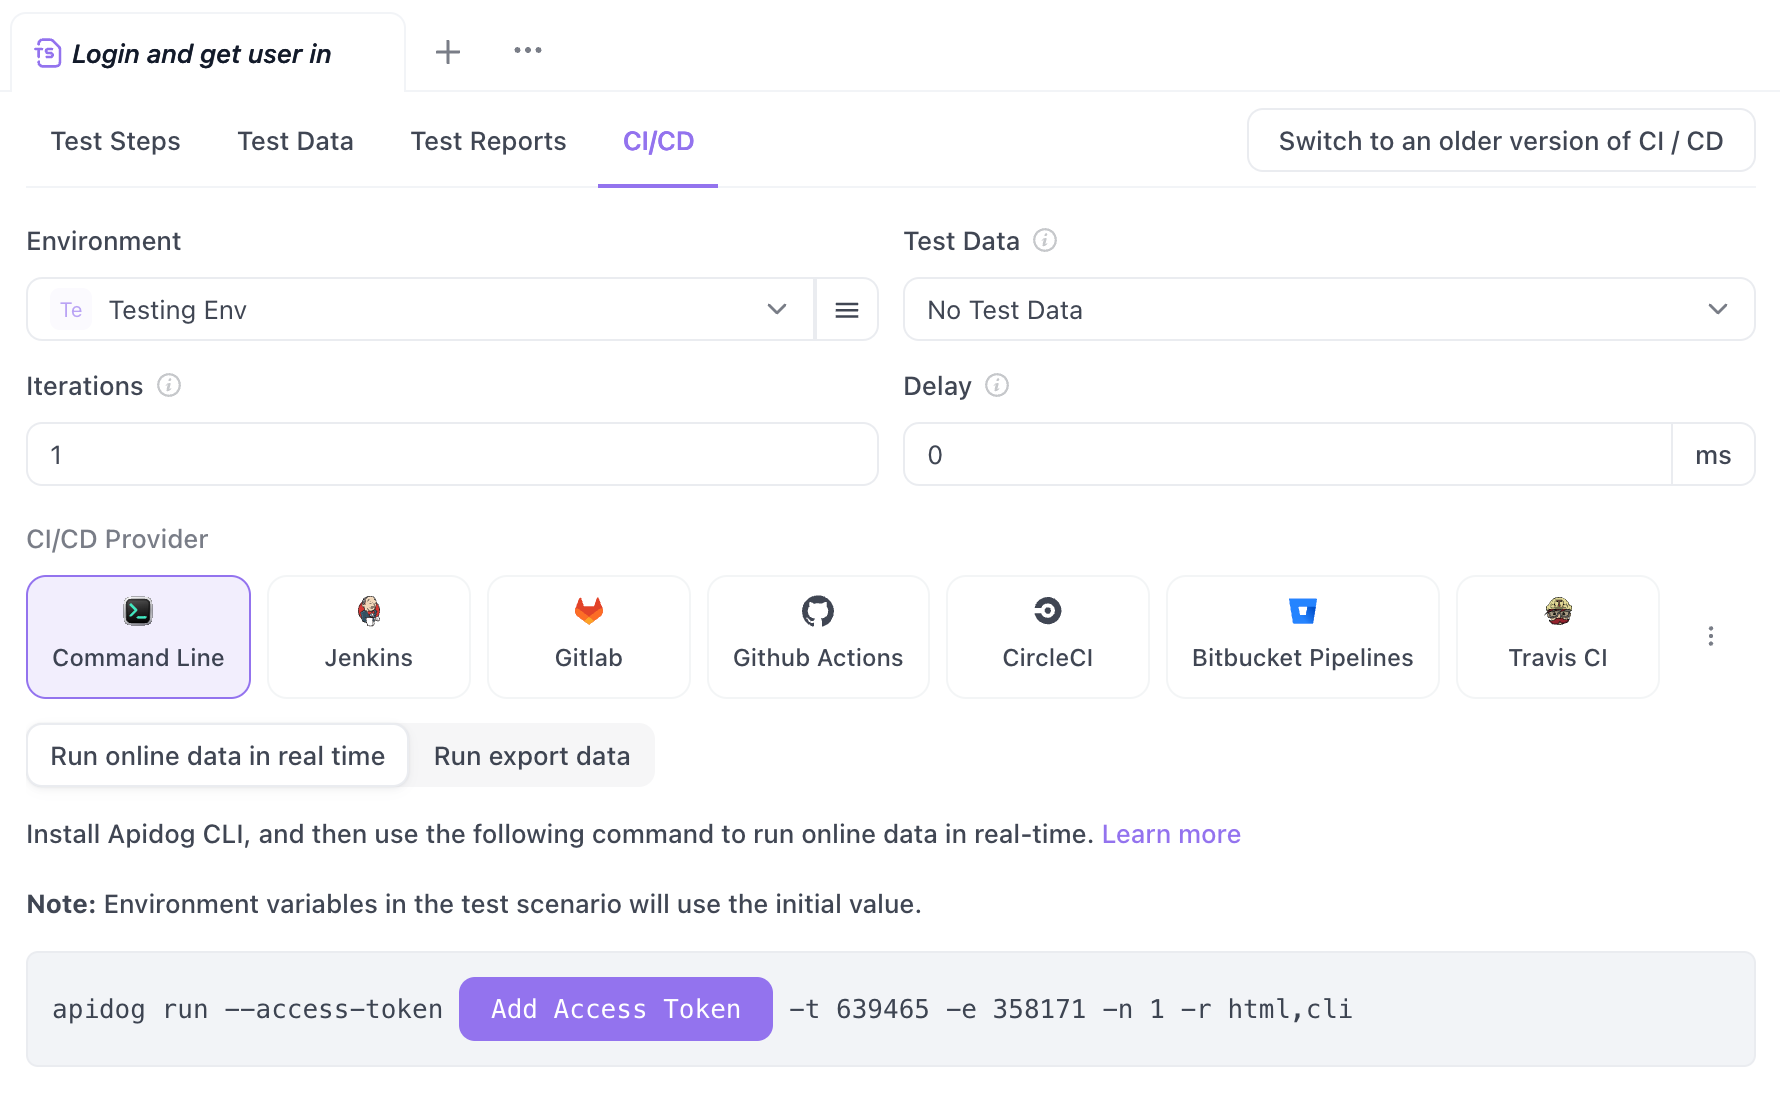
Install Apidog CLI and run tests locally or in CI
Install globally:
# Node.js (v16+) required
npm install -g apidog-cli
# verify
node -v && apidog -v
Apidog CLI can run online (with access token) or local/offline using exported test scenarios. For online runs, pass --access-token with your Apidog Access Token.
Run a saved test scenario (online):
export APIDOG_ACCESS_TOKEN="sk_apidog_..."
apidog run --access-token $APIDOG_ACCESS_TOKEN -t <TEST_ID> -e <ENV_ID> -r html,cli
Run locally (from exported test scenarios):
apidog run ./exported-scenarios/payment-tests.json --report cli
Apidog CLI integrates smoothly in CI pipelines and produces CLI/HTML reports for test runs.
Example end-to-end automation: generate spec with GPT-5, import to Apidog, run tests (GitHub Actions)
Below is a minimal GitHub Actions workflow showing the pattern.
name: GPT5 → Apidog CI

on: [push]

jobs:
  generate-and-test:
    runs-on: ubuntu-latest
    steps:
      - uses: actions/checkout@v4

      - name: Install Node.js and Apidog CLI
        uses: actions/setup-node@v4
        with:
          node-version: '18'
      - run: npm install -g apidog-cli

      - name: Install Cursor CLI
        run: curl https://cursor.com/install -fsS | bash

      - name: Generate OpenAPI via Cursor (headless)
        env:
          CURSOR_API_KEY: ${{ secrets.CURSOR_API_KEY }}
        run: |
          cursor-agent -m gpt-5 -p "Generate OpenAPI 3.0.3 YAML for a Payments API. Only return raw YAML." > openapi.yaml
          # Basic validation
          npx @stoplight/spectral lint openapi.yaml || true

      - name: Upload openapi.yaml to S3 (or GitHub Raw)
        run: |
          # upload steps here -- depends on your infra
          echo "Upload to bucket and set OPENAPI_URL"

      - name: Import to Apidog via API
        env:
          APIDOG_ACCESS_TOKEN: ${{ secrets.APIDOG_ACCESS_TOKEN }}
          APIDOG_PROJECT_ID: ${{ secrets.APIDOG_PROJECT_ID }}
        run: |
          curl -s -X POST "https://api.apidog.com/v1/projects/${APIDOG_PROJECT_ID}/import-openapi?locale=en-US" \
            -H "Authorization: Bearer ${APIDOG_ACCESS_TOKEN}" \
            -H "Content-Type: application/json" \
            --data-raw "{\"input\":{\"url\":\"${{ env.OPENAPI_URL }}\"},\"options\":{}}"

      - name: Run Apidog tests
        env:
          APIDOG_ACCESS_TOKEN: ${{ secrets.APIDOG_ACCESS_TOKEN }}
        run: |
          apidog run --access-token $APIDOG_ACCESS_TOKEN -t 637132 -e 358171 -r cli
Notes:
Replace S3 / upload steps with your artifact hosting.
Keep secrets CURSOR_API_KEY, APIDOG_ACCESS_TOKEN, and APIDOG_PROJECT_ID in repository secrets.
Approve and vet the generated spec before deploying it to production.
Apidog and Cursor both support headless/CI usage: Cursor’s CLI explicitly supports headless agent usage across environments, and Apidog CLI is built for CI integration.
Advanced: make the agent edit code, run tests locally, and commit patches
Cursor’s agent can edit files and run shell commands (subject to approvals). This capability lets you:
Ask GPT-5 to scaffold server code (Express/Flask/FastAPI).
Review diffs in the terminal.
Accept apply, run npm test, and commit the changes automatically.
Example sequence (local dev):
# generate code + apply
cursor-agent -m gpt-5 "Create an Express v4 route at src/routes/payments.js with handlers for POST/GET/PUT/DELETE and unit tests (jest). Run tests after applying."
# Cursor CLI will propose edits; review and allow or deny specific shell commands.
The docs describe the Agent’s toolkit (file ops, search, run shell commands) and emphasize review checkpoints and check-in workflows. Use them to keep control over automated edits.
Debugging common failure modes
GPT produced invalid YAML — re-run with precise "only YAML" prompt, or post-process with sed/yq to remove leading lines.
Apidog import reports missing fields — inspect components and operationIds; Apidog maps summary, operationId, and path preferentially for endpoint names. Fix those in the spec, then re-import.
Apidog CLI fails because of variables or file paths — use absolute paths for file uploads in CLI runs and verify environment variables are set. Apidog docs explain the common file path problems and how to configure CLI runs.
Security & governance (very important)
Never run the agent with elevated credentials on untrusted code. Cursor warns that the CLI can run shell commands and modify files; guard production secrets carefully.
Secrets handling: keep API keys and environment secrets in your CI secret store. Use Apidog Vault / environment variables rather than embedding tokens in specs. Apidog supports vault integrations (HashiCorp, Azure Key Vault).
Approve agent changes manually when the agent proposes file system or shell ops; require at least one human approval step in CI for production pushes.
Example: precise prompts you can copy
Generate OpenAPI YAML (short):
cursor-agent -m gpt-5 -p "Output ONLY a valid OpenAPI 3.0.3 YAML for a 'payments' API with POST /payments, GET/PUT/DELETE /payments/{paymentId}. Use components.schemas PaymentRequest and PaymentResponse. Add examples. Do not include any markdown fences or commentary."
Make Cursor write an Express handler and tests:
cursor-agent -m gpt-5 -p "Create Express route handlers in src/routes/payments.js with corresponding unit tests in tests/payments.test.js. Implement basic in-memory store. Provide package.json scripts to run tests. Only output a JSON patch showing file names and full contents in JSON format."
Convert an existing README description to an OpenAPI spec:
cursor-agent -m gpt-5 -p "Convert the following README API description into an OpenAPI 3.0.3 YAML. Output only YAML. [paste README paragraphs]"
Why pair GPT-5 + Cursor CLI + Apidog?
Cursor CLI brings GPT-5 into the terminal and supports non-interactive automation, file operations, and headless CI usage. That reduces friction when you want machine-generated artifacts directly in your repo.
GPT-5 provides higher accuracy and reasoning for code and schema generation (Cursor has added GPT-5 support inside the product).
Apidog completes the loop: import the resulting OpenAPI spec, generate mock servers, run smoke and integration tests, and export reports — enabling a robust dev/test feedback loop.
Conclusion
This workflow gives you a practical pattern: generate (GPT-5 via Cursor CLI) → import/inspect (Apidog) → mock & test (Apidog CLI/UI). It speeds up prototyping, and combined with validation (Spectral, unit tests) you can safely move from idea to integration. As you scale, add stricter guardrails: schema validation gates, manual approvals on generated code, and rolling test suites.