Google’s Gemini 2.0 AI models are transforming the landscape of AI development, offering powerful capabilities for various applications. A key aspect of leveraging these models is understanding the Gemini API Pricing and how to integrate it into your projects efficiently.
What is the Gemini API?
The Gemini API lets developers access Google’s latest generative AI models, making it easier to build AI-powered applications. With this API, businesses and developers can integrate powerful AI capabilities into their products, enhancing automation, content creation, and user interactions.
The API supports multiple programming languages, including:
- Python
- Node.js
- Go
- Dart (Flutter)
- Android
- Swift
- Web
With these integrations, developers can harness AI models like Gemini 2.0 Flash, Flash-Lite, and Pro, each offering unique advantages in terms of performance, efficiency, and pricing.
Gemini API Pricing: What You Need to Know
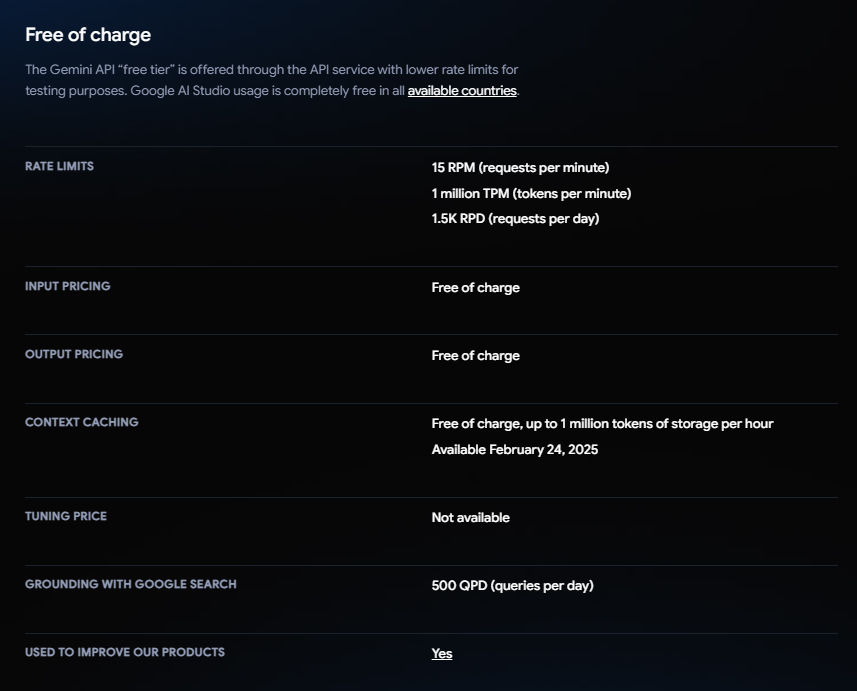
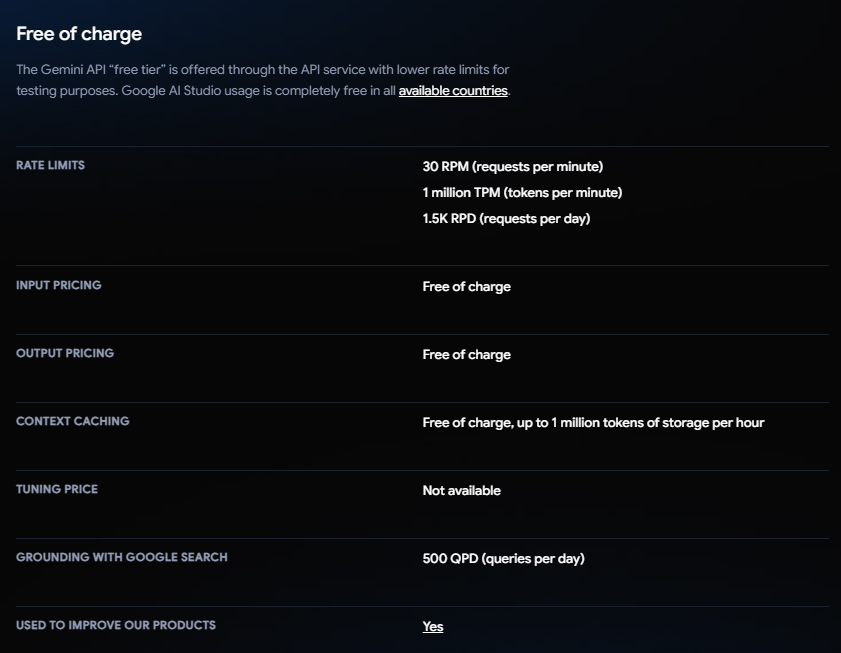
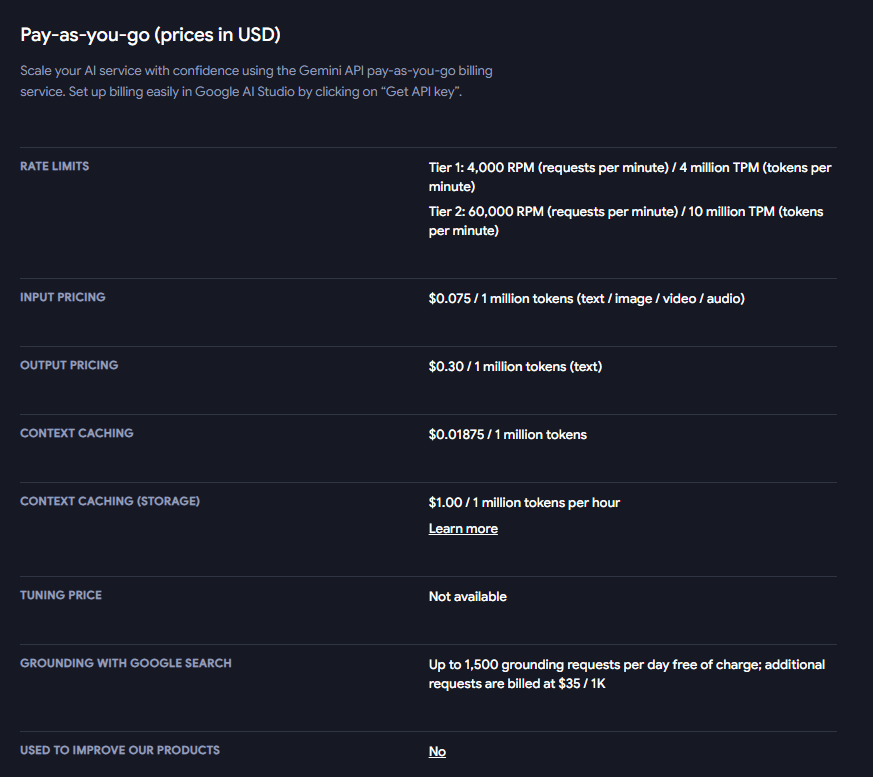
Google has introduced multiple pricing tiers for Gemini API users, catering to different levels of usage. As part of these updates, Gemini 2.0 Flash and 2.0 Flash-Lite continue to drive cost reductions by adopting a single price per input type, eliminating the previous distinction between short and long context requests in Gemini 1.5 Flash. This change allows both 2.0 Flash and Flash-Lite to be more cost-effective than Gemini 1.5 Flash in mixed-context workloads, despite offering improved performance.
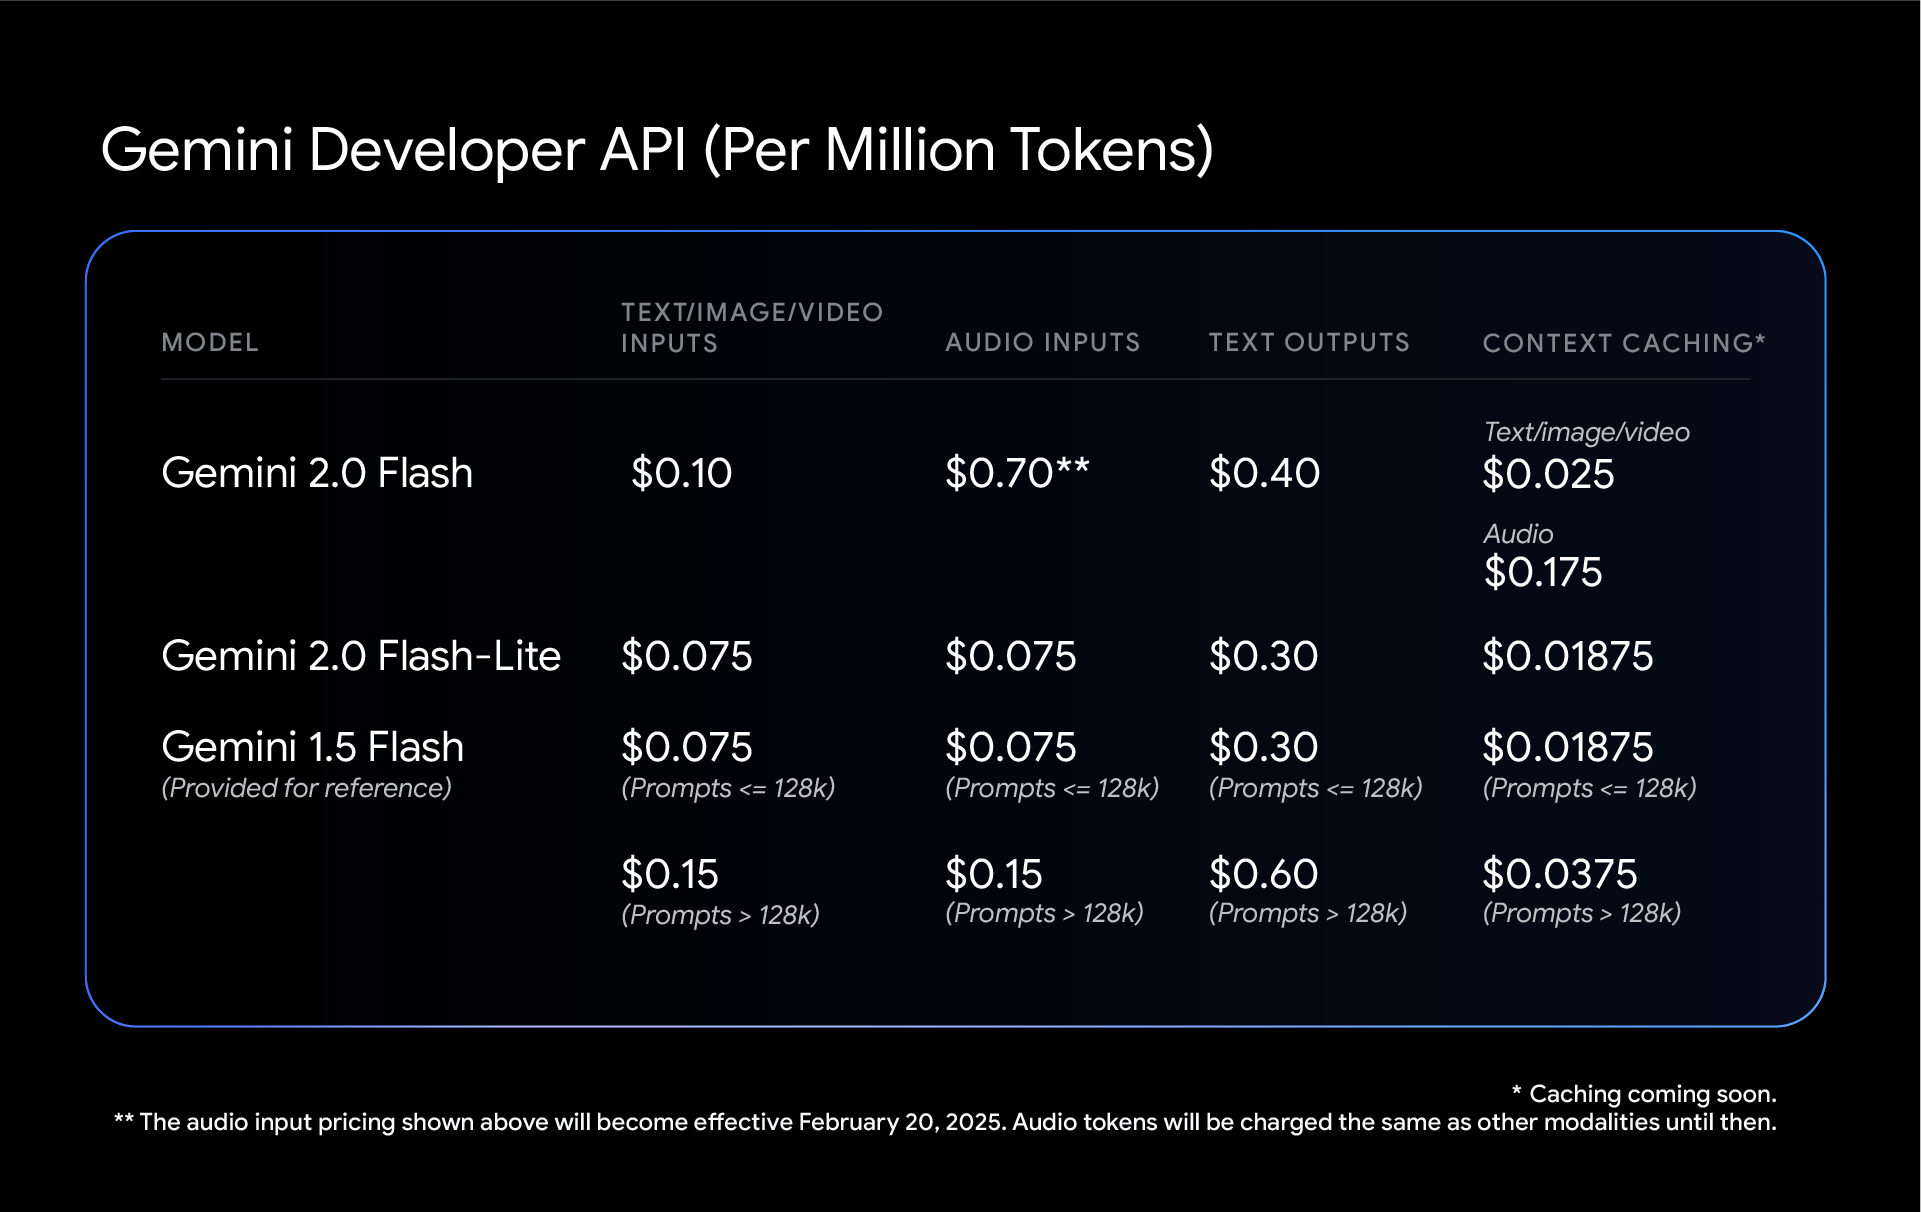
Pricing for Gemini 2.0 Flash

Pricing for Gemini 2.0 Flash-Lite
Enterprise Plans
For businesses requiring large-scale AI deployments, Google offers custom enterprise plans with dedicated support, enhanced security, and flexible pricing models.
Understanding these pricing tiers can help developers and businesses optimize their API usage while managing costs effectively.
How to Use the Gemini API
Getting started with the Gemini API is straightforward. Follow these steps:
Step 1: Install the Gemini API Library
For Python users (Python 3.9+), install the google-genai package using the following pip command:
pip install -q -U google-genai
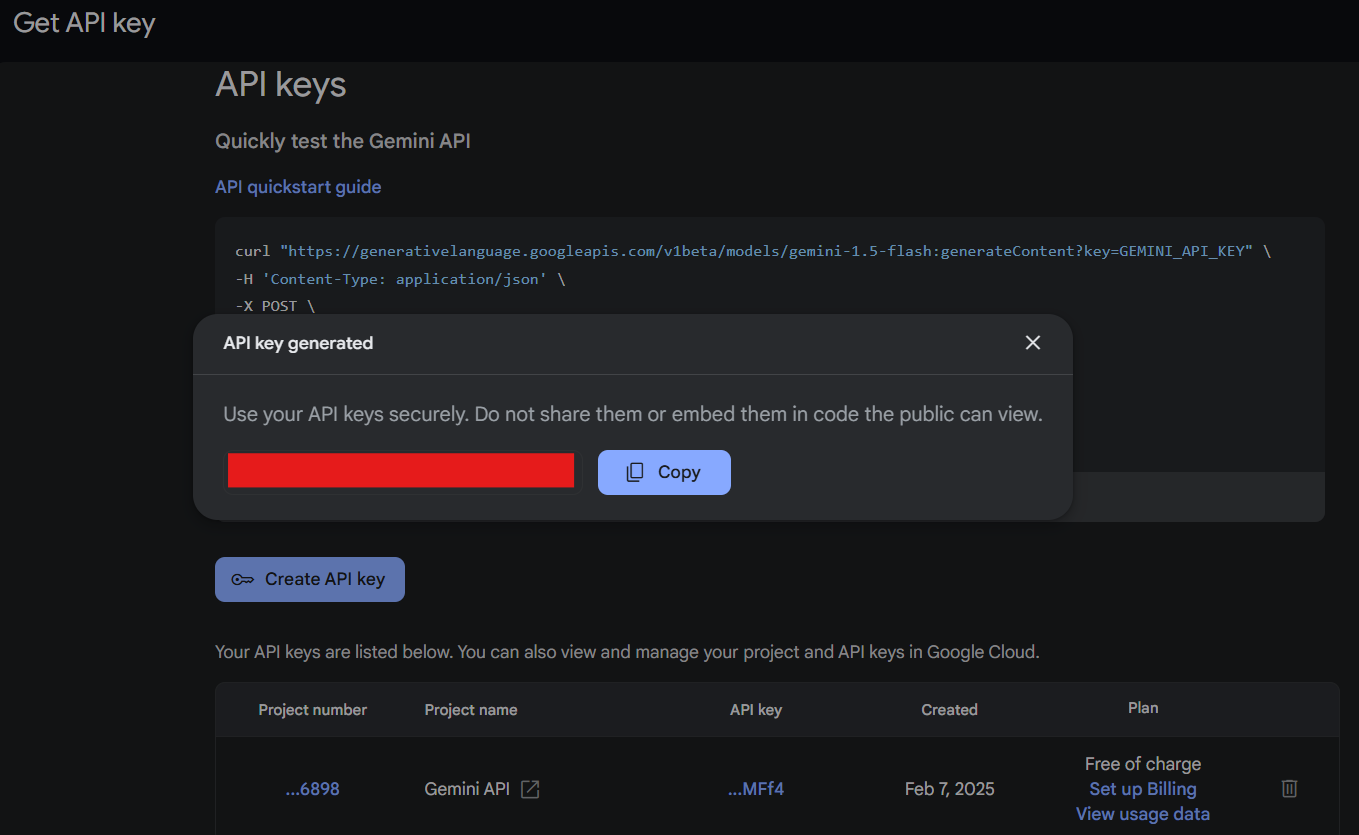
Step 2: Generate an API Key
Before making API requests, you need to generate an API key from the Google AI Studio. This key authenticates your requests and allows you to access different models.
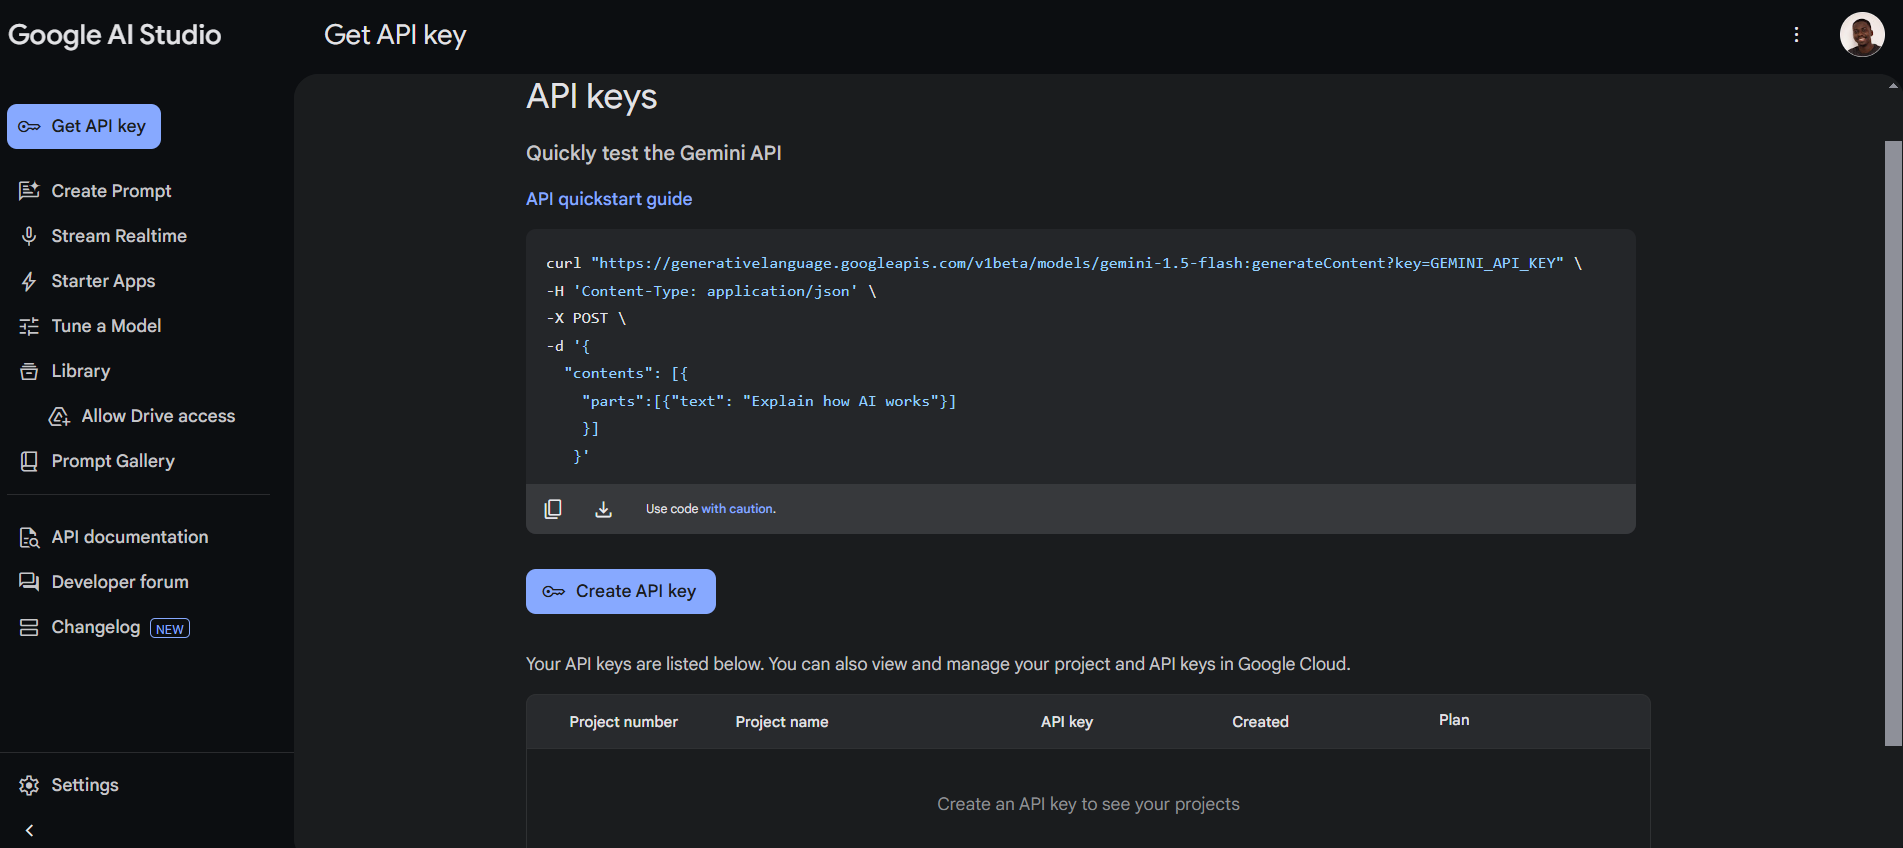
API Key Security: When generating an API key, it is essential to keep it secure. API keys should never be shared or embedded in publicly accessible code, as this can lead to unauthorized access and potential security risks. Always store API keys securely and follow best practices to protect sensitive data.
Step 3: Make Your First Request
Use the generate_content method to send a request to the Gemini API:
from google import genai

client = genai.Client(api_key="YOUR_API_KEY")
response = client.models.generate_content(
    model="gemini-2.0-flash", contents="Explain how AI works"
)
print(response.text)
Running the Gemini API Script in Apidog
Apidog allows you to test API requests easily without writing full Python scripts. To run your Gemini API request in Apidog, follow these steps:
Step 1. Open Apidog
- Launch Apidog on your computer or open the web version.
- Create a new API project (or open an existing one).
Step 2. Create a New Request
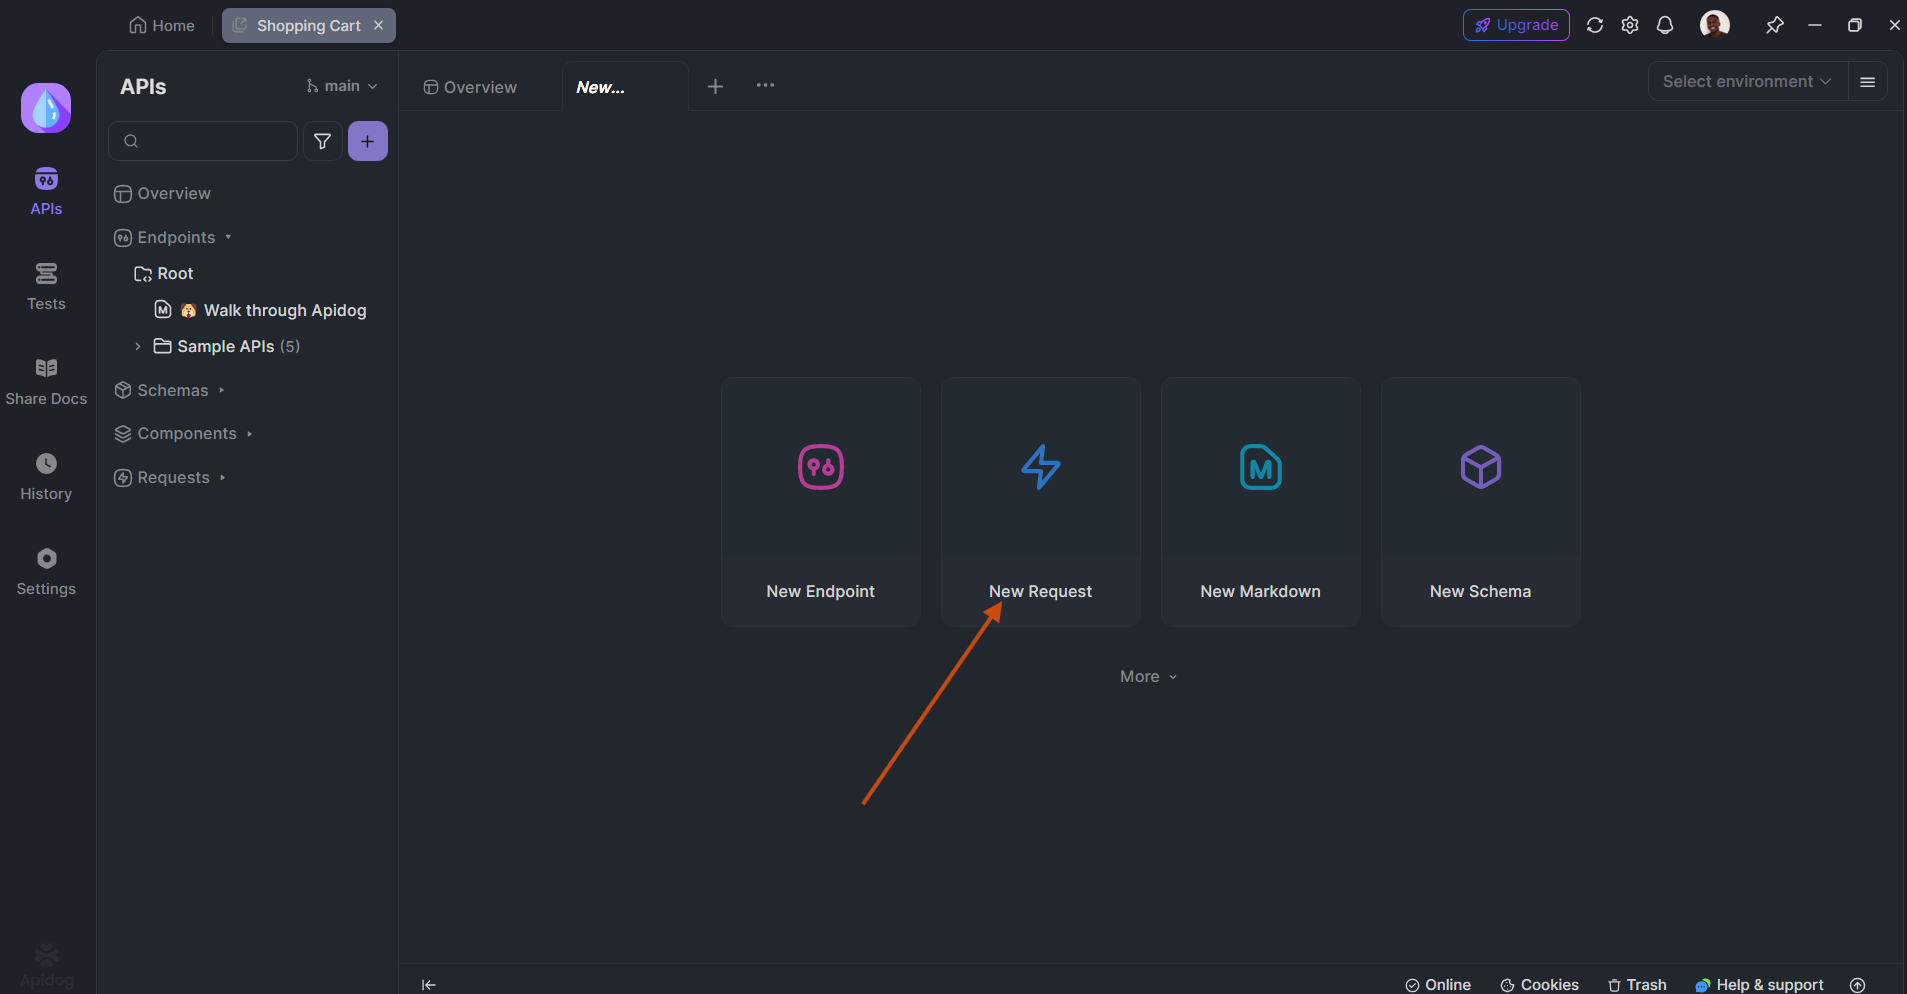
- Click "New Request".
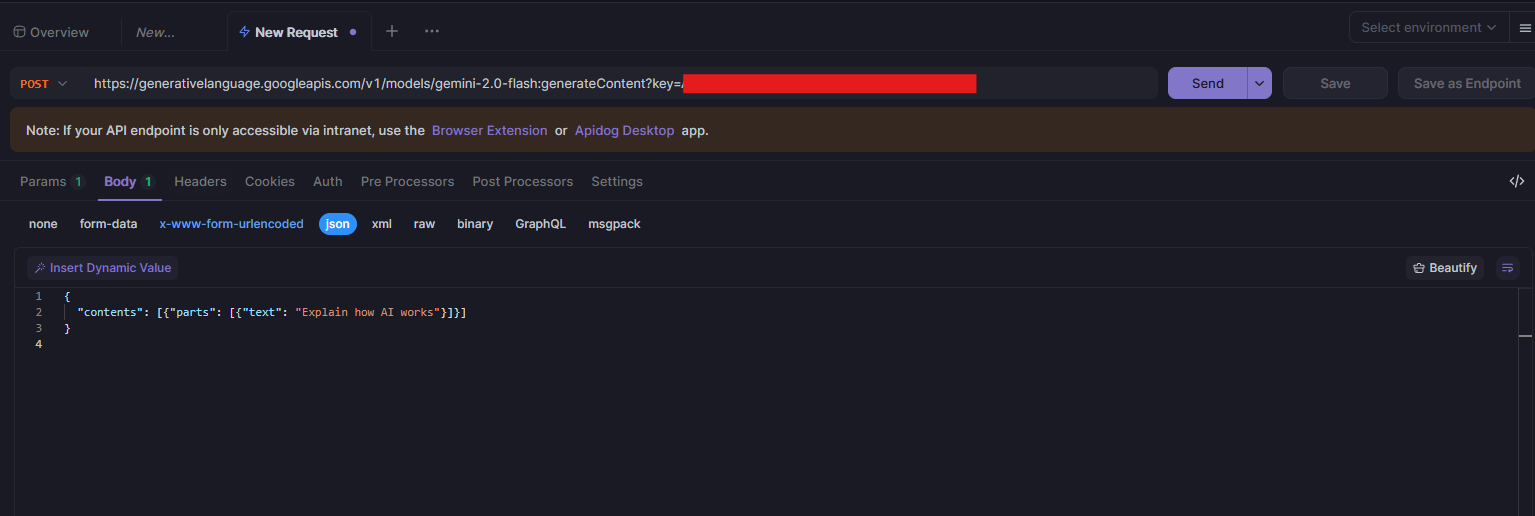
- Set the request method to
POST. - Enter the API endpoint:
https://generativelanguage.googleapis.com/v1/models/gemini-2.0-flash:generateContent?key=YOUR_API_KEY
🔹 Replace YOUR_API_KEY with your actual Google API key.
Step 3. Configure Headers
Go to the Headers tab and add:
| Key | Value |
|---|---|
Content-Type |
application/json |
Step 4. Set Up Request Body
Switch to the Body tab and select raw JSON, then enter:
{
  "contents": [{"parts": [{"text": "Explain how AI works"}]}]
}
Step 5. Send the Request
- Click "Send" to test the API.
- The response will appear in the Response tab.
Step 6. Review the Response
You should see a JSON response with the AI-generated text:
{
  "candidates": [
    {
      "content": {
        "parts": [
          {
            "text": "AI, or artificial intelligence, refers to..."
          }
        ]
      }
    }
  ]
}

The generated text will be under "text" in the response.
Optional: Save & Reuse Requests
- Click "Save" to store the request for future use.
- You can create multiple API requests and organize them into collections.

Running a Gemini AI Script in VS Code
To run the script using Google's Gemini API in VS Code, follow these steps:
Step 1. Install Required Packages
Before running the script, ensure you have installed the google-generativeai package:
pip install google-generativeai
Step 2. Save Your Script
Create a new Python file (e.g., googlemodel.py) and add the following code:
from google import genai

client = genai.Client(api_key="YOUR_API_KEY")
response = client.models.generate_content(
    model="gemini-2.0-flash", contents="Explain how AI works"
)
print(response.text)
🔹 Replace "YOUR_API_KEY" with your actual Gemini API key.
Step 3. Set Up VS Code and Run the Script
- Open VS Code and navigate to the folder containing your script.
- Ensure Python is installed and properly set up in VS Code.
- Open a Terminal (
Ctrl + ~) and run:
python googlemodel.py
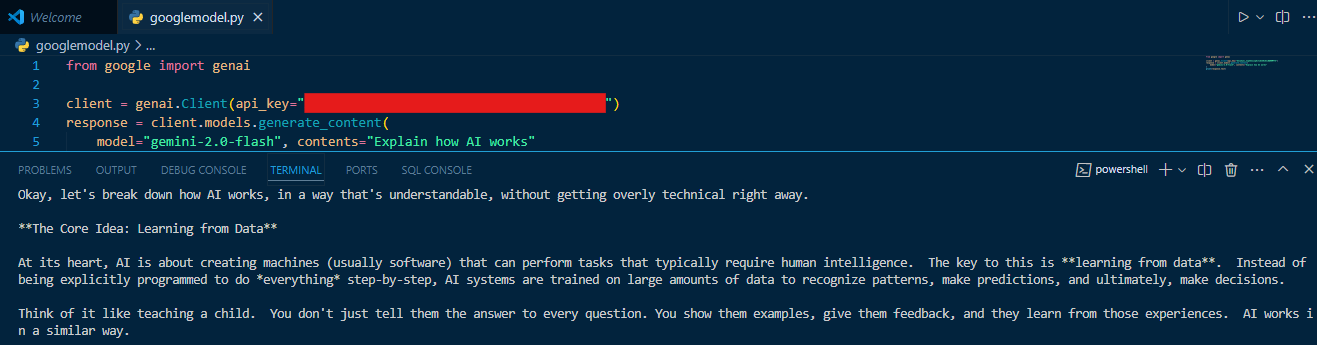
Your script should now generate a response from Gemini AI.
This simple example demonstrates how to generate AI-powered content using Gemini 2.0 Flash.
Step 4: Choose the Right Model for Your Use Case
Different models serve different purposes:
- Flash-Lite – Ideal for cost-efficient applications.
- Flash – Balances speed and performance.
- Pro – Optimized for complex reasoning and tasks.
By selecting the right model, developers can maximize efficiency while keeping costs manageable.
Optimizing API Usage for Cost Efficiency
To ensure you’re using the Gemini API cost-effectively, consider these best practices:
- Use Token-Efficient Prompts – Structure queries concisely to reduce API calls.
- Batch Requests – Process multiple inputs in a single API call to lower costs.
- Monitor Usage – Track API consumption through the Google Cloud console.
- Experiment with Free Tiers – Test the API before scaling up to paid plans.
Future Developments and Advancements in AI
With Google’s ongoing investment in AI, the Gemini API is expected to introduce:
- Multimodal Reasoning – Combining text, images, and video understanding.
- Enhanced Automation Features – Streamlining business operations.
- Security Improvements – Protecting user data with stronger encryption.
These advancements will further enhance the API’s capabilities, making it an essential tool for AI-powered applications.
Conclusion
The Google Gemini API provides powerful generative AI capabilities, enabling developers to create innovative applications across multiple industries. Understanding the pricing structure helps businesses optimize costs while leveraging the latest AI advancements. With easy integration and flexible pricing, the Gemini API is a valuable tool for anyone looking to incorporate cutting-edge AI into their projects.
By exploring the API’s features, developers can unlock new possibilities and stay ahead in the evolving AI landscape. Whether you’re a startup or an enterprise, the Gemini API offers the tools needed to build smarter, more efficient AI-powered solutions.