If you're dipping your toes into workflow automation, n8n stands out as an open-source powerhouse that lets you connect apps, data, and AI without needing deep coding expertise. Whether you're streamlining tasks like data syncing or building custom agents for smarter operations, n8n's node-based interface makes it approachable for newcomers. In this guide, we'll walk through self-hosting n8n on Docker Desktop and crafting your first AI agent from scratch—one that pulls Wikipedia insights and formats them neatly. By the end, you'll have the confidence to automate almost anything in your workflow. Let's begin!
Want an integrated, All-in-One platform for your Developer Team to work together with maximum productivity?
Apidog delivers all your demands, and replaces Postman at a much more affordable price!
Choosing Between Cloud and Self-Hosting n8n
You can use n8n in the cloud if you do not want to install Docker Desktop, by first signing up for an account at AI Workflow Automation Platform & Tools - n8n.
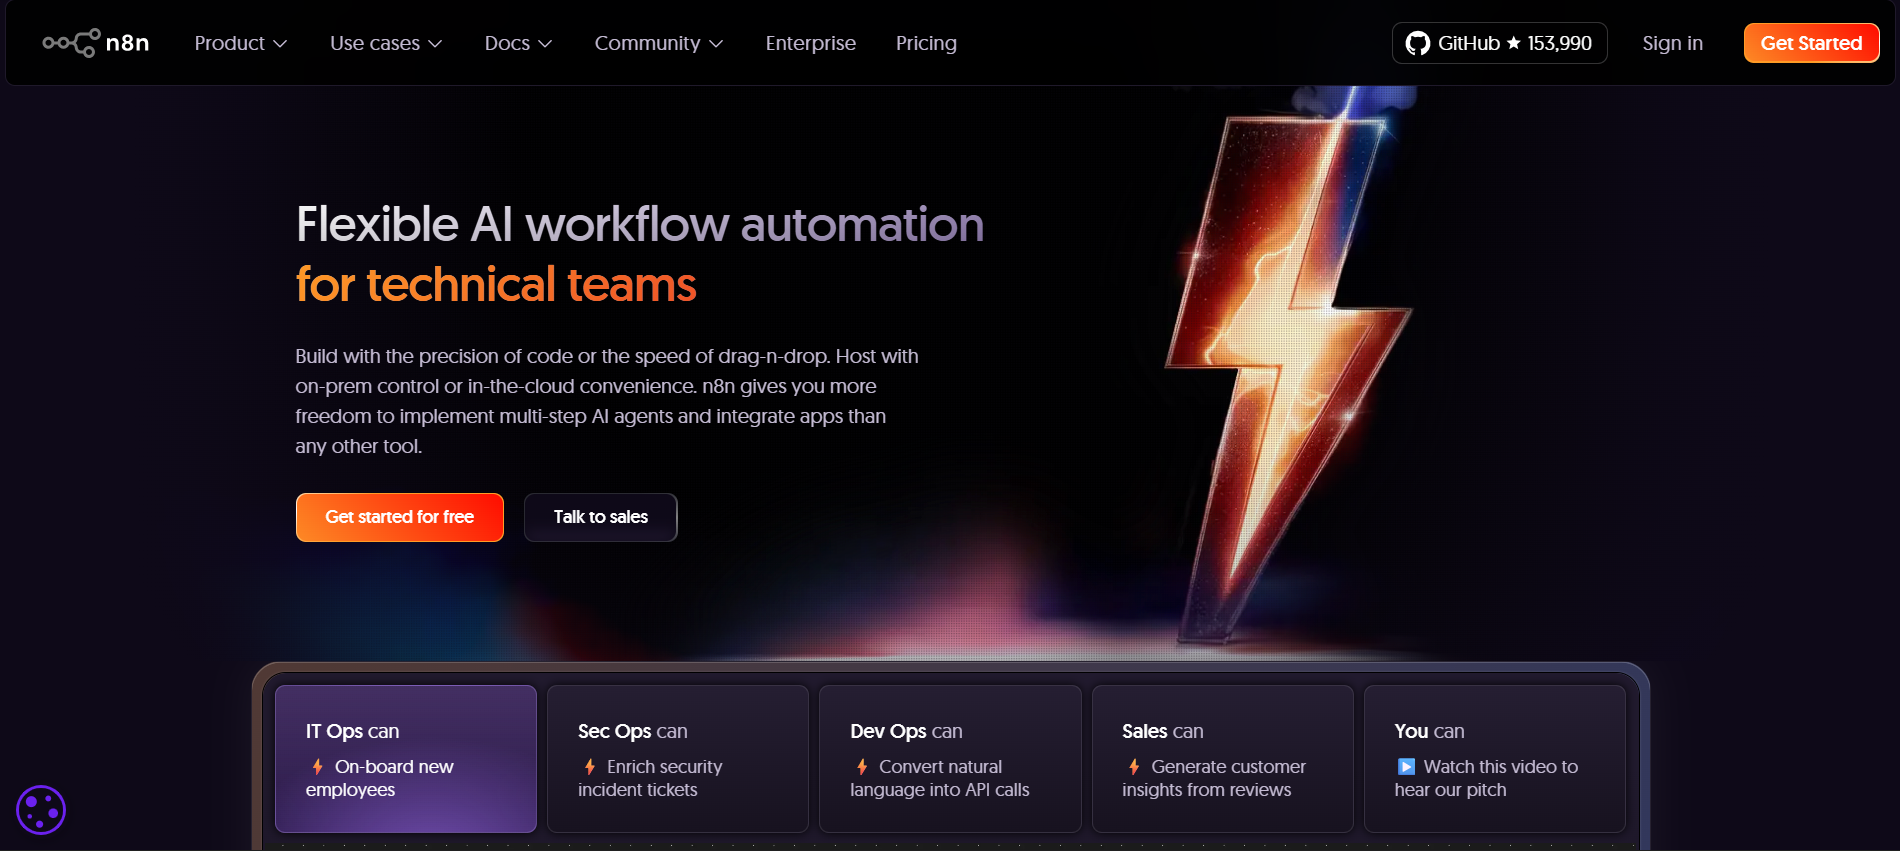
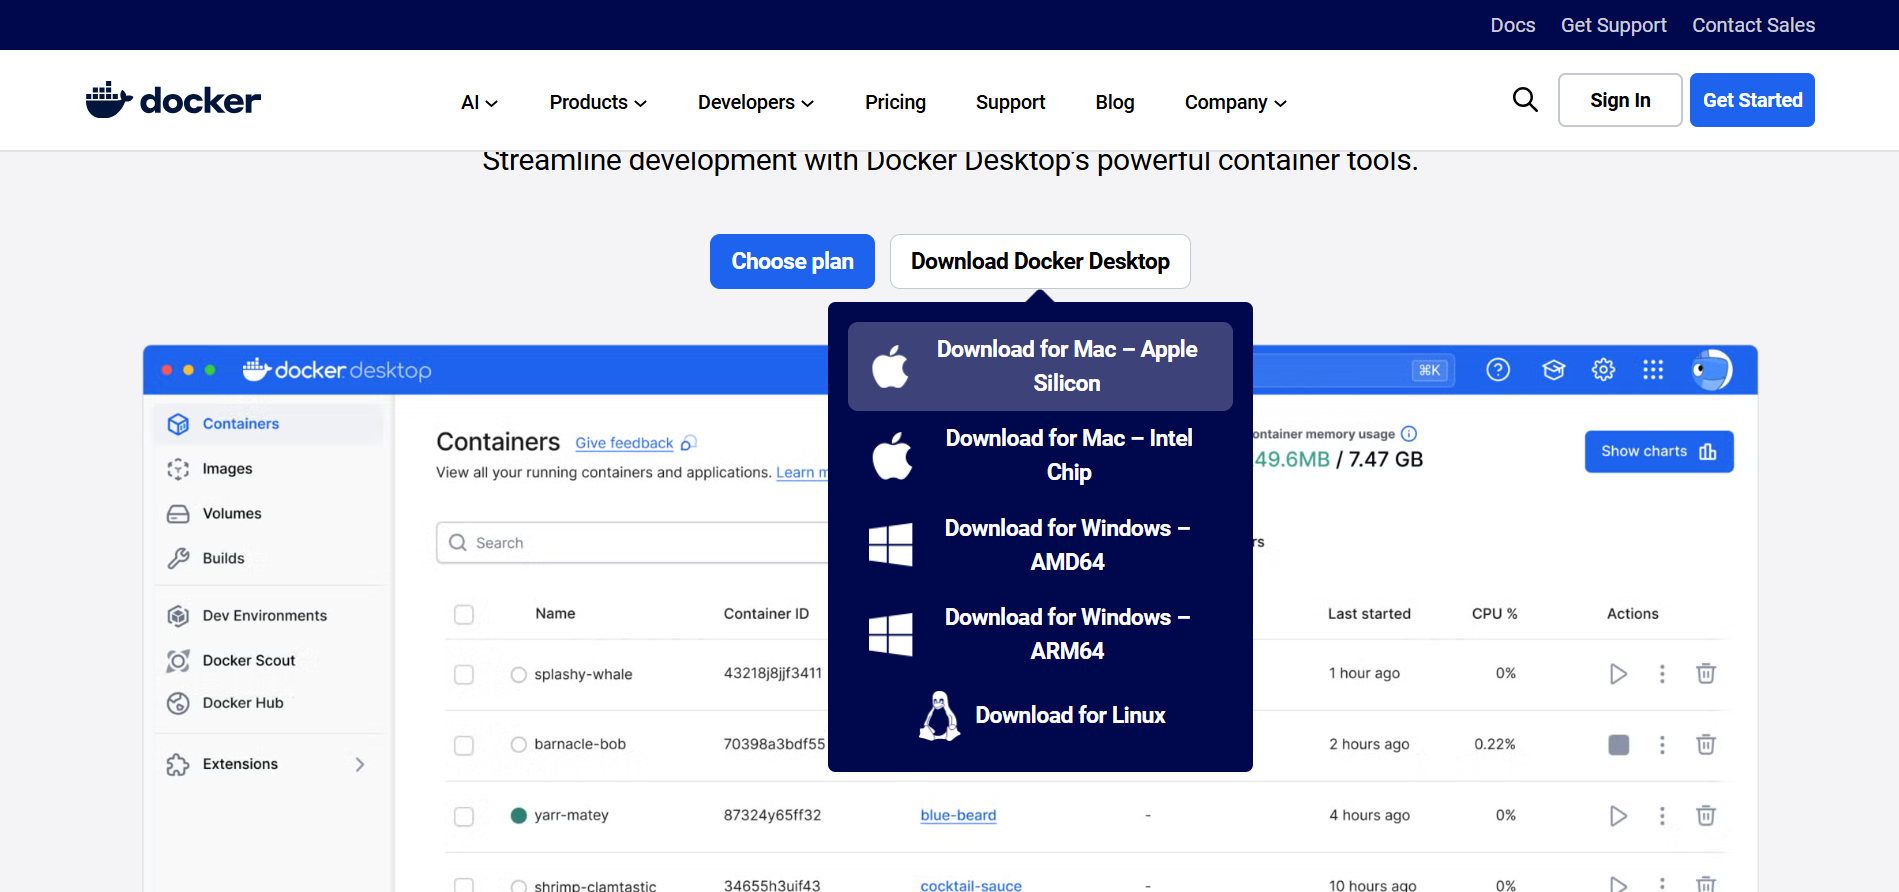
For this tutorial, we will be using n8n by self-hosting it on Docker Desktop. To do this, head over to https://www.docker.com/products/docker-desktop/ and install a compatible version for your operating system.
Installing and Setting Up Docker Desktop for n8n
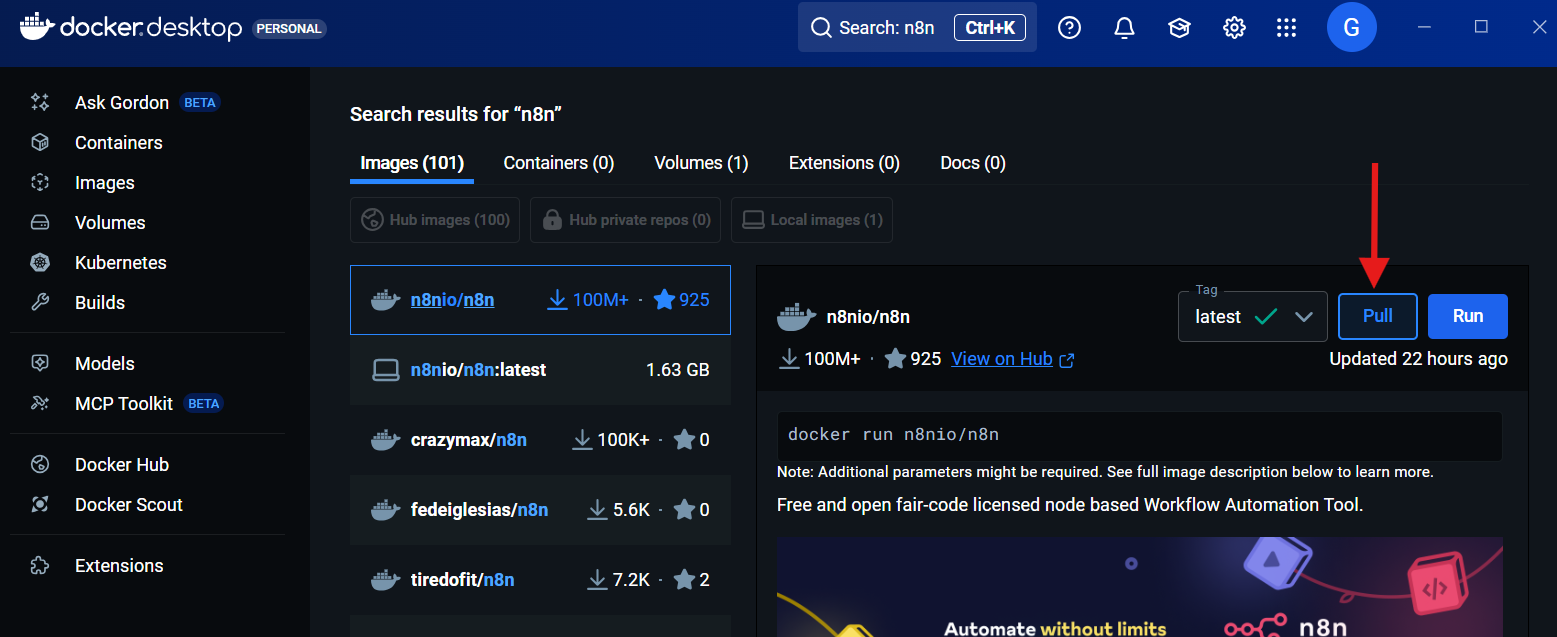
After successful installation, open Docker Desktop and create an account. Then, to install n8n, head over to "Images" and search for n8n simply by using the keyword "n8n," then click "Pull."
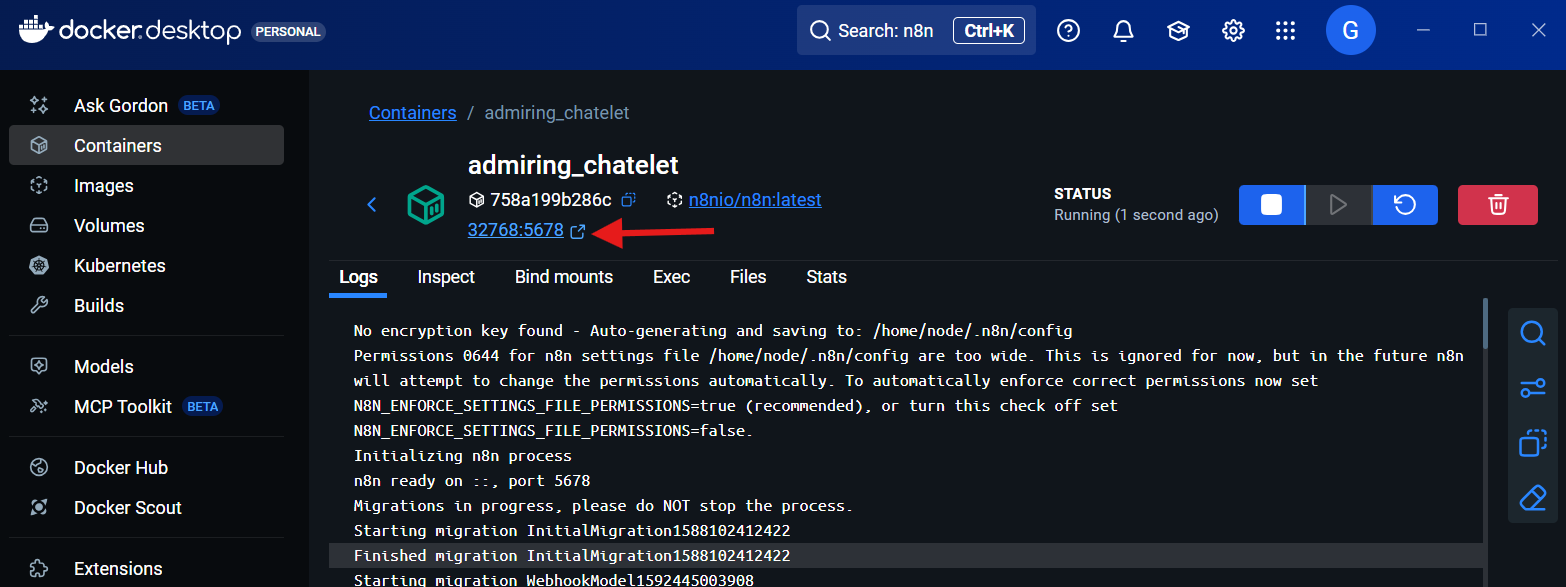
When the pull process is done, you can run n8n by clicking "Run" then going to "http://localhost:5678" in your browser to access n8n.
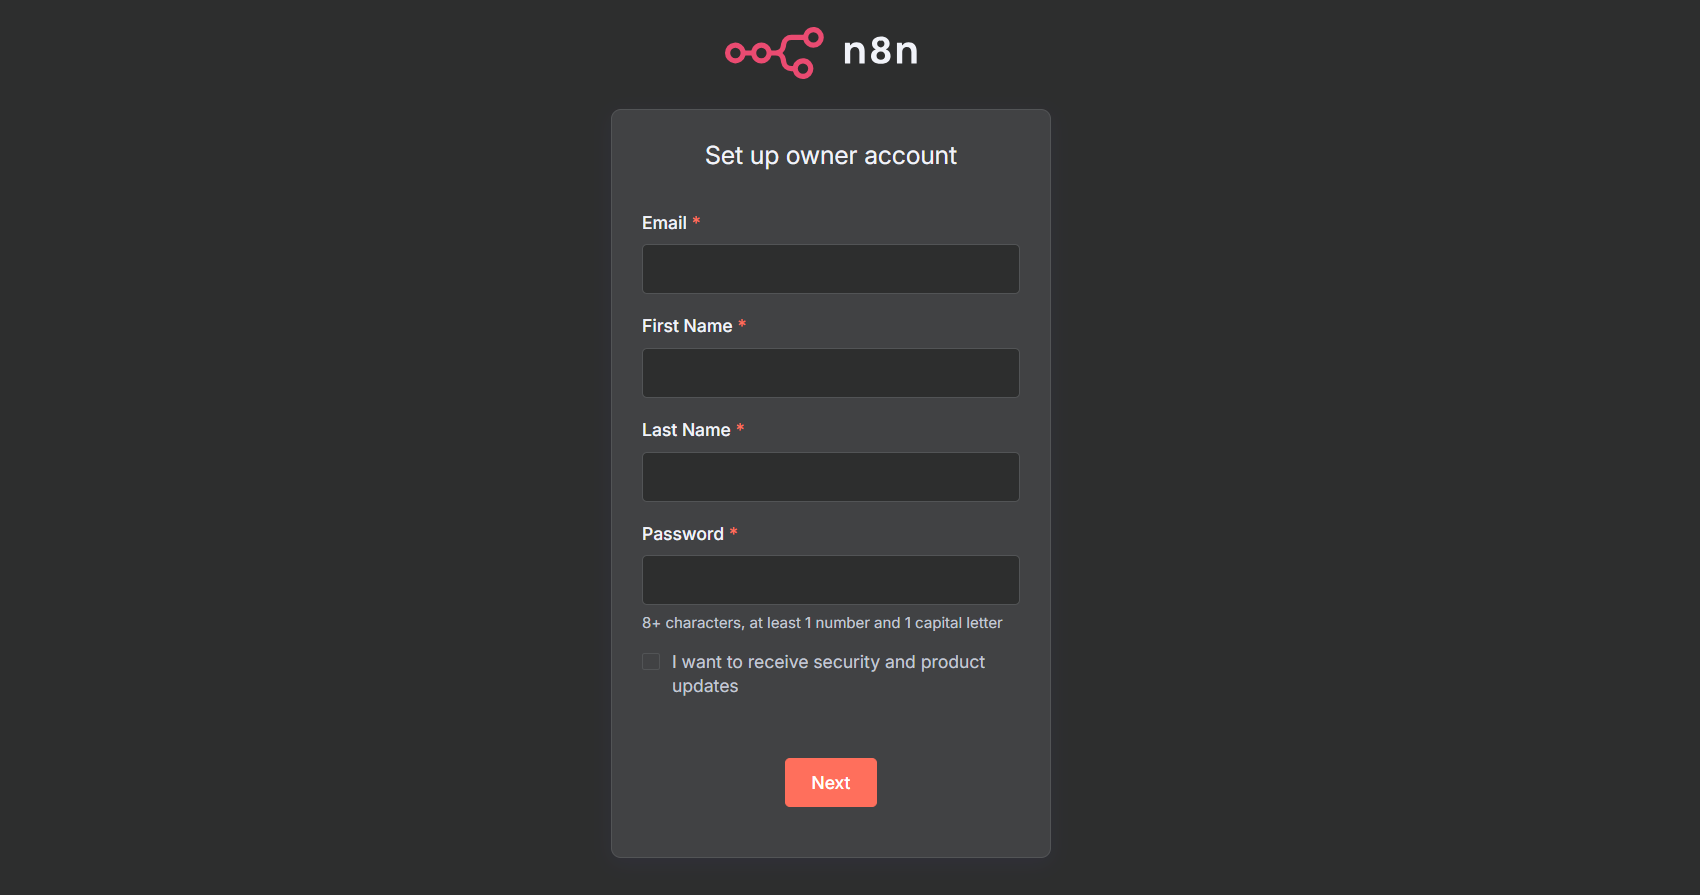
You will be redirected to your browser in a new tab where you will have to create a new n8n account. When you complete this process, you are all set to start building your very own custom AI agents using n8n.
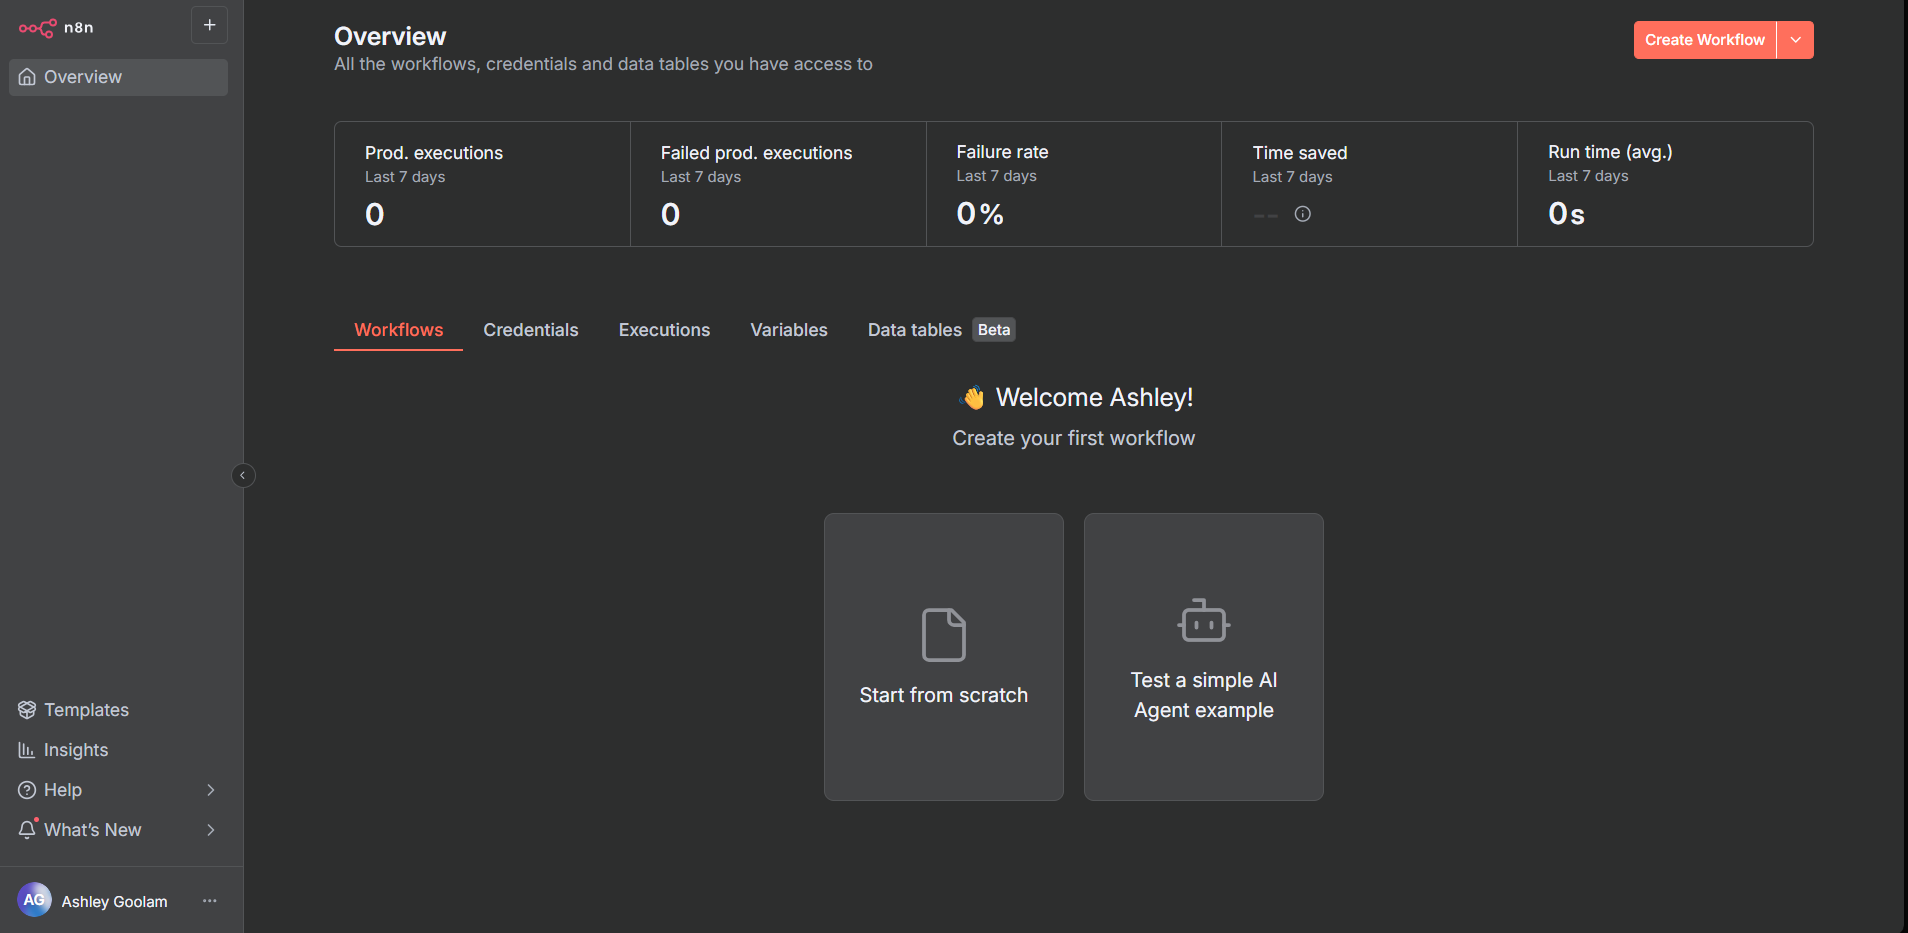
Exploring n8n's Built-in AI Agent Examples
You can get started by using the example AI agent that n8n has already created for you, by simply selecting the "Test a simple AI Agent Example" option. However, in this tutorial, you will learn how to get started entirely from scratch. You also have the option to modify the example agent that n8n has provided to work with and follow along this tutorial.
Building Your First n8n AI Agent
For this tutorial, we will be building an AI Agent that will get data from Wikipedia about anything we ask and presentably display it using HTML. Let's get started!
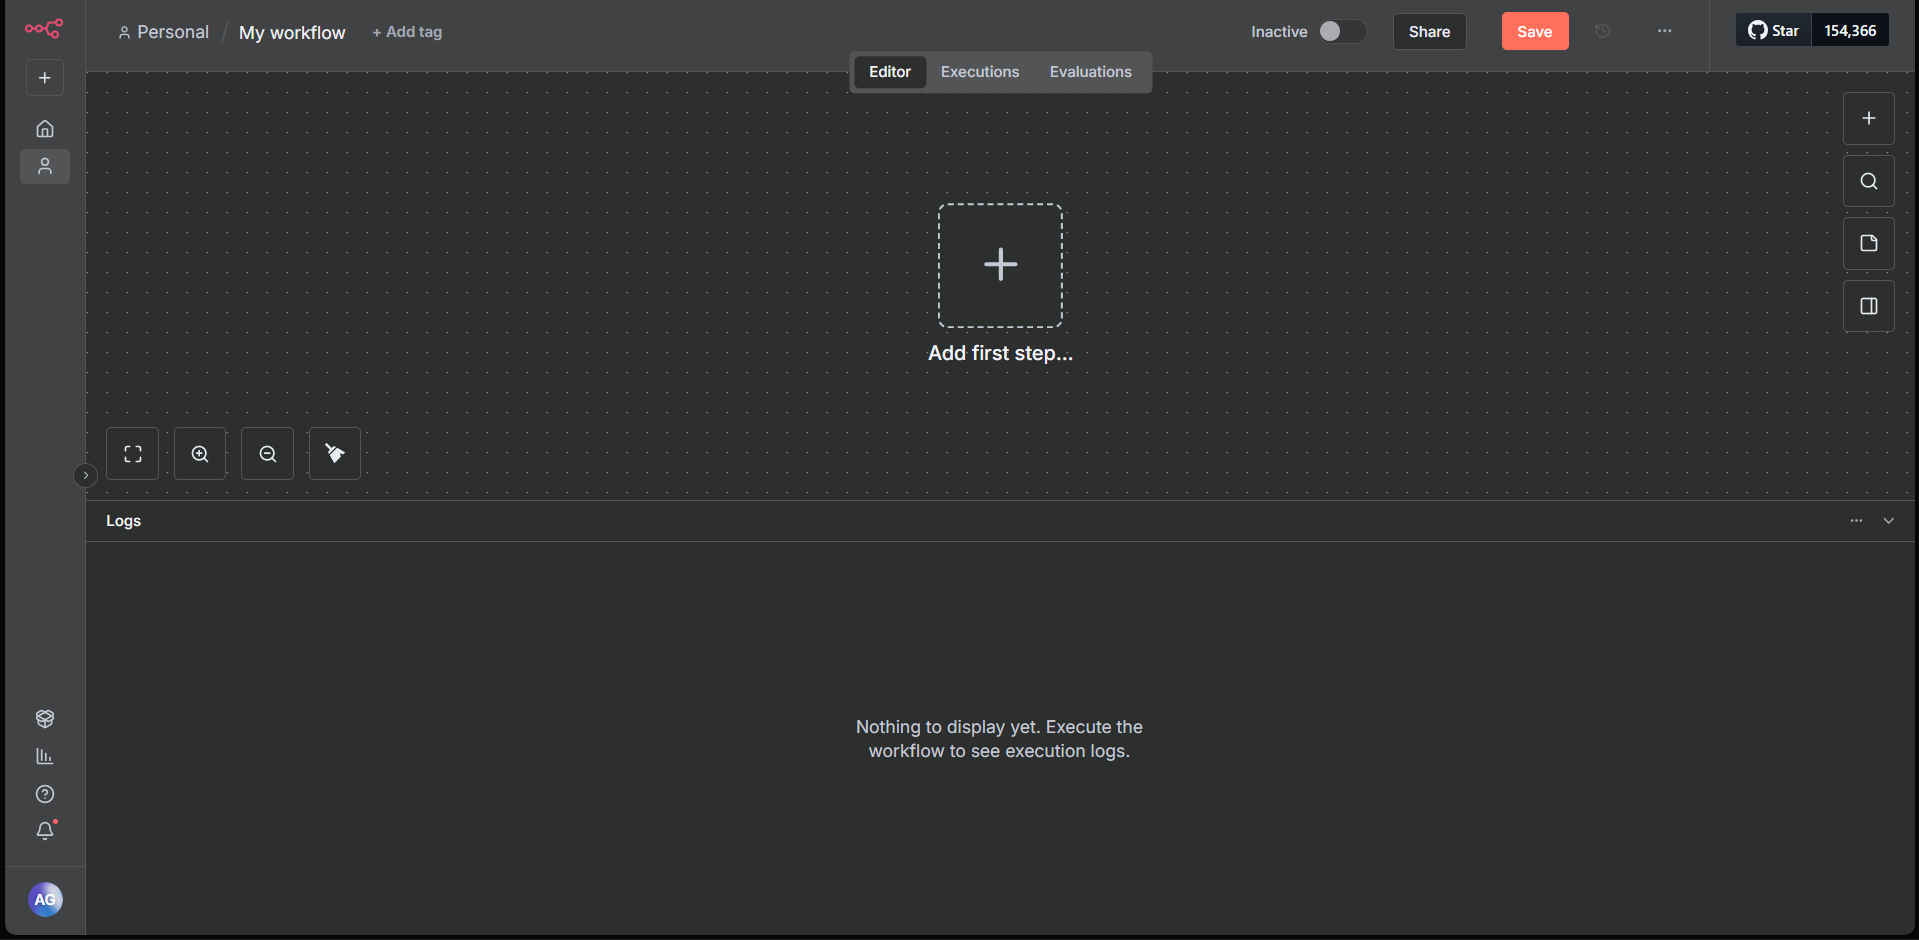
To get started with a fresh new template, we are going to select the "Start from Scratch" option in the homepage, and we will be greeted with a blank workspace where we will create our custom Wikipedia emailing agent. Haven't thought about a creative name for it but I guess let's just call it Bob for now. Bob the AI Agent who can use html to display some random content we need from Wikipedia. Your AI Agents can literally be about any task that you would like to automate. Think about chatbots for e-commerce stores to even planning out group holiday trips. Exactly—literally any task you would like to automate.
Adding a Chat Interface to Your n8n Agent
So how will we get started with creating Bob? First, we will need some kind of chat interface that we can use to input data and parse to our AI agent. So, click "Add a first step," then search for "chat" in the right-side bar that will pop up and select a "Chat Trigger."
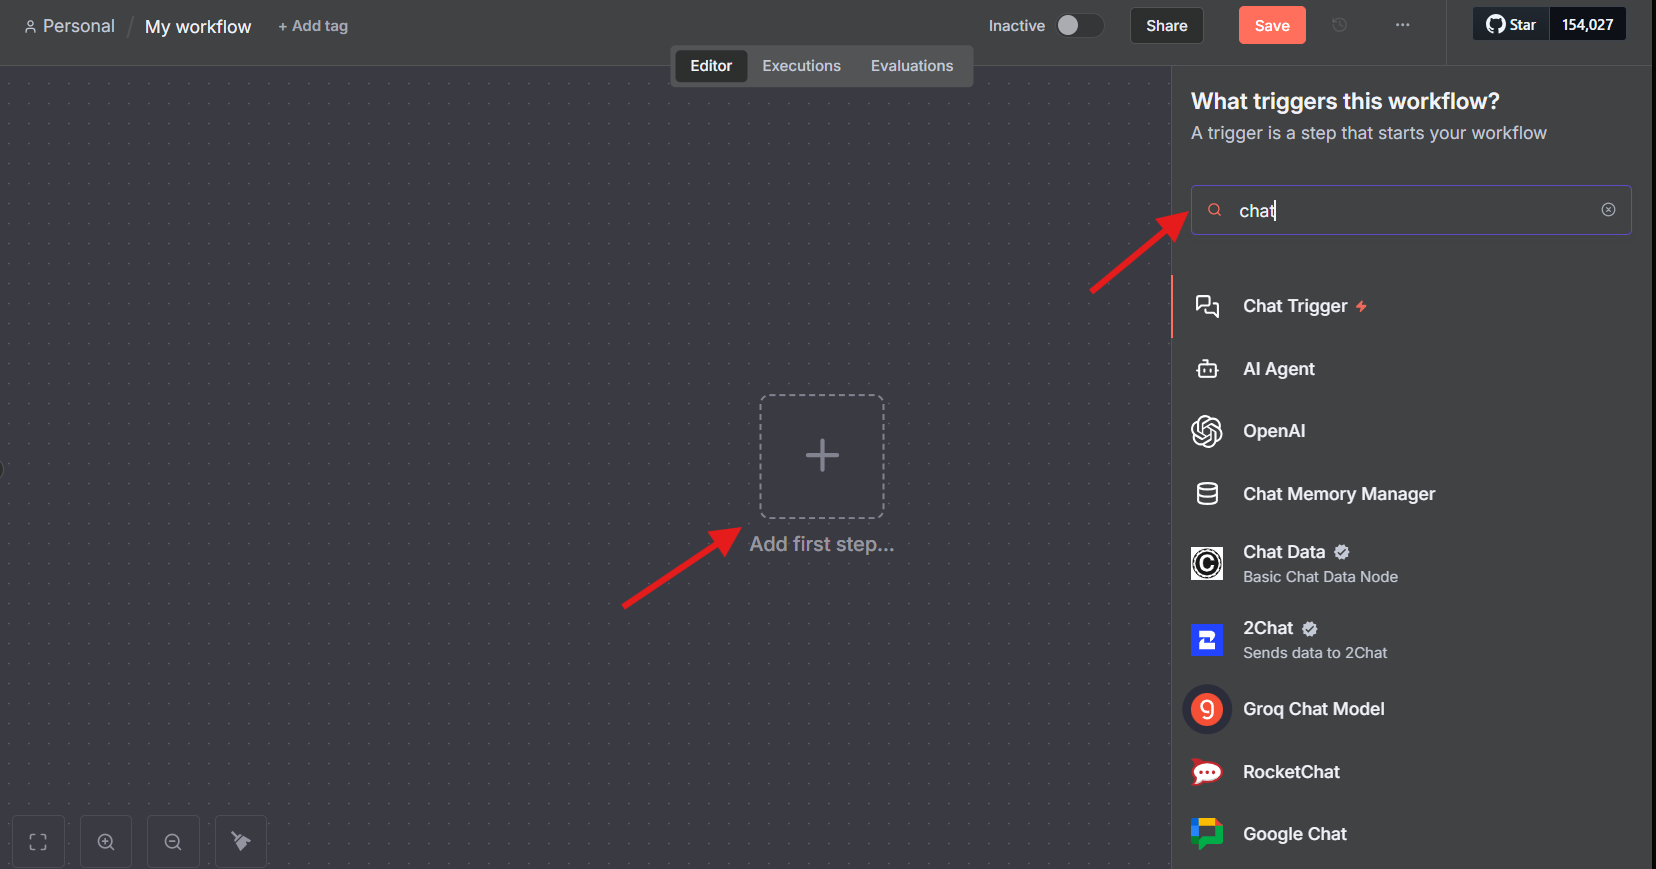
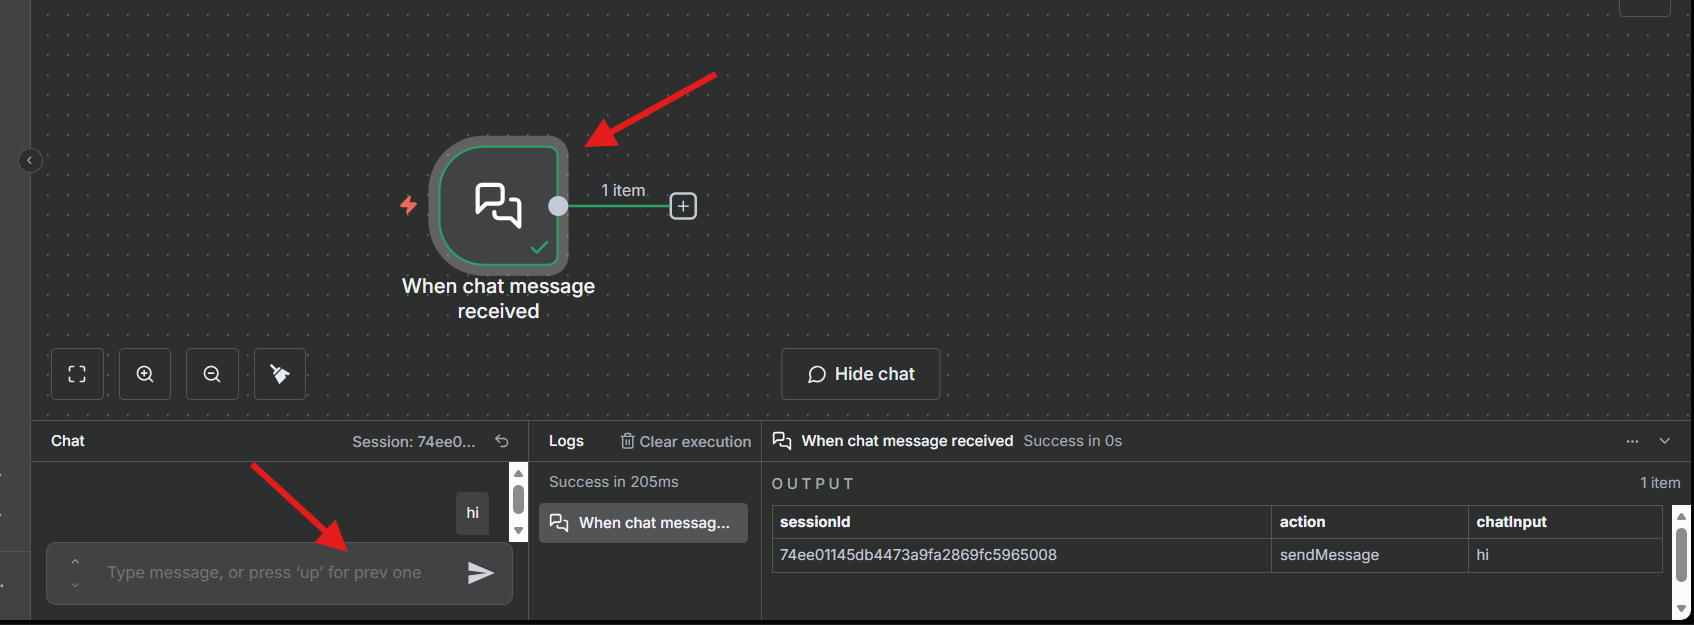
This sidebar contains various tools that you can use to build your AI agents. All you need to do is search for what you are looking for and browse through the many tools n8n has made available. We will use this to pass our input text data to Bob the AI agent. To test if the "Chat Trigger" can work, simply hover over the item and select "Open Chat," then input any message in the chat panel below, e.g., "Hi," and you should see the Chat Trigger glow green, indicating that it works.
Integrating an AI Agent Node in n8n
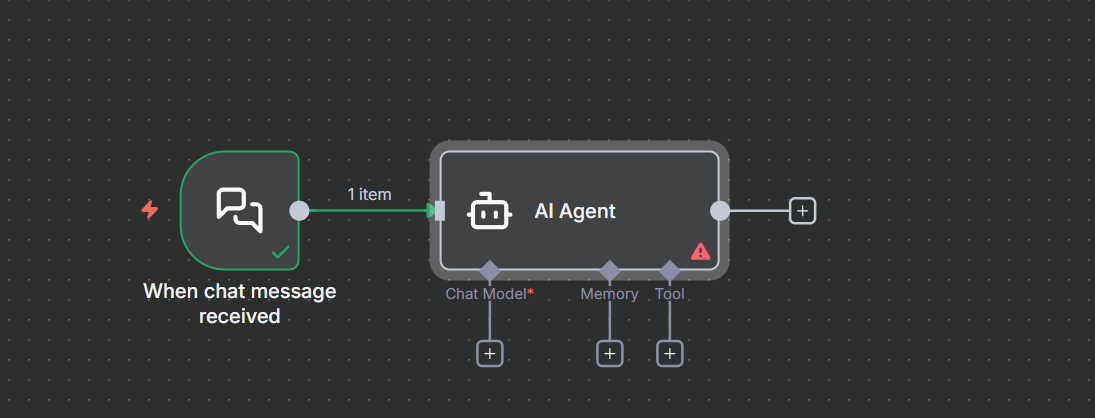
Now that we can send a message to Bob our AI agent, we will need our actual AI agent who could process this data and grab information from Wikipedia. For this task, what better than the AI Agent tool itself? So, we go over to the right-side panel—as n8n calls it the "nodes panel"—by clicking the "+" button and selecting the option "AI" and then choosing "AI Agent."
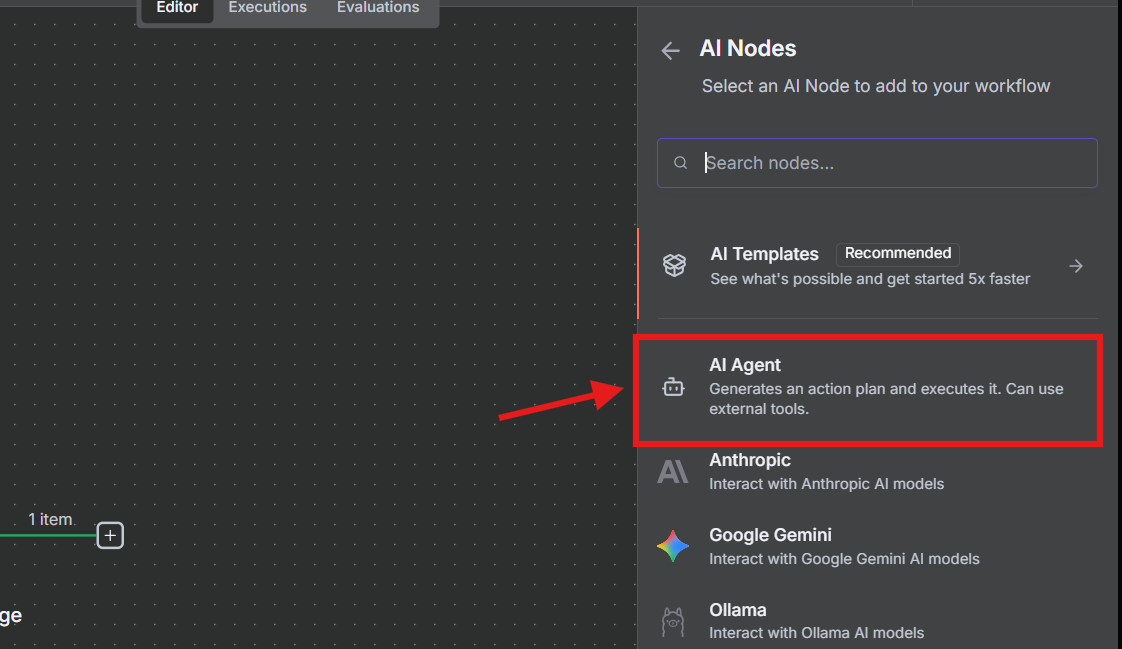
With that being added, our workflow should look something like this:
Configuring the AI Brain for Your n8n Agent
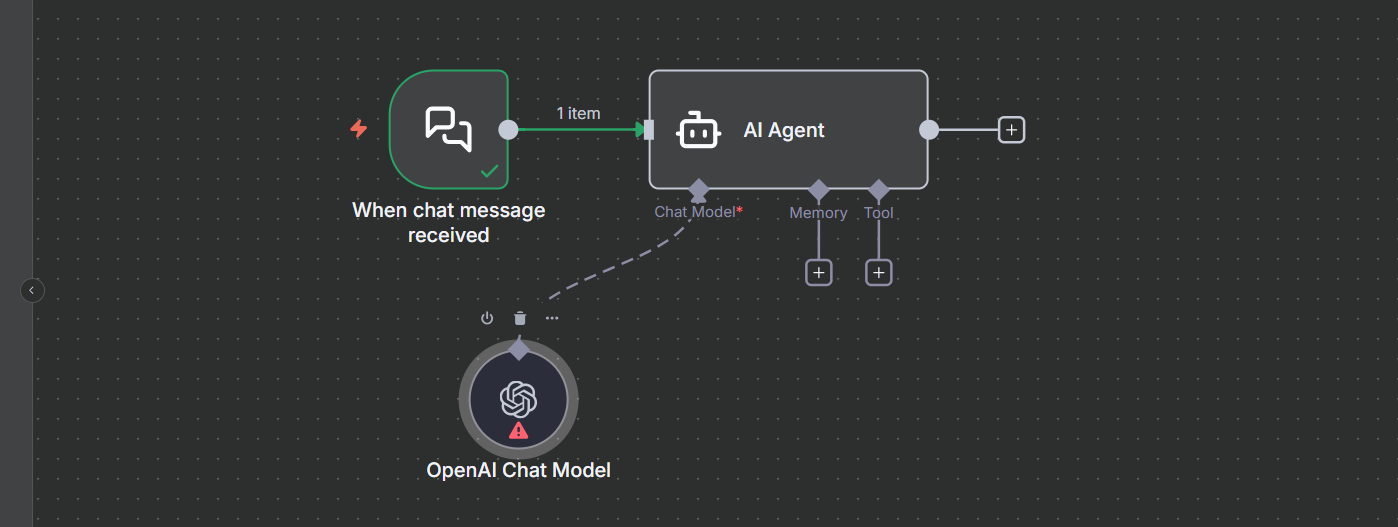
Ok, so now we have an AI agent that can receive the text data from our Chat Trigger, but up to this point our AI agent is not yet smart enough to process or understand the data that is coming from our Chat Trigger. So, to help Bob a little here, we will need to provide him with what we can call the brains of this AI agent. Of course, this being a powerful AI Chat model like Google's Gemini, Anthropic's Claude, OpenAI's GPT models, and many more. For this tutorial, we will be using OpenAI's GPT 4o-mini chat model. So go ahead and select it from the node panel by simply searching for "OpenAI Chat Model."
After adding it to our workspace, we will need to grab an API key or create one from https://platform.openai.com/api-keys.
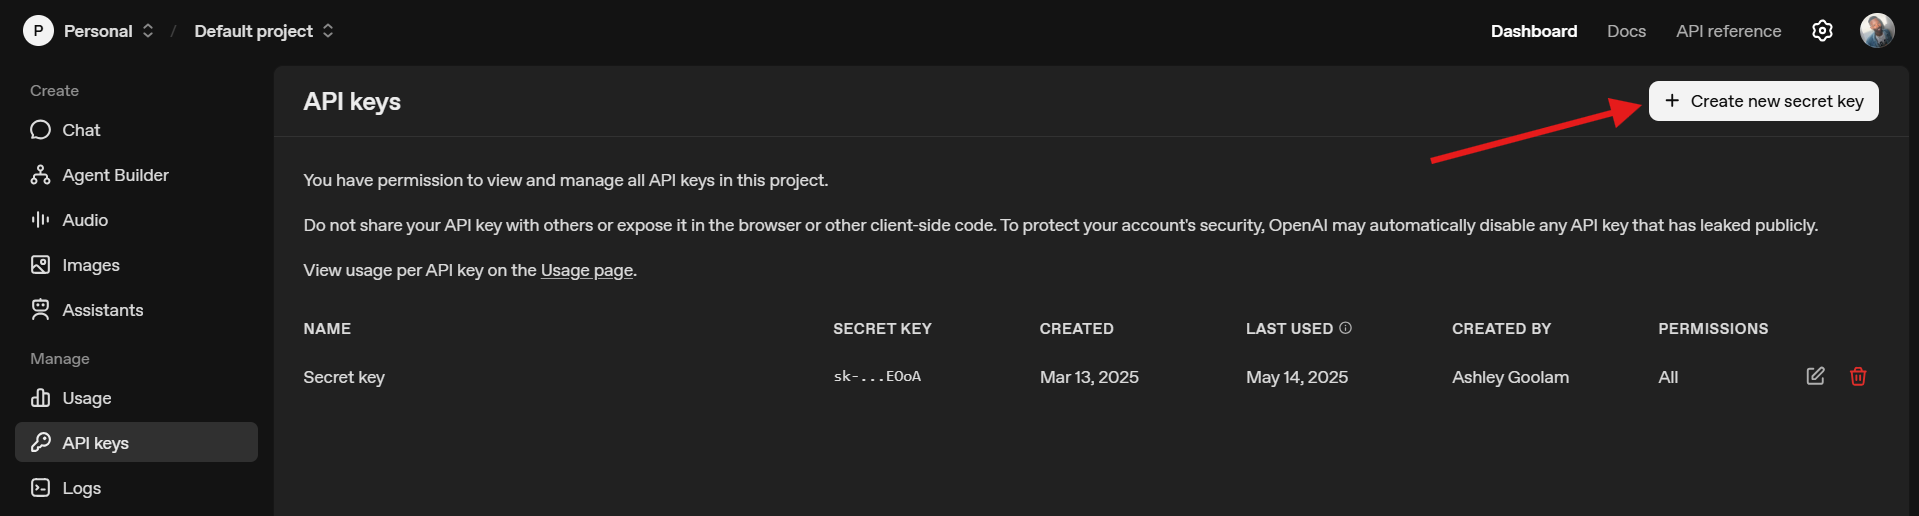
To configure our AI chat model, we need to select the option "Select Credential" and then copy and paste your API key to configure the AI chat model.
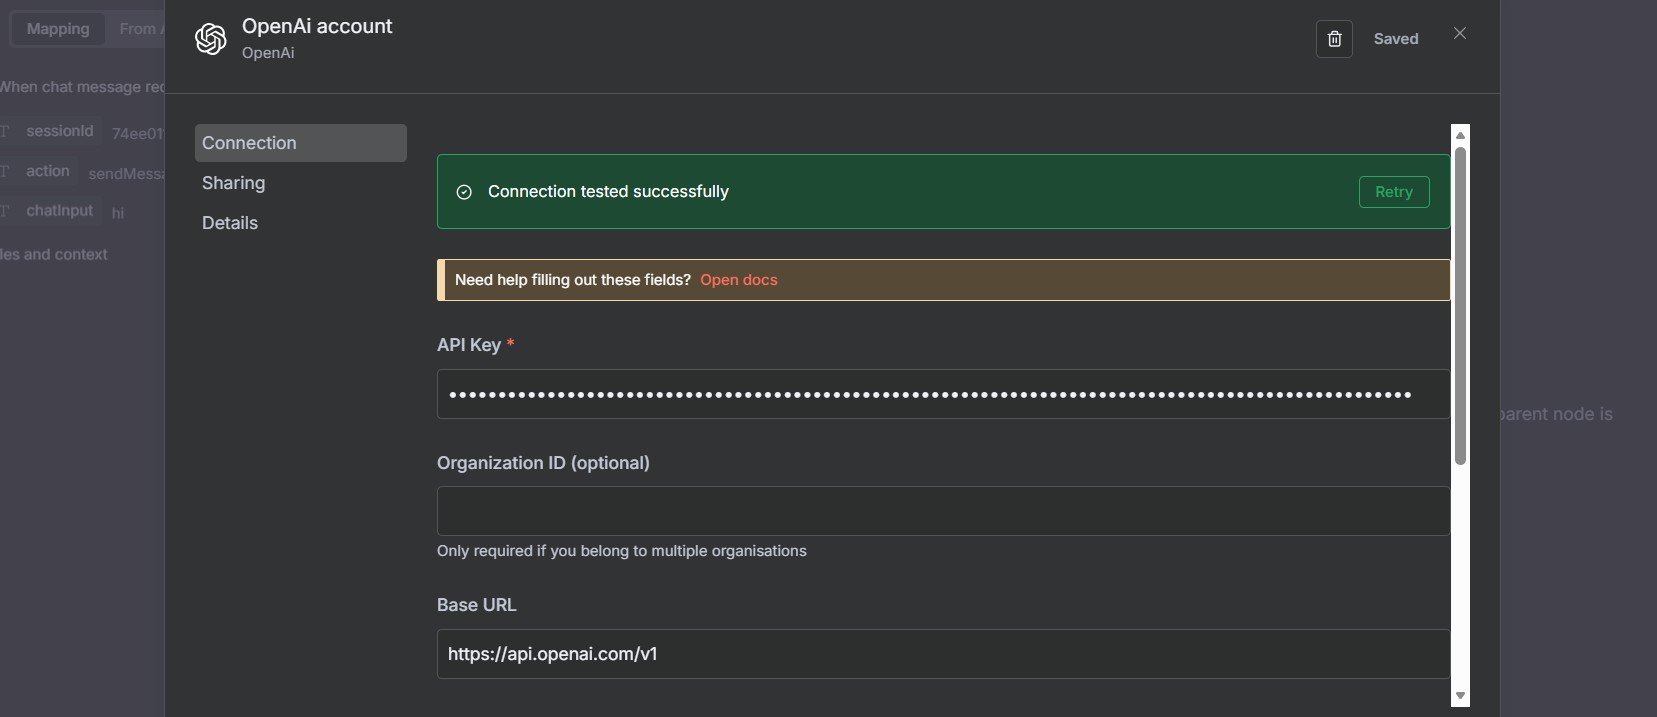
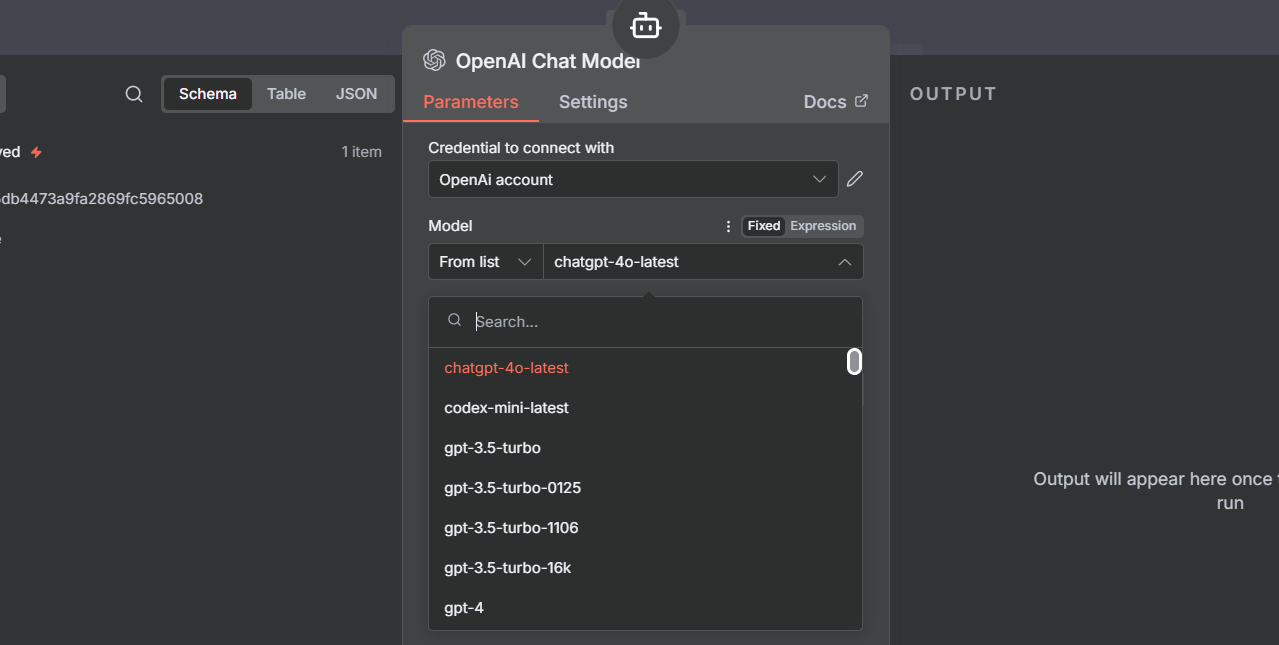
After successfully configuring the AI chat agent, you can select a model of your choice under the "Models" option.
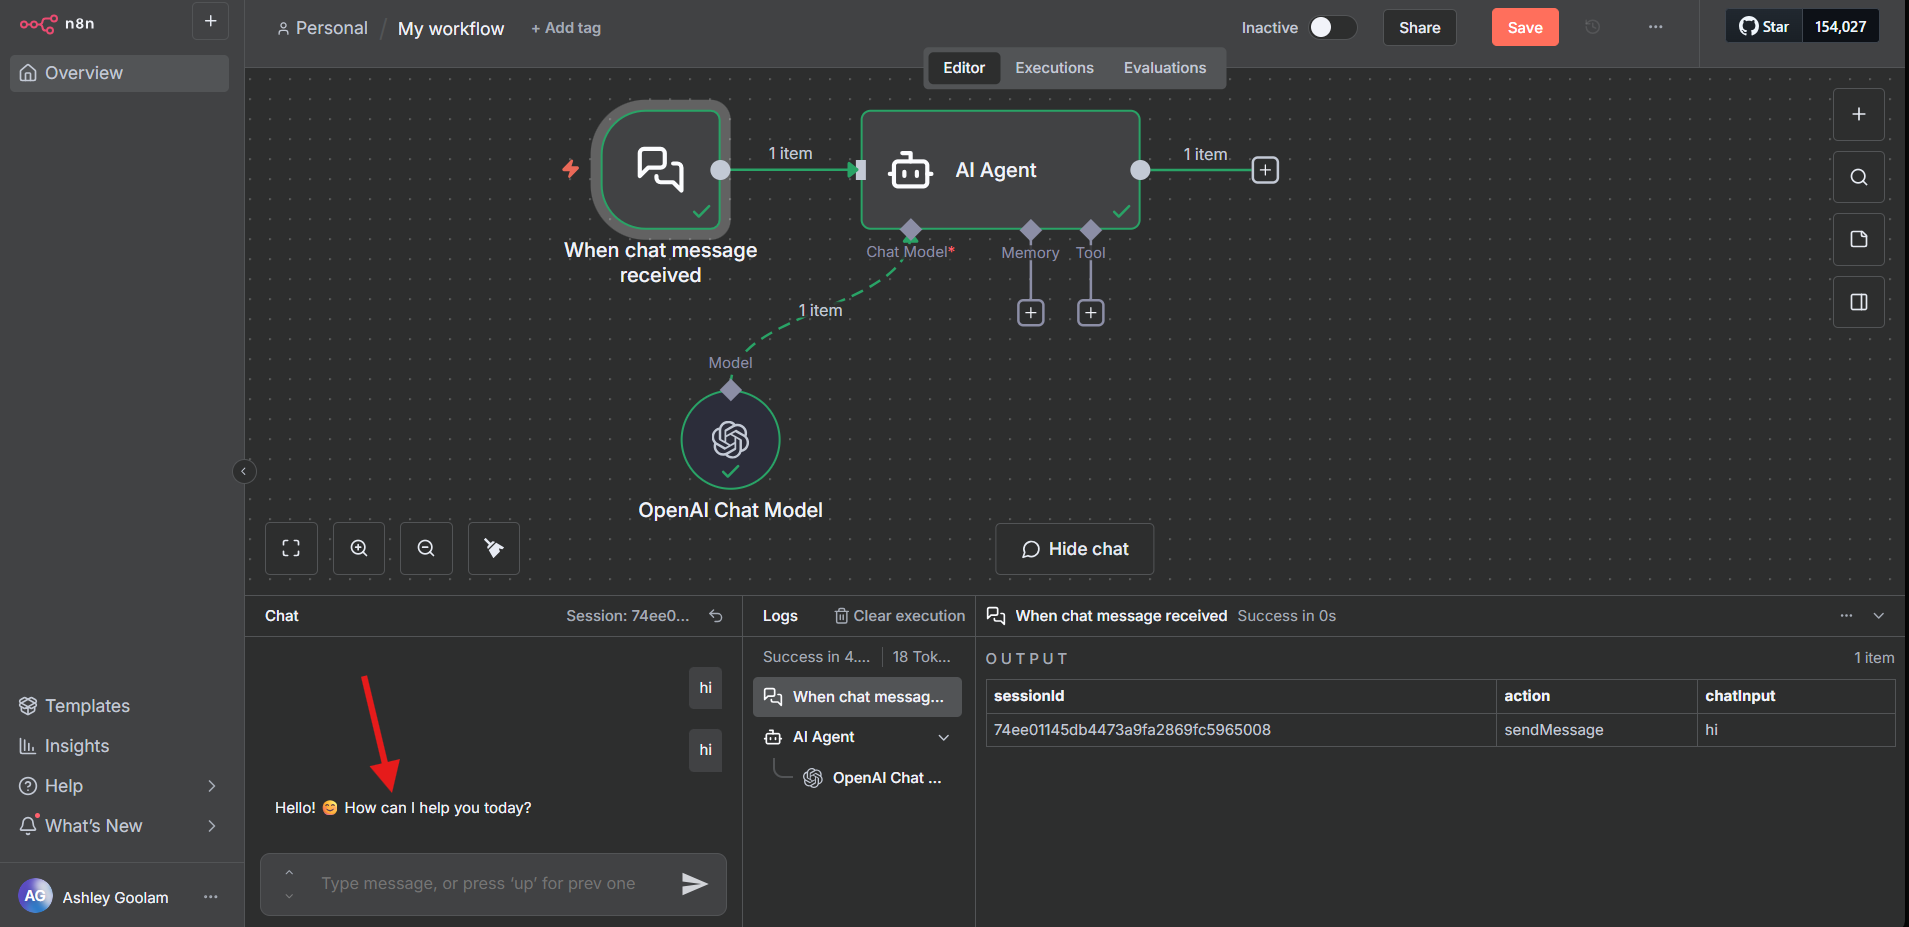
Now we head back to the canvas and test our AI chat model by simply typing "Hi" in the Chat Trigger's chat panel and seeing the response. And as always, if everything is green, then you're good to go to the next step.
Adding Memory to Your n8n AI Agent
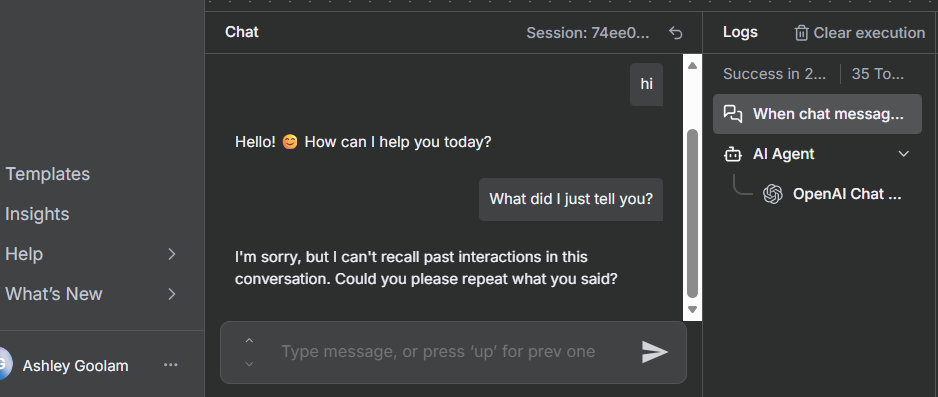
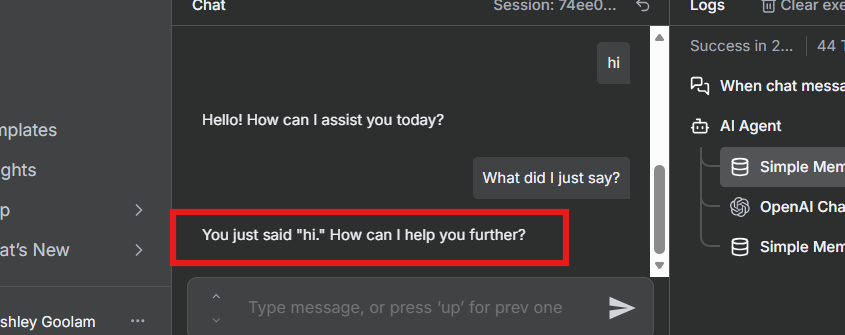
We have just leveled Bob up with OpenAI's GPT 4o-mini model and now Bob can understand what we are saying. This is great, but now we need to give Bob the ability to remember what we had previously just said, because currently Bob can only take in new information but cannot remember what we had previously talked about. We can test this out by asking Bob, "What did I just tell you?" and you can see that Bob does not remember what we just asked.
To fix this, we are going to add "Simple Memory" from the node panel by searching using the keyword "memory." This memory is going to be connected to our Chat Trigger and so if we say "Hi" and then now ask Bob, "What did I just say?" we will see that Bob can now remember our previous questions and we just solved Bob's short-term memory problem we had earlier.
Enabling Wikipedia Integration in n8n
Now we need to enable our AI agent Bob to be able to access data from Wikipedia because after all his main job is to pull data from Wikipedia. So, we simply need to search for Wikipedia in the node panel and add it to the tools of our AI agent. We can test it out by saying "Tell me something about cats from Wikipedia" and we can see its response.

Applying Prompt Engineering to Your n8n Agent
Great! We are almost there! Now, it is time for some prompt engineering. It is good for our AI agent Bob to have a clear understanding of the task at hand and how he should handle it. Double-tap the AI Agent and in the settings under the AI agent's system message, paste the following content:

Role: You are a research assistant

User_Input: {{ $json.chatInput }}

Expected_structure: { 'title': 'Your title about what user is looking for', 'body': 'Your content from Wikipedia' }

Task: Your job is to look up information about User_Input from Wikipedia and return the output in JSON format following the Expected_Structure.
Formatting Output with HTML in n8n
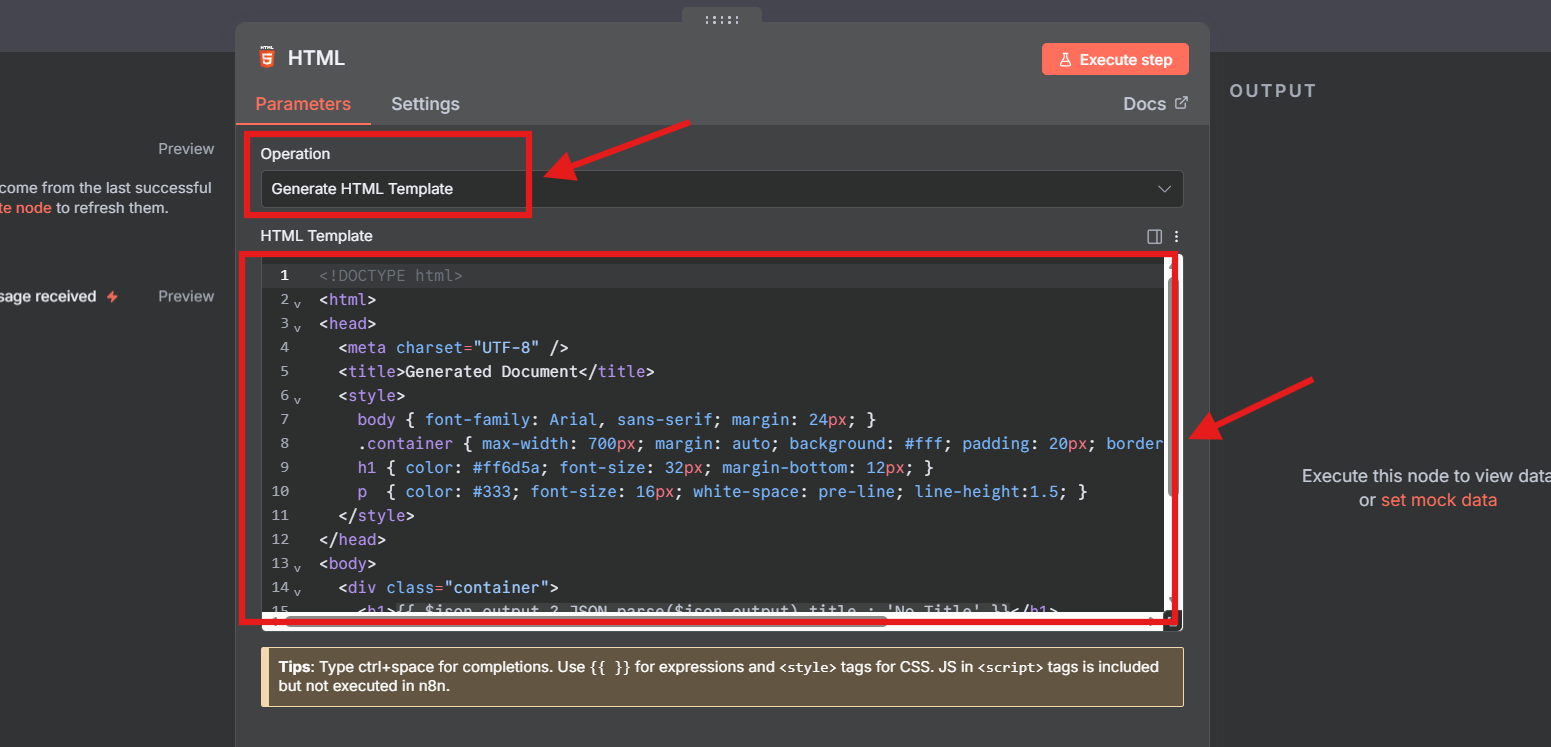
Now for the final piece of our AI agent. We need to display the information presentably and what better way than using good old HTML. To do this, we search for the "HTML" tool and attach it to the end of our AI agent, select the "Generate HTML" option, and then replace the code in the parameters section with the following code:
<!DOCTYPE html>
<html>
<head>
  <meta charset="UTF-8" />
  <title>Generated Document</title>
  <style>
    body { font-family: Arial, sans-serif; margin: 24px; }
    .container { max-width: 700px; margin: auto; background: #fff; padding: 20px; border: 1px solid #eee; border-radius: 8px; }
    h1 { color: #ff6d5a; font-size: 32px; margin-bottom: 12px; }
    p  { color: #333; font-size: 16px; white-space: pre-line; line-height:1.5; }
  </style>
</head>
<body>
  <div class="container">
    <h1>{{ $json.output ? JSON.parse($json.output).title : 'No Title' }}</h1>
    <p>{{ $json.output ? JSON.parse($json.output).body : 'No content available.' }}</p>
  </div>
</body>
</html>
This code will be used to format our JSON returned by the AI agent into HTML code which is going to look more presentable.
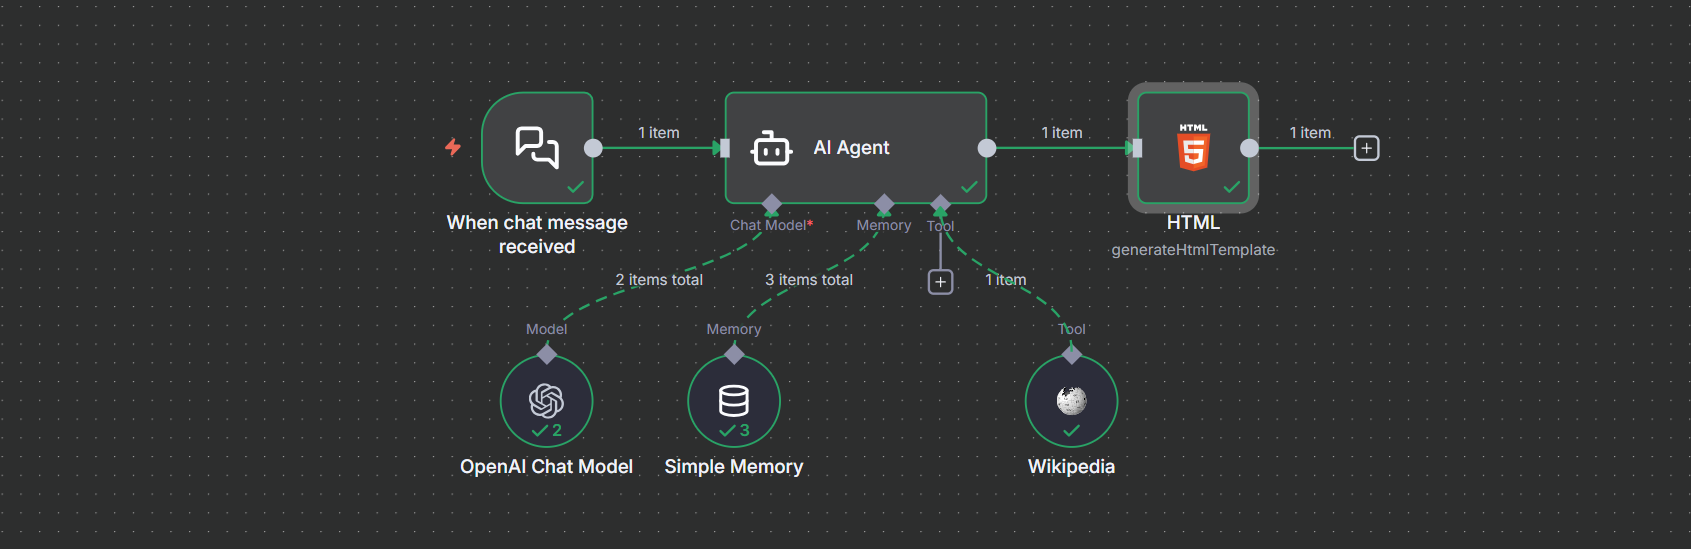
Up to this point the structure of our AI agent's workflow should look like this:
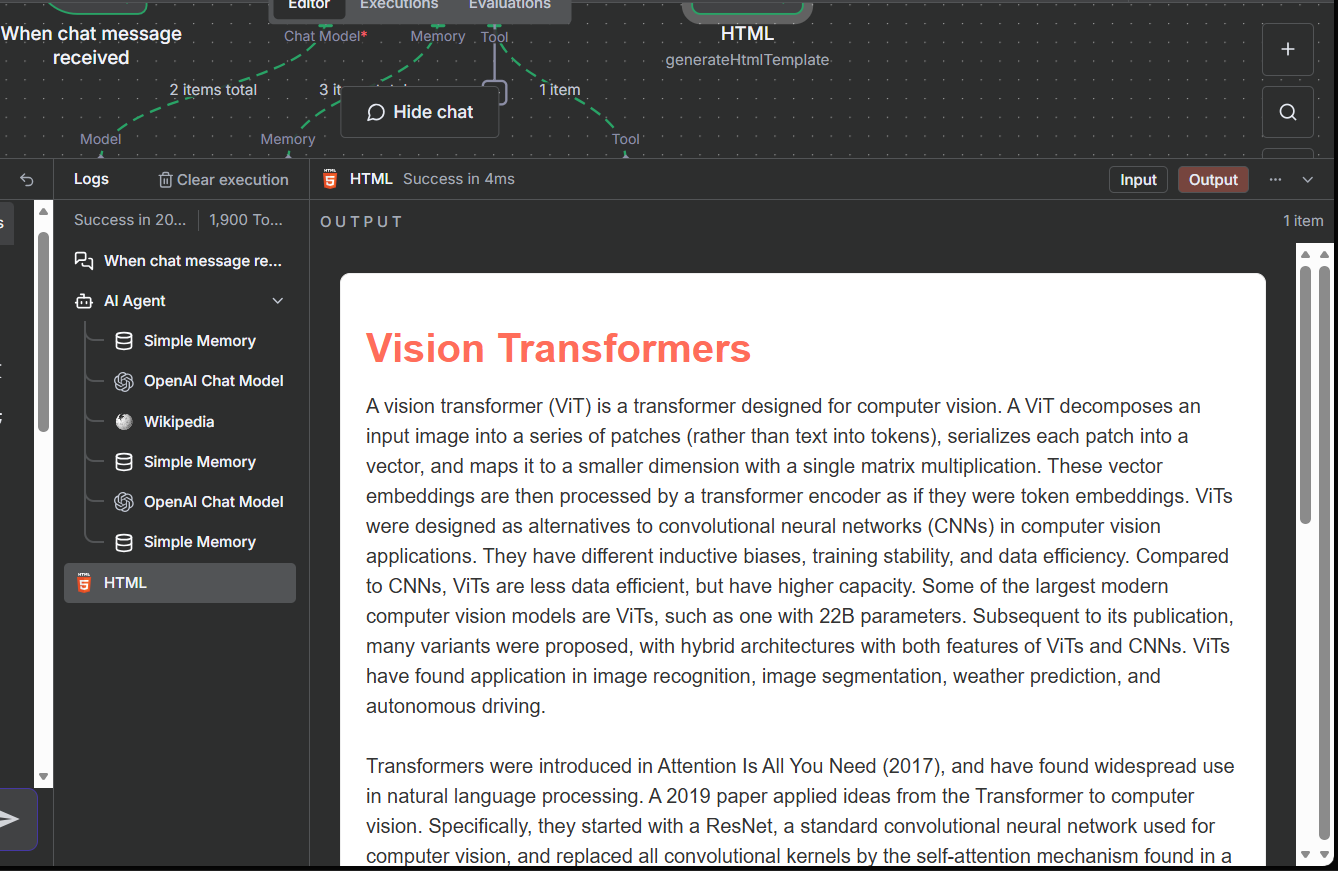
You've now built a functional n8n agent that can look up information you need from Wikipedia and display it in html—feel free to expand it for more automations! Interact with it by asking questions like, "What are vision transformers?" or "Tell me about Dogs," in the chat interface and view your results!
Frequently Asked Questions
Q: Is n8n free to self-host?
A: Yes, the core is open-source and free; optional cloud plans add convenience.
Q: What languages does n8n support for nodes?
A: n8n works with JavaScript for custom nodes, but no-code options cover most needs.
Q: Can I integrate n8n with other AI models?
A: Absolutely—connect OpenAI, Anthropic, or others via API keys in nodes.
Q: How do I secure my n8n instance?
A: Use HTTPS, API keys, and Docker's isolation; enable auth in settings.
Q: What's the learning curve for n8n beginners?
A: Gentle—start with examples, then build incrementally as in this guide.
Conclusion
With your first n8n AI agent up and running, you've just unlocked the potential to automate everyday tasks with ease and creativity. From simple chat triggers to intelligent integrations, n8n empowers you to build workflows that scale with your ideas. Experiment, iterate, and watch your productivity soar—happy automating!