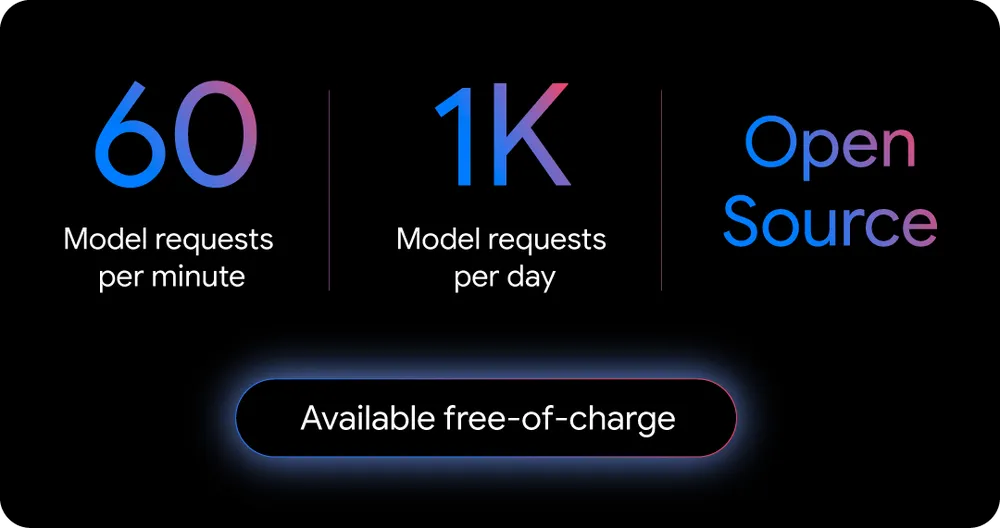
Google just dropped a bombshell that's shaking up the AI coding world. While everyone was busy paying for Claude Code and Cursor subscriptions, Google quietly launched Gemini CLI—a completely free, open-source AI agent that runs in your terminal with industry-leading usage limits. We're talking 60 requests per minute, 1000 requests per day, access to Gemini 2.5 pro, completely free. No credit card required, no subscription fees, just pure AI-powered development magic.
In this comprehensive guide, we'll dive deep into what makes Gemini CLI a game-changer, how to set it up from scratch, and most importantly, how to supercharge it with MCP servers that will transform your development workflow.
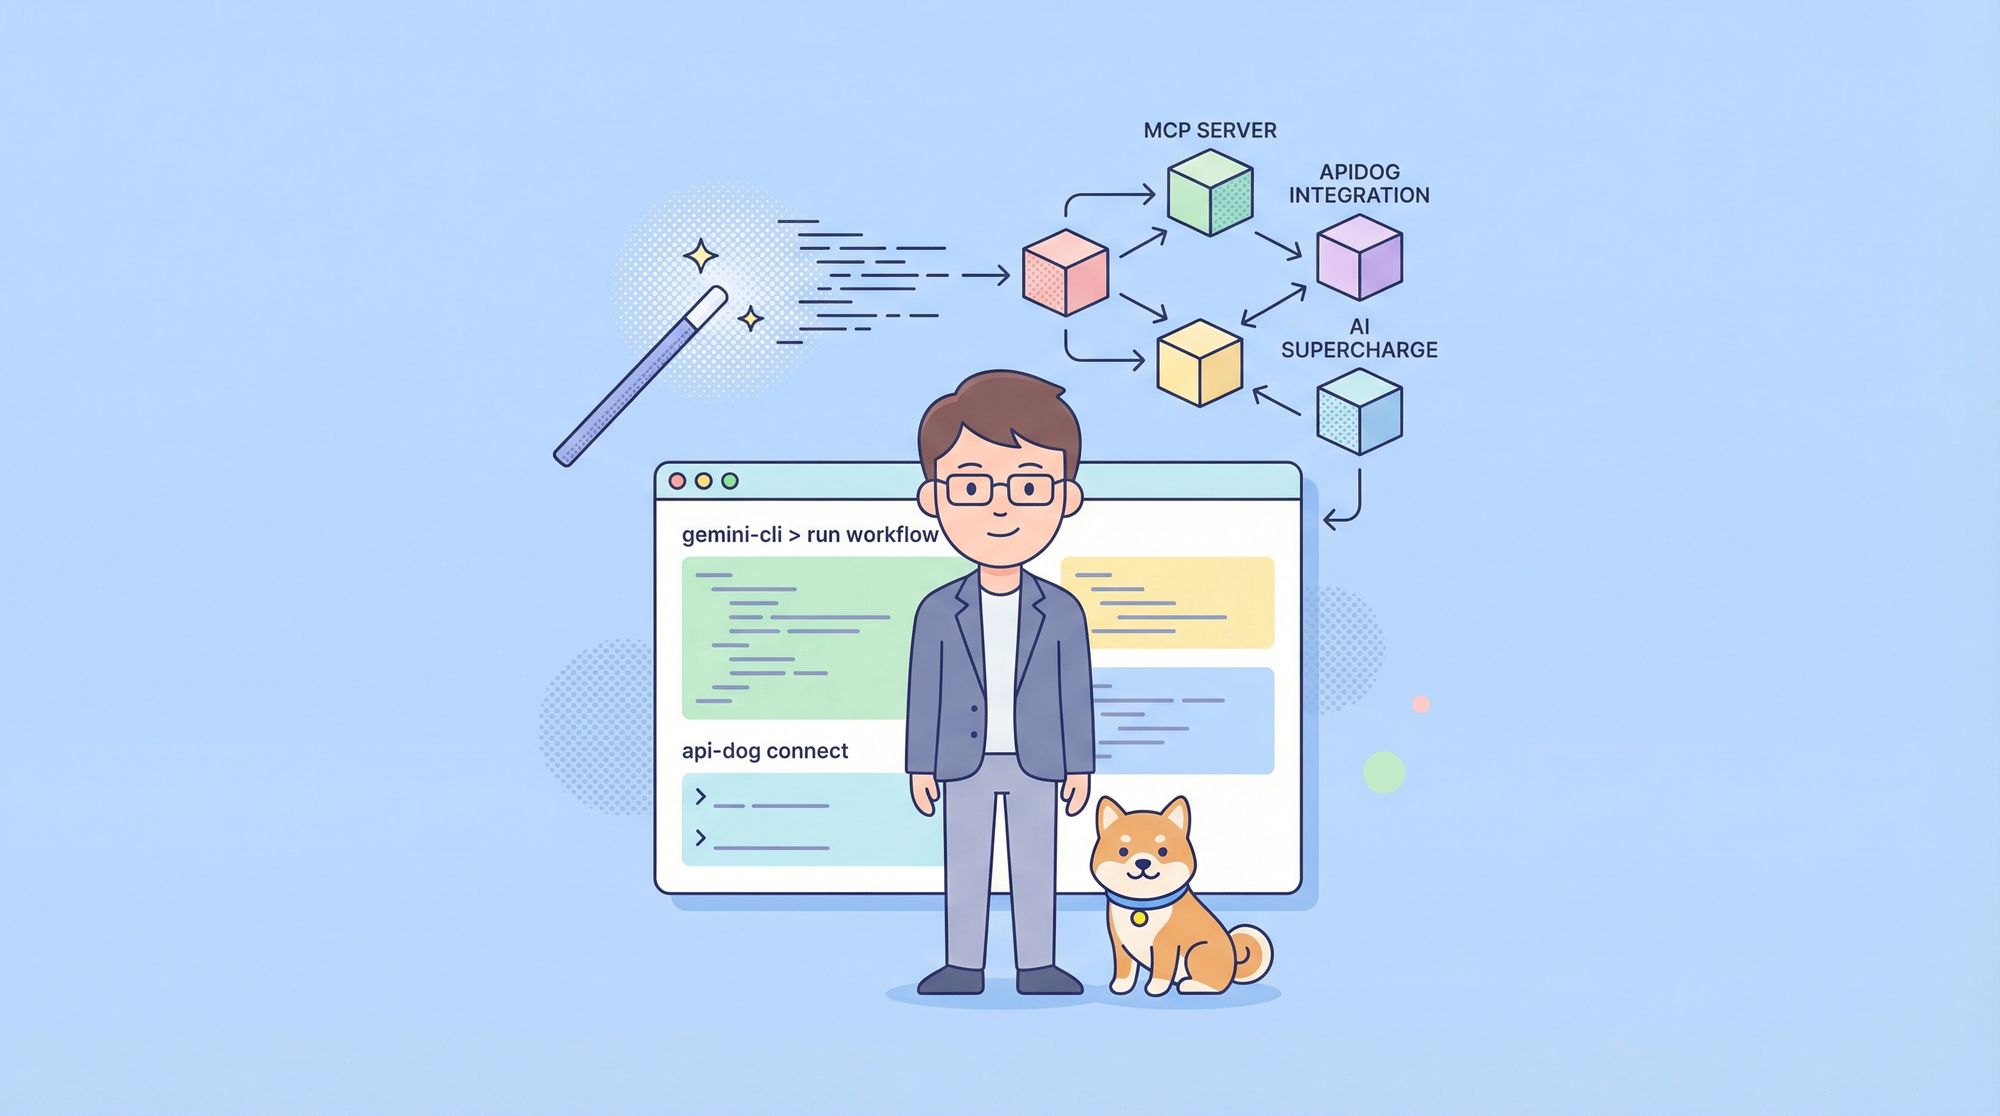
Pro Tip: Want to supercharge Gemini CLI with your API docs? Try Apidog MCP Server—the all-in-one platform that lets AI coding assistants directly access your API specifications, generate code, and automate workflows. Sign up for free!
What is Gemini CLI and Why Should You Care?
Gemini CLI is Google's answer to the AI coding assistant revolution. It's not just another chatbot—it's a full-fledged AI agent that lives in your terminal, understands your codebase, and can execute complex multi-step tasks with minimal human intervention.
 google-gemini
The Numbers That Matter
- Free Usage: 60 requests per minute, 1000 requests per day
- Model Power: Direct access to Gemini 2.5 Pro with 1 million token context window
- Open Source: Apache 2.0 license—inspect, modify, contribute
- Zero Cost: No credit card, no subscription, just your Google account
Why Gemini CLI Beats the Competition
Unlike other AI coding tools that charge premium prices for basic functionality, Gemini CLI offers enterprise-grade capabilities for free. It's like having a senior developer, a code reviewer, and a documentation writer all rolled into one.
Key Advantages:
- Google Search Integration: Real-time web content for up-to-date answers
- MCP Server Support: Extensible architecture for custom workflows
- VS Code Integration: Seamless switching between terminal and IDE
- Customizable Prompts: Train it to understand your specific workflow
Getting Started with Gemini CLI: Your First Steps
Prerequisites and Installation
Before diving into the setup, ensure you have the basics covered:
- Node.js 18+: The foundation for running Gemini CLI
- Google Account: Your personal account for authentication
- Terminal Access: Command line interface (CLI) familiarity
Step-by-Step Installation Guide
Step 1: Install Gemini CLI
Choose your preferred installation method:
# Quick start (recommended)
npx https://github.com/google-gemini/gemini-cli

# Or install globally
npm install -g @google/gemini-cli
gemini
Step 2: Authenticate with Google
When prompted, sign in with your personal Google account. This grants you immediate access to:
- Gemini 2.5 Pro model
- 60 requests per minute
- 1000 requests per day
- 1 million token context window
Step 3: Choose Your Theme
Select a color theme that matches your terminal aesthetic. This is your AI companion—make it feel like home.
Verifying Your Setup
Test your installation with a simple command:
gemini
> Hello! Can you help me understand what you can do?
If you receive a helpful response, congratulations! You're ready to unleash the power of AI-assisted development.
Understanding MCP Servers in Gemini CLI
What is Model Context Protocol (MCP)?
MCP Server is the universal translator between AI assistants and your data sources. Think of it as the API for everything—local files, databases, APIs, and custom tools. With MCP, you can extend Gemini CLI's capabilities beyond its built-in features.
Why MCP Servers Matter for Developers
MCP servers act as bridges between Gemini CLI and external systems, enabling:
- API Integration: Connect to your APIs and services
- Database Access: Query and manipulate data directly
- File System Operations: Read, write, and organize files
- Custom Workflows: Build specialized tools for your needs
Core MCP Architecture in Gemini CLI
Gemini CLI's MCP integration is built on a sophisticated discovery and execution system:
Discovery Layer: Automatically finds and connects to configured MCP servers Execution Layer: Handles tool calls, confirmations, and response processing Transport Mechanisms: Supports Stdio, SSE, and HTTP streaming
Setting Up MCP Servers in Gemini CLI
Configuration Structure
MCP servers are configured through the settings.json file. Here's the basic structure:
{
  "mcpServers": {
    "serverName": {
      "command": "path/to/server",
      "args": ["--arg1", "value1"],
      "env": {
        "API_KEY": "$MY_API_TOKEN"
      },
      "cwd": "./server-directory",
      "timeout": 30000,
      "trust": false
    }
  }
}
Essential Configuration Properties
Required Properties:
command: Path to the executable (Stdio transport)url: SSE endpoint URLhttpUrl: HTTP streaming endpoint URL
Optional Properties:
args: Command-line argumentsenv: Environment variablescwd: Working directorytimeout: Request timeout in millisecondstrust: Bypass confirmation dialogs (use with caution)
Example MCP Server Configurations
Python MCP Server:
{
  "mcpServers": {
    "pythonTools": {
      "command": "python",
      "args": ["-m", "my_mcp_server", "--port", "8080"],
      "cwd": "./mcp-servers/python",
      "env": {
        "DATABASE_URL": "$DB_CONNECTION_STRING",
        "API_KEY": "${EXTERNAL_API_KEY}"
      },
      "timeout": 15000
    }
  }
}
Node.js MCP Server:
{
  "mcpServers": {
    "nodeServer": {
      "command": "node",
      "args": ["dist/server.js", "--verbose"],
      "cwd": "./mcp-servers/node",
      "trust": true
    }
  }
}
Apidog MCP Server: Your API Development Superpower
Why Apidog MCP Server is a Game-Changer
While Gemini CLI provides the AI foundation, Apidog MCP Server transforms it into an API development powerhouse. This integration allows AI assistants to directly access your API specifications, eliminating the constant context switching between documentation and code.
Key Benefits of Apidog MCP Server
- Direct API Specification Access: AI can read and understand your API docs
- Code Generation: Generate DTOs, controllers, and clients from specifications
- Real-time Updates: Always work with the latest API documentation
- Multi-Project Support: Connect to multiple API projects simultaneously
Setting Up Apidog MCP Server
Step 1: Prepare OpenAPI File
- Ensure you have a URL or a local path to a Swagger/OpenAPI file
- Supported formats: OpenAPI files in JSON or YAML
Step 2: Configure MCP in Your IDE
Add this configuration to your MCP settings:
{
  "mcpServers": {
    "API specification": {
      "command": "npx",
      "args": [
        "-y",
        "apidog-mcp-server@latest",
        "--oas=<oas-url-or-path>"
      ]
    }
  }
}
Step 3: Verify the Connection
Test the setup by asking Gemini CLI:
Please fetch API specification via MCP and tell me how many endpoints exist in the projectExplore a detailed guide on how to set up the Apidog MCP Server here.
Advanced Gemini CLI Workflows
Code Exploration and Understanding
Gemini CLI excels at helping you understand complex codebases:
gemini
> Describe the main pieces of this system's architecture
> What security mechanisms are in place?
> Help me migrate this codebase to the latest version of Java
Automated Workflow Integration
Leverage MCP servers for powerful automation:
gemini
> Make me a slide deck showing the git history from the last 7 days
> Create a web app to display our most interacted-with GitHub issues
> Convert all images in this directory to PNG with EXIF date naming
API Development with Apidog Integration
Combine Gemini CLI with Apidog MCP Server for seamless API development:
gemini
> Use Apidog MCP to fetch the API specification and generate Java records for the 'Product' schema
> Based on the API specification, add the new fields to the 'Product' DTO
> Generate all the MVC code related to the endpoint '/users' according to the API specification
Troubleshooting and Best Practices
Common Issues and Solutions
Connection Problems:
- Verify Node.js version (18+ required)
- Check network connectivity to npmjs.com
- Ensure proper file permissions
MCP Server Issues:
- Validate JSON configuration syntax
- Test server commands manually
- Check environment variables and paths
Performance Optimization:
- Use appropriate timeout values
- Implement connection pooling for heavy usage
- Monitor system resources
Security Considerations
- Trust Settings: Use
trust: trueonly for servers you control - API Keys: Store sensitive tokens as environment variables
- Access Control: Limit MCP server permissions to necessary directories
Conclusion: The New Era of AI-Powered Development
Google's Gemini CLI represents more than just another AI tool—it's a paradigm shift in how developers interact with AI. By offering enterprise-grade capabilities for free, Google is leveling the playing field and enabling developers worldwide to access powerful AI assistance.
The integration with MCP servers, particularly Apidog MCP Server, creates a comprehensive development environment where AI becomes a true partner in your workflow. From understanding complex codebases to generating production-ready code from API specifications, the possibilities are endless.
As we move into 2025, the question isn't whether to adopt AI-assisted development—it's which tools to choose. With Gemini CLI and Apidog MCP Server, you get the best of both worlds: powerful AI capabilities and seamless API development integration, all without breaking the bank.
Ready to transform your development workflow? Start with Gemini CLI, add Apidog MCP Server, and experience the future of AI-powered development today.


