
Unlocking advanced AI coding features in your IDE can dramatically accelerate API development, debugging, and code review. Google’s Gemini 2.5 Pro is among the most powerful AI models available for developers, now accessible directly in Cursor IDE—without any subscription fees. This guide walks API professionals and backend engineers through configuring Gemini 2.5 Pro in Cursor, plus how to streamline your workflow by pairing it with Apidog for end-to-end API design and testing.
Why Use Gemini 2.5 Pro in Cursor?
Gemini 2.5 Pro delivers enhanced reasoning, code generation, and contextual understanding for developers. Integrated with Cursor IDE, it provides:
- Smart, context-aware code completion
- In-depth technical explanations
- Efficient debugging suggestions across multiple programming languages
Unlike earlier models, Gemini 2.5 Pro maintains coherence through long coding sessions, making it ideal for complex, multi-file projects.
Enhance Your API Workflow with Apidog
While Gemini 2.5 Pro boosts your coding efficiency, robust API management is equally crucial. Apidog seamlessly integrates into the modern development stack, allowing you to:

- Design, test, and document APIs in one place

- Automate mock servers and streamline request building
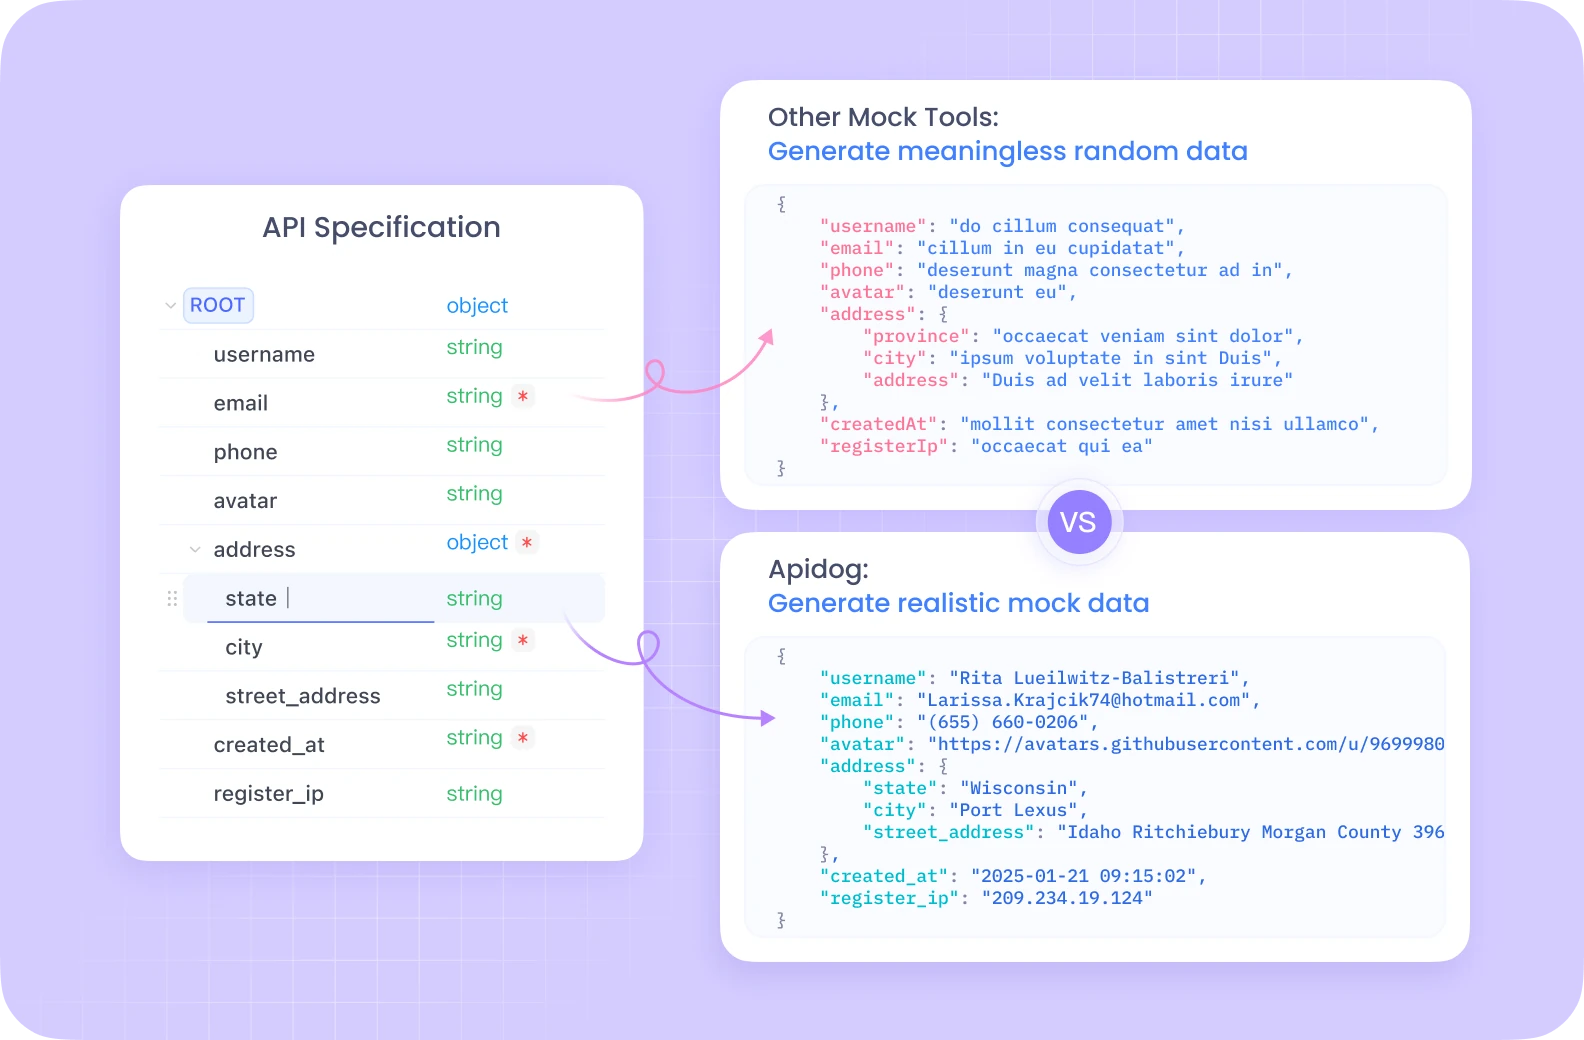
- Effortlessly switch between REST, GraphQL, WebSocket, and SOAP protocols
Apidog complements Cursor’s AI assistance, reducing context switching and making your end-to-end API lifecycle more efficient.
Step-by-Step: Add Gemini 2.5 Pro to Cursor IDE
1. Open Cursor Settings
macOS:
- Launch Cursor from Applications or Dock.
- Click Cursor in the top menu → Settings → Cursor Settings.
Windows/Linux:
- Open Cursor from Start or your desktop.
- Choose File → Preferences → Settings.
Settings will open in a new editor tab, keeping your workspace intact.
2. Navigate to Model or Extensions Settings
- In the settings panel, look for a left-side menu.
- Find sections named Models, AI Providers, Extensions, or AI Settings.
- Use the search bar with keywords like "model" or "AI" if needed.
This section manages your AI integrations.
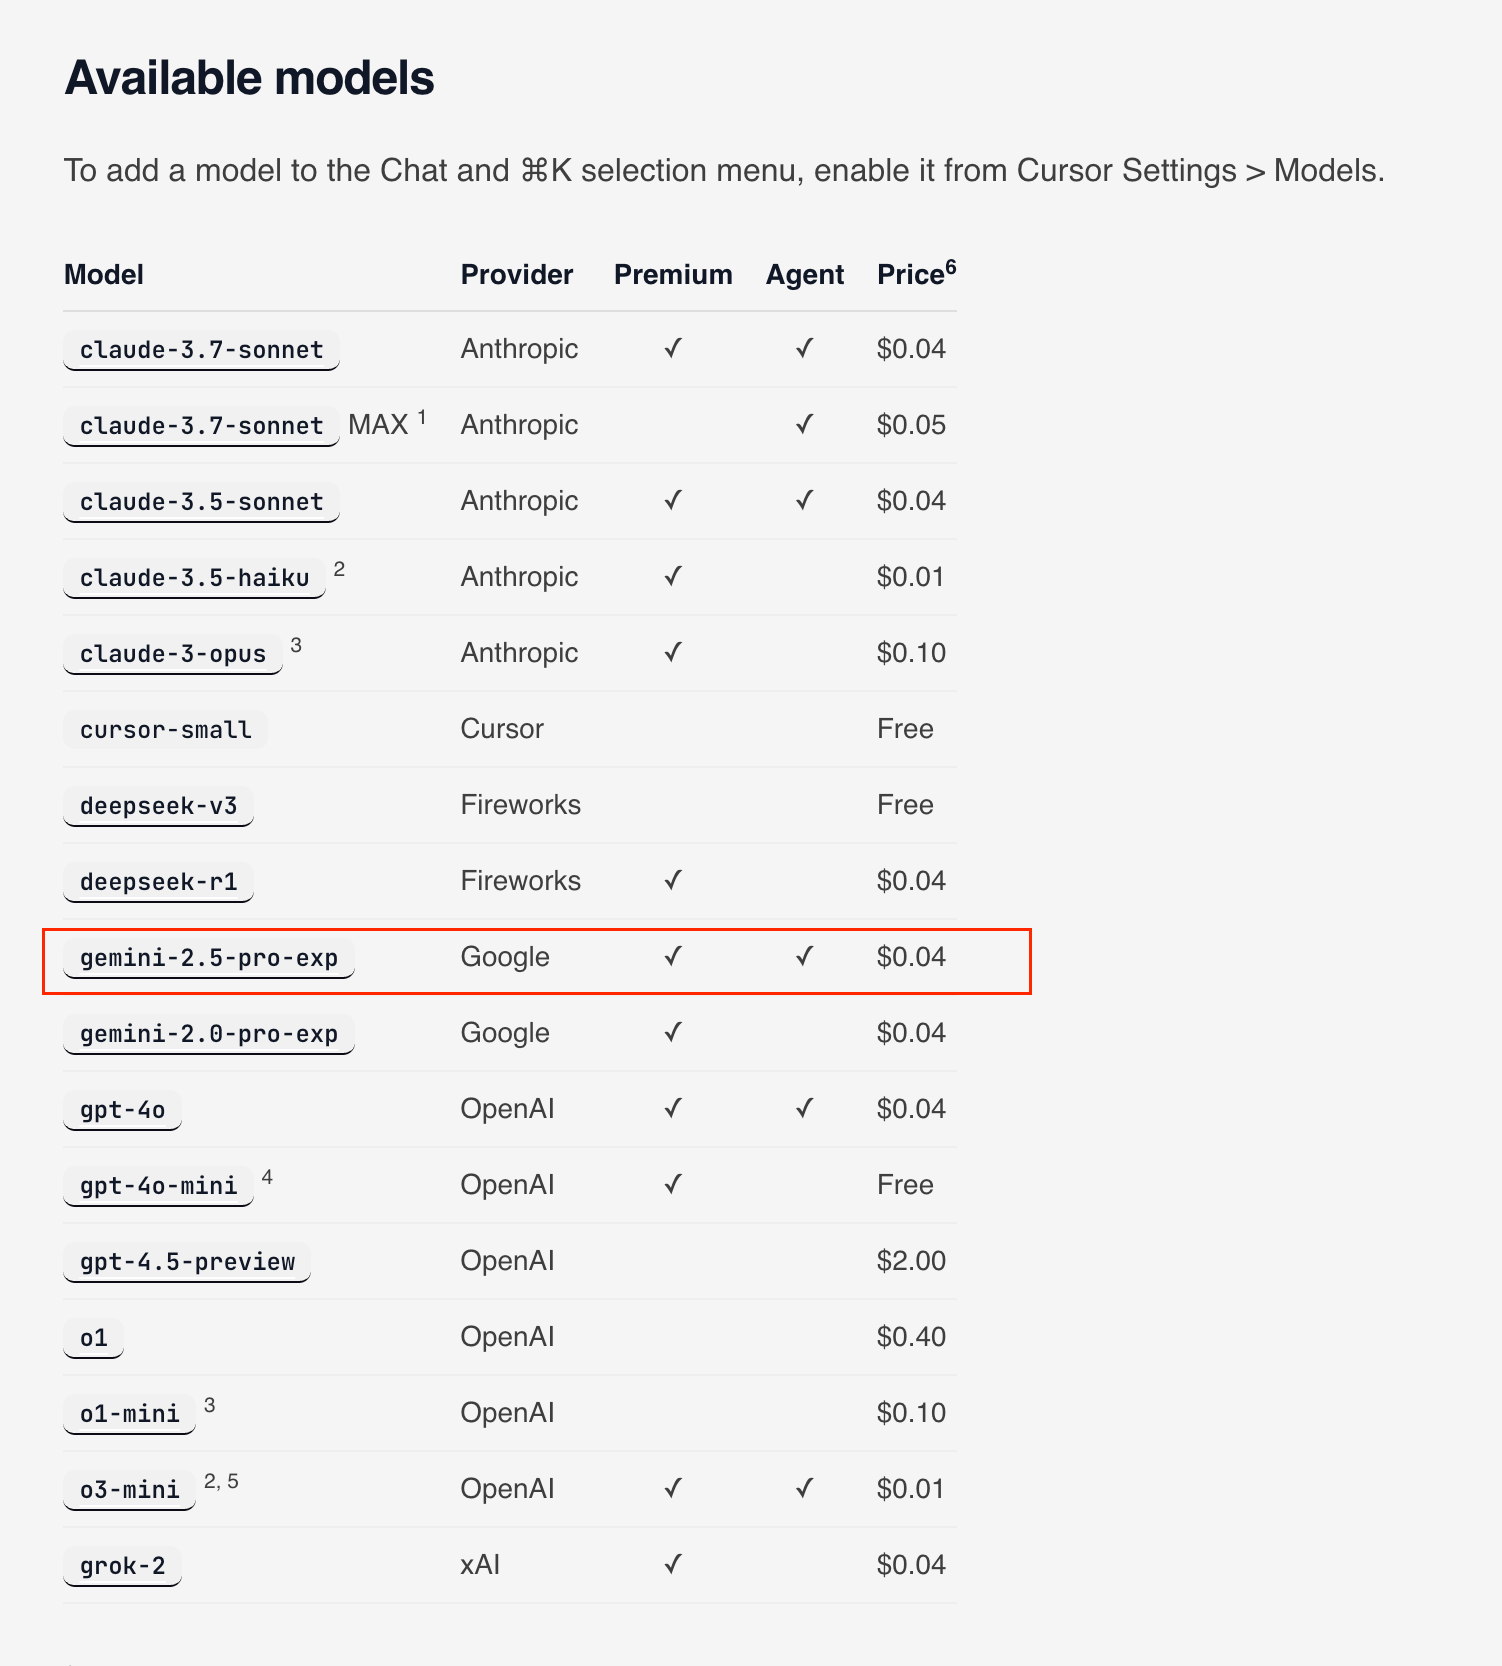
3. Use the Correct Gemini Model Identifier

Gemini 2.5 Pro Experimental’s identifier for Cursor is:
gemini-2.5-pro-exp-03-25
Type it exactly, including hyphens and numbers. If you see connection errors, double-check the identifier on Google AI Studio.
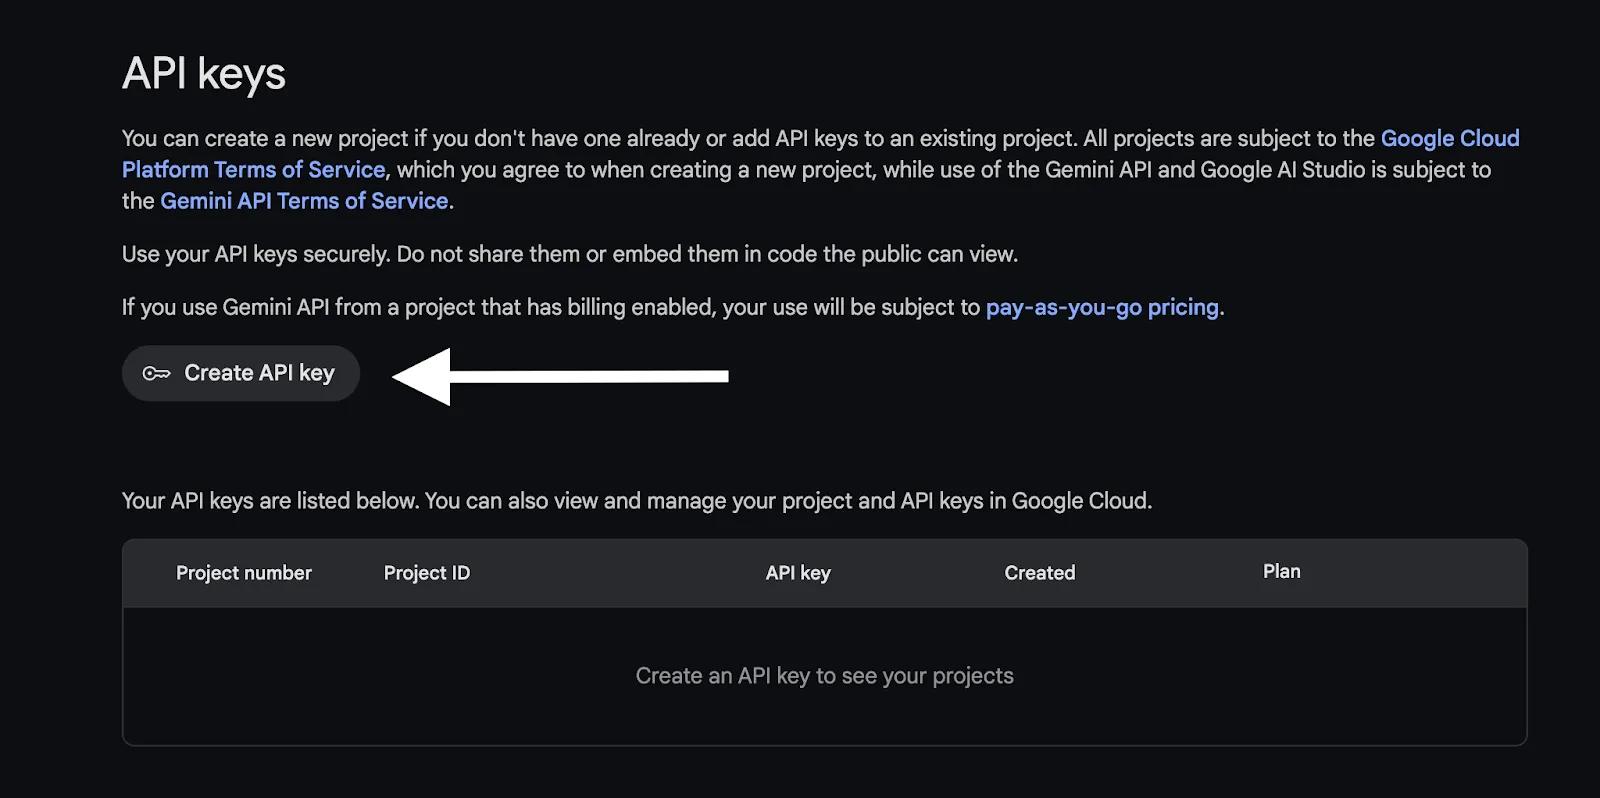
4. Get a Google API Key
To enable Cursor’s access to Gemini 2.5 Pro, generate an API key:
- Visit Google AI Studio (or ai.google.dev)
- Sign in with your Google account.
- Click Get API key (top-left or in the side menu).
- Select Create API key (and “Create in new project” if prompted).
- Complete any verification steps.
- Copy the generated API key and store it securely.
Security tip:
Never share or commit your API key. Revoke and regenerate it immediately if compromised. Google’s free tier covers most individual usage, but monitor your quota to avoid charges.
5. Add a Custom Model in Cursor
Return to Cursor’s settings:
- In AI-related settings, look for:
- “Custom Provider”
- “Add Model”
- “Custom Model Configuration”
- “Override OpenAI Base URL”
- Click “Add” or “+” by the model list, if available.
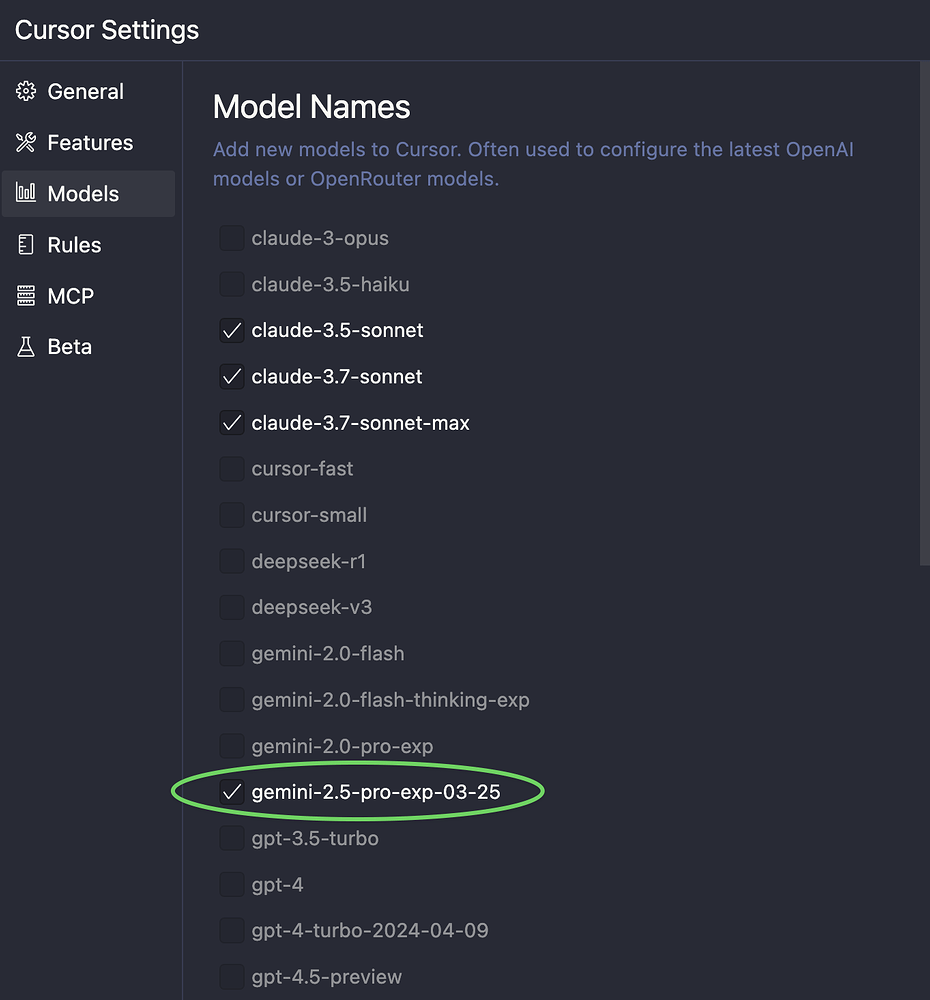
6. Enter Gemini 2.5 Pro Model Name
In the custom model setup:
- Find the Model Name or Model ID field.
- Enter:
gemini-2.5-pro-exp-03-25 - Double-check for typos or extra spaces.
7. Override the OpenAI Base URL
Cursor often defaults to OpenAI APIs. To use Gemini, redirect requests:
- Find the API Base URL or Endpoint field.
- Enter:
<https://generativelanguage.googleapis.com/v1beta/openai/>
Include the trailing slash. If your Cursor version supports a "Google" provider, select it instead.
8. Enter Your Google API Key
- Find the API Key or Authentication Token field.
- Paste your API key from Step 4.
- Remove any extra spaces.
- Use “Test Connection” if available to confirm success.
9. Save and Apply Settings
- Click Save, Apply, or OK.
- Restart Cursor if prompted.
Your new Gemini 2.5 Pro model is now ready for use.
10. Test Gemini 2.5 Pro in Cursor
- Open a code file in Cursor (Python or JavaScript are good for testing).
- Access the AI assistant (usually a chat panel or command palette).
- Try:
- Code completion: Type a function and see suggestions.
- Chat: Ask a technical question.
- Command: Use
Ctrl/Cmd + Kto access AI features.
- Ensure “gemini-2.5-pro-exp-03-25” is selected if there’s a model picker.
- Sample prompt: “Write a function to calculate Fibonacci sequence in Python.”
If responses are accurate and detailed, your integration is successful.
Alternative: Using OpenRouter to Connect Gemini 2.5 Pro
If you run into issues with Google’s direct API, OpenRouter offers an alternative route to access Gemini 2.5 Pro and other language models.
1. Set Up OpenRouter
- Go to OpenRouter
- Sign up and log in (Google, GitHub, or email)
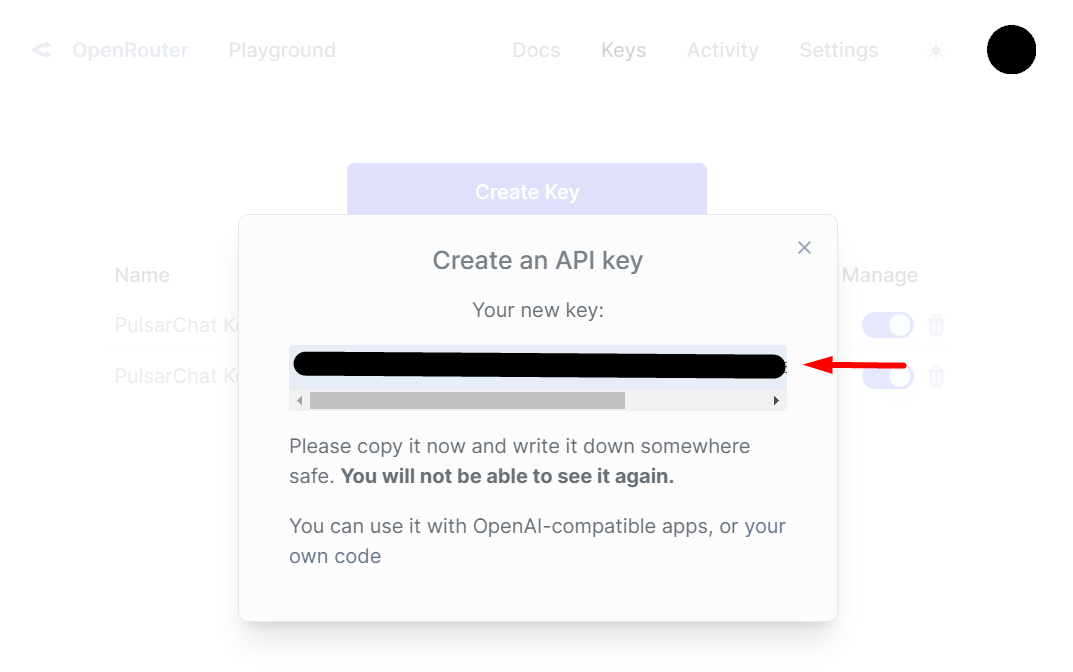
- In your dashboard, go to API Keys or Credentials
- Click Create API Key (name it for easy reference)
- Set usage limits if needed
- Copy your API key
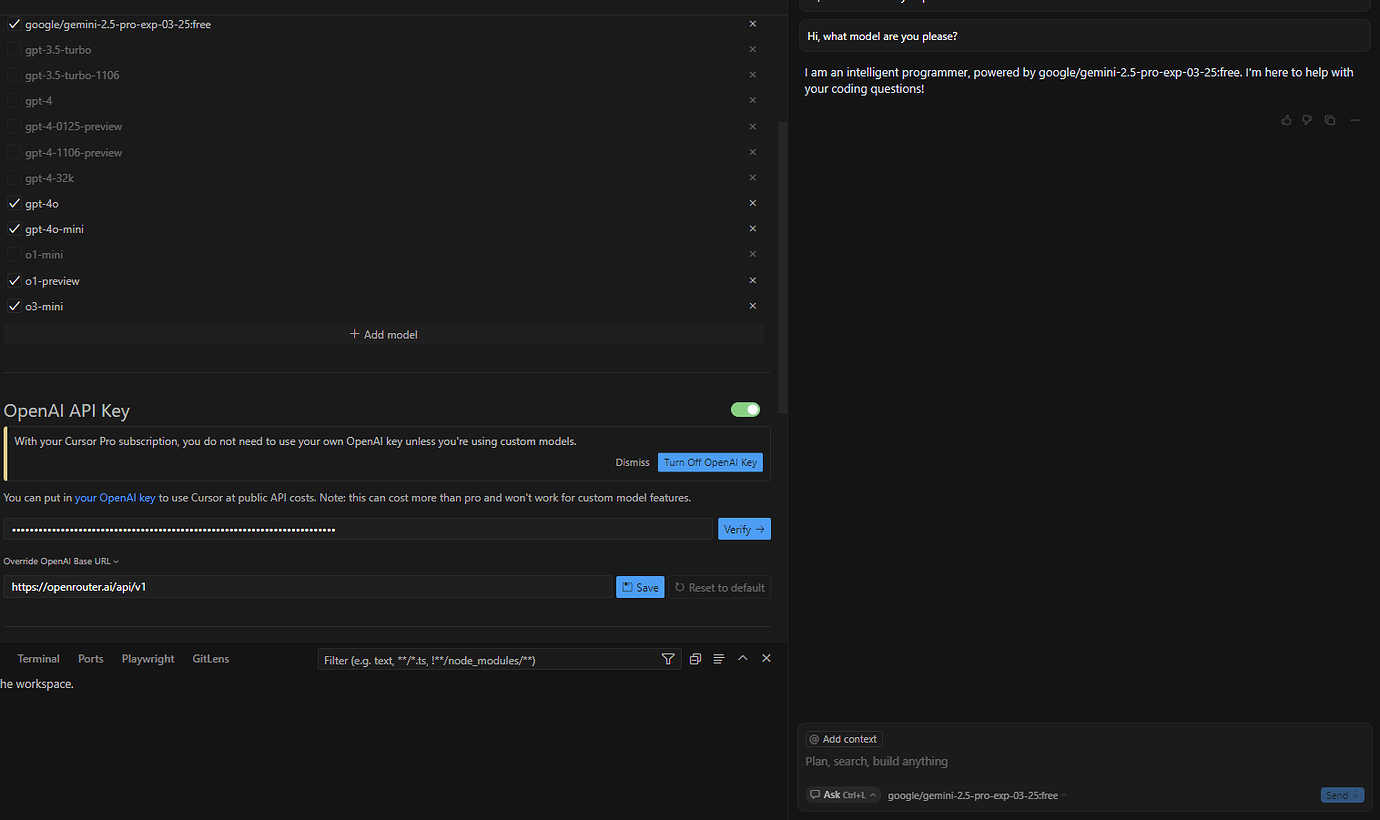
2. Configure Cursor with OpenRouter
- Follow earlier steps to access Cursor’s custom model/API configuration.
- Override the OpenAI base URL with:
<https://openrouter.ai/api/v1> - Enter your OpenRouter API key.
- Set the custom model as:
google/gemini-2.5-pro-exp-03-25:free
(Check OpenRouter’s docs for updates on the identifier.) - Save your settings and test as before.
Advantages of OpenRouter:
- Simplifies API management
- Lets you easily switch between models
- Offers free monthly credits for light usage
Note: OpenRouter acts as a middleman, so expect minor latency and possible service interruptions if they occur.
Conclusion
By following these steps, you can add Gemini 2.5 Pro’s advanced AI coding features to your Cursor IDE—at no extra cost. This setup is ideal for API developers and engineers who want to:
- Accelerate code generation and debugging
- Get contextual, high-quality technical suggestions
- Seamlessly manage the API lifecycle with tools like Apidog
Regularly review API usage and check for updates in Cursor and Gemini documentation, as integration steps may evolve.


