
Are you ready to supercharge your design-to-code workflow using AI? Discover how Figma MCP (Model Context Protocol) bridges your Figma designs with advanced large language models (LLMs) like Claude, Windsurf, Cursor, and Cline—enabling automation, smarter collaboration, and faster prototyping. This step-by-step guide covers what Figma MCP is, how it works, and how to set it up with your favorite AI developer tools.
💡 Want to streamline your API development? Try Apidog for free and see how it can accelerate your workflow, from designing to testing robust APIs.
What is Figma MCP?
Figma MCP is a server implementation of the Model Context Protocol, designed to connect Figma's design environment with LLMs. This integration gives developers and designers a standardized way to let AI tools read, analyze, and manipulate Figma resources—unlocking powerful automation and smarter design collaboration.
Key Benefits:
- Standardizes how LLMs interact with Figma assets
- Automates repetitive design tasks and code generation
- Improves team collaboration and speeds up the design-to-code process
How Figma MCP Works with AI Tools
The Model Context Protocol (MCP) provides a universal framework for LLMs to interact with external applications, such as Figma. By connecting Figma’s API to AI models via the MCP server, you can:
- Extract and analyze design data: LLMs can read files, components, and styles.
- Automate design operations: Generate new variations, update styles, or build components automatically.
- Integrate with your toolchain: Plug into modern AI-powered IDEs and assistants like Cursor, Claude, Windsurf, and Cline.
Step-by-Step Setup: Connecting Figma MCP to AI Tools
Prerequisites
Before you begin, make sure you have:
- Node.js (v16.0+)
- npm (v7.0+) or pnpm (v8.0+)
- A Figma account (Professional or Enterprise recommended)
- A Figma API access token with read permissions
1. Generate Your Figma API Access Token
To let MCP access your Figma resources, you’ll need a secure API token.
Step-by-Step:
-
Create a Figma Account
- Visit Figma’s official website and sign up if you don’t already have an account.
-
Install the Figma App
- Download the desktop app for your OS (Windows, macOS, or Linux).
- Follow installation instructions.
-
Log In and Access Profile Settings
- Open Figma and log in.
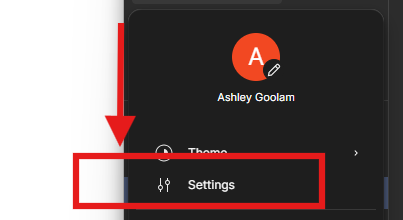
- Click your profile icon in the sidebar.
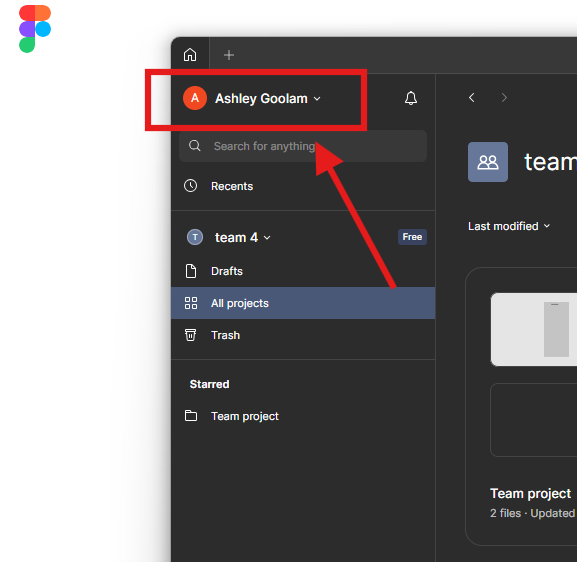
- Click Settings from the dropdown.
-
Navigate to Security Settings
- Go to the Security tab in the settings menu.
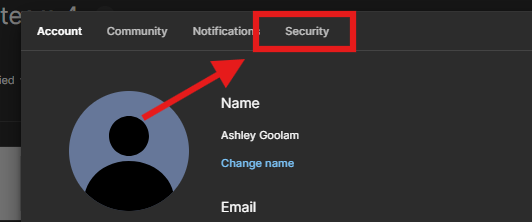
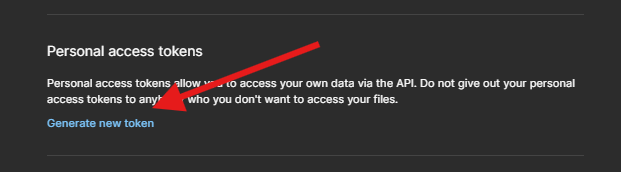
- Scroll to the Personal Access Tokens section.
-
Generate and Store Your Token
- Click “Generate New Token.”
- Give it a descriptive name, like
Figma_MCP. - Click Create and copy the token. Figma will only display it once.
- Store your token securely (e.g., in a password manager).
Pro Tips:
- Store your token as an environment variable:
export FIGMA_API_TOKEN="your_token_here" - Never hardcode tokens in your codebase.
- If compromised, immediately revoke and regenerate the token.
2. Install the Figma MCP Server
You have two options: quick install or local setup.
Quick Installation via NPM
npx figma-developer-mcp --figma-api-key=<your-figma-api-key>
Or use pnpx, yarn dlx, or bunx as alternatives.
Local Installation
git clone https://github.com/GLips/Figma-Context-MCP.git
cd Figma-Context-MCP
pnpm install
cp .env.example .env    # Then edit .env to add your token
pnpm run dev
3. Configure the MCP Server
- Environment Variables: Set
FIGMA_API_KEYin your.envfile. Optionally, setPORT(default is 3333). - Command-Line Arguments: Use
--figma-api-keyand--portwhen launching; these override environment variables.
4. Integrate Figma MCP with AI Tools (Example: Cursor IDE)
Connect the MCP Server
-
Start the MCP Server
- Ensure it's running on your desired port.
npx figma-developer-mcp --figma-api-key=<your-figma-api-key> -
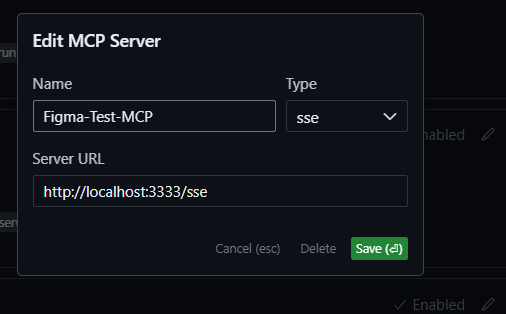
Add MCP Server in Cursor
- Open Cursor IDE and go to Settings.
- In the MCP section, click Add New MCP Server.
- Name your server, select the SSE option, and enter the MCP server URL (e.g.,
http://localhost:3333).
-
Alternative Configuration (for Windsurf, Cline, Claude Desktop)
- Add the following to your configuration file:
{
  "mcpServers": {
    "figma-developer-mcp": {
      "command": "npx",
      "args": ["-y", "figma-developer-mcp", "--stdio"],
      "env": {
        "FIGMA_API_KEY": "<your-figma-api-key>"
      }
    }
  }
}
-
Verify the Connection
- A green dot next to the server name indicates success; red means troubleshooting is needed.

Use Figma MCP with Your Design
-
Open Your Figma Project
- Select the design or components to work with.
-
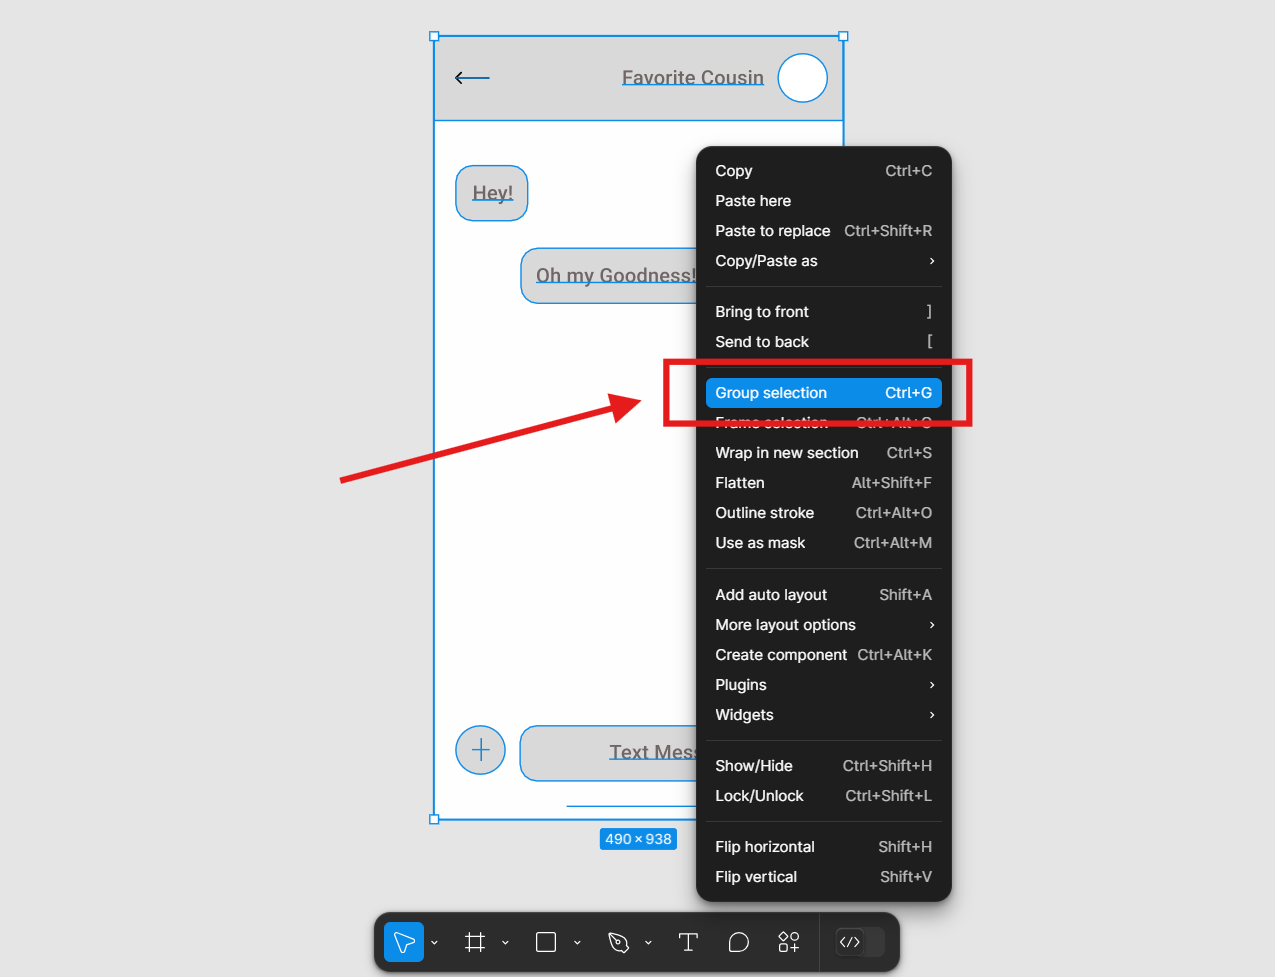
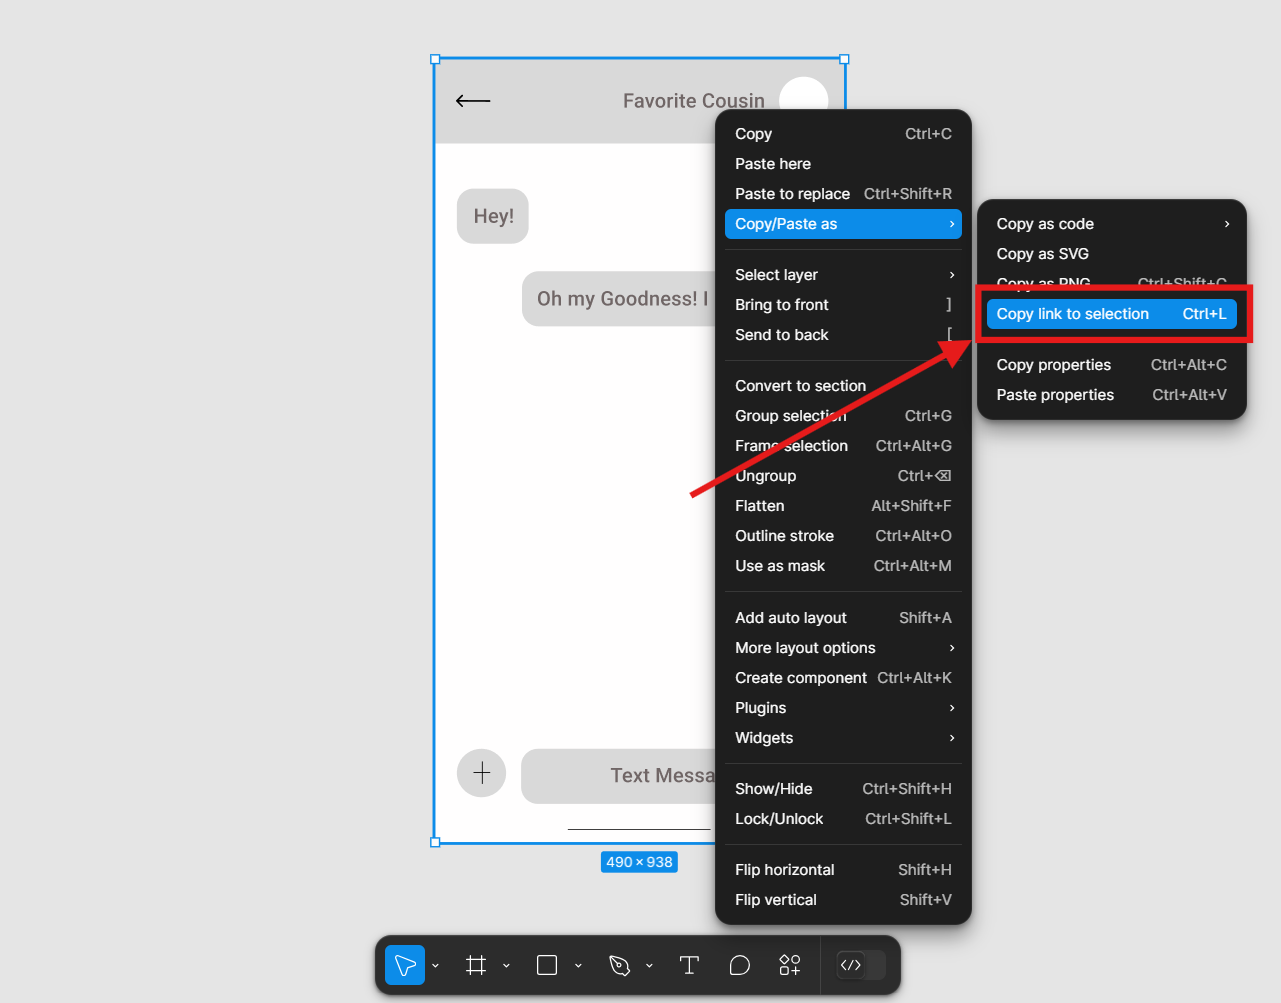
Copy the Figma Link
- Right-click the selection > Copy/Paste As > Copy Link to Selection.
-
Automate with Cursor Composer
- Open Composer in Cursor, enable Agent Mode, and paste your Figma link.
- Sample prompts you can use:
- Generate Code: "Implement this Figma design in React."
- Create Components: "Convert this design into reusable UI components."
- Optimize Layout: "Suggest improvements for this layout."
Advanced Tools and Features
- MCP Inspector: Run
pnpm inspectto launch a Web UI for inspecting server responses. - API Endpoints:
get_file: Retrieve info about a Figma file (requiresfileKey).get_node: Get info about a specific node (requiresfileKeyandnodeId).
Figma MCP Features at a Glance
- MCP Protocol Compliance: Ensures smooth interoperability with LLM-powered tools.
- Type-Safe Codebase: Built in TypeScript for reliability.
- Custom URI Scheme: Simplifies Figma asset management.
- Robust Error Handling: Validates requests and manages errors efficiently.
- Batch Operations: Efficiently processes multiple design elements.
Conclusion
Figma MCP empowers API developers, engineers, and product teams to build faster, automate more, and harness AI for design and development. By connecting Figma to modern LLMs and integrating with tools like Cursor, you unlock a seamless design-to-code workflow and foster next-level team collaboration.
For API-driven organizations, pairing tools like Figma MCP with robust API platforms such as Apidog creates a truly end-to-end pipeline—from design ideation to tested, documented APIs.


