
Unlock the full power of Claude Desktop by integrating the Fetch MCP server—a lightweight tool for real-time web content fetching, transformation, and automation. This guide walks API professionals through setting up Fetch MCP server, connecting it to Claude Desktop, and streamlining your workflow with practical examples. Discover how this integration, paired with essential API tools like Apidog, can boost your productivity and enable seamless web data extraction.
What Is Fetch MCP Server? (and Why Should API Developers Care)
Fetch MCP server is an open-source Model Context Protocol (MCP) server designed to fetch and transform web content—HTML, JSON, plain text, and Markdown—on demand. Developed by Zach Caceres and hosted on GitHub, it's part of Anthropic's MCP ecosystem, which bridges AI models like Claude with external tools and live data.
Why it matters for developers and technical teams:
- Enables Claude Desktop to fetch, parse, and transform web data in real time.
- Supports automation, research, and integration with other tools.
- Lightweight, flexible, and ideal for workflow customization.
Example Use Cases:
- Instantly summarize or convert articles to Markdown for research.
- Extract structured data from APIs or web pages.
- Combine with other MCP tools to automate documentation or sync with platforms like Notion.
💡 Pro Tip: For API developers, efficient testing and debugging are critical. Apidog offers a streamlined experience for API design, testing, and collaboration—perfect for those building and integrating modern workflows.
Prerequisites: Setting Up for Fetch MCP Server + Claude Desktop
Prepare your environment to ensure a smooth setup.
-
Node.js
- Required: Node.js v16 or higher.
- Check with
node --versionor download from nodejs.org.
-
Claude Desktop
- Download from anthropic.com.
- MCP integration requires a paid plan (Max, Team, or Enterprise).
-
Project Workspace
- Open your terminal and create a dedicated folder:
mkdir fetch-mcp-project cd fetch-mcp-project - This will house your Fetch MCP setup.
- Open your terminal and create a dedicated folder:
Step 1: Installing Fetch MCP Server
Integrate Fetch MCP server into your environment by following these steps:
1. Clone the Repository
git clone https://github.com/zcaceres/fetch-mcp.git
cd fetch-mcp
This pulls the latest Fetch MCP server code from GitHub.
2. Install Dependencies & Build
npm install
npm run build
- Installs necessary Node.js packages (e.g.,
sharpfor image processing). - Builds the server for use.
3. Configure Claude Desktop
- Locate the Claude Desktop config file:
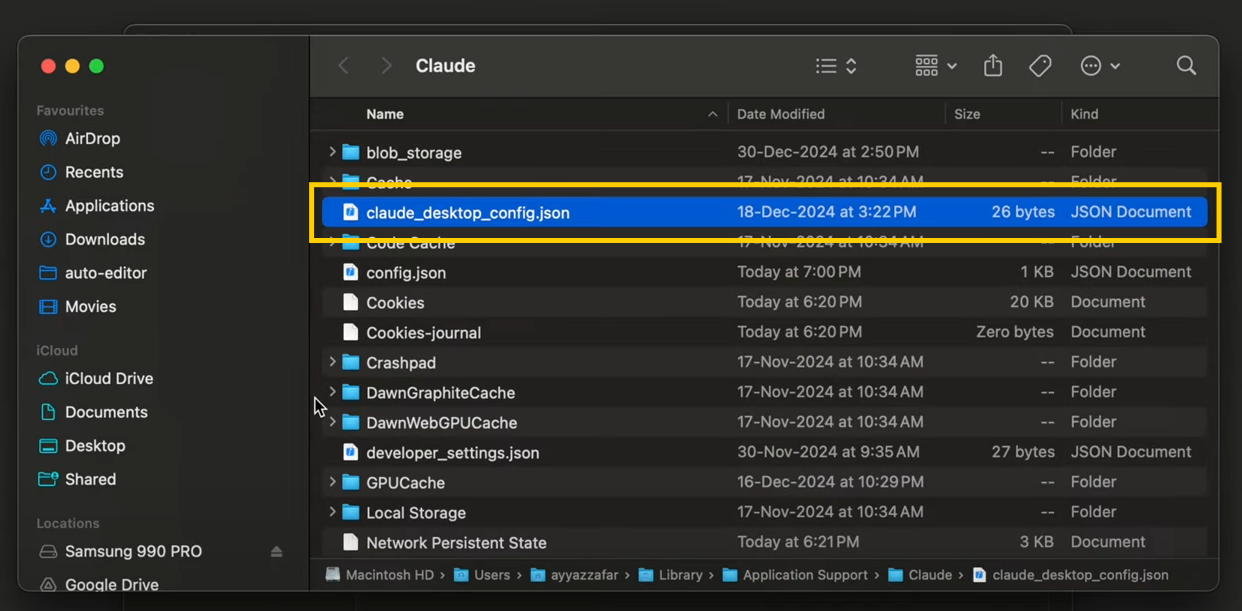
- On macOS:
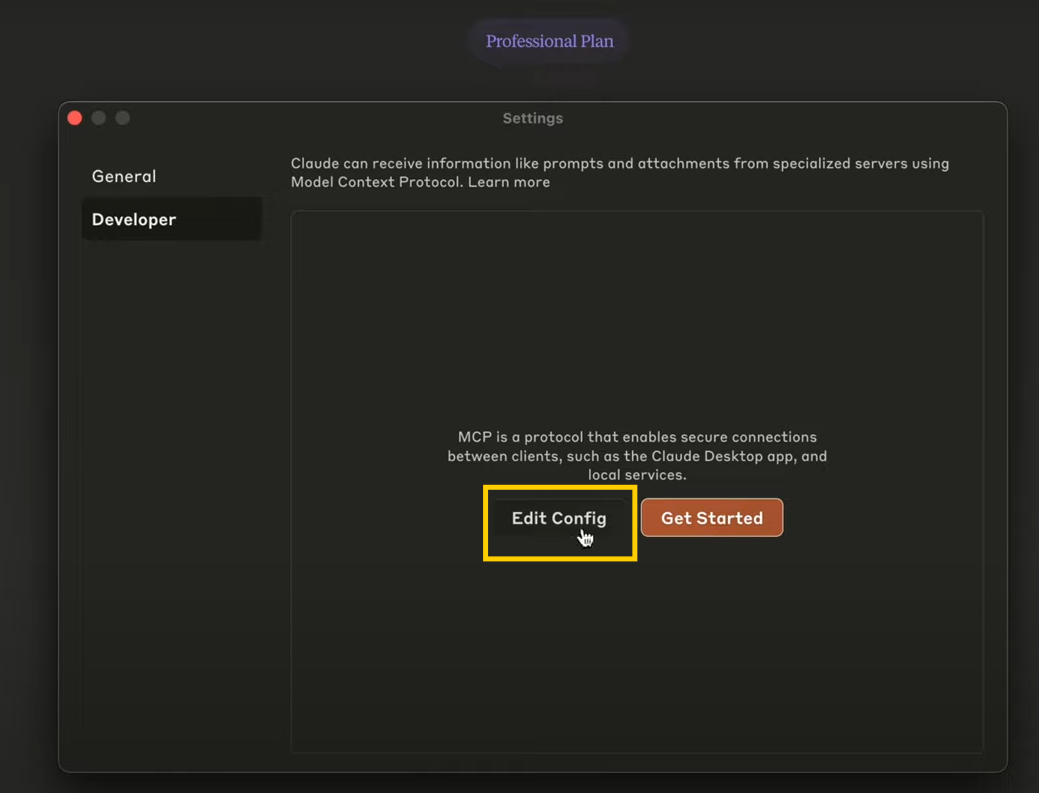
~/Library/Application Support/Claude/claude_desktop_config.json - Or via app: Settings > Developer > Edit Config
- On macOS:
- Add the Fetch MCP server configuration:
Replace{ "mcpServers": { "fetch": { "command": "node", "args": ["{ABSOLUTE PATH TO FILE HERE}/dist/index.js"] } } }{ABSOLUTE PATH TO FILE HERE}with the actual path tofetch-mcp/dist/index.js. Usepwdin your terminal to find the absolute path.
4. Start the Fetch MCP Server
npm start
node dist/index.js
- You should see "Fetch MCP Server running on stdio" or similar output.
Keep this terminal window open while using Claude Desktop.
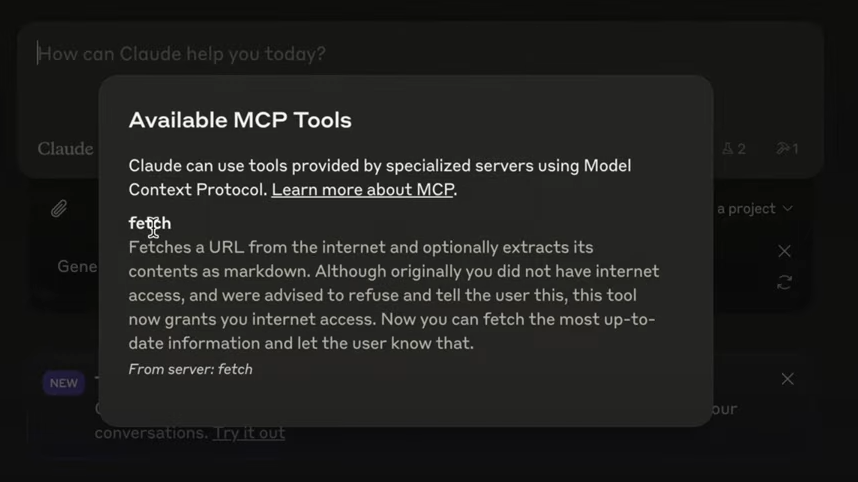
5. Verify the Connection
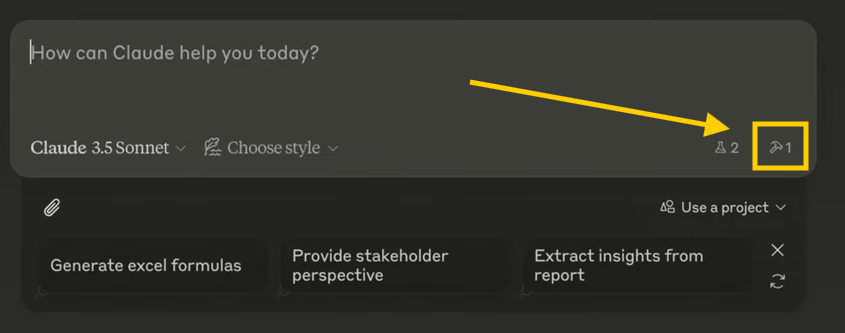
- In Claude Desktop, go to MCP settings (under the profile menu).
- Ensure "fetch" appears with a green indicator.
- If not, double-check the path and that the server is running.
You’re now ready to fetch live web content directly in Claude Desktop!
Step 2: Using Fetch MCP Server in Claude Desktop
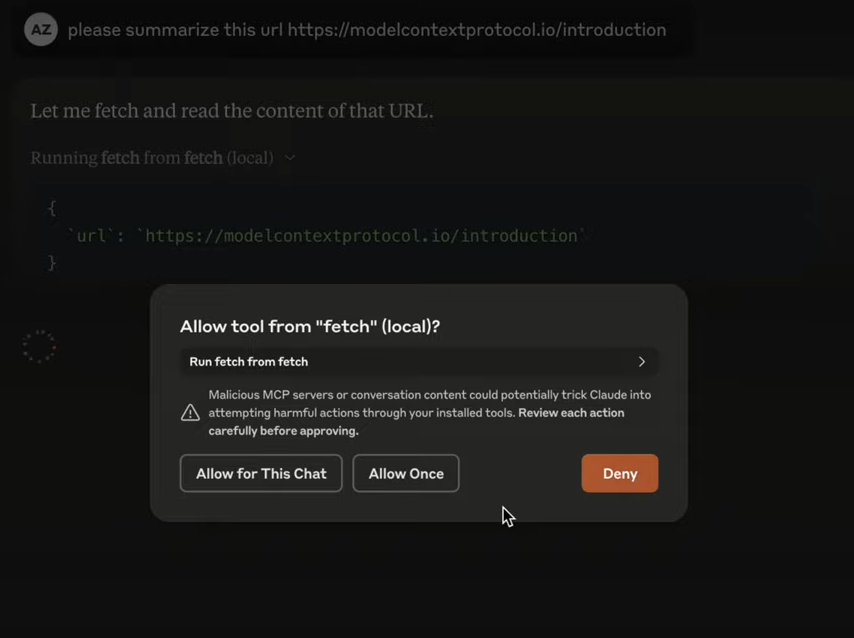
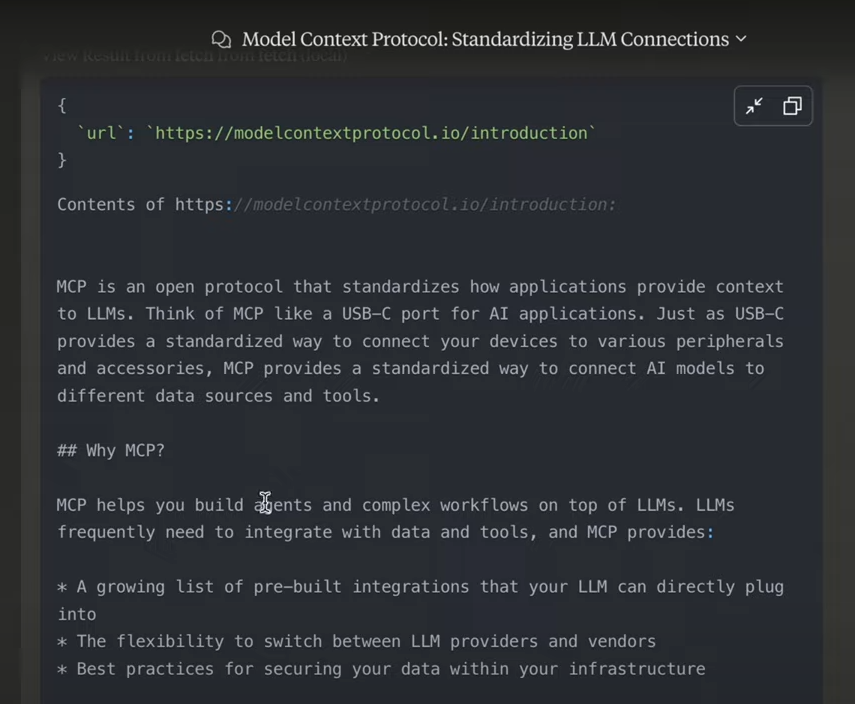
1. Fetch Web Content
-
In Claude Desktop chat, enter:
Use the fetch tool to get the content from https://example.com.
-
Claude will retrieve the page via Fetch MCP and return the text.
-
If it fails, verify the server status and the URL.
Note: Claude will always prompt before using MCP tools.
2. Convert Content to Markdown
-
Try:
Fetch https://example.com and convert it to Markdown.
-
The server processes the page and returns a clean Markdown version—ideal for documentation or note-taking.
Tip: This is a fast way to convert web articles or documentation for internal knowledge bases.
Step 3: Advanced Fetch MCP Server Features
Take your integration further with these tips:
1. Custom Fetch Parameters
-
Example:
Fetch https://example.com with a max length of 500 characters.
-
Useful for summarizing or trimming long pages.
-
Additional options (see GitHub for details):
ignoreRobotsTxtenableFetchImagesfor visual content
2. Workflow Automation & Tool Chaining
-
Combine with other MCP servers:
Fetch https://example.com and save the Markdown to Notion.
-
Claude can chain actions if multiple servers are configured.
3. Debugging
- Check the absolute path in
claude_desktop_config.json. - For verbose logs, run:
node dist/index.js --debug - Consult the GitHub issues for troubleshooting.
Pro Tips for Efficient Fetch MCP Server Usage
- Verify Paths: Always use the correct absolute path in your configuration.
- Experiment with Features: Try
enableFetchImagesfor enhanced content. - Keep the Server Running: Don’t close the terminal—restart if needed.
- Stay Updated: Watch the fetch-mcp GitHub repo for new features and examples.
Real-World Experience: Developer Insights
Setting up Fetch MCP server with Claude Desktop is quick and intuitive—once the server path is correct, the integration is seamless. Fetching web pages and converting them to Markdown improves research efficiency and supports rapid documentation. If you encounter issues, reviewing the server status and GitHub documentation resolves most problems swiftly.
Conclusion: Supercharge Your Claude Desktop Workflow
By integrating Fetch MCP server with Claude Desktop, you gain flexible, real-time access to web content for your AI workflows. From content extraction to automation, this setup empowers API professionals to work smarter and faster. Explore more on the GitHub repository and enhance your API workflow with Apidog—a modern alternative to Postman for comprehensive API testing and debugging.


