Unlock Seamless LLM Integration: FastMCP & Model Context Protocol Explained
The rapid evolution of Large Language Models (LLMs) is transforming how API developers and backend engineers enable intelligent systems to interact with external data and APIs. As LLMs move beyond simple text generation, they increasingly need standardized, secure ways to trigger actions, access data, or run tools—without re-inventing the wheel each time.
This guide introduces the Model Context Protocol (MCP)—the "USB-C port for AI"—and shows how FastMCP, a Pythonic framework, helps you build robust, MCP-compliant servers and clients in minutes. You'll learn practical steps, best practices, and see how tools like Apidog can further streamline your API development and documentation workflow.

What Is the Model Context Protocol (MCP)?
MCP is an open specification that standardizes how LLM clients request information or trigger actions from external systems (servers). For API-focused teams, MCP brings the following core building blocks:
- Tools: Functions exposed for LLMs to execute actions (think POST endpoints). Example: sending emails, running calculations, querying databases.
- Resources: Data for LLMs to retrieve (like GET endpoints). Example: user profiles, config files, real-time data.
- Prompts: Structured templates to guide LLM conversations and outputs, ensuring consistency.
- Context: Instructions and metadata to optimize tool/resource usage.
By adopting MCP, teams create a secure, reliable foundation for LLMs to access APIs and data—reducing custom glue code, improving maintainability, and preparing for cross-provider LLM integrations.
Why FastMCP? Benefits for Python API Developers
While you could hand-code an MCP server, FastMCP accelerates your workflow—especially if you work in Python. Here’s what makes it stand out:
[ ]
]
- Rapid Prototyping: Define new tools or resources by simply decorating Python functions. No protocol boilerplate required.
- Pythonic & Intuitive: Leverages Python best practices—type hints, decorators, async support—for clean, readable code.
- Full MCP Compliance: FastMCP implements the entire MCP spec, ensuring broad compatibility.
- Abstraction of Complexity: Handles server setup, content types, error management, and underlying protocol details.
- Advanced Features: Supports client/server proxying, composition, modular server builds, and more.
FastMCP is now bundled into the official MCP Python SDK. Its latest version introduces flexible clients, server proxying, and advanced composition patterns to further simplify LLM system development.
Installing FastMCP: Step-by-Step
Setup takes just a few minutes, using either uv (recommended) or pip.
1. Install via uv (Recommended):
uv add fastmcp
uv pip install fastmcp
2. Or use pip:
pip install fastmcp
3. Verify Installation:
fastmcp version
# Example output:
# FastMCP version:   0.4.2.dev41+ga077727.d20250410
# MCP version:       1.6.0
# Python version:    3.12.2
# Platform:          macOS-15.3.1-arm64-arm-64bit
4. For Development/Contributing:
git clone https://github.com/jlowin/fastmcp.git
cd fastmcp
uv sync
# Run tests with:
pytest
Building Your First MCP Server with FastMCP
Let’s walk through a practical example: exposing tools and resources for LLMs using FastMCP.
1. Create a Basic Server
# my_server.py
from fastmcp import FastMCP

mcp = FastMCP(name="My First MCP Server")
print("FastMCP server object created.")
You can configure the server with options like name, instructions, lifespan, tags, and server settings (e.g., port, host, log_level).
2. Add Tools and Resources
Expose Tools (Functions):
@mcp.tool()
def greet(name: str) -> str:
    return f"Hello, {name}!"

@mcp.tool()
def add(a: int, b: int) -> int:
    return a + b
Expose a Static Resource:
APP_CONFIG = {"theme": "dark", "version": "1.1", "feature_flags": ["new_dashboard"]}

@mcp.resource("data://config")
def get_config() -> dict:
    return APP_CONFIG
Expose a Resource Template (Parameterized URI):
USER_PROFILES = {
    101: {"name": "Alice", "status": "active"},
    102: {"name": "Bob", "status": "inactive"},
}

@mcp.resource("users://{user_id}/profile")
def get_user_profile(user_id: int) -> dict:
    return USER_PROFILES.get(user_id, {"error": "User not found"})
Define a Prompt Template:
@mcp.prompt("summarize")
async def summarize_prompt(text: str) -> list[dict]:
    return [
        {"role": "system", "content": "You are a helpful assistant skilled at summarization."},
        {"role": "user", "content": f"Please summarize the following text:\n\n{text}"}
    ]
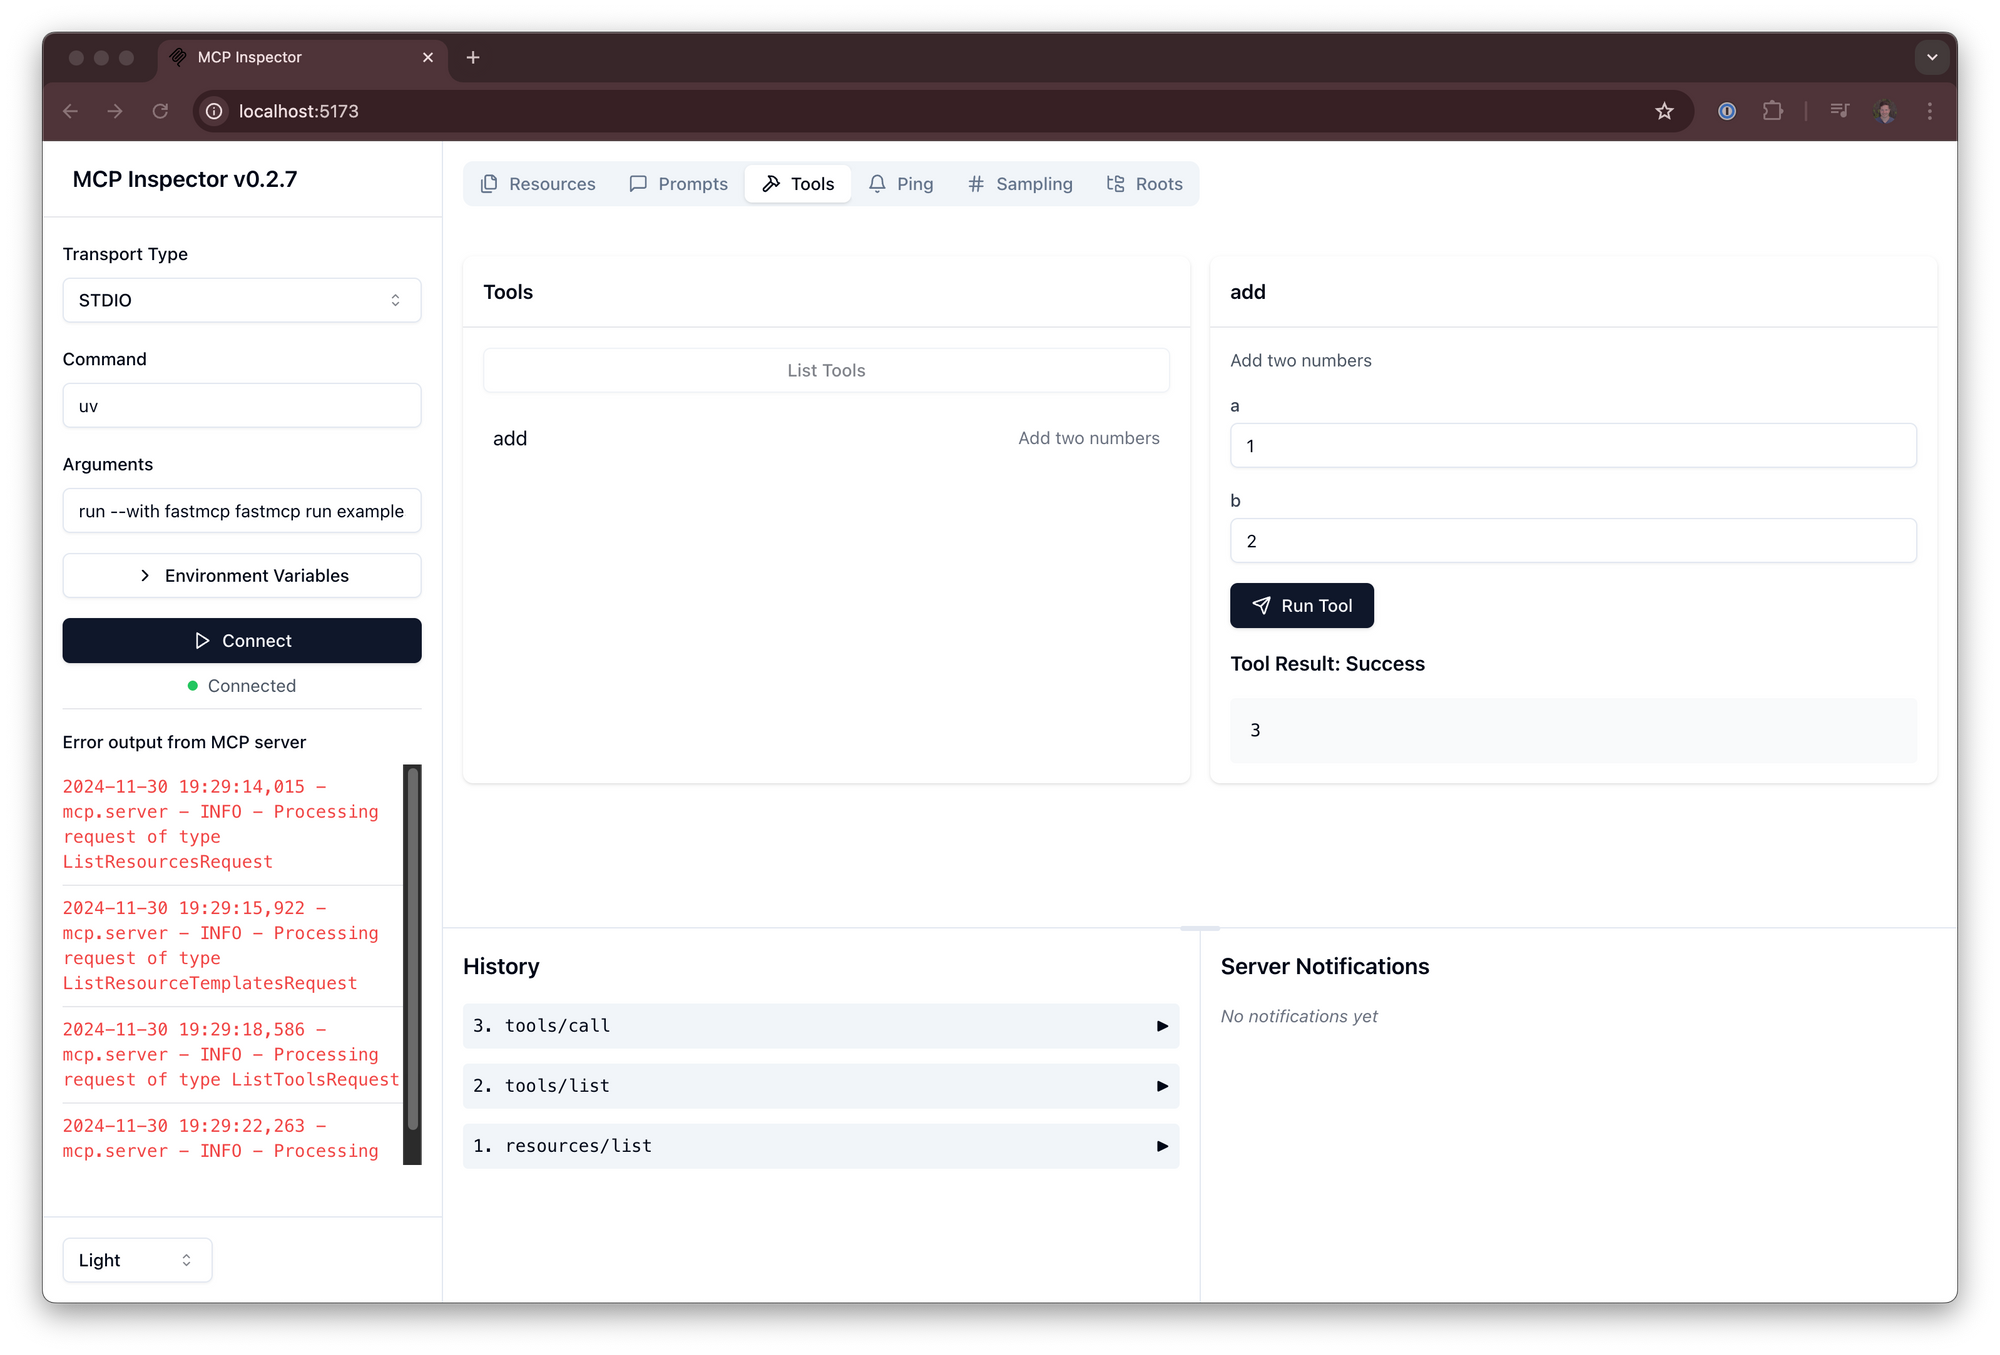
3. Test the Server In-Process
Before running externally, you can test tools and resources using the FastMCP Client:
from fastmcp import Client
import asyncio

async def test_server_locally():
    client = Client(mcp)
    async with client:
        greet_result = await client.call_tool("greet", {"name": "FastMCP User"})
        add_result = await client.call_tool("add", {"a": 5, "b": 7"})
        config_data = await client.read_resource("data://config")
        user_profile = await client.read_resource("users://101/profile")
        prompt_messages = await client.get_prompt("summarize", {"text": "This is some text."})
        print(greet_result, add_result, config_data, user_profile, prompt_messages)
4. Run the MCP Server
Option 1: Standard Python Execution
Add this block to your script:
if __name__ == "__main__":
    mcp.run()
Then run:
python my_server.py
Option 2: FastMCP CLI
fastmcp run my_server.py:mcp
# Or with SSE (for web clients):
fastmcp run my_server.py:mcp --transport sse --port 8080 --host 0.0.0.0
5. Connect with an MCP Client
Create a new script, my_client.py:
from fastmcp import Client
import asyncio

async def interact_with_server():
    client = Client("http://localhost:8080")  # Use the actual URL/port
    async with client:
        greet_result = await client.call_tool("greet", {"name": "Remote Client"})
        config_data = await client.read_resource("data://config")
        profile_102 = await client.read_resource("users://102/profile")
        print(greet_result, config_data, profile_102)

if __name__ == "__main__":
    asyncio.run(interact_with_server())
Run both server and client in separate terminals.
Advanced FastMCP Use Cases
- Composition: Combine multiple MCP servers.
main.mount("sub", sub_server)creates a live link;main.import_server(sub_server)copies components. Great for microservices or modular APIs. - Proxying:
FastMCP.from_client(client)builds a proxy server for bridging transports or adding unified frontends.
Tip: When building and exposing APIs to LLMs, clear documentation and testing are vital. Tools like Apidog generate API documentation automatically, foster team collaboration (all-in-one developer platform), and can replace legacy tools like Postman at a lower cost.
Configuring MCP Servers
You can fine-tune FastMCP using:
- Init arguments: e.g.,
FastMCP(port=8080, log_level="DEBUG") - Environment variables: e.g.,
FASTMCP_SERVER_PORT=8888 - .env file: Load default settings from file.
- Defaults: Used if not overridden.
Key options:
host,port,log_level- Duplicate handling:
on_duplicate_tools,on_duplicate_resources,on_duplicate_prompts
Example:
mcp_configured = FastMCP(
    name="ConfiguredServer",
    port=8080,
    host="127.0.0.1",
    log_level="DEBUG",
    on_duplicate_tools="warn"
)
print(mcp_configured.settings.port)
Conclusion
FastMCP empowers API and backend engineers to quickly build, expose, and manage LLM-connected tools and resources using the Model Context Protocol. Its Pythonic, decorator-based approach slashes boilerplate, improves maintainability, and readies your stack for the next generation of AI-driven workflows.
For teams focused on robust API design and documentation, integrating FastMCP with an API platform like Apidog ensures your LLM-powered endpoints are discoverable, testable, and ready for collaboration.
Start building smarter LLM integrations today—with FastMCP and the Model Context Protocol, the barrier to advanced AI tooling is lower than ever.


