
When writing product or technical documentation, it’s crucial to structure your content clearly and present it visually in an intuitive way. This helps readers quickly grasp the key points and reduces the effort required to understand the content.
Apidog, as an API management tool, not only enables efficient API documentation management but also allows teams to create professional-grade product documents using flexible Markdown syntax. The Apidog help documentation for users is built using Apidog’s Markdown features.
Below are 10 practical tips for writing product documentation with Markdown in Apidog.
1. Customize the Sidebar Title
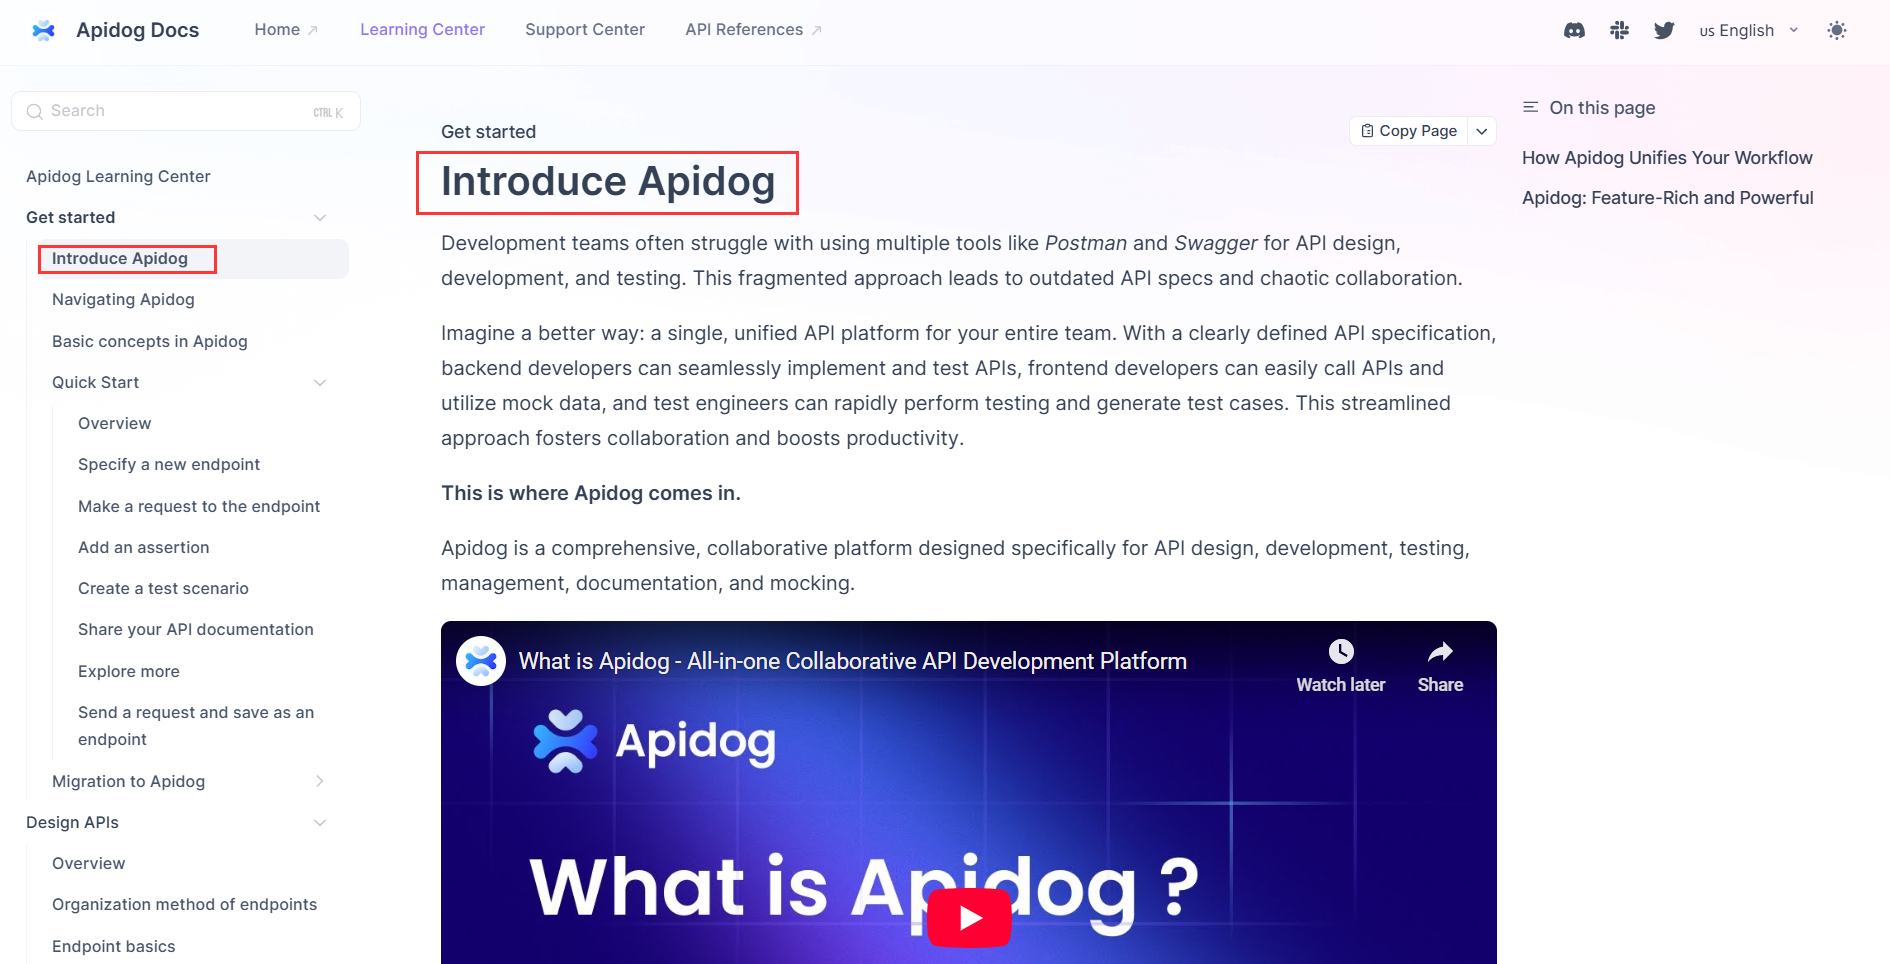
When you create a new Markdown document in Apidog, the title in the Markdown document is used by default as the sidebar title, as shown below:
If you want the sidebar and document titles to be different, you can customize them separately.
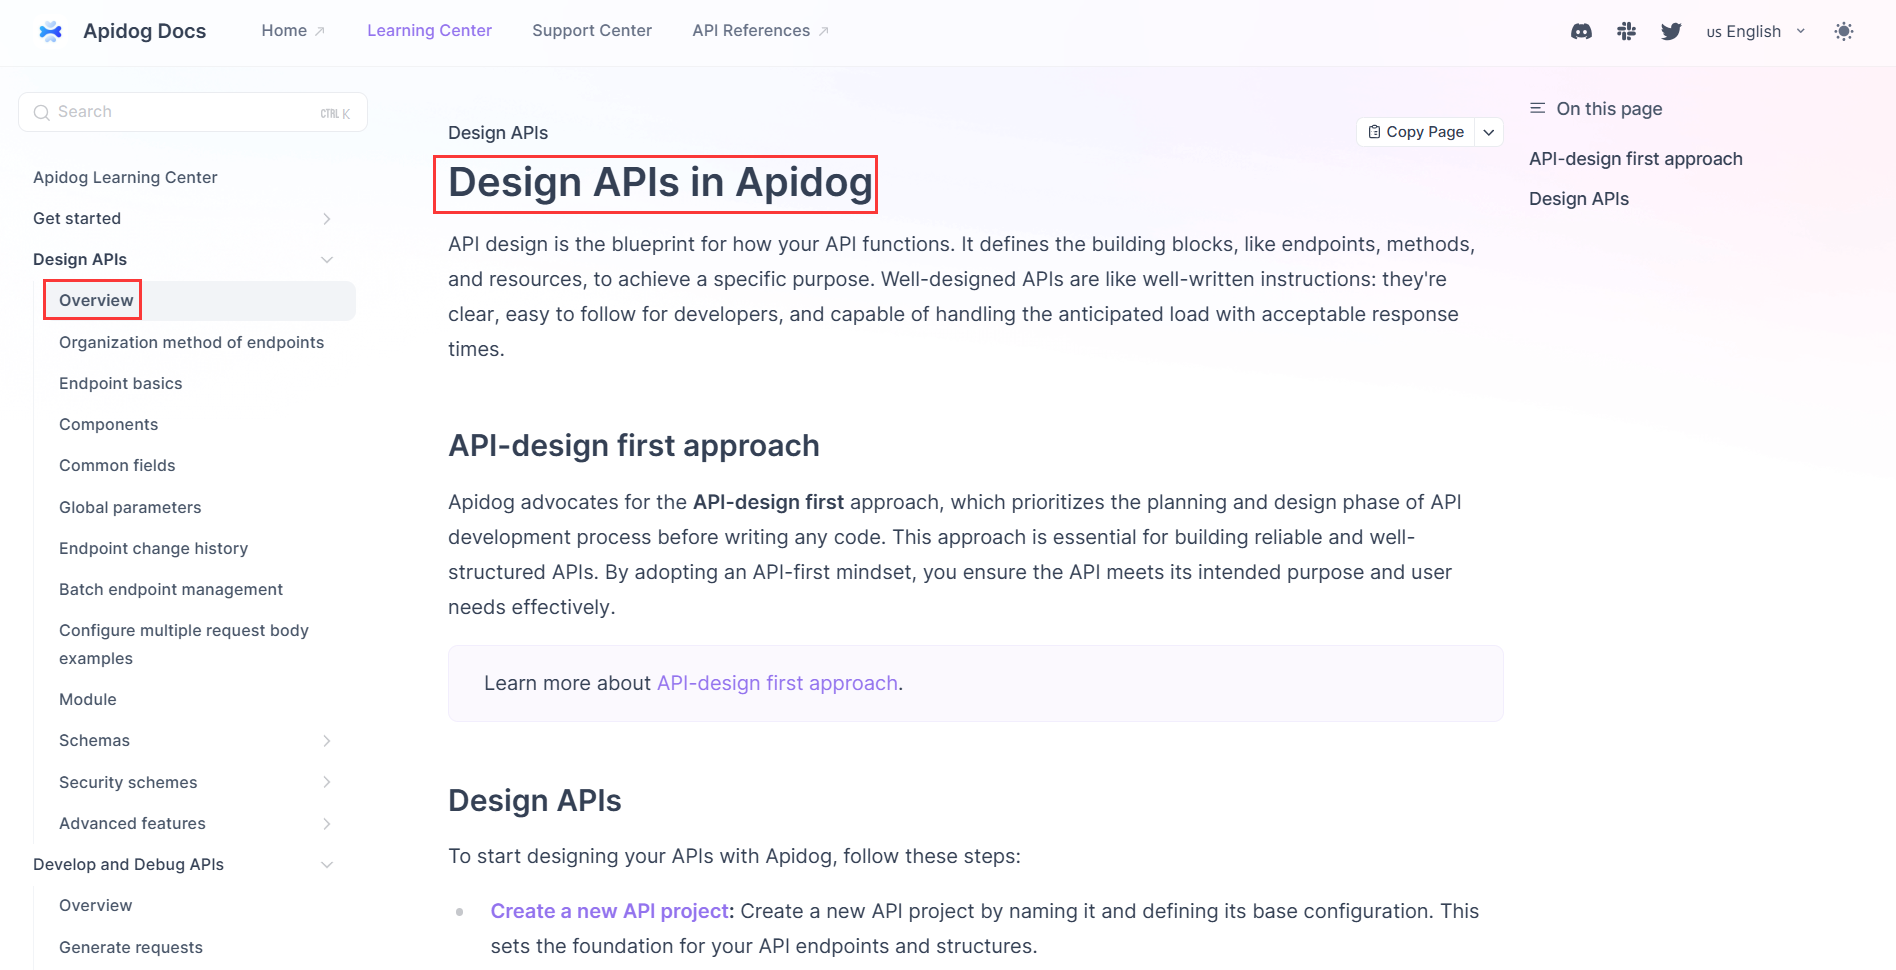
For example, you can use "Overview" as the sidebar title and give the document a more specific title like "Design APIs in Apidog".
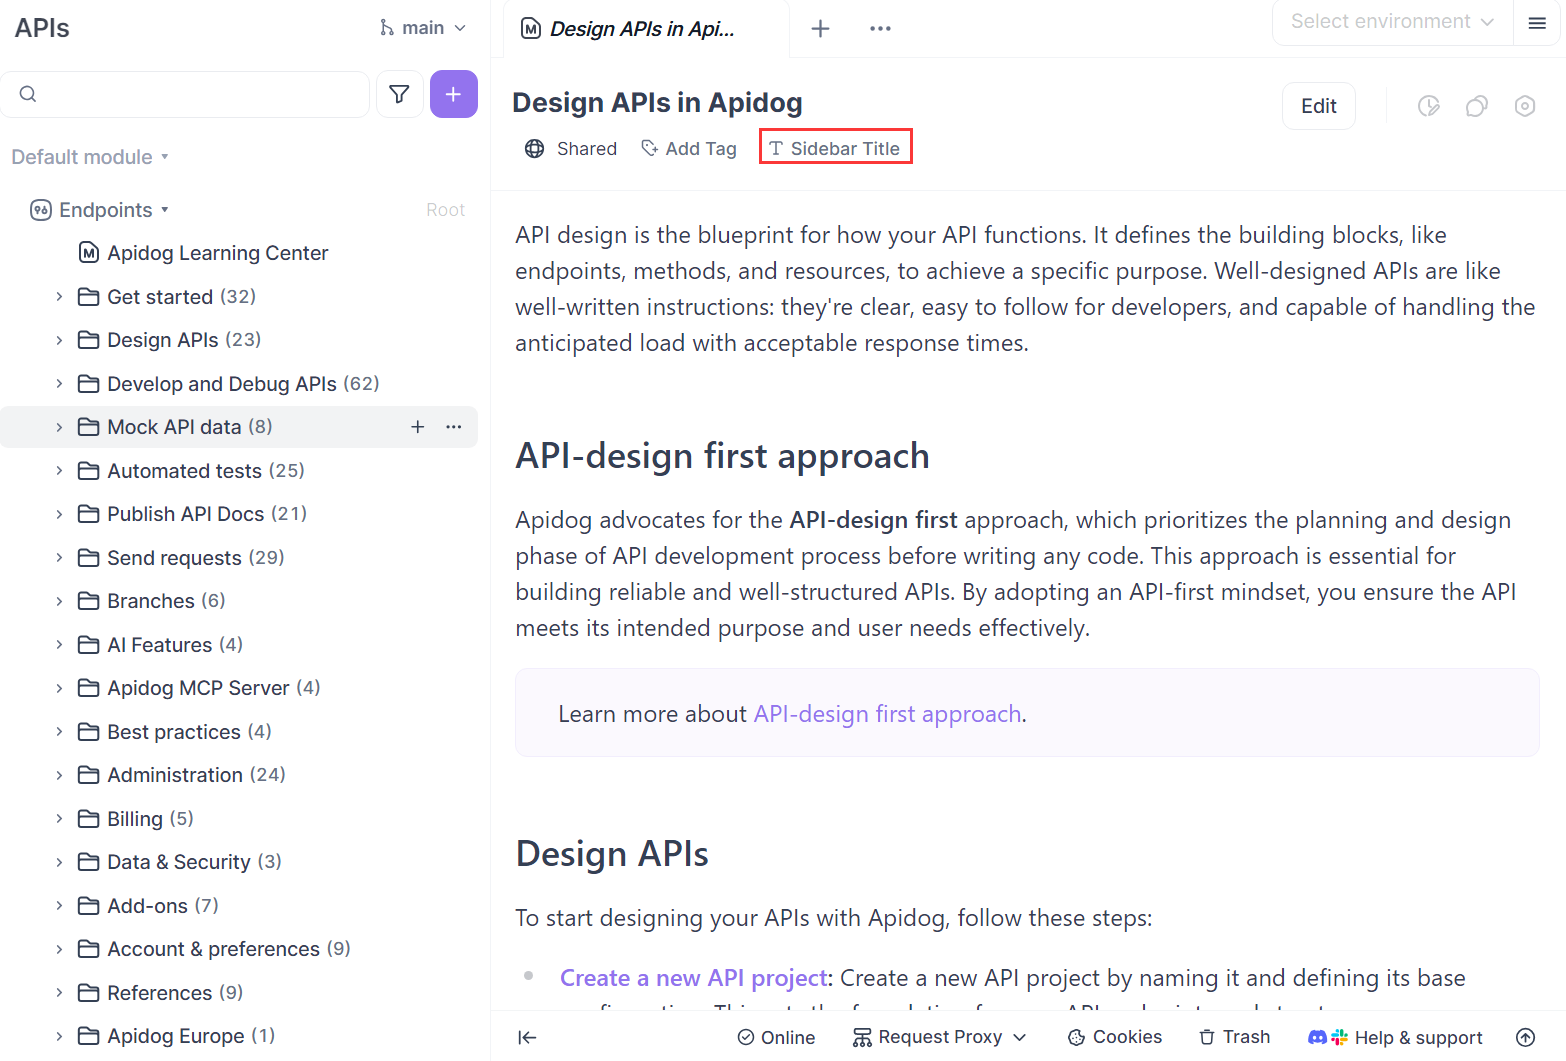
Here is how to set this up: Inside the Markdown document, click "Sidebar Title" and modify the title.
Using different titles for the sidebar and the document has two benefits:
- The sidebar title stays short and tidy, keeping the folder structure clean.
- The document title can be more detailed and descriptive for clarity.
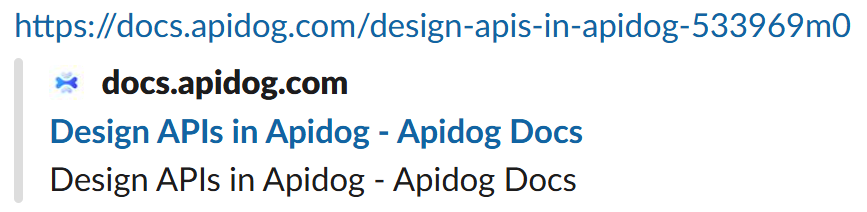
When you share a document link on platforms like Slack, the document title appears in the preview, making the link look clearer and easier to understand. Here’s an example of how it looks in Slack:
2. Quote Project Resources and Schemas
Apidog makes it easy to quote endpoints, documents, and schemas from your project directly into Markdown files.
To quote endpoints and Markdown documents:
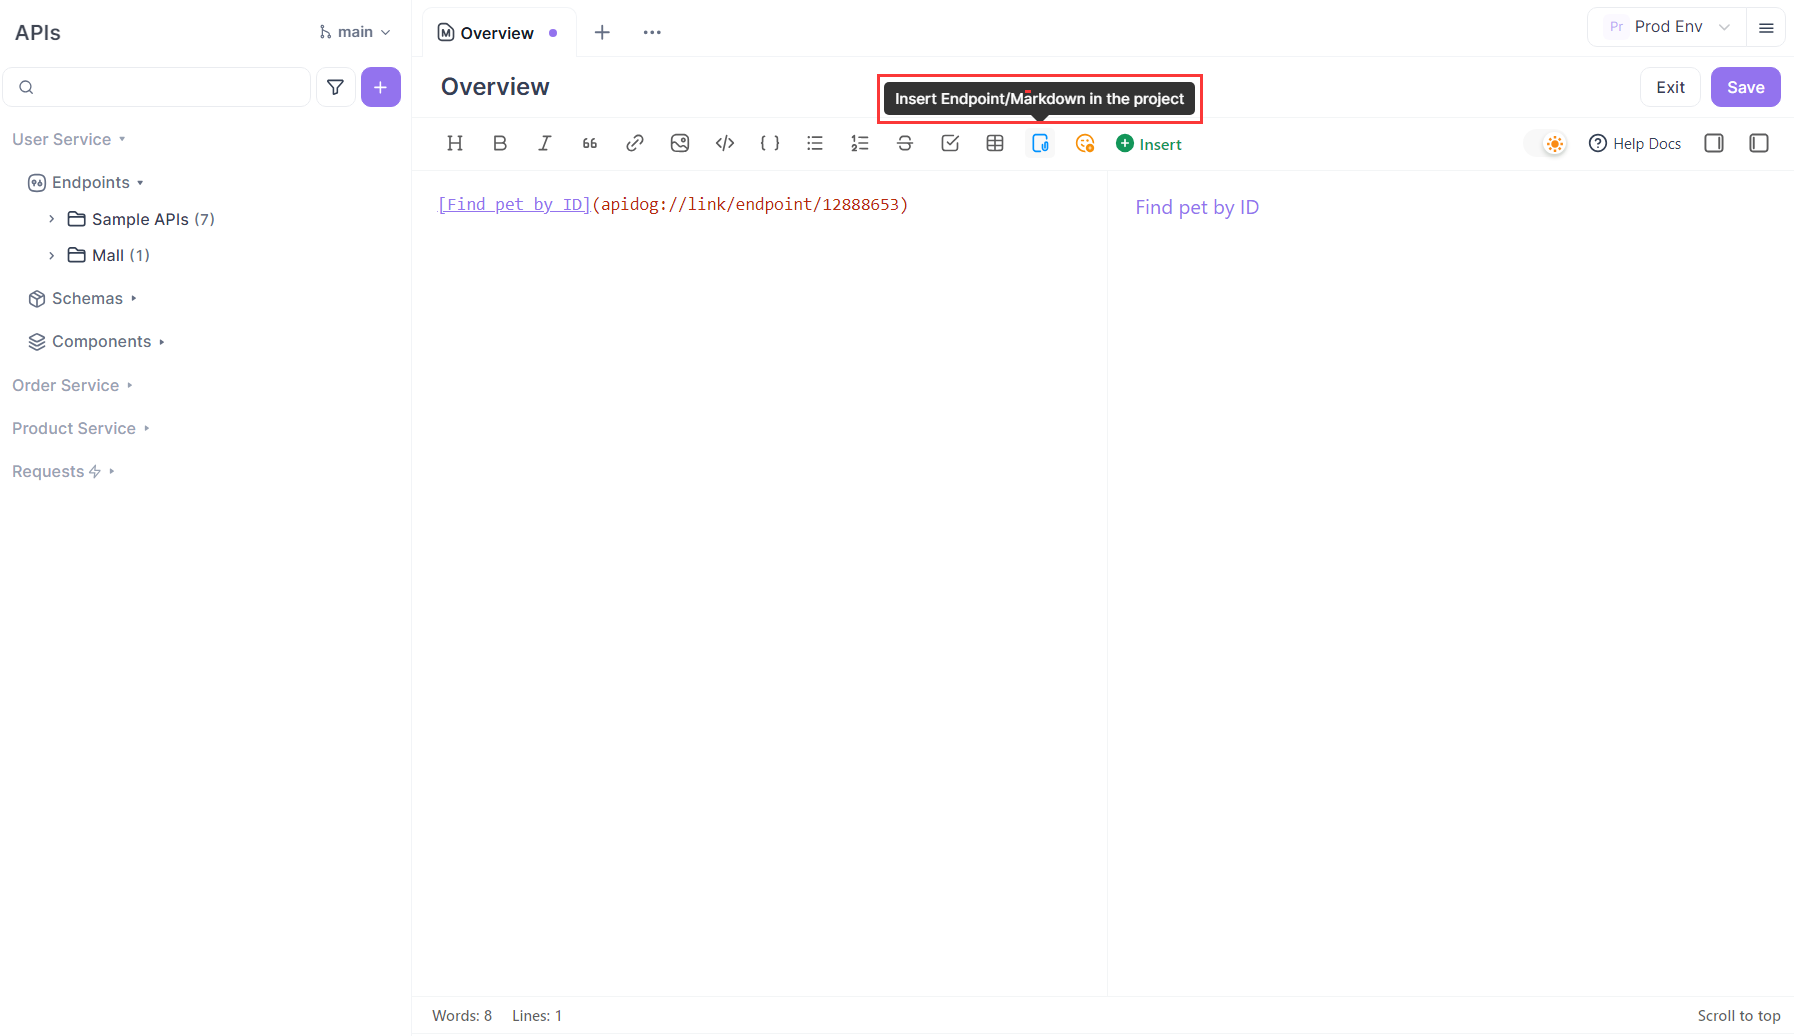
- Open your Markdown document and click "Insert Endpoint/Markdown in the project".
- Choose the resource you want to insert (endpoint or Markdown document).
The quoted content will automatically be linked to the target resource in the project, and clicking it in the preview view will jump to that detailed page.
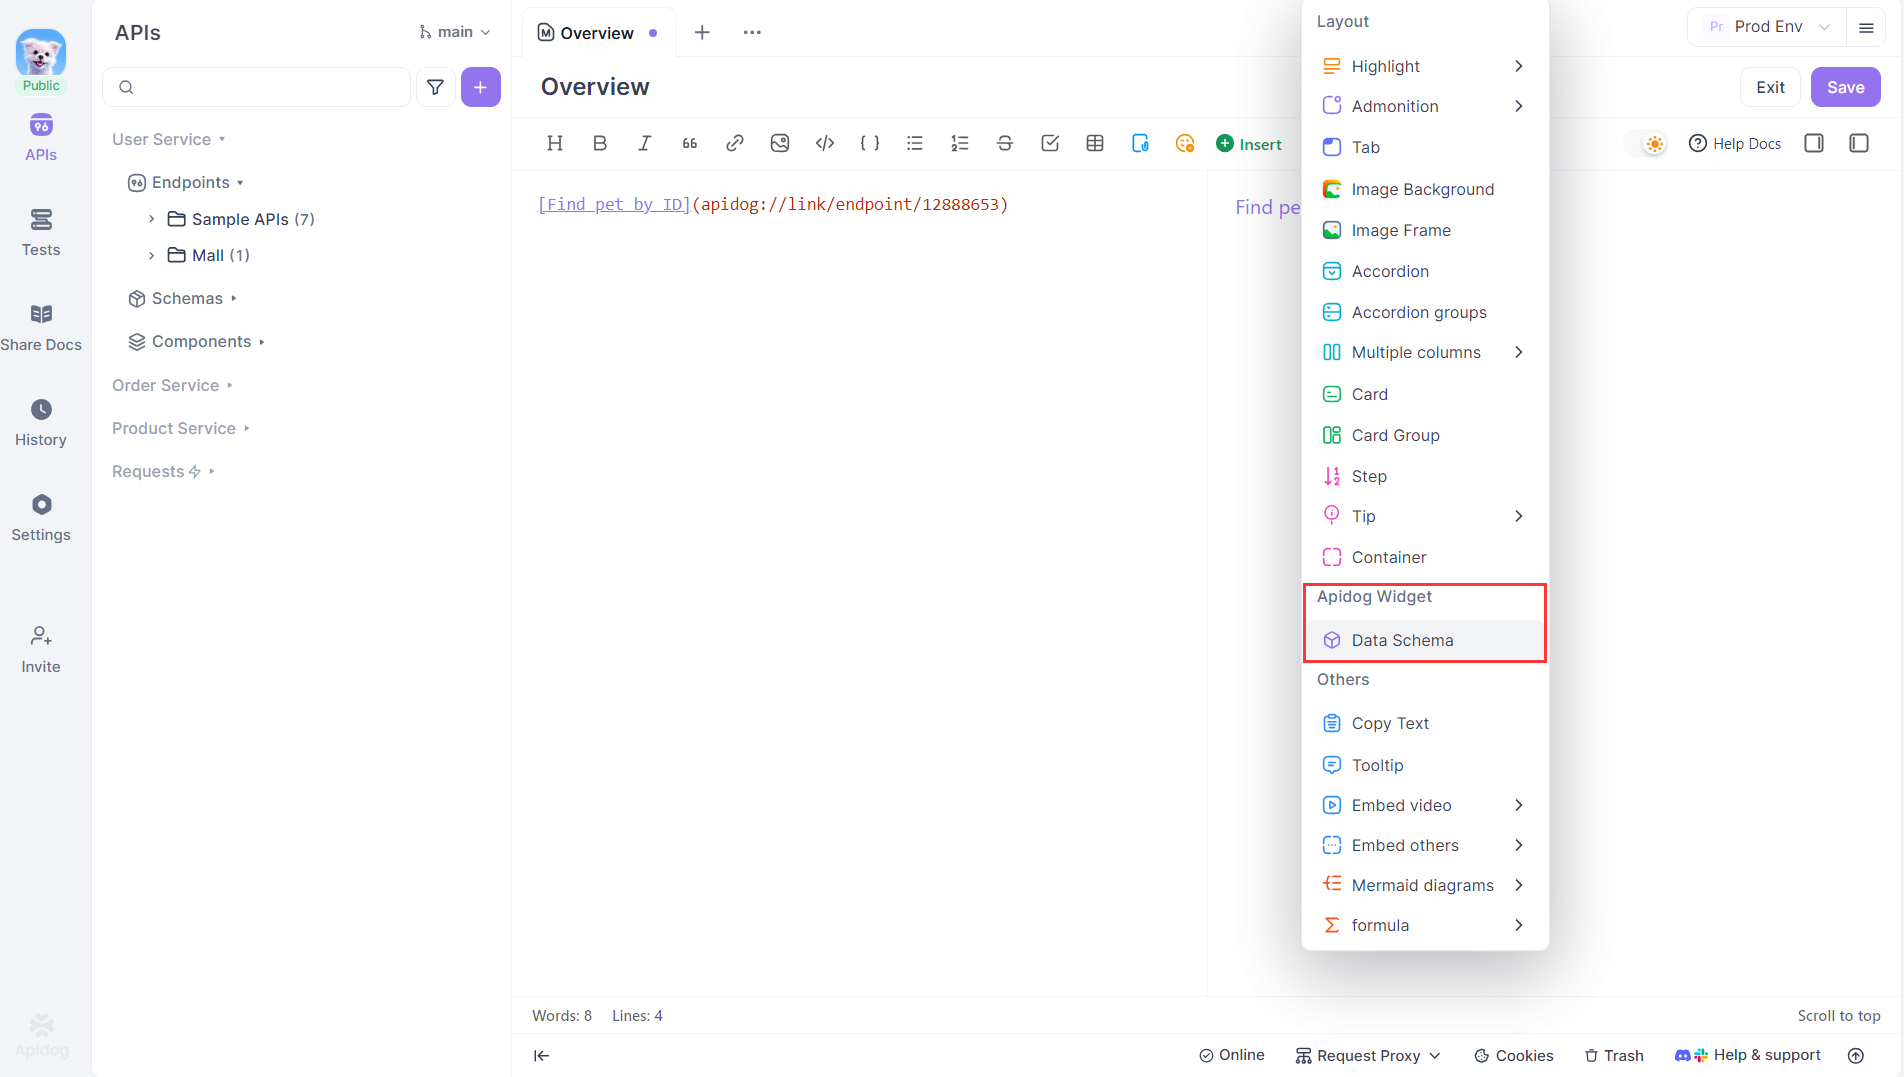
To quote schemas:
- Go to "Insert" → "Data Schema".
- Select the desired one.
Any changes your team makes to the data schema will automatically sync with the quoted version, ensuring your documentation always stays up-to-date. This prevents confusion and errors caused by outdated information.
Example code:
<DataSchema id="4700682" />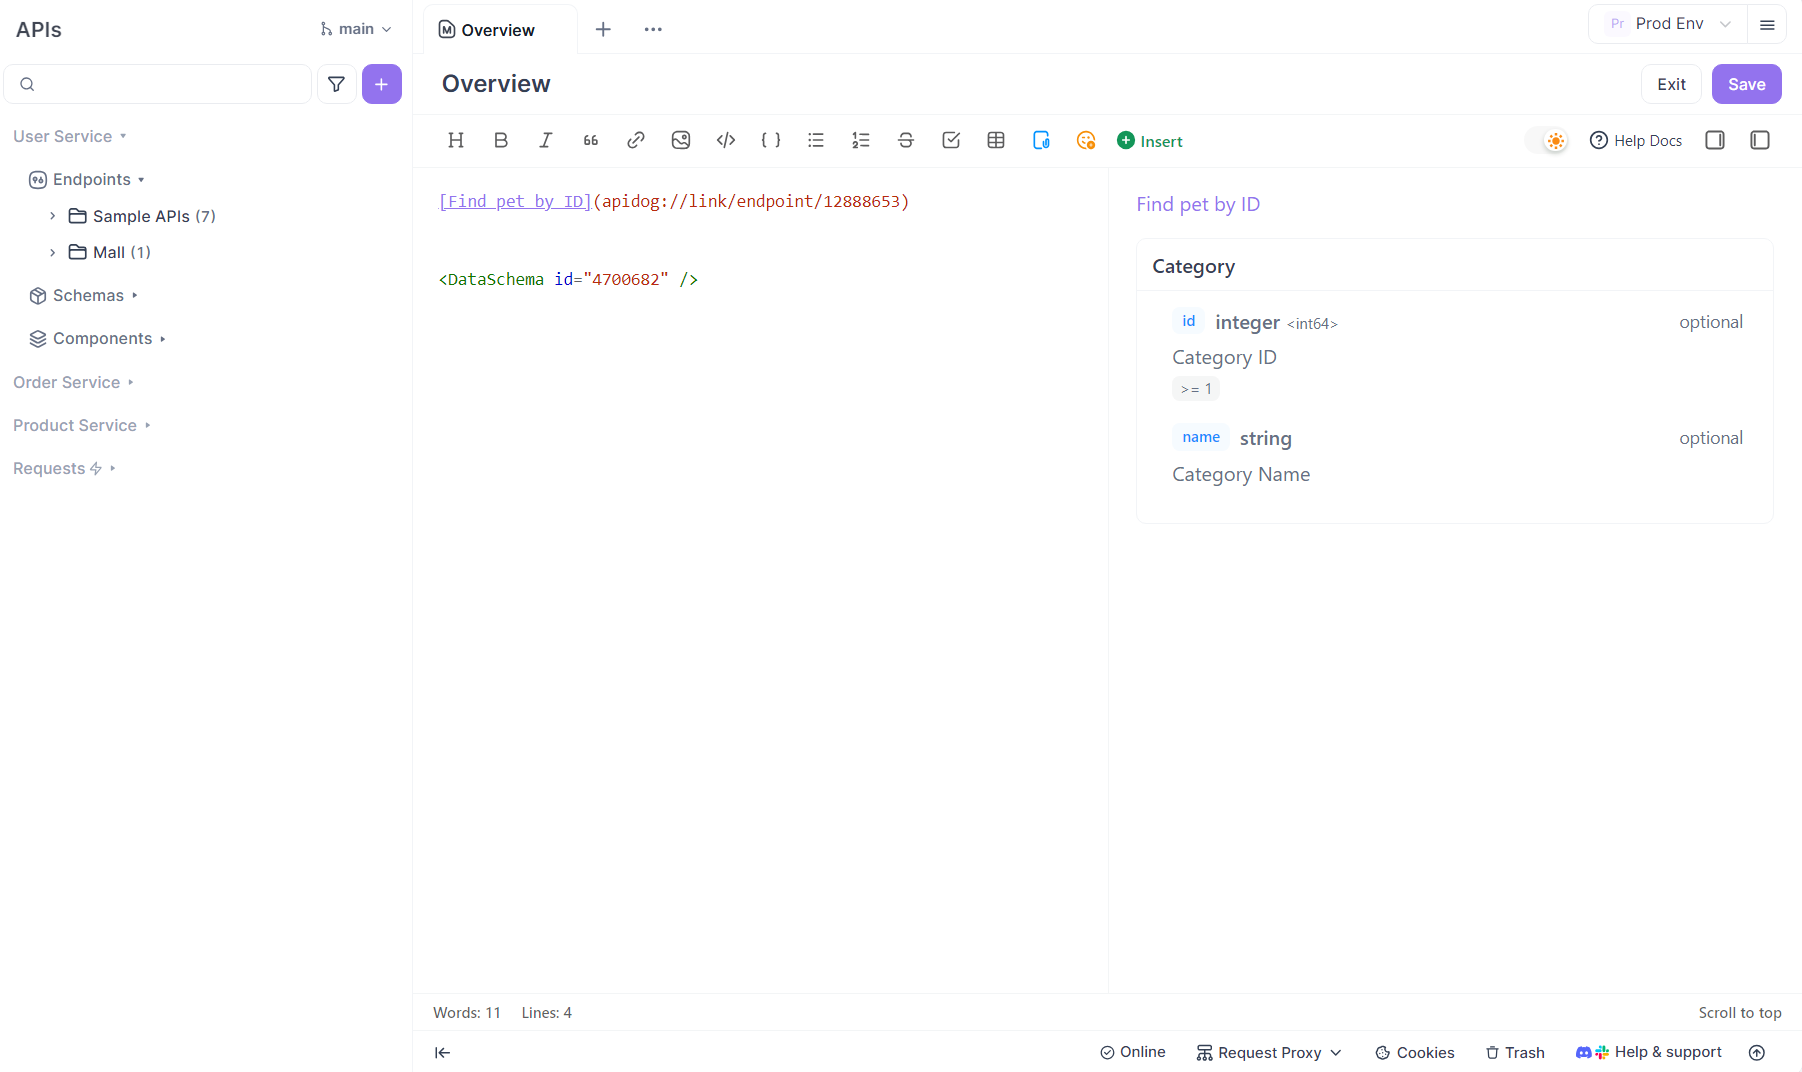
3. Control Link Behavior and Navigation
Apidog Markdown supports various link types, and their behavior in online documentation differs:
- Some links open in a new browser tab
- Some open in the current page
- Others jump directly to a specific section in the document using anchors
Choosing the right link type makes navigation easier and helps users quickly find the information they need.
Below, you’ll find details on how each link type works and how to configure them.
3.1 Links Opening in the Current Page
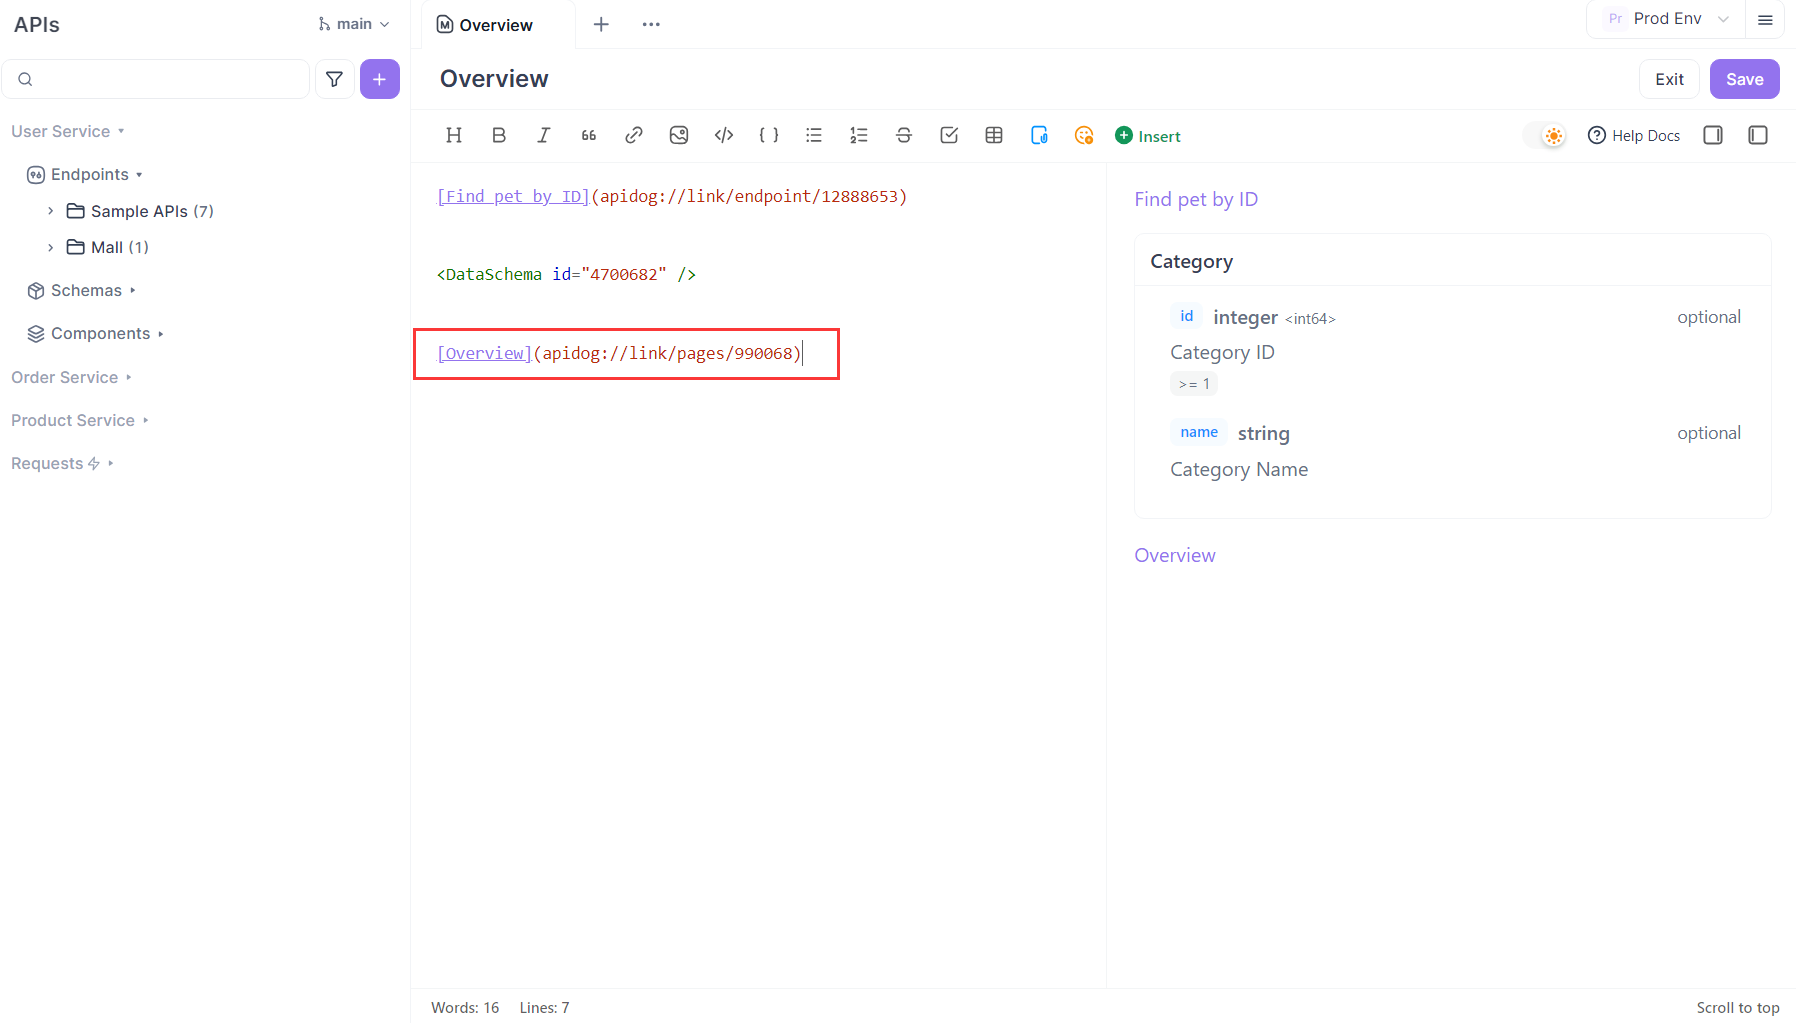
Links added via "Insert Endpoint/Markdown in the project" generate addresses starting withapidog://link/pages/..., which opens in the current browser page when clicked.
For example:
[Overview](apidog://link/pages/990068)
How to set this up: Click the "Insert Endpoint/Markdown in the project" button and select the desired endpoint or document.
Links like apidog://link/pages/... can be used as normal links in Apidog Markdown. After publishing or sharing, they are automatically converted to actual online addresses (e.g., https://xxx.apidog.io/xxx) and support jumping. For example, in a "Card" component:
<Card title="Click here" href="apidog://link/pages/990068">
 This is a card, click to jump to the target page
</Card>
3.2 Links Opening in a New Tab
Any link not added via "Insert Endpoint/Markdown in the project" will open in a new browser tab by default. For example:
[API-design first approach](https://docs.apidog.com/api-design-first-approach-533942m0)
3.3 Anchor Links Opening in a New Tab
To link directly to a specific section in the Table of Contents (TOC), add an anchor (e.g., #xxx) to the end of your link. For example:
[these methods are the same as those used for inviting users to the team](https://docs.apidog.com/managing-team-members-613028m0#invitation-methods)
3.4 Anchor Links Opening in the Current Page
You can also use anchors in internal project links to jump to a specific section within the same document. For example:
[these methods are the same as those used for inviting users to the team](apidog://link/pages/613028#invitation-methods)
Anchor links such as apidog://link/pages/613028#invitation-methods only work after the page is shared or published. If you click these links in the Apidog client before publishing, nothing will happen because the link hasn’t been converted into an accessible web path yet.
The links above can be in either Markdown or HTML format, for example:
Link that opens in the current page:

<a href="apidog://link/pages/533969">Design APIs in Apidog</a>

Link that opens in a new tab:

<a href="https://docs.apidog.com/design-apis-in-apidog-533969m0">Design APIs in Apidog</a>

Anchor link (opens in a new tab):

<a href="https://docs.apidog.com/design-apis-in-apidog-533969m0#design-apis">Design APIs in Apidog</a>

Anchor link (opens in the current page):

<a href="apidog://link/pages/533969#design-apis">Design APIs in Apidog</a>`
4. Create Side-by-Side Layouts with Containers and Columns
When you need to show differences between versions, feature comparisons, or parallel information, use the "Container" component nested with the "Column" component to create a visually striking side-by-side layout.
This layout makes it easy for readers to compare content at a glance, improving clarity and communication.
For example:
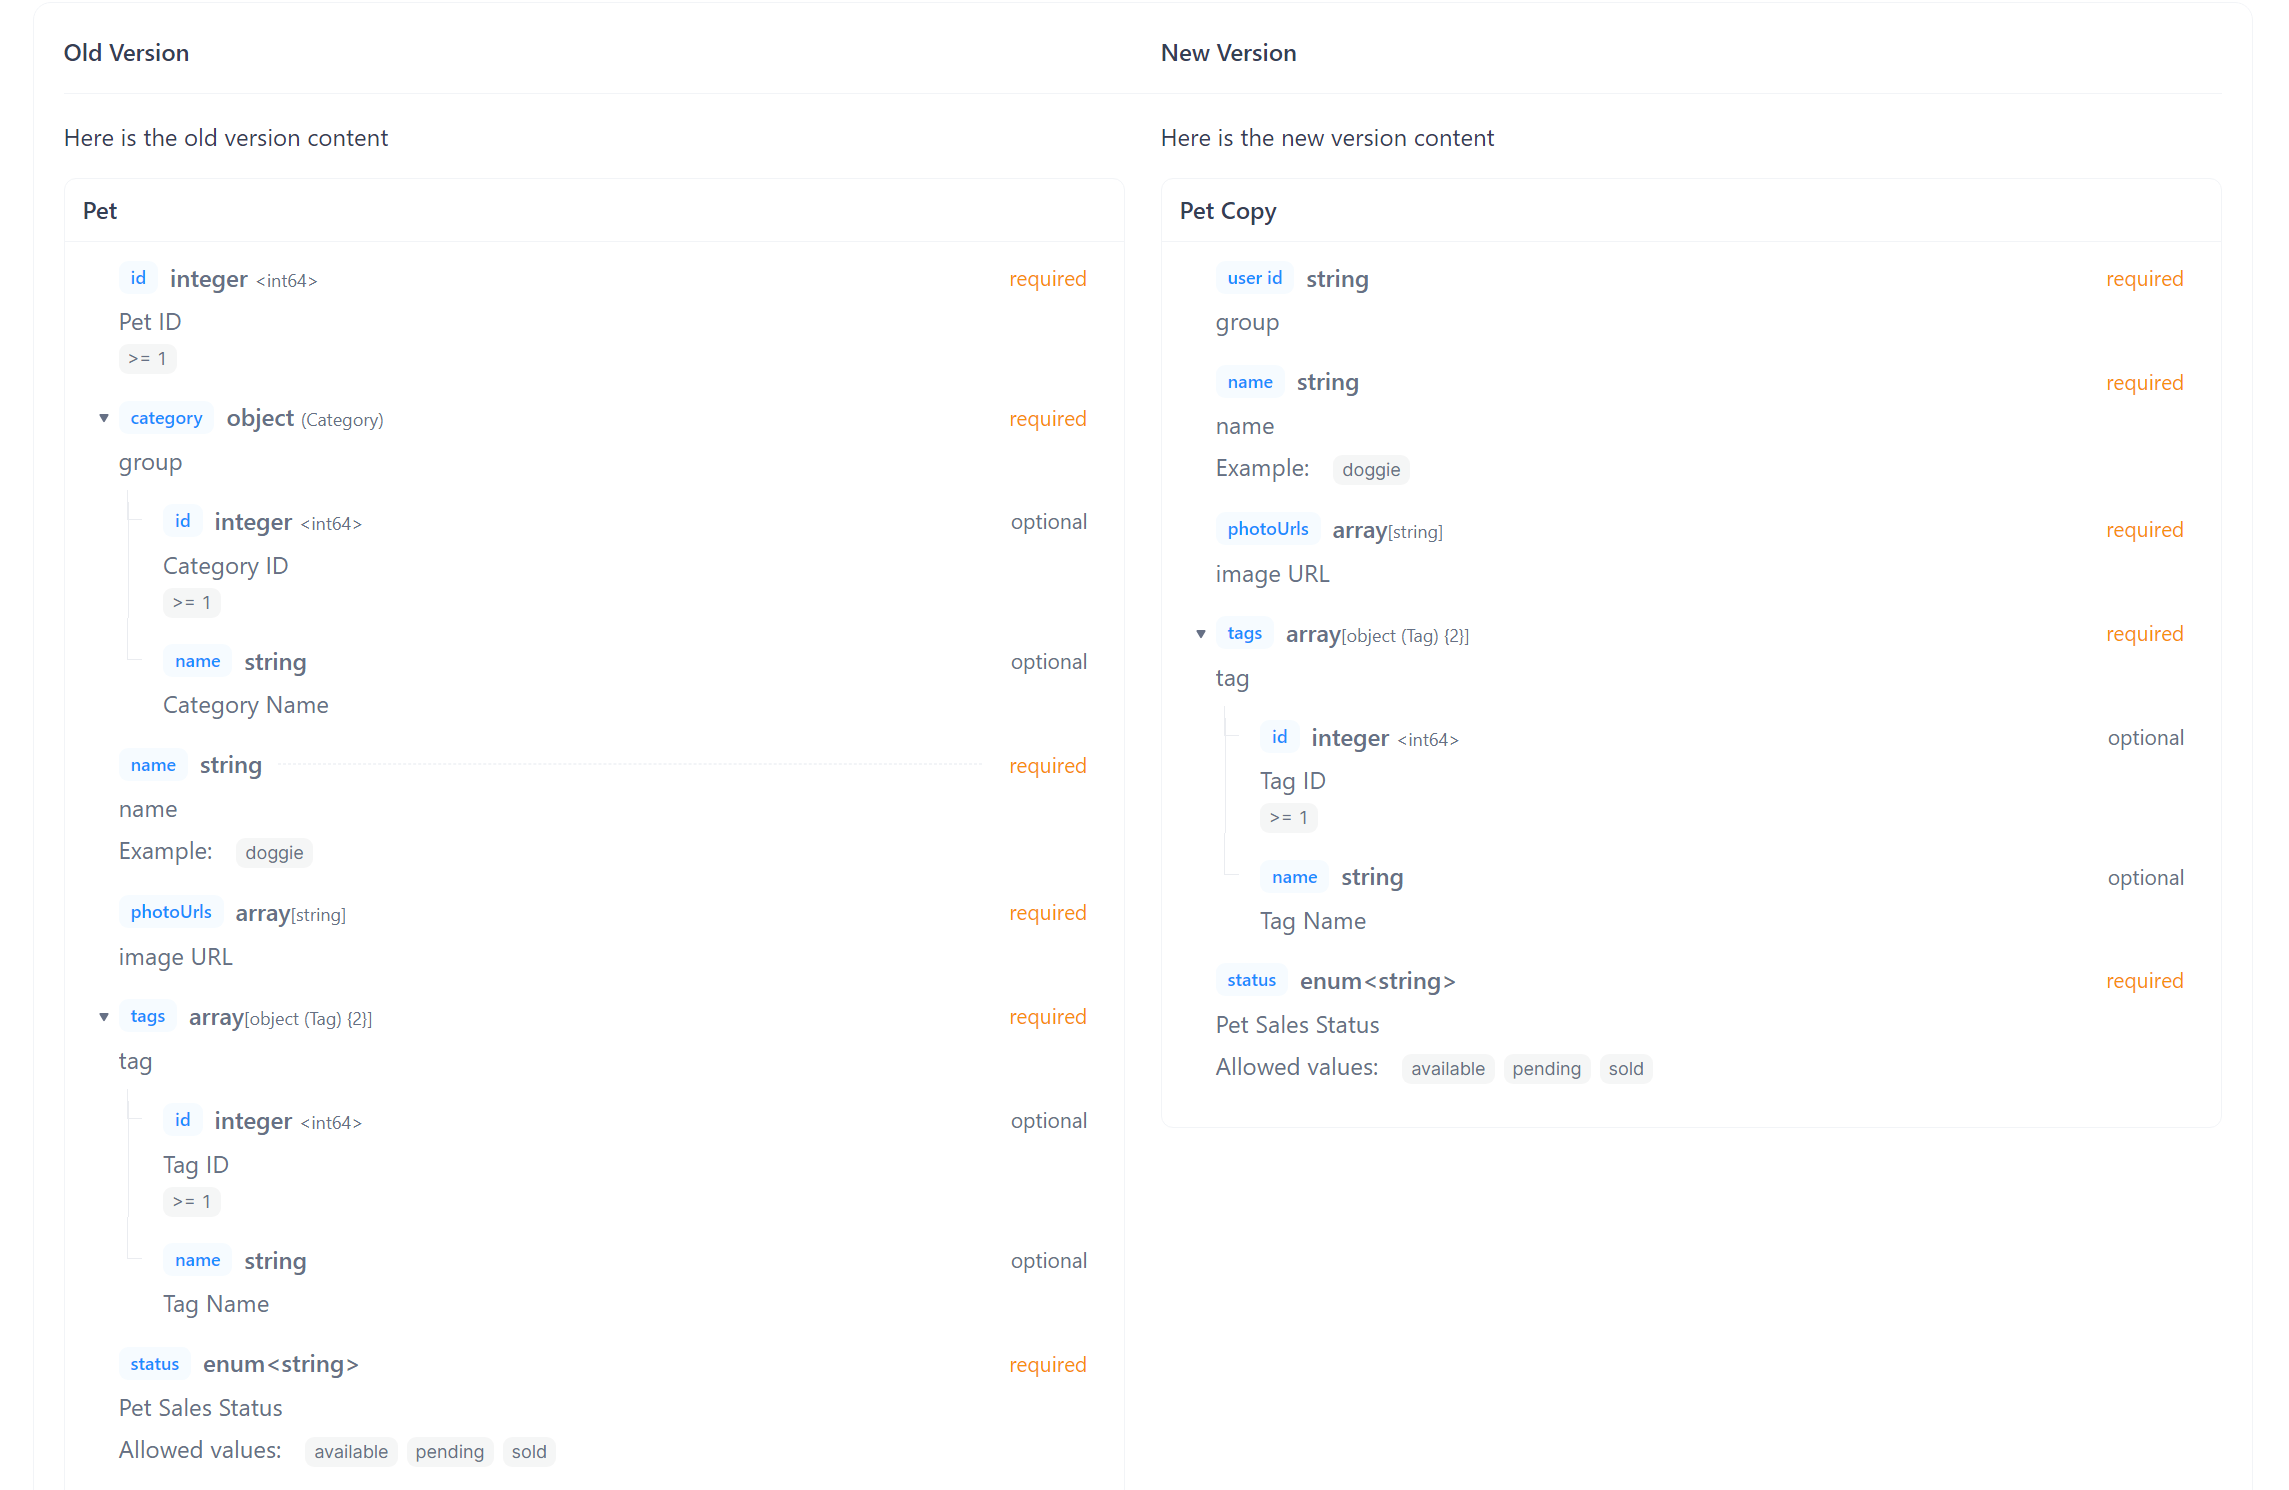
Here is how you set this up: In the Markdown document, select "Container", then "Multiple columns → 2 columns". You can fill each column with content, such as “Old Version” and “New Version” descriptions.
Markdown syntax Sample:
<Container>

    <Columns>
      <Column>
        **Old Version**
      </Column>
      <Column>
        **New Version**
      </Column>

    </Columns>

        ---

    <Columns>
      <Column>
        Here is the old version content
        <DataSchema id="4700681" />
      </Column>

      <Column>
        Here is the new version content
       <DataSchema id="8144258" />
      </Column>
    </Columns>
</Container>
💡 In the above Markdown, <DataSchema id="xxxxxx" /> refers to a schema in the project.
5. Use Step Component for Visual Guidance
For hands-on tutorials or feature guides, use the "Step" component in Apidog Markdown to break down complex processes into simple, easy-to-follow steps.
This guided design helps reduce user confusion and improves success rates, especially for new users or when explaining complex features.
The "Step" component automatically numbers each step and adds visual cues to make the process clear and engaging.
For example:
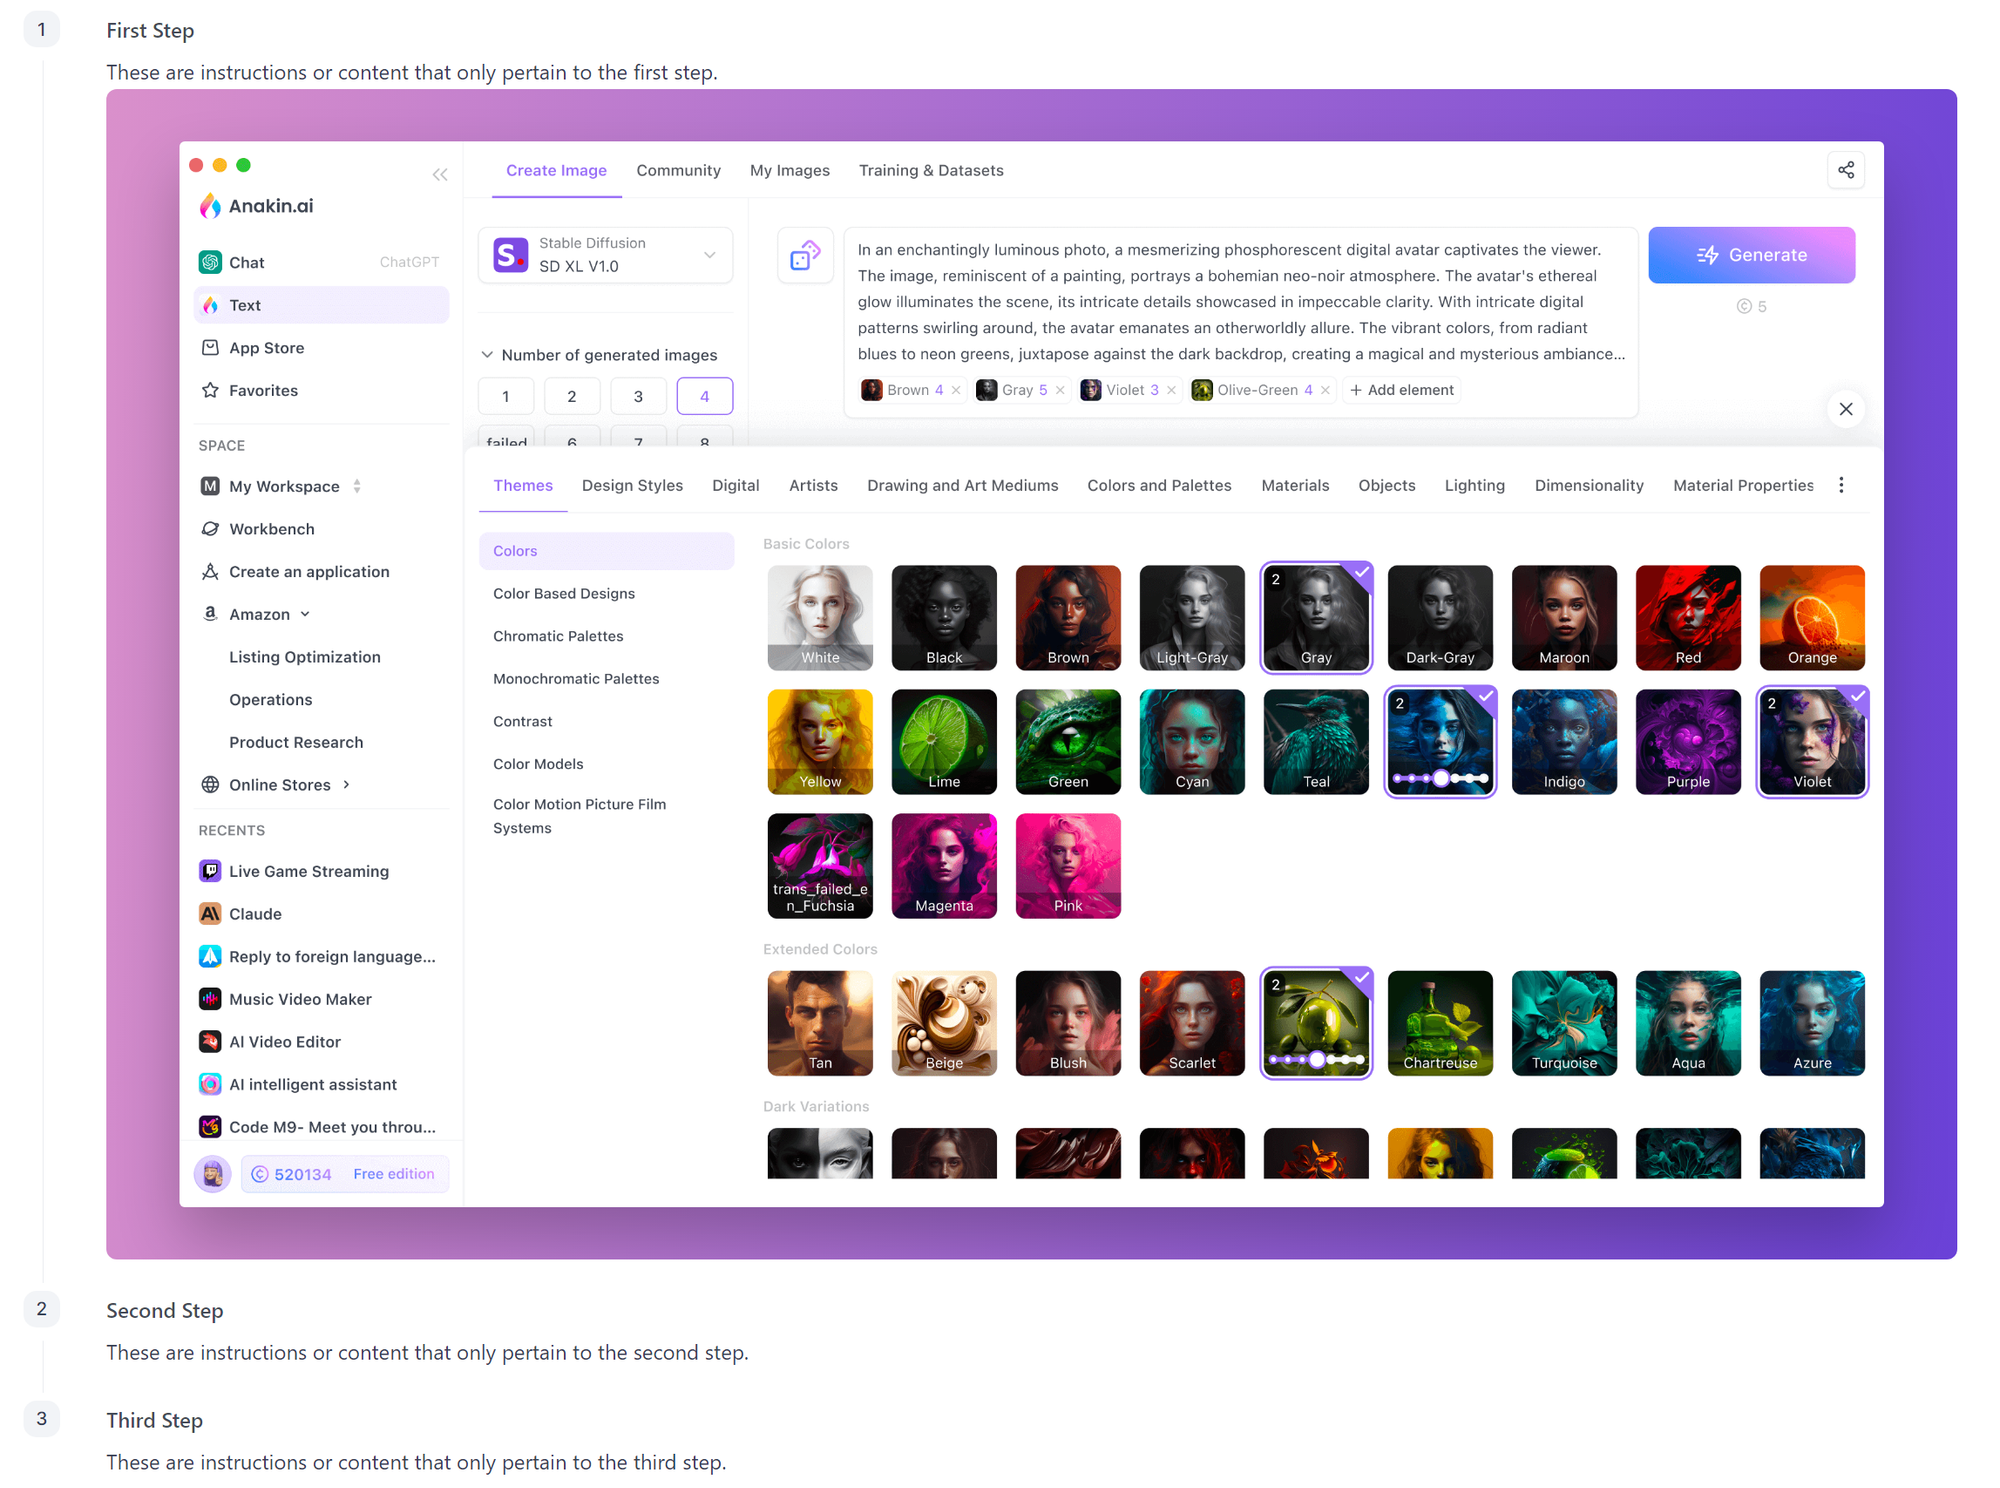
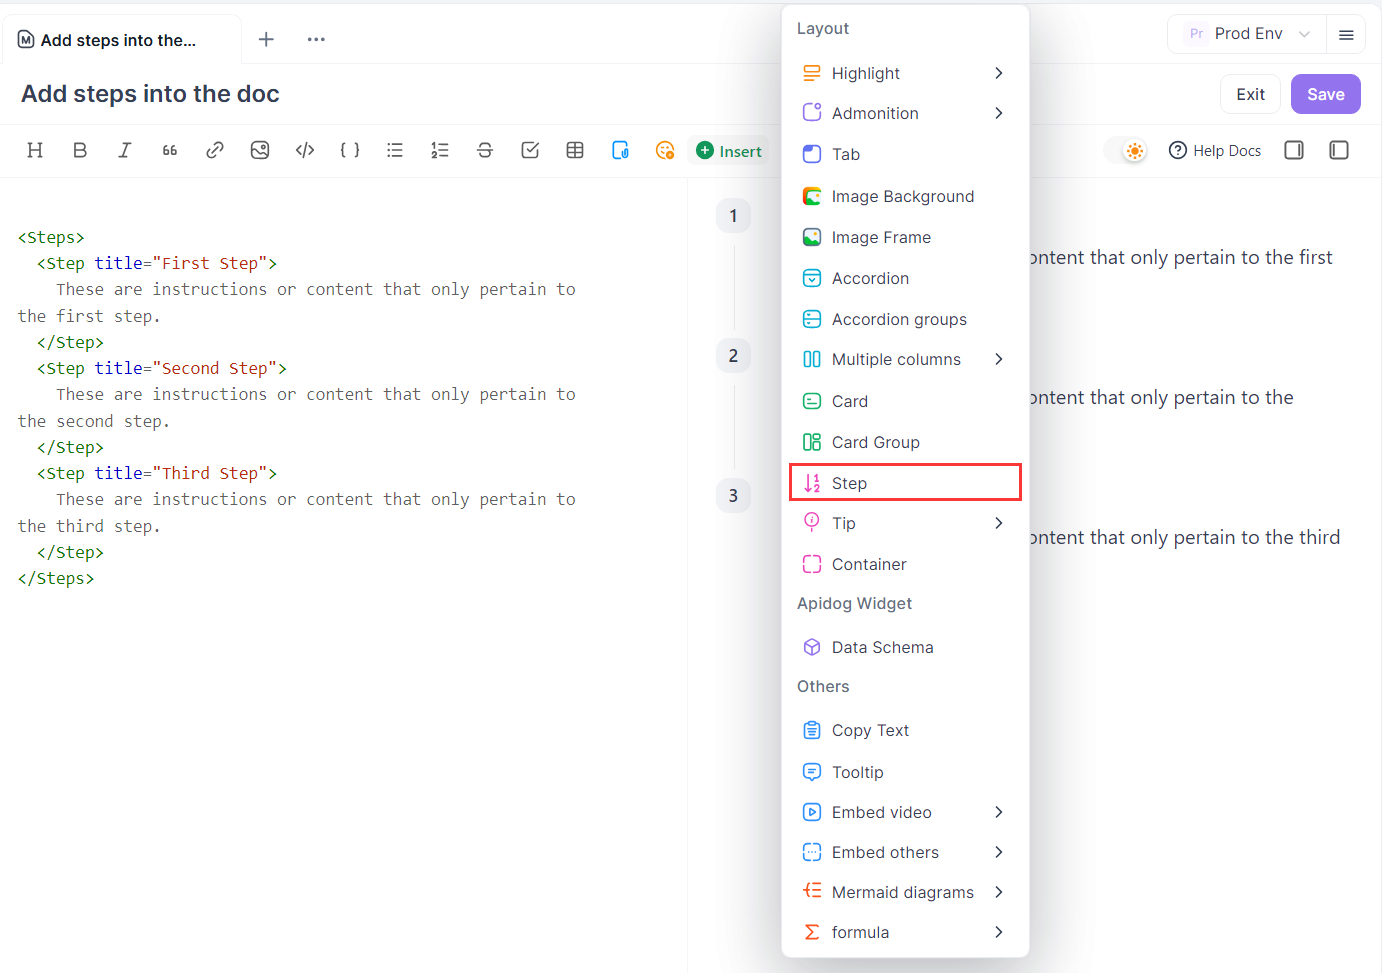
Here is how you set this up: In the Markdown document, select the "Step" component and enter detailed content for each step.
Markdown syntax Sample:
<Steps>
  <Step title="First Step">
    These are instructions or content that only pertain to the first step.
  </Step>
  <Step title="Second Step">
    These are instructions or content that only pertain to the second step.
  </Step>
  <Step title="Third Step">
    These are instructions or content that only pertain to the third step.
  </Step>
</Steps>
6. Enhance Image Display and Layout
In Apidog Markdown, inserting images is easy. You can upload images from your computer or paste them directly into the editor.
Image links can come from third-party CDNs, such as:
Both Markdown and HTML syntax are supported for inserting images, for example:

<img src="https://api.apidog.com/api/v1/projects/544525/resources/350490/image-preview" alt="Apidog"/>With HTML, you can add inline CSS styles, such as specifying width, height, and centering:
<img src="https://api.apidog.com/api/v1/projects/544525/resources/350490/image-preview" alt="Apidog" style="width: 400px;display: block; margin: 0 auto"/>

// or

<div style="text-align: center;">
  <img src="https://api.apidog.com/api/v1/projects/544525/resources/350490/image-preview" alt="Apidog" style="width: 400px;" />
</div>
In dark mode, if the image has transparency, the background will default to white. To remove the white background, use inline CSS:
<img src="https://api.apidog.com/api/v1/projects/544525/resources/350490/image-preview" alt="Apidog" style="background-color: transparent;"/>To make the image presentation more professional and beautiful, you can add a background to the image:
<Background>

</Background>Or add a frame and caption to the image:
<Frame caption="Appearance Preferences">
</Frame>7. Use Tables to Clearly Display Structured Information
Tables are the best way to present structured data. Apidog Markdown supports standard Markdown table syntax and allows HTML styles to make tables more professional and beautiful.
Basic table:
| Feature | Status | Description |
| --- | --- | --- |
| User Auth | ✅ Done | Supports multiple login methods |
| Data Sync | ⚠️ In Progress | Expected next week |
| Report Export | ❌ Not Started | Planned for Q3 |
Adjust column width: Use HTML inline styles to control column width and avoid messy layouts.
| <div style="width: 100px;">Feature</div> | <div style="width: 100px;">Status</div> | <div style="width: 200px;">Descriptions</div> |
| --- | --- | --- |
| User Auth | ✅ Done | Supports multiple login methods |
| Data Sync | ⚠️ In Progress | Expected next week |
| Report Export | ❌ Not Started | Planned for Q3 |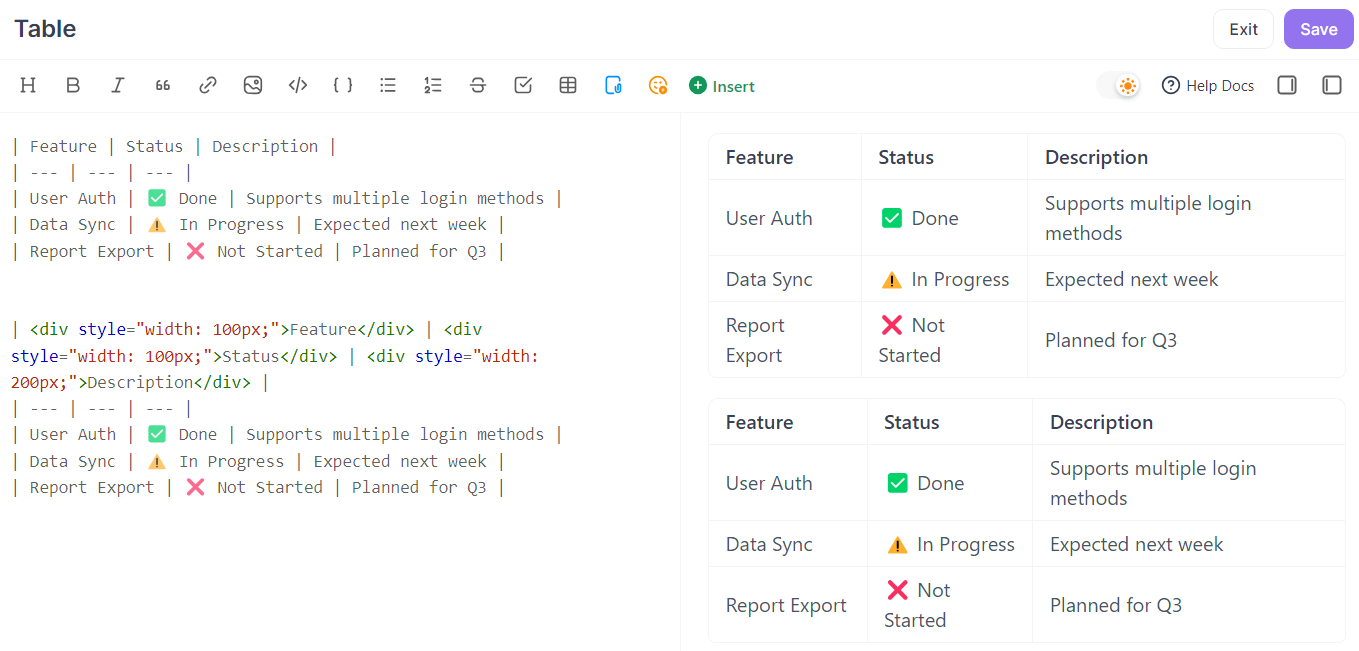
8. Use Accordion Blocks for FAQ
Accordion blocks are ideal for organizing FAQs or non-essential details. This structure lets readers expand content as needed, keeping the page tidy and uncluttered.
Accordion blocks are especially suitable for FAQs, optional features, advanced configuration, troubleshooting, etc., allowing users to quickly access key info without losing detail.
Basic usage:
`<Accordion title="How to reset password?"> 1. Click “Forgot Password” on the login page 2. Enter your registered email address 3. Click “Send Reset Email” 4. Click the reset link in the email and set a new password </Accordion>Set default state (collapsed):
<Accordion title="Advanced Settings (Optional)" defaultOpen={false}> This section covers advanced but non-essential options for users with special needs. - Custom request headers - Proxy server settings - Performance optimization </Accordion>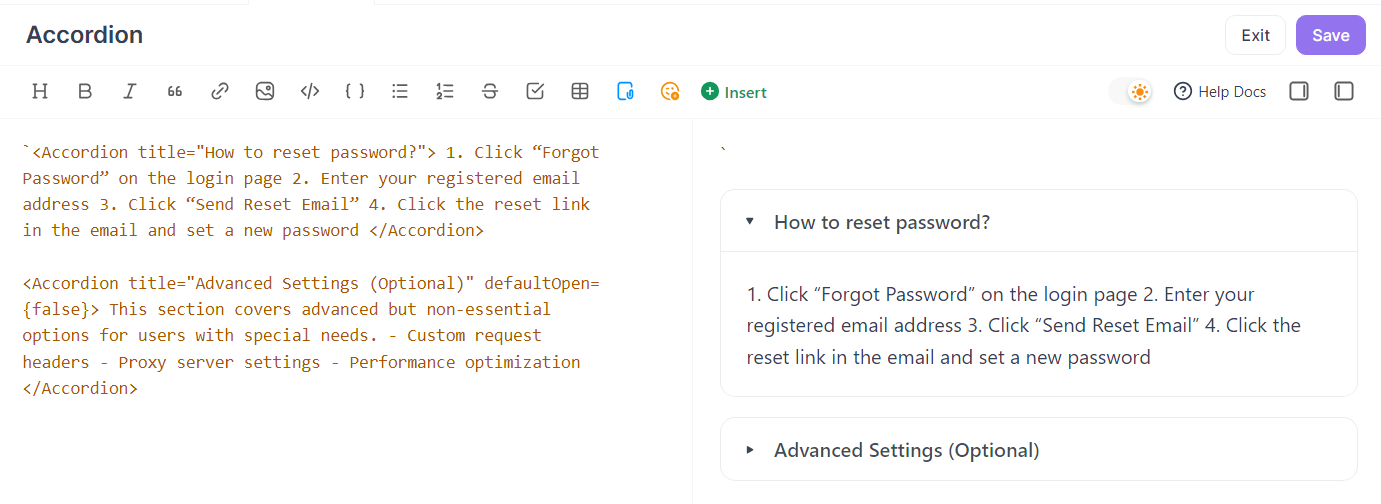
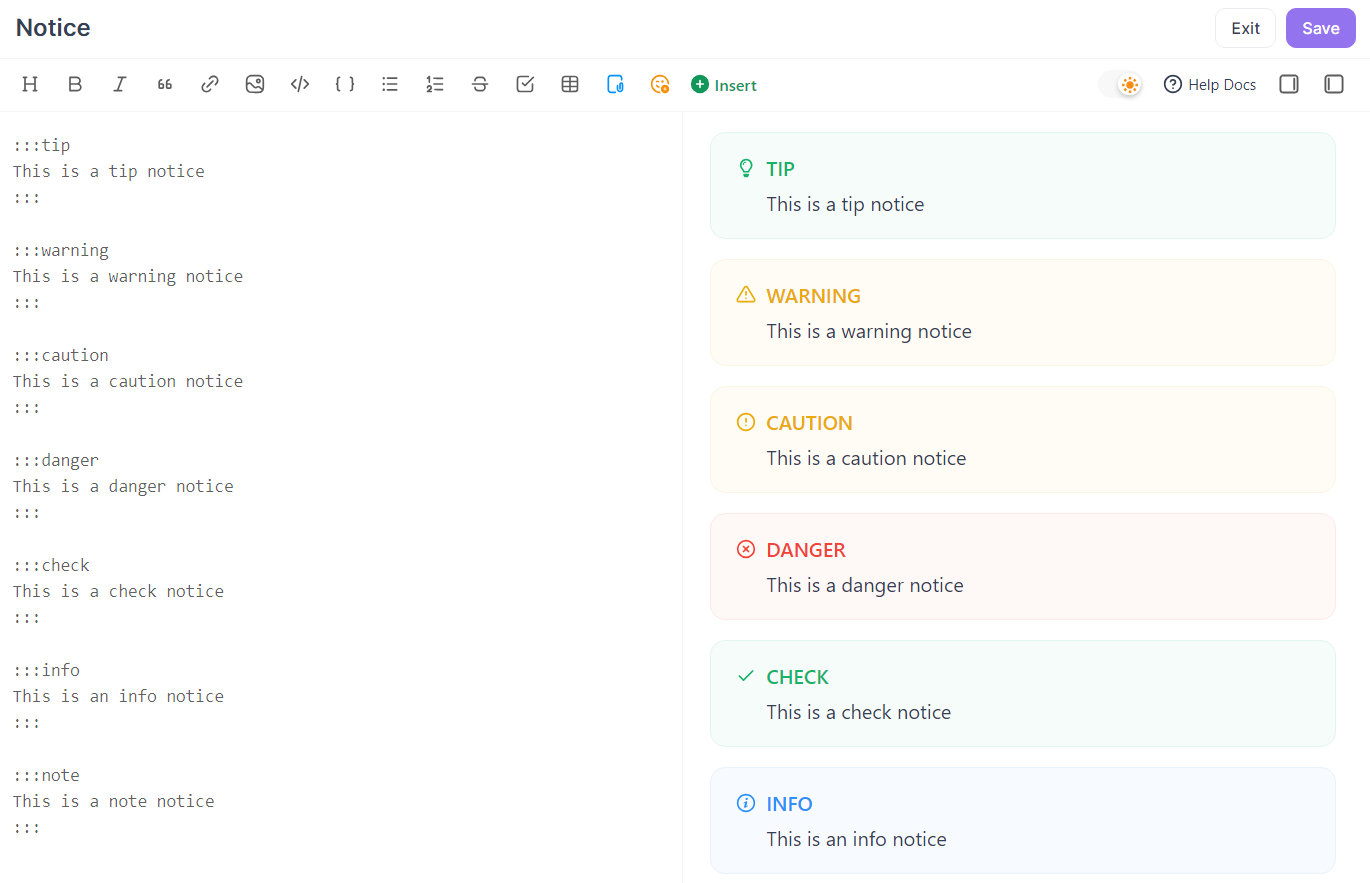
9. Use Notices to Highlight Important Information
Notices and highlight blocks are great for emphasizing important info such as notes, tips, or warnings, ensuring users don’t miss key content.
Notice:
:::tip
This is a tip notice
:::

:::warning
This is a warning notice
:::

:::caution
This is a caution notice
:::

:::danger
This is a danger notice
:::

:::check
This is a check notice
:::

:::info
This is an info notice
:::

:::note
This is a note notice
:::
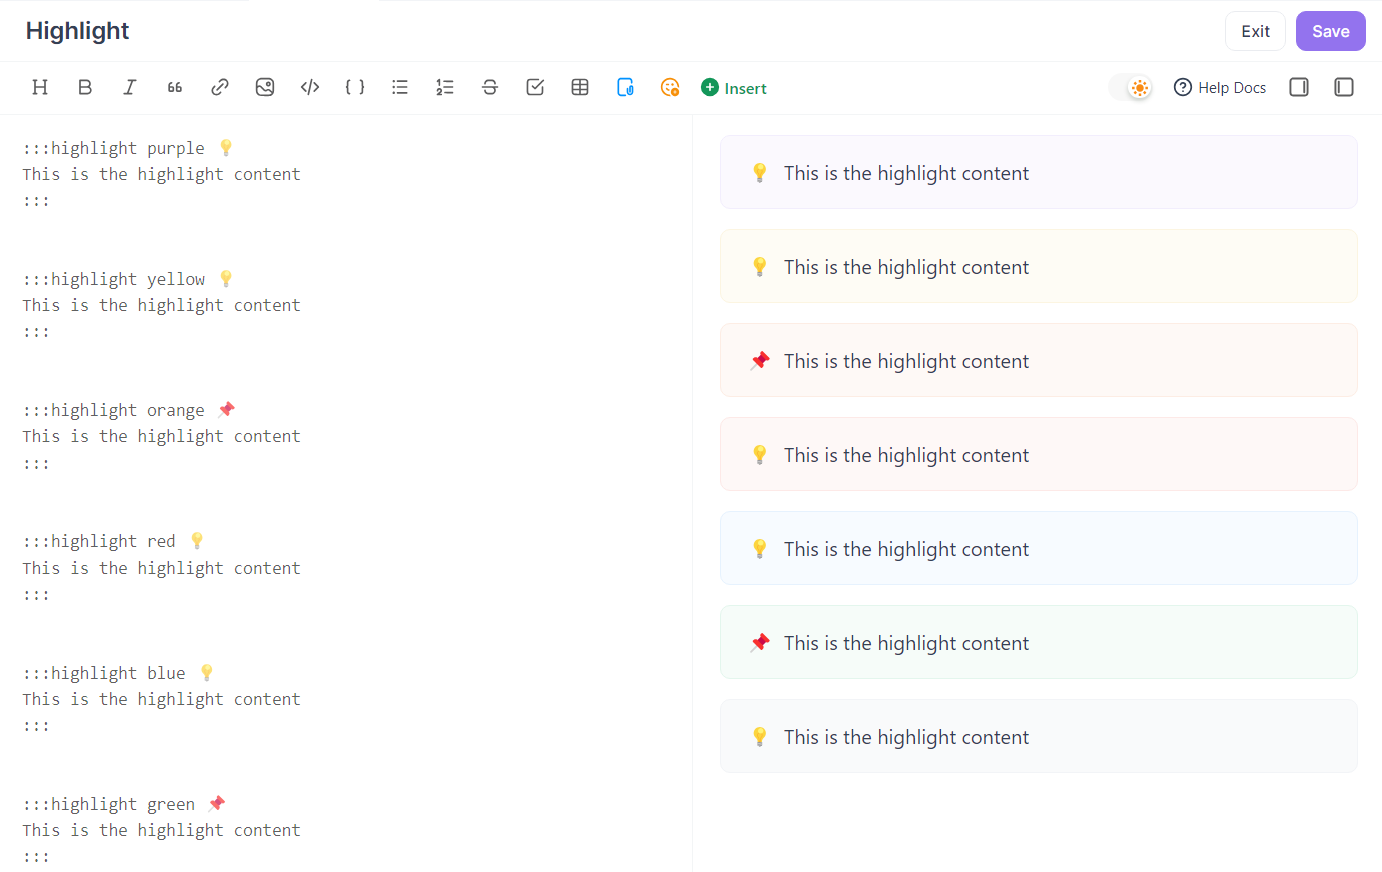
Highlight block:
:::highlight purple 💡
This is highlighted content
:::

:::highlight yellow 👋
This is highlighted content
:::

:::highlight orange 🚀
This is highlighted content
:::

:::highlight red 🌟
This is highlighted content
:::

:::highlight gray 🚀
This is highlighted content
:::

:::highlight blue 📌
This is highlighted content
:::

:::highlight green 🔑
This is highlighted content
:::
10. Add Hover and Copy Features to Terms
With the Tooltip component, you can show definitions when hovering over text.
<Tooltip tip="This is a tip!"> Hover here for a tip</Tooltip>With the CopyToClipboard component, you can copy text by clicking.
<CopyToClipboard >Click here to copy text</CopyToClipboard>Combine Tooltip and CopyToClipboard for "hover tip and copy":
<Tooltip tip="This is a tip, and you can copy!"><CopyToClipboard >Click here to copy text</CopyToClipboard></Tooltip>
Conclusion
By flexibly using these Apidog Markdown features, you can create documentation that is both professional and visually appealing. Good documentation reduces communication costs, improves development efficiency, and showcases your team’s professionalism and product quality. Excellent documentation is a key part of the product experience and is worth the investment. For more tips, check out the Apidog Markdown Documentation.