
Imagine sitting down at your desk with a vision for a app—but instead of wrestling with countless lines of code, you simply describe your idea. Today, that vision is closer than ever to reality with tools: Deepseek R1 and Roo Code. Deepseek R1 is an open-source AI that tackles everything from complex math problems to intricate programming challenges with a level of reasoning that rivals the best in the industry, all while being remarkably cost-efficient. On the other hand, Roo Code integrates seamlessly with Visual Studio Code to become your personal coding companion, streamlining your workflow by generating, debugging, and refining code on the fly.
What Is Deepseek R1?
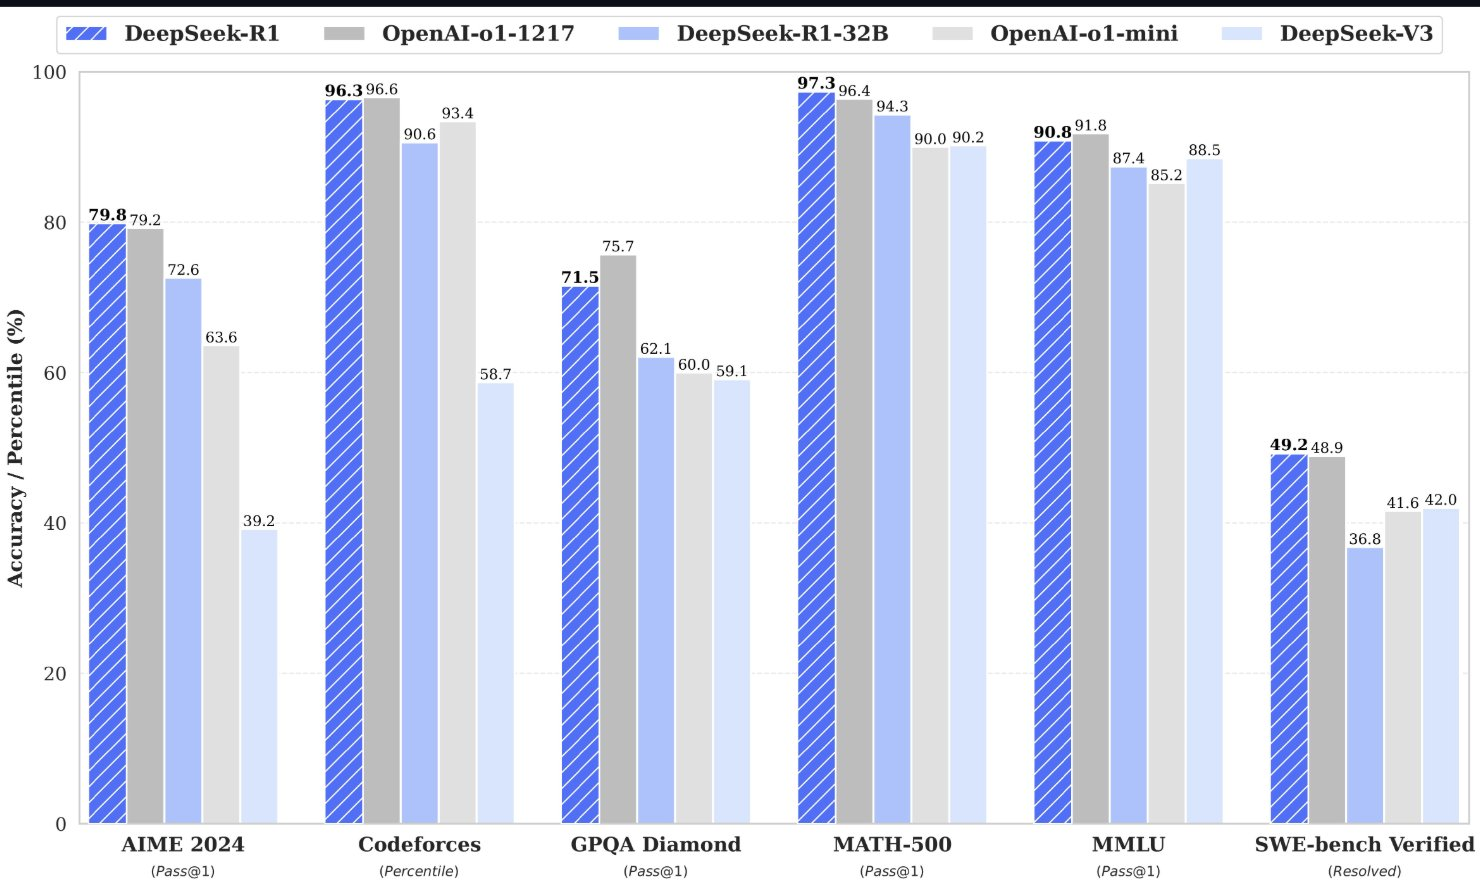
Deepseek R1 is an advanced AI model developed by the innovative Chinese startup DeepSeek. Founded in 2023 by Liang Wenfeng, DeepSeek has quickly risen to prominence by delivering models that rival, and sometimes even surpass, their American counterparts—all at a fraction of the cost. Deepseek R1 is especially notable for its “chain-of-thought” reasoning capabilities. This means that rather than simply spitting out answers, Deepseek R1 takes the time to work through problems step by step, offering transparent insights into its thought process.

Key Features of Deepseek R1
- Advanced Reasoning: Deepseek R1 can handle complex problems—whether it’s solving intricate mathematical equations or debugging multifaceted code logic. Its ability to “think out loud” sets it apart from many traditional coding assistants.
- Cost Efficiency: One of the standout claims from DeepSeek is that Deepseek R1 required a fraction of the computing power (and cost) compared to leading models in the industry. This makes it accessible not only for large corporations but also for individual developers and startups.
- Open-Source Nature: Deepseek R1 is open source, meaning its code is available for everyone to review, modify, and improve upon. This openness fosters a community of collaboration and innovation that benefits the entire tech ecosystem.
- Versatility: Although it excels at reasoning, Deepseek R1 is also a robust tool for a wide range of coding tasks—from generating boilerplate code to suggesting complex application architectures.
First, Deepseek R1 changes the game by automating tasks that once required intense human involvement. Next, its ability to produce readable and well-structured code through reasoning makes it an invaluable assistant for developers. Meanwhile, its open-source model ensures that improvements and adaptations can be made rapidly by the community.
Introducing Roo Code: The AI Coding Agent
Now that we have a good grasp on Deepseek R1, let’s talk about its perfect partner: Roo Code. Roo Code is designed to serve as an AI coding agent that leverages the power of Deepseek R1 to generate full-stack applications without writing any code manually.

What Does Roo Code Do?
Roo Code acts as an intelligent bridge between your app idea and a functioning product. It takes high-level requirements and, by harnessing the reasoning and code generation abilities of Deepseek R1, produces everything from frontend user interfaces to backend server code—all with minimal human oversight.
- Visual Development: Roo Code offers a graphical user interface that lets you design your application layout, specify features, and even set business logic without touching a keyboard.
- Code Generation: Once you define your app’s structure, Roo Code works with Deepseek R1 to generate the necessary code. This means it can create REST APIs, database queries, authentication modules, and even integrate third-party services.
- Rapid Prototyping: Because the heavy lifting is done by the AI, you can quickly iterate on your ideas and see working prototypes in minutes rather than days or weeks.
- No-Code to Low-Code Transition: Roo Code is perfect for both non-developers who want to see their ideas come to life and seasoned developers looking to save time on repetitive coding tasks.
First, Roo Code simplifies the development process by abstracting away the complexity of writing code manually. Next, it allows you to focus on design and functionality rather than getting bogged down in syntax and debugging. Meanwhile, by integrating with Deepseek R1, Roo Code ensures that the generated code is efficient, logical, and adheres to best practices.
Step-by-Step Tutorial: Installing Roo Code in VS Code & Getting Your Deepseek R1 API Key
Step 1: Download and Install VS Code
First, navigate to the Visual Studio Code website and download the version that matches your operating system (Windows, macOS, or Linux). The download is quick, and the installation process is straightforward. Follow the on-screen instructions to complete the installation.
Next, launch VS Code once the installation is complete. Familiarize yourself with the interface: notice the Activity Bar (usually on the left), the Command Palette (invoked via Ctrl+Shift+P or Cmd+Shift+P on macOS), and the Extensions panel (accessed via the square icon).
Step 2: Install Roo Code
First, click on the Extensions icon in the Activity Bar on the left side of VS Code. In the search box at the top, type “Roo Code” (previously known as “Roo Cline”).
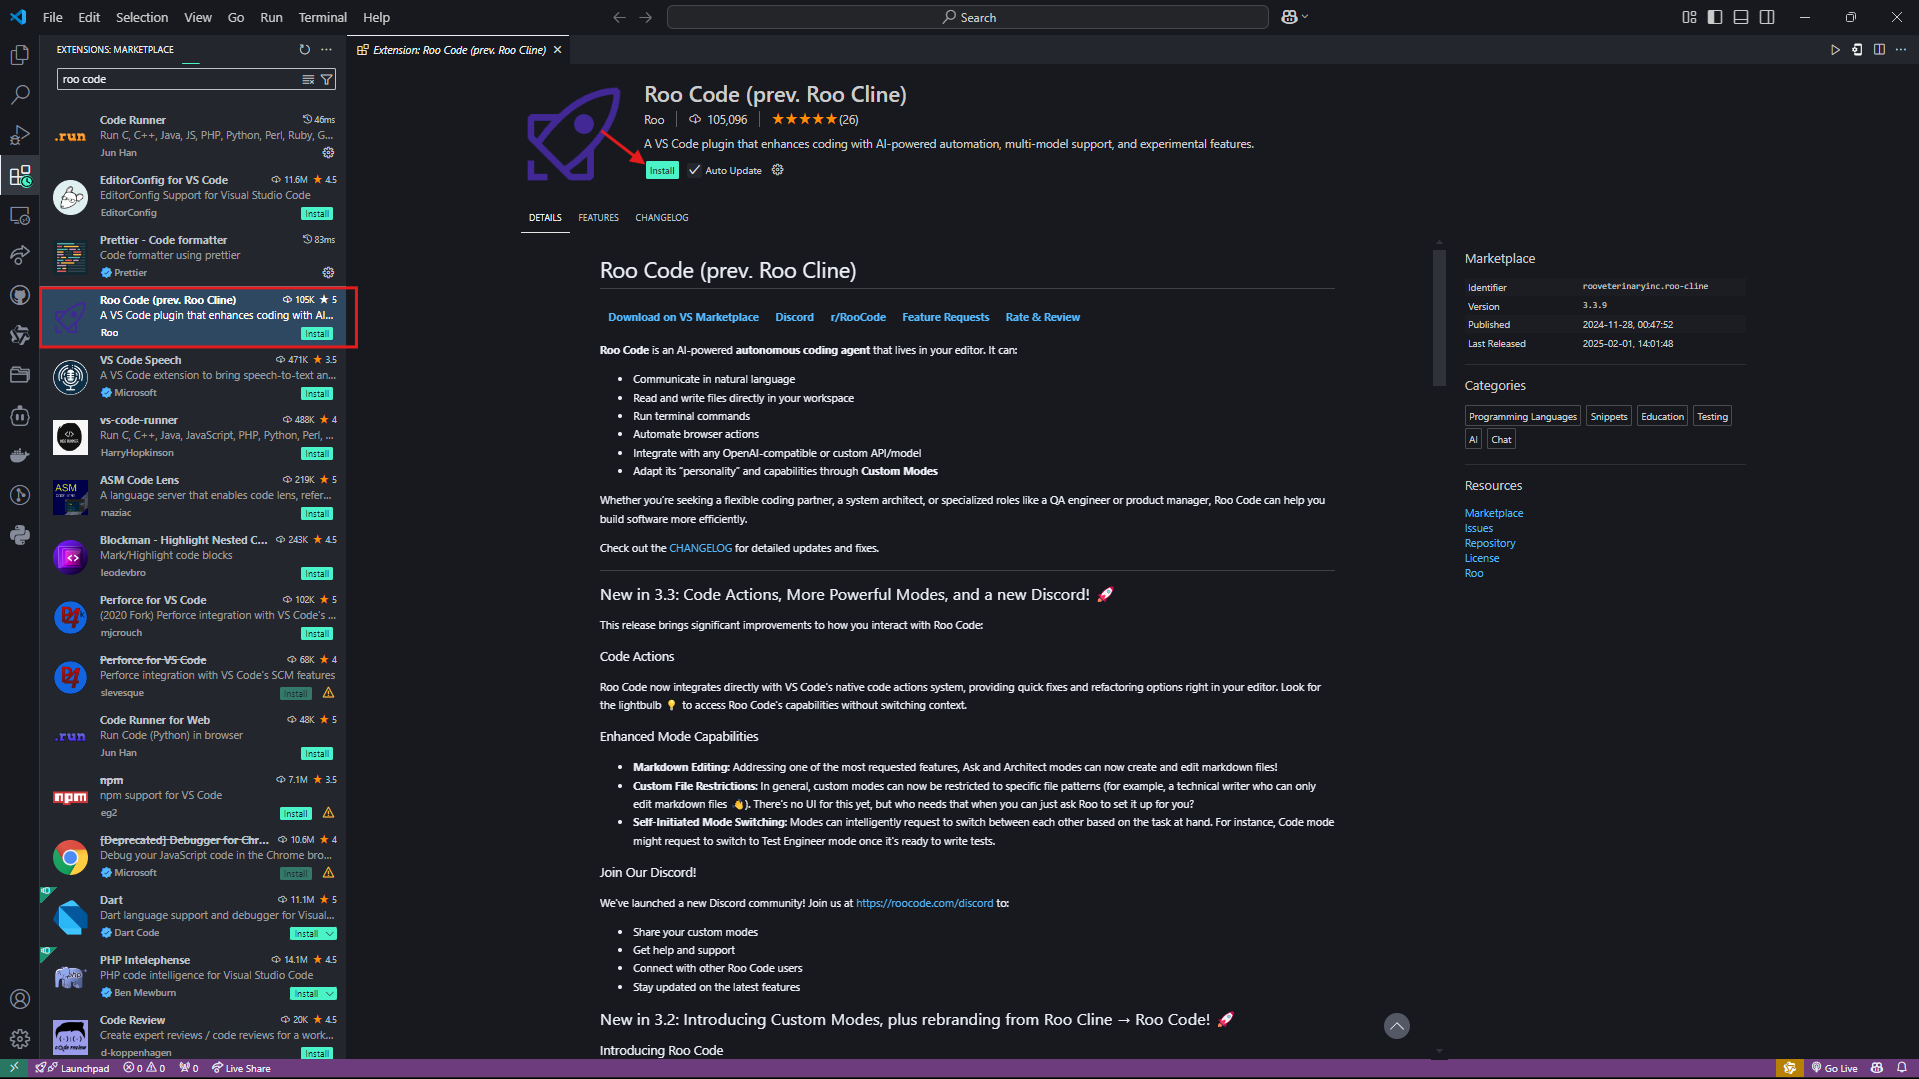
Next, from the search results, locate the Roo Code extension. As of the latest update, the extension shows installation counts and reviews—this is a good sign that it is well-supported by the community. Click the Install button. The installation should complete in seconds, and you’ll see a confirmation message in VS Code.
Tip: If you’d prefer to install via a downloaded VSIX file, visit the Visual Studio Marketplace page for Roo Code and follow the instructions to drag and drop the VSIX file into your editor.
Step 3: Obtaining Your Deepseek R1 API Key
Access to DeepSeek Platform, if you’re a new user, click on the “Sign Up” button and fill in your details to create an account. If you already have an account, simply sign in.
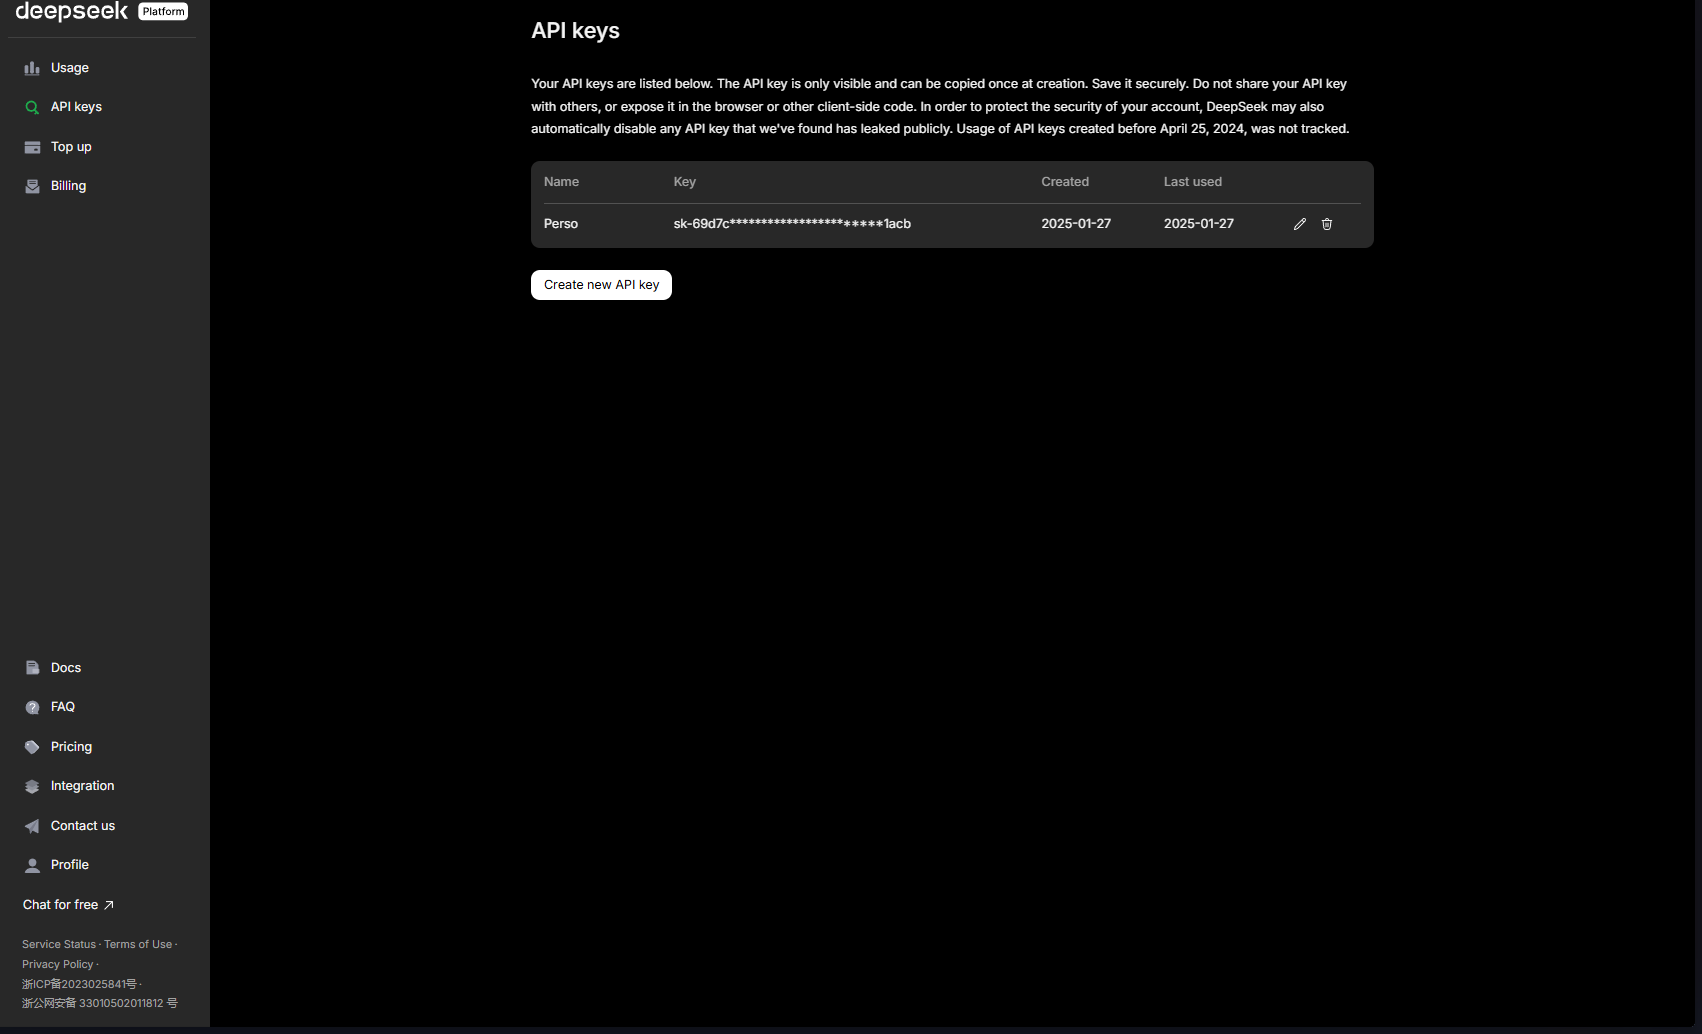
Once you’re signed in, look for the option to generate a new API key. This is usually found in your account dashboard or under the “API Keys” section. Click on “Generate API Key” and follow the prompts.
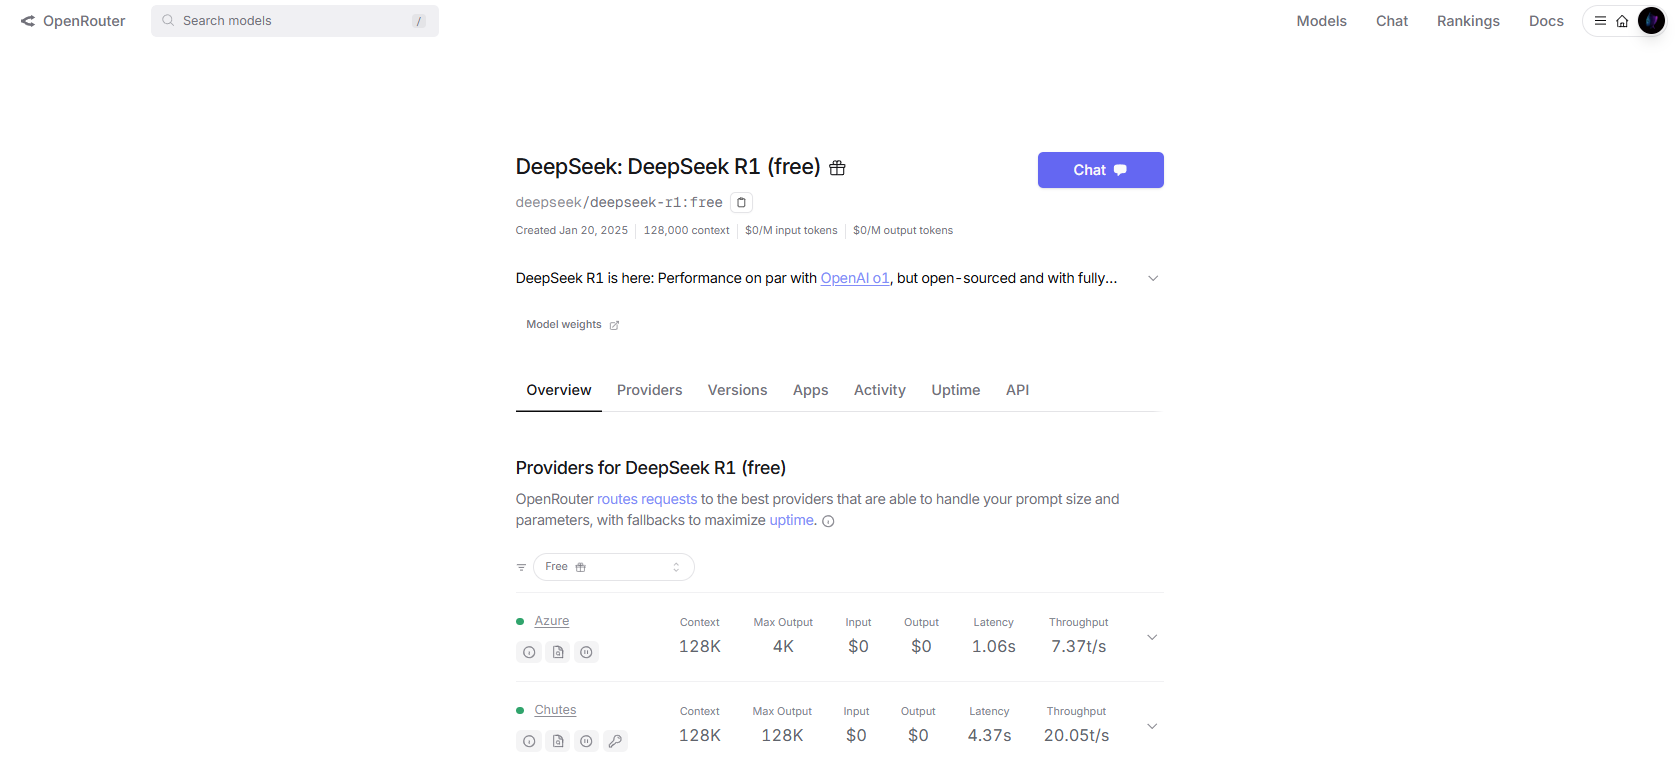
Note: Some platforms like OpenRouter now offer Deepseek R1 for free usage.
After you click to generate the key, a unique string will be created. Copy this key and store it securely; you’ll need it to configure Roo Code.
Step 4: Configuring Roo Code with the Deepseek R1 API Key
First, open the Roo Code panel
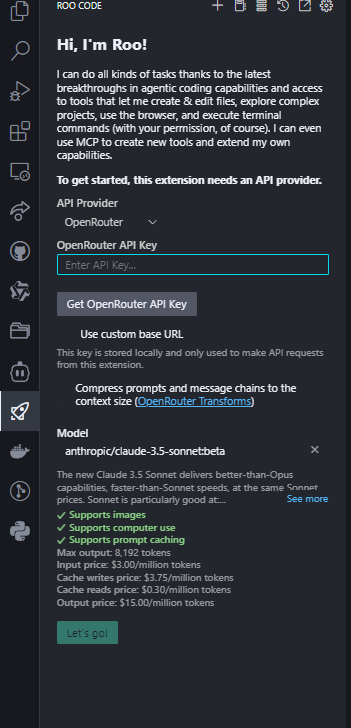
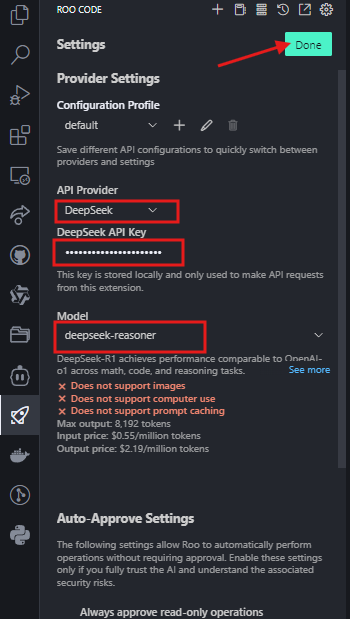
Next, within the Roo Code settings, locate the fields for configuring your API provider. You should see options to select an API provider(“Openrouter” if using their API ). In our case, select the option to use "Deepseek" as API provider.
Paste your copied Deepseek R1 API key into the provided field.
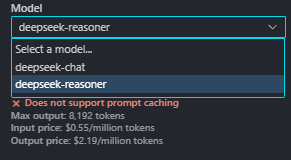
Then change the model to "deepseek-reasoner" to be able to use the R1 model with Roo Code
Once you have filled in the details, click “Done” or “Save” to update your configuration.
Roo Code vs. Cline: What’s Similar and What’s Different
Roo Code originated as Cline, and while many of the core functionalities remain, Roo Code has evolved significantly. Let’s compare the two:
Similarities
- Core AI-Powered Capabilities: Both Roo Code and Cline are designed to work as autonomous coding agents. They can read your files, write code, run terminal commands, and interact with your development environment in natural language.
- OpenAI Compatibility: Both tools are compatible with OpenAI-style APIs. This means if you’ve previously used Cline with services like Deepseek R1 or even OpenAI’s API, the integration model remains largely similar.
- Interactive Chat Interface: Both provide a chat interface directly in VS Code where you can type instructions and get code suggestions, error fixes, or architectural guidance.
Differences
- Enhanced Multi-Mode Support: Roo Code now comes with multiple modes (such as Code, Architect, and Ask), each tailored to different aspects of software development. This flexibility wasn’t as pronounced in Cline.
- Improved Customization: The rebranding to Roo Code has allowed for more extensive customization options. You can now create custom modes with tailored prompts, specify file restrictions, and even configure auto-approval for certain commands.
- Refined User Interface: While Cline provided a basic interface for code generation, Roo Code integrates more seamlessly with VS Code’s native features (like code actions and terminal integration). This leads to a more cohesive experience.
- Updated Integrations: Roo Code now offers better integrations with popular tools such as Apidog for API management, making it easier to design, test, and document your APIs alongside your code generation workflow.
- Performance and Stability Improvements: Roo Code has been optimized to handle more complex workflows with a better response time and fewer glitches compared to its predecessor.
Meanwhile, if you have experience with Cline, you’ll find that Roo Code maintains a similar logic flow but offers more control and efficiency—especially when working with models like Deepseek R1.
If you're interested in learning how to use the tool with Cline instead of Roo Code, please check out the detailed guide available at the link below:

Testing Your Setup
After completing the installation and configuration, it’s important to test the entire workflow to ensure everything is working as expected.
Step 1: Run a Sample Command in Roo Code
First, open the Roo Code chat panel and type a simple instruction, such as:
“Create a basic HTML template for a portfolio website.”
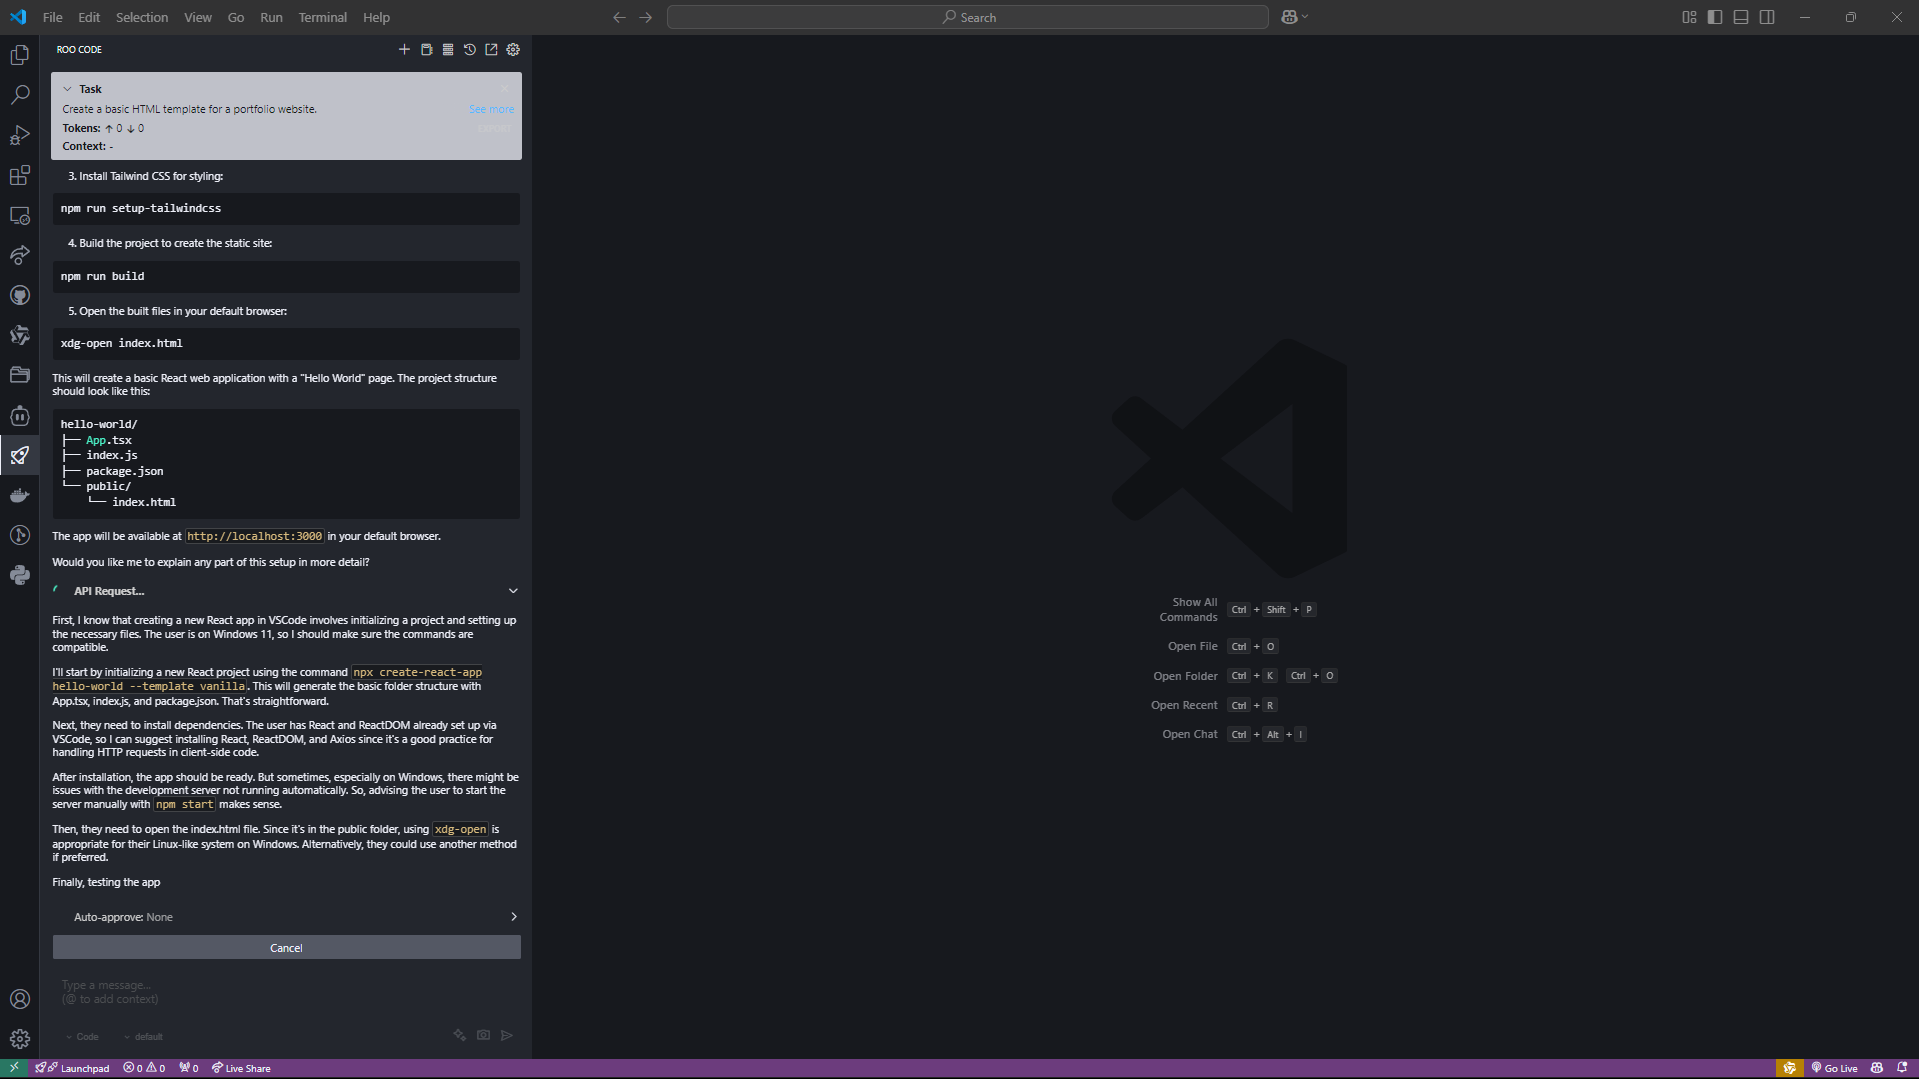
Roo Code should generate the code snippet in a new editor tab. This confirms that the Deepseek R1 API is being invoked correctly through Roo Code.
Step 2: Modify a File Using Roo Code Commands
Next, try asking Roo Code to make a small change to an existing file in your project. For example:
“Update the title of index.html to ‘My Awesome Portfolio’.”
Check your file to ensure that the changes have been applied. This step confirms that Roo Code can read, write, and update files in your workspace.

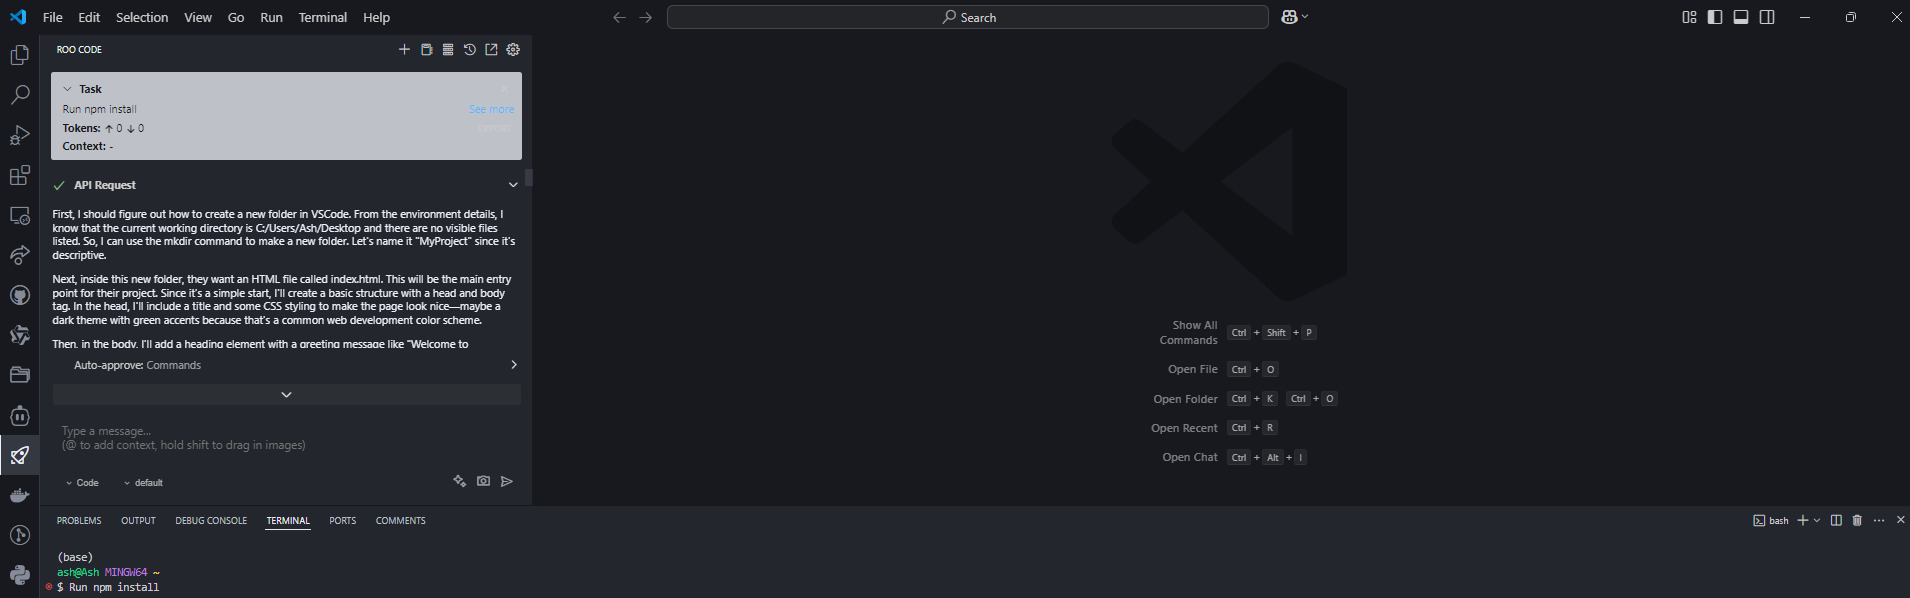
Step 3: Run a Terminal Command via Roo Code
Finally, instruct Roo Code to execute a terminal command. For example:
“Run npm install” (if your project uses Node.js).
Observe the terminal output to verify that the command runs successfully. If you see the expected output, your terminal integration is working as intended.
The Synergy of Deepseek R1, Roo Code, and Apidog
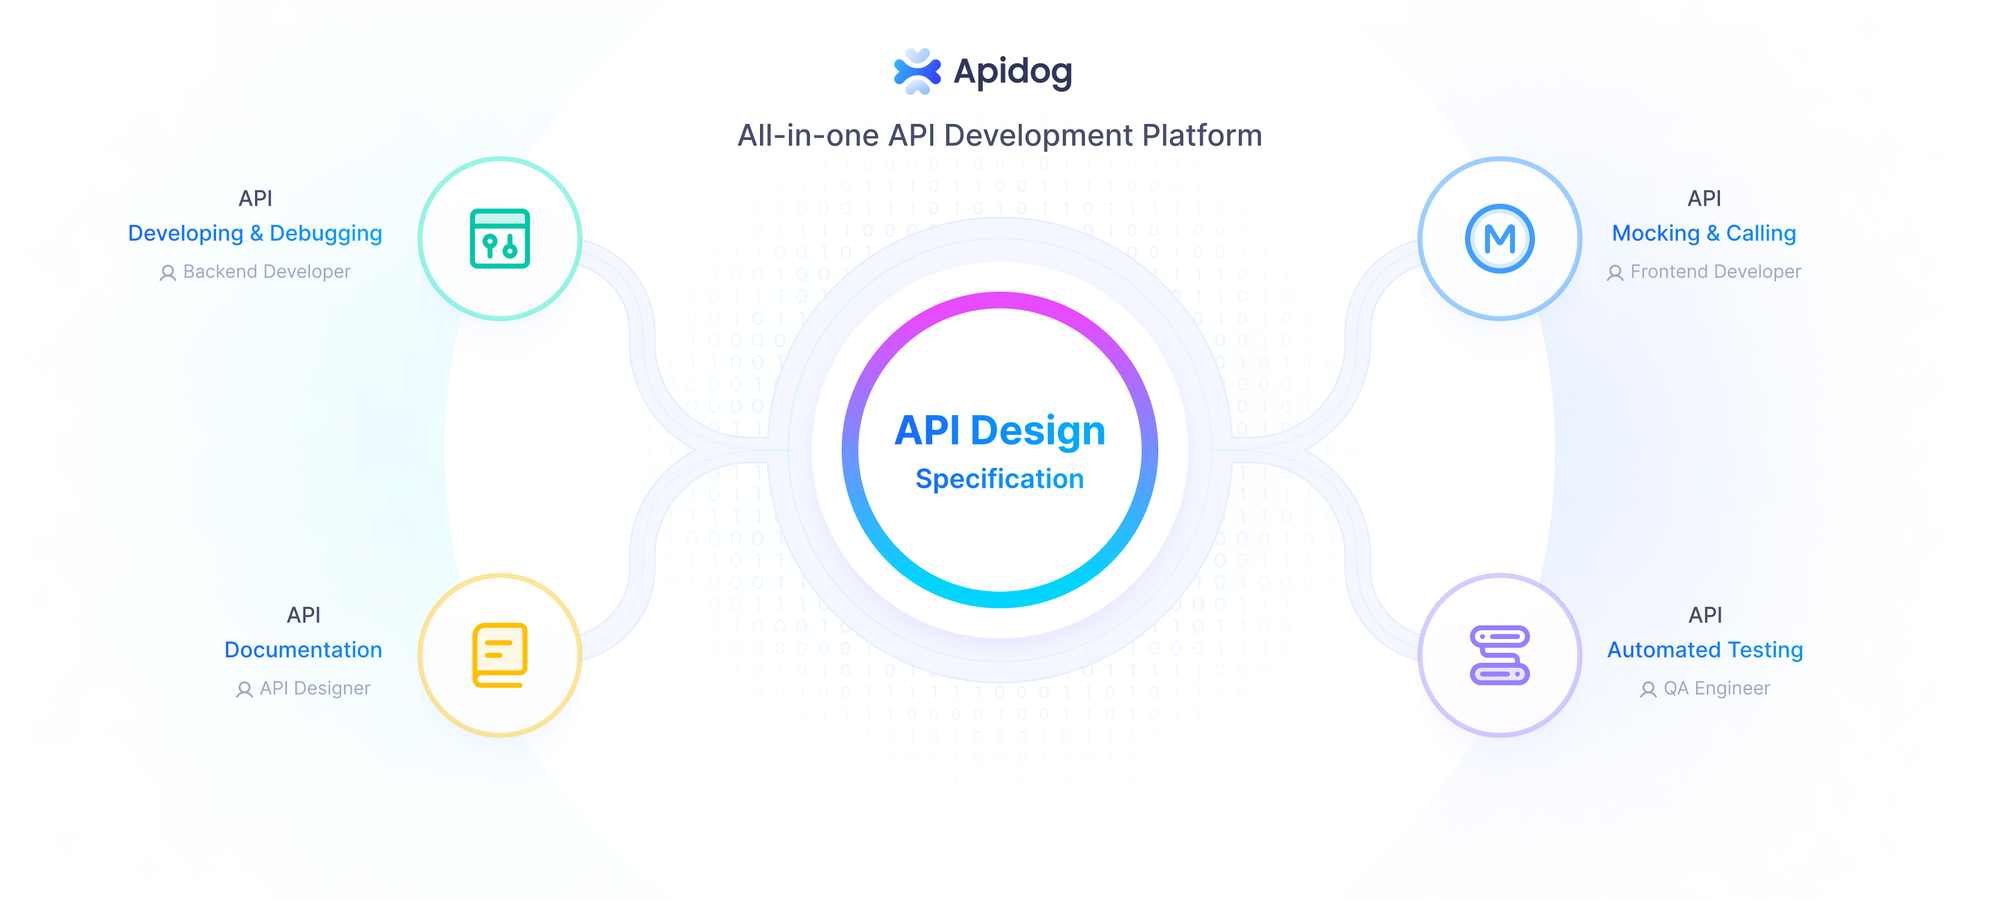
It’s important to note that while Deepseek R1 and Roo Code are transformative on their own, their potential is multiplied when combined with a powerful API development platform like Apidog.
Why Download Apidog for Free?
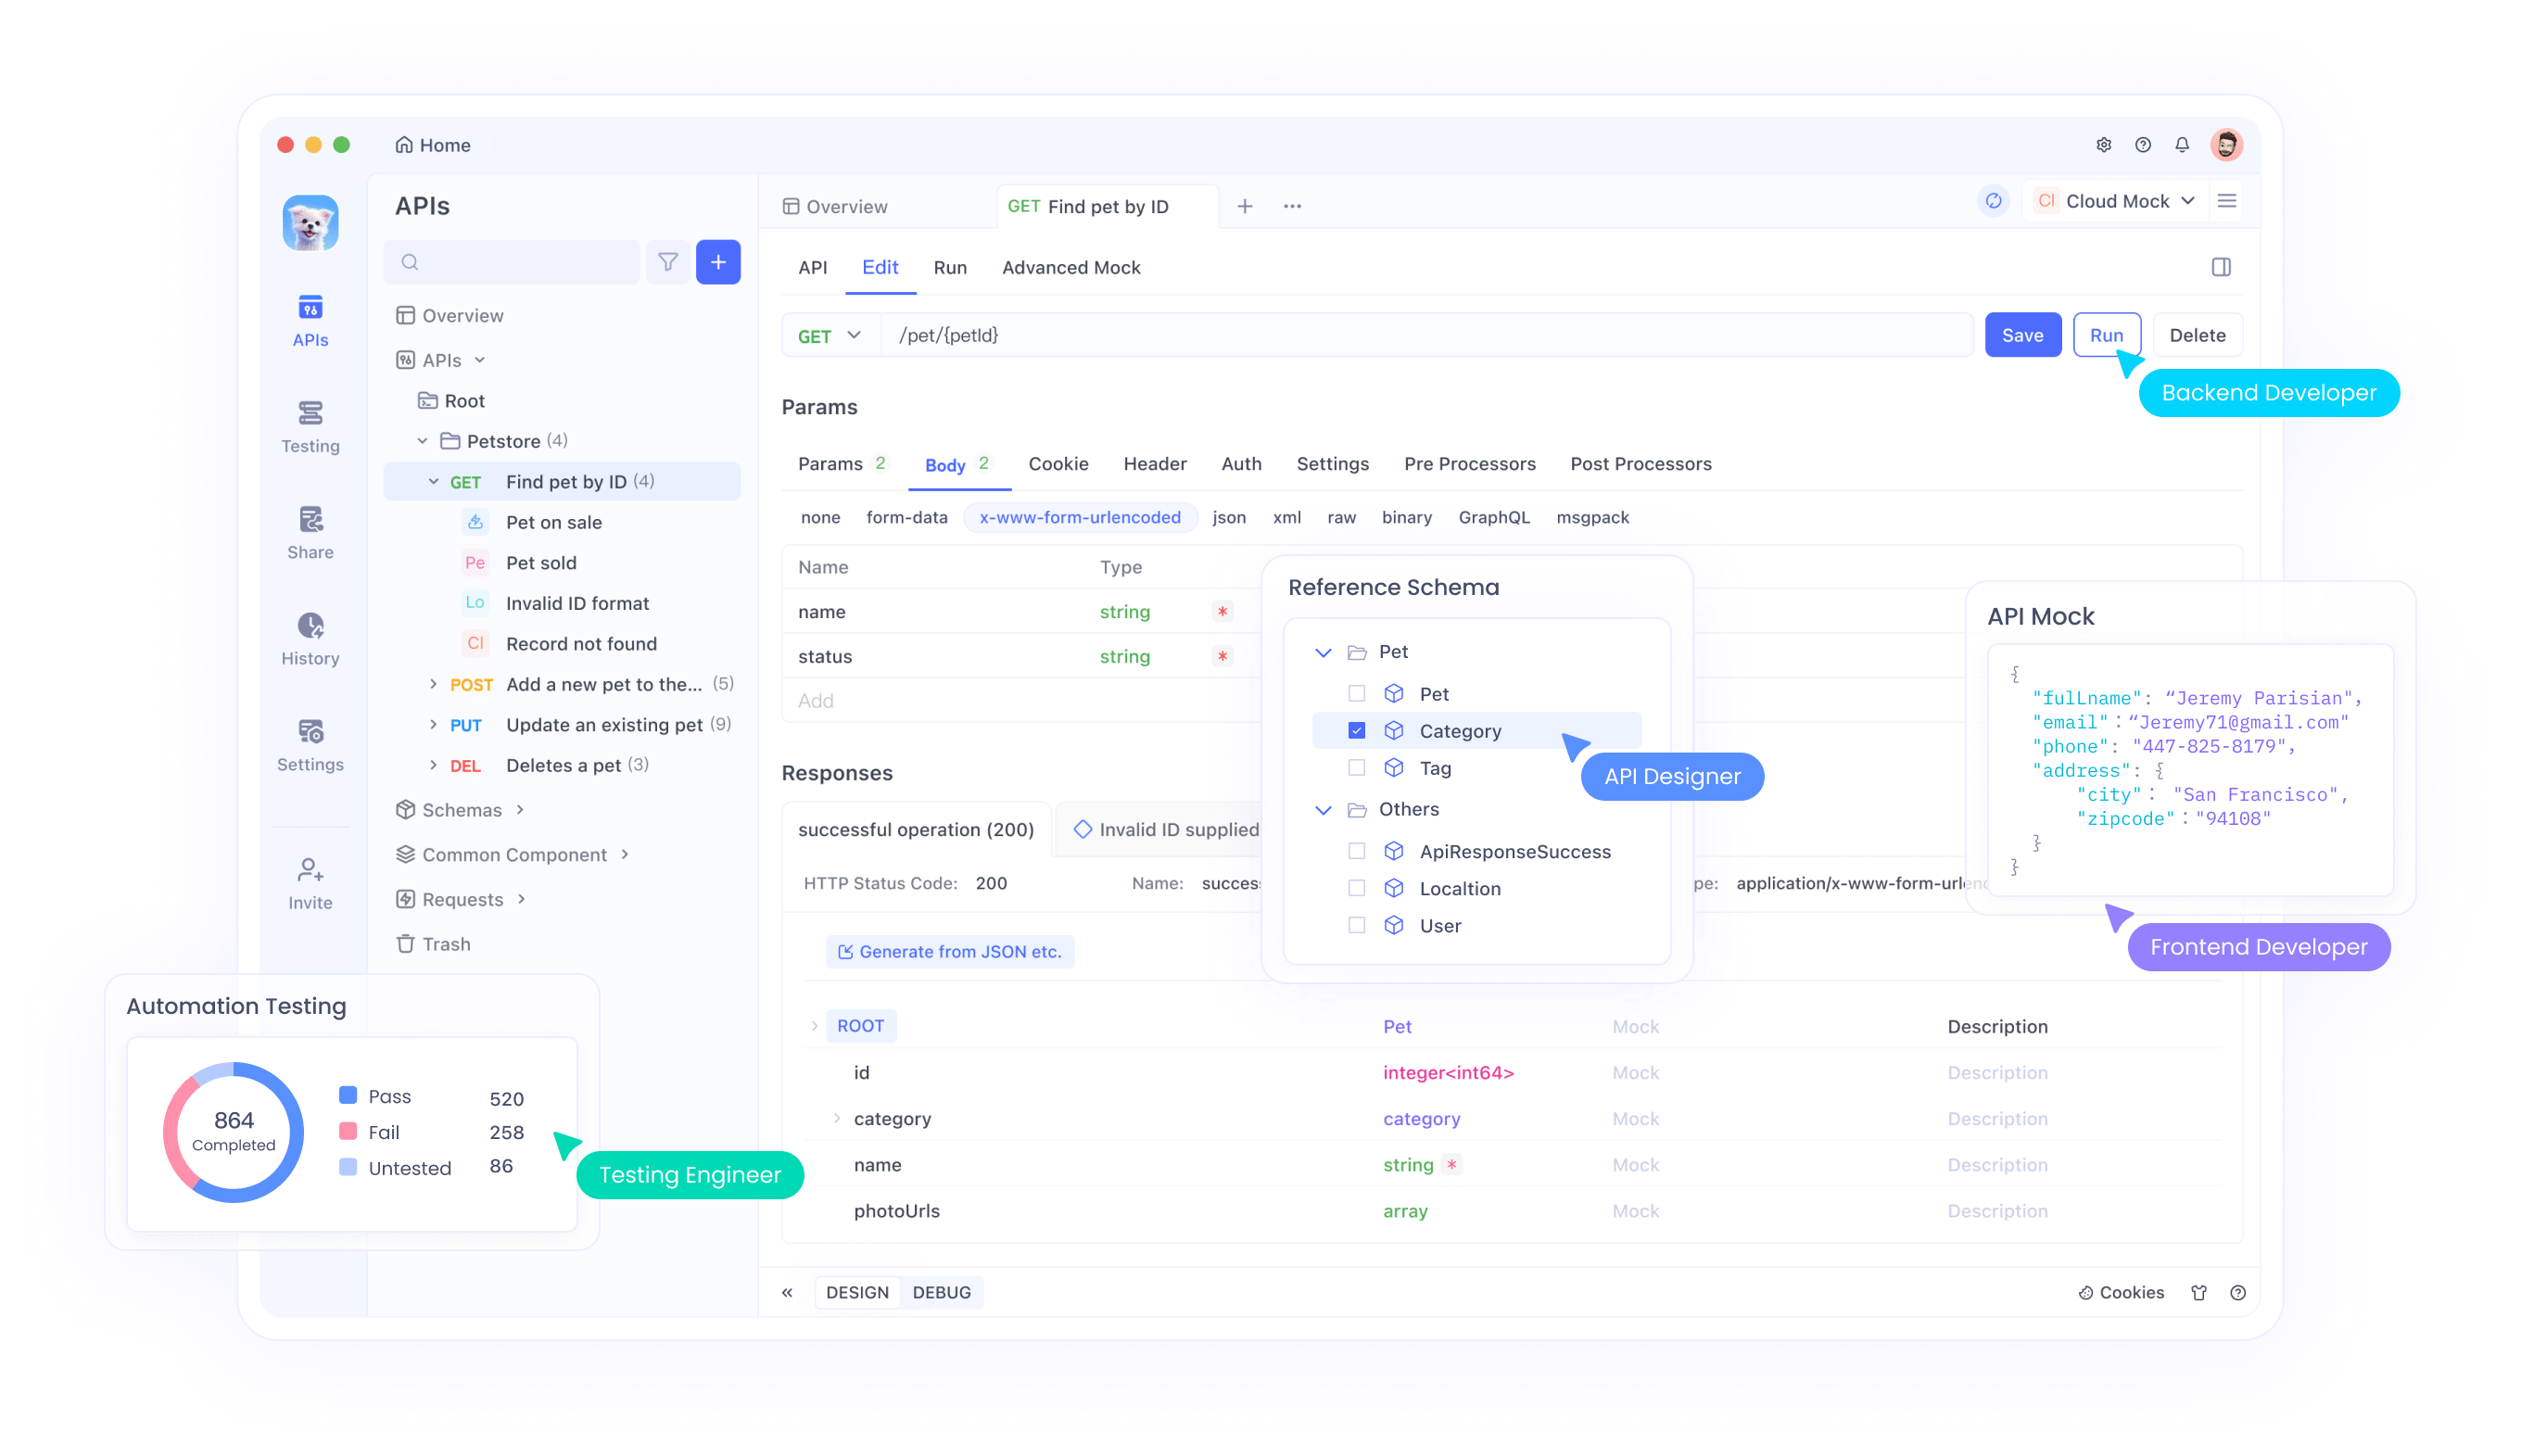
First, Apidog brings a holistic approach to managing the entire API lifecycle. It allows you to:
- Design APIs Visually: Use its intuitive interface to create and edit API specifications with ease.
- Debug and Test: Quickly identify issues in your API responses and validate your endpoints.
- Automate Documentation: Generate comprehensive and visually appealing API documentation that is easy to share with your team.
- Collaborate Seamlessly: Work together with team members in real time, ensuring everyone is on the same page.
Next, when you integrate Apidog with your Deepseek R1 and Roo Code-driven workflow, you get a seamless experience from the very first draft of your application to the final deployment. Apidog ensures that every API your application relies on is robust, secure, and well-documented. Meanwhile, Deepseek R1’s reasoning capabilities guarantee that the underlying logic of your code is sound, and Roo Code ties everything together by automatically generating, testing, and iterating on your application code.
Conclusion
By now, you should have a fully functional development environment where you can use Deepseek R1 directly within VS Code using Roo Code. This powerful combination lets you automate repetitive coding tasks, receive intelligent code suggestions, and streamline your development workflow—all while enjoying a more interactive and dynamic programming experience.
Meanwhile, if you’re curious about exploring further, consider integrating additional tools like Apidog to manage your APIs or even experimenting with other OpenAI-compatible models. The ecosystem is growing rapidly, and being familiar with these tools now will position you well for the future.
Finally, remember that every new setup might require a bit of tweaking. Do not hesitate to revisit the configuration settings, consult online documentation, or participate in community forums if you run into any hurdles. The developer community is vibrant and supportive, and tools like Roo Code are constantly being updated based on user feedback.
Happy coding, and enjoy your new AI-powered development journey with Roo Code and Deepseek R1!


