
Jupyter Notebook remains a cornerstone tool for data scientists, developers, and researchers who need an interactive environment to write, test, and visualize code. When paired with Cursor, an AI-powered code editor, its capabilities expand significantly, offering a streamlined workflow for coding and analysis.
Now, let’s get started with the technical details.
What Is Cursor and How Does It Integrate with Jupyter Notebook?
Cursor is an AI-enhanced integrated development environment (IDE) built to accelerate coding tasks. Unlike traditional editors, Cursor leverages large language models (LLMs) to provide real-time code suggestions, auto-debugging, and context-aware assistance. When combined with Jupyter Notebook—a web-based platform for interactive coding, visualization, and documentation—Cursor transforms the notebook experience into a more efficient and intelligent process.
Jupyter Notebook traditionally uses .ipynb files, which store code, markdown, and outputs in a JSON format. However, Cursor introduces a unique twist: it supports Jupyter-style workflows using plain .py files with cell delimiters (e.g., # %%). This approach simplifies AI interaction, as LLMs process plaintext more effectively than complex JSON structures. Consequently, developers gain a lightweight, AI-driven environment without sacrificing Jupyter’s interactivity.
Why Use Cursor with Jupyter Notebook?
Before diving into the setup, let’s examine why this combination stands out:
- AI-Powered Assistance: Cursor’s AI suggests code, fixes errors, and generates markdown explanations based on your output, reducing manual effort.
- Plaintext Simplicity: Using
.pyfiles eliminates the overhead of.ipynbcomplexity, making version control and collaboration easier. - Flexibility: Cursor runs Python scripts natively, allowing seamless transitions between notebook-style exploration and production-ready code.
- Efficiency: The integration cuts down on repetitive tasks, letting you focus on analysis and experimentation.
Now, let’s move to the technical setup.
Setting Up Cursor for Jupyter Notebook: Step-by-Step
To use Cursor with Jupyter Notebook functionality, follow these steps carefully. This setup assumes you have basic familiarity with Python and IDEs.
Step 1: Install Cursor
Download and install Cursor from its official website. Ensure your system meets the requirements:
- Operating System: Windows, macOS, or Linux
- Python: Version 3.7 or higher
- RAM: At least 8GB for smooth AI performance
After installation, launch Cursor and configure your Python interpreter via the settings menu. Select your preferred Python environment (e.g., a virtual environment or global installation).
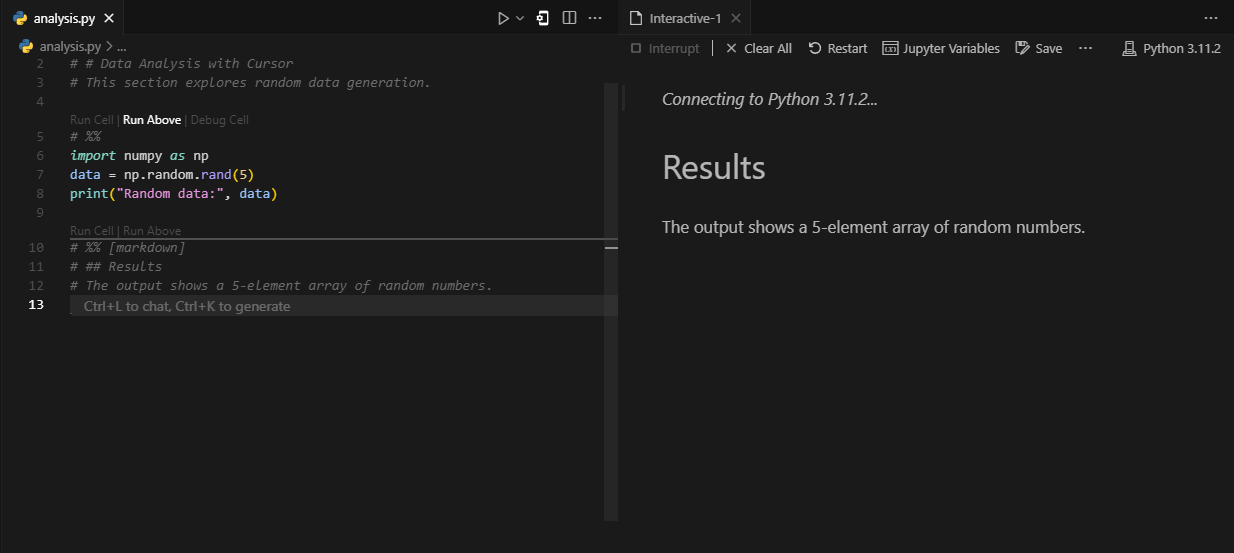
Step 2: Create a Python File with Jupyter Cells
In Cursor, create a new file with a .py extension (e.g., analysis.py). Structure it using Jupyter-style cell delimiters. For example:
# %% [markdown]
# # Data Analysis with Cursor
# This section explores random data generation.

# %%
import numpy as np
data = np.random.rand(5)
print("Random data:", data)

# %% [markdown]
# ## Results
# The output shows a 5-element array of random numbers.
# %%denotes a code cell.# %% [markdown]denotes a markdown cell.
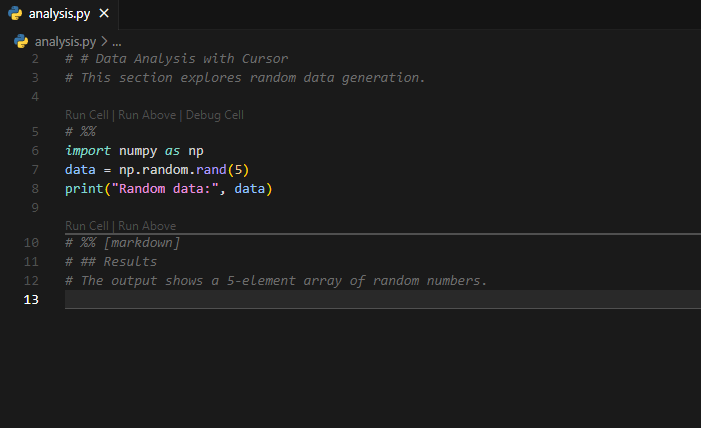
This format mimics Jupyter Notebook’s cell-based structure while remaining plaintext.
Step 3: Run Cells in Cursor
Cursor executes Python files natively. To run a specific cell:
- Place your cursor within the cell.
- Press
Ctrl + Enter(orCmd + Enteron macOS) to execute it. - Alternatively, use the “Run Below” button in the toolbar to execute all cells below the current one.
The output appears in Cursor’s terminal pane. For example, running the second cell above prints the random data array.
Step 4: Leverage AI Assistance
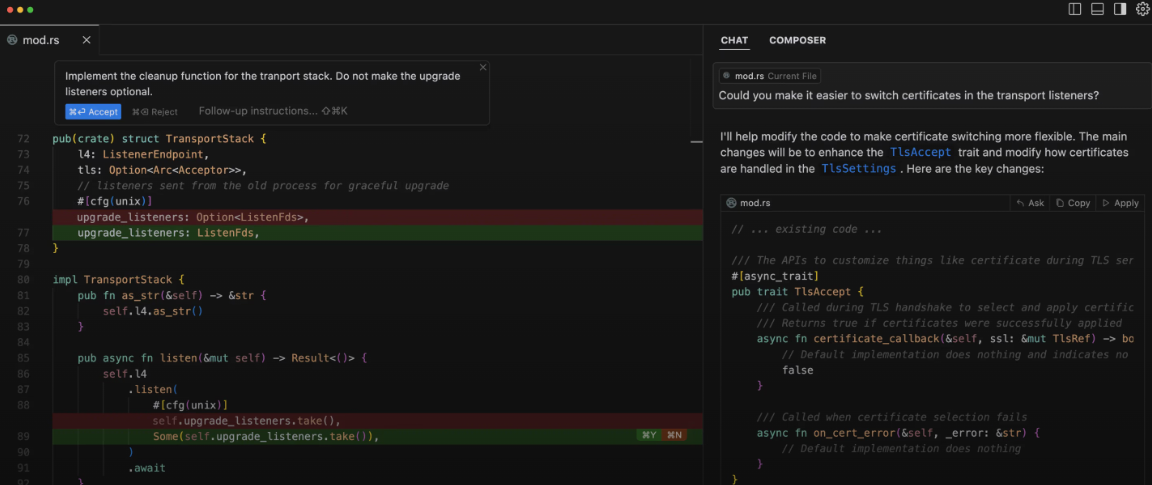
Highlight a code block and press Ctrl + K (or Cmd + K) to open Cursor’s AI chat. Ask it to:
- Explain the code: “What does
np.random.rand(5)do?” - Suggest improvements: “Optimize this random data generation.”
- Generate markdown: “Write a markdown summary of this output.”
The AI responds instantly, often embedding suggestions directly into your file upon approval.
Advanced Features of Cursor with Jupyter Notebook
Once you’ve mastered the basics, explore these advanced capabilities to elevate your workflow.
Visualizing Data
Data visualization poses a challenge in Cursor, as it doesn’t natively display charts like Jupyter Notebook’s web interface. However, you can work around this:
- Write plotting code using libraries like Matplotlib or Seaborn.
- Run the cell with “Run Below” to execute the script.
- View the chart in a separate pop-up window.
For example:
# %%
import matplotlib.pyplot as plt
plt.plot([1, 2, 3], [4, 5, 6])
plt.show()
Cursor can’t “see” the chart, but it can analyze the code and suggest enhancements (e.g., adding labels or changing styles).
Debugging with AI
Encounter an error? Highlight the problematic code, open the AI chat, and type: “Fix this error.” Cursor’s AI diagnoses the issue and proposes a solution. For instance, if you forget to import NumPy, it’ll suggest adding import numpy as np.
Integrating with Apidog
When your Jupyter Notebook project involves APIs (e.g., fetching data for analysis), Apidog becomes invaluable. Apidog is a robust API testing tool that lets you design, test, and debug APIs efficiently.
- Install Apidog from its official site.
- In Cursor, write API-calling code (e.g., using
requests). - Use Apidog to test the API endpoint separately, ensuring it returns the expected data.
- Feed the API response into your notebook for analysis.
Best Practices for Using Cursor with Jupyter Notebook
To optimize your experience, adopt these technical best practices:
Keep Cells Modular
Break your code into small, focused cells. For example, separate data loading, processing, and visualization. This modularity enhances readability and allows Cursor’s AI to provide targeted suggestions.
Use Version Control
Since Cursor uses .py files, integrate Git for version control. Unlike .ipynb files, plaintext files diff cleanly, making collaboration smoother.
Comment Liberally
Add comments within cells to guide the AI. For instance:
# %%
# Generate 10 random integers between 0 and 100
import numpy as np
numbers = np.random.randint(0, 100, 10)
The AI uses these comments to understand your intent, improving its responses.
Test Incrementally
Run cells individually during development to catch errors early. This iterative approach aligns with Jupyter Notebook’s strengths and leverages Cursor’s real-time feedback.
Comparing Cursor to Traditional Jupyter Notebook
How does Cursor stack up against the classic Jupyter Notebook experience? Let’s analyze:
- File Format: Cursor uses
.pyfiles, while Jupyter uses.ipynb. The former simplifies AI processing and version control. - Execution: Both support cell-based execution, but Cursor’s native Python runtime avoids Jupyter’s kernel overhead.
- Visualization: Jupyter displays charts inline, whereas Cursor relies on external windows.
- AI Integration: Cursor’s built-in AI outshines Jupyter’s plugin-based options (e.g., Jupyter AI).
For data scientists prioritizing AI assistance and plaintext workflows, Cursor offers a compelling alternative.
Enhancing Your Workflow with Apidog
Let’s circle back to Apidog, which ties into this ecosystem beautifully. When your Jupyter Notebook project requires external data via APIs, Apidog streamlines the process.
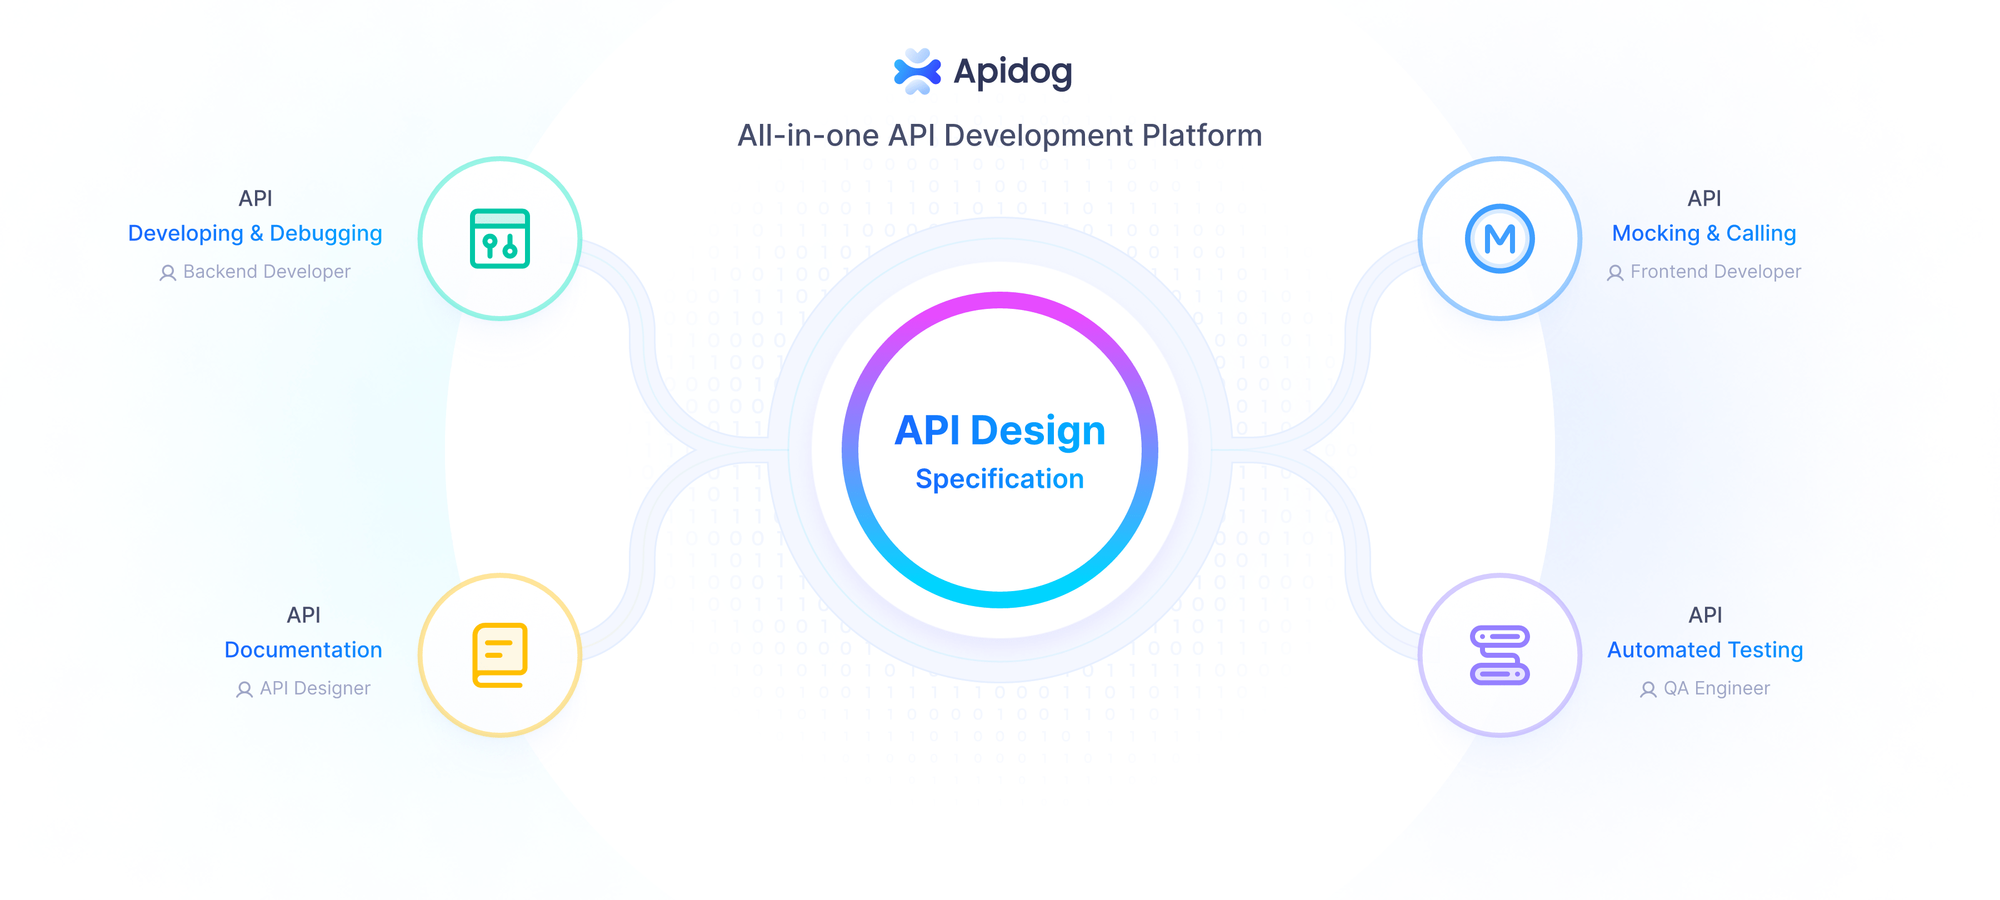
- API Design: Define endpoints with precise parameters.
- Testing: Send requests and inspect responses without leaving your workflow.
- Debugging: Identify issues (e.g., 404 errors) before integrating data into Cursor.
For example, if you’re analyzing API-fetched sales data, use Apidog to ensure the endpoint works, then process it in Cursor:
# %%
import pandas as pd
df = pd.DataFrame(data["sales"])
print(df.describe())
This synergy saves time and reduces errors.
Conclusion
Using Cursor with Jupyter Notebook revolutionizes how developers and data scientists approach interactive coding. By combining Cursor’s AI capabilities with Jupyter’s cell-based structure, you achieve a powerful, efficient workflow. Add Apidog into the mix, and you’ve got a full-stack solution for API-driven projects. Start experimenting today—set up Cursor, structure your .py files, and integrate Apidog for a seamless experience.


