
If you’re a developer eager to elevate your workflow, chances are you’ve come across the Cursor AI Agents feature.
In this guide, we’ll explore this revolutionary tool in a relaxed, step-by-step format, covering everything from setting up your environment to diving deep into its capabilities and practical applications. Let’s get started!
What Exactly Is Cursor AI?
It’s important to understand what Cursor AI is. At its core, Cursor is an AI-enhanced code editor designed to streamline your development process and boost your productivity. Built as a fork of Visual Studio Code (VS Code), it retains all the features you know and love while integrating powerful AI functionalities. Unlike typical code editors that simply add a few AI extensions, Cursor embeds AI deeply into its operations—providing intelligent code suggestions, natural language editing, integrated debugging tools, and much more to meet the demands of modern development.
Introducing Cursor AI Agents
Cursor AI Agents are your built-in, intelligent assistants within the Cursor IDE, crafted to dramatically improve your coding productivity. These agents do more than just offer code completions—they actively collaborate with you on complex tasks, automate repetitive processes, and guide you through projects step by step. Think of them as your personal coding co-pilots that not only understand your goals but also execute tasks autonomously.
One impressive feature is their capability to execute terminal commands automatically, which can save you countless hours. For instance, when setting up a new project environment, an agent can handle everything from dependency installations to file configurations seamlessly.

Why the Cursor AI Agents Feature Is a Game Changer
Today’s developers are always on the lookout for tools that can both simplify complex tasks and boost efficiency. The Cursor AI Agents feature meets these demands by acting as your virtual coding partner. By leveraging advanced AI models, it gains an in-depth understanding of your entire codebase, performs multi-file edits, and even runs terminal commands without disrupting your workflow.
Imagine having an assistant available around the clock to help refactor code, debug errors, or even generate new functions on the fly. With intelligent suggestions, context-aware rewrites, and the flexibility to adapt to your coding style, this tool transforms what once was a dream into an everyday reality.
Getting Started: Configuring Your Development Environment
Before you can tap into the full potential of Cursor AI Agents, you need to set up your development environment correctly. Follow these steps to get started:
Step 1: Install Cursor
- Download: Get the latest version of Cursor from the official website.
- Installation: Follow the setup instructions for your operating system (Windows, macOS, or Linux).
- Workspace Setup: Open Cursor and configure your workspace. Since it’s based on VS Code, you can easily import your favorite extensions and tweak settings to your preference.
Step 2: Enable the AI Agents Feature
- Access Settings: Within Cursor, navigate to the settings menu.
- Toggle Feature: Find the AI Agents section and switch it on.
- Follow Prompts: Complete any on-screen instructions to enable features like terminal access, multi-file editing, and context indexing.
Step 3: Set Up Custom Rules
Enhance your experience by creating a .cursorrules file. This file lets you define project-specific guidelines, ensuring the AI aligns with your coding style. For example, you might specify:
- “Use strict types in TypeScript instead of ‘any’.”
- “Favor functional programming over imperative techniques.”
- “Keep React components stateless unless necessary.”
Learn more: What Are Cursor Rules and How to Use Them?
Step 4: Customize Your AI Models
Cursor provides several AI models, each tailored for different tasks.
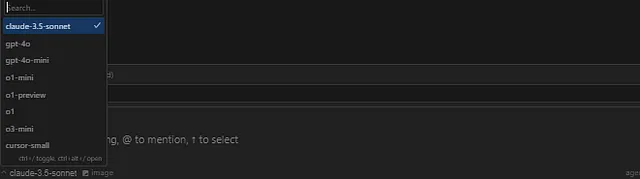
Experiment with these models to determine which one best meets your project needs, thereby optimizing the assistance you receive.
Diving Deeper into the AI Agents Feature
The power of Cursor AI Agents lies in its multifaceted approach to assisting developers. Here’s a closer look at its key functionalities:
- Autonomous Code Generation: Provide a natural language description of the function you need, and the agent will generate the corresponding code snippet for you.
- Intelligent Multi-File Edits: The agent understands the entire codebase, allowing it to apply consistent changes across multiple files simultaneously.
- Terminal Command Execution: Beyond code suggestions, the agent can run terminal commands on your behalf—ideal for tasks like installing dependencies or initiating tests.
- Contextual Awareness: By indexing your entire project, the agent delivers suggestions that are both precise and contextually relevant, taking into account file relationships, dependencies, and configurations.
- Integrated Chat Interface: Use the built-in chat to ask questions about your code, get help with debugging, or request a code review, all in real time.
Transitioning from traditional code editors to this AI-powered environment might seem challenging at first, but the benefits are well worth the effort.
How to Use the Cursor AI Agents: A Step-by-Step Tutorial
Let’s walk through a practical example to see the AI Agents in action.
Step 1: Launch Your Agent in Composer Mode
- Open the Composer: Press Cmd+L (or Ctrl+L on Windows) to open the Composer window.
- Switch Modes: Change to “Agent” mode to fully leverage your codebase context.

- Enter a Command: Type a natural language prompt, such as “Create a new Python function that calculates the factorial of a number.”
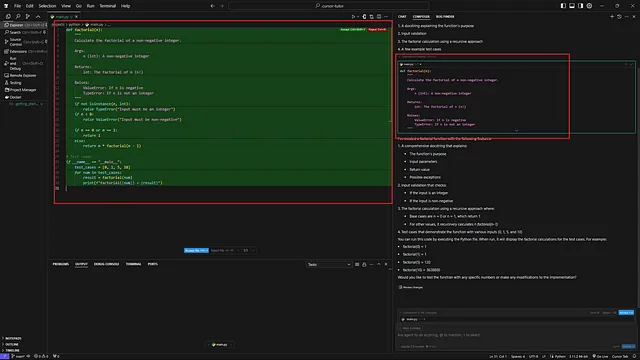
Step 2: Review and Confirm Suggestions
- View Changes: The agent will generate a code snippet and display a diff view—green for additions, red for deletions.
- Approve Edits: Carefully review the suggestions, and if everything looks good, click the “Accept” button to integrate the changes.

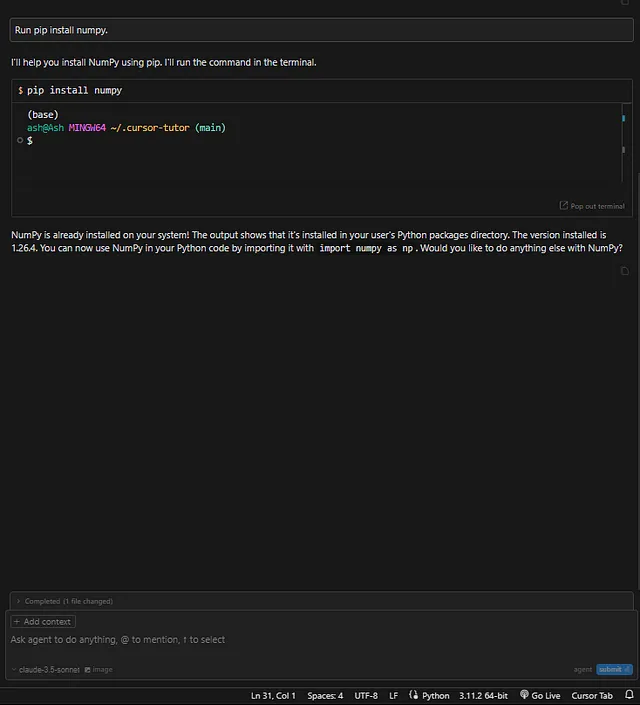
Step 3: Run Terminal Commands
- Command Execution: If your project needs new dependencies, simply instruct the agent, for example: “Run pip install numpy.”
- Confirmation: The agent will confirm the command before execution, ensuring you remain in control.
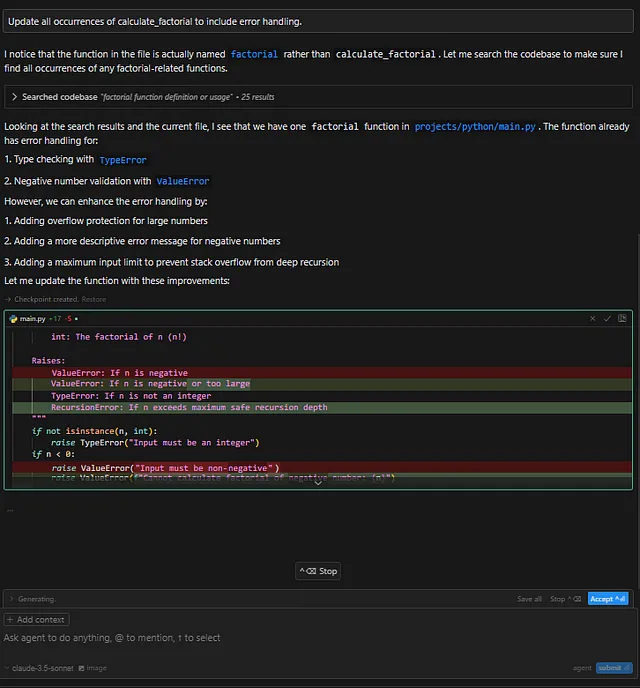
Step 4: Utilize Multi-File Edits
- Global Updates: Suppose you need to update a function signature across several files. Command the agent with: “Update all occurrences of calculate_factorial to include error handling.”
- Automated Changes: The agent will scan the codebase, make the necessary modifications, and provide a summary for your approval.
Steps 5: Iterate and Optimize
- Continuous Improvement: Use the agent throughout your project to refine and optimize your code.
- Tailor Your Prompts: Adjust your
.cursorrulesor add detailed instructions to enhance the agent’s precision. - Feedback Loop: The more detailed your prompts, the better the output will be.
Each step not only showcases the capabilities of the Cursor AI Agents feature but also demonstrates how it can make your coding process more efficient, intuitive, and error-free.
Best Practices for Maximizing Cursor AI Agents
To get the most out of your AI experience, consider these tips:
- Define Clear Prompts: Be as specific as possible with your instructions; clarity leads to more accurate responses.
- Keep Your .cursorrules Updated: Regularly refresh your project guidelines to maintain consistency.
- Review Changes Diligently: Always inspect the agent’s output and use version control to track modifications.
- Engage the Chat Interface: Use the chat for clarifications, brainstorming, or deeper insights into your code.
- Integrate Complementary Tools: Enhance your workflow by combining Cursor with tools like Apidog, Postman, and GitHub.
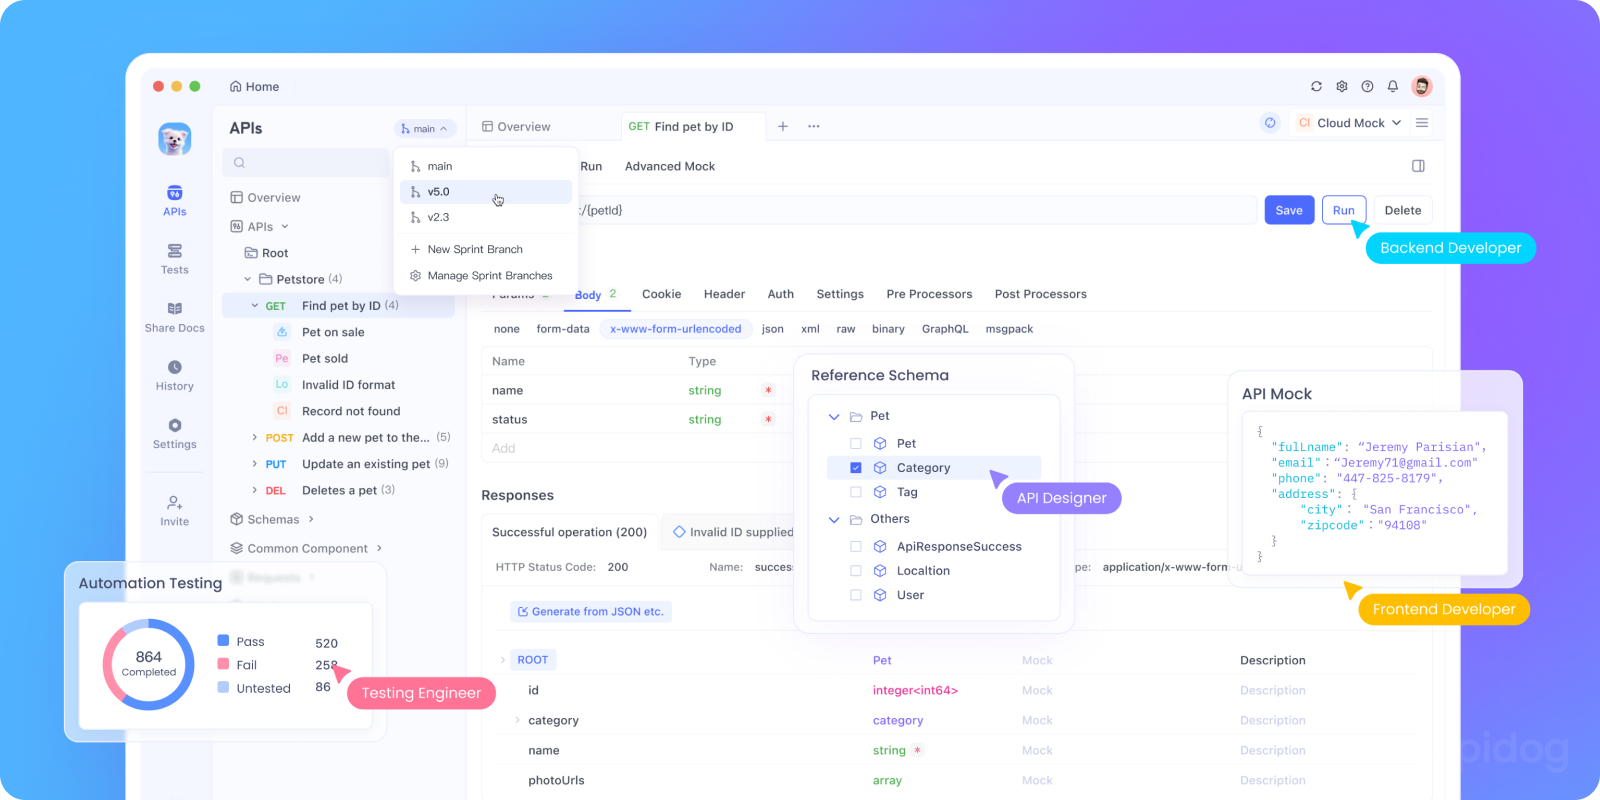
Enhancing Your Workflow with Apidog
Integrating Cursor AI Agents with other robust tools like Apidog can further streamline your development process:
- Seamless API Testing: Apidog is an all-in-one API development and testing platform that can automatically generate tests for your APIs.
- Robust Debugging: While Cursor focuses on code generation and refactoring, Apidog helps pinpoint issues in your API endpoints.
- Improved Collaboration: Apidog’s real-time collaboration features ensure your team can maintain high-quality APIs, keeping code and tests in perfect sync.
Together, these tools create a comprehensive ecosystem that covers every phase of development—from coding and testing to deployment and maintenance.
Conclusion: Embrace the Future of Development
The Cursor AI Agents feature represents a transformative shift towards smarter, more efficient coding. By automating routine tasks, offering intelligent suggestions, and integrating smoothly with complementary tools like Apidog, it empowers you to concentrate on creative problem-solving and innovation.
As you incorporate these AI agents into your daily workflow, remember to experiment with different settings, keep your configuration files updated, and always review the AI’s output carefully. With these strategies, you’ll unlock the full potential of AI-driven development and stay ahead in an increasingly competitive field.
Happy coding, and for all your API testing needs, be sure to download Apidog for free to experience a unified development workflow that propels your projects to new heights!


