If you are a developer who works with APIs, you probably have used curl and httpie at some point. These are two popular command-line tools for making HTTP requests and interacting with web services. But do you know how to switch between them easily and efficiently? In this blog post, I will show you how to convert curl commands to httpie commands and vice versa, using a simple tool called apidog. You will also learn some tips and tricks to make your API testing more productive and fun.
What are Curl and Httpie?
Before we dive into the conversion process, let's briefly review what curl and httpie are and why they are useful.
Curl
Curl is a classic tool that has been around since 1997. It stands for "client URL" and it allows you to transfer data from or to a server using various protocols, such as HTTP, FTP, SMTP, etc. Curl is widely supported on different platforms and languages, and it has many options and features to customize your requests. You can use curl to test APIs, download files, upload data, and more.
Here is an example of a curl command that makes a GET request to the GitHub API and prints the response headers:
curl -i https://api.github.com/users/octocat
Httpie
Httpie is a newer tool that was created in 2012. It stands for “HTTPie: a CLI, cURL-like tool for humans”. Httpie is designed to be a user-friendly alternative to curl, with a simpler and more expressive syntax, colorful output, and smart defaults. Httpie supports HTTP/1.1, HTTP/2, and HTTPS, and it can automatically handle JSON, forms, and file uploads.
Here is an example of an httpie command that makes the same GET request as the curl command above, but with a more readable syntax and output:
http -v https://api.github.com/users/octocat

Why Switch Between Curl and Httpie?
You might be wondering why you would need to switch between curl and httpie in the first place. Aren’t they both doing the same thing? Well, yes and no. While curl and httpie can perform similar tasks, they have different strengths and weaknesses, and different use cases.
Here are some reasons why you might want to switch between curl and httpie:
- You are working on a project that uses both curl and httpie commands, and you need to understand and modify them.
- You are following a tutorial or a documentation that uses curl or httpie commands, and you want to try them out with the other tool.
- You are testing an API that has different behaviors or features depending on the tool you use, and you want to compare them.
- You are curious about the differences and similarities between curl and httpie, and you want to learn more about them.
How to Switch Between Curl and Httpie with Apidog?
Now that you know what curl and httpie are and why you might want to switch between them, let me introduce you to a tool that can make your life easier: apidog.
Apidog is a web-based tool that allows you to convert curl commands to httpie commands and vice versa. It also lets you run the commands and see the results in real time. Apidog is free and easy to use.
Here is how to use apidog to switch between curl and httpie:
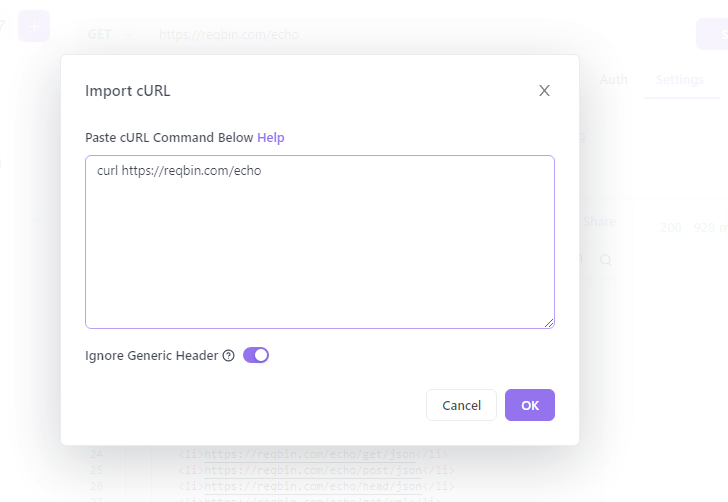
Step 1: Paste or type your curl or httpie command in the input box.
You can either paste an existing command that you copied from somewhere, or type a new command from scratch. Apidog will automatically detect the type of the command and show you the corresponding icon (curl or httpie) on the left side of the input box.
Step 2: Click on actual request
Apidog will convert your command to the other tool and show you the result in the output box.
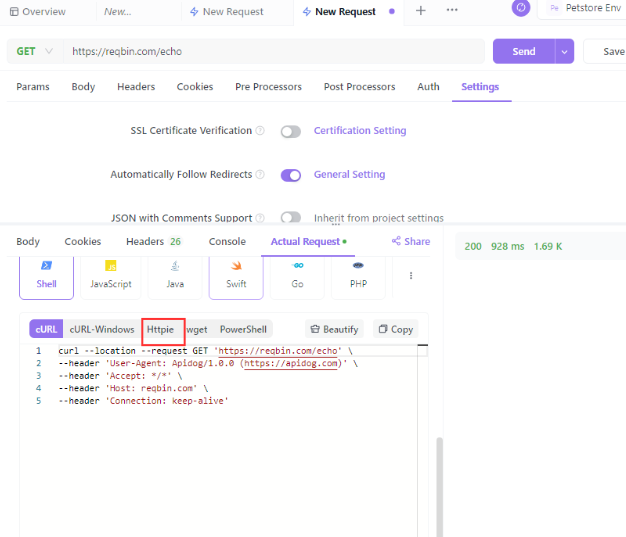
If you want to test the converted command and see the response from the server, you can click on the run button or press Ctrl+R. Apidog will execute the command and show you the response in the lower panel. You can also switch between the raw and formatted views of the response by clicking on the toggle button or pressing Ctrl+F.
Tips and Tricks for Switching Between Curl and Httpie
While apidog can handle most of the common curl and httpie commands, there are some cases where you might need to do some manual adjustments or use some extra options. Here are some tips and tricks to help you with that:
- If your curl command uses the
-dor--dataoption to send data in the request body, you might need to add the--formoption to the httpie command to indicate that the data is form-encoded. For example:
# curl command
curl -d "name=John&age=25" https://example.com/users

# httpie command
http --form POST https://example.com/users name=John age=25
- If your curl command uses the
-Hor--headeroption to set custom headers, you might need to add a:after the header name in the httpie command. For example:
# curl command
curl -H "Authorization: Bearer abc123" https://example.com/secret

# httpie command
http https://example.com/secret Authorization:"Bearer abc123"
- If your curl command uses the
-uor--useroption to set basic authentication credentials, you can use the same option in the httpie command, or use theusername:password@syntax in the URL. For example:
# curl command
curl -u admin:secret https://example.com/admin

# httpie command (option 1)
http -u admin:secret https://example.com/admin

# httpie command (option 2)
http https://admin:secret@example.com/admin
- If your curl command uses the
-For--formoption to upload files, you can use the same option in the httpie command, or use the@syntax to indicate the file path. For example:
# curl command
curl -F "image=@photo.jpg" https://example.com/upload

# httpie command (option 1)
http -f POST https://example.com/upload image@photo.jpg

# httpie command (option 2)
http POST https://example.com/upload image@/path/to/photo.jpg
- If your curl command uses the
-Xor--requestoption to specify the HTTP method, you can use the same option in the httpie command, or use the method name as the first argument. For example:
# curl command
curl -X PUT -d "status=active" https://example.com/users/1

# httpie command (option 1)
http -X PUT -d "status=active" https://example.com/users/1

# httpie command (option 2)
http PUT https://example.com/users/1 status=active
- If your curl command uses the
-Gor--getoption to append the data to the URL as query parameters, you can use the same option in the httpie command, or use the==syntax to indicate the query parameters. For example:
# curl command
curl -G -d "q=hello" https://example.com/search

# httpie command (option 1)
http -G -d "q=hello" https://example.com/search

# httpie command (option 2)
http https://example.com/search q==hello
- If your curl command uses the
--data-urlencodeoption to encode the data before sending it, you can use the same option in the httpie command, or use the:=syntax to indicate the encoded data. For example:
# curl command
curl --data-urlencode "message=Hello World!" https://example.com/echo

# httpie command (option 1)
http --data-urlencode "message=Hello World!" https://example.com/echo

# httpie command (option 2)
http https://example.com/echo message:="Hello World!"
- If your curl command uses the
--data-binaryoption to send raw binary data, you can use the same option in the httpie command, or use the@syntax to indicate the binary data. For example:
# curl command
curl --data-binary "@data.bin" https://example.com/binary

# httpie command (option 1)
http --data-binary "@data.bin" https://example.com/binary

# httpie command (option 2)
http https://example.com/binary @data.bin
- If your curl command uses the
-oor--outputoption to save the response to a file, you can use the same option in the httpie command, or use the>operator to redirect the output. For example:
# curl command
curl -o response.json https://example.com/data

# httpie command (option 1)
http -o response.json https://example.com/data

# httpie command (option 2)
http https://example.com/binary > response.bin
Benefits of Switching Between Curl and Httpie
By now, you should have a good idea of how to switch between curl and httpie commands using apidog. But what are the benefits of doing so? Here are some of the advantages of being able to use both tools:
- You can choose the tool that suits your preferences and needs better. Some people prefer curl for its versatility and compatibility, while others prefer httpie for its simplicity and readability. By switching between them, you can enjoy the best of both worlds.
- You can learn new skills and techniques from both tools. Curl and httpie have different features and options that can help you with different tasks and scenarios. By switching between them, you can discover new ways of doing things and improve your knowledge and proficiency.
- You can avoid errors and bugs caused by using the wrong tool or syntax. Curl and httpie have different behaviors and expectations when it comes to handling data, headers, authentication, files, etc. By switching between them, you can ensure that you are using the correct tool and syntax for your situation and avoid potential problems.
Conclusion
In this blog post, I have shown you how to switch between curl and httpie commands using apidog, a web-based tool that can convert and run curl and httpie commands. I have also given you some tips and tricks to help you with the conversion process, and some benefits of being able to use both tools.
Thank you for reading and happy coding!