
Remotion just dropped Agent Skills, and this changes everything for video creation with AI.
npx skills add remotion-dev/skills
That's it. One command, and Claude Code becomes a video creation expert that understands Remotion's React-based video framework inside and out.
What Are Remotion Agent Skills?
Agent Skills are "instruction manuals" that teach AI agents like Claude Code how to properly use specific tools and frameworks. The official Remotion skills give Claude deep knowledge of:
- Remotion's component architecture (
<Composition>,<Sequence>,<AbsoluteFill>) - Animation APIs (
interpolate,spring,useCurrentFrame) - Best practices for timing, performance, and rendering
- Common patterns for intros, transitions, and effects
Without skills, Claude might generate buggy or incorrect Remotion code. With skills, it writes production-quality video components on the first try.
What You'll Build
In this tutorial, you'll:
- Install Remotion Agent Skills in one command
- Generate a complete intro video using natural language
- Refine animations through conversation
- Render your video to MP4
- Scale with Remotion Lambda (optional)
TL;DR
# 1. Create a Remotion project
npx create-video@latest my-video && cd my-video

# 2. Install Agent Skills (the key step!)
npx skills add remotion-dev/skills

# 3. Start Claude Code and describe your video
claude

# 4. Render
npx remotion render <composition-name> out/video.mp4
That's the entire workflow. Agent Skills teach Claude how to write proper Remotion code, so you can focus on describing what you want instead of debugging React components.
Prerequisites
Before starting, make sure you have:
| Requirement | Version | Check Command |
|---|---|---|
| Node.js | 18+ | node --version |
| npm or yarn | Latest | npm --version |
| Claude Code | Latest | claude --version |
| Code editor | VS Code recommended | - |
You should also have:
- Basic familiarity with the command line
- Basic understanding of React (helpful but not required)
Step 1: Install Remotion and Create Your Project
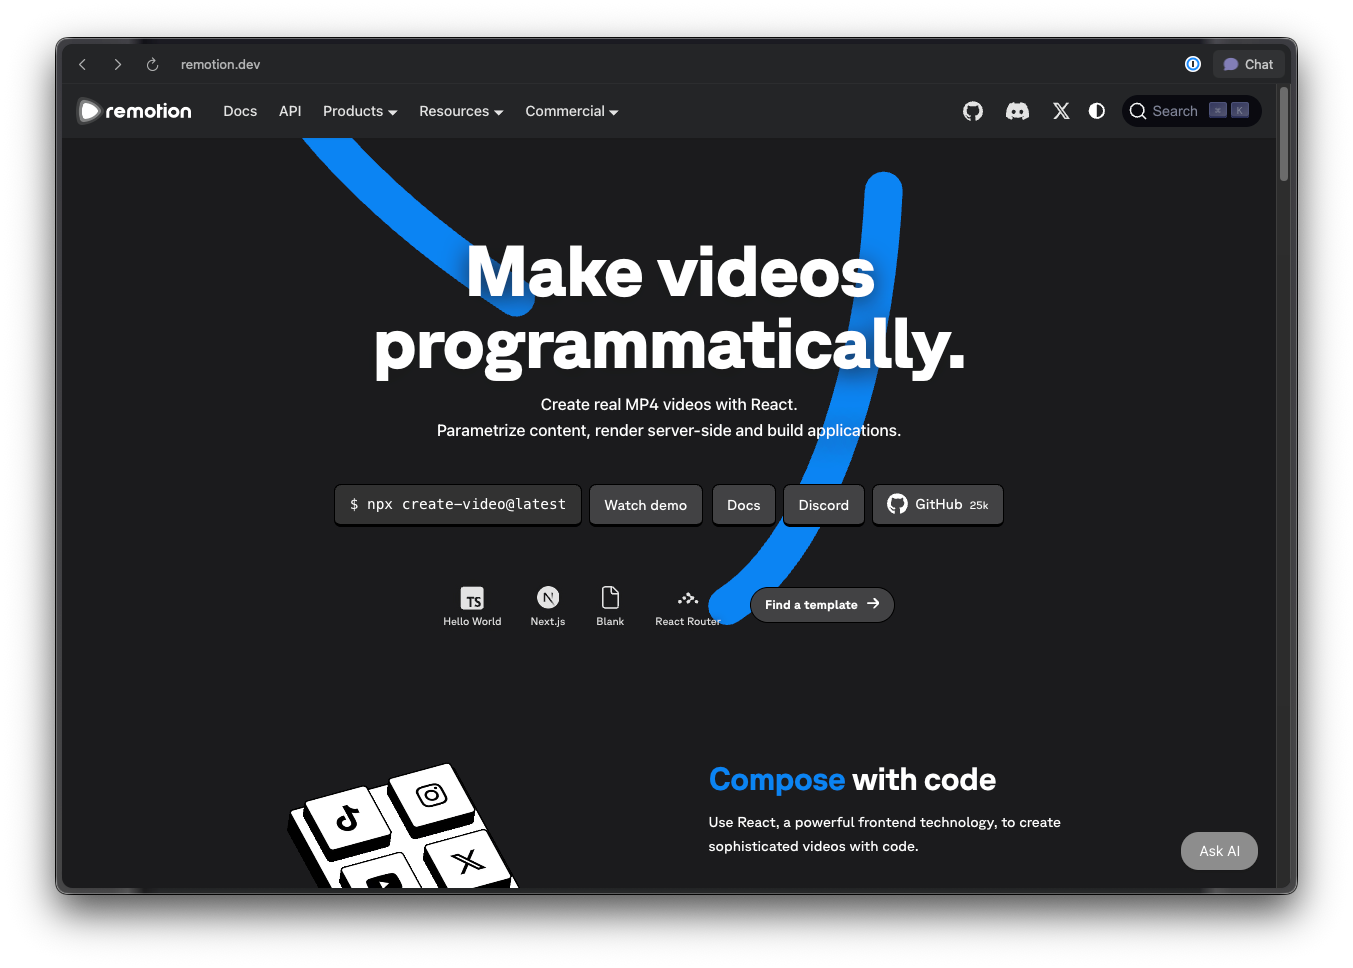
First, create a new Remotion project using the official CLI.
1.1 Open your terminal and run:
npx create-video@latest my-first-video
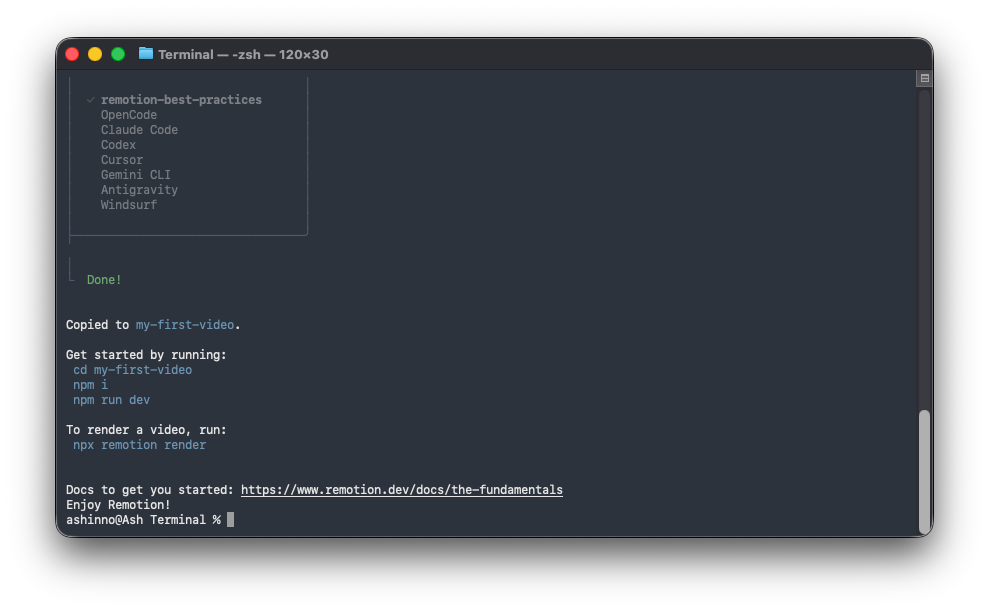
1.2 When prompted, select these options:
? What would you like to name your project? my-first-video
? Choose a template: blank
? Use TypeScript? Yes
? Install dependencies? Yes
1.3 Navigate to your project:
cd my-first-video
1.4 Verify the installation:
npm run dev
This opens Remotion Studio in your browser at http://localhost:3000. You should see a blank canvas with a timeline at the bottom.
Expected result: A browser window with the Remotion Studio interface.
Step 2: Install Remotion Agent Skills
This is where the magic happens. One command gives Claude Code expert-level knowledge of Remotion.
2.1 In your project directory, run:
npx skills add remotion-dev/skills
When you see Added skill: remotion displayed, the installation was successful.
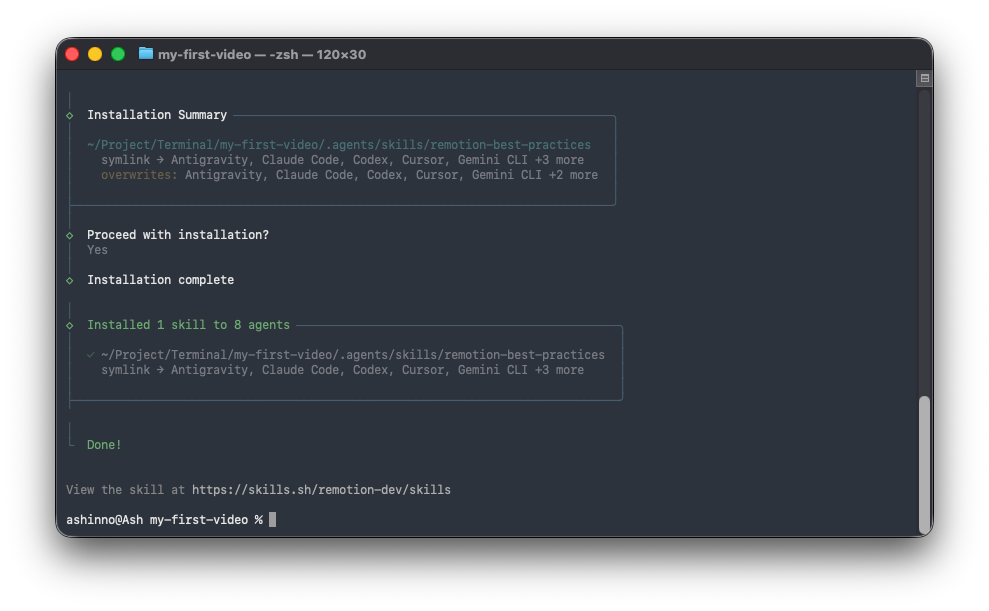
2.2 What just happened?
The command added a skill to .claude/skills/remotion/ in your project. This folder contains SKILL.md—the instruction manual that teaches Claude how to write proper Remotion code.
2.3 Verify the installation:
Check that the skill file exists:
ls .claude/skills/remotion/
Expected output:
SKILL.md
2.4 Your project structure now looks like:
my-first-video/
├── .claude/
│   └── skills/
│       └── remotion/
│           └── SKILL.md      # The "brain" that teaches Claude Remotion
├── src/
│   ├── Root.tsx
│   ├── Composition.tsx
│   └── index.ts
├── public/
├── remotion.config.ts
├── package.json
└── tsconfig.json
Pro tip: If the skill isn't being recognized, run npx skills add remotion-dev/skills again or restart Claude Code.
Step 3: Create Your First Video with Claude Code
Now let's use Claude Code to generate a complete video. Open your terminal in the project directory.
3.1 Start Claude Code:
claude
3.2 Describe your video:
Type this prompt to Claude Code:
Create a 5-second intro video for a tech company called "DevFlow".

Requirements:
- Resolution: 1920x1080
- Frame rate: 30fps
- Background: Dark gradient from #1a1a2e to #16213e
- Animation sequence:
  1. Logo text "DevFlow" fades in from opacity 0 to 1 (frames 0-30)
  2. Logo scales up slightly with a bounce effect (frames 15-45)
  3. Tagline "Build faster. Ship smarter." fades in below (frames 45-90)
  4. Everything holds for the remaining frames

Use modern, clean typography with the Inter font family.
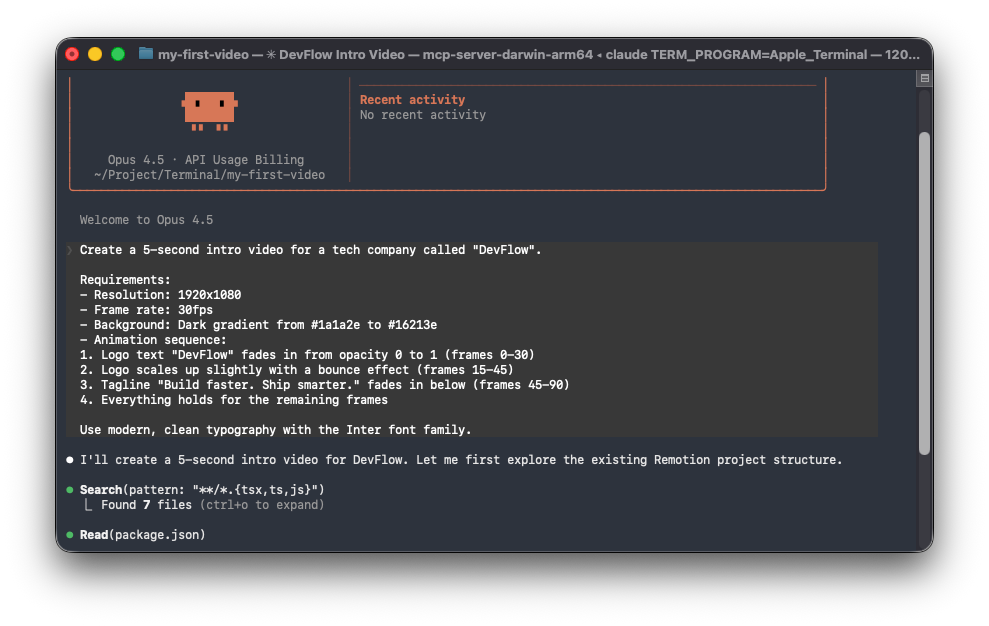
3.3 Claude Code generates the files:
Claude Code will create or modify these files:
src/Root.tsx - Composition definition:
import React from 'react';
import { Composition } from 'remotion';
import { DevFlowIntro } from './DevFlowIntro';

export const RemotionRoot: React.FC = () => {
  return (
    <>
      <Composition
        id="devflow-intro"
        component={DevFlowIntro}
        durationInFrames={150}
        fps={30}
        width={1920}
        height={1080}
      />
    </>
  );
};
src/DevFlowIntro.tsx - Main video component:
import React from 'react';
import {
  AbsoluteFill,
  useCurrentFrame,
  interpolate,
  spring,
  useVideoConfig,
} from 'remotion';

export const DevFlowIntro: React.FC = () => {
  const frame = useCurrentFrame();
  const { fps } = useVideoConfig();

  // Logo fade in (frames 0-30)
  const logoOpacity = interpolate(frame, [0, 30], [0, 1], {
    extrapolateRight: 'clamp',
  });

  // Logo bounce scale (frames 15-45)
  const logoScale = spring({
    frame: frame - 15,
    fps,
    from: 1,
    to: 1.1,
    config: {
      damping: 10,
      stiffness: 100,
    },
  });

  // Tagline fade in (frames 45-90)
  const taglineOpacity = interpolate(frame, [45, 90], [0, 1], {
    extrapolateLeft: 'clamp',
    extrapolateRight: 'clamp',
  });

  return (
    <AbsoluteFill
      style={{
        background: 'linear-gradient(135deg, #1a1a2e 0%, #16213e 100%)',
        justifyContent: 'center',
        alignItems: 'center',
        fontFamily: 'Inter, sans-serif',
      }}
    >
      <div style={{ textAlign: 'center' }}>
        <h1
          style={{
            fontSize: 120,
            fontWeight: 700,
            color: 'white',
            margin: 0,
            opacity: logoOpacity,
            transform: `scale(${frame >= 15 ? logoScale : 1})`,
          }}
        >
          DevFlow
        </h1>

        <p
          style={{
            fontSize: 36,
            color: 'rgba(255, 255, 255, 0.8)',
            marginTop: 24,
            opacity: taglineOpacity,
            fontWeight: 400,
          }}
        >
          Build faster. Ship smarter.
        </p>
      </div>
    </AbsoluteFill>
  );
};
3.4 Preview your video:
If Remotion Studio isn't running, start it:
npm run dev
Select "devflow-intro" from the composition dropdown. Use the timeline to scrub through your video and preview the animations.
Expected result: Your intro video playing with the fade-in logo and tagline animations.
Step 4: Refine Your Video with Follow-up Prompts
The power of Claude Code is iterative refinement. Let's improve our video.
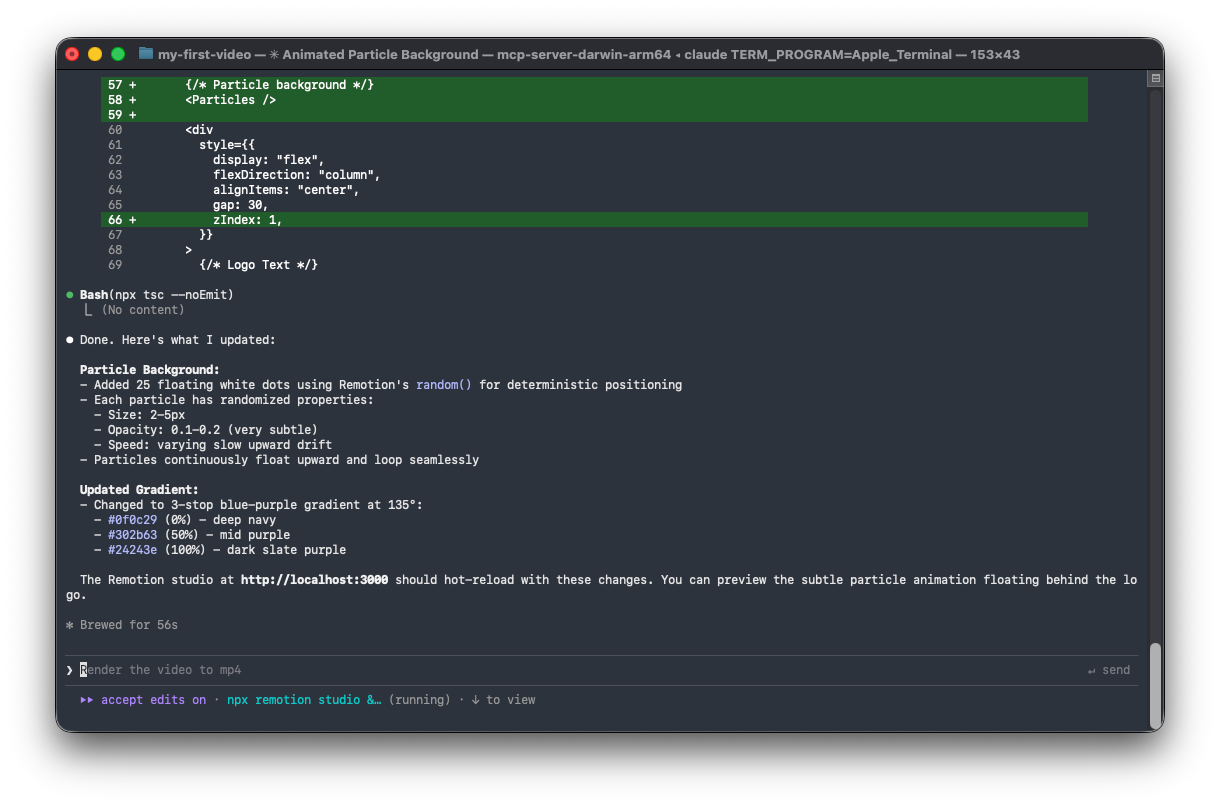
4.1 Add a particle background effect and Change the color scheme
Add a subtle animated particle background with small white dots
that slowly float upward. Keep it minimal - about 20-30 particles,
very low opacity (0.1-0.2), and slow movement.
Change the gradient to a blue-purple theme:
- Start color: #0f0c29
- Mid color: #302b63
- End color: #24243e
Make it a 3-stop gradient.
4.3 Add a sound effect cue (optional):
Add a marker comment where a "whoosh" sound effect should play
when the logo bounces. I'll add the audio later.
Each time you give feedback, Claude Code modifies the relevant code and you can preview the changes immediately in Remotion Studio.
Step 5: Add Dynamic Content with Props
Make your video reusable by accepting dynamic props. This lets you generate multiple videos with different content.
5.1 Ask Claude Code to add props:
Refactor the video to accept these props:
- companyName (string) - replaces "DevFlow"
- tagline (string) - replaces the tagline text
- primaryColor (string) - main gradient color
- secondaryColor (string) - secondary gradient color

Also add Zod schema validation for type safety.
5.2 Claude Code generates the schema:
src/DevFlowIntro.tsx (updated):
import { z } from 'zod';

export const introSchema = z.object({
  companyName: z.string().default('DevFlow'),
  tagline: z.string().default('Build faster. Ship smarter.'),
  primaryColor: z.string().default('#0f0c29'),
  secondaryColor: z.string().default('#24243e'),
});

type IntroProps = z.infer<typeof introSchema>;

export const DevFlowIntro: React.FC<IntroProps> = ({
  companyName,
  tagline,
  primaryColor,
  secondaryColor,
}) => {
  // ... component uses these props
};
src/Root.tsx (updated):
import { Composition } from 'remotion';
import { DevFlowIntro, introSchema } from './DevFlowIntro';

export const RemotionRoot: React.FC = () => {
  return (
    <>
      <Composition
        id="company-intro"
        component={DevFlowIntro}
        durationInFrames={150}
        fps={30}
        width={1920}
        height={1080}
        schema={introSchema}
        defaultProps={{
          companyName: 'DevFlow',
          tagline: 'Build faster. Ship smarter.',
          primaryColor: '#0f0c29',
          secondaryColor: '#24243e',
        }}
      />
    </>
  );
};
5.3 Test with different props in Remotion Studio:
In Remotion Studio, click the Props panel and modify values:
{
  "companyName": "Apidog",
  "tagline": "Design. Debug. Test. Document.",
  "primaryColor": "#1e3a5f",
  "secondaryColor": "#0d1b2a"
}
The preview updates in real-time.
Step 6: Create a Multi-Scene Video
Let's build a more complex video with multiple scenes.
6.1 Prompt Claude Code:
Create a 30-second product demo video with these scenes:

Scene 1 (0-5 seconds): Logo intro animation
Scene 2 (5-12 seconds): Feature showcase with 3 icons appearing one by one
  - Icon 1: Rocket (Speed)
  - Icon 2: Shield (Security)
  - Icon 3: Chart (Analytics)
  Each icon should slide in from the left with a fade

Scene 3 (12-22 seconds): Mockup of the product dashboard
  - Show a simple UI mockup
  - Highlight different sections sequentially

Scene 4 (22-30 seconds): Call to action
  - "Start your free trial"
  - Website URL fades in

Use the <Sequence> component to organize scenes.
Total duration: 900 frames at 30fps.
6.2 Claude Code generates the scene structure:
import { Sequence, AbsoluteFill } from 'remotion';
import { LogoIntro } from './scenes/LogoIntro';
import { FeatureShowcase } from './scenes/FeatureShowcase';
import { DashboardMockup } from './scenes/DashboardMockup';
import { CallToAction } from './scenes/CallToAction';

export const ProductDemo: React.FC = () => {
  return (
    <AbsoluteFill style={{ backgroundColor: '#0a0a0a' }}>
      {/* Scene 1: Logo Intro (frames 0-150) */}
      <Sequence from={0} durationInFrames={150}>
        <LogoIntro />
      </Sequence>

      {/* Scene 2: Feature Showcase (frames 150-360) */}
      <Sequence from={150} durationInFrames={210}>
        <FeatureShowcase />
      </Sequence>

      {/* Scene 3: Dashboard Mockup (frames 360-660) */}
      <Sequence from={360} durationInFrames={300}>
        <DashboardMockup />
      </Sequence>

      {/* Scene 4: Call to Action (frames 660-900) */}
      <Sequence from={660} durationInFrames={240}>
        <CallToAction />
      </Sequence>
    </AbsoluteFill>
  );
};
6.3 Claude Code creates individual scene components:
src/scenes/FeatureShowcase.tsx:
import { useCurrentFrame, interpolate, AbsoluteFill } from 'remotion';

const features = [
  { icon: '🚀', label: 'Speed', delay: 0 },
  { icon: '🛡️', label: 'Security', delay: 30 },
  { icon: '📊', label: 'Analytics', delay: 60 },
];

export const FeatureShowcase: React.FC = () => {
  const frame = useCurrentFrame();

  return (
    <AbsoluteFill
      style={{
        justifyContent: 'center',
        alignItems: 'center',
        gap: 80,
        flexDirection: 'row',
      }}
    >
      {features.map((feature, index) => {
        const slideIn = interpolate(
          frame - feature.delay,
          [0, 30],
          [-100, 0],
          { extrapolateRight: 'clamp', extrapolateLeft: 'clamp' }
        );
        const opacity = interpolate(
          frame - feature.delay,
          [0, 30],
          [0, 1],
          { extrapolateRight: 'clamp', extrapolateLeft: 'clamp' }
        );

        return (
          <div
            key={index}
            style={{
              display: 'flex',
              flexDirection: 'column',
              alignItems: 'center',
              transform: `translateX(${slideIn}px)`,
              opacity,
            }}
          >
            <span style={{ fontSize: 80 }}>{feature.icon}</span>
            <span style={{ fontSize: 24, color: 'white', marginTop: 16 }}>
              {feature.label}
            </span>
          </div>
        );
      })}
    </AbsoluteFill>
  );
};
Step 7: Add Audio to Your Video
7.1 Add a background music track:
Place your audio file in the public folder:
public/
└── audio/
    └── background-music.mp3
7.2 Ask Claude Code to integrate audio:
Add background music from public/audio/background-music.mp3
- Fade in over the first 30 frames
- Fade out over the last 30 frames
- Set volume to 0.5
7.3 Claude Code adds the Audio component:
import { Audio, interpolate, useCurrentFrame, useVideoConfig } from 'remotion';
import { staticFile } from 'remotion';

export const ProductDemo: React.FC = () => {
  const frame = useCurrentFrame();
  const { durationInFrames } = useVideoConfig();

  // Audio fade in/out
  const volume = interpolate(
    frame,
    [0, 30, durationInFrames - 30, durationInFrames],
    [0, 0.5, 0.5, 0],
    { extrapolateLeft: 'clamp', extrapolateRight: 'clamp' }
  );

  return (
    <AbsoluteFill>
      <Audio src={staticFile('audio/background-music.mp3')} volume={volume} />
      {/* ... rest of scenes */}
    </AbsoluteFill>
  );
};
Step 8: Render Your Video
Now let's export your video to a file.
8.1 Render from the command line:
# Render to MP4 (recommended for most uses)
npx remotion render company-intro out/company-intro.mp4

# Render with custom props
npx remotion render company-intro out/apidog-intro.mp4 \
  --props='{"companyName":"Apidog","tagline":"Design. Debug. Test. Document."}'
8.2 Render options:
# High quality (slower)
npx remotion render company-intro out/video.mp4 --crf=18

# Lower quality (faster, smaller file)
npx remotion render company-intro out/video.mp4 --crf=28

# Render as GIF
npx remotion render company-intro out/video.gif --codec=gif

# Render as WebM
npx remotion render company-intro out/video.webm --codec=vp8

# Render specific frame range
npx remotion render company-intro out/preview.mp4 --frames=0-90
8.3 Render progress:
You'll see output like:
ℹ Rendering frames 0-150
████████████████████████████████████████ 100% | 150/150 frames
✓ Rendered 150 frames in 12.3s (12.2 fps)
✓ Encoded video in 3.2s
✓ Video saved to out/company-intro.mp4
Expected result: A rendered video file in your out/ directory.
Step 9: Scale with Remotion Lambda (Optional)
For rendering videos at scale (hundreds or thousands), use Remotion Lambda.
9.1 Install Lambda dependencies:
npm install @remotion/lambda
9.2 Configure AWS credentials:
# Set up AWS credentials
aws configure

# Create Remotion Lambda role
npx remotion lambda policies role
9.3 Deploy your Lambda function:
# Deploy the render function
npx remotion lambda functions deploy

# Deploy your video site
npx remotion lambda sites create src/index.ts --site-name=my-videos
9.4 Render via Lambda:
npx remotion lambda render \
  --function-name=remotion-render \
  --serve-url=https://your-bucket.s3.amazonaws.com/sites/my-videos \
  --composition=company-intro \
  --props='{"companyName":"ClientCo"}'
9.5 Programmatic rendering:
import { renderMediaOnLambda } from '@remotion/lambda/client';

const result = await renderMediaOnLambda({
  region: 'us-east-1',
  functionName: 'remotion-render',
  composition: 'company-intro',
  serveUrl: 'https://your-bucket.s3.amazonaws.com/sites/my-videos',
  codec: 'h264',
  inputProps: {
    companyName: 'Apidog',
    tagline: 'Design. Debug. Test. Document.',
  },
});

console.log('Video URL:', result.url);
Step 10: Build a Video Generation API
Create an API endpoint that generates videos on demand.
10.1 Ask Claude Code to create an Express server:
Create an Express.js API server with these endpoints:

POST /api/videos/generate
- Accepts: template, props, format
- Triggers a Remotion Lambda render
- Returns: jobId, status

GET /api/videos/status/:jobId
- Returns render progress and download URL when complete

Include proper error handling and Zod validation.
10.2 Claude Code generates the server:
server/index.ts:
import express from 'express';
import { renderMediaOnLambda, getRenderProgress } from '@remotion/lambda/client';
import { z } from 'zod';

const app = express();
app.use(express.json());

const generateSchema = z.object({
  template: z.enum(['company-intro', 'product-demo']),
  props: z.record(z.unknown()),
  format: z.enum(['mp4', 'webm', 'gif']).default('mp4'),
});

app.post('/api/videos/generate', async (req, res) => {
  try {
    const { template, props, format } = generateSchema.parse(req.body);

    const { renderId, bucketName } = await renderMediaOnLambda({
      region: 'us-east-1',
      functionName: 'remotion-render',
      composition: template,
      serveUrl: process.env.REMOTION_SITE_URL!,
      codec: format === 'gif' ? 'gif' : 'h264',
      inputProps: props,
    });

    res.json({
      jobId: renderId,
      bucketName,
      status: 'processing',
    });
  } catch (error) {
    res.status(400).json({ error: (error as Error).message });
  }
});

app.get('/api/videos/status/:jobId', async (req, res) => {
  const { jobId } = req.params;
  const { bucketName } = req.query;

  const progress = await getRenderProgress({
    renderId: jobId,
    bucketName: bucketName as string,
    region: 'us-east-1',
    functionName: 'remotion-render',
  });

  res.json({
    status: progress.done ? 'completed' : 'processing',
    progress: progress.overallProgress,
    downloadUrl: progress.outputFile,
  });
});

app.listen(3001, () => {
  console.log('Video API running on http://localhost:3001');
});
10.3 Test your API with Apidog:
Use Apidog to test your video generation endpoints:
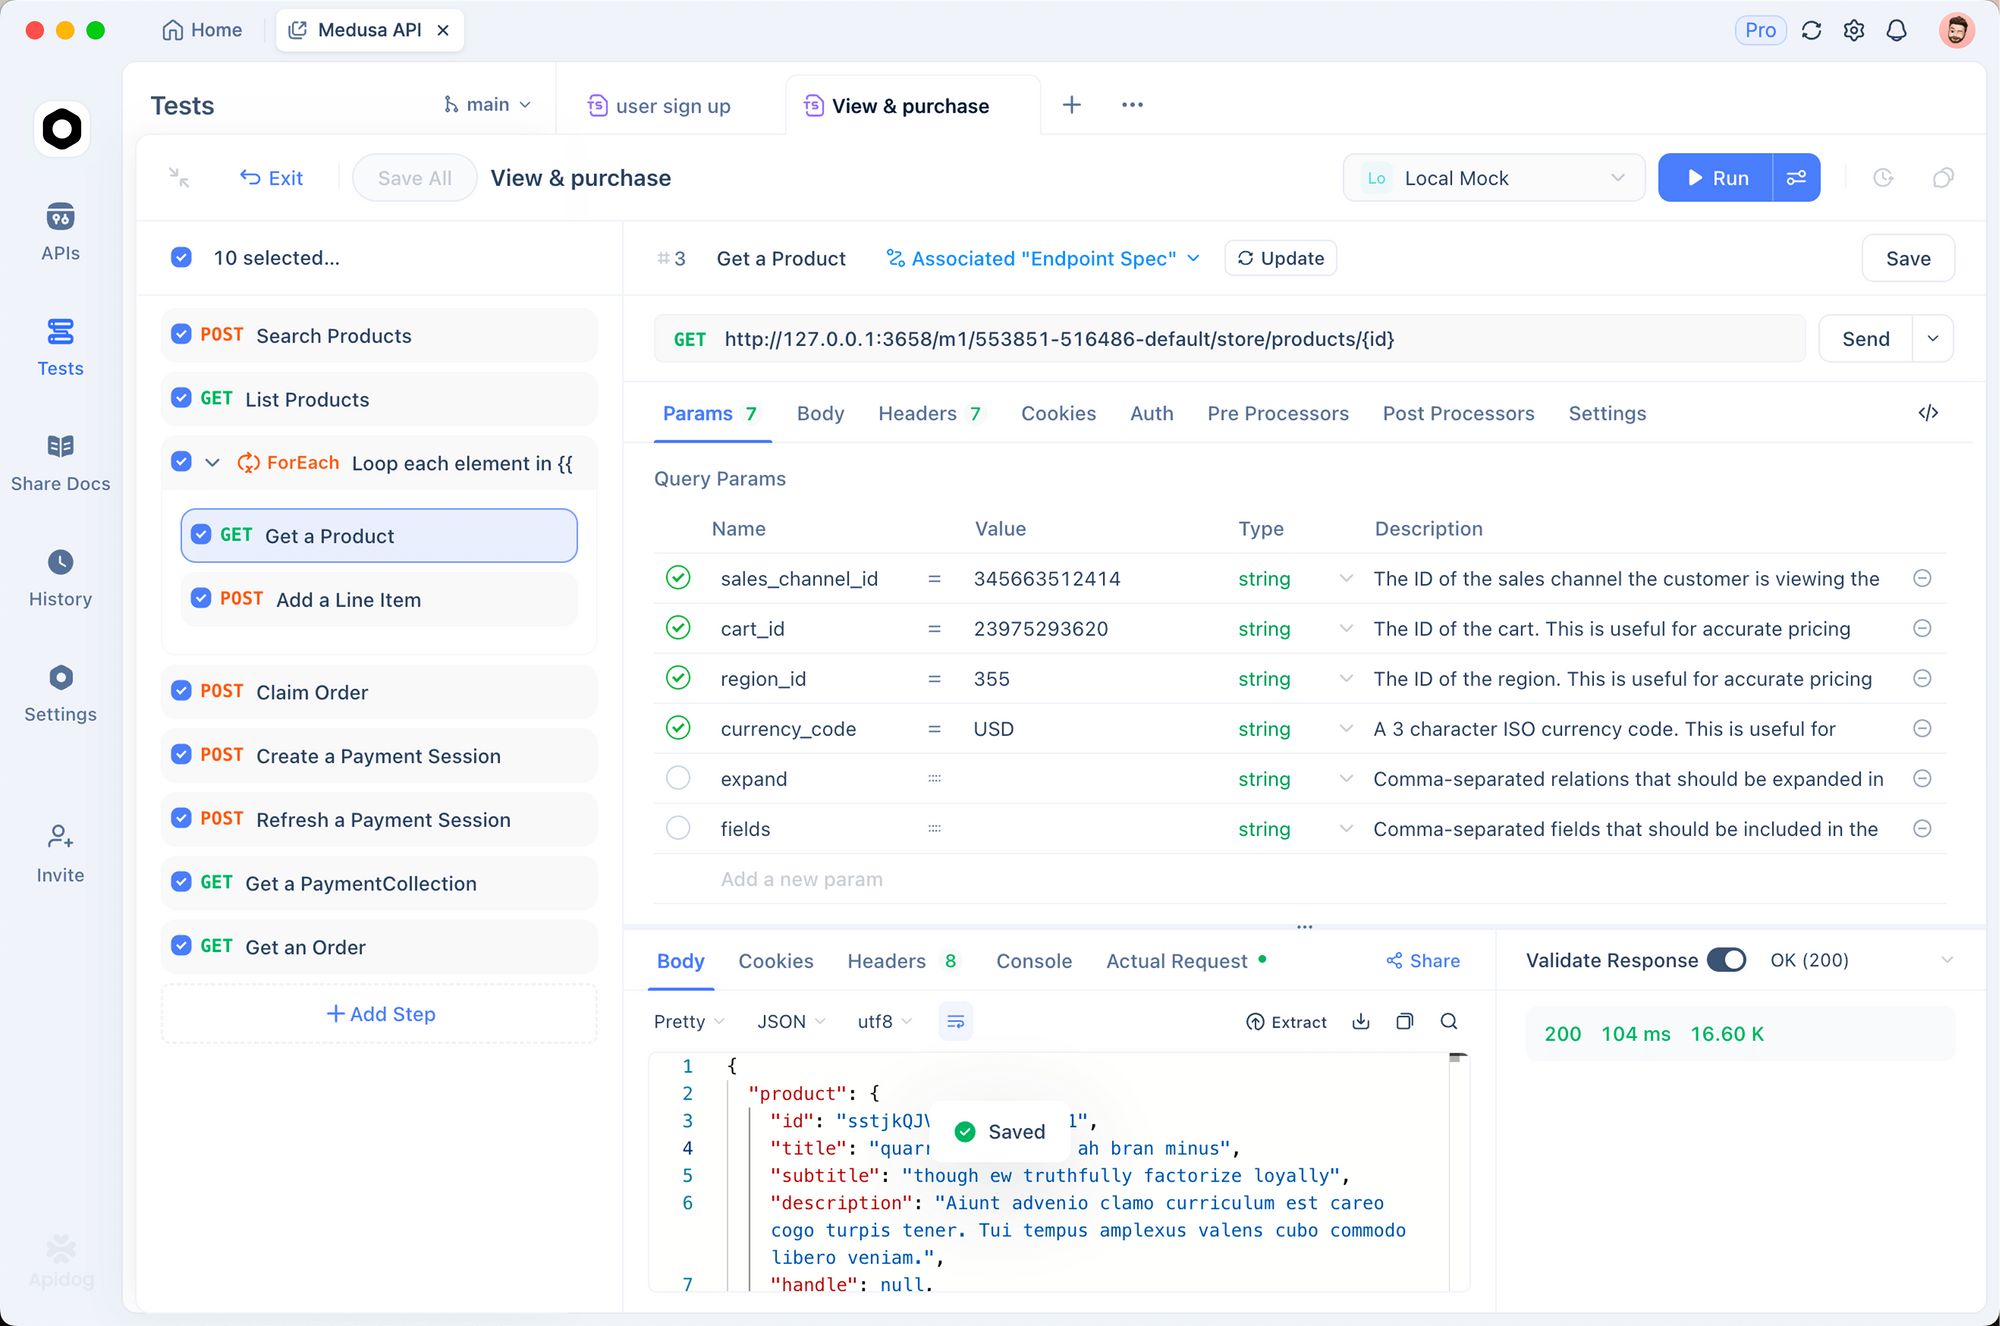
- Create a new request to
POST /api/videos/generate - Set the body:
{
  "template": "company-intro",
  "props": {
    "companyName": "TestCorp",
    "tagline": "Testing made easy"
  },
  "format": "mp4"
}
- Send and verify the response contains a
jobId - Poll the status endpoint until
status: "completed"
Apidog's automated testing features help you validate your video generation pipeline works reliably.
Complete Example: Marketing Video Generator
Here's a full example you can use as a template.
Prompt for Claude Code:
Create a complete marketing video generator with these features:

1. Template: "social-promo"
   - Duration: 15 seconds (450 frames at 30fps)
   - Resolution: 1080x1080 (Instagram square)

2. Scenes:
   - Hook text (0-3s): Big bold text that grabs attention
   - Product image (3-9s): Display a product with Ken Burns effect
   - Features list (9-12s): 3 bullet points appearing sequentially
   - CTA (12-15s): "Shop Now" with pulsing animation

3. Props:
   - hookText: string
   - productImageUrl: string
   - features: string[] (array of 3 items)
   - ctaText: string
   - brandColor: string

4. Include audio ducking for when text appears

Generate all files needed for this to work.
Claude Code will generate a complete, production-ready video template that you can customize and render at scale.
Troubleshooting Common Issues
Issue: "Cannot find module 'remotion'"
# Solution: Reinstall dependencies
rm -rf node_modules
npm install
Issue: Fonts not loading
// Add font import to your component
import { loadFont } from '@remotion/google-fonts/Inter';

const { fontFamily } = loadFont();

// Use in styles
style={{ fontFamily }}
Issue: Video renders black
- Check that your components return visible content
- Verify
AbsoluteFillhas a background color set - Ensure animations aren't all at opacity 0
Issue: Claude Code doesn't recognize Remotion skills
# Reinstall the skill
npx skills add remotion-dev/skills

# Check that .claude/skills/remotion/SKILL.md exists
ls .claude/skills/remotion/

# Restart Claude Code
Issue: Version mismatch errors
# Check and update Remotion versions
npx remotion versions

# This often fixes compatibility issues
Building video generation APIs? Try Apidog free to design, test, and document your endpoints. Validate request schemas, automate test scenarios, and ensure your video pipeline handles edge cases gracefully.


