
Are you ready to unleash your AI tools in full beast mode? Today, we’re diving into how to enable Claude Code and Gemini CLI in Yolo Mode—a setting that lets your AI run tasks like a champ without constant permission checks. You could be generating boilerplate code with Claude Code or experimenting with Gemini CLI, Yolo Mode is like giving your AI a turbo boost. But fair warning: it’s powerful and a bit risky, so we’ll keep safety first. In this guide, we’ll walk through the setup for both tools, test them out, and keep things beginner friendly. Let’s get started!
Want an integrated, All-in-One platform for your Developer Team to work together with maximum productivity?
Apidog delivers all your demands, and replaces Postman at a much more affordable price!
What Are Claude Code and Gemini CLI Yolo Modes?
Before we jump in, let’s break it down. Claude Code is Anthropic’s AI-powered coding assistant, and Gemini CLI is Google’s command-line interface for interacting with the Gemini AI model. Both have a “Yolo Mode” that lets them execute tasks uninterrupted—like fixing lint errors or setting up a Next.js app—without asking for permission at every step.
Why use Yolo Mode? It’s a time-saver for repetitive or well-defined tasks. But here’s the catch: skipping permissions can be risky, potentially leading to data loss or security issues (think prompt injection attacks). We’ll show you how to use Claude Code and Gemini CLI Yolo Mode safely, so you can code like a pro without the chaos.
Step-by-Step Guide to Enable Claude Code Yolo Mode
Let’s start with Claude Code. We’ll set it up in a secure Docker container to minimize risks, using the steps from the provided content.
Prerequisites for Claude Code
- Docker Desktop: Download from docker.com.
- Cursor IDE: Install from cursor.sh.
- Git: For cloning the repository.
- Anysphere Dev Containers Extension: Available in Cursor’s marketplace.
Setup Instructions
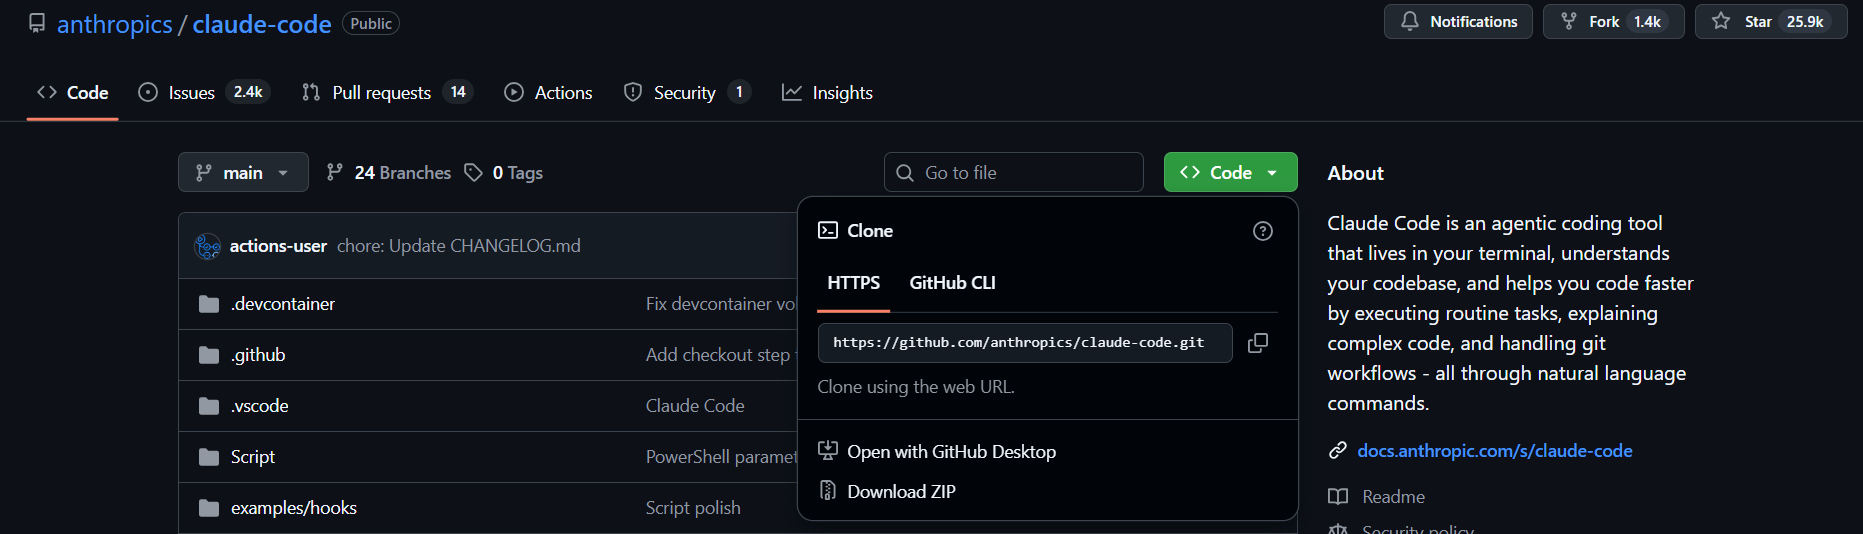
Clone the Claude Code Repository:
- Open your terminal and run:
git clone https://github.com/anthropics/claude-code.git
cd claude-code
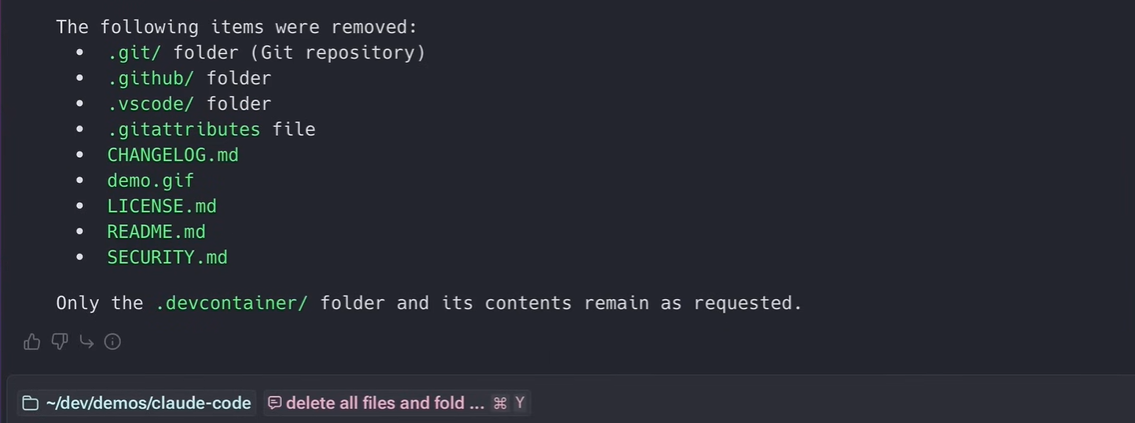
- The
.devcontainerfolder is the star here; you can delete the rest if you want. (Pro tip: Use Claude Code in Agent Mode to automate this!)
Open in Cursor:
- Launch Cursor and open the
claude-codefolder.
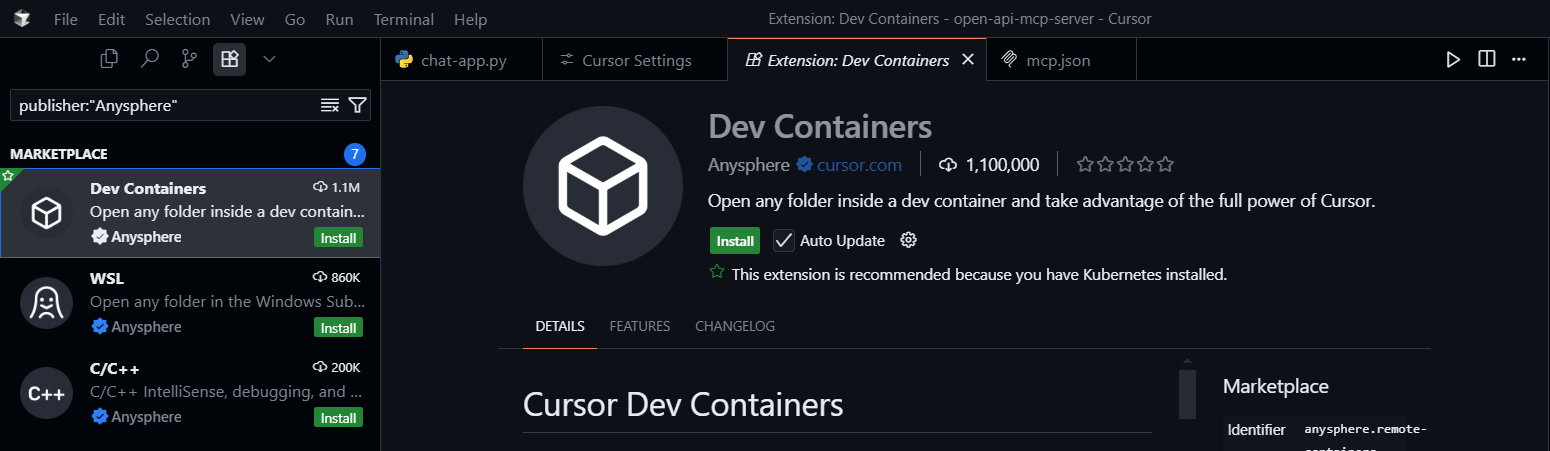
Install Dev Containers Extension:
- In Cursor, go to the Extensions Marketplace, search for “Dev Containers” by Anysphere, and install it.
Edit devcontainer.json:
- To avoid logging in every time, modify
.devcontainer/devcontainer.jsonunder themountssection:
"mounts": [
  "source=claude-code-bashhistory-${devcontainerId},target=/commandhistory,type=volume",
  "source=${localEnv:HOME}/.claude,target=/home/node/.claude,type=bind"
]
- For Next.js support (since we’re in a container), add port forwarding:
"forwardPorts": [3000],
"portsAttributes": {
  "3000": { "label": "Next.js App", "onAutoForward": "notify" }
}
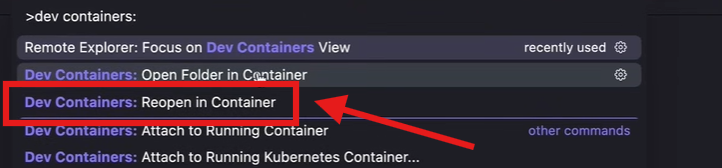
Open in Container:
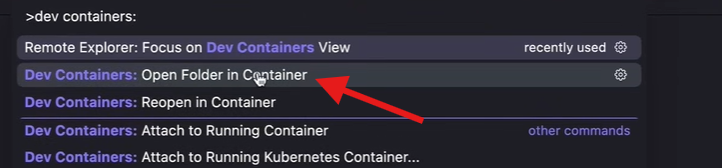
- Hit
Ctrl + Shift + Pin Cursor, type “Dev Containers,” and select Dev Containers: Open Folder in Container. - Choose the
claude-codefolder. First-time setup may take a bit, so grab a coffee.
Run Claude:
- Once loaded, open a new terminal in Cursor and type:
claude
- Log in, select Use Recommended Settings, and choose Yes, proceed to trust the folder’s files. This setup persists, so next time, just use Reopen in Container (
Ctrl + Shift + P) and runclaudewithout re-authenticating.
Enable Yolo Mode:
- In the terminal, run:
claude --dangerously-skip-permissions
- Select Yes, I accept to confirm.
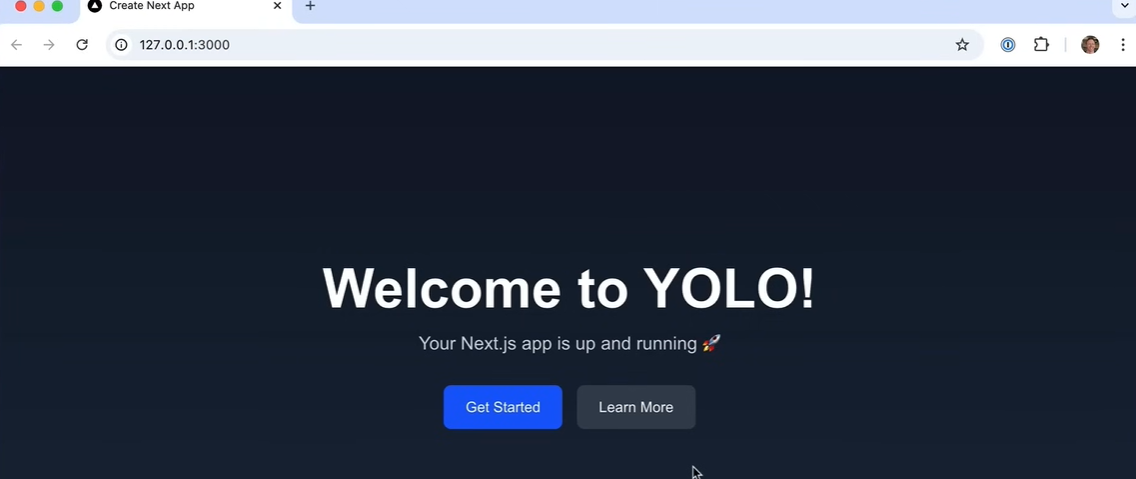
Test It Out:
- Enter this prompt:
Set up a new Next.js app in a folder called yolo, install all packages, create a new home page, and run it so I can test in my browser.
- Watch Claude Code work its magic, creating a Next.js app without asking for permissions. Open your browser at
http://localhost:3000to see the result!
Safety Note
Running Claude Code with --dangerously-skip-permissions is risky outside a container. The Docker setup isolates the environment, minimizing potential damage. Avoid internet access in the container to prevent data exfiltration.
Step-by-Step Guide to Enable Gemini CLI Yolo Mode
Now, let’s switch gears to Gemini CLI. This is simpler but still powerful, and we’ll keep it safe for non-critical projects.
Prerequisites for Gemini CLI
- Gemini API Key: Get one from Google AI Studio.
- Node.js: Optional, if you prefer running CLI tools locally.
- Terminal Access: Any terminal will do.
Setup Instructions
Get Your Gemini API Key:
- Visit Google AI Studio and generate an API key.
Create a Project Folder:
- Make a new directory (e.g.,
gemini-cli-tool):
mkdir gemini-cli-tool
cd gemini-cli-tool
Set Up the API Key:
- Create a
.envfile and add:
GEMINI_API_KEY="YOUR_API_KEY"
- Save and close.
Install Gemini CLI:
- In the
gemini-cli-toolfolder, open a terminal and run:
npm install -g @google/gemini-cli
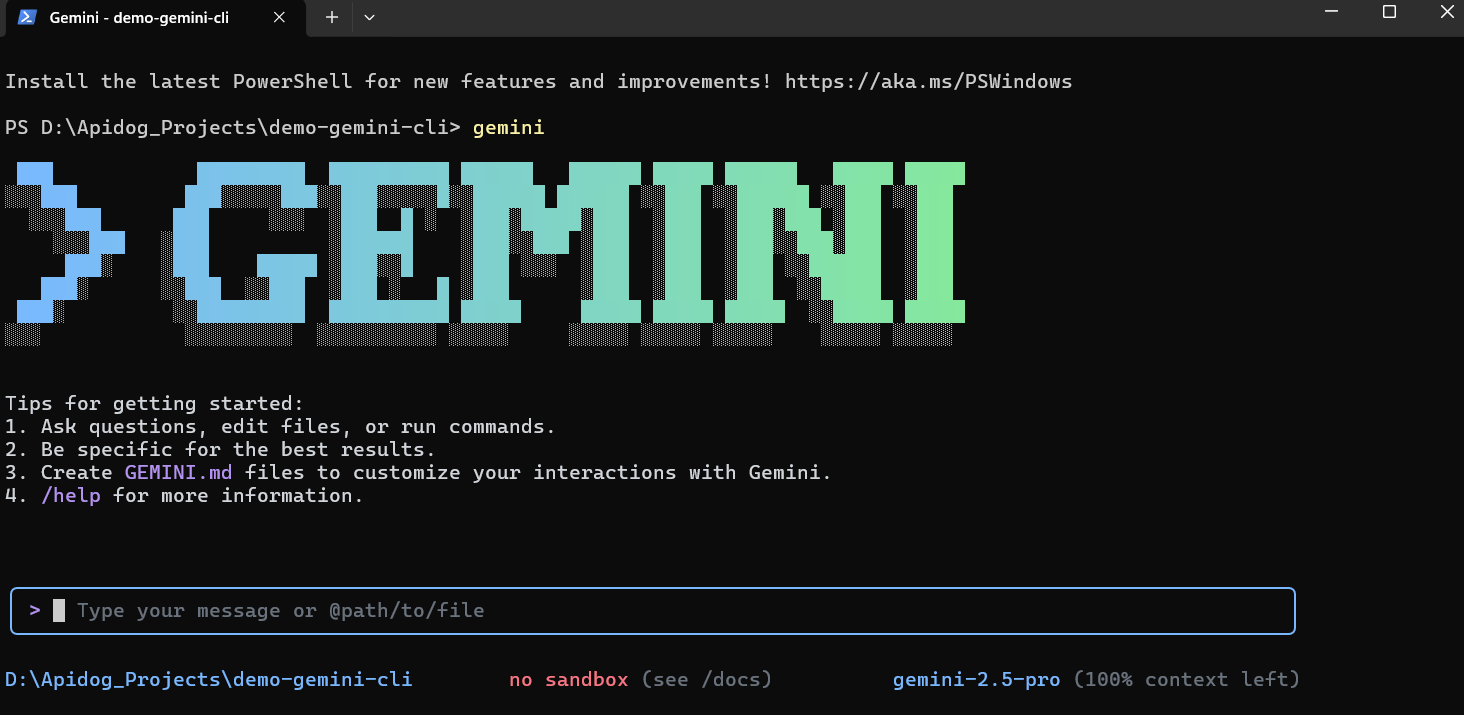
- Once installed, start the CLI:
gemini
Authenticate:
- Choose the API key option (it’ll auto-detect from your
.envfile) or log in with your Google account. - Pick a theme for the CLI—have fun browsing the options!
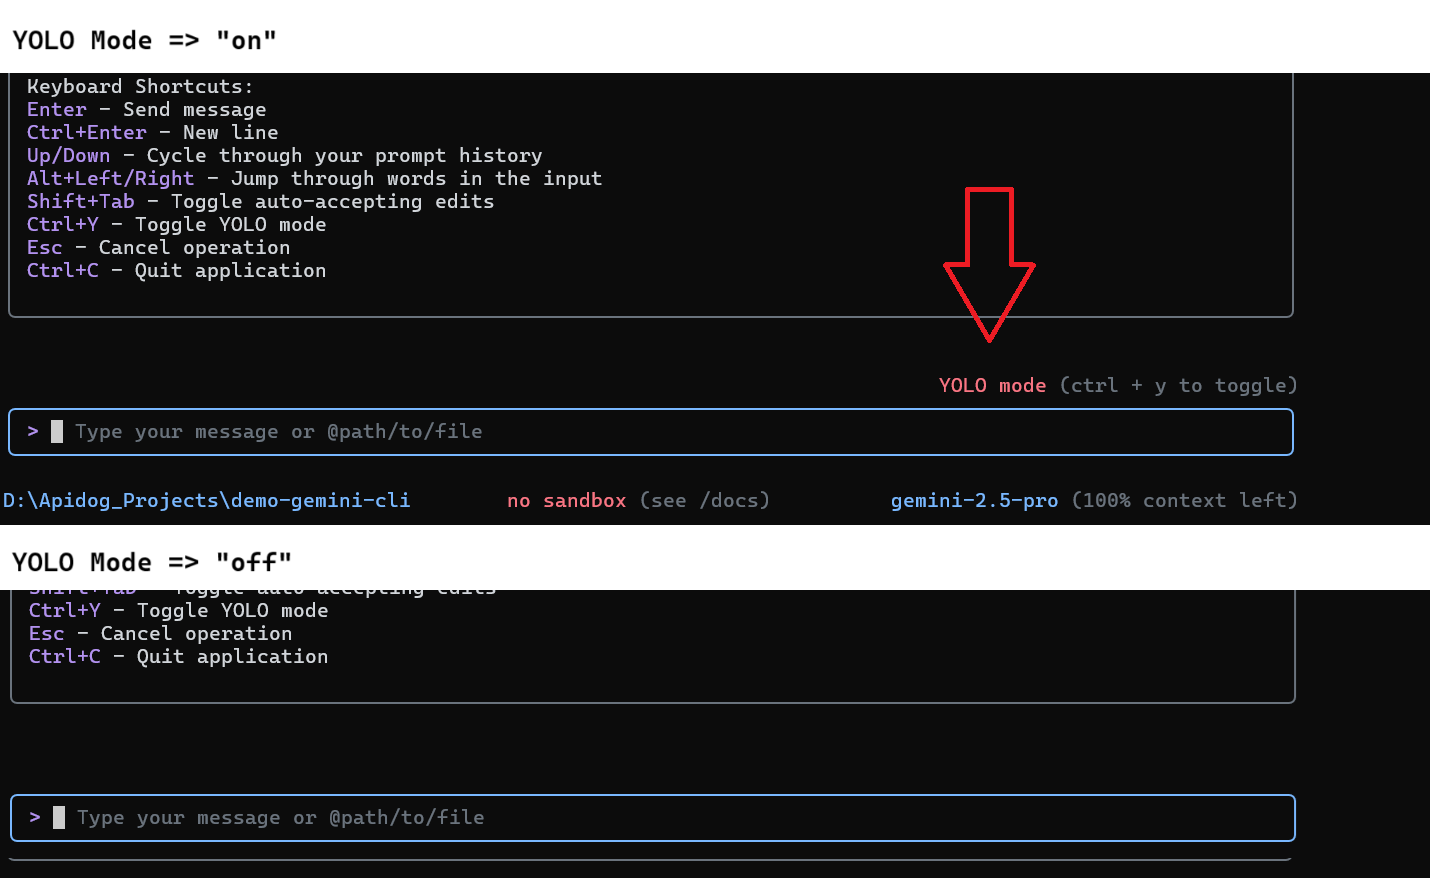
Enable Yolo Mode:
- In the Gemini CLI interface, press
Ctrl + Yto toggle Yolo Mode. You’ll see an indicator in the top-right corner of the input box.
Test It Out:
- Try a simple command:
Generate a Python script for a calculator app.
- With Yolo Mode on, Gemini CLI will execute the task without extra prompts. Check the output to see your script ready to roll!
Safety Note
Yolo Mode in Gemini CLI is less risky than Claude Code but still bypasses safety checks. Use it for non-critical projects to avoid unintended consequences.
Why Use Claude Code and Gemini CLI Yolo Mode?
Yolo Mode in Claude Code and Gemini CLI is perfect for speeding up coding tasks when you trust the environment. For Claude Code, it’s great for automating setup tasks like creating a Next.js app or fixing lint errors. For Gemini CLI, it’s ideal for quick experiments or generating code snippets without interruptions. Just remember to use these modes wisely—stick to safe environments like Docker containers or low-stakes projects.
Troubleshooting Tips
- Claude Code Not Loading? Ensure Docker Desktop is running and the Dev Containers extension is installed.
- Gemini CLI Authentication Issues? Verify your API key in the
.envfile and check your internet connection. - Yolo Mode Not Working? For Claude Code, confirm you used
--dangerously-skip-permissions. For Gemini CLI, ensureCtrl + Ytoggled the mode (check for theYOLO Modeindicator). - Next.js App Not Accessible? Double-check the
forwardPortssetting indevcontainer.jsonand that port 3000 is open.
Conclusion
And there you go! You’ve mastered enabling Yolo Mode for Claude Code and Gemini CLI, turning your AI tools into unstoppable coding machines. With Claude Code, you set up a Next.js app in a safe Docker container, and with Gemini CLI, you toggled Yolo Mode for quick experiments. These tools make coding faster and more fun, as long as you keep safety in mind.
Ready to take your AI coding to the next level? Try out more complex tasks with Claude Code or experiment with Gemini CLI themes.
Want an integrated, All-in-One platform for your Developer Team to work together with maximum productivity?
Apidog delivers all your demands, and replaces Postman at a much more affordable price!


