
Imagine giving your AI assistant the ability to fetch weather data, analyze stock prices, or automate tasks—all through a single protocol. The Model Context Protocol (MCP) makes this possible, and with the new MCP Framework, building your own server is easier than ever.
In this guide, I’ll Walk you through creating an MCP server using the MCP Framework’s CLI tools. No prior MCP experience needed—just basic JavaScript/TypeScript knowledge and a sprinkle of curiosity!

Understanding MCP
Before diving into the setup, let's quickly cover what MCP is and why it's important:
MCP Overview: The Model Context Protocol is an open specification created by Anthropic to standardize how AI models interact with external data sources. It allows developers to build tools that can be easily integrated with AI platforms like Claude Desktop.

Benefits of MCP: MCP simplifies the integration process by providing a standardized protocol for tool development. This means you can focus on building tools without worrying about compatibility issues across different platforms.
Building Your First MCP Server
Step 1: What You Will Need
Before getting started, make sure you have the following installed:
- Node.js (20 or higher): The server is built on Node.js, so you'll need it installed. Download here
- TypeScript (5.0 or later): This is used for building your server.
- npm: A package manager to handle dependencies.
- MCP Framework: This can be installed globally via npm or added to an existing project.
- 10 minutes of patience: Seriously, it’s that quick
Step 2: Install the MCP Framework
There are two ways to get started with the MCP Framework:
Option 1: Using the MCP CLI (Recommended)
The easiest way to set up an MCP server is by using the CLI. Here’s how to do it:
# Install the CLI globally
npm install -g mcp-framework

# Create a new project
mcp create my-mcp-server

# Navigate to your project
cd my-mcp-server

# Install dependencies
npm install
This scaffolds a ready-to-use MCP server with: Preconfigured TypeScript, Example tools, and Built-in error handling. It should look something like this:
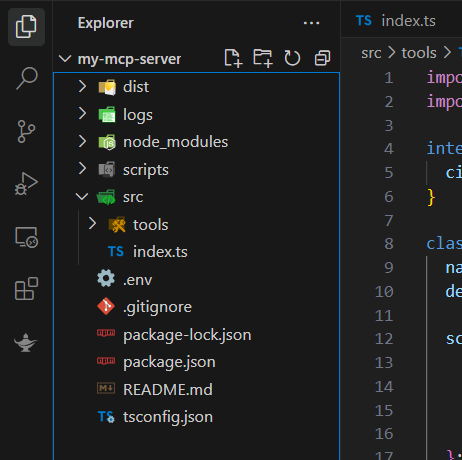
Now, your new MCP project is ready to go.
Option 2: Manual Installation (For Existing Projects)
If you want to add the MCP Framework to an existing project, follow these steps:
Install the MCP Framework:
npm install mcp-frameworCreate a basic server inside the src/index.ts file:
import { MCPServer } from "mcp-framework";

const server = new MCPServer();

server.start().catch((error) => {
  console.error("Server error:", error);
  process.exit(1);
});
Step 3: Creating Your First Tool (Weather Example)
Now that your server is set up, let’s build a weather tool that fetches weather information for a given city.
Create a new tool:
Using the MCP CLI, you can create a new tool for weather information:
mcp add tool weather This will generate a file called src/tools/WeatherTool.ts. Alternatively, you could just manually create that file by yourself. Now, let’s edit that file.
Modify the Weather Tool:
Open the WeatherTool.ts file and update it as follows:
import { MCPTool } from "mcp-framework";
import { z } from "zod";

interface WeatherInput {
  city: string;
}

class WeatherTool extends MCPTool<WeatherInput> {
  name = "weather";
  description = "Get weather information for a city";

  // Schema validation using Zod
  schema = {
    city: {
      type: z.string(),
      description: "City name (e.g., London)",
    },
  };

  async execute({ city }: WeatherInput) {
    // Replace this with a real API call
    return {
      city,
      temperature: 22,
      condition: "Sunny",
      humidity: 45,
    };
  }
}

export default WeatherTool;
In this code, we define a WeatherTool class that fetches the weather for a city. While this mock implementation returns static data, you can replace it with a real API call.
Step 4: Build and Test Your MCP Server
After modifying the weather tool, it’s time to build and test to see if your MCP server performs as expected, and for that we will be using the MCP inspector.
Build the project:
npm run buildChoose a transport method: MCP Framework supports two transports:
- STDIO Transport: Best for CLI and local integrations.
- SSE Transport: Ideal for web applications and distributed systems.
For this tutorial, we'll use the STDIO Transport, which is perfect for local testing.
Launch the MCP Inspector: use the following command:
npx @modelcontextprotocol/inspector dist/index.js Test The Weather Tool:
To test you weather tool, select the weather tool and input a city like "Paris".
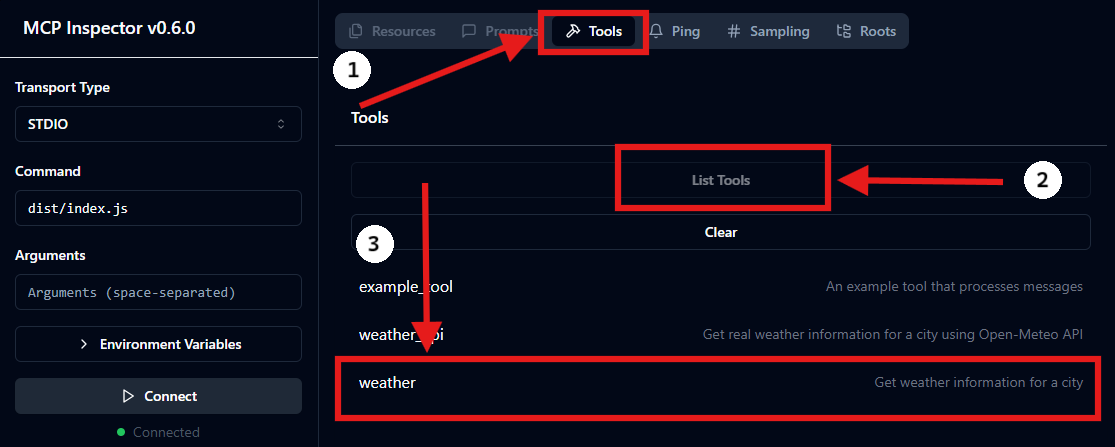
Then see the mock weather data.

Step 5: Connect the MCP to Real Weather Data
Let’s upgrade our weather tool to use Open-Meteo’s free API - a powerful alternative that provides hyperlocal forecasts without API keys. To start, you can create a new tool and give it a new name or simply replace the old tools code with the new code below:
import { MCPTool } from "mcp-framework";
import { z } from "zod";
import axios, { AxiosError } from "axios";

interface WeatherApiInput {
  city: string;
}

interface WeatherApiResponse {
  city: string;
  temperature: number;
  condition: string;
  humidity: number;
  windSpeed: number;
  feelsLike: number;
  precipitation: number;
}

class WeatherApiTool extends MCPTool<WeatherApiInput> {
  name = "weather_api";
  description = "Get real weather information for a city using Open-Meteo API";

  private readonly GEOCODING_URL = "https://geocoding-api.open-meteo.com/v1/search";
  private readonly WEATHER_URL = "https://api.open-meteo.com/v1/forecast";

  schema = {
    city: {
      type: z.string(),
      description: "City name to get weather for",
    },
  };

  async execute({ city }: WeatherApiInput): Promise<WeatherApiResponse> {
    try {
      // First, get coordinates for the city
      const geoResponse = await axios.get(this.GEOCODING_URL, {
        params: {
          name: city,
          count: 1,
          language: "en",
          format: "json"
        }
      });

      if (!geoResponse.data.results?.length) {
        throw new Error(`City '${city}' not found`);
      }

      const location = geoResponse.data.results[0];

      // Then get weather data using coordinates
      const weatherResponse = await axios.get(this.WEATHER_URL, {
        params: {
          latitude: location.latitude,
          longitude: location.longitude,
          current: ["temperature_2m", "relative_humidity_2m", "apparent_temperature", "precipitation", "weather_code", "wind_speed_10m"],
          timezone: "auto"
        }
      });

      const current = weatherResponse.data.current;

      // Map weather code to condition
      const condition = this.getWeatherCondition(current.weather_code);

      return {
        city: location.name,
        temperature: Math.round(current.temperature_2m),
        condition,
        humidity: Math.round(current.relative_humidity_2m),
        windSpeed: Math.round(current.wind_speed_10m),
        feelsLike: Math.round(current.apparent_temperature),
        precipitation: current.precipitation
      };
    } catch (error: unknown) {
      if (error instanceof Error) {
        throw new Error(`Failed to fetch weather data: ${error.message}`);
      }
      throw new Error('Failed to fetch weather data: Unknown error occurred');
    }
  }

  private getWeatherCondition(code: number): string {
    // WMO Weather interpretation codes (https://open-meteo.com/en/docs)
    const conditions: Record<number, string> = {
      0: "Clear sky",
      1: "Mainly clear",
      2: "Partly cloudy",
      3: "Overcast",
      45: "Foggy",
      48: "Depositing rime fog",
      51: "Light drizzle",
      53: "Moderate drizzle",
      55: "Dense drizzle",
      61: "Slight rain",
      63: "Moderate rain",
      65: "Heavy rain",
      71: "Slight snow",
      73: "Moderate snow",
      75: "Heavy snow",
      77: "Snow grains",
      80: "Slight rain showers",
      81: "Moderate rain showers",
      82: "Violent rain showers",
      85: "Slight snow showers",
      86: "Heavy snow showers",
      95: "Thunderstorm",
      96: "Thunderstorm with slight hail",
      99: "Thunderstorm with heavy hail"
    };

    return conditions[code] || "Unknown";
  }
}

export default WeatherApiTool;
The code is a little bit long but for now focus on getting the code to work and the feel of getting started with MCP. Take your time and use this as an example guide to help you transition into building even more complex MCP's.
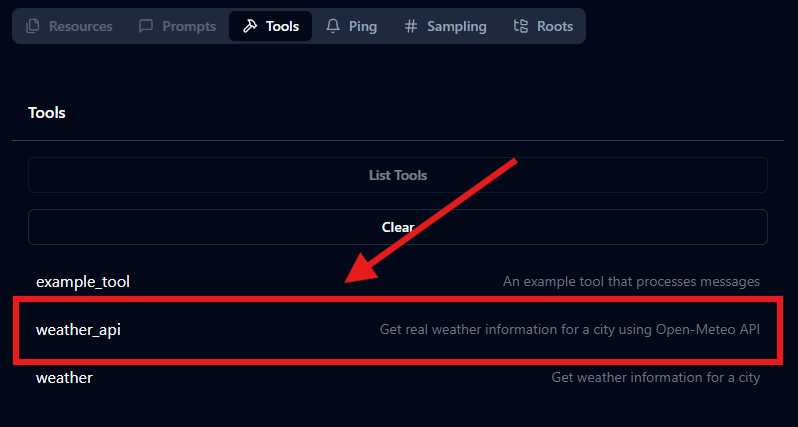
To test the tool, simply select it:
Enter a city e.g. "Lusaka", and view the results:
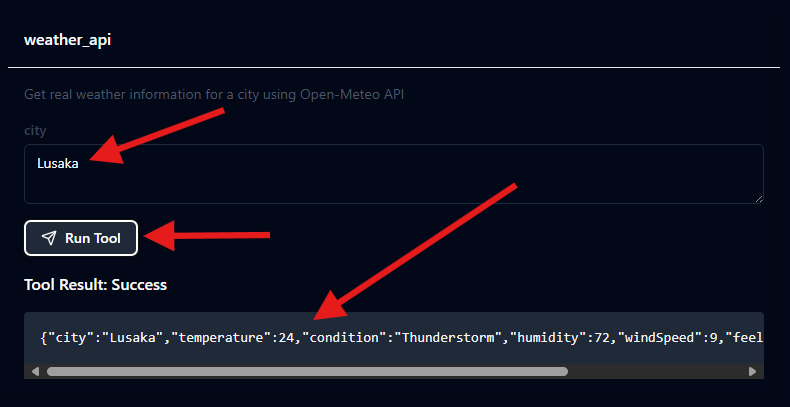
Hopefully at this stage you would have gotten over most of the hiccups of configuration and running the project, so testing the new MCP Tool shouldn't be a challenge at all!
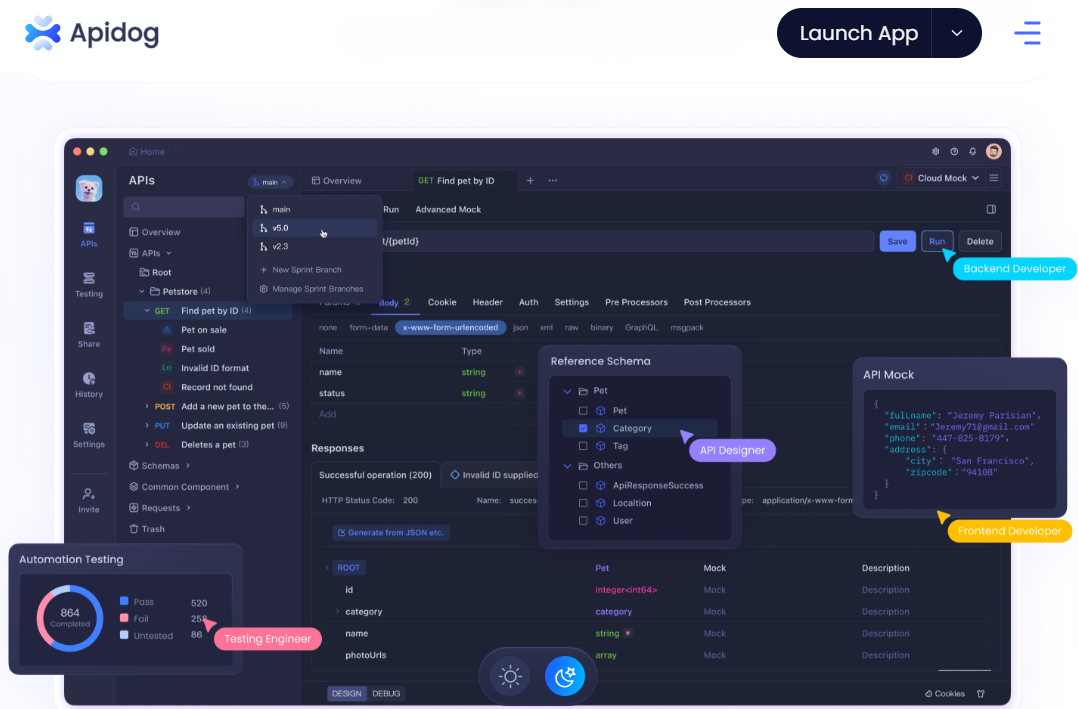
Working with Apidog
Don't forget to boost your MCP server development with Apidog—a versatile tool that simplifies API testing, mocking, and documentation. Start by signing up for its free tier, then create a project to centralize your API workflows. Import your endpoints to monitor requests, simulate responses with smart mock servers, and automate tests to catch hidden bugs early. Apidog streamlines debugging and ensures your tools work flawlessly, making it the perfect companion for building robust AI integrations.
Conclusion
Building an MCP Server is a straightforward process that can significantly enhance your AI workflows. By integrating tools like Apidog, you can streamline your development process, ensuring robust and well-documented APIs. Whether you're working with web services or local files, MCP provides a standardized way to connect AI models with external data sources.
Ready to take your API development workflow to the next level? Download Apidog for free today and discover how it can transform your workflow!


