
If you're an API developer or backend engineer looking to extend the power of your Cursor IDE, creating a custom MCP (Model Context Protocol) server unlocks advanced capabilities—like real-time web search and secure document analysis—all within your editor.
This practical guide walks you through setting up a custom MCP server, integrating web search and Retrieval-Augmented Generation (RAG) tools, and shows how Apidog can help you test and debug these APIs with ease.
Why Extend Cursor IDE with a Custom MCP Server?
A custom MCP server lets you tailor Cursor's features to your workflow. With your own server, you can:
- Add real-time web search directly to your coding environment
- Analyze private or project documents securely (RAG)
- Connect to third-party APIs (e.g., Twitter, Gemini, etc.)
- Build specialized AI-driven developer tools
Recent updates have made MCP server development approachable, even if you're new to backend tooling.
Prerequisites
Before you start, ensure you have:
- Latest version of Cursor IDE
- Python 3.8 or higher
- UV package manager (instructions below)
- Basic command line experience
1. Setting Up Your Development Environment
Clone the Starter MCP Server Template
To get started quickly, use this pre-built template:
git clone https://github.com/patchy631/ai-engineering-hub/tree/main/cursor_linkup_mcp
- Open the cloned
cursor_linkup_mcpfolder in Cursor IDE.
2. Registering Your MCP Server in Cursor
Within Cursor IDE:
-
Go to:
Settings → Cursor Settings → MCP → Add New MCP Server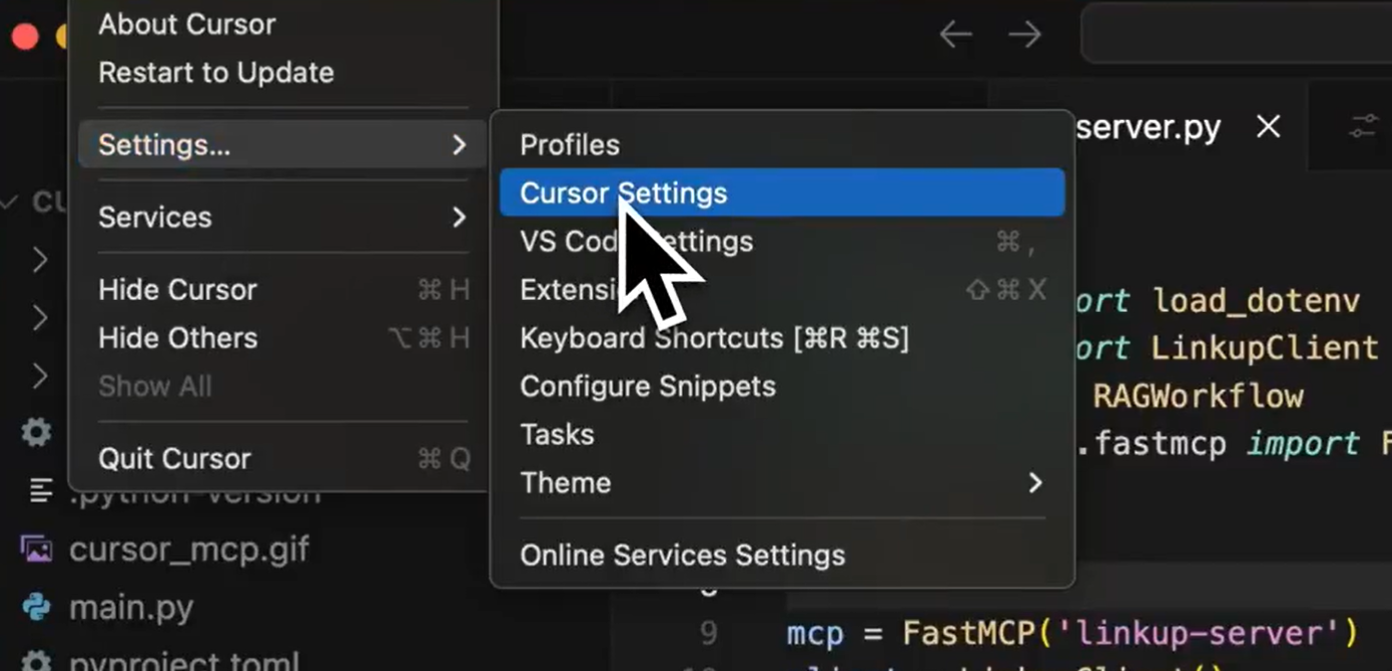
-
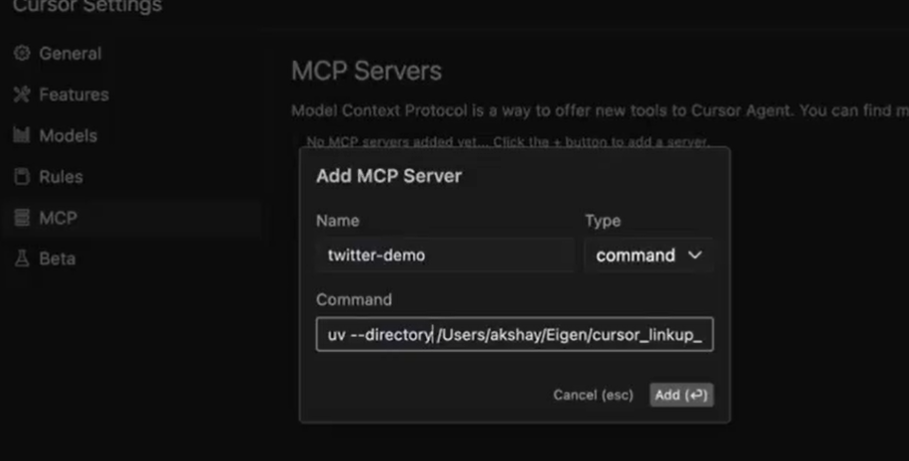
Configure your server:
- Name: Choose a descriptive name (e.g.,
twitter-demo) - Command: We'll use UV to manage dependencies and run the server.
- Name: Choose a descriptive name (e.g.,
-
If UV isn't installed:
pip install uv -
Set the command to launch your server:
uv --directory /path/to/cursor_linkup_mcp run server.py(Replace
/path/to/with your actual folder path.) -
Click Add to save the configuration.
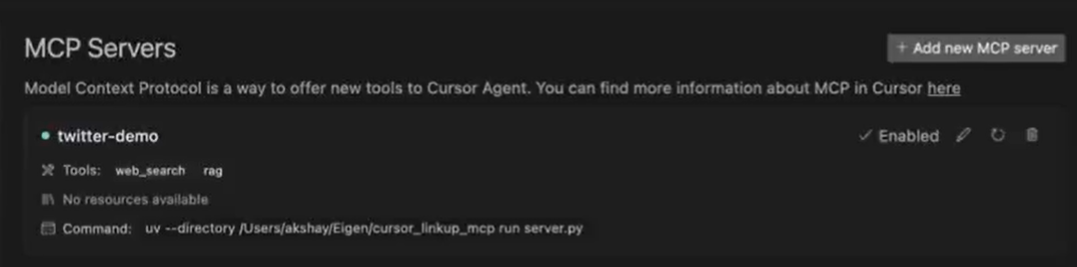
3. Test Your Custom Tools in Cursor
With the server running, try out the new features directly inside Cursor.
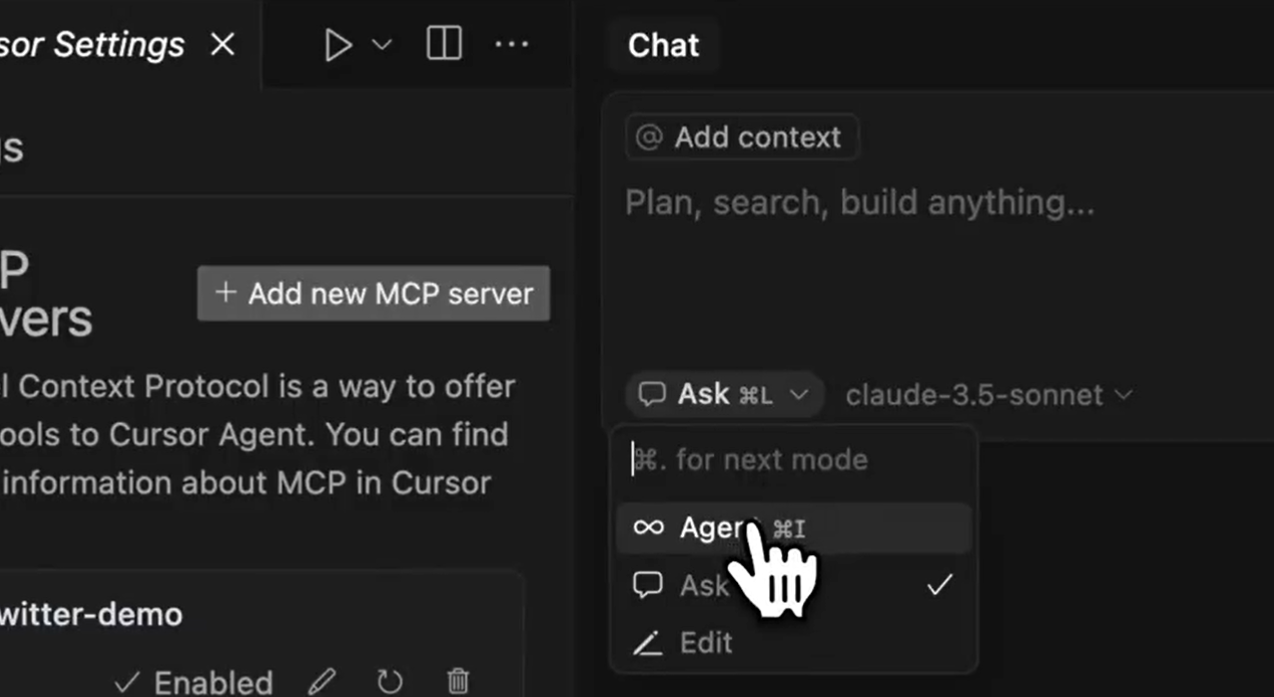
A. Web Search Tool
-
Open a new chat in Agent mode.
-
Ask a real-world question, e.g.:
Who won the latest cricket match between India and Australia?
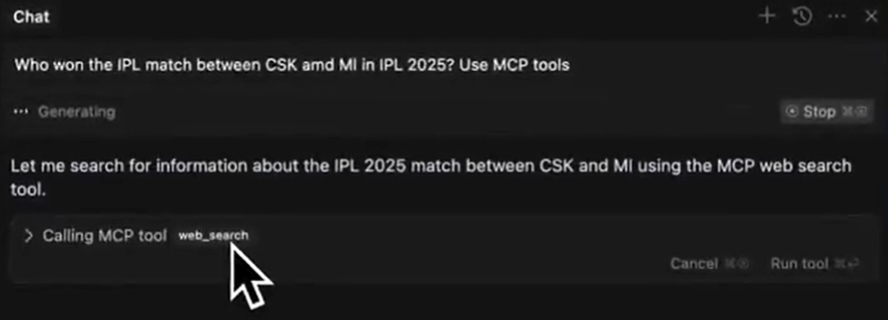
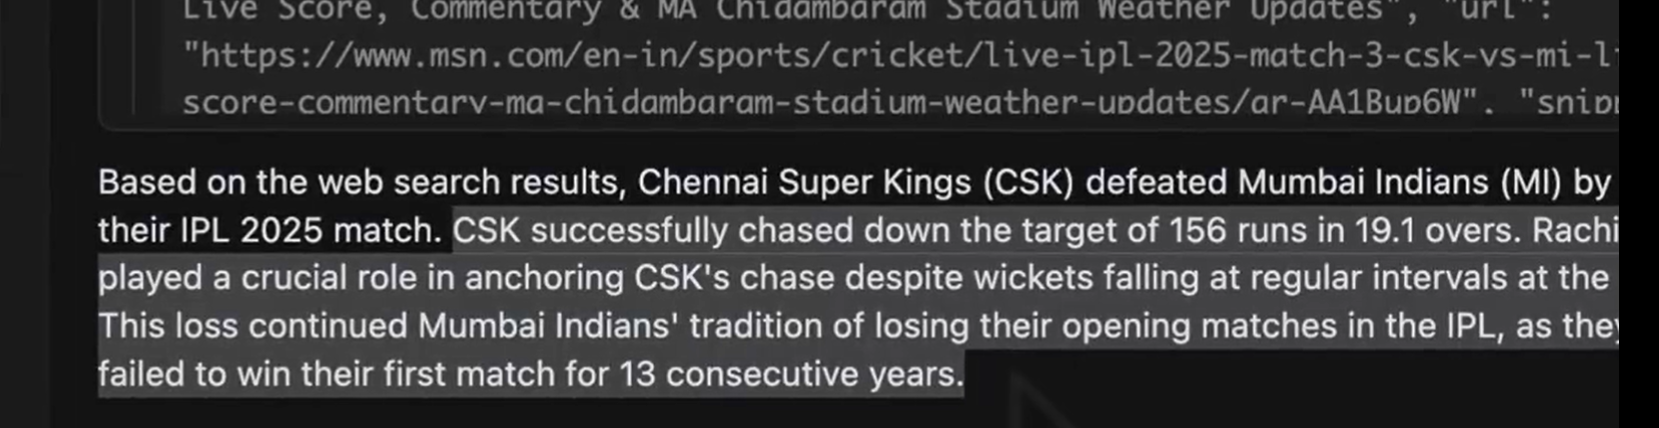
-
Cursor uses your MCP server to fetch and display the answer.
B. RAG (Document Analysis) Tool
-
In your cloned repository, locate the
datafolder.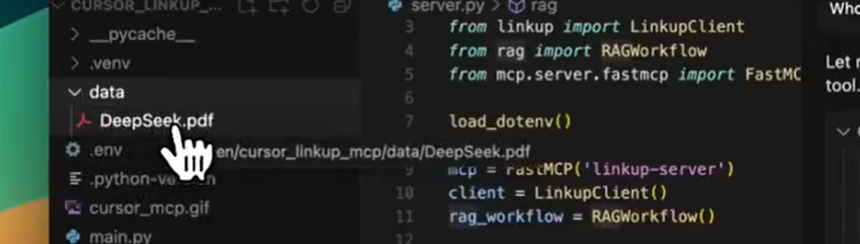
-
Add documents you wish to analyze (PDFs, Word files, etc.).
-
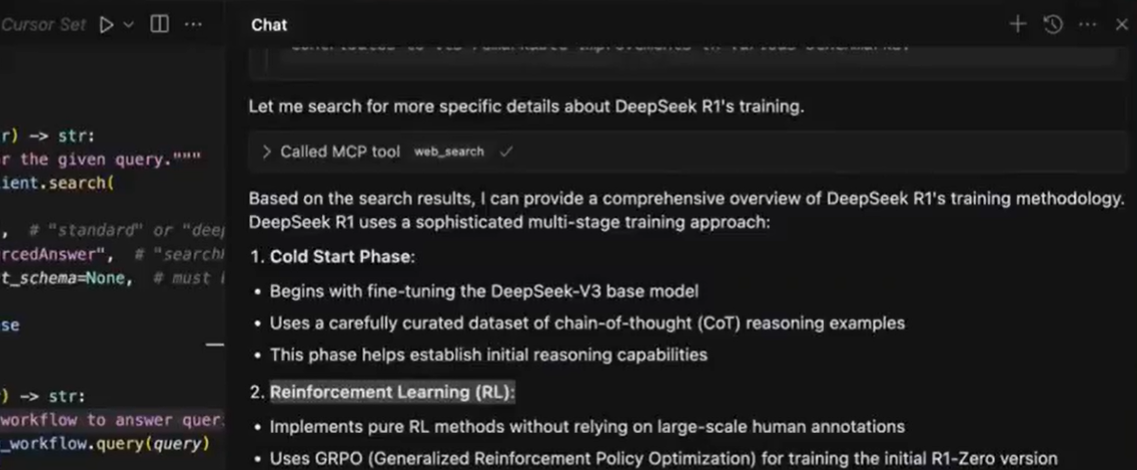
In chat, ask something like:
Summarize the key points from my file about how DeepSeek R1 is trained.
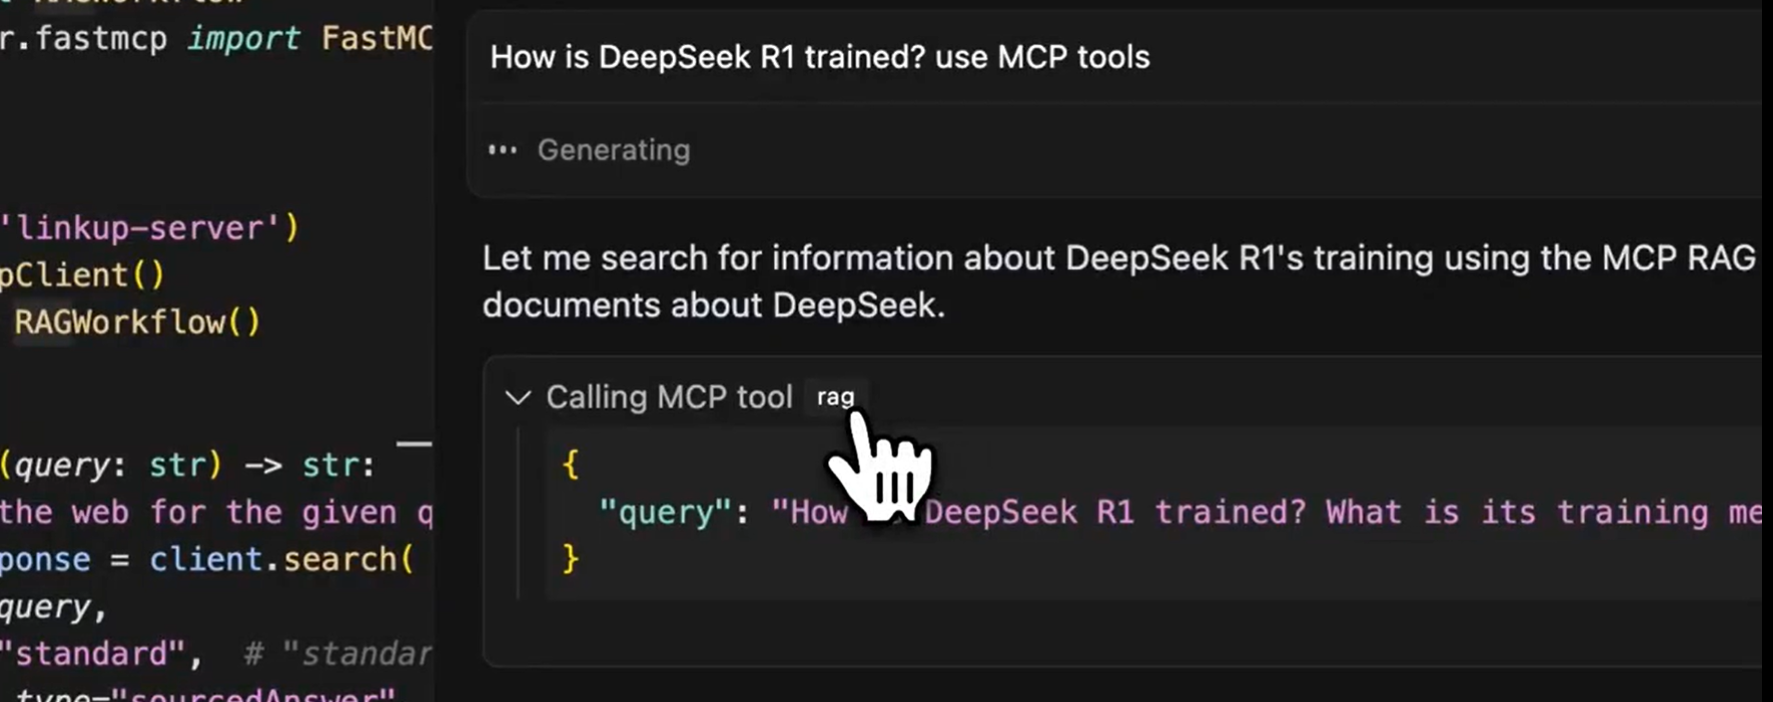
-
View concise, AI-generated results in the chat.
4. How the MCP Server Works: Technical Overview
Your custom MCP server acts as a bridge between Cursor and external APIs or local resources:
- Cursor sends user queries to your MCP server.
- The server processes requests (web search, document analysis, etc.).
- Results are returned and displayed in Cursor's chat interface.
Core Python Script Breakdown
Here's how the sample server is structured:
1. Import Dependencies
import asyncio
from dotenv import load_dotenv
from linkup import LinkupClient
from rag import RAGWorkflow
from mcp.server.fastmcp import FastMCP
- asyncio: Enables async operations for concurrency.
- dotenv: Loads secrets (API keys) from
.env. - LinkupClient: Handles web search.
- RAGWorkflow: Manages document analysis.
- FastMCP: Provides the MCP server framework.
2. Server Initialization
load_dotenv()
mcp = FastMCP('linkup-server')
client = LinkupClient()
rag_workflow = RAGWorkflow()
- Loads environment variables.
- Sets up web search and document analysis tools.
3. Web Search Tool
@mcp.tool()
def web_search(query: str) -> str:
    """Search the web for the given query."""
    search_response = client.search(
        query=query,
        depth="standard",
        output_type="sourcedAnswer",
        structured_output_schema=None,
    )
    return search_response
- Adds
/web_searchcommand to Cursor. - Supports different search depths and result types.
Example command in Cursor:
/web_search query="Who won the 2023 Cricket World Cup?"
4. Document Analysis (RAG) Tool
@mcp.tool()
async def rag(query: str) -> str:
    """Use RAG to answer queries using documents from the data directory"""
    response = await rag_workflow.query(query)
    return str(response)
- Adds
/ragcommand for querying your own documents. - Asynchronous for handling large files efficiently.
Example command in Cursor:
/rag query="What are the key safety recommendations in this AI paper?"
5. Server Startup
if __name__ == "__main__":
    asyncio.run(rag_workflow.ingest_documents("data"))
    mcp.run(transport="stdio")
- Loads all
data/documents on startup. - Starts the MCP server for Cursor to connect.
5. Tips for API Developers: Testing and Debugging MCP Integrations
Working with APIs—especially when integrating with tools like Gemini 2.5 Pro—requires robust testing and clear inspection of requests and responses. This is where Apidog stands out:
- Design, test, and debug APIs with a user-friendly interface.
- Simulate API calls before wiring into Cursor's MCP server.
- Collaborate with teammates using API collections and documentation.
- Solve integration issues faster, keeping your development workflow smooth.
6. Advanced Use Cases & Next Steps
Once your MCP server is running:
- Add new tools: Integrate Twitter, stock market APIs, or GitHub search.
- Enhance document analysis: Customize RAG prompts or support more file types.
- Fine-tune web search: Adjust depth or result schema for your needs.
- Share with your team: Deploy servers centrally for collaborative coding.
For inspiration and ready-to-use MCP servers, check out HiMCP.ai—a directory of 1682+ curated MCP servers and clients for Cursor, Claude, Windsurf, and more.
7. Troubleshooting
Common issues and fixes:
- Wrong directory: Double-check the UV command path.
- Missing dependencies: Run
pip install -r requirements.txtin your MCP folder. - Python version: Ensure you're on Python 3.8+.
- Server won't start: Review Cursor's error logs for clues.
Conclusion
Building a custom MCP server for Cursor gives you powerful, personalized tools—enabling real-time web research and secure document analysis, all within your IDE. With tools like Apidog, you can test and debug APIs efficiently, ensuring smooth integration every step of the way.
Whether you're working solo or with a team, extending Cursor with MCP unlocks new productivity gains for API-driven development. What will you automate next?


