
Ever wanted to empower your AI to interact with the web like a real user—navigating sites, clicking buttons, filling out forms, and extracting data? With the Browserbase MCP Server, this is not just possible—it's surprisingly straightforward. In this developer-focused tutorial, you'll learn how to connect AI models like Claude, GPT, or Gemini to real browser sessions and automate web tasks efficiently.
Whether you're building intelligent bots, automating QA workflows, or prototyping new data-driven tools, this guide will show you why Browserbase MCP Server is essential and how to set it up seamlessly.
💡 Looking for an API testing platform that creates beautiful API documentation and powers collaborative developer workflows? Apidog combines powerful testing, streamlined docs, and team productivity—all at a fraction of Postman's cost.
What Is Browserbase MCP Server?
The Browserbase MCP Server is an open-source tool that connects large language models (LLMs) to web browsers using the Model Context Protocol (MCP). Think of it as a secure, programmable bridge between AI and real-world browser automation.
With Browserbase MCP Server, an AI can:
- Navigate to any URL
- Click buttons or links
- Fill in and submit forms
- Extract structured data from web pages
- Take precise screenshots
- Execute JavaScript on a live page
- Manage multiple browser sessions in parallel
This capability unlocks advanced automation and data extraction without manual intervention—ideal for API-driven teams, backend engineers, and QA automation specialists.
Compatible with: OpenAI GPT, Anthropic Claude, Google Gemini, and other MCP-supported models.
Why Use Browserbase MCP Server for AI-Driven Automation?
For developers and teams, Browserbase MCP Server stands out for several reasons:
- Cloud-Based Browsing: Run browser actions in scalable cloud environments—no local Chrome setup required.
- Supports Multiple AI Models: Use your preferred LLMs, switching between Claude, GPT, or Gemini as needed.
- Parallel Session Handling: Run multiple browser automations concurrently for efficient workflows.
- Visual Context: Capture and analyze screenshots for advanced QA or data collection.
- Simple Integration: Connects quickly with popular MCP clients (e.g., Claude Desktop, Cursor) for streamlined developer experience.
Whether you're automating repetitive web tasks, building data pipelines, or integrating browser automation into CI/CD flows, Browserbase MCP Server saves engineering hours while enabling robust and reliable testing.
How to Install and Configure Browserbase MCP Server
You can start using the Browserbase MCP Server in three ways:
- Hosted remote server (easiest)
- Via npm (recommended)
- Local installation (full control)
Prerequisites
Before setup, ensure you have:
- An MCP-compatible AI client (e.g., Claude Desktop, Cursor)
- A Browserbase API key (get one from Browserbase)
For local setup, also install:
- Git (for repo cloning)
- pnpm (package manager from pnpm.io)
- Node.js (from nodejs.org)
- AI model API key (such as Gemini API key)
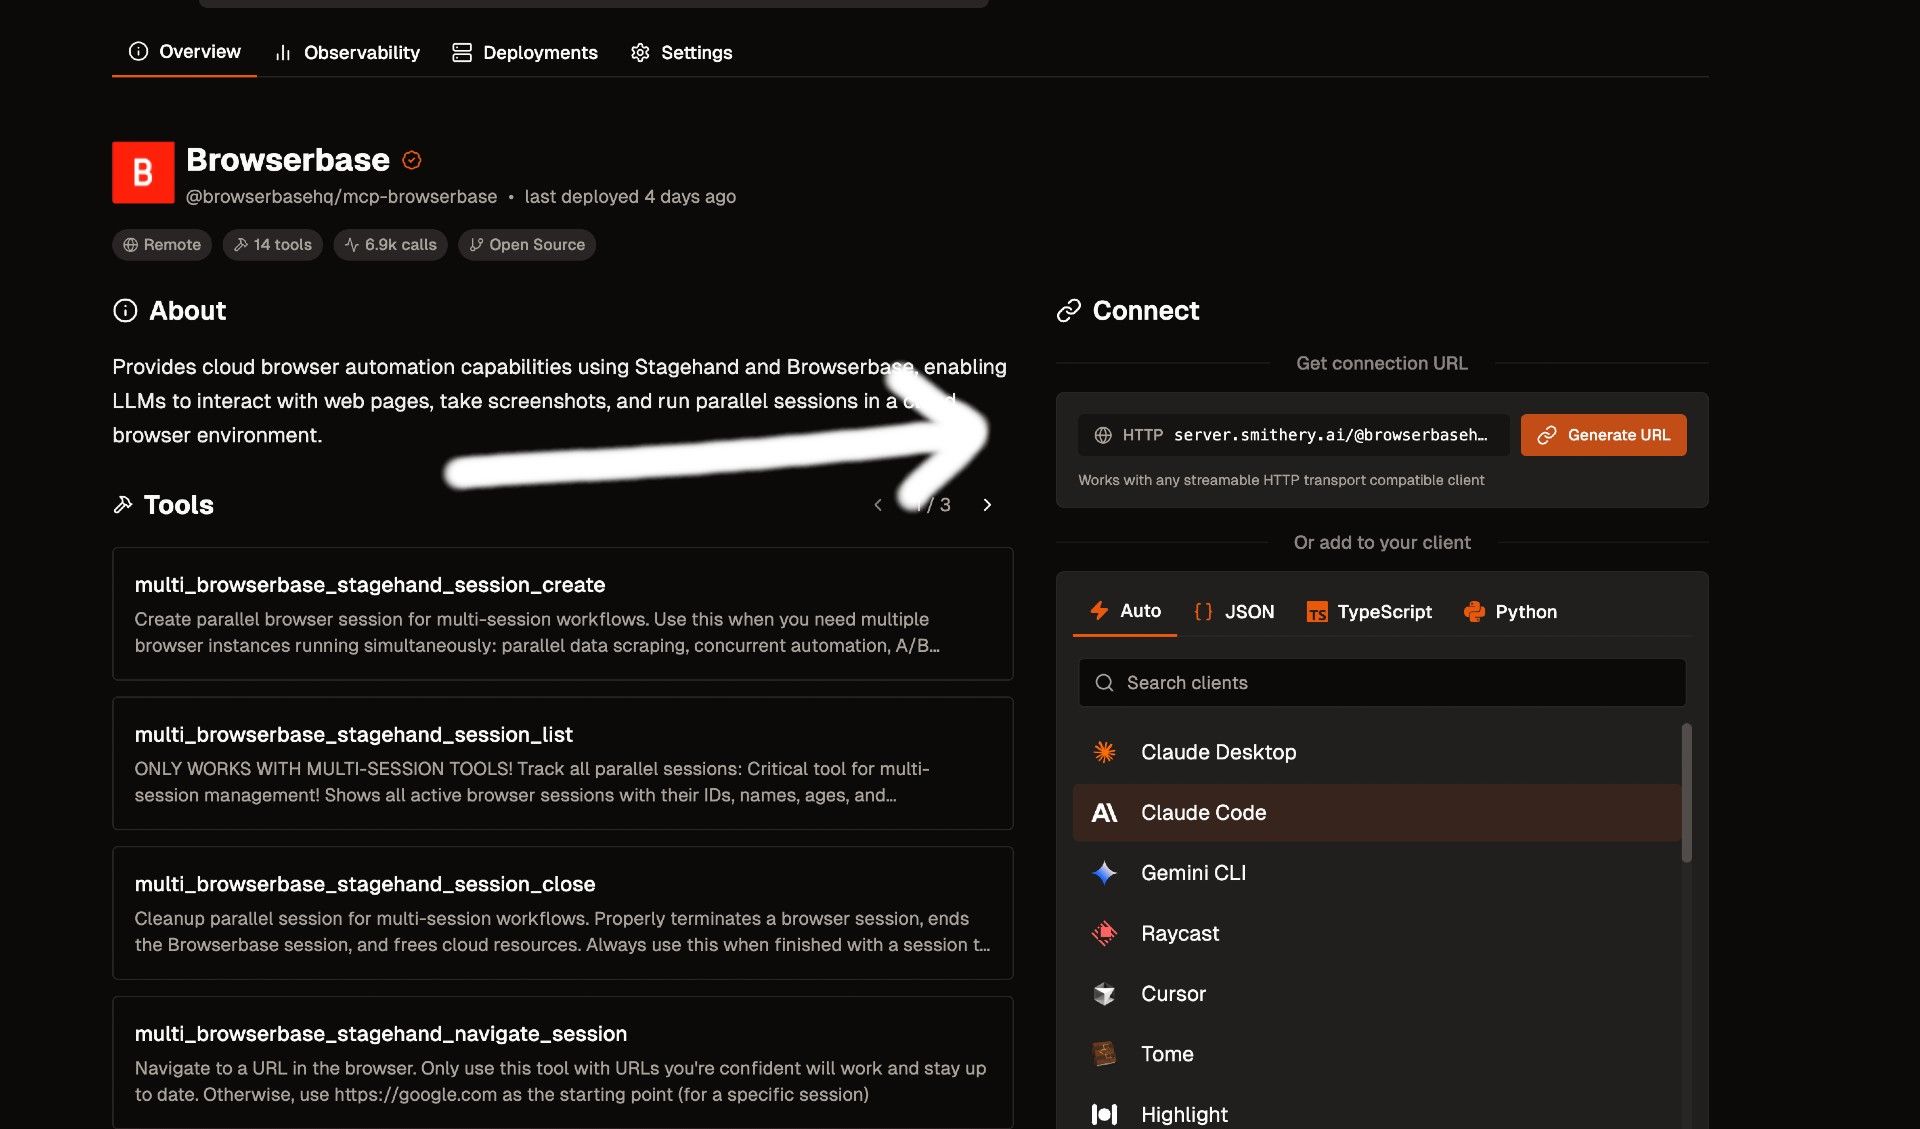
Option 1: Hosted Remote Server (Fastest Setup)
Skip installation and use Browserbase’s cloud-hosted MCP Server:
-
Get Your Credentials:
Go to smithery.ai to obtain your API keys and MCP server URL. -
Configure Your AI Client:
Add the URL to your AI client's MCP settings.
For Claude Desktop, update yourclaude_desktop_config.json:{ "mcpServers": { "browserbase": { "url": "https://your-smithery-url.com" } } }For the
mcp-remoteCLI:{ "mcpServers": { "browserbase": { "command": "npx", "args": ["mcp-remote", "https://your-smithery-url.com"] } } } -
Restart Your Client to activate the new settings.
Your AI client now has full browser automation via Browserbase MCP Server.
Option 2: Run Browserbase MCP Server with NPM (Recommended for Most Developers)
Run the server directly via npm for maximum compatibility:
-
In your MCP config JSON, add:
{ "mcpServers": { "browserbase": { "command": "npx", "args": ["@browserbasehq/mcp"], "env": { "BROWSERBASE_API_KEY": "", "BROWSERBASE_PROJECT_ID": "", "GEMINI_API_KEY": "" } } } } -
Insert your actual API keys and project ID.
-
Restart your AI client.
Option 3: Local Installation for Advanced Users
For teams needing full control or integration into custom pipelines, install and run locally:
-
Clone the Repo:
git clone https://github.com/browserbase/mcp-server-browserbase.git cd mcp-server-browserbase -
Install Dependencies:
pnpm install && pnpm build -
Start the Server:
-
STDIO (local process):
Configure your MCP client as:{ "mcpServers": { "browserbase": { "command": "node", "args": ["path/to/mcp-server-browserbase/cli.js"], "env": { "BROWSERBASE_API_KEY": "your_api_key", "BROWSERBASE_PROJECT_ID": "your_project_id", "GEMINI_API_KEY": "your_gemini_key" } } } } -
HTTP Transport:
Start with:node cli.js --port 3000Then, point your MCP client to
http://localhost:3000.
-
-
Add API Keys:
Replace placeholders with your actual Browserbase and model API keys. -
Restart Your Client to enable the server.
Customizing the Server
Browserbase MCP Server supports several flags for fine-tuning:
--proxies: Enable built-in proxies for privacy.--advancedStealth: Activate stealth mode to avoid detection (requires Scale Plan).--browserWidth/--browserHeight: Set custom browser window size.--modelName: Specify a different AI model for Stagehand.
Example:
"args": ["path/to/cli.js", "--proxies", "--browserWidth=1920"]
Using Browserbase MCP Server to Automate Chrome
Once setup is complete, you can issue natural language commands through your AI client to control Chrome. Here’s how:
1. Connect Your AI Client
Ensure your client (e.g., Claude Desktop, Cursor) is linked to Browserbase MCP Server using one of the above methods.
2. Issue Browser Automation Commands
In the AI chat, you can instruct the browser with plain language, such as:
- Navigate to a site:
“Go to https://example.com” - Click a button:
“Click the 'Sign Up' button” - Fill a form:
“Fill the email field with 'user@example.com' and submit” - Take a screenshot:
“Take a screenshot of the homepage” - Extract data:
“Extract all product titles from this page”
The AI interprets your instructions and executes browser actions live.
3. Review the Results
You’ll receive real-time feedback, such as:
- Action confirmations (“Navigated to https://example.com”)
- Extracted data (lists, tables, etc.)
- Downloadable screenshots (“Screenshot captured as 'homepage.png'”)
Real-World Example: Automate a Google Search
Test your setup with this workflow:
- Open your AI client (e.g., Claude Desktop)
- Issue command:
“Go to https://google.com, search for 'Browserbase MCP Server', and click the first result” - Watch Chrome automate the actions—visible if running with local HTTP transport
- Review the response—the AI should confirm navigation and may extract page content
Troubleshooting Tips
- Server not starting? Check API keys and that
pnpm buildsucceeded. - Client not connecting? Verify MCP config and restart the client.
- Actions failing? Some sites need advanced stealth or proxies—review configuration.
- Model errors? Confirm your model API key is valid and that your LLM supports browser context.
Conclusion
Browserbase MCP Server bridges the gap between powerful AI models and real-world browser automation, unlocking new possibilities for API development, QA, and workflow automation. Whether you choose the hosted, npm, or local approach, you can rapidly automate web tasks and integrate them into your team's toolchain.
Ready to streamline your API or QA workflows? Consider combining Browserbase automation with Apidog’s robust API testing and documentation features for best-in-class productivity.
💡 Discover how Apidog offers beautiful API documentation, streamlined team collaboration, and a smarter alternative to Postman.


