
Looking for a faster way to automate browser tasks, scrape real-time data, or streamline debugging—all without leaving your coding environment? Discover how Browser tools mcp transforms Cursor IDE into a powerful web automation platform, letting you script browser actions, capture logs, and extract web data directly from your workspace. In this hands-on guide, you’ll learn how to set up Browser tools mcp with Cursor IDE and get practical tips for browser automation in your development workflow.
💡 Tip: If your work involves testing APIs alongside browser automation, Apidog is an excellent tool for API debugging and streamlined testing. It pairs well with Browser tools mcp to give you robust, end-to-end workflow coverage.
What Is Browser tools mcp?
Browser tools mcp is an open-source Model Context Protocol (MCP) server that connects AI models and developer tools to your web browser for seamless, secure automation. Built by AgentDeskAI, it enables platforms like Cursor IDE—as well as Windsurf, RooCode, Cline, and Claude Desktop—to control browser actions programmatically.
With Browser tools mcp, you can automate tasks such as:
- Taking browser screenshots
- Navigating web pages
- Filling forms
- Scraping web data
- Capturing console/network logs
This bridge is especially powerful for developers who want to automate repetitive browser tasks, accelerate front-end testing, or fetch live web data—all inside their favorite IDE.
Prerequisites: Prepare Your Environment
Before installing Browser tools mcp, make sure your system meets these requirements:
- Node.js (v16+). Check with
node --versionor download from nodejs.org. - Google Chrome or Chromium – For running the required extension.
- Cursor IDE (v0.45+). Download from cursor.com if not installed.
- Basic terminal and Chrome extension familiarity
- Hardware: 4+ core CPU, 16GB+ RAM, 10GB+ storage
Project setup:
mkdir browser-tools-mcp
cd browser-tools-mcp
This will serve as your workspace for the following steps.
How to Install Browser tools mcp with Cursor IDE
Follow these steps to get Browser tools mcp working with Cursor IDE for full-featured browser automation.
1. Install the BrowserTools Chrome Extension
To automate browser actions, you’ll need the Browser tools mcp Chrome extension:
a. Download the Extension
- Pending Chrome Web Store approval, download the source from GitHub:
git clone https://github.com/AgentDeskAI/browser-tools-mcp.git
b. Load the Extension in Chrome
- Go to
chrome://extensions/in Chrome. - Enable Developer Mode (toggle upper right).
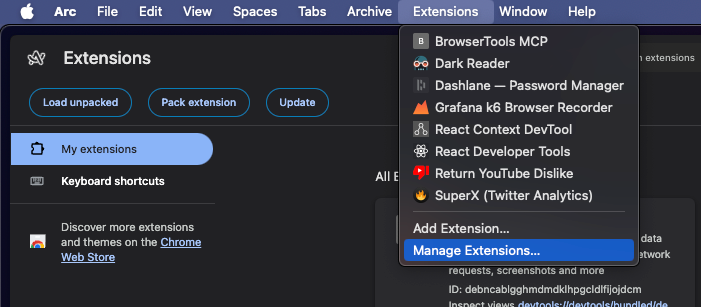
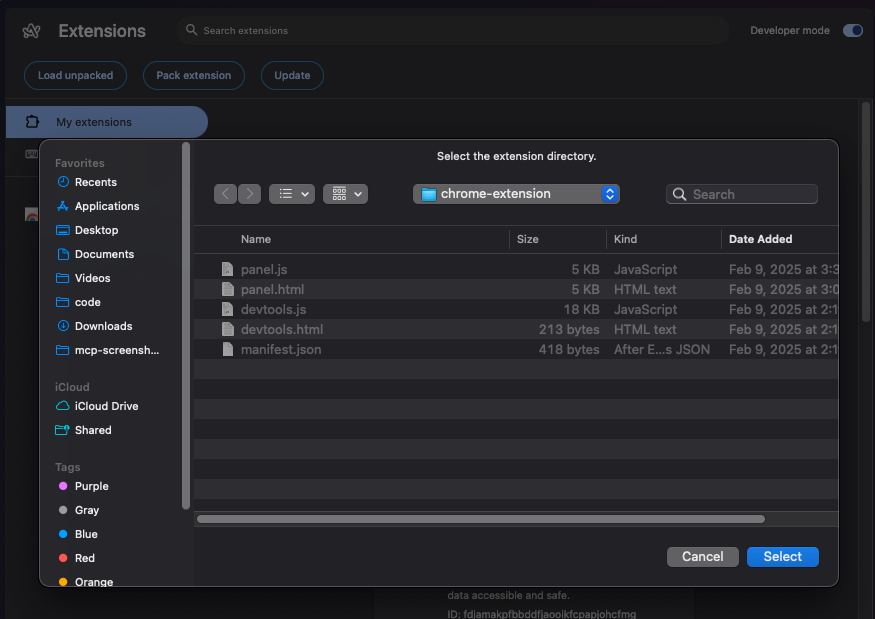
- Click “Load unpacked” and select the
chrome-extensionfolder from your cloned repo.
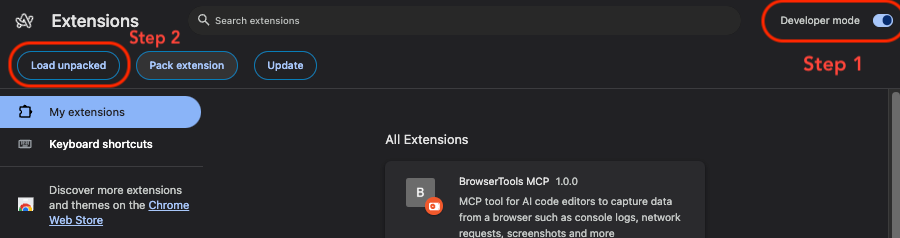
- Confirm “BrowserToolsMCP” appears in your extension list. Pin it for quick access.
2. Connect BrowserTools MCP Server in Cursor IDE
Bridge Cursor IDE to your browser with these steps:
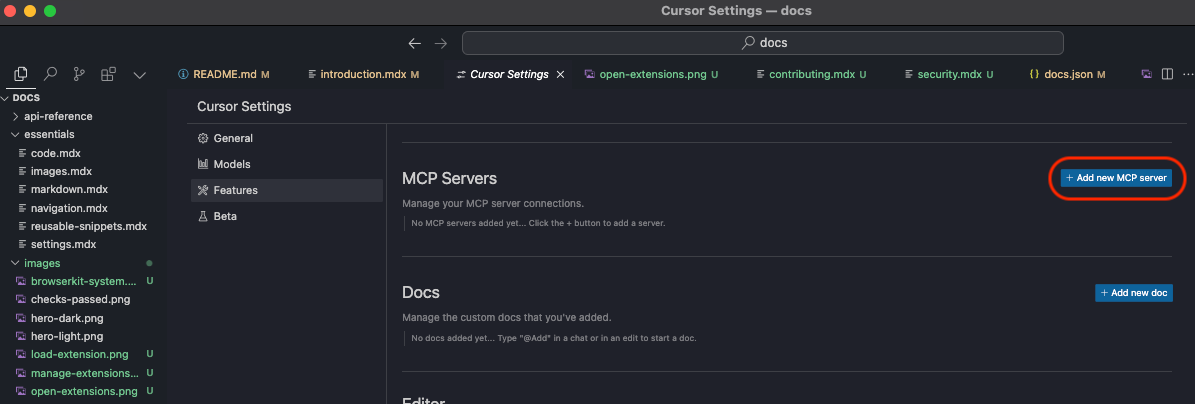
- Open Cursor IDE Settings (
Ctrl+,orCmd+,). - Navigate to Features → MCP Servers.
- Click “Add new MCP server”.
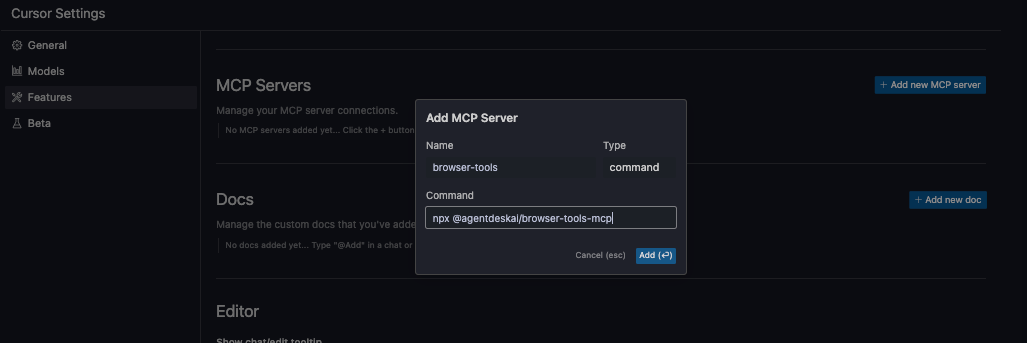
- Fill in:
- Name: browser-tools (or any unique identifier)
- Select: command
- Command:
npx @agentdeskai/browser-tools-mcp@1.2.0
Windows tip: If
npxisn’t recognized, usewhere npxto find its full path (e.g.,C:\Users\YourName\AppData\Roaming\npm\npx) and use that explicitly.
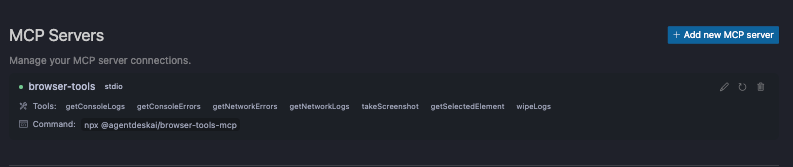
- Save. You should see a green indicator next to “browser-tools.” If not, refresh Cursor IDE or wait a few seconds.
3. (Optional) Run the BrowserTools Server for Advanced Features
For screenshot capture and aggregated logs, start the BrowserTools server:
npx @agentdeskai/browser-tools-server@1.2.0
- Default port: 3025
- Ensure no conflicts:
- Windows:
netstat -a -n | find "3025" - Mac/Linux:
lsof -i :3025
- Windows:
This improves WebSocket communication for image capture and audit features.
4. Use Chrome DevTools with BrowserTools MCP
Once the extension is active:
- Open any webpage (e.g., example.com)
- Right-click → Inspect to open DevTools
- Find the “BrowserTools” panel
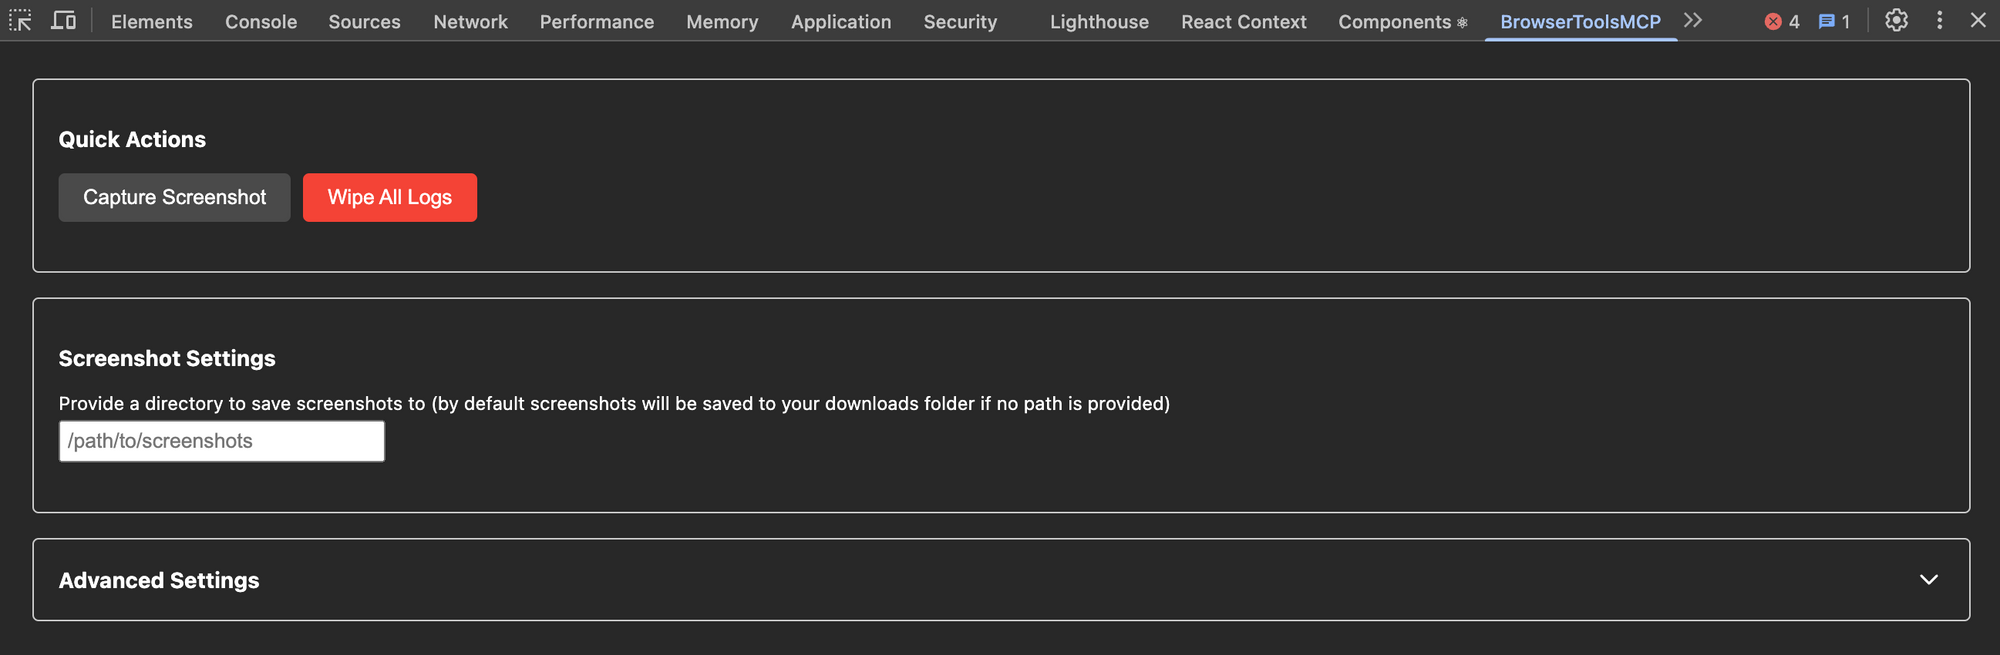
From here, you can:
- Capture screenshots (auto-paste to Cursor IDE optional)
- Set screenshot save paths (default:
Downloads/mcp-screenshots) - Wipe logs
- Adjust log limits and truncation
Note: Logs reset on page reload or MCP server restart.
5. Verify Your Setup
Test your setup by running commands in Cursor IDE’s chat (Ctrl or Cmd + L):
- “Capture console logs from the current page”
- “Take a screenshot of https://example.com”
Check that logs and screenshots appear in your IDE or target folder. If not, ensure the MCP server and extension are running.
Browser Automation Examples in Cursor IDE
Once connected, you can automate a range of browser tasks. Here are practical examples:
1. Programmatic Navigation
- Command:
“Open the website ‘https://example.com’ in Chrome.” - Result: Chrome opens the page, and Cursor IDE confirms the action.
2. Automated Form Filling
- Command:
“Go to ‘https://example.com/contact’ and fill out the form with name ‘Alex Smith’, email ‘alex@example.com’, and message ‘Hello!’” - Result: The form is filled automatically, with confirmation in Cursor IDE.
3. Web Data Scraping
-
Command:
“Scrape the headlines from ‘https://news.example.com’.” -
Result: Headlines are extracted using DOM selectors and returned in Cursor IDE.
-
For specific targets, clarify:
“Extract headlines from class ‘news-title’.”

Pro Tips: Get the Most from Browser tools mcp
- Be Specific: Use clear commands (e.g., “Click the button with ID ‘submit-btn’”) for best results.
- Check Permissions: The Chrome extension must have access to active tabs and screen capture.
- Keep MCP Server Running: If you close the terminal, restart the server before use.
- Explore Features: Try screenshot capture, log analysis, and more (see the GitHub repo for updates).
Real-World Developer Experience
Setting up Browser tools mcp with Cursor IDE is quick and intuitive. Automated screenshots and logs make debugging and testing far more efficient. If you encounter connection issues, double-check port 3025 and the extension’s active status.
Combine Browser Automation with API Testing
While Browser tools mcp accelerates browser automation, many workflows also require robust API testing. Apidog is a trusted platform for API debugging, mock server creation, and collaboration—making it an excellent complement to your automation toolkit. Integrating Apidog with browser automation helps you test full-stack workflows from the UI to the API layer.
Conclusion
By connecting Browser tools mcp with Cursor IDE, you unlock powerful browser automation for navigation, data extraction, UI testing, and more—right from your development environment. Experiment with advanced use cases like price monitoring, automated front-end QA, and beyond. For even more seamless development and testing, combine these tools with Apidog to streamline your API workflows alongside browser automation.


