Discover how to streamline your API workflow, create mock servers, and build Flutter apps faster.
If you've ever found yourself stuck waiting for backend APIs to be ready before you can start frontend development, this article is for you. Today, I'm going to show you a tool that completely changed how I develop applications—and it's going to change yours too.
Watch the Video Tutorial about How Apidog Transforms Flutter Development
The Problem Every Developer Faces
Let's talk about a scenario you've probably experienced: You receive the Figma designs for your new app. You're excited to start building. But then reality hits—the backend team is still defining the architecture, communicating with stakeholders, and figuring out what they need to make everything work.
What do most developers do in this situation? They open up a mocking tool, create some mock data, and start building. If you're using clean architecture or similar patterns, you build your business logic separately from the backend, then connect everything later.
But here's the problem:
When you use traditional mocking tools, you can only run them locally. If you need to share with your team, there's a complex process involved. And then there's documentation—you need Swagger for specs, Postman for testing, and various other tools just to get your work done.
You're juggling multiple tools:
- Swagger for documentation
- Postman for API testing
- Local mocking tools for development
- Separate tools for team collaboration
This fragmented workflow slows you down and creates opportunities for errors.
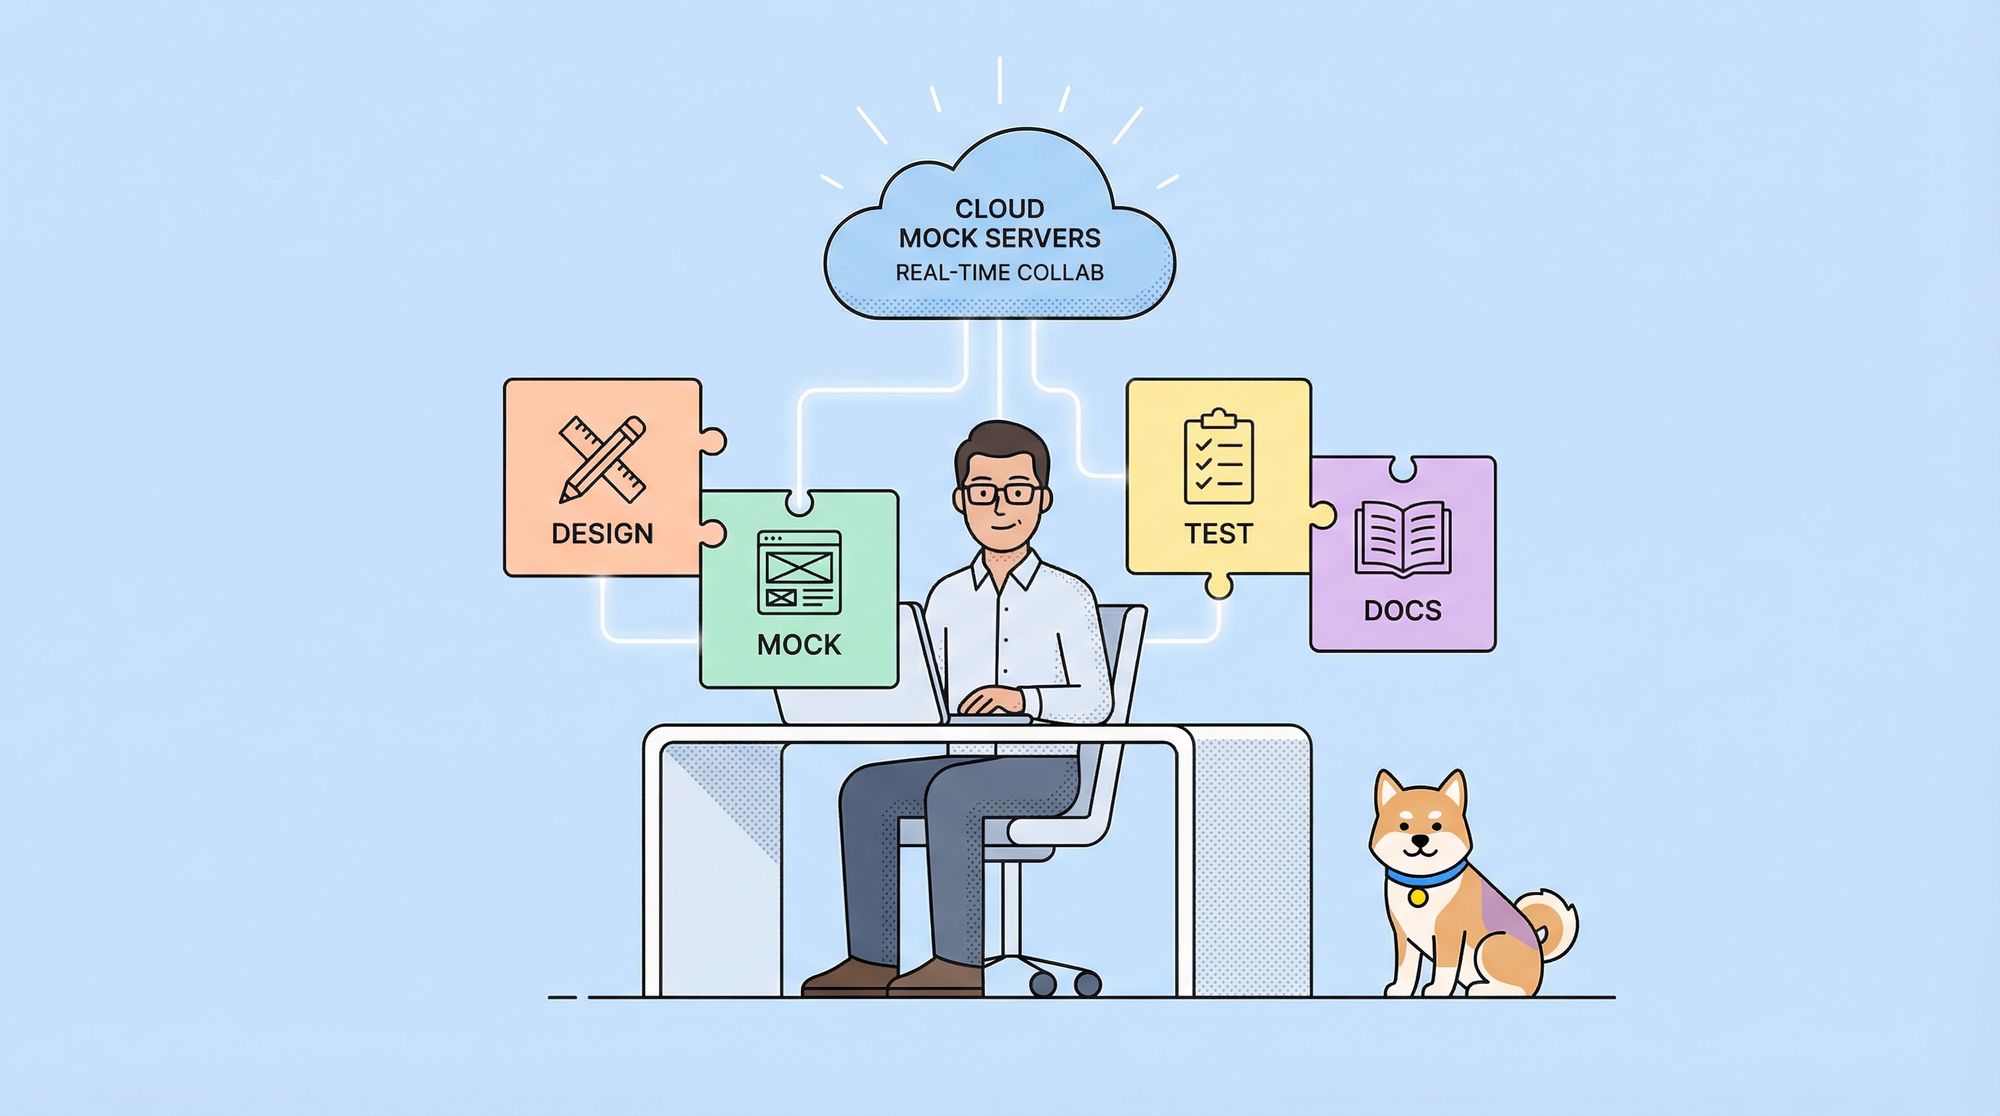
Introducing Apidog: Your All-in-One API Solution
Apidog is the tool that brings everything together. It's not just another API tool—it's a complete platform that transforms how you design , mock , test , debug and document APIs.
What Makes Apidog Special?
Everything in One Place:
- API design and documentation
- Mock server generation (local and cloud)
- API testing and validation
- Team collaboration with branching
- Code generation for multiple languages
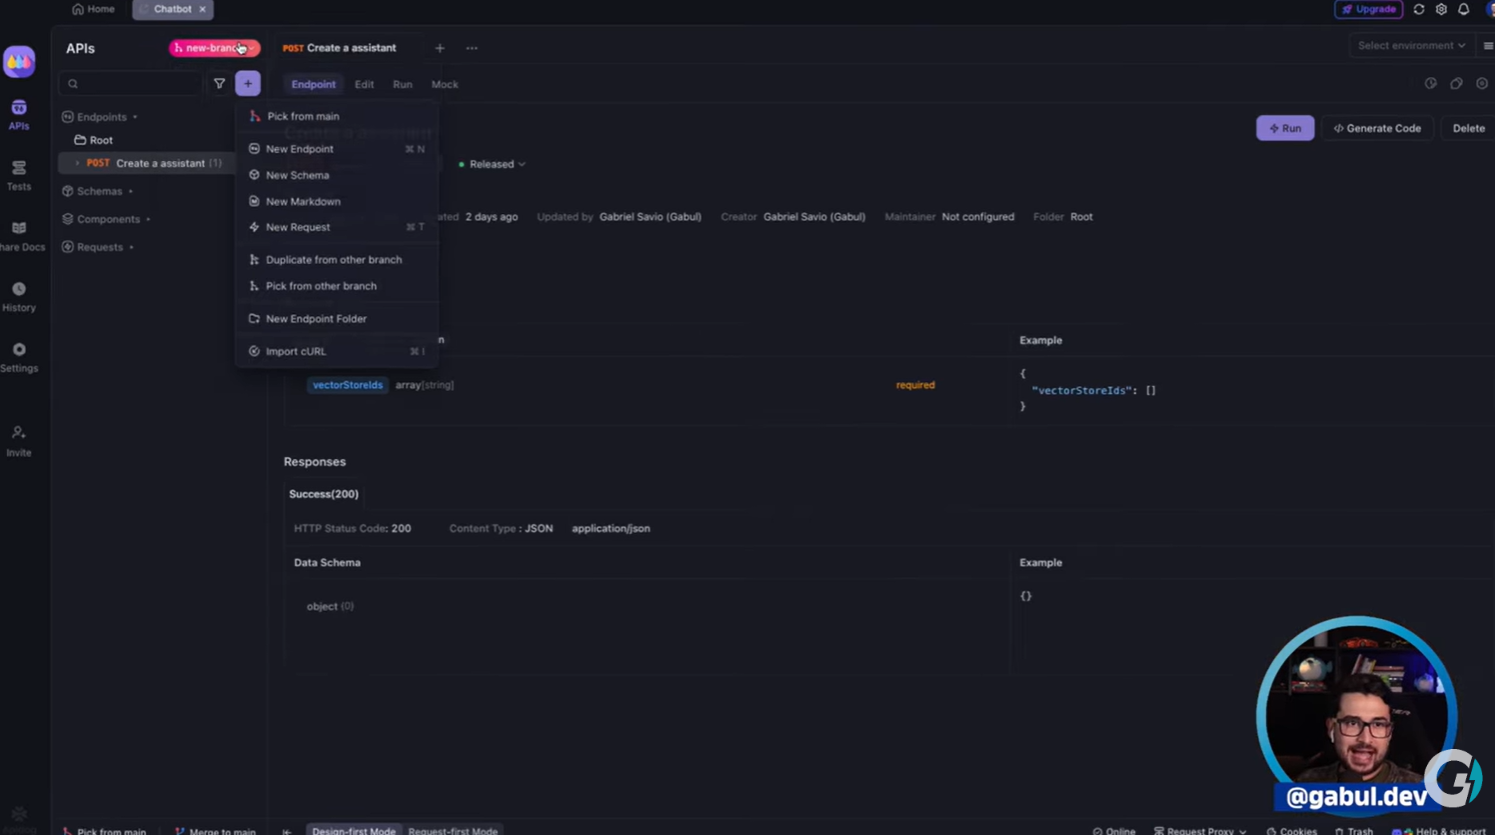
Real-Time Collaboration: Just like Git, Apidog supports branching. You can create a branch to work on API modifications without breaking the main documentation. When you're ready, merge your changes, and everyone on your team gets access to the updates.
Getting Started with Apidog
Step 1: Download and Install
Visit apidog.com and download the application for your platform:
- Windows
- Mac
- Linux
- Or use the web app directly in your browser
I recommend downloading the desktop app for the best experience when testing.
Step 2: Create Your First Project
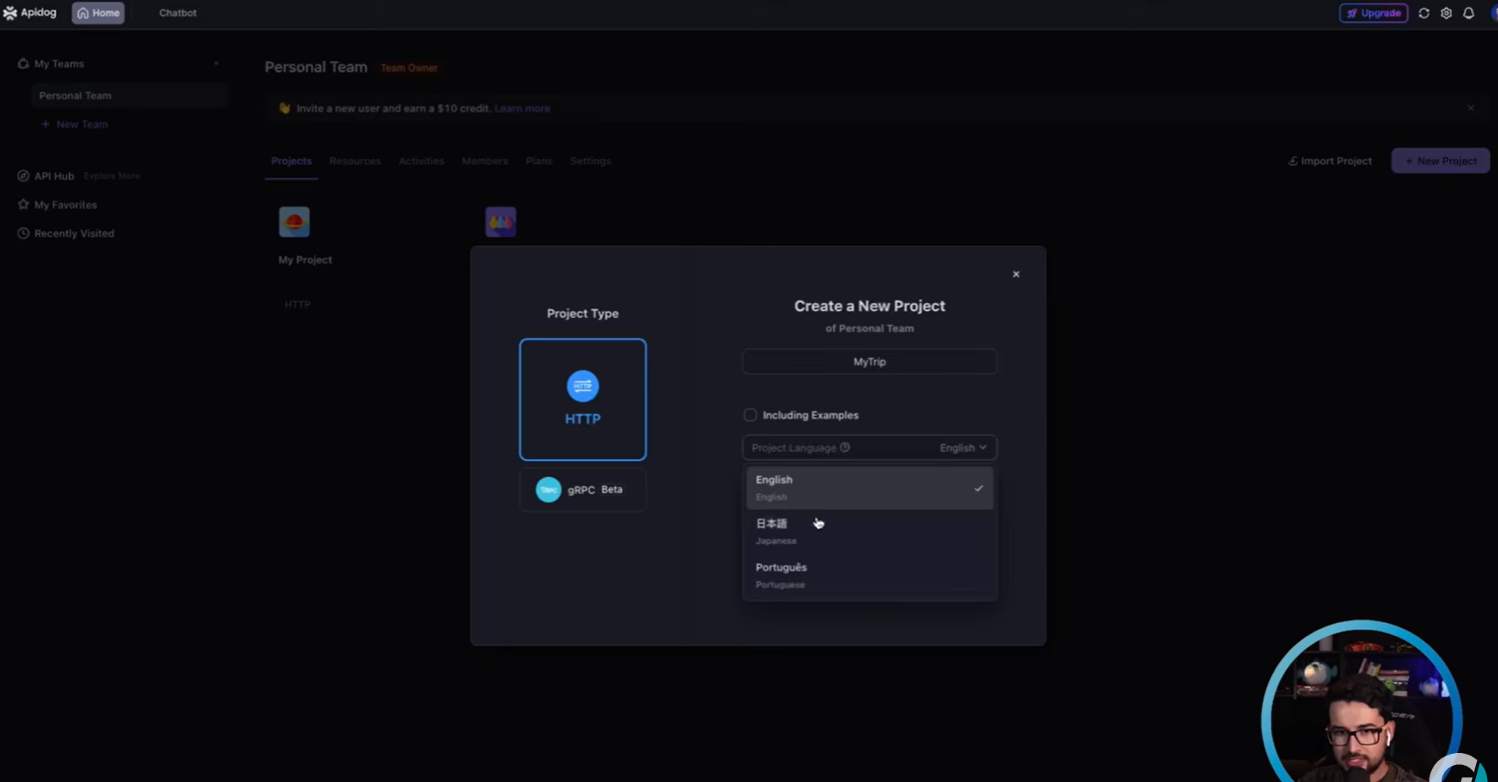
Once you've installed Apidog and logged in, create a new project:
- Click "New Project"
- Name your project (e.g., "My Trip")
- Choose your language (English, Japanese, Spanish or Portuguese)
- Select HTTP as your API type
Your project workspace is now ready!
Step 3: Import Existing APIs (Optional)
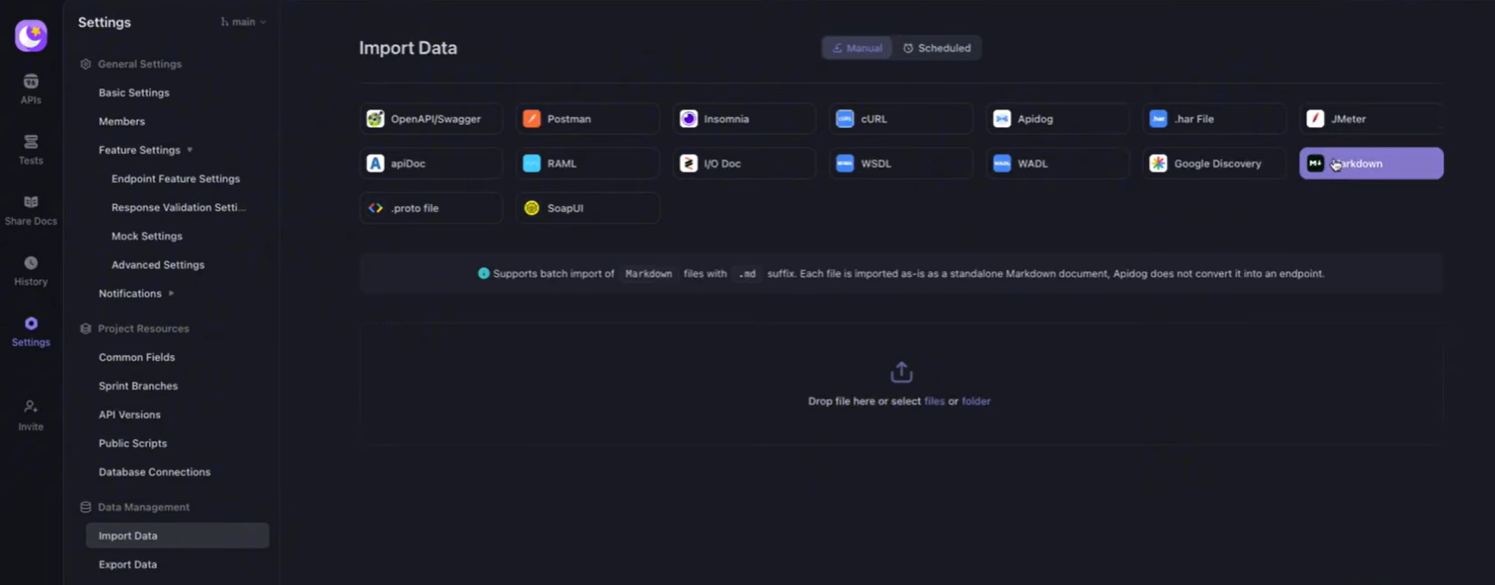
If you already have APIs documented elsewhere, Apidog makes migration easy:
Supported Import Formats:
- Swagger/OpenAPI specifications
- Postman collections
- Insomnia exports
- cURL commands
- HAR files
- JMeter test plans
- Markdown documentation
- And many more
Simply drag and drop your files, and Apidog imports everything automatically.
Designing Your API: The Schema-First Approach
Why Start with Schemas?
Creating schemas first ensures that both frontend and backend teams know exactly what data structure to expect. This is what we call API Design-First Development.
Creating Your First Schema
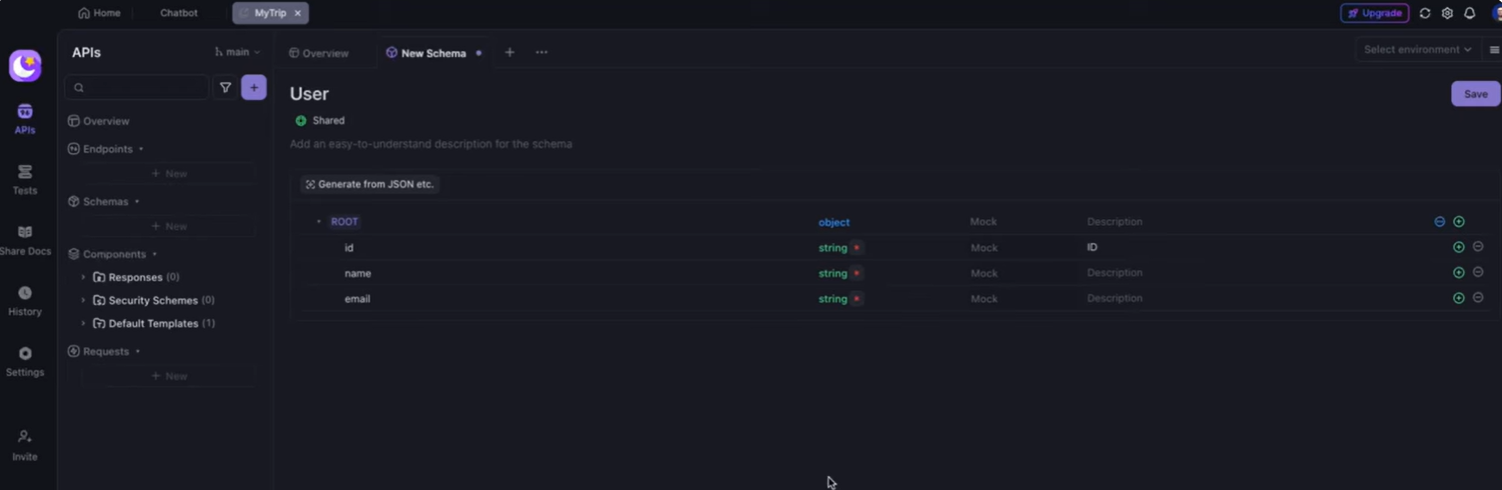
Let's create a User schema as an example:
- Navigate to Schemas in your project
- Click "New Schema"
- Name it "User"
- Add fields: -
id(string) - User identifier -name(string) - User's full name -email(string) - User's email address
Adding Mock Data

Here's where Apidog shines. For each field, you can specify mock data generators:
For the name field:
- Select mock type: Full Name
- Apidog will generate realistic names automatically
For the email field:
- Select mock type: Email
- Apidog generates valid email addresses
For the id field:
- Select mock type: UUID or custom ID format
- Consistent ID generation for testing
Documentation Built-In
As you create your schema, add descriptions:
- "Represents a user in the trip application"
- Document each field's purpose
- Add validation rules and constraintsNow you have both documentation AND mock data generation configured—all in one place!
Creating Your First Endpoint
Define the Endpoint
- Click "New Endpoint"
- Set the path:
/users - Add a description: "Fetch all users"
- Set the HTTP method: GET
Configure Visibility and Status
Apidog lets you track API development status:
- Status: In Development, Testing, or Production
- Visibility: Public or Private
- Maintainer: Assign team members
- Tags: Organize endpoints by category
Set Up Response
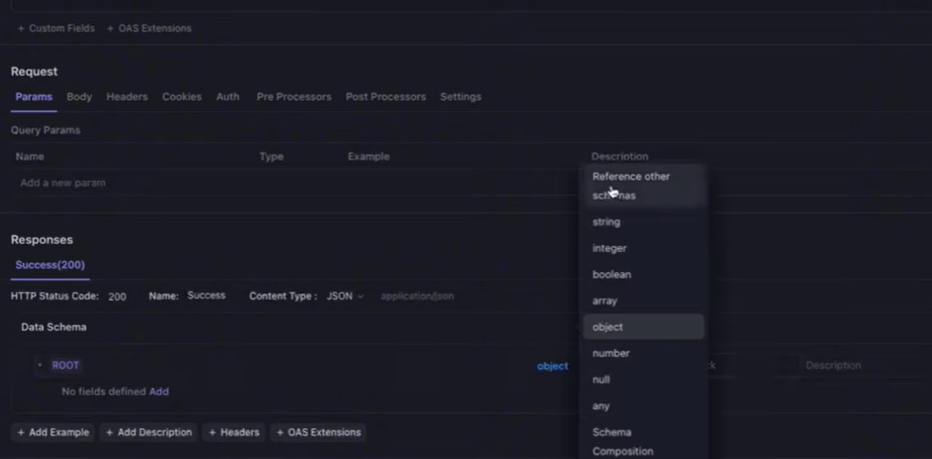
- Click on the 200 Success response
- Change the response type to Array
- Reference your User schema for array items
- Apidog automatically generates mock responses
Multiple Response Scenarios
Document all possible responses:
- 200 - Success with user list
- 401 - Unauthorized
- 403 - Forbidden
- 404 - Not Found
- 500 - Server Error
This helps frontend developers handle all scenarios properly.
The Magic of Mock Servers
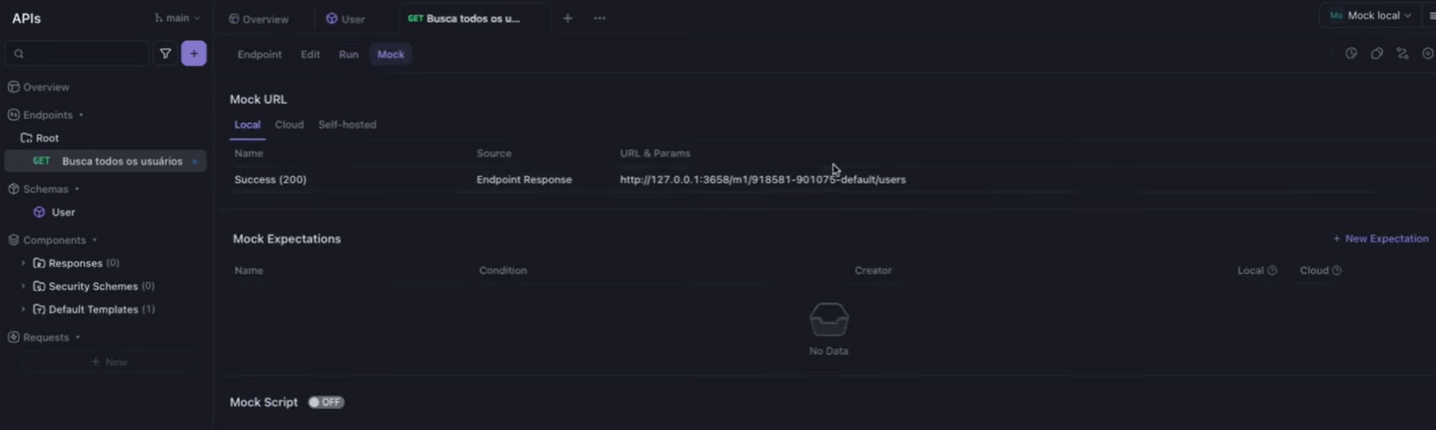
Local Mock Server
Once you've saved your endpoint:
- Click "Run"
- Select "Local Mock" environment
- Click "Send"
Boom! You have a working mock API running locally. Open your browser and navigate to the mock URL—you'll see realistic data generated automatically.
Cloud Mock Server (Game Changer!)
This is where Apidog truly stands out:
- Go to the Mock tab
- Enable "Cloud Mock"
- Choose your region (e.g., United States)
- Get your shareable cloud URL
Now your mock API is accessible from anywhere—no local server required! Test it on your phone, share it with your team, or use it in your deployed frontend applications.
Why This Matters:
- Frontend developers can work independently
- QA can test without backend being ready
- Demos and presentations always work
- Team collaboration becomes seamless
Integrating with Flutter
Generate Dart Code Automatically
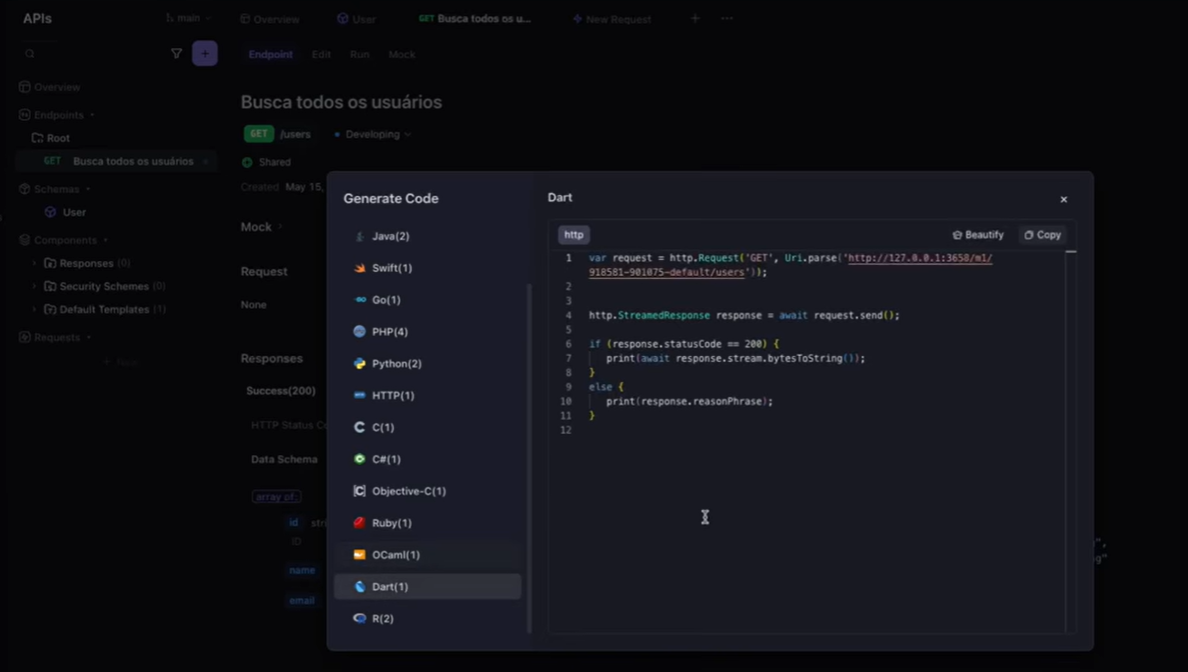
Apidog generates client code for multiple languages. For Flutter developers:
- Click "Generate Code" on your endpoint
- Select "Dart"
- Choose your preferred approach:
- Freezed models
- JSON Serializable
- Hive annotations
- Plain Dart classes
Example Generated Code:
class User {

  final String id;

  final String name;

  final String email;


  User({

    required this.id,

    required this.name,

    required this.email,

  });


  factory User.fromJson(Map<String, dynamic> json) {

    return User(

      id: json['id'],

      name: json['name'],

      email: json['email'],

    );

  }

}
Generate API Client Code
Apidog also generates the HTTP client code:
Future<List<User>> fetchUsers() async {

  final response = await http.get(

    Uri.parse('YOUR_MOCK_URL/users'),

  );


  if (response.statusCode == 200) {

    final List<dynamic> decoded = json.decode(response.body);

    return decoded.map((json) => User.fromJson(json)).toList();

  } else {

    throw Exception('Failed to load users');

  }

}
Just copy, paste, and you're ready to go!
Real-World Flutter Integration Example

Let me show you a practical example using DartPad:
Step 1: Set Up Your Flutter Project
import 'package:http/http.dart' as http;

import 'dart:convert';


class UserListScreen extends StatefulWidget {

  @override

  _UserListScreenState createState() => _UserListScreenState();

}


class _UserListScreenState extends State<UserListScreen> {

  List<dynamic> users = [];


  Future<void> fetchUsers() async {

    final response = await http.get(

      Uri.parse('YOUR_APIDOG_CLOUD_MOCK_URL/users'),

    );


    if (response.statusCode == 200) {

      final decoded = json.decode(response.body);

      setState(() {

        users = decoded;

      });

    }

  }


  @override

  Widget build(BuildContext context) {

    return Scaffold(

      appBar: AppBar(title: Text('Users')),

      body: ListView.builder(

        itemCount: users.length,

        itemBuilder: (context, index) {

          return ListTile(

            title: Text(users[index]['name']),

            subtitle: Text(users[index]['email']),

          );

        },

      ),

      floatingActionButton: FloatingActionButton(

        onPressed: fetchUsers,

        child: Icon(Icons.refresh),

      ),

    );

  }

}
Step 2: Test with Cloud Mock
- Get your cloud mock URL from Apidog
- Replace
YOUR_APIDOG_CLOUD_MOCK_URLin the code - Run your Flutter app
- Click the refresh button
Result: Your app fetches real-looking data from Apidog's cloud mock server. Every time you refresh, you get different realistic data!
Step 3: Configure Mock Data Quantity
Want to test with more data? In Apidog:
- Edit your endpoint
- Set minimum items: 30
- Set maximum items: 50
- Save
Now your mock API returns 30-50 users per request—perfect for testing pagination, scrolling, and performance!
Advanced Features for Professional API Development
API Testing Suite
Apidog includes a complete testing framework:
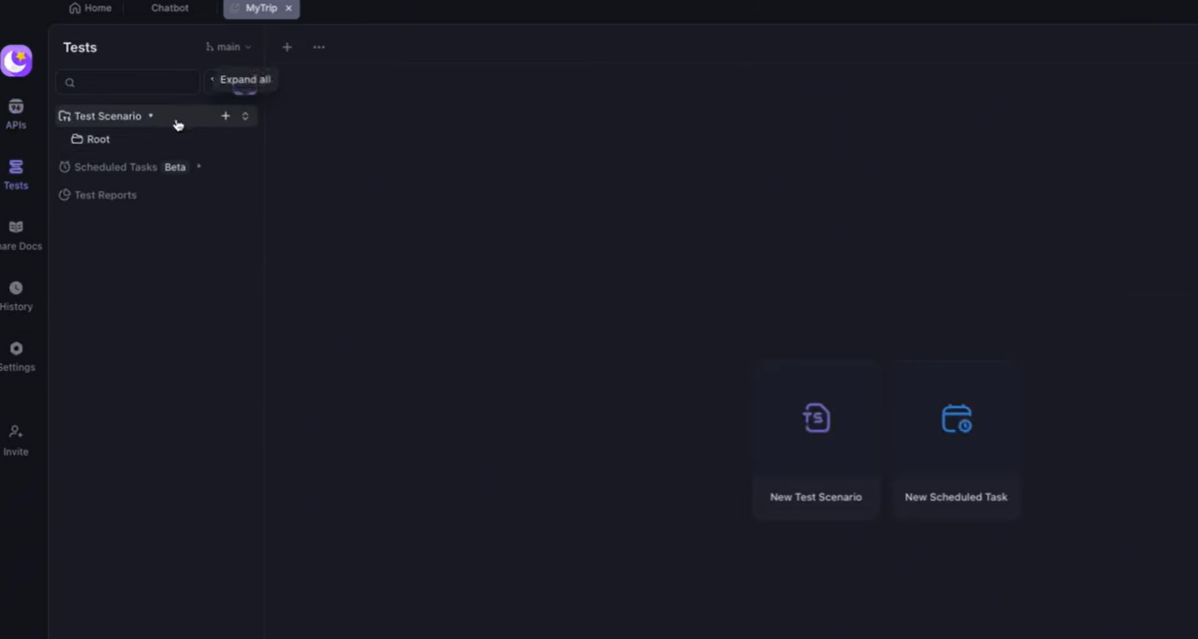
- Navigate to the Test tab
- Create a new test scenario: "Fetch Users Test"
- Set priority level (P0 for critical)
- Add test steps:
- Import your endpoint
- Define expected responses
- Set up validation rules
Run your tests:
- Click "Run" to execute
- View pass/fail results
- Identify issues before backend implementation
Environment Management
Configure multiple environments:
Development Environment:
- Base URL:
http://localhost:3000 - API Key: Development key
- Debug mode: Enabled
Testing Environment:
- Base URL:
https://test-api.yourapp.com - API Key: Testing key
- Debug mode: Enabled
Production Environment:
- Base URL:
https://api.yourapp.com - API Key: Production key
- Debug mode: DisabledSwitch between environments with one click!
Team Collaboration with Branching
Just like Git, Apidog supports branching:
Create a Branch:
- Click the branch dropdown
- Select "Create Branch"
- Name it (e.g., "feature/new-endpoints")
- Make your changes
Merge Changes:
- Click "Merge"
- Review differences
- Approve and merge
- Team members see updates instantlyThis prevents breaking changes and enables parallel development.
CI/CD Integration
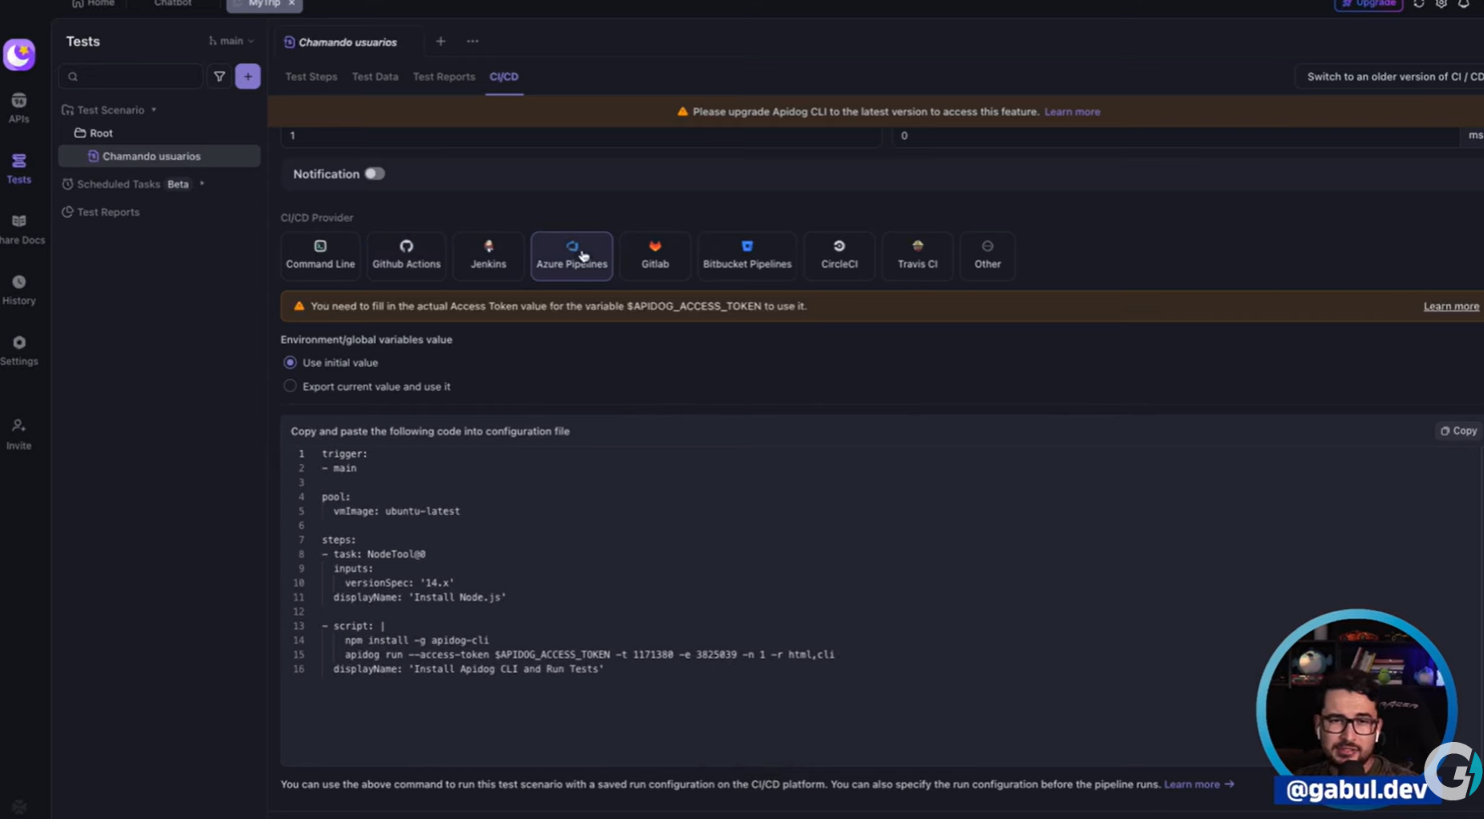
Integrate Apidog with your development pipeline:
- Connect to GitHub Actions
- Run API tests automatically
- Validate contract compliance
- Block merges on test failuresEverything stays synchronized across your entire development workflow.
Publishing Professional Documentation
Create Public Documentation
- Go to Share Docs → Publish Docs
- Configure your documentation:
- Custom domain
- Logo and branding
- Color scheme
- Navigation layout
3. Choose access control:
- Public access
- Password protected
- IP whitelist
- Email whitelist
4. Publish and share the URL
Your API documentation is now live with:
- Interactive "Try It Out" functionality
- Code examples in multiple languages
- Automatic updates when APIs change
- Professional appearance
Why Apidog Changes Everything for API Development
For Frontend Developers
No More Waiting:
- Start development immediately with mock servers
- Don't depend on backend completion
- Test all scenarios including errors
- Build with confidence
Better Code Quality:
- Generated code follows best practices
- Type-safe models from schemas
- Consistent API client implementation
- Reduced boilerplate code
For Backend Developers
Clear Contracts:
- Frontend and backend agree on schemas upfront
- No miscommunication about data structures
- Validation catches issues early
- Documentation stays current
Faster Development:
- Design APIs before implementation
- Test endpoints as you build
- Validate responses automatically
- Share progress with team instantly
For Teams
Improved Collaboration:
- Single source of truth for APIs
- Branching prevents conflicts
- Real-time updates for everyone
- Clear communication through documentation
Reduced Costs:
- Fewer integration bugs
- Less time in meetings
- Faster feature delivery
- Lower support burden
Real-World Use Case: Demo for Investors
Imagine this scenario: You need to demo your app to investors, but the backend isn't complete for all features.
Traditional Approach:
- Hardcode fake data in Flutter
- Hope nothing breaks during demo
- Explain missing features
- Risk looking unprofessional
Apidog Approach:
- Create mock endpoints for missing features
- Generate realistic dynamic data
- Use cloud mock server
- Demo works perfectly every time
When backend is ready, simply switch from mock to production URL. No code changes needed!
Getting Started Today
Free Tier Includes:
- Unlimited API endpoints
- Local and cloud mock servers
- Code generation
- Basic team collaboration
- API testing
- Documentation publishing
Enterprise Features:
For larger teams and organizations:
- Advanced team management
- Custom domains
- Priority support
- SLA guarantees
- On-premises deployment
Best Practices for Success
1. Start with Schemas
Always define your data structures first. This ensures consistency and enables all of Apidog's features.
2. Document as You Design
Add descriptions, examples, and constraints while creating endpoints. Future you (and your team) will thank you.
3. Use Realistic Mock Data
Configure mock generators to produce realistic data. This helps catch UI issues early.
4. Test All Scenarios
Document and test success cases, error cases, and edge cases. Comprehensive testing prevents production issues.
5. Leverage Branching
Use branches for experimental changes. Merge only when ready. This keeps your main documentation stable.
6. Integrate with CI/CD
Automate API testing in your pipeline. Catch breaking changes before they reach production.
7. Keep Documentation Updated
When APIs change, update Apidog first. Documentation and mocks update automatically.
Common Questions
Q: Can I use Apidog for free?
A: Yes! The free tier includes all core features for individual developers and small teams.
Q: Does Apidog work with existing APIs?
A: Absolutely. Import from Swagger, Postman, or any OpenAPI specification.
Q: Can I use Apidog offline?
A: Yes, the desktop app works offline. Cloud features require internet connection.
Q: Is my data secure?
A: Yes. Apidog uses enterprise-grade security. You can also deploy on-premises for maximum control.
Q: Can I customize generated code?
A: Yes. Apidog provides templates you can customize for your coding style.
Q: Does Apidog support GraphQL?
A: Currently, Apidog focuses on REST APIs. GraphQL support is on the roadmap.
Conclusion: Transform Your Development Workflow
Apidog isn't just another tool—it's a complete paradigm shift in how you develop applications. By bringing design, documentation, mocking, and testing into one platform, it eliminates the friction that slows down development.
Key Takeaways:
✅ Design APIs before coding - Prevent miscommunication and rework
✅ Generate mock servers instantly - Frontend and backend work in parallel
✅ Create documentation automatically - Always accurate, always current
✅ Test comprehensively - Catch issues before production
✅ Collaborate seamlessly - Branching and merging like Git
✅ Integrate with your workflow - CI/CD, code generation, and more
Whether you're a solo developer or part of a large team, whether you're building a new app or maintaining existing ones, Apidog streamlines your workflow and improves your results.
Ready to transform how you develop apps?
- Download Apidog - Free for individual developers
- Import your existing APIs or create new ones
- Generate mock servers and start building
- Share with your team and collaborate
The tool that changed how I develop apps is now available to you. Try it today and experience the difference.


