
Whenever the discussion of test cases in APIs (Application Programming Interfaces) arises, developers lean toward the idea of how to create stable and functional test cases. When it comes to POST requests, specifically designed test cases are essential to guarantee that APIs function flawlessly.
API tools that have a simple and intuitive user interface like Apidog can facilitate the proper development necessary for development. With Apidog, building, testing, and documenting POST requests become a simple task that only requires a few clicks of a button.
If you are interested in how Apidog can streamline your workflow, click the button below to begin!
What are API POST Requests
Let us have a recap on what API POST requests are.
An API POST request, in the context of APIs (Application Programming Interfaces), is a formal method used to create a new resource or sub-resource on a server. It follows the client-server model, where a client application initiates the request by sending data to a specific URL (endpoint) on the server.
Key Aspects of API POST Requests
Method: The core of a POST request lies in the HTTP method specified in the header. It's a clear message to the server – "I'm sending data to create something new." This method is denoted by "POST".
Data: Unlike GET requests that retrieve data, POST requests carry information for resource creation. This data resides in the request body, separate from the URL. Formatting is crucial! APIs often use structured formats like JSON or XML to ensure the server understands the data. This data acts as the blueprint for the new resource.
Idempotence: Ideally, a POST request with identical data should create the resource only once, even if sent multiple times. This characteristic safeguards against accidental duplicates. However, this behavior depends on the specific API.
Side Effects: POST requests are inherently different from GET requests. Unlike GET, which retrieves data without modifying the server, POST requests actively create or update data, causing a change in the server's state. This necessitates thorough testing to ensure they produce the intended modifications.
Server Response: Upon receiving a POST request, the server responds with a status code indicating success or failure. Common success codes include:
- 201 (Created): The resource was successfully created, and the response body may contain information about it.
- 200 (OK): The resource creation was successful, but details might not be included.
Failure codes like 400 (Bad Request) or 409 (Conflict) might arise for invalid data or duplicate resource attempts. The specific codes and their meanings depend on the individual API.
Beyond the Basics:
- Authentication: Many APIs require authentication to authorize users to create resources. This might involve including authentication tokens or credentials within the request header.
- Error Handling: Robust APIs provide meaningful error messages in the response body for failed POST requests. This helps developers diagnose and rectify issues.
API Test Cases for POST Requests
1. Valid GET Requests:
Test Case 1: Retrieving Existing Resource:
Pre-Condition: A specific resource exists on the server (e.g., user ID 123).
Action: Send a GET request to the endpoint for retrieving that resource (e.g., /users/123).
Expected Result:
- Status code: 200 (OK).
- Response body: Contains the expected data for the resource (e.g., user information for ID 123).
Test Case 2: Filtering Data:
Pre-Condition: The API supports filtering (e.g., by status).
Action: Send a GET request with a valid filter parameter (e.g., /products?status=active).
Expected Result:
- Status code: 200 (OK).
- Response body: Contains only resources matching the filter (e.g., only active products).
Test Case 3: Pagination:
Pre-Condition: The API supports pagination (e.g., retrieving results in batches).
Action: Send a GET request with pagination parameters (e.g., /articles?page=2&per_page=10).
Expected Result:
- Status code: 200 (OK).
- Response body: Contains the requested page of results (e.g., articles from page 2, 10 per page).
2. Invalid GET Requests:
Test Case 4: Non-existent Resource:
Action: Send a GET request to an endpoint for a non-existent resource (e.g., /users/999).
Expected Result:
- Status code: 404 (Not Found).
- Response body: May contain an error message indicating the resource cannot be found.
Test Case 5: Invalid Filter:
Pre-Condition: The API supports filtering.
Action: Send a GET request with an invalid filter parameter (e.g., /products?status=invalid).
Expected Result:
- Status code: 400 (Bad Request) or similar error code.
- Response body: May contain an error message indicating the filter is invalid.
Test Case 6: Invalid Pagination Parameters:
Pre-Condition: The API supports pagination.
Action: Send a GET request with invalid pagination parameters (e.g., /articles?page=-1&per_page=0).
Expected Result:
- Status code: 400 (Bad Request) or similar error code.
- Response body: May contain an error message indicating invalid pagination parameters.
3. Additional Considerations:
- Performance Testing: Measure response times for GET requests, ensuring they meet performance benchmarks.
- Authentication: Test GET requests requiring authentication (e.g., with valid and invalid tokens).
- Authorization: Verify that users can only access authorized resources (e.g., user cannot access another user's profile).
- Response Format: Ensure the response body adheres to the expected format (e.g., JSON, XML).
Apidog - Create POST Requests Within a Few Seconds!
Although POST requests are important components in every API, they can be very simple to setup, especially if you have all the necessary resources. One of these resources would be having an excellent API platform that can support many processes required for the entire API lfiecycle - one like Apidog.

Building API POST Requests with Apidog
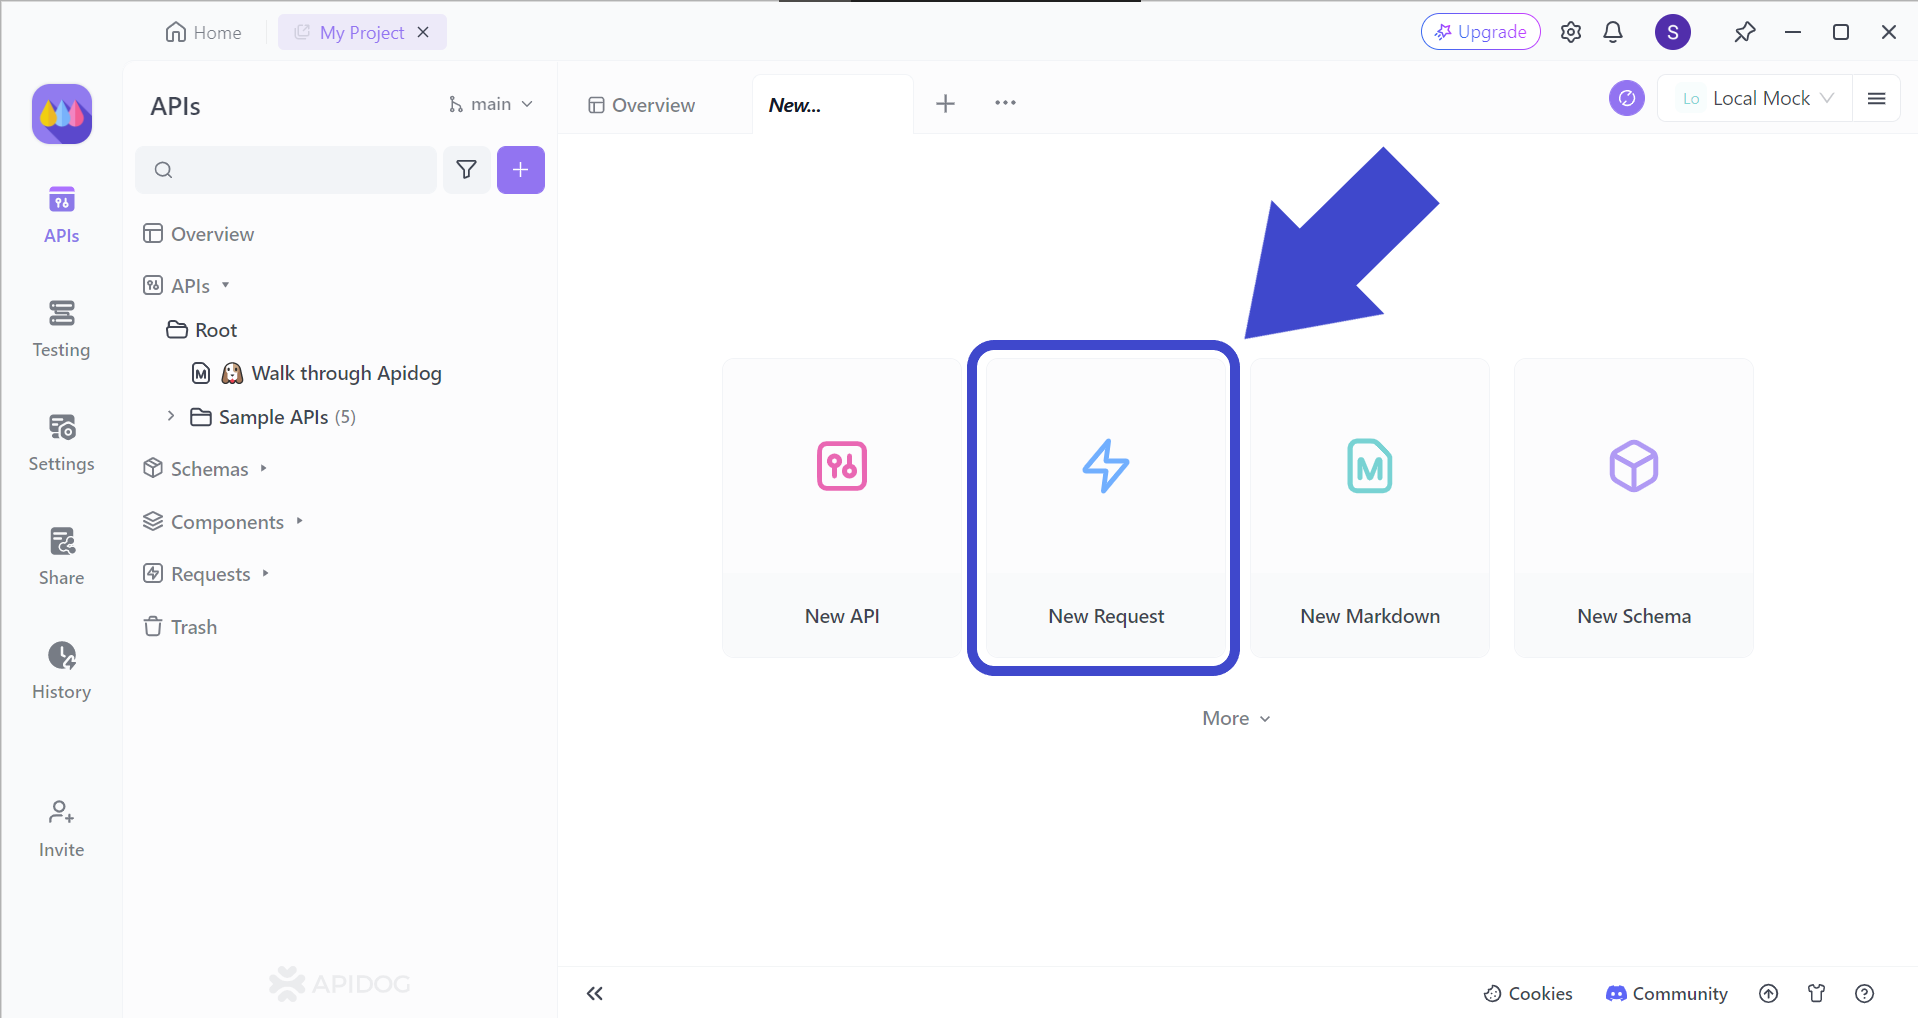
Begin by pressing the New Request button as pointed out by the arrow in the picture above.

To create an API GET request, make sure to select the POST method, and create a relevant URL. If you plan to pass multiple parameters into the POST request URL, make sure to include them in the section underneath.

Observing the Response Obtained from JavaScript HTTP POST Method Using Apidog
You can utilize Apidog's simple and intuitive user interface to analyze the response returned after the request has been sent.
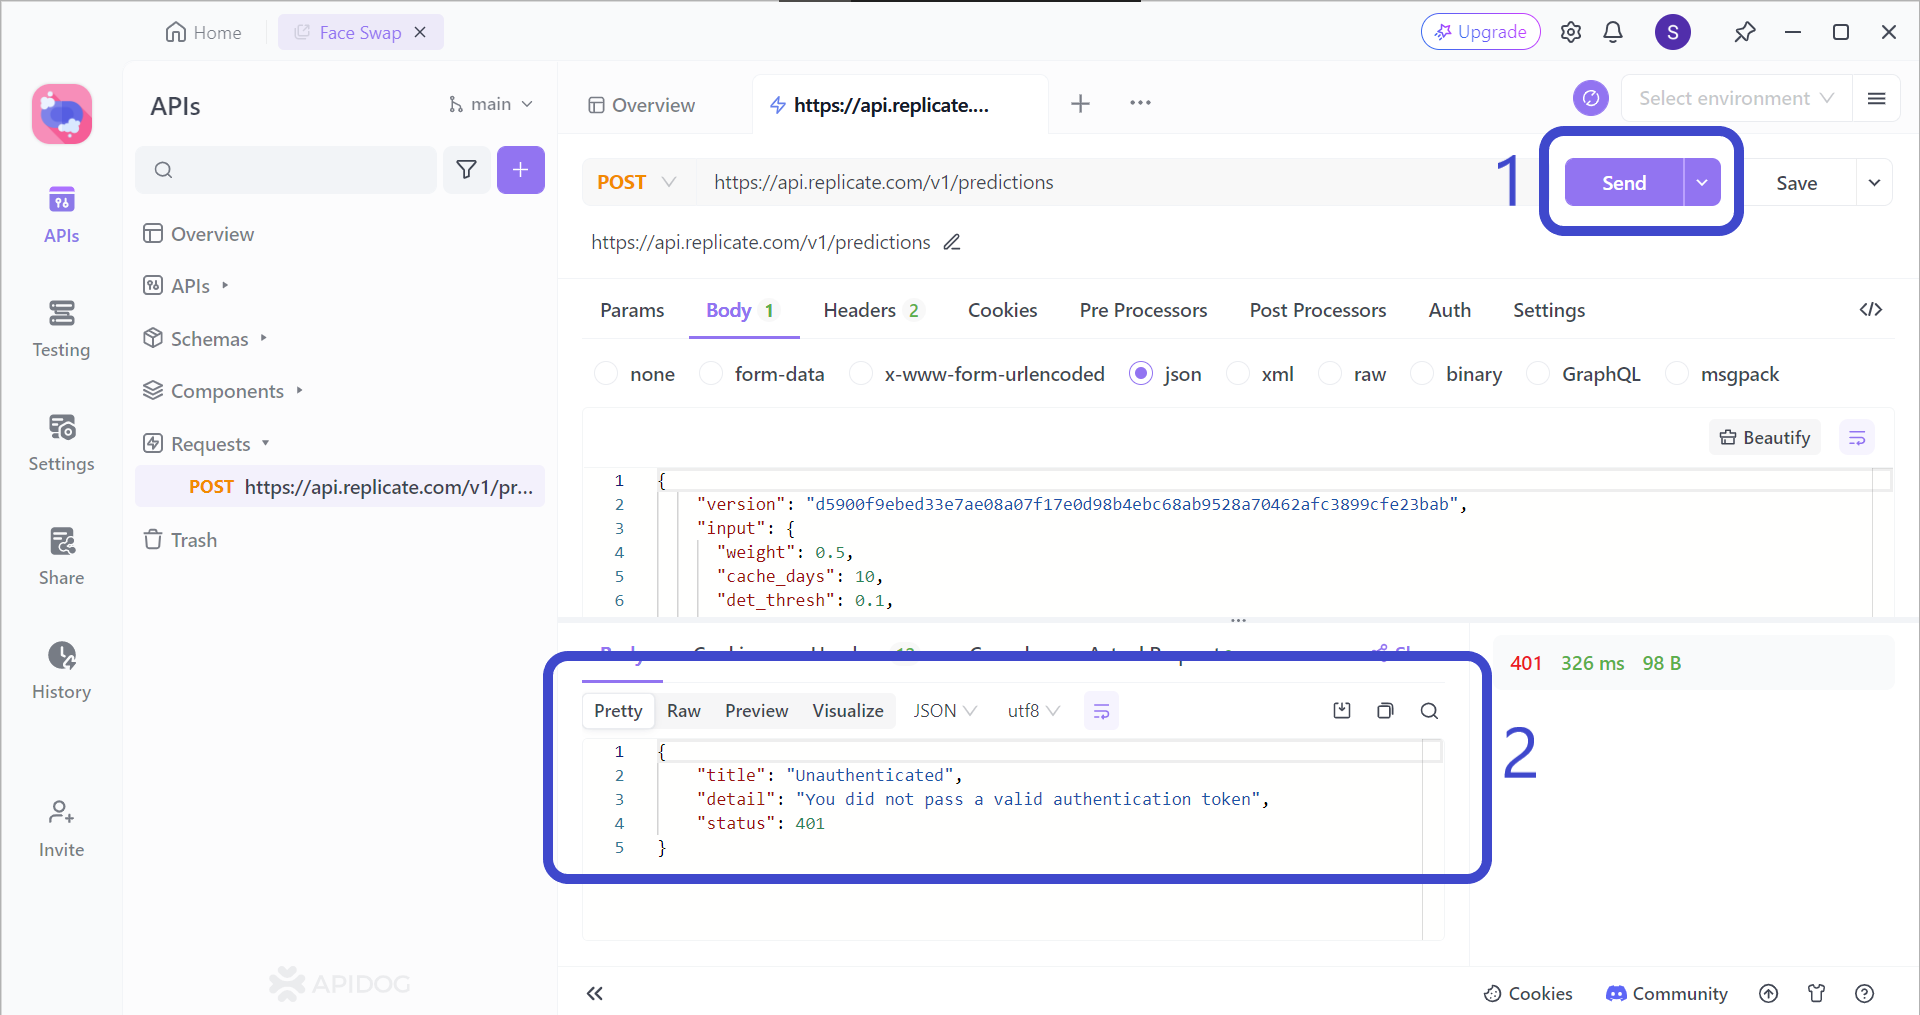
Make the API POST request by pressing the Send button found in the right corner of the Apidog window. Then, you should be able to view the response on the bottom portion of the screen.
Conclusion
Meticulously crafted test cases are the cornerstone of robust and reliable APIs. By following a structured approach that incorporates various POST request scenarios, you can ensure your API functions flawlessly. This involves testing not only successful creation of new resources, but also error handling, edge cases, and authentication.
By rigorously testing these aspects, you can guarantee that your POST requests operate as intended, promoting a stable and dependable API for your users. If in any case you have not found an API development tool suitable for you, you can consider trying Apidog. With Apidog, get quickly accustomed to the sleek yet beautiful user interface, and enjoy the numerous useful functionalities that help you become a more efficient API developer!


