
Ever wished your API could chat with AI agents like Claude or Cursor, turning your endpoints into smart, conversational tools? Well, buckle up, because we’re diving into how to turn your API into an MCP server using Stainless and an OpenAPI spec. This conversational guide will walk you through the process, from setup to deployment, with a test to prove it works. We’ll use the Model Context Protocol (MCP) to make your API AI-friendly, all in a fun, approachable way. Let’s get started!
Want an integrated, All-in-One platform for your Developer Team to work together with maximum productivity?
Apidog delivers all your demands, and replaces Postman at a much more affordable price!
What’s an MCP Server, and Why Should You Care?
The Model Context Protocol (MCP) is like a universal handshake for AI systems. It’s a JSON-RPC-based standard that lets AI clients (like Claude Desktop, Cursor, or VS Code Copilot) interact with your API using natural language or programmable prompts. An MCP server acts as a bridge, translating your API’s endpoints into tools that AI agents can understand and use.
Why turn your API into an MCP server? It’s a game-changer:
- AI-Powered Interaction: Let AI agents call your API with simple prompts like “Fetch user data” or “Create a new order.”
- Automation Made Easy: Stainless automates the process, generating an MCP server from your OpenAPI spec with minimal coding.
- Scalability: Expose your API to multiple AI clients, from local dev tools to production-grade apps.
- Developer-Friendly: No need to rewrite your API—just add an MCP layer and let AI do the heavy lifting.
Whether you’re building a payment platform, a content API, or a custom service, turning your API into an MCP server makes it smarter and more accessible.
How Does Stainless Fit In?
Stainless is a developer’s best friend for creating SDKs and now MCP servers from OpenAPI specs. Its experimental MCP server generation feature takes your OpenAPI definition and spits out a TypeScript subpackage that’s ready to roll as an MCP server. This means your API’s endpoints become AI-accessible tools without you breaking a sweat. Let’s see how to make it happen!

Turning Your API into an MCP Server with Stainless
Prerequisites
Before we dive in, ensure you have:
- OpenAPI Specification: A valid OpenAPI (Swagger) file for your API (e.g.,
openapi.yamloropenapi.json). - Stainless Account: Sign up at stainless.com to create a project.
- Apidog Account: For testing your OpenAPI Spec (visit https://apidog.com/).
- Node.js 20+: For local testing and running the MCP server (nodejs.org/en/download).
- npm: Comes with Node.js for package management.
- MCP-Compatible Client: Claude Desktop, Cursor, or VS Code Copilot for testing.
- API Key: If your API requires authentication, have an API key ready.
Step 1: Testing Your OpenAPI Spec with Apidog
Before or even after turning your OpenAPI spec into an MCP server, it would be great to test it out. And that's where Apidog comes in handy! Apidog’s intuitive platform lets you import and test your OpenAPI spec to ensure your API’s endpoints are ready for MCP integration. Here’s how to do it:
- Visit Apidog and Sign Up or Sign In:
- Click Sign In (top right) if you have an account, or Sign Up to create one by following the prompts.
2. Create a New Project and Import Your OpenAPI Spec:
- Once signed in, click Create Project on the dashboard.
- On the project creation page, click Import.
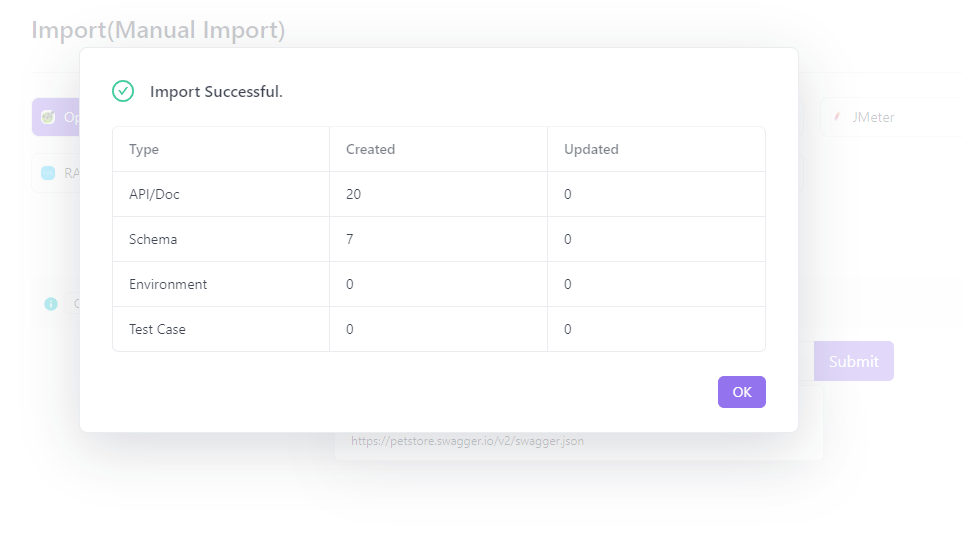
- Enter the URL of your OpenAPI file (e.g., https://my-api.com/openapi.yaml) or click or upload a file to select your local openapi.yaml or openapi.json.

- Apidog will parse the file and generate a new API in your account (this may take a few minutes for complex specs).
3. Configure API Settings:
- After a successful import, you’ll be directed to the settings page. Customize your API’s name, description, and authentication requirements (e.g., API key or OAuth).
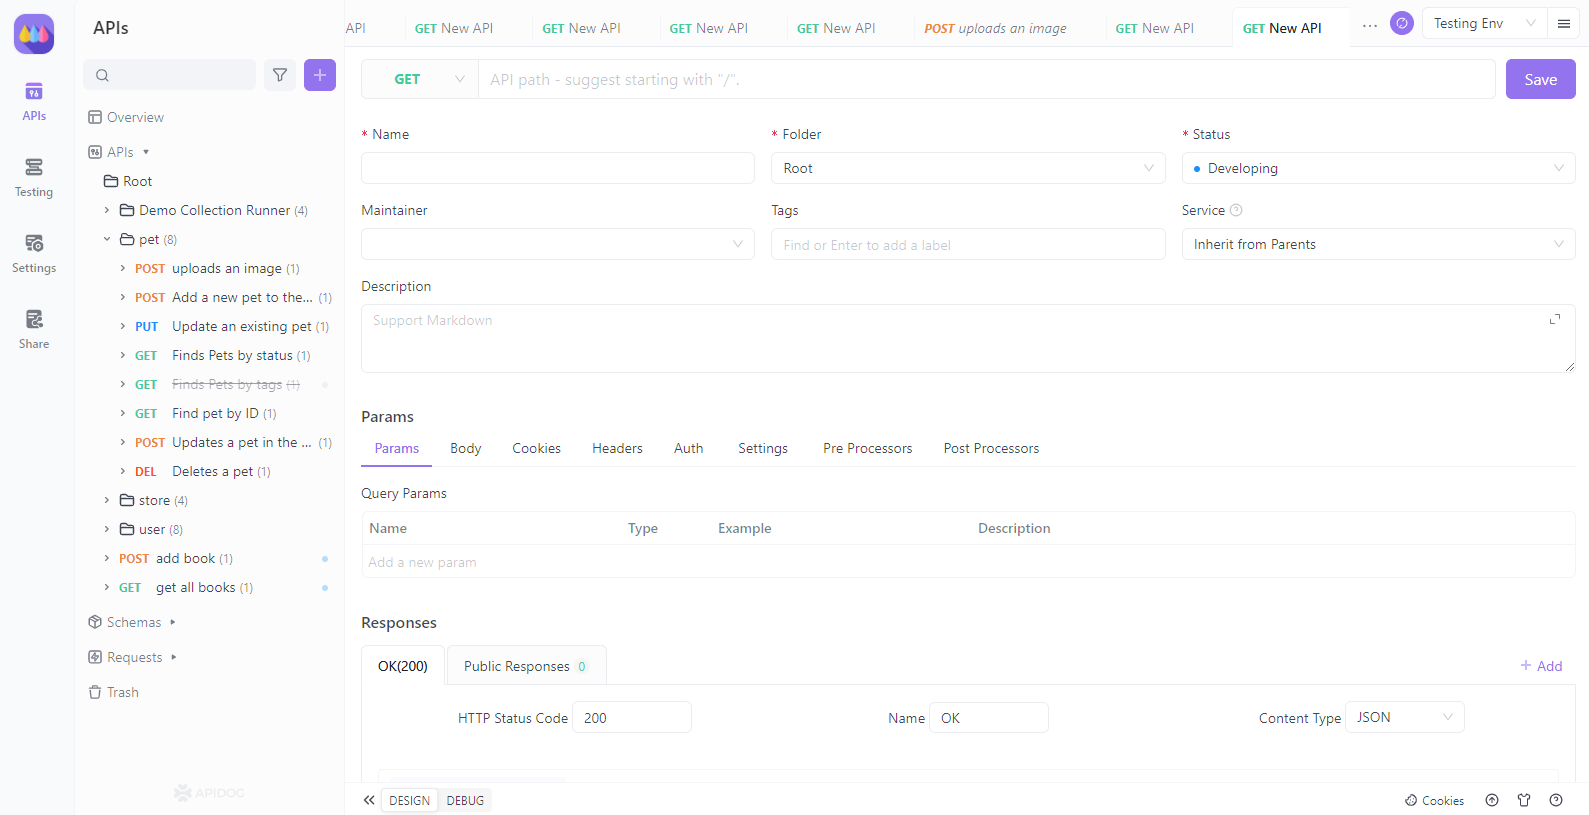
4. Add Endpoints and Test:
- Use Apidog’s interface to add or edit endpoints and documentation.
- Test your endpoints directly in Apidog to verify they work as expected before generating your MCP server.
Testing with Apidog ensures your OpenAPI spec is solid, making the Stainless MCP generation process smoother and your MCP server more reliable.
Step 2: Set Up a Stainless Project with TypeScript
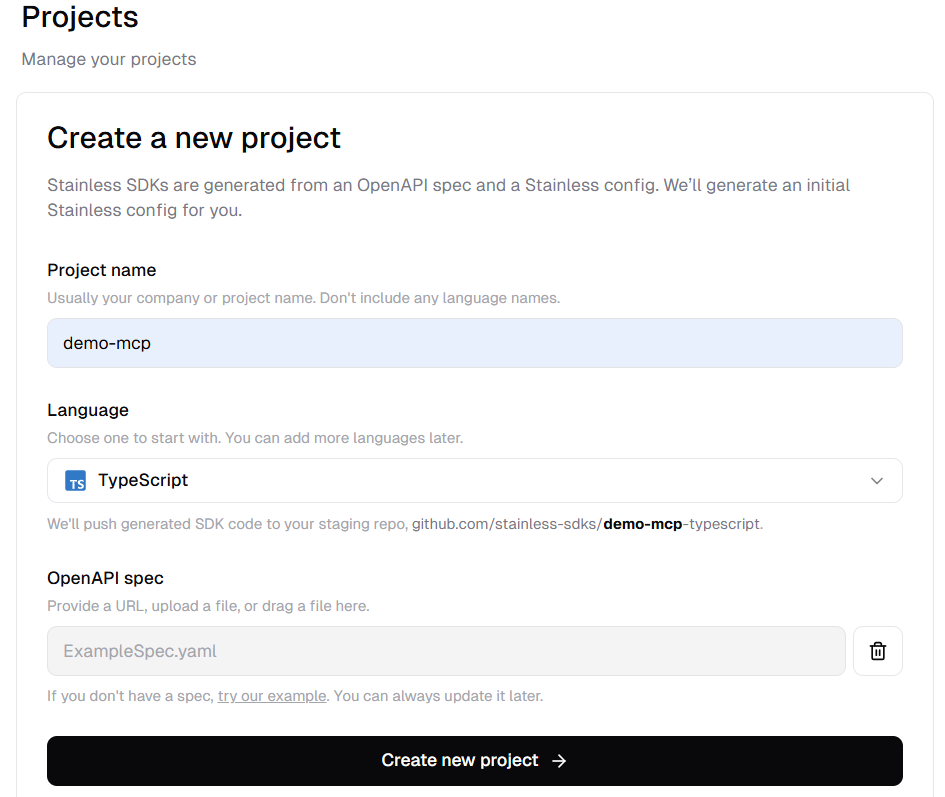
Create a Stainless Project:
- Log in to stainless.com and create a new project.
- Upload your OpenAPI spec (YAML or JSON) to define your API’s endpoints.
- Choose TypeScript as the target language (MCP server generation requires TypeScript, though legacy
nodetargets are supported).
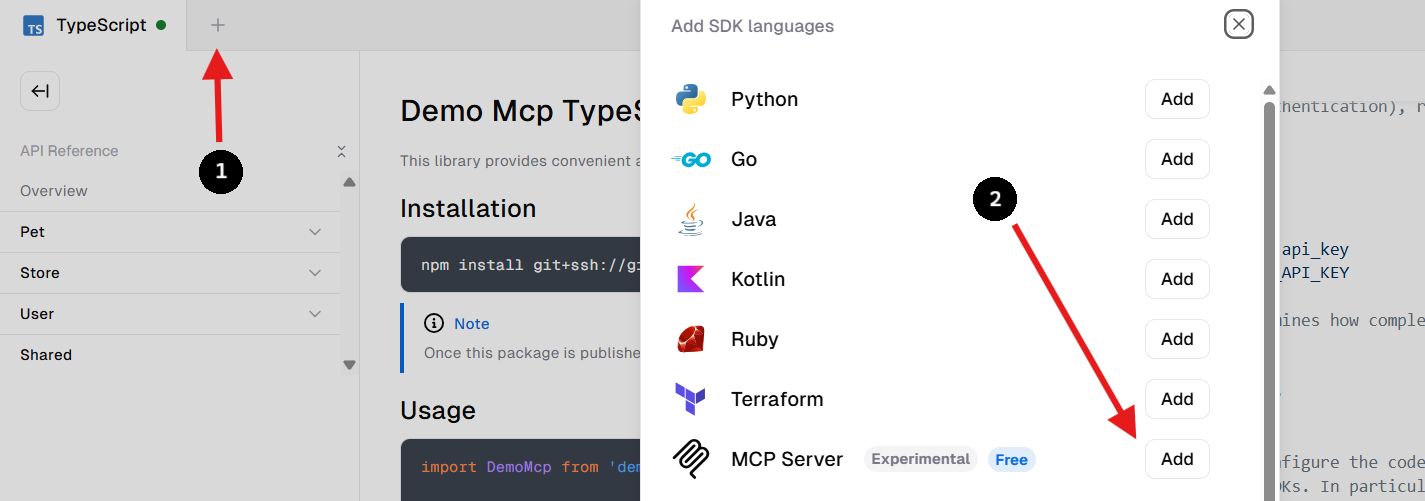
Enable MCP Server Generation:
- In your project’s Add SDKs section, select MCP Server to enable generation.
- This creates a subpackage under
packages/mcp-serverin your project.
Step 3: Configure MCP Server Generation
In your Stainless project settings, configure the MCP server options. Create or edit a configuration file (e.g., stainless.yaml) with:
targets:
  typescript:
    package_name: my-org-name
    production_repo: null
    publish:
      npm: false
    options:
      mcp_server:
        package_name: my-org-name-mcp
        enable_all_resources: true
package_name: Name your MCP server package (defaults to your SDK name with-mcp).enable_all_resources: true: Exposes all API endpoints as MCP tools by default.
This tells Stainless to generate an MCP server subpackage that implements your API’s endpoints as AI-accessible tools.
Step 4: Customize Endpoint Exposure and Tool Descriptions
By default, all endpoints in your OpenAPI spec become MCP tools. To customize:
- Select Specific Endpoints:
- Set
enable_all_resources: falseand enable specific resources or methods:
resources:
  users:
    mcp: true
    methods:
      create:
        mcp: true
  orders:
    methods:
      create:
        mcp: true
        endpoint: post /v1/orders
2. Fine-Tune Tool Metadata:
- Customize tool names and descriptions for better AI interaction:
resources:
  users:
    methods:
      create:
        mcp:
          tool_name: create_user
          description: Creates a new user profile with name and email.
This ensures your MCP server exposes only the endpoints you want, with clear, AI-friendly descriptions.
Step 5: Handle Large APIs with Tool Filtering and Dynamic Tools
For APIs with many endpoints (>50), exposing each as a separate tool can overwhelm an AI’s context window. Use these strategies:
- Tool Filtering:
- Filter tools at runtime by resource, operation type (e.g., read/write), or custom tags:
npx -y my-org-mcp --resource=users
2. Dynamic Tools Mode:
- Enable dynamic tools to expose three meta-tools:
list_api_endpoints,get_api_endpoint_schema, andinvoke_api_endpoint. This simplifies interaction for large APIs:
npx -y my-org-mcp --tools=dynamic
Dynamic tools let the AI discover and call endpoints dynamically, reducing context overload.
Step 6: Build and Publish Your MCP Server
Build the MCP Server:
- Stainless generates the MCP server in
packages/mcp-serverwhen you build your SDK. - Run the build command in your Stainless project (check your project’s
README.mdfor specifics).
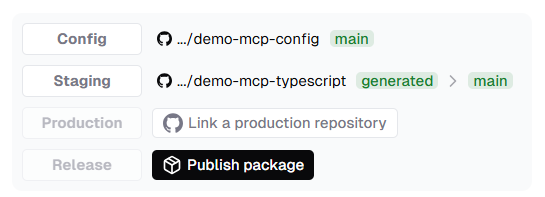
Publish to npm:
- Configure a production repository in your Stainless settings.
- Publish the MCP server as a separate npm package (e.g.,
my-org-name-mcp):
npm publish
Step 7: Install and Configure for MCP Clients
After publishing, install your MCP server package locally or remotely for use with AI clients. For Claude Desktop:
- Install the Package:
- If testing locally, navigate to
packages/mcp-serverand follow theREADME.mdinstructions. - For remote use, install via npm:
npm install my-org-name-mcp
2. Configure Claude Desktop:
- Open
claude_desktop_config.json(macOS:~/Library/Application Support/Claude, Windows:%APPDATA%\Claude).
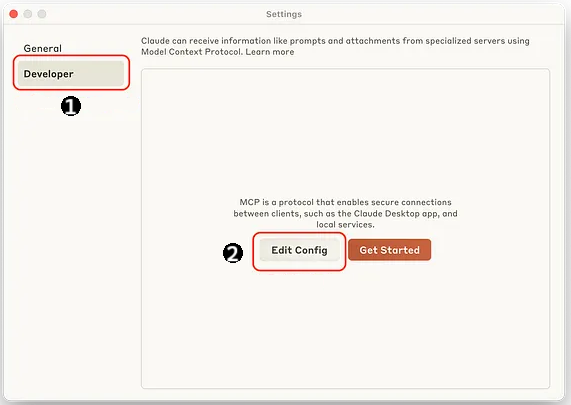
- Add:
{
  "mcpServers": {
    "my_org_api": {
      "command": "npx",
      "args": ["-y", "my-org-mcp"],
      "env": {
        "MY_API_KEY": "123e4567-e89b-12d3-a456-426614174000"
      }
    }
  }
}
- Replace
my-org-mcpwith your package name andMY_API_KEYwith your API key. - Save and restart Claude Desktop.
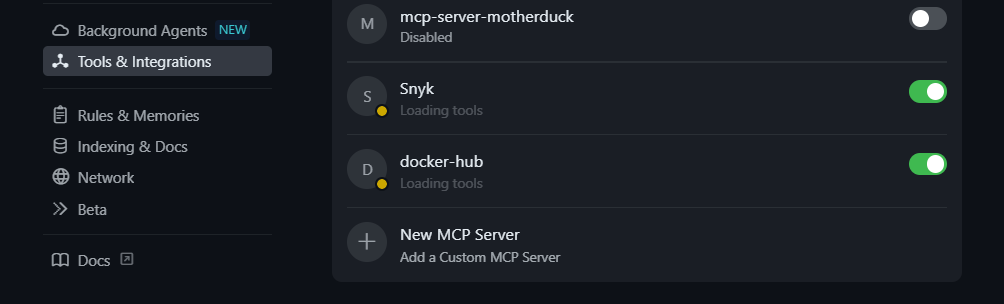
3. Other Clients:
- For Cursor or VS Code Copilot, add the same config to their respective settings (e.g.,
settings.jsonfor VS Code or Cursor’s Tools and Integrations panel).
Step 8: Test Your MCP Server
Let’s test your MCP server! In Claude Desktop (or another MCP client), try this prompt:
Using the MCP server, create a new user with name "Alex" and email "alex@example.com"
If your API has a POST /users endpoint (as defined in your OpenAPI spec), the MCP server will translate this prompt into an API call, creating a user and returning a response like:
User created: { "name": "Alex", "email": "alex@example.com", "id": "123" }
This confirms your MCP server is working and ready for AI-driven interactions.
Troubleshooting Tips
- Build Errors? Ensure your OpenAPI spec is valid and TypeScript is enabled in your Stainless project.
- Client Not Connecting? Verify the package name and API key in your MCP config, and restart the client.
- Prompt Not Working? Check your endpoint configurations and ensure the prompted action matches an exposed tool.
- Context Overload? Enable dynamic tools mode or filter resources for large APIs.
Best Practices for MCP Servers
- Keep Tools Focused: Expose only the endpoints your AI needs to avoid context bloat.
- Clear Descriptions: Write LLM-friendly tool descriptions to improve prompt accuracy.
- Use Dynamic Tools for Big APIs: Simplify large APIs with meta-tools to save context space.
- Secure Authentication: Use environment variables or OAuth for API keys in production.
- Test Locally First: Use the
README.mdinstructions to test before publishing to npm.
Conclusion
And that’s a wrap! You’ve just learned how to turn your API into an MCP server using Stainless, transforming your OpenAPI spec into an AI-ready powerhouse. From configuring endpoints to testing with a user creation prompt, this guide makes it easy to bridge your API with AI agents like Claude or Cursor. Whether you’re enhancing a small project or scaling a production API, the MCP server is your ticket to smarter, conversational integrations.
Ready to try it? Grab your OpenAPI spec, fire up Stainless, and let your API shine in the AI world.
Want an integrated, All-in-One platform for your Developer Team to work together with maximum productivity?
Apidog delivers all your demands, and replaces Postman at a much more affordable price!


