
Hey, there! Ever wished you had a super-smart assistant who could pair-program with you, tweak your code, and commit changes like a pro—all from your terminal? Meet Aider AI, the open-source AI coding assistant that’s changing the game in 2025. Think of it as your personal coding sidekick, powered by your favourite large language models (LLMs) like Claude or GPT-4o, ready to help you build projects, debug issues, or even vibe-code a game. In this beginner’s guide, I’ll be walking you through everything you need to know about Aider AI, from installing it to chatting with it in your browser. We’ll cover setup, usage, connecting to LLMs, and configuring it like a champ. Ready to make coding feel like a breeze? Let’s dive in!
What is Aider AI? Your Coding Copilot
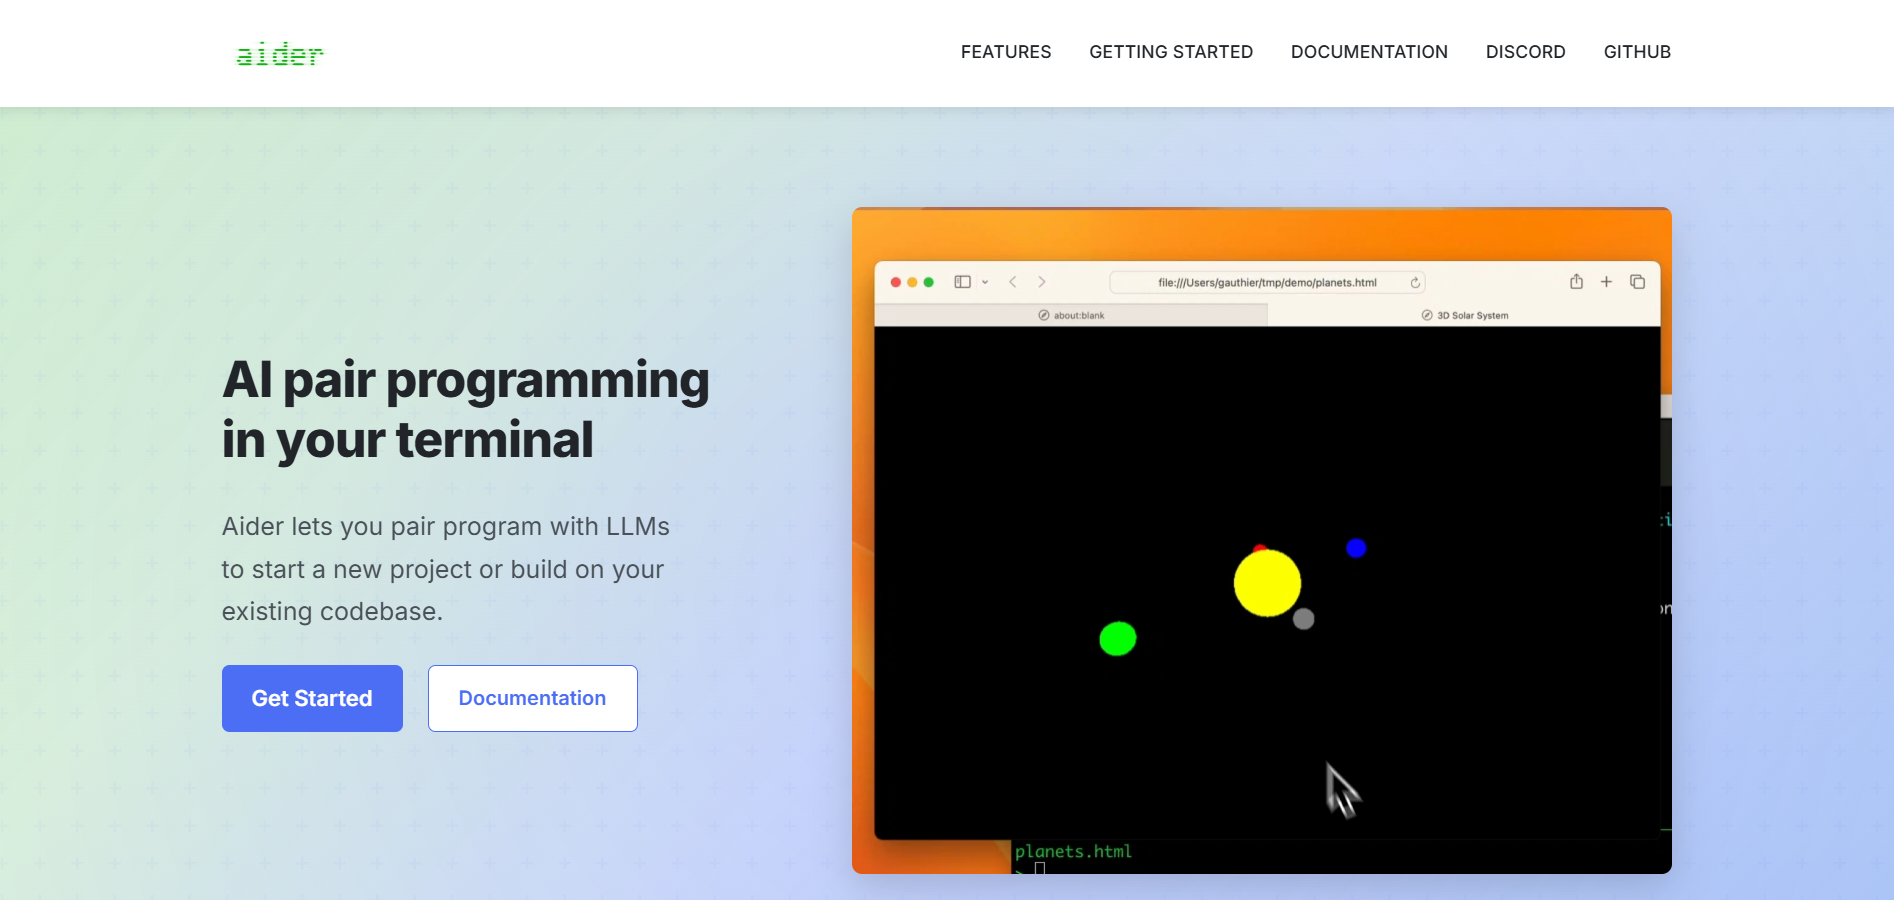
So, what’s Aider AI all about? Created by Paul Gauthier, it’s a free, open-source tool that lets you pair-program with AI right in your terminal—or browser, if that’s your thing. Unlike basic code completion tools, Aider AI dives deep into your Git repository, maps your codebase, and makes smart edits across multiple files. It’s like having a junior dev who’s fluent in Python, JavaScript, Rust, and dozens of other languages, plus it auto-commits changes with tidy Git messages. Whether you’re starting a new project or sprucing up an old one, Aider AI is your ticket to faster, smoother coding. X users call it “the best free AI coding assistant” for a reason—it’s powerful, flexible, and just plain fun.
Let’s break down how to get started with Aider AI, step by step, so you can see why everyone’s raving about it.
1. Installing Aider AI: Easy as Pie
Getting Aider AI up and running is a very simple task, especially if you’re comfortable with a terminal. The official docs at aider.chat recommend a few methods, and I’ll guide you through the simplest one for beginners. Here’s what you need to know.
Prerequisites
Before you install Aider AI, make sure you’ve got:
- Python: Version 3.9 or higher. Check with
python --version. No Python? Grab it from python.org. - Git: For version control (it’s how Aider AI tracks changes). Run
git --versionto confirm it’s installed. If not, head to git-scm.com. - Terminal Access: You’ll need a command line (Terminal on Mac/Linux, PowerShell on Windows).
- API Keys (optional for now): For premium LLMs like Claude or GPT-4o, you’ll need keys from Anthropic or OpenAI. We’ll cover that later.
Step-by-Step Installation
The Aider docs push pipx or uv for a clean install, but we’ll use pip in a virtual environment to keep things tidy. Follow along:
Create a Virtual Environment:
Open your terminal and make a new folder for your coding adventures:
mkdir aider-projects
cd aider-projects
python -m venv aider-env
Activate it:
- Mac/Linux:
source aider-env/bin/activate - Windows:
aider-env\Scripts\activate
Install Aider AI:
With the environment active, run:
python -m pip install -U --upgrade-strategy only-if-needed aider-chat
This grabs the latest Aider AI package (version 0.42.1 as of April 2025) and its dependencies without messing with your system Python.
Test It Out:
Check if it’s working:
aider --version
You should see something like “Aider v0.42.1-dev.” If you get an error, try python -m aider --version or double-check your Python version.
Optional Extras:
Want to use voice commands or scrape web pages? The docs suggest installing Playwright for web scraping:
pip install playwright
playwright install
Or PortAudio for voice (Mac/Linux example):
brew install portaudio
These are totally optional—skip them for now if you’re just starting.
That’s it! Aider AI is now installed in your system, ready to code. If you hit snags, the installation guide has more tips.
2. Using Aider AI: Terminal, Browser, and Chat Modes
Now that Aider AI is installed, let’s try it out! You can use it in your terminal for classic coding vibes, in a browser for a GUI twist, or switch between chat modes to control how it behaves. Here’s the lowdown.
Running Aider AI in Your Terminal
The terminal is where Aider AI shines. Navigate to a Git repo (or create one):
mkdir my-project
cd my-project
git init
Start Aider AI:
aider
You’ll see a prompt like aider >. This is code mode, where you ask for changes, and Aider AI edits files directly. Try:
>> Create a Python script called hello.py that prints "Hello, Aider!"
Aider AI will whip up hello.py, show you the diff, and commit it to Git. Need to tweak it? Say:
>> Add a function to hello.py that takes a name and prints a greeting.
It’ll update the file and commit again. So smooth!
Switching Chat Modes
Aider AI offers four chat modes to match your mood [aider.chat/docs/usage]. Use the /chat-mode <mode> flag or /<mode name> command:
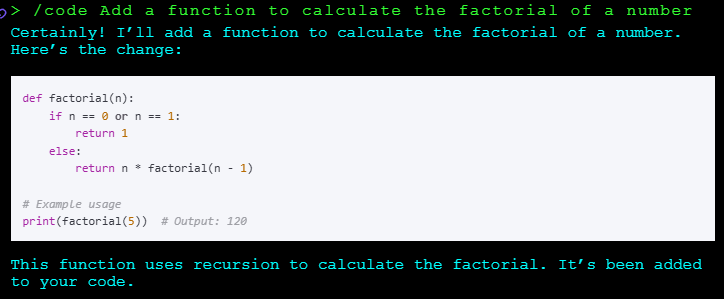
- Code Mode (default): Edits files based on your requests. Example:
> /chat-mode code.
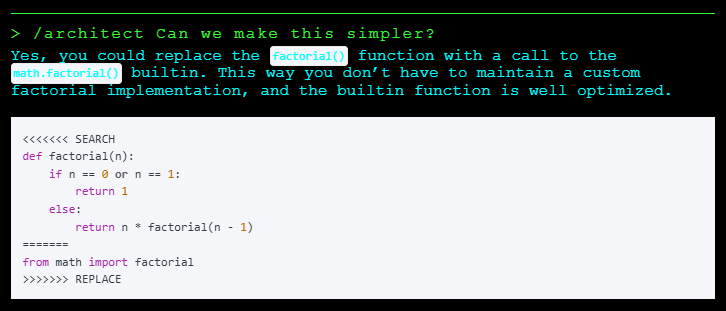
- Architect Mode: Plans out big changes before coding. Try:
> /architectthen “Design a REST API.”
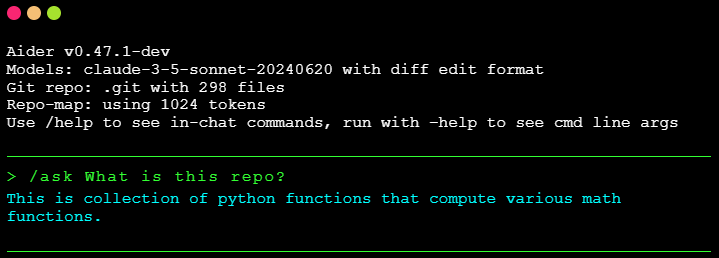
- Ask Mode: Answers questions without touching files. Run:
> /chat-mode askand ask, “What’s a Python decorator?”
- Help Mode: Explains Aider AI features. Type:
> /chat-mode helpor> /help How do I add files?

Switch modes mid-session with /chat-mode <name> and /<mode name>. It’s like flipping between AI personas—super handy!
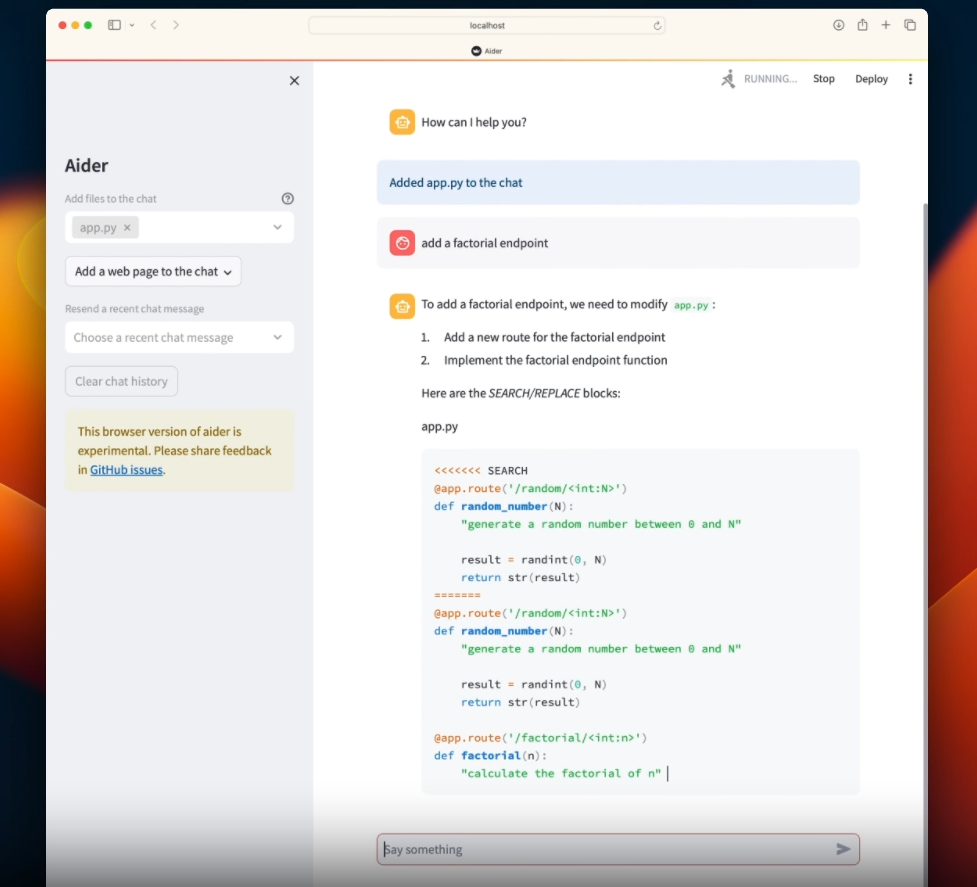
Using Aider AI in Your Browser
Don’t love the terminal? Aider AI has an experimental browser mode [aider.chat/docs/usage]:
aider --browser
This spins up a web UI (localhost in your browser) where you can chat with Aider AI like it’s a fancy app. It’s great for visual folks or if you’re juggling multiple tasks. You’ll still need a Git repo, and it works best with API keys set up (more on that soon). The UI’s a bit raw, but X users say it’s “surprisingly slick” for quick edits.
Pro Usage Tips
- Add Files: Tell Aider AI which files to edit with
aider file1.py file2.jsor/add file.pyin-chat. Don’t overload it—pick only what’s needed [aider.chat/docs/usage]. - Undo Changes: Mess up? Type
/undoto revert the last commit. - Run Tests: Use
/run pytestto execute tests and let Aider AI fix failures. - Voice Mode: Feeling chatty? Try
/voice(needs PortAudio) to dictate changes.
Whether you’re terminal hardcore or browser curious, Aider AI adapts to your style.
3. Connecting Aider AI to LLMs
Aider AI is only as smart as the LLM behind it, and lucky for you, it plays nice with tons of models—Claude 3.7 Sonnet, GPT-4o, DeepSeek, even local ones via Ollama. Here’s how to hook it up.
Choosing an LLM
The docs highlight top performers [aider.chat/docs/llms]:
- Claude 3.7 Sonnet: Great for reasoning. Use:
aider --model sonnet. - GPT-4o: Fast and versatile. Run:
aider --model gpt-4o. - DeepSeek R1: Budget-friendly. Try:
aider --model deepseek. - Local Models: Got Ollama? Start its server, then:
aider --model ollama/llama3.
List available models with:
aider --list-models openai/
Or check [aider.chat/docs/llms] for the full roster.
Setting Up API Keys
Premium LLMs need API keys from providers like OpenAI or Anthropic. Get yours from:
- OpenAI: platform.openai.com (not ChatGPT Plus!).
- Anthropic: console.anthropic.com.
Pass the key via command line:
aider --model gpt-4o --api-key openai=sk-xxx
Or better yet, store it securely (see configuration below). For local models, no keys needed—just a running Ollama server.
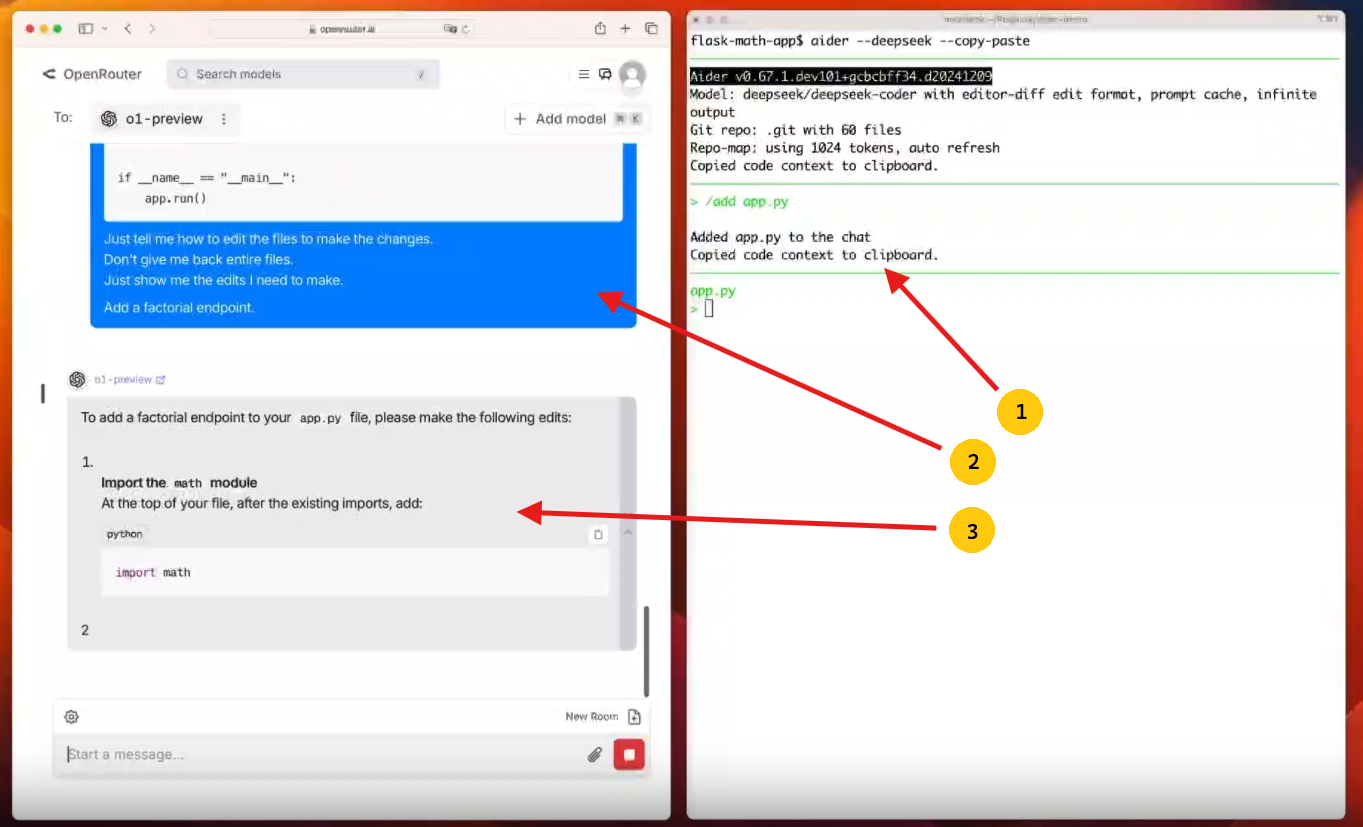
Web Chat Fallback
No API key? Aider AI can copy-paste code to an LLM’s web chat (like ChatGPT’s site) [aider.chat/docs/llms]. Run:
aider --copy-paste
It’s clunky but works in a pinch. Stick with API keys for the full experience.
Switch models anytime with /model <name>. Aider AI’s flexibility means you can experiment to find your perfect coding partner.
4. Configuring Aider AI: API Keys, .env, and More
Aider AI is super customizable, letting you tweak everything from API keys to colors. Let’s focus on the biggies: API keys and .env files, with a sprinkle of other options [aider.chat/docs/config].
Storing API Keys
Typing API keys every time is a drag. Aider AI lets you save them in:
i) Command Line: Like --api-key openai=sk-xxx.
ii) Environment Variables:
- Mac/Linux:
export OPENAI_API_KEY=sk-xxx - Windows:
setx OPENAI_API_KEY sk-xxx(restart your shell).
iii) .env File: The easiest way—let’s set it up.
Using a .env File
A .env file stores keys and settings securely. Aider AI looks for it in your home directory, Git repo root, or current folder [aider.chat/docs/config/dotenv]. Here’s how:
- Create a file named
.envin your project:
touch .env
2. Add your keys:
OPENAI_API_KEY=sk-xxx
ANTHROPIC_API_KEY=sk-xxx
DEEPSEEK_API_KEY=xxx
3. Save and run Aider AI:
aider
It’ll load the keys automatically—no flags needed!
For other providers (e.g., Gemini), use:
GEMINI_API_KEY=xxx
Or the --api-key gemini=xxx flag.
Important: Keep .env out of Git—add it to .gitignore to avoid leaks.

Other Cool Configuration Options
Aider AI offers tons of tweaks via command flags, .aider.conf.yml, or .env [aider.chat/docs/config/options]:
- Colors: Love a dark terminal? Try
--dark-modeor:
AIDER_DARK_MODE=true
- Model Settings: Set reasoning effort:
--reasoning-effort highorAIDER_REASONING_EFFORT=high. - Editor Mode: Run Aider AI in VS Code? It works great in a terminal pane. Add files with
/addor watch edits with--fancy-input. - YAML Config: Prefer a config file? Create
.aider.conf.yml:
model: gpt-4o
openai-api-key: sk-xxx
Place it in your repo root or home directory.
Check all options with:
aider --help
Or dig into [aider.chat/docs/config/options]. Aider AI lets you make it your tool.
Bonus: Why Aider AI is Awesome for Beginners
So, why pick Aider AI as a newbie? It’s forgiving and powerful:
- Git Safety: Auto-commits mean you can undo mistakes with
git revert. - Language Support: Python, JS, Go, HTML—it handles them all.
- Community Love: X posts call it “mind-blowing” for boosting productivity, with fans like Eric S. Raymond saying it “rocks your world.”
- Free and Open: Apache 2.0 licensed, so you can tweak it on GitHub.
It’s like training wheels for AI coding—you get pro results without pro stress.
Wrapping Up: Your Aider AI Journey Starts Now
Congrats—you’re ready to rock Aider AI! From installing it in a virtual environment to chatting in architect mode, connecting to vs code, or setting up a .env file, you’ve got the tools to code smarter. Fire up your terminal, try aider --browser, or ask it to build a game—maybe Pong? The Aider AI docs are packed with more tricks, so keep exploring. What will be your first Aider AI project? And don’t forget to test APIs with apidog.com to round out your dev toolkit.


