การทำงานอัตโนมัติของเบราว์เซอร์เดิมทีต้องใช้การเขียนสคริปต์ที่ซับซ้อน การจัดการ Selector และการจัดการสถานะหน้าเว็บที่ไม่สามารถคาดเดาได้ Claude Code เปลี่ยนกระบวนการนี้โดยให้คุณอธิบายสิ่งที่คุณต้องการด้วยภาษาธรรมชาติ และให้ AI แปลเป็นการกระทำของเบราว์เซอร์ที่แม่นยำ
อะไรที่ทำให้การทำงานอัตโนมัติของเบราว์เซอร์ด้วย Claude Code มีประสิทธิภาพ:
- การควบคุมด้วยภาษาธรรมชาติ: บอก Claude ว่า "คลิกปุ่มเข้าสู่ระบบ" แทนที่จะเขียนโค้ด Selector
- การปรับตัวอย่างชาญฉลาด: AI เข้าใจบริบทและปรับตัวเข้ากับการเปลี่ยนแปลงของหน้าเว็บ
- ความเข้าใจทางภาพ: โหมดแผนผังการเข้าถึง (Accessibility tree) และโหมดสแนปช็อต (snapshot) ช่วยให้การกำหนดเป้าหมายองค์ประกอบมีความน่าเชื่อถือ
- รองรับหลายเบราว์เซอร์: ทำงานร่วมกับ Chromium, Firefox และ WebKit
- การรวมเข้าด้วยกันอย่างราบรื่น: ทำงานได้โดยตรงในขั้นตอนการพัฒนาของคุณ
คู่มือนี้ครอบคลุมทุกอย่างตั้งแต่การตั้งค่าพื้นฐานไปจนถึงรูปแบบการทำงานอัตโนมัติขั้นสูงโดยใช้เซิร์ฟเวอร์ MCP (Model Context Protocol)
ทำความเข้าใจตัวเลือกการทำงานอัตโนมัติของเบราว์เซอร์
Claude Code มีแนวทางหลายอย่างสำหรับการทำงานอัตโนมัติของเบราว์เซอร์ ซึ่งแต่ละอย่างเหมาะสมกับกรณีการใช้งานที่แตกต่างกัน
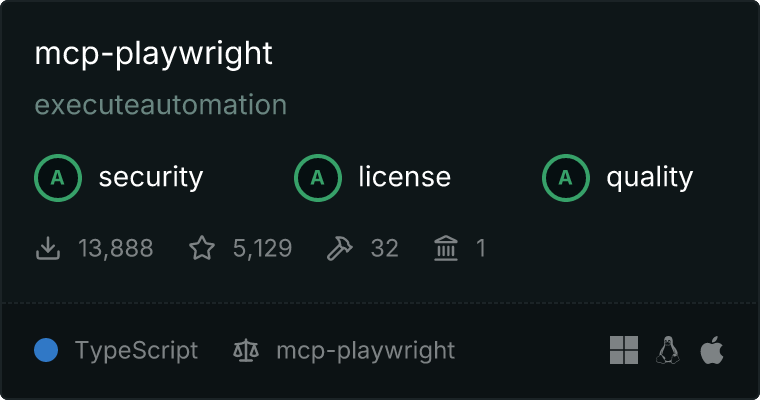
ตัวเลือกที่ 1: Playwright MCP (แนะนำ)
Playwright MCP ของ Microsoft เป็นแนวทางที่แนะนำสำหรับการทำงานอัตโนมัติของเบราว์เซอร์ด้วย Claude Code โดยมีข้อดีดังนี้:
- การสนับสนุนอย่างเป็นทางการ: ดูแลโดย Microsoft
- ข้ามเบราว์เซอร์: ทำงานร่วมกับ Chromium, Firefox และ WebKit
- โหมดแผนผังการเข้าถึง: การกำหนดเป้าหมายองค์ประกอบที่เชื่อถือได้โดยไม่ต้องใช้ Selector ที่เปราะบาง
- การพัฒนาอย่างต่อเนื่อง: การอัปเดตและปรับปรุงอย่างสม่ำเสมอ
ตัวเลือกที่ 2: Puppeteer MCP (ชุมชน)
แม้ว่าแพ็กเกจ Puppeteer MCP อย่างเป็นทางการจะถูกเลิกใช้งานแล้ว แต่ยังมีทางเลือกที่ดูแลโดยชุมชนอยู่:
- API ที่คุ้นเคย: ถ้าคุณคุ้นเคยกับ Puppeteer อยู่แล้ว
- เน้น Chrome: ปรับแต่งมาเพื่อ Chrome/Chromium
- การสนับสนุนสำหรับเวอร์ชันเก่า: สำหรับเวิร์กโฟลว์ที่ใช้ Puppeteer ที่มีอยู่แล้ว

ตัวเลือกที่ 3: Claude Computer Use API
สำหรับการควบคุมเดสก์ท็อปอย่างเต็มรูปแบบนอกเหนือจากเบราว์เซอร์:
- การเข้าถึงเดสก์ท็อปอย่างสมบูรณ์: ควบคุมแอปพลิเคชันใดก็ได้
- อิงตามภาพหน้าจอ: ความเข้าใจทางภาพของเนื้อหาบนหน้าจอ
- การรวม API: สร้างโซลูชันการทำงานอัตโนมัติที่กำหนดเอง
ตารางเปรียบเทียบ
| คุณสมบัติ | Playwright MCP | Puppeteer MCP | Computer Use API |
|---|---|---|---|
| การรองรับเบราว์เซอร์ | Chromium, Firefox, WebKit | Chromium เท่านั้น | เบราว์เซอร์ใดก็ได้ |
| การบำรุงรักษา | Microsoft (เป็นทางการ) | ชุมชน | Anthropic |
| การกำหนดเป้าหมายองค์ประกอบ | แผนผังการเข้าถึง | CSS selectors | ภาพ/พิกัด |
| โหมด Headless | ใช่ | ใช่ | ไม่ (ต้องแสดงผล) |
| เหมาะสำหรับ | การทดสอบเว็บ, การ Scrapping | โปรเจกต์เก่า | การทำงานอัตโนมัติของเดสก์ท็อป |
การตั้งค่า Playwright MCP
Playwright MCP เป็นวิธีที่แนะนำในการเพิ่มการทำงานอัตโนมัติของเบราว์เซอร์ให้กับ Claude Code นี่คือวิธีการตั้งค่า
ข้อกำหนดเบื้องต้น
- Node.js 18 หรือสูงกว่า
- ติดตั้ง Claude Code CLI แล้ว
- มี npm หรือ npx ให้ใช้งาน
ขั้นตอนที่ 1: กำหนดค่า MCP Server
เพิ่ม Playwright MCP ในการตั้งค่า Claude Code ของคุณ สร้างหรือแก้ไข .claude/settings.json:
{
  "mcpServers": {
    "playwright": {
      "command": "npx",
      "args": ["@playwright/mcp@latest"],
      "env": {
        "PLAYWRIGHT_BROWSERS_PATH": "0"
      }
    }
  }
}
ขั้นตอนที่ 2: ตรวจสอบการติดตั้ง
เริ่ม Claude Code และตรวจสอบว่า MCP server ทำงานอยู่:
claude
คุณควรเห็น Playwright MCP อยู่ในรายการเครื่องมือที่ใช้งานได้ ทดสอบด้วยคำสั่งง่ายๆ:
Navigate to https://example.com and tell me the page title
ขั้นตอนที่ 3: กำหนดค่าตัวเลือกเบราว์เซอร์
สำหรับการควบคุมที่มากขึ้น ให้ปรับแต่งการตั้งค่า MCP server:
{
  "mcpServers": {
    "playwright": {
      "command": "npx",
      "args": [
        "@playwright/mcp@latest",
        "--browser", "chromium",
        "--headless"
      ],
      "env": {
        "PLAYWRIGHT_BROWSERS_PATH": "0"
      }
    }
  }
}
ตัวเลือกที่ใช้งานได้:
--browser: เลือกchromium,firefox, หรือwebkit--headless: รันโดยไม่มีหน้าต่างเบราว์เซอร์ที่มองเห็นได้--port: ระบุพอร์ตที่กำหนดเอง (ค่าเริ่มต้น: กำหนดโดยอัตโนมัติ)--host: ผูกกับโฮสต์ที่ระบุ (ค่าเริ่มต้น: localhost)
ขั้นตอนที่ 4: การรันใน CI/CD
สำหรับ Pipeline อัตโนมัติ ให้ใช้โหมด Headless:
{
  "mcpServers": {
    "playwright": {
      "command": "npx",
      "args": [
        "@playwright/mcp@latest",
        "--headless",
        "--browser", "chromium"
      ]
    }
  }
}
ทางเลือกอื่น: Puppeteer MCP
ถ้าคุณชอบ Puppeteer หรือมีเวิร์กโฟลว์ที่ใช้ Puppeteer อยู่แล้ว คุณสามารถใช้ MCP server ที่ดูแลโดยชุมชน
การติดตั้ง
ใช้ Puppeteer MCP server ของชุมชน:
{
  "mcpServers": {
    "puppeteer": {
      "command": "npx",
      "args": ["-y", "puppeteer-mcp-server"]
    }
  }
}
ทางเลือกอื่น: puppeteer-mcp-claude
อีกหนึ่งตัวเลือกของชุมชนที่มีการทำงานอัตโนมัติของเบราว์เซอร์ที่ครอบคลุม:
# Clone the repository
git clone https://github.com/jaenster/puppeteer-mcp-claude.git
cd puppeteer-mcp-claude
npm install
กำหนดค่าใน .claude/settings.json:
{
  "mcpServers": {
    "puppeteer": {
      "command": "node",
      "args": ["/path/to/puppeteer-mcp-claude/index.js"]
    }
  }
}
ความแตกต่างที่สำคัญจาก Playwright
| แง่มุม | Playwright MCP | Puppeteer MCP |
|---|---|---|
| การตั้งค่า | npx (ไม่ต้องติดตั้ง) | อาจต้องติดตั้ง npm |
| เบราว์เซอร์ | หลากหลาย | Chrome/Chromium |
| กลยุทธ์ Selector | แผนผังการเข้าถึง | CSS/XPath |
| การบำรุงรักษา | Microsoft | ชุมชน |
คำสั่งพื้นฐานสำหรับการทำงานอัตโนมัติของเบราว์เซอร์
เมื่อ MCP server ของคุณได้รับการกำหนดค่าแล้ว คุณสามารถควบคุมเบราว์เซอร์โดยใช้ภาษาธรรมชาติได้
การนำทาง
Navigate to https://github.com
Go to the login page on github.com
Open https://docs.example.com/api in a new tab
การโต้ตอบกับองค์ประกอบ
Click the "Sign In" button
Type "my-username" in the email field
Select "United States" from the country dropdown
Check the "Remember me" checkbox
การอ่านเนื้อหาหน้าเว็บ
Get the text content of the main heading
List all links on the current page
Extract the product prices from this page
การจับภาพหน้าจอ
Take a screenshot of the current page
Capture a screenshot of just the navigation menu
การรอและกำหนดเวลา
Wait for the loading spinner to disappear
Wait 3 seconds then click the submit button
Wait until the "Success" message appears
การจัดการฟอร์ม
Fill out the contact form:
- Name: John Doe
- Email: john@example.com
- Message: Testing automation
Then submit the form
การโต้ตอบที่ซับซ้อน
Scroll down to the footer and click the "Privacy Policy" link
Hover over the "Products" menu and click "Enterprise"
Drag the slider to the 75% position
รูปแบบการทำงานอัตโนมัติขั้นสูง
รูปแบบที่ 1: เวิร์กโฟลว์หลายขั้นตอน
สร้างลำดับการทำงานอัตโนมัติที่ซับซ้อน:
Automate the following checkout flow:
1. Navigate to https://shop.example.com
2. Search for "wireless headphones"
3. Click on the first product result
4. Select size "Medium" if available
5. Click "Add to Cart"
6. Go to cart and verify the item is there
7. Take a screenshot of the cart
รูปแบบที่ 2: การดึงข้อมูล
ดึงข้อมูลที่มีโครงสร้างจากหน้าเว็บ:
Go to https://news.ycombinator.com and extract the top 10 stories with:
- Title
- URL
- Points
- Number of comments
- Posted time ago

Format as JSON
รูปแบบที่ 3: เวิร์กโฟลว์การยืนยันตัวตน
จัดการลำดับการเข้าสู่ระบบ:
Log into the application:
1. Navigate to https://app.example.com/login
2. Enter username: test@example.com
3. Enter password from environment variable LOGIN_PASSWORD
4. Click Sign In
5. Wait for dashboard to load
6. Verify login succeeded by checking for "Welcome" text
รูปแบบที่ 4: การทดสอบ Visual Regression
เปรียบเทียบสถานะหน้าเว็บ:
1. Navigate to https://staging.example.com
2. Take a full-page screenshot named "staging-homepage"
3. Navigate to https://production.example.com
4. Take a full-page screenshot named "production-homepage"
5. Compare the two screenshots and report any differences
รูปแบบที่ 5: การตรวจสอบและการแจ้งเตือน
สร้างเวิร์กโฟลว์การตรวจสอบ:
Check if the service is healthy:
1. Navigate to https://status.example.com
2. Look for "All Systems Operational" text
3. If not found, extract the current status message
4. Take a screenshot for documentation
5. Report the findings
รูปแบบที่ 6: การทดสอบ E2E พร้อมการตรวจสอบ API
รวมการทดสอบเบราว์เซอร์และ API:
Test the user registration flow:
1. Navigate to https://app.example.com/register
2. Fill in registration form with test data
3. Submit the form
4. Wait for confirmation page
5. Verify the user was created by checking the API response
6. Take a screenshot of the success page
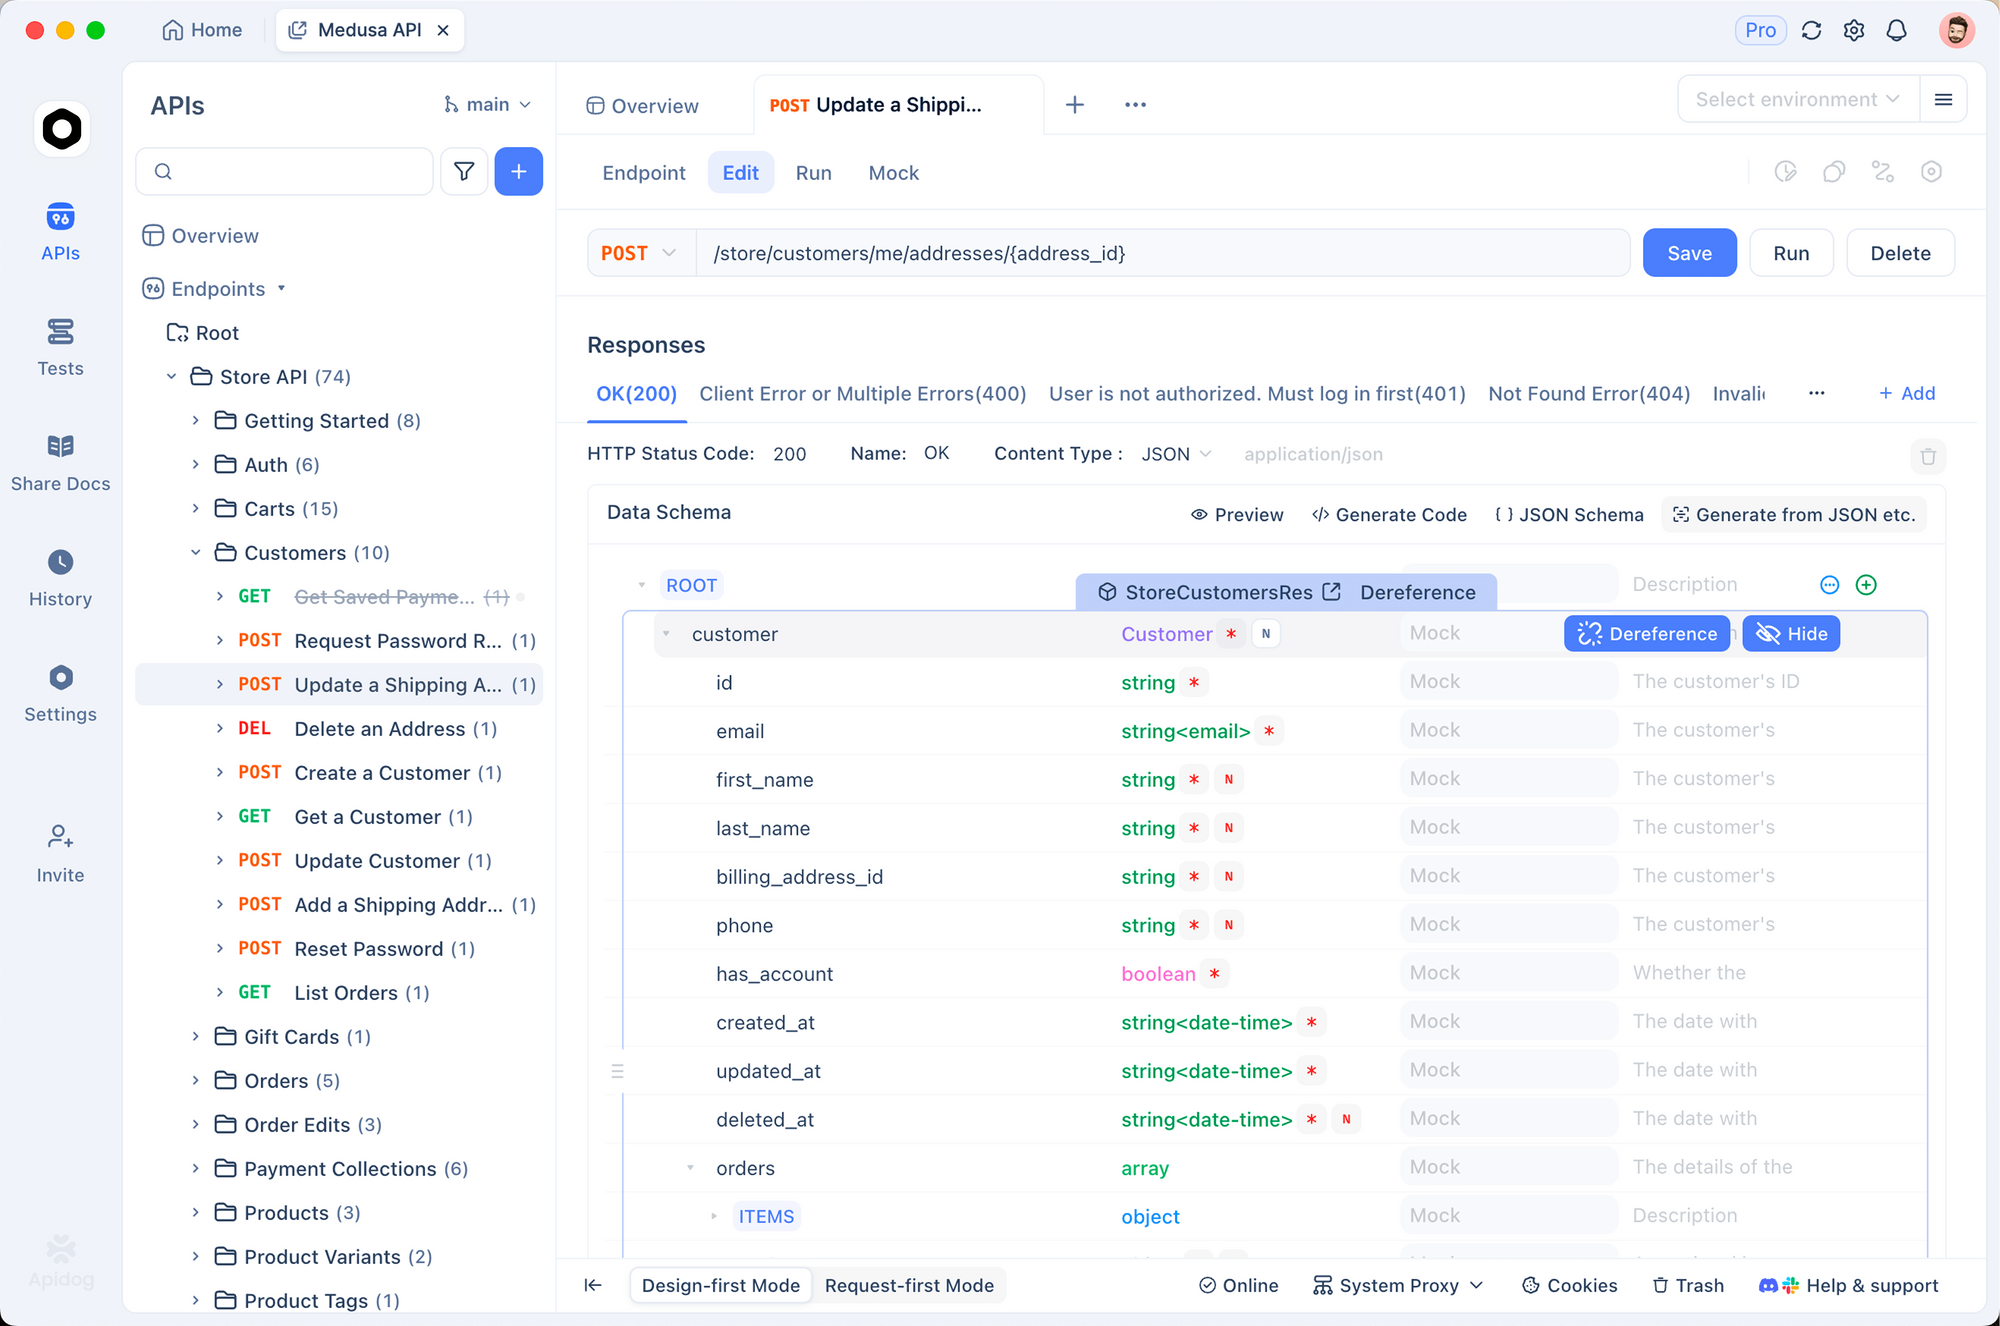
เมื่อทดสอบเวิร์กโฟลว์ที่เกี่ยวข้องกับ API ให้ใช้ Apidog เพื่อตรวจสอบการตอบกลับของ Backend คุณสามารถตรวจสอบได้ว่าการกระทำของเบราว์เซอร์ของคุณเรียกใช้ API ที่ถูกต้องและได้รับการตอบกลับที่คาดหวัง
กรณีการใช้งานจริง
กรณีใช้งาน 1: การจับภาพหน้าจอสำหรับการรีวิวโค้ดอัตโนมัติ
บันทึกเอกสารภาพสำหรับการรีวิวโค้ด:
For the PR review, capture screenshots of:
1. The login page before changes
2. The login page after changes
3. The error state when invalid credentials are entered
4. The success redirect after valid login

Save all screenshots to ./review-screenshots/
กรณีใช้งาน 2: การวิเคราะห์คู่แข่ง
ตรวจสอบเว็บไซต์คู่แข่ง:
Analyze competitor pricing:
1. Navigate to https://competitor.com/pricing
2. Extract all plan names and prices
3. Take a screenshot of the pricing page
4. Compare with our current pricing data
5. Generate a summary report
กรณีใช้งาน 3: การทดสอบฟอร์มอัตโนมัติ
ทดสอบการตรวจสอบฟอร์มในสถานการณ์ต่างๆ:
Test the contact form validation:

Test 1: Empty submission
- Submit empty form
- Verify all required field errors appear
- Screenshot: empty-form-errors.png

Test 2: Invalid email
- Enter "John" in name
- Enter "invalid-email" in email
- Submit
- Verify email validation error
- Screenshot: invalid-email-error.png

Test 3: Valid submission
- Fill all fields correctly
- Submit
- Verify success message
- Screenshot: form-success.png
กรณีใช้งาน 4: การตรวจสอบ SEO
ทำการตรวจสอบ SEO โดยอัตโนมัติ:
Perform SEO audit on https://mysite.com:
1. Check page title length (should be 50-60 characters)
2. Check meta description exists and length
3. Verify H1 tag exists and is unique
4. Check all images have alt text
5. Verify canonical URL is set
6. Check for broken links on the page
7. Generate audit report
กรณีใช้งาน 5: การทดสอบการเข้าถึง
ทำการตรวจสอบการเข้าถึงโดยอัตโนมัติ:
Run accessibility audit on https://app.example.com:
1. Navigate to the homepage
2. Check color contrast ratios
3. Verify all interactive elements are keyboard accessible
4. Check ARIA labels are present
5. Verify focus indicators are visible
6. Test with screen reader simulation
7. Generate accessibility report
กรณีใช้งาน 6: การตรวจสอบประสิทธิภาพ
ติดตามประสิทธิภาพการโหลดหน้าเว็บ:
Monitor page load performance:
1. Clear browser cache
2. Navigate to https://app.example.com
3. Record time to first contentful paint
4. Record time to interactive
5. Capture network waterfall
6. Take screenshot when fully loaded
7. Compare with baseline metrics
การรวมเข้ากับ CI/CD Pipeline
การรวม GitHub Actions
เพิ่มการทำงานอัตโนมัติของเบราว์เซอร์ใน CI Pipeline ของคุณ:
# .github/workflows/e2e-tests.yml
name: E2E Browser Tests

on:
  pull_request:
    branches: [main, develop]

jobs:
  browser-tests:
    runs-on: ubuntu-latest

    steps:
      - uses: actions/checkout@v4

      - name: Setup Node.js
        uses: actions/setup-node@v4
        with:
          node-version: '20'

      - name: Install Playwright Browsers
        run: npx playwright install --with-deps chromium

      - name: Install Claude Code
        run: npm install -g @anthropic-ai/claude-code

      - name: Run Browser Tests
        env:
          ANTHROPIC_API_KEY: ${{ secrets.ANTHROPIC_API_KEY }}
        run: |
          claude --mcp playwright "
            Run the following browser tests:
            1. Navigate to ${{ env.STAGING_URL }}
            2. Test login flow with test credentials
            3. Verify dashboard loads correctly
            4. Take screenshots of each step
            5. Report any failures
          "

      - name: Upload Screenshots
        if: always()
        uses: actions/upload-artifact@v4
        with:
          name: browser-test-screenshots
          path: screenshots/
การสร้างทักษะการทดสอบเบราว์เซอร์
สร้างทักษะที่นำกลับมาใช้ใหม่ได้สำหรับการทดสอบเบราว์เซอร์:
---
name: browser-test-runner
version: "1.0.0"
description: Runs browser-based E2E tests using Playwright MCP
user-invocable: true
allowed-tools:
  - Bash
  - Read
  - Write
  - mcp_playwright
---

# Browser Test Runner

Automated browser testing skill using Playwright MCP.

## Usage

```bash
/browser-test-runner --url https://app.example.com --suite smoke
/browser-test-runner --url https://staging.example.com --suite full
Claude Computer Use API
สำหรับสถานการณ์ที่ต้องการการควบคุมเดสก์ท็อปอย่างเต็มรูปแบบ Claude Computer Use API ของ Claude มีความสามารถในการทำงานอัตโนมัติที่ครอบคลุม
ภาพรวม
Computer Use เป็นฟีเจอร์เบต้าที่ช่วยให้ Claude สามารถ:
- ถ่ายภาพหน้าจอ
- เลื่อนและคลิกเมาส์
- พิมพ์ข้อความ
- เลื่อนและนำทาง
การตั้งค่าพื้นฐาน
import anthropic

client = anthropic.Anthropic()

response = client.messages.create(
    model="claude-sonnet-4-20250514",
    max_tokens=1024,
    tools=[
        {
            "type": "computer_20250124",
            "name": "computer",
            "display_width_px": 1920,
            "display_height_px": 1080,
            "display_number": 1
        }
    ],
    messages=[
        {
            "role": "user",
            "content": "Open Chrome and navigate to github.com"
        }
    ],
    betas=["computer-use-2025-01-24"]
)
ควรใช้ Computer Use หรือ MCP เมื่อใด
| สถานการณ์ | แนวทางที่แนะนำ |
|---|---|
| การ Scrapping เว็บ | Playwright MCP |
| การทดสอบ E2E | Playwright MCP |
| การทำงานอัตโนมัติของแอปเดสก์ท็อป | Computer Use API |
| เวิร์กโฟลว์ข้ามแอปพลิเคชัน | Computer Use API |
| CI/CD Pipeline | Playwright MCP (headless) |
| การทดสอบด้วยภาพ | ได้ทั้งสองอย่าง |
แนวทางปฏิบัติที่ดีที่สุดสำหรับ Computer Use
- ตรวจสอบการกระทำเสมอก่อนคลิก
- ใช้พิกัดที่เฉพาะเจาะจงเมื่อเป็นไปได้
- เพิ่มการหน่วงเวลาระหว่างการกระทำที่รวดเร็ว
- ใช้การกู้คืนข้อผิดพลาดสำหรับการคลิกที่ไม่สำเร็จ
- จำกัดขอบเขตให้มีสิทธิ์ที่จำเป็นเท่านั้น
ข้อควรพิจารณาด้านความปลอดภัย
การจัดการการยืนยันตัวตน
ควรทำ:
- ใช้ตัวแปรสภาพแวดล้อมสำหรับข้อมูลรับรอง
- ล้างข้อมูลรับรองหลังการทดสอบ
- ใช้บัญชีทดสอบ ไม่ใช่ข้อมูลรับรองสำหรับการผลิต
ไม่ควรทำ:
- กำหนดรหัสผ่านแบบ Hardcode ในคำสั่ง
- จัดเก็บข้อมูลรับรองในภาพหน้าจอ
- แชร์ไฟล์สถานะการยืนยันตัวตน
# ใช้ตัวแปรสภาพแวดล้อม
export TEST_USERNAME="test@example.com"
export TEST_PASSWORD="secure-test-password"
Log in using credentials from environment variables
TEST_USERNAME and TEST_PASSWORD
ความเป็นส่วนตัวของข้อมูล
ควรทำ:
- ปกปิดข้อมูลที่ละเอียดอ่อนในภาพหน้าจอ
- ล้างข้อมูลเบราว์เซอร์หลังการทดสอบ
- ใช้สภาพแวดล้อม Staging/ทดสอบ
ไม่ควรทำ:
- ถ่ายภาพหน้าเว็บที่มีข้อมูลผู้ใช้จริง
- จัดเก็บข้อมูลส่วนบุคคล
- รันกับ Production ด้วยข้อมูลจริง
ความปลอดภัยของเครือข่าย
ควรทำ:
- จำกัดการเข้าถึงเครือข่ายของเบราว์เซอร์
- ใช้ Whitelist สำหรับโดเมนที่ได้รับอนุญาต
- ตรวจสอบคำขอเครือข่าย
ไม่ควรทำ:
- อนุญาตการเข้าถึงอินเทอร์เน็ตแบบไม่จำกัด
- เพิกเฉยต่อข้อผิดพลาดใบรับรอง SSL ใน Production
- ดาวน์โหลดเนื้อหาที่ไม่น่าเชื่อถือ
ความปลอดภัยของ MCP Server
- รันภายในเครื่องเมื่อเป็นไปได้
- ตรวจสอบโค้ด MCP serverก่อนใช้งาน
- จำกัดสิทธิ์ของเครื่องมือให้เหลือน้อยที่สุดเท่าที่จำเป็น
- ตรวจสอบบันทึก MCP serverเพื่อหาความผิดปกติ
สรุป
การทำงานอัตโนมัติของเบราว์เซอร์ด้วย Claude Code เปลี่ยนแปลงวิธีการที่นักพัฒนาใช้ในการทดสอบเว็บ, การ Scrapping และการทำงานอัตโนมัติ ด้วยการรวมคำสั่งภาษาธรรมชาติเข้ากับ MCP server ที่ทรงพลังอย่าง Playwright คุณสามารถสร้างเวิร์กโฟลว์การทำงานอัตโนมัติที่ซับซ้อนได้โดยไม่ต้องเขียนสคริปต์ที่ซับซ้อน
สำหรับการทดสอบที่ครอบคลุม ให้ใช้การทำงานอัตโนมัติของเบราว์เซอร์ด้วย Claude Code ควบคู่กับการตรวจสอบ API ดาวน์โหลด Apidog ฟรีเพื่อสร้างเวิร์กโฟลว์การทดสอบที่สมบูรณ์ซึ่งครอบคลุมทั้ง Frontend และ Backend ของคุณ