
Murf AI は、テキストをスタジオ品質のナレーション付きの自然な音声に変換します。開発者は Murf AI API を統合して、コンテンツのナレーション、記事のオーディオ版の作成、仮想アシスタントの強化、大規模なナレーションの生成を行うアプリケーションを構築しています。
Murf AI API とは?
Murf AI は、書かれたコンテンツを人間のようなリアルな音声に変換するクラウドベースのテキスト読み上げサービスを提供します。ロボットのような TTS エンジンとは異なり、Murf は AI 搭載の音声合成を使用して、自然な抑揚、適切な強調、そして本物の感情表現を生み出します。

この API は、開発者向けにこの機能を提供します。主な機能は以下の通りです。
- 音声ライブラリ - さまざまな性別、年齢、アクセントにわたる120以上のAI音声にアクセスできます
- 多言語サポート - 英語、スペイン語、フランス語、ドイツ語、ヒンディー語を含む20以上の言語で音声を生成できます
- 音声カスタマイズ - ピッチ、速度、強調を調整して正確に制御できます
- 複数の出力形式 - オーディオを MP3、WAV、FLAC でエクスポートできます
- SSML サポート - 音声合成マークアップ言語を使用して発音を微調整できます
開発者は、ビデオのナレーション、ポッドキャスト制作、IVR システム、オーディオブック生成、アクセシビリティ機能にMurf AI APIを使用します。この API は、短いスニペットと長文コンテンツの両方を処理でき、多様なユースケースに適しています。
Murf AI API の始め方
API を呼び出す前に、認証を設定する必要があります。Murf AI は、標準的な REST 規約に従い、API キーを使用して認証を行います。
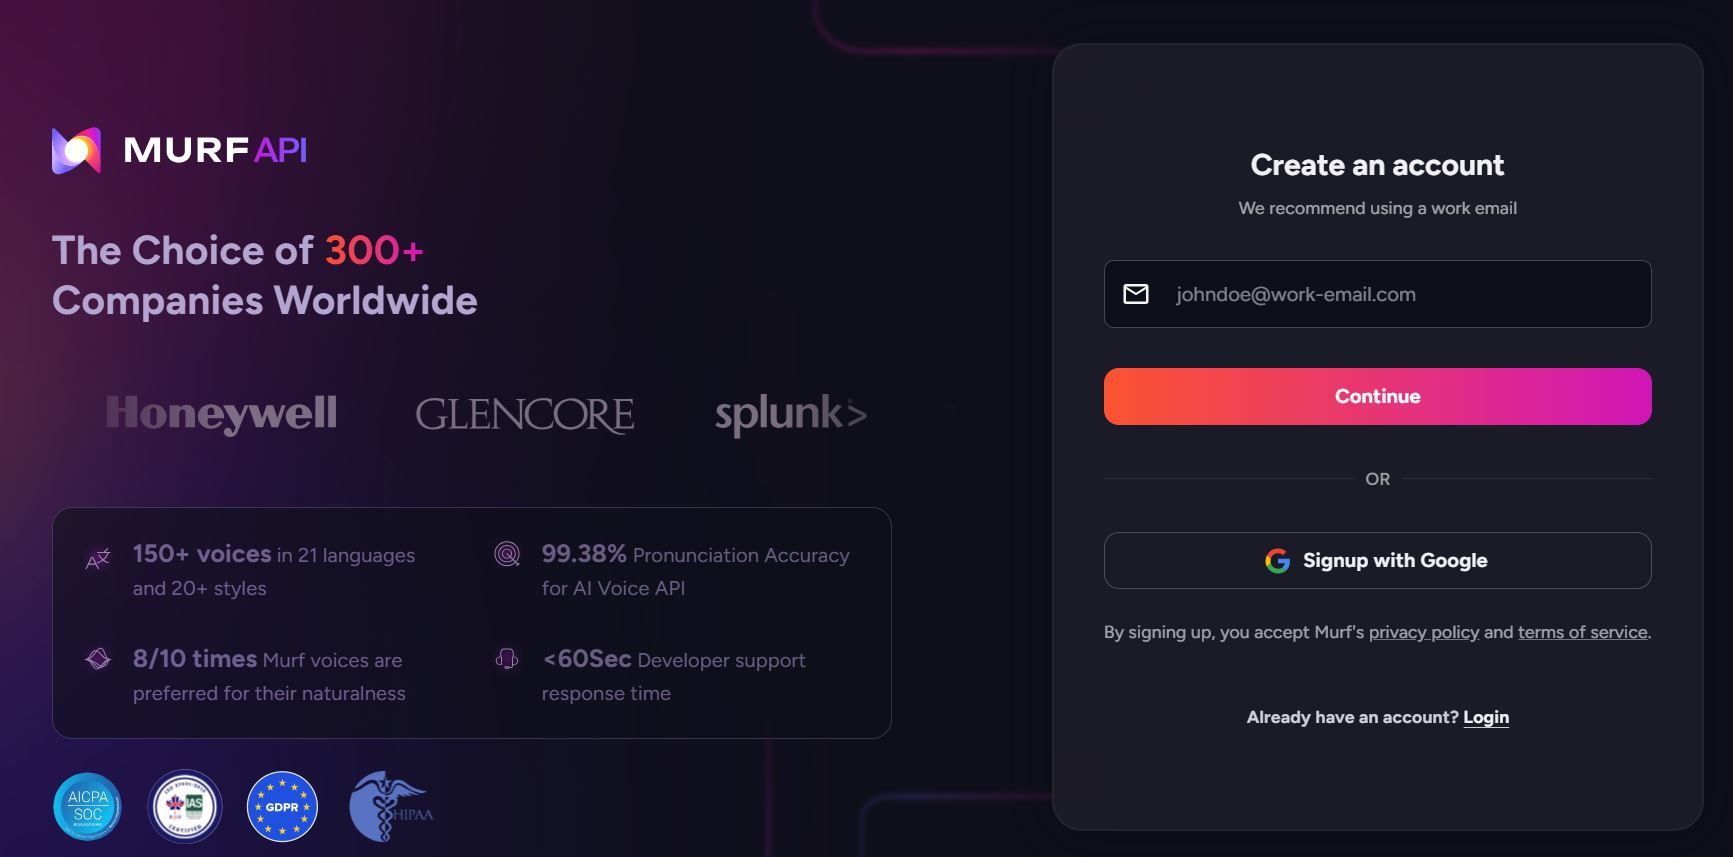
ステップ 1: Murf AI アカウントを作成する
murf.ai にアクセスしてアカウントを登録します。Murf は、API のテストに最適な、制限付きクレジットの無料プランを提供しています。本番環境で使用するには、API アクセスを含む有料プランが必要です。
ステップ 2: Murf AI API キーを生成する
アカウント設定に移動し、API セクションを見つけます。新しいAPI キーを生成し、安全に保管してください。このキーは、すべてのリクエストを認証します。
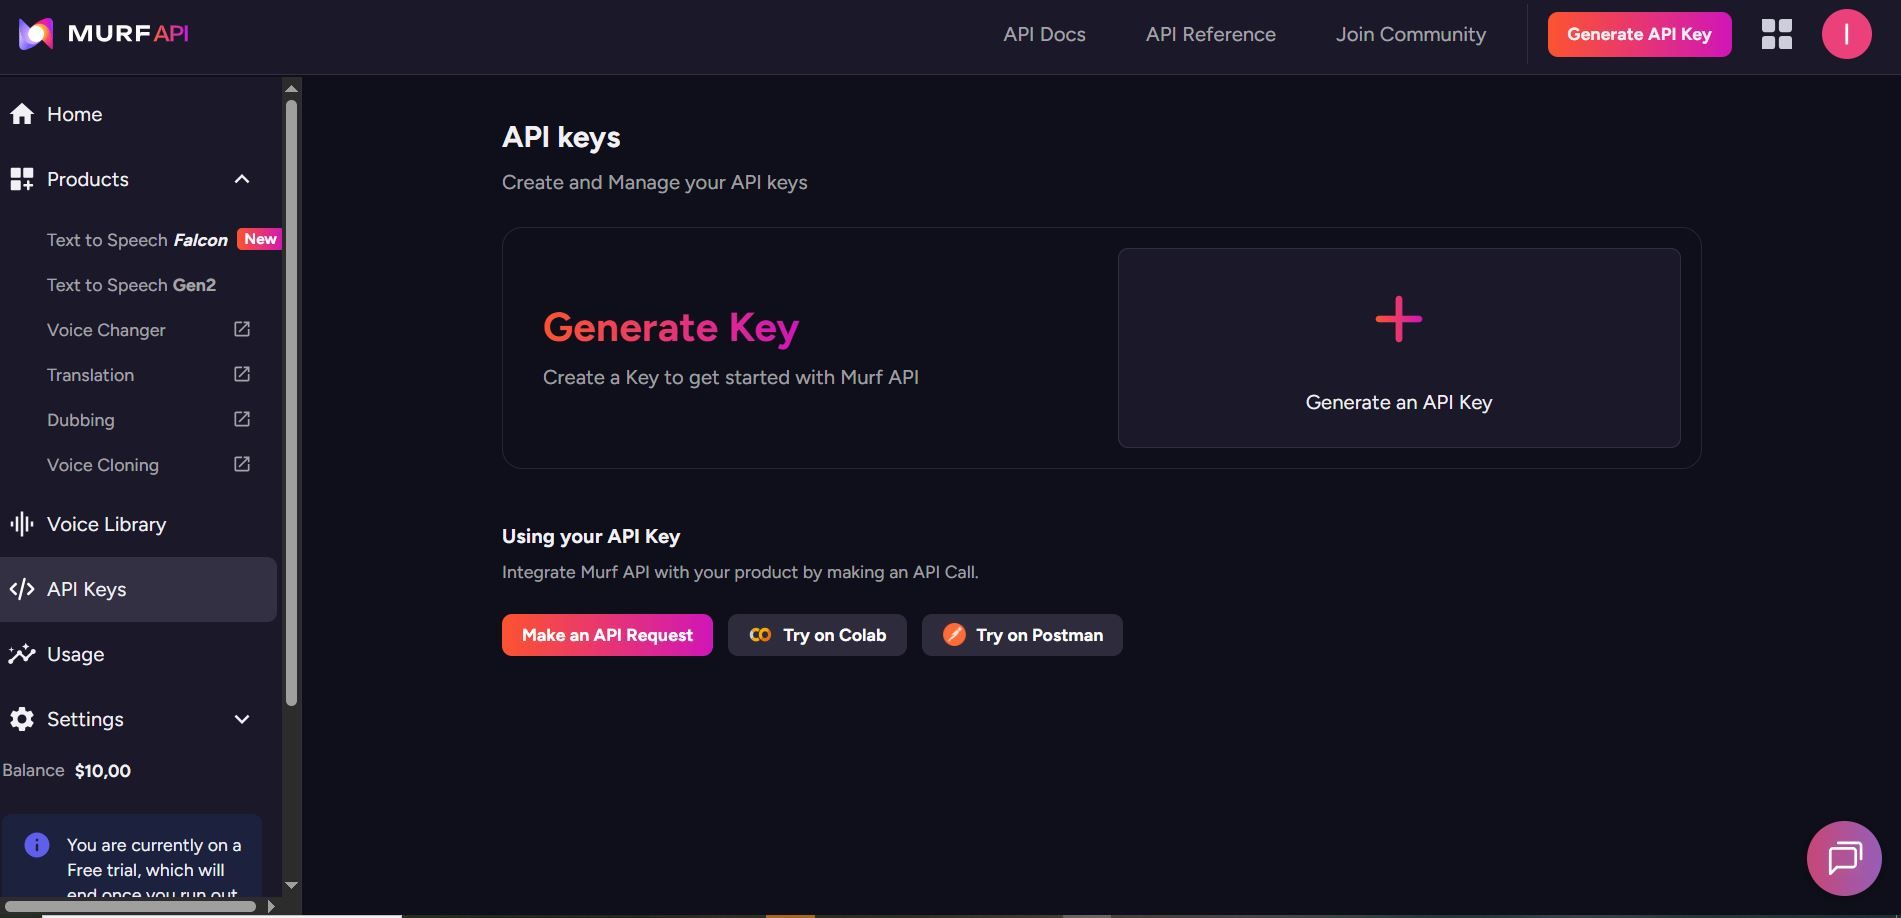
API キーは機密情報として保管してください。バージョン管理にコミットしたり、クライアント側のコードに公開したりしないでください。
ステップ 3: Murf AI API のベース URL を理解する
すべての Murf AI API リクエストは次の宛先に送信されます。
https://api.murf.ai/v1
API は、JSON リクエストおよびレスポンス本文で RESTful 規約に従います。認証は `api-key` ヘッダーを介して行われます。
Murf AI API 認証
すべての API リクエストには、リクエストヘッダーに API キーが必要です。認証ヘッダーの形式は次のとおりです。
api-key: YOUR_API_KEY
Content-Type: application/json
さまざまなプログラミング言語での認証は次のようになります。
Murf AI API を使用した Python 認証
import requests

API_KEY = "your_murf_api_key"
BASE_URL = "https://api.murf.ai/v1"

headers = {
    "api-key": API_KEY,
    "Content-Type": "application/json"
}

# Test authentication by fetching available voices
response = requests.get(f"{BASE_URL}/voices", headers=headers)

if response.status_code == 200:
    print("Authentication successful!")
    voices = response.json()
    print(f"Available voices: {len(voices)}")
else:
    print(f"Authentication failed: {response.status_code}")
Murf AI API を使用した JavaScript 認証
const API_KEY = 'your_murf_api_key';
const BASE_URL = 'https://api.murf.ai/v1';

const headers = {
    'api-key': API_KEY,
    'Content-Type': 'application/json'
};

// Test authentication
fetch(`${BASE_URL}/voices`, { headers })
    .then(response => response.json())
    .then(data => console.log('Voices available:', data.length))
    .catch(error => console.error('Auth failed:', error));
Murf AI API を使用した cURL 認証
curl -X GET "https://api.murf.ai/v1/voices" \
  -H "api-key: YOUR_API_KEY" \
  -H "Content-Type: application/json"
認証が成功すると、ステータスコード 200 が返されます。無効なキーの場合は 401 Unauthorized が返されます。
Murf AI API で利用可能な音声を取得する
音声を生成する前に、利用可能な音声のリストを取得して、ユースケースに合ったものを選択します。`/voices` エンドポイントは、すべてのアクセス可能な音声をそのメタデータとともに返します。
すべての音声のリスト
import requests

API_KEY = "your_murf_api_key"
BASE_URL = "https://api.murf.ai/v1"

headers = {
    "api-key": API_KEY,
    "Content-Type": "application/json"
}

response = requests.get(f"{BASE_URL}/voices", headers=headers)
voices = response.json()

# Display voice information
for voice in voices[:5]:  # Show first 5 voices
    print(f"Name: {voice['name']}")
    print(f"Voice ID: {voice['voiceId']}")
    print(f"Language: {voice['language']}")
    print(f"Gender: {voice['gender']}")
    print(f"Accent: {voice.get('accent', 'N/A')}")
    print("---")
レスポンスには音声のプロパティが含まれます。
| プロパティ | 説明 | 例 |
|---|---|---|
| voiceId | 音声の一意の識別子 | "en-US-marcus" |
| name | 音声の表示名 | "Marcus" |
| language | 言語コード | "en-US" |
| gender | 音声の性別 | "male" または "female" |
| accent | 地域のアクセント | "American", "British" |
| style | 音声のスタイル/トーン | "conversational", "formal" |
言語で音声をフィルタリングする
# Filter for English voices
english_voices = [v for v in voices if v['language'].startswith('en')]
print(f"English voices available: {len(english_voices)}")

# Filter for Spanish voices
spanish_voices = [v for v in voices if v['language'].startswith('es')]
print(f"Spanish voices available: {len(spanish_voices)}")
テキストから音声を生成する
Murf AI API の核となる機能は、テキストから音声を変換することです。`/speech` エンドポイントは、テキストと音声のパラメータを受け入れ、オーディオファイルを返します。
基本的なテキスト読み上げリクエスト
import requests

API_KEY = "your_murf_api_key"
BASE_URL = "https://api.murf.ai/v1"

headers = {
    "api-key": API_KEY,
    "Content-Type": "application/json"
}

payload = {
    "text": "Welcome to our application. This audio was generated using Murf AI.",
    "voiceId": "en-US-marcus",
    "format": "mp3",
    "sampleRate": 24000
}

response = requests.post(
    f"{BASE_URL}/speech",
    headers=headers,
    json=payload
)

if response.status_code == 200:
    # Save the audio file
    with open("output.mp3", "wb") as f:
        f.write(response.content)
    print("Audio saved to output.mp3")
else:
    print(f"Error: {response.status_code} - {response.text}")
リクエストパラメータ
| パラメータ | タイプ | 必須 | 説明 |
|---|---|---|---|
| text | string | はい | 音声に変換するテキスト |
| voiceId | string | はい | 使用する音声のID |
| format | string | いいえ | 出力形式: mp3, wav, flac (デフォルト: mp3) |
| sampleRate | integer | いいえ | オーディオサンプルレート: 8000, 16000, 24000, 48000 |
| speed | float | いいえ | 話す速度: 0.5 から 2.0 (デフォルト: 1.0) |
| pitch | float | いいえ | 音声のピッチ調整: -10 から 10 |
音声の速度とピッチを調整する
payload = {
    "text": "This text is spoken at a slower pace with a lower pitch.",
    "voiceId": "en-US-marcus",
    "format": "mp3",
    "speed": 0.8,    # 80% of normal speed
    "pitch": -2      # Slightly lower pitch
}

response = requests.post(f"{BASE_URL}/speech", headers=headers, json=payload)
高度な制御のための SSML の使用
音声合成マークアップ言語 (SSML) は、発音、一時停止、強調などをきめ細かく制御できます。Murf AI API は、プロフェッショナルグレードのオーディオ出力のために SSML タグをサポートしています。
SSML の例
ssml_text = """
<speak>
    Welcome to <emphasis level="strong">Murf AI</emphasis>.
    <break time="500ms"/>
    Our text-to-speech technology creates <prosody rate="slow">natural sounding</prosody> audio.
    <break time="300ms"/>
    The word <phoneme alphabet="ipa" ph="ˈdeɪtə">data</phoneme> is pronounced correctly.
</speak>
"""

payload = {
    "text": ssml_text,
    "voiceId": "en-US-julia",
    "format": "mp3",
    "ssml": True  # Enable SSML parsing
}

response = requests.post(f"{BASE_URL}/speech", headers=headers, json=payload)
一般的な SSML タグ
| タグ | 目的 | 例 |
|---|---|---|
<break> | 一時停止を挿入 | <break time="500ms"/> |
<emphasis> | 単語を強調 | <emphasis level="strong">important</emphasis> |
<prosody> | 速度/ピッチを調整 | <prosody rate="slow">text</prosody> |
<phoneme> | カスタム発音 | <phoneme alphabet="ipa" ph="...">word</phoneme> |
<say-as> | タイプとして解釈 | <say-as interpret-as="date">2026-01-29</say-as> |
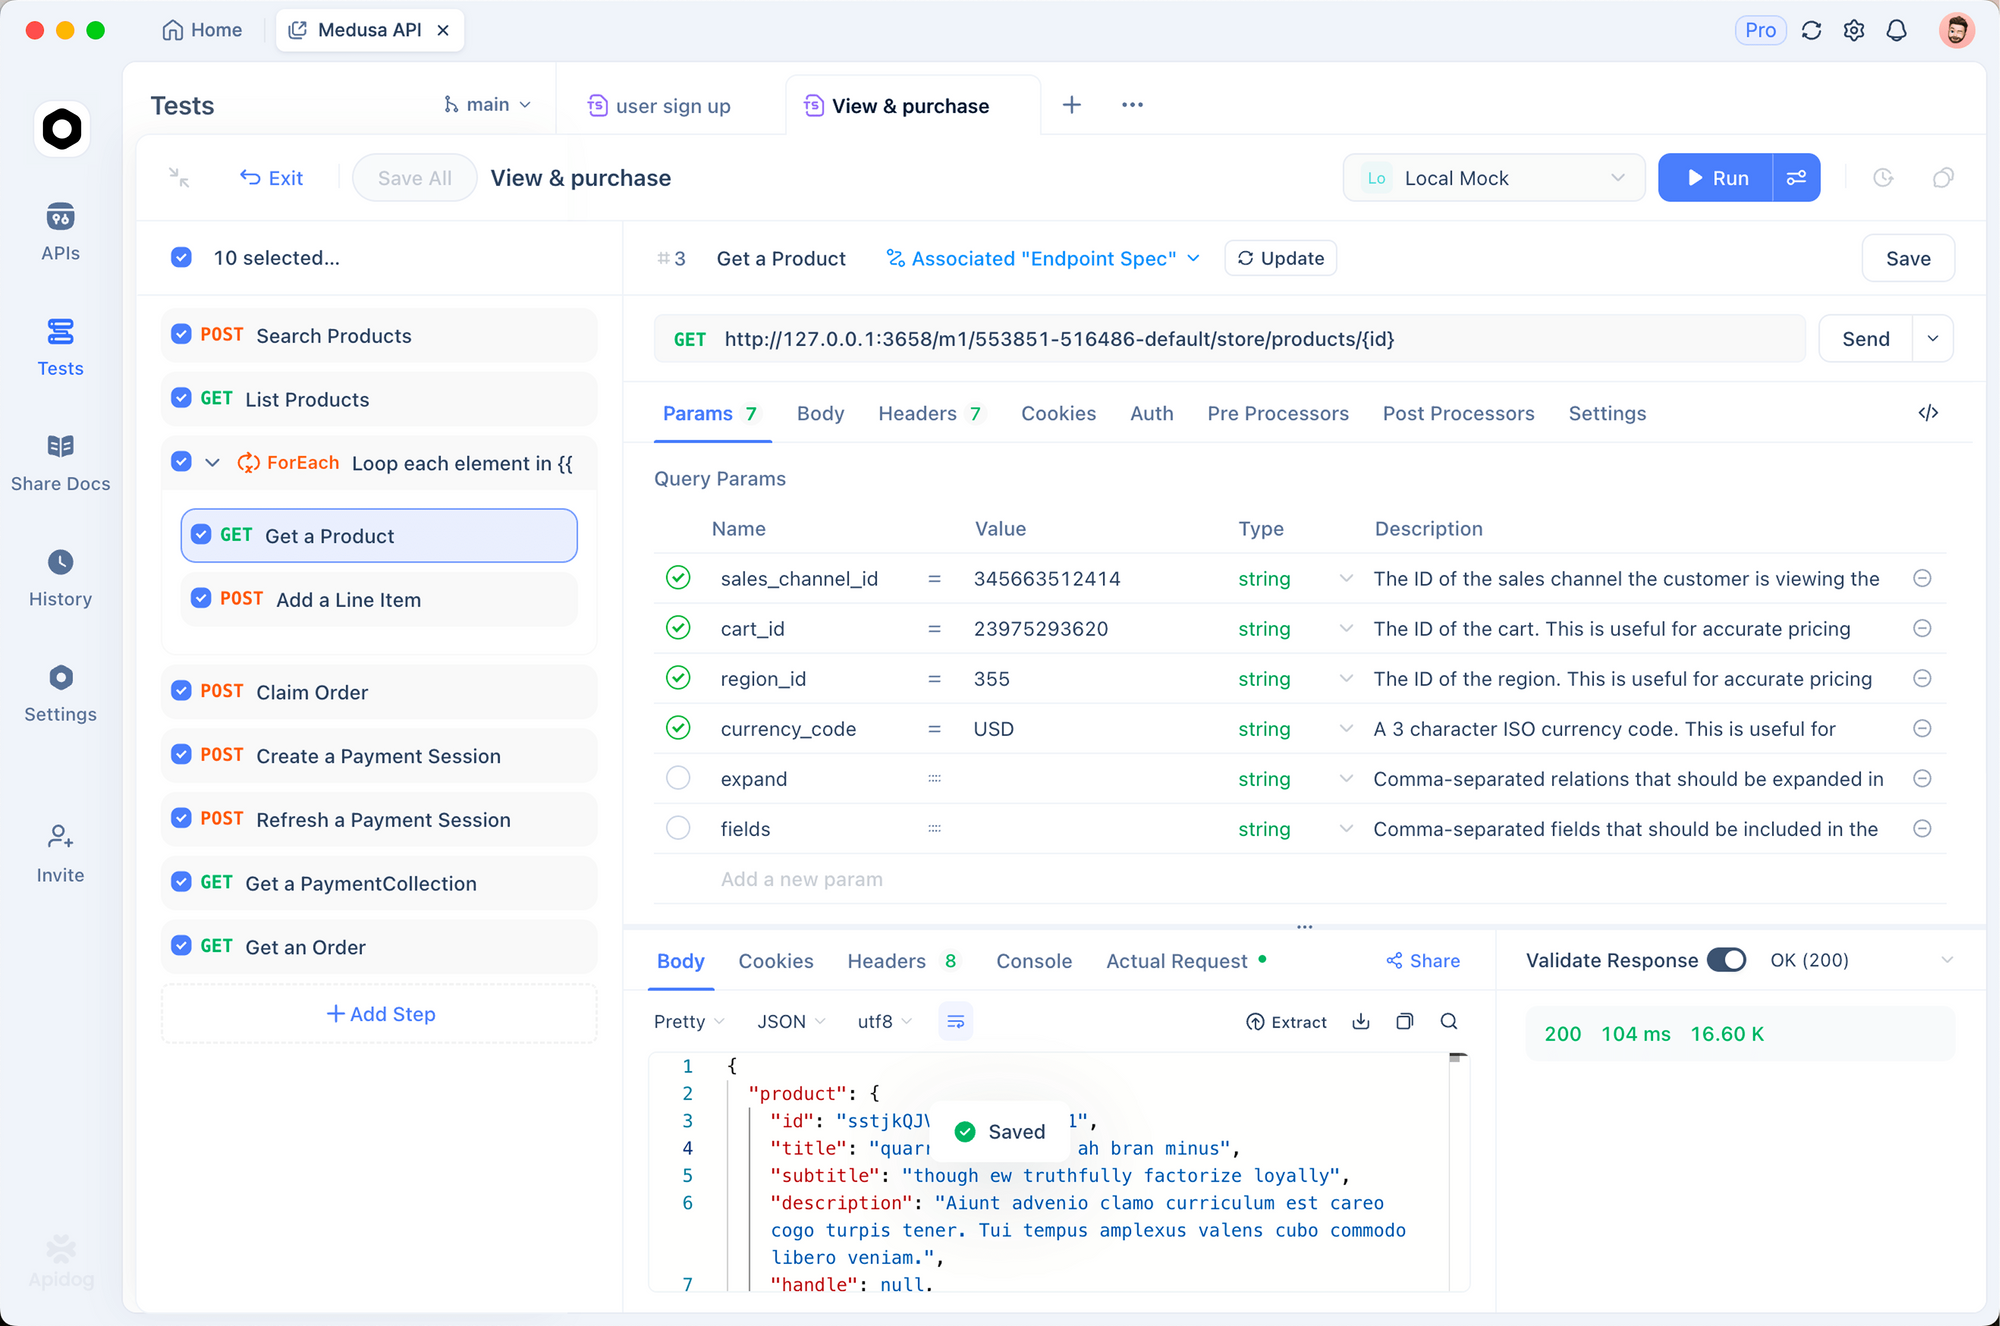
Apidog で Murf AI API をテストする
統合コードを記述する前に、API 呼び出しを対話的にテストしてください。Apidog は、リクエストの作成、レスポンスの検査、問題のデバッグを行うための視覚的なインターフェースを提供します。
Murf AI 用 Apidog の設定
1. Apidog をダウンロードしてインストールする
Apidog を無料で入手してください。Windows、Mac、Linux、およびウェブブラウザをサポートしています。
2. 新しいプロジェクトを作成する
「Murf AI Integration」という名前で新しいプロジェクトを開始します。これにより、API エンドポイントが整理されます。
3. 環境変数を設定する
API キーを使用して環境を作成します。
{
    "baseUrl": "https://api.murf.ai/v1",
    "apiKey": "your_murf_api_key"
}
環境変数は、機密データをリクエスト設定から分離します。
4. 最初のリクエストを作成する
次の設定で新しい POST リクエストを追加します。
- URL:
{{baseUrl}}/speech - ヘッダー:
api-key:{{apiKey}}Content-Type:application/json- 本文 (JSON):
{
    "text": "Testing Murf AI API with Apidog. This is a sample voiceover.",
    "voiceId": "en-US-marcus",
    "format": "mp3"
}
5. レスポンスを送信して検査する
「送信」をクリックします。Apidog はレスポンスのステータス、ヘッダーを表示し、生成されたオーディオファイルを直接ダウンロードできます。
Apidog を使用した一般的な問題のデバッグ
| 問題 | Apidog が役立つ方法 |
|---|---|
| 401 Unauthorized | リクエストインスペクタで api-key ヘッダーを確認 |
| 無効な voiceId | まず GET /voices を使用して利用可能な ID を確認 |
| 空のオーディオ応答 | エラーメッセージについては、レスポンスヘッダーを検査 |
| レート制限 | 429 ステータスコードのリクエスト履歴を監視 |
Apidog のリクエスト履歴機能を使用すると、成功したリクエストと失敗したリクエストを並べて比較できるため、デバッグが簡単になります。
Murf AI API を使用した長文コンテンツの処理
記事、ブログ投稿、または本の章の場合、テキストをチャンクで処理する必要がある場合があります。Murf AI にはリクエストあたりの文字数制限があるため、コンテンツを分割することで信頼性の高い処理が保証されます。
チャンキング戦略
import requests

API_KEY = "your_murf_api_key"
BASE_URL = "https://api.murf.ai/v1"

headers = {
    "api-key": API_KEY,
    "Content-Type": "application/json"
}

def chunk_text(text, max_chars=3000):
    """Split text into chunks at sentence boundaries."""
    sentences = text.replace('!', '.').replace('?', '.').split('.')
    chunks = []
    current_chunk = ""

    for sentence in sentences:
        sentence = sentence.strip()
        if not sentence:
            continue

        if len(current_chunk) + len(sentence) + 2 > max_chars:
            chunks.append(current_chunk.strip())
            current_chunk = sentence + ". "
        else:
            current_chunk += sentence + ". "

    if current_chunk.strip():
        chunks.append(current_chunk.strip())

    return chunks

def generate_long_audio(text, voice_id, output_prefix="output"):
    """Generate audio for long-form content."""
    chunks = chunk_text(text)
    audio_files = []

    for i, chunk in enumerate(chunks):
        payload = {
            "text": chunk,
            "voiceId": voice_id,
            "format": "mp3"
        }

        response = requests.post(
            f"{BASE_URL}/speech",
            headers=headers,
            json=payload
        )

        if response.status_code == 200:
            filename = f"{output_prefix}_{i+1}.mp3"
            with open(filename, "wb") as f:
                f.write(response.content)
            audio_files.append(filename)
            print(f"Generated: {filename}")
        else:
            print(f"Failed chunk {i+1}: {response.status_code}")

    return audio_files

# Example usage
long_text = """
Your long article or document content goes here.
It can span multiple paragraphs and pages.
The function splits it automatically at sentence boundaries.
"""

audio_files = generate_long_audio(long_text, "en-US-marcus", "article_audio")
print(f"Generated {len(audio_files)} audio files")
Murf AI API でオーディオファイルを連結する
チャンクを生成した後、FFmpeg または Python ライブラリを使用して単一のファイルに結合します。
from pydub import AudioSegment

def concatenate_audio(file_list, output_file="final_audio.mp3"):
    """Combine multiple audio files into one."""
    combined = AudioSegment.empty()

    for filename in file_list:
        audio = AudioSegment.from_mp3(filename)
        combined += audio

    combined.export(output_file, format="mp3")
    print(f"Combined audio saved to {output_file}")
    return output_file

# Combine the chunks
concatenate_audio(audio_files, "complete_article.mp3")
Murf AI API を使用したエラー処理のベストプラクティス
本番アプリケーションには堅牢なエラー処理が必要です。Murf AI API は、標準の HTTP ステータスコードと詳細なエラーメッセージを返します。
一般的なエラーコード
| ステータスコード | 意味 | 解決策 |
|---|---|---|
| 400 | 不正なリクエスト | リクエスト本文の形式とパラメータを確認 |
| 401 | 未認証 | API キーが正しいか、アクティブであるかを確認 |
| 403 | 禁止 | アカウント権限とプラン制限を確認 |
| 429 | レート制限 | 指数関数的バックオフを実装 |
| 500 | サーバーエラー | 少し遅れて再試行 |
堅牢な API クライアント
import requests
import time
from typing import Optional

class MurfAPIClient:
    def __init__(self, api_key: str):
        self.api_key = api_key
        self.base_url = "https://api.murf.ai/v1"
        self.headers = {
            "api-key": api_key,
            "Content-Type": "application/json"
        }

    def _request(self, method: str, endpoint: str,
                 data: dict = None, retries: int = 3) -> Optional[requests.Response]:
        """Make API request with retry logic."""
        url = f"{self.base_url}/{endpoint}"

        for attempt in range(retries):
            try:
                if method == "GET":
                    response = requests.get(url, headers=self.headers)
                else:
                    response = requests.post(url, headers=self.headers, json=data)

                if response.status_code == 200:
                    return response
                elif response.status_code == 429:
                    # Rate limited - wait and retry
                    wait_time = 2 ** attempt
                    print(f"Rate limited. Waiting {wait_time}s...")
                    time.sleep(wait_time)
                elif response.status_code >= 500:
                    # Server error - retry
                    time.sleep(1)
                else:
                    # Client error - don't retry
                    print(f"Error {response.status_code}: {response.text}")
                    return None

            except requests.RequestException as e:
                print(f"Request failed: {e}")
                time.sleep(1)

        return None

    def get_voices(self) -> list:
        """Fetch available voices."""
        response = self._request("GET", "voices")
        return response.json() if response else []

    def generate_speech(self, text: str, voice_id: str,
                        format: str = "mp3", **kwargs) -> Optional[bytes]:
        """Generate speech from text."""
        payload = {
            "text": text,
            "voiceId": voice_id,
            "format": format,
            **kwargs
        }
        response = self._request("POST", "speech", payload)
        return response.content if response else None

# Usage
client = MurfAPIClient("your_api_key")
voices = client.get_voices()
audio = client.generate_speech(
    "Hello world!",
    "en-US-marcus",
    speed=1.0
)

if audio:
    with open("output.mp3", "wb") as f:
        f.write(audio)
ナレーション生成サービスの構築
Murf AI をラップする完全な Flask API を構築して、アプリケーションで使用しましょう。
from flask import Flask, request, jsonify, send_file
import requests
import os
import uuid

app = Flask(__name__)

MURF_API_KEY = os.environ.get("MURF_API_KEY")
MURF_BASE_URL = "https://api.murf.ai/v1"

headers = {
    "api-key": MURF_API_KEY,
    "Content-Type": "application/json"
}

@app.route("/api/voices", methods=["GET"])
def list_voices():
    """List available voices."""
    language = request.args.get("language")

    response = requests.get(f"{MURF_BASE_URL}/voices", headers=headers)

    if response.status_code != 200:
        return jsonify({"error": "Failed to fetch voices"}), 500

    voices = response.json()

    if language:
        voices = [v for v in voices if v["language"].startswith(language)]

    return jsonify(voices)

@app.route("/api/synthesize", methods=["POST"])
def synthesize():
    """Generate speech from text."""
    data = request.json

    if not data or "text" not in data:
        return jsonify({"error": "Missing 'text' field"}), 400

    if "voiceId" not in data:
        return jsonify({"error": "Missing 'voiceId' field"}), 400

    payload = {
        "text": data["text"],
        "voiceId": data["voiceId"],
        "format": data.get("format", "mp3"),
        "speed": data.get("speed", 1.0),
        "pitch": data.get("pitch", 0)
    }

    response = requests.post(
        f"{MURF_BASE_URL}/speech",
        headers=headers,
        json=payload
    )

    if response.status_code != 200:
        return jsonify({"error": "Speech generation failed"}), 500

    # Save to temp file
    filename = f"audio_{uuid.uuid4().hex}.mp3"
    filepath = os.path.join("/tmp", filename)

    with open(filepath, "wb") as f:
        f.write(response.content)

    return send_file(
        filepath,
        mimetype="audio/mpeg",
        as_attachment=True,
        download_name=filename
    )

if __name__ == "__main__":
    app.run(debug=True, port=5000)
このサービスは、音声のリスト表示と音声生成の2つのエンドポイントを公開しています。本番環境での使用には、キャッシング、認証、およびキューベースの処理を追加することで拡張できます。
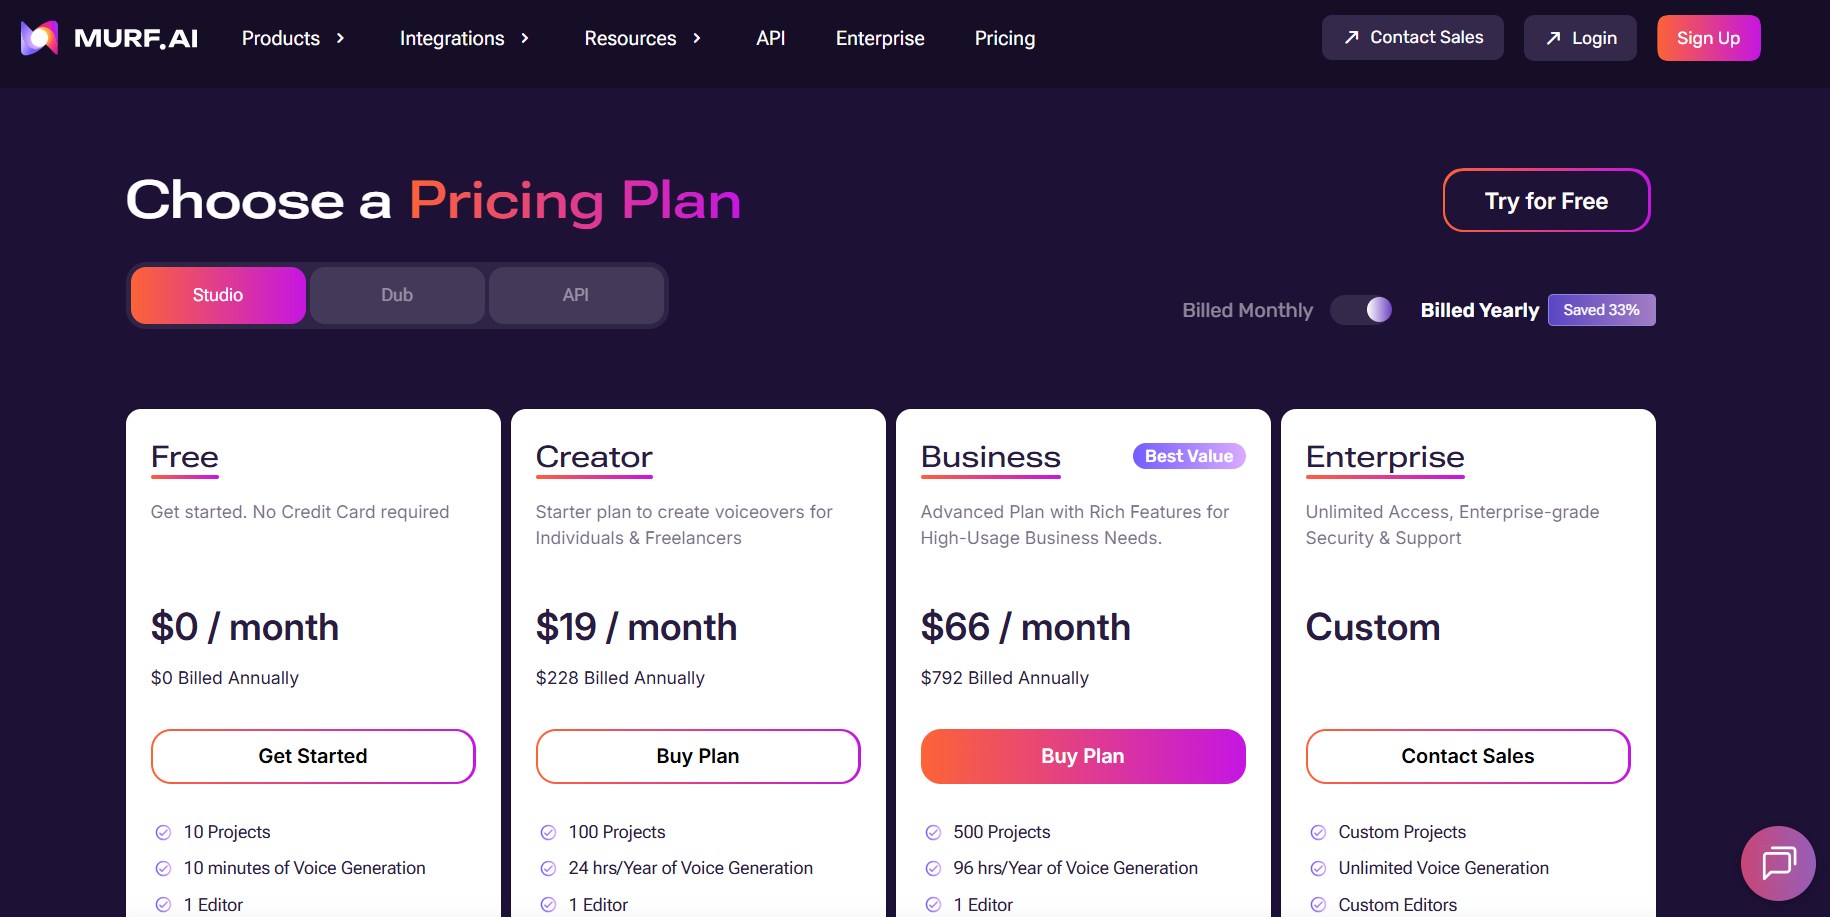
Murf AI API のレート制限と料金に関する考慮事項
Murf AI は、サブスクリプションプランに基づいてレート制限を適用します。これらの制限を理解することで、効率的なアプリケーションを設計するのに役立ちます。
API 使用量の最適化
- 生成されたオーディオをキャッシュする - 繰り返しリクエストのために結果を保存します
- 同様のリクエストをバッチ処理する - 可能であれば短いテキストを結合します
- より低いサンプルレートを使用する - 音声コンテンツには 16000 Hz が適しています
- Apidog で監視する - 使用パターンを追跡し、最適化します
一般的なフレームワークとの統合
Node.js 統合
const axios = require('axios');
const fs = require('fs');

const API_KEY = process.env.MURF_API_KEY;
const BASE_URL = 'https://api.murf.ai/v1';

async function generateSpeech(text, voiceId, options = {}) {
    try {
        const response = await axios.post(
            `${BASE_URL}/speech`,
            {
                text,
                voiceId,
                format: options.format || 'mp3',
                speed: options.speed || 1.0,
                pitch: options.pitch || 0
            },
            {
                headers: {
                    'api-key': API_KEY,
                    'Content-Type': 'application/json'
                },
                responseType: 'arraybuffer'
            }
        );

        return Buffer.from(response.data);
    } catch (error) {
        console.error('Error:', error.response?.data || error.message);
        throw error;
    }
}

// Usage
(async () => {
    const audio = await generateSpeech(
        'Hello from Node.js!',
        'en-US-marcus'
    );

    fs.writeFileSync('output.mp3', audio);
    console.log('Audio saved!');
})();
React フロントエンド統合
import React, { useState } from 'react';

function VoiceGenerator() {
    const [text, setText] = useState('');
    const [voiceId, setVoiceId] = useState('en-US-marcus');
    const [audioUrl, setAudioUrl] = useState(null);
    const [loading, setLoading] = useState(false);

    const generateAudio = async () => {
        setLoading(true);

        try {
            const response = await fetch('/api/synthesize', {
                method: 'POST',
                headers: { 'Content-Type': 'application/json' },
                body: JSON.stringify({ text, voiceId })
            });

            const blob = await response.blob();
            const url = URL.createObjectURL(blob);
            setAudioUrl(url);
        } catch (error) {
            console.error('Generation failed:', error);
        } finally {
            setLoading(false);
        }
    };

    return (
        <div className="voice-generator">
            <textarea
                value={text}
                onChange={(e) => setText(e.target.value)}
                placeholder="Enter text to convert to speech..."
            />

            <select value={voiceId} onChange={(e) => setVoiceId(e.target.value)}>
                <option value="en-US-marcus">Marcus (US Male)</option>
                <option value="en-US-julia">Julia (US Female)</option>
                <option value="en-GB-oliver">Oliver (UK Male)</option>
            </select>

            <button onClick={generateAudio} disabled={loading}>
                {loading ? 'Generating...' : 'Generate Audio'}
            </button>

            {audioUrl && (
                <audio controls src={audioUrl}>
                    Your browser does not support audio playback.
                </audio>
            )}
        </div>
    );
}

export default VoiceGenerator;
まとめ
Murf AI API は、開発者向けに強力なテキスト読み上げ機能を提供します。単純なナレーションから複雑な複数音声制作まで、この API は自然な音声出力で多様な要件に対応します。主なポイントは以下の通りです。
- 認証 - すべての呼び出しに API キーをリクエストヘッダーで使用します
- 音声選択 - 言語やアクセントを超えて 120 以上の音声を探します
- カスタマイズ - 速度、ピッチを調整し、SSML を使用して正確に制御します
- エラー処理 - 本番環境向けに再試行と指数関数的バックオフを実装します
- テスト - Apidog を使用して統合をデバッグおよび最適化します
無料プランから始めて試してみて、アプリケーションの成長に合わせてスケールアップしてください。高品質な音声と開発者フレンドリーな API デザインの組み合わせにより、Murf AI は音声対応アプリケーションの堅実な選択肢となります。
準備はできましたか? Murf AI API 呼び出しをテストし、開発ワークフローを効率化するためにApidog をダウンロードしてください。