When it comes to API testing and development, mastering the intricacies of POST requests is essential, and Postman stands out as the ultimate tool for simplifying this process. With its intuitive interface and powerful features, Postman empowers developers to effortlessly create and send POST requests, facilitating seamless interaction with APIs.
In this guide, we'll provide a comprehensive walkthrough of how to effectively utilize Postman for making POST requests, ensuring that you have the skills and confidence to navigate the complexities of API development effortlessly.
The Guide on Make POST Requests Using Postman
Step 1: Create a New Request
Open Postman, locate the "New" button in the top-left corner and click on it. This will open a dropdown menu where you can select "Request." Give your request a meaningful name to easily identify it later.
Step 2: Select the POST HTTP Method
With your request created, ensure that the HTTP method is set to "POST." This signifies that you will be sending data to the server to create or update a resource.
Step 3: Enter the Request URL
Next, enter the URL of the endpoint you wish to send the POST request to in the address bar located below the HTTP method dropdown.

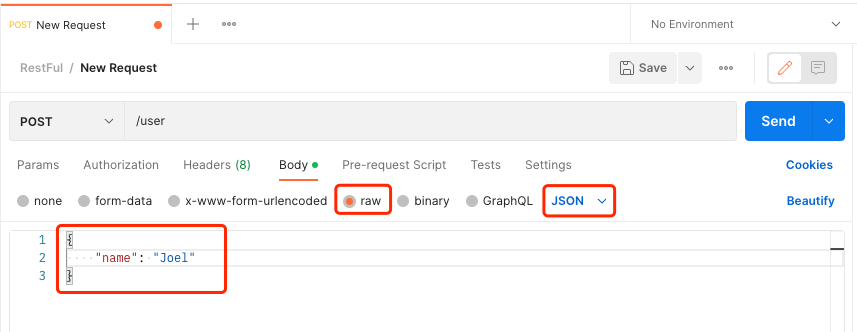
Step 4: Add Request Body
Unlike GET requests, which typically do not include a request body, POST requests often require you to send data along with the request. To add a request body in Postman, navigate to the "Body" tab located below the request URL. Here, you can choose the format of your request body, e.g., JSON body.
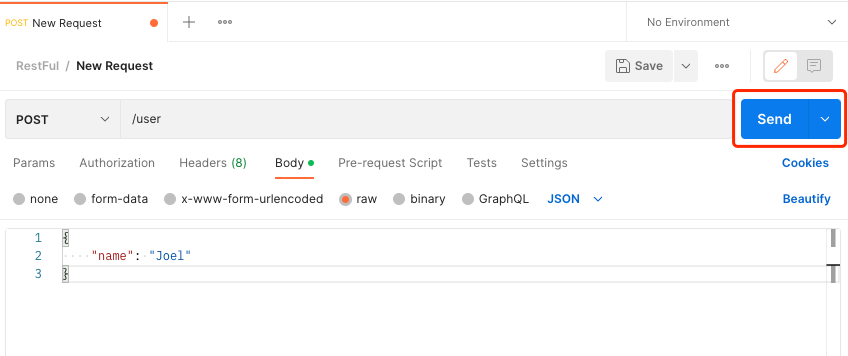
Step 5: Send the Request
Once you have configured the request URL and body, you're ready to send the POST request. Simply click on the "Send" button located to the right of the address bar. Postman will then execute the request and display the response from the server.
Step 6: Review Response
After sending the request, Postman will display the response received from the server in the lower portion of the interface. Here, you can review the status code, response headers, and response body to ensure that the request was successful and to troubleshoot any issues if necessary.
Apidog: The Best Postman Alternative
In contrast to the limitations posed by Postman in handling dynamic values and the automatic generation of JSON bodies, Apidog emerges as a compelling solution. Apidog boasts several standout features that address the aforementioned drawbacks:
Effortless JSON Body Generation:
Apidog's automatic generation of JSON bodies is a time-saving feature that eliminates the manual effort required in crafting requests. Users can select from a variety of predefined templates, streamlining the process and ensuring consistency in JSON structures across different requests.
Conclusion
Making a POST request in Postman is a straightforward process that allows developers to interact with APIs efficiently. By following the steps outlined in this guide, you can confidently create and send POST requests, enabling you to test and develop APIs with ease. Whether you're building a new application or debugging an existing one, mastering the art of making POST requests in Postman is a valuable skill that will enhance your development workflow.