
In a game-changing move for developers, GitHub has announced a new free tier for GitHub Copilot, the AI-powered coding assistant. This update allows developers to access Copilot's coding suggestions at no cost, offering a chance to dive into the world of AI-assisted coding without any financial commitment.

For those working in VS Code, Visual Studio, JetBrains IDES, Vim/Neovim, Xcode, or Azure Data Studio, this is particularly exciting. Developers can now experience the power of GitHub Copilot, enhancing productivity with intelligent code completions and suggestions, while keeping costs low. Let’s delve into how you can set up and make the most of GitHub Copilot’s free tier in these popular environments and why it's worth considering as part of your development toolkit.
Features of GitHub Copilot Free
For developers using VS Code, JetBrains IDEs, the free tier of GitHub Copilot offers several valuable features:
- Code Completion: Copilot suggests lines or blocks of code based on your current work. It works across multiple languages, including JavaScript, Python, Ruby, and more.
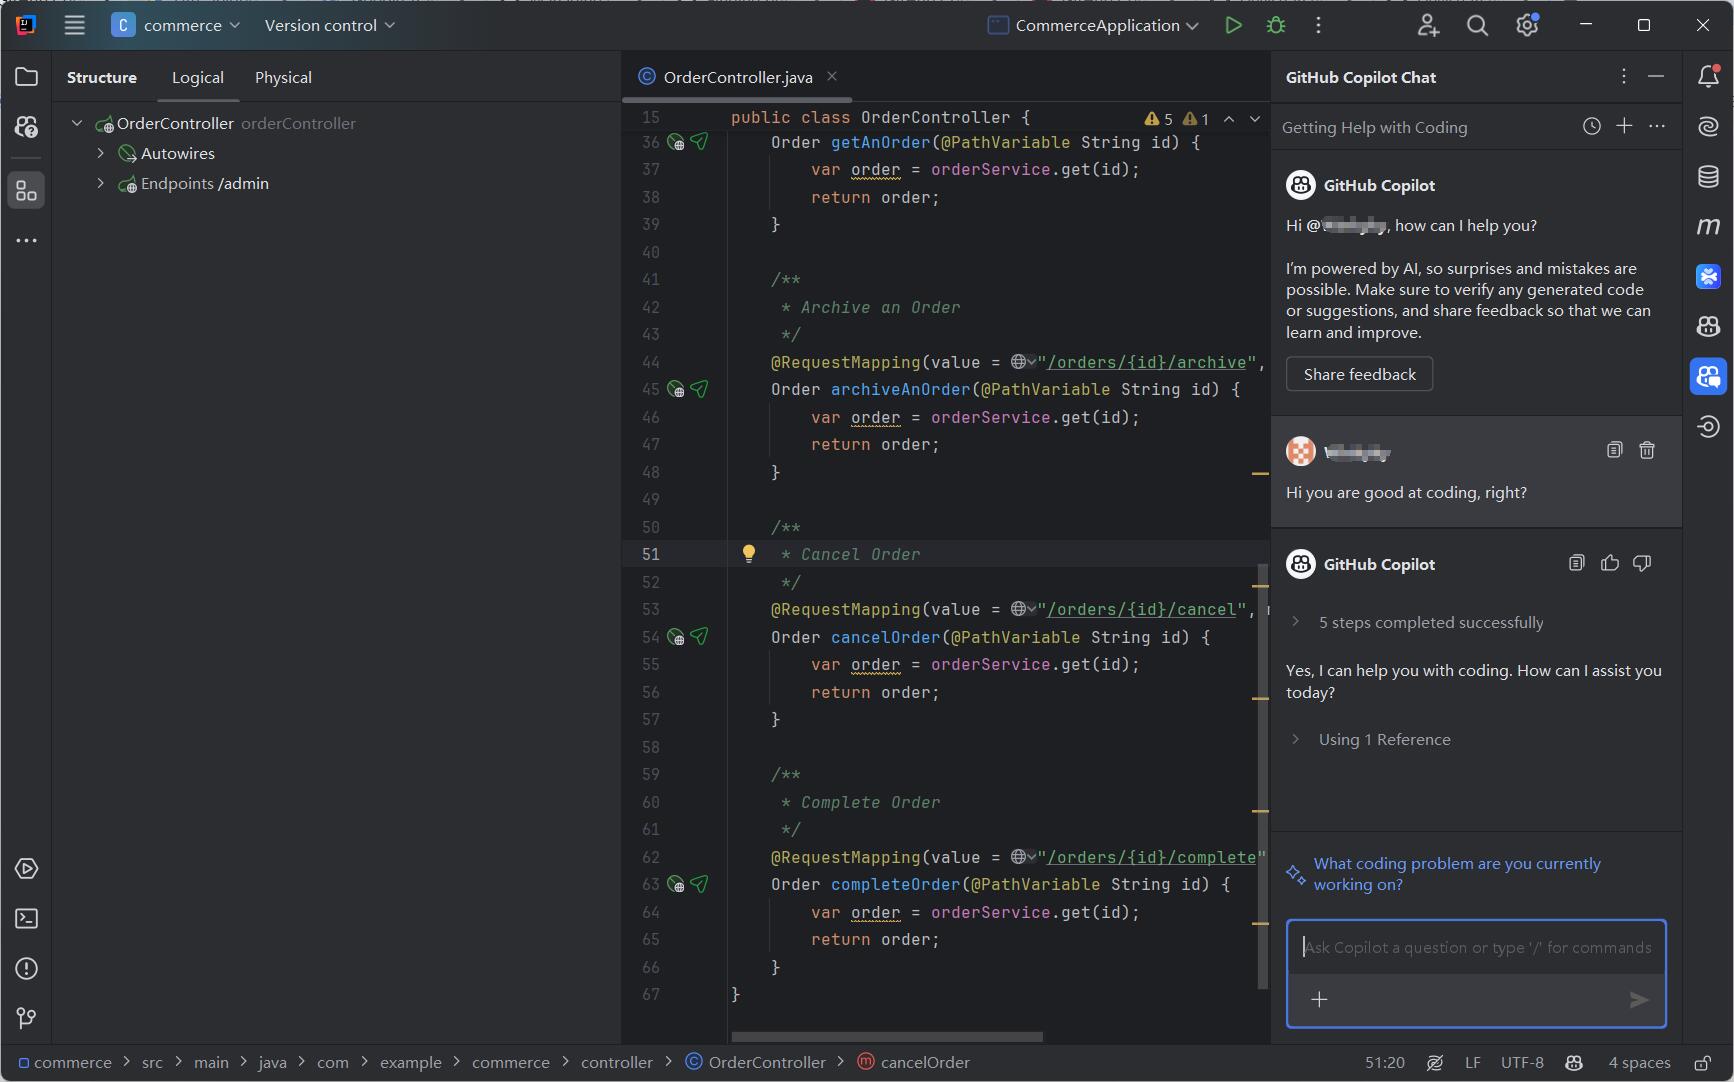
- Copilot Chat: You can ask Copilot questions and get code snippets or explanations, enhancing your ability to solve complex coding problems directly within your IDE.
- Copilot Edits: Available in VS Code and Visual Studio, this feature lets you make changes across multiple files, helping you maintain consistency and productivity.
- Claude 3.5 Sonnet Models: With the free tier, you’ll also get access to Claude 3.5, enhancing Copilot’s AI capabilities to deliver more accurate and helpful suggestions.
- Public Code Blocking: Copilot Free allows you to block suggestions that match public code, giving you control over your development environment.
Setting Up GitHub Copilot Free in VS Code
To get started with GitHub Copilot Free in VS Code, follow these steps:
Step 1: Install VS Code
If you haven’t already, download and install VS Code.
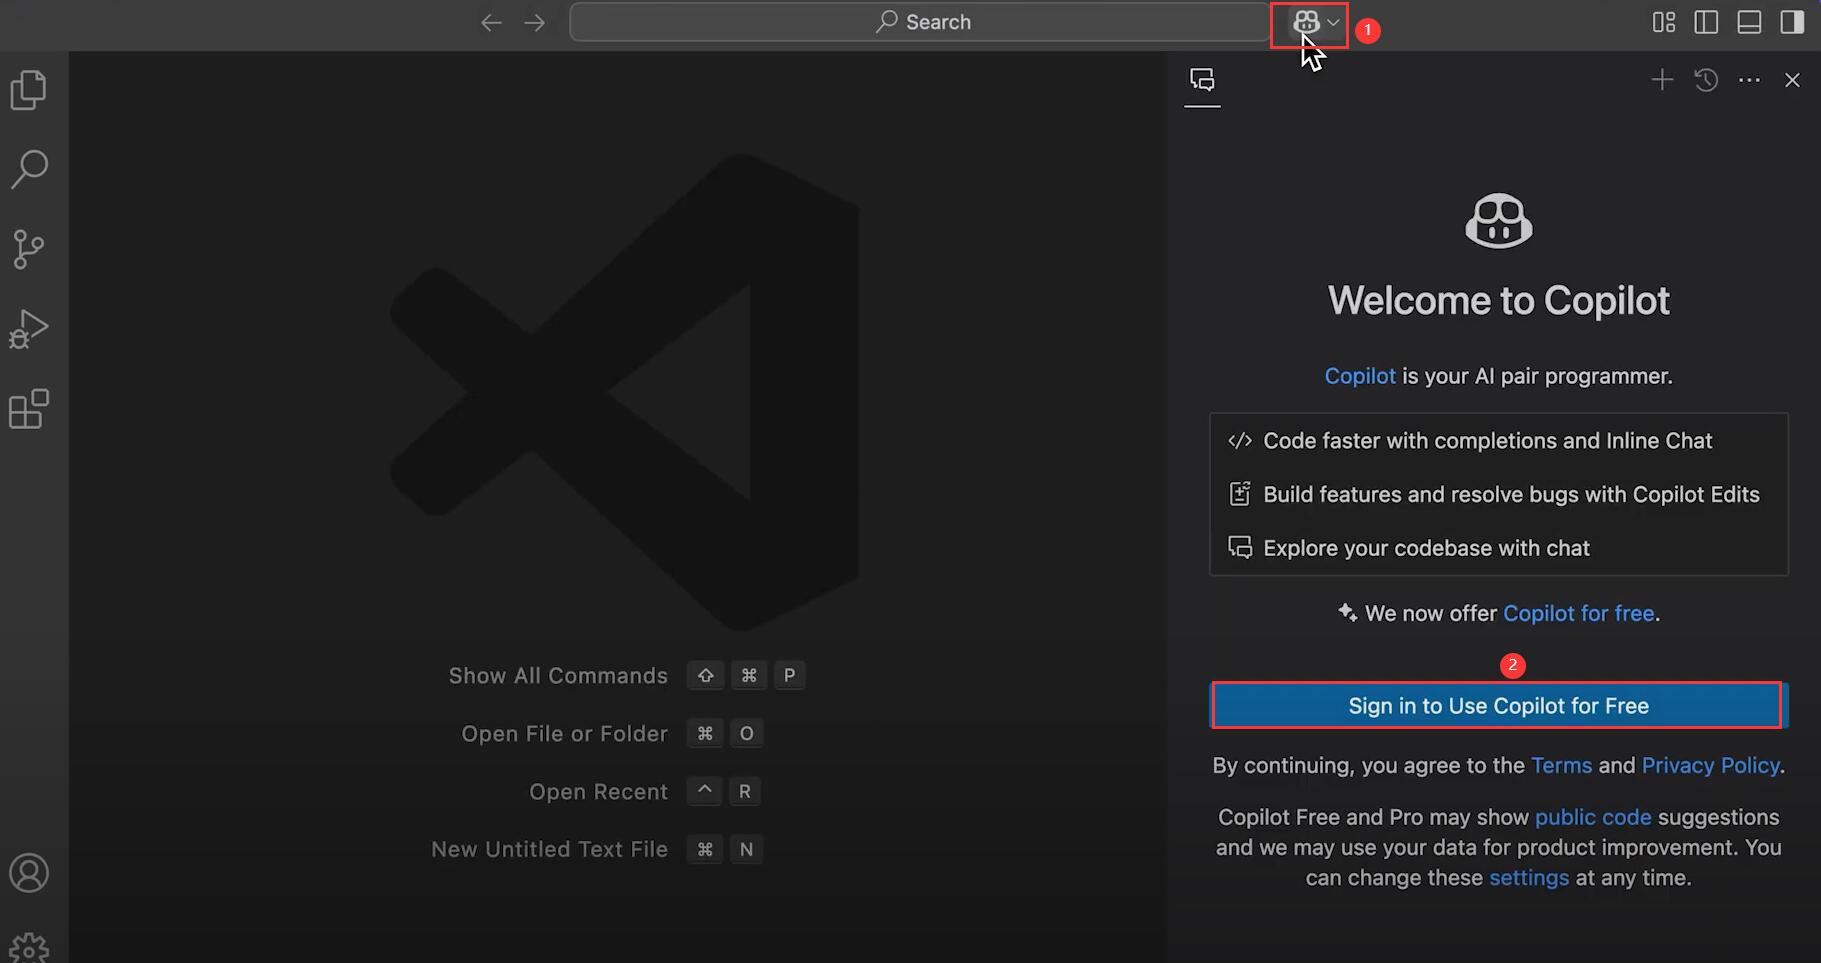
Step 2: Sign Up for GitHub Copilot Free
In VS Code, open the sidebar and clickSign in to Use Copilot for Free. Log into your GitHub account or create one if you don’t have one already.
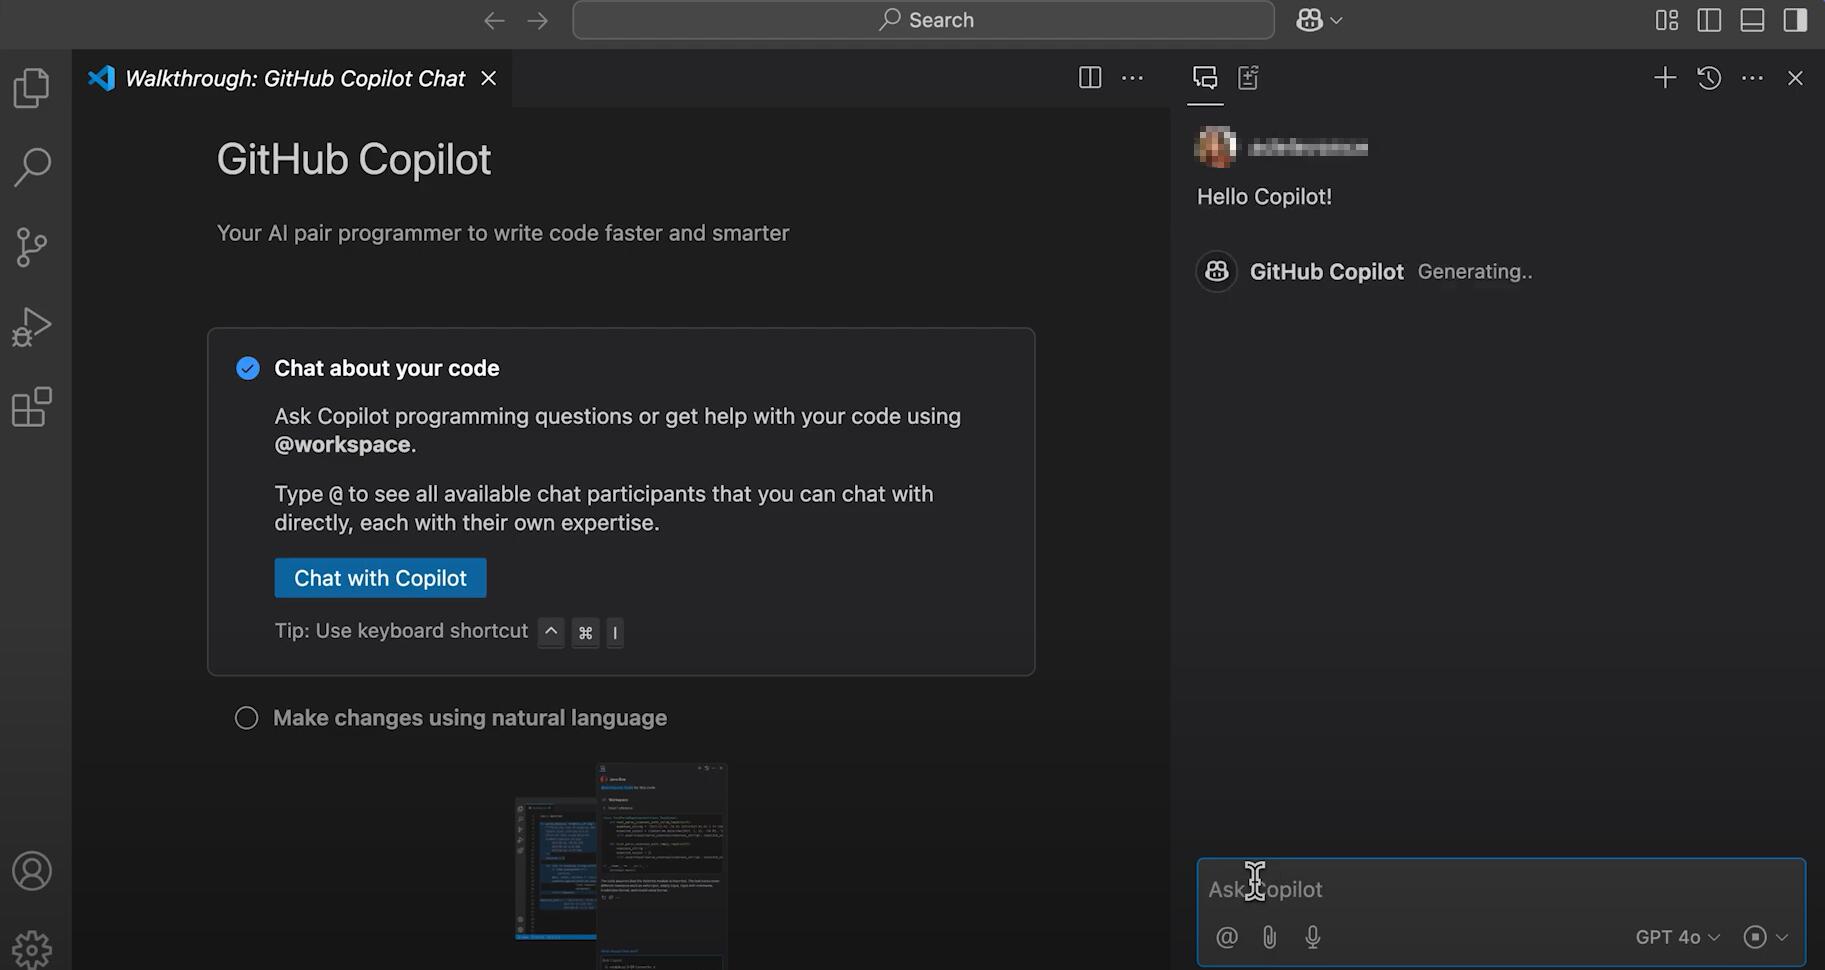
Step 3: Start Coding and Using GitHub Copilot Free
Once set up, Copilot will automatically start offering code suggestions at no cost as you type. You'll get context-aware completion, saving you time and helping you write cleaner, more efficient code.
How Copilot Free Works in JetBrains IDEs?
If you're more accustomed to JetBrains IDEs (such as IntelliJ IDEA, PyCharm, or WebStorm), Copilot’s free tier integrates seamlessly. Here’s how to get started:
Step1: Install JetBrains IDE
Ensure you have a compatible JetBrains IDE installed on your machine. You can find the full list of supported IDEs on GitHub’s official documentation.
Step 2: Activate GitHub Copilot Free
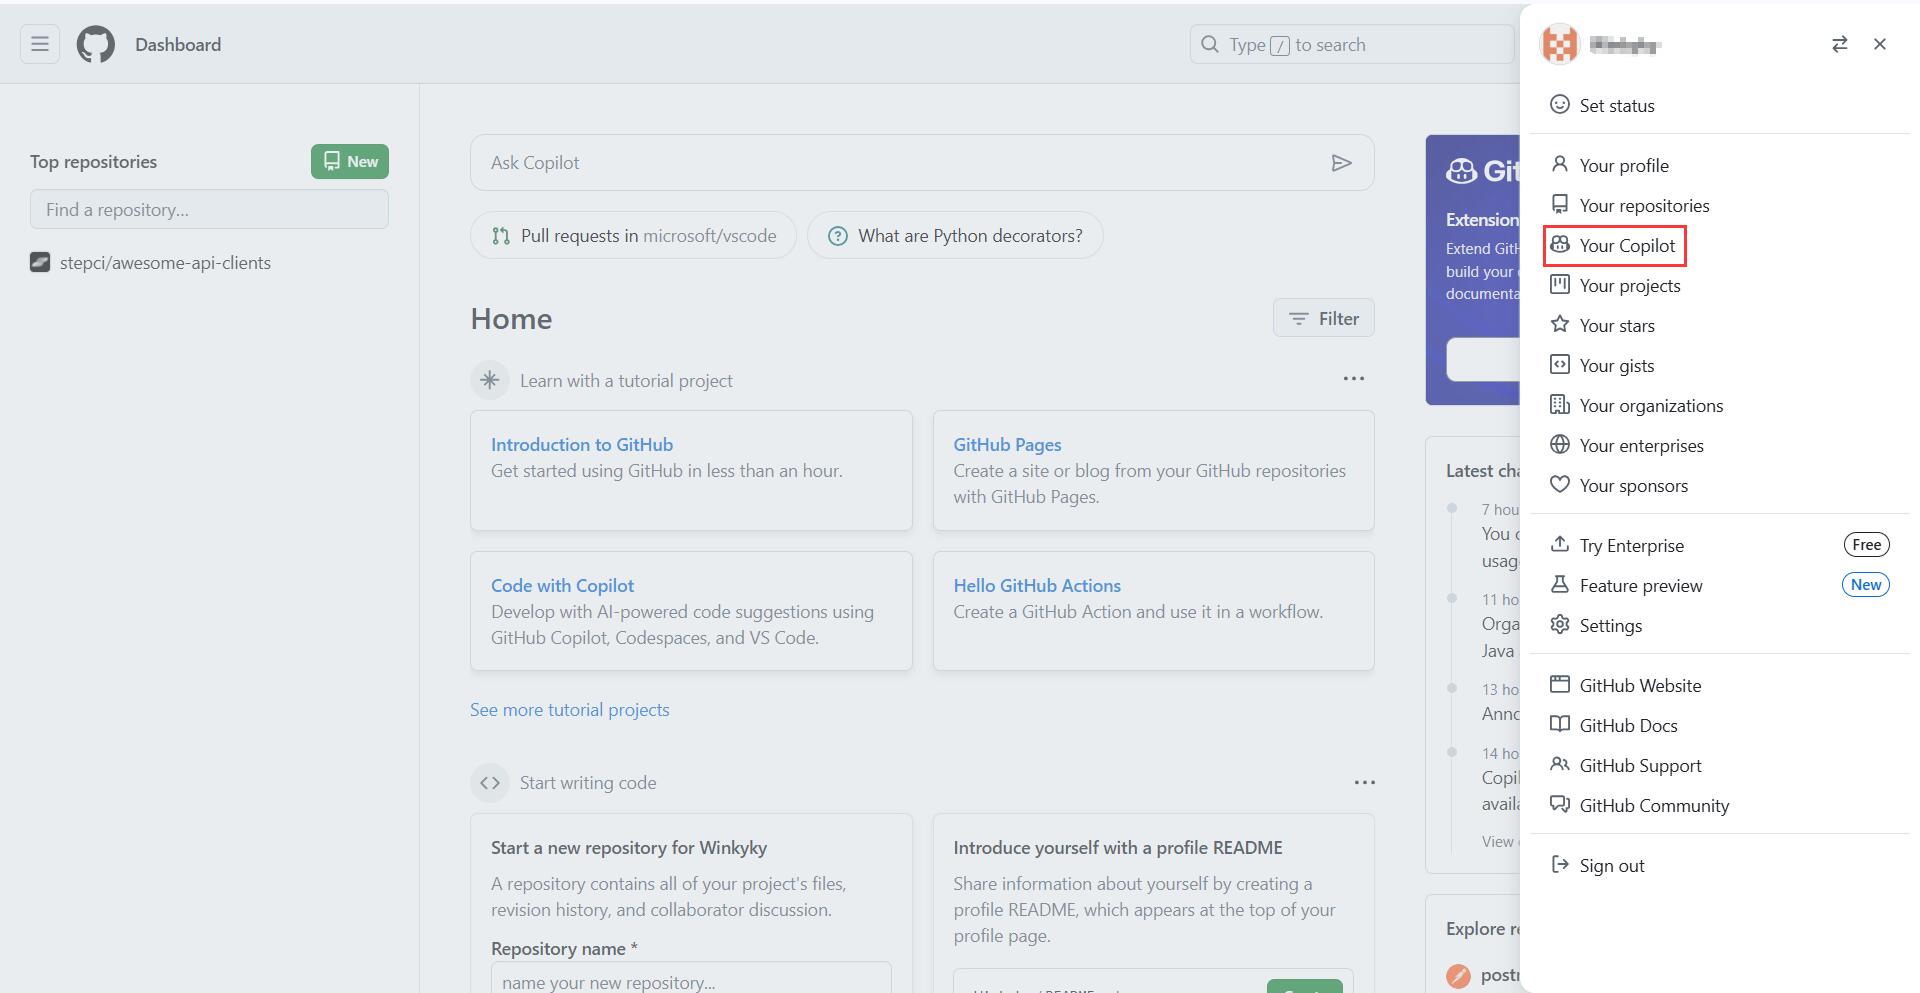
- Go to GitHub, login your account and navigate to your profile. Click
Your Copilotoption from the list.
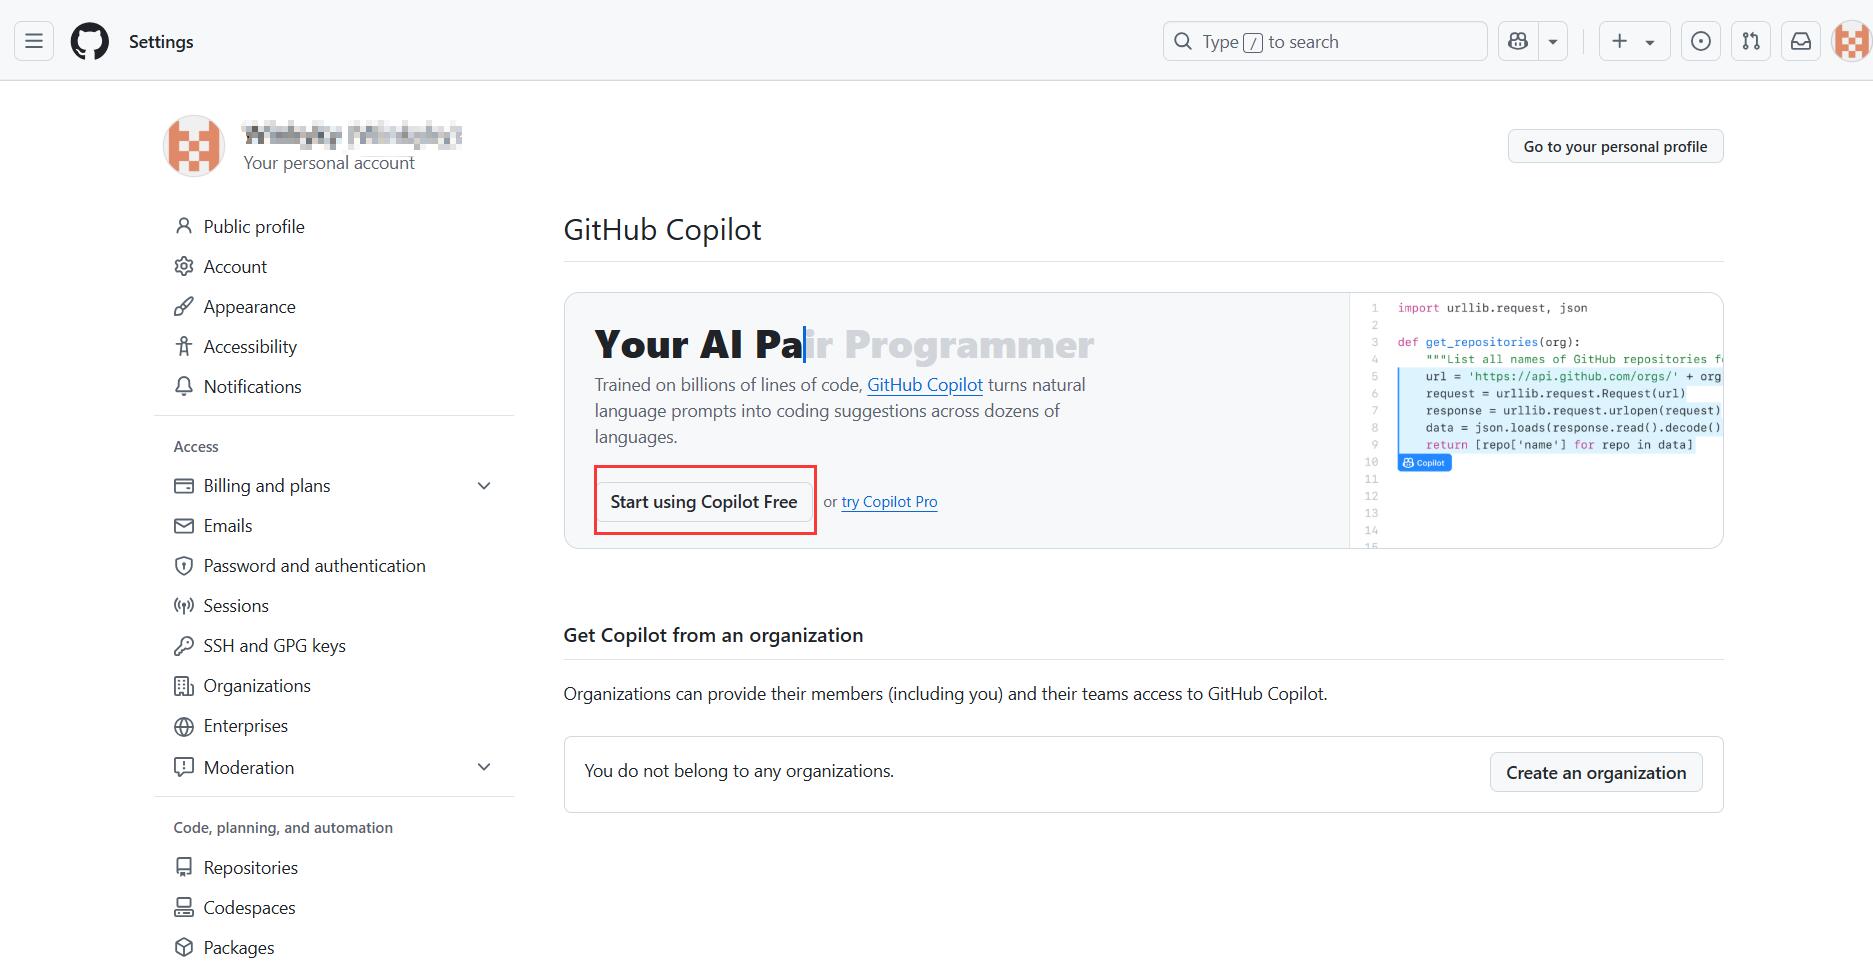
- On the new open page, click on
Start using Copilot Freeto activate Copilot Free.
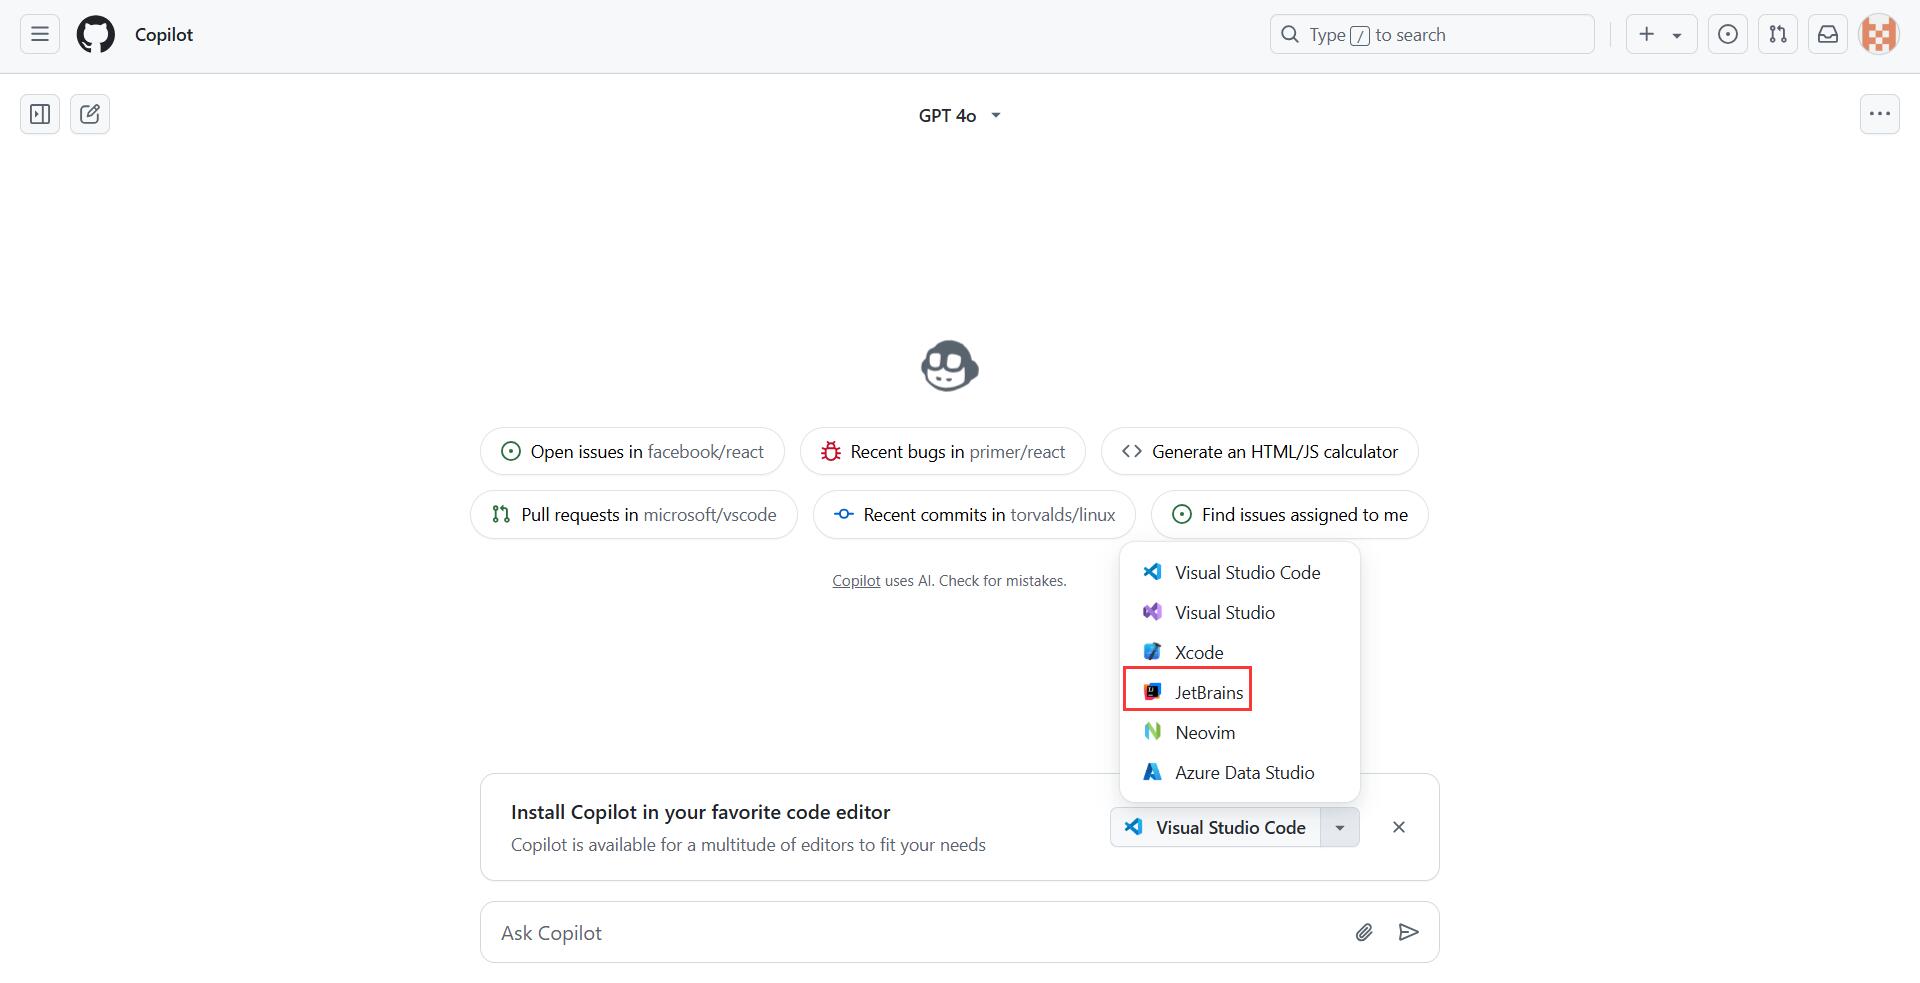
- In the newly open conversation thread, choose
JetBrains.
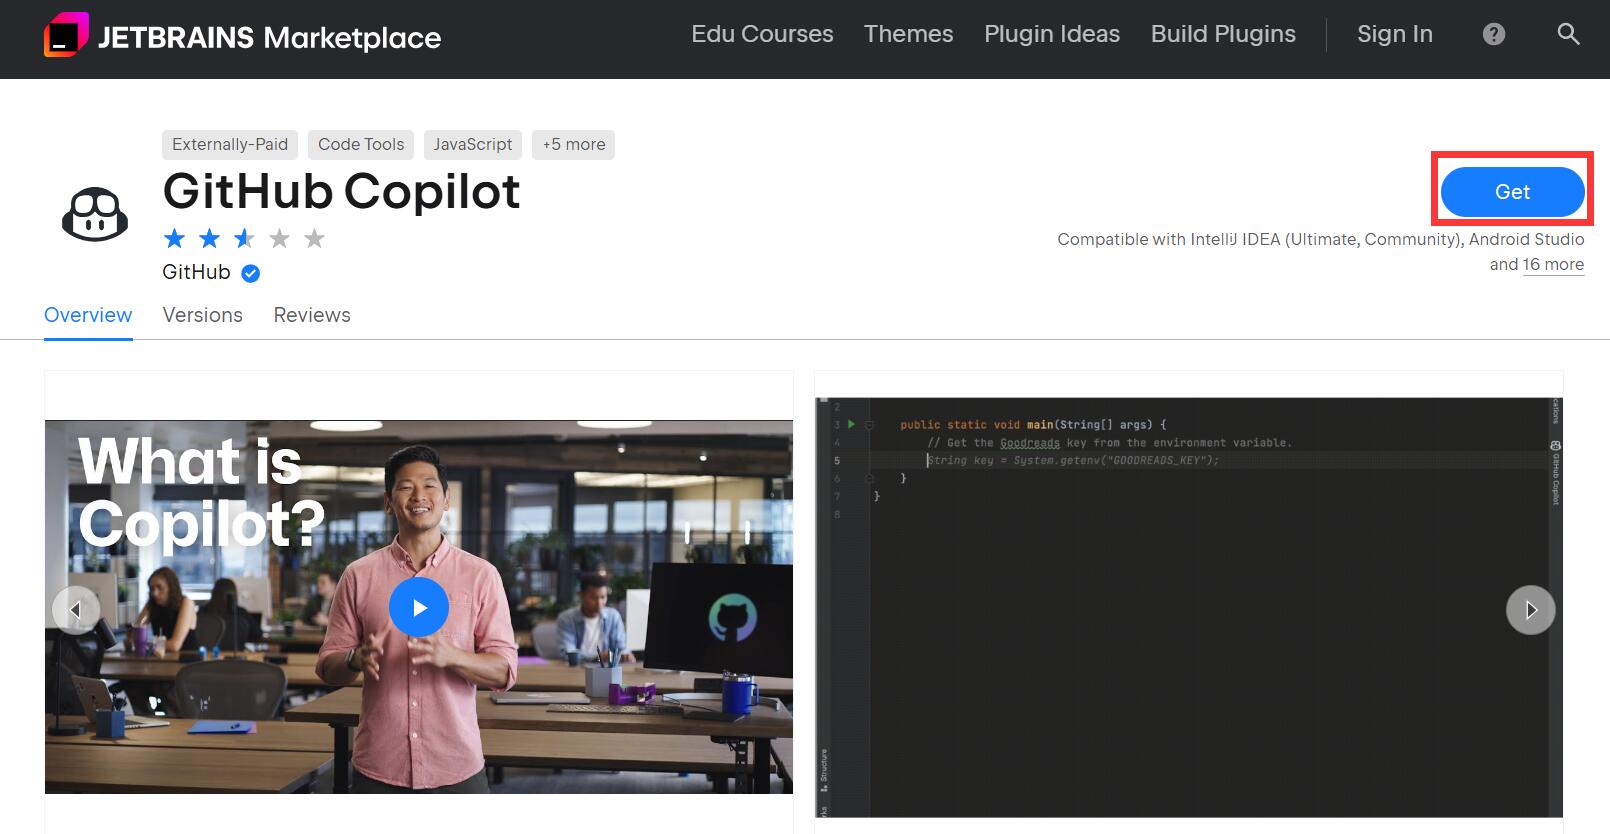
- You will be directed to GitHub Copilot in JetBrains Marketplace. Click on
Getto download the GitHub Copilot plugin.
- Follow the instructions below to install the plugin into IntelliJ IDEA.

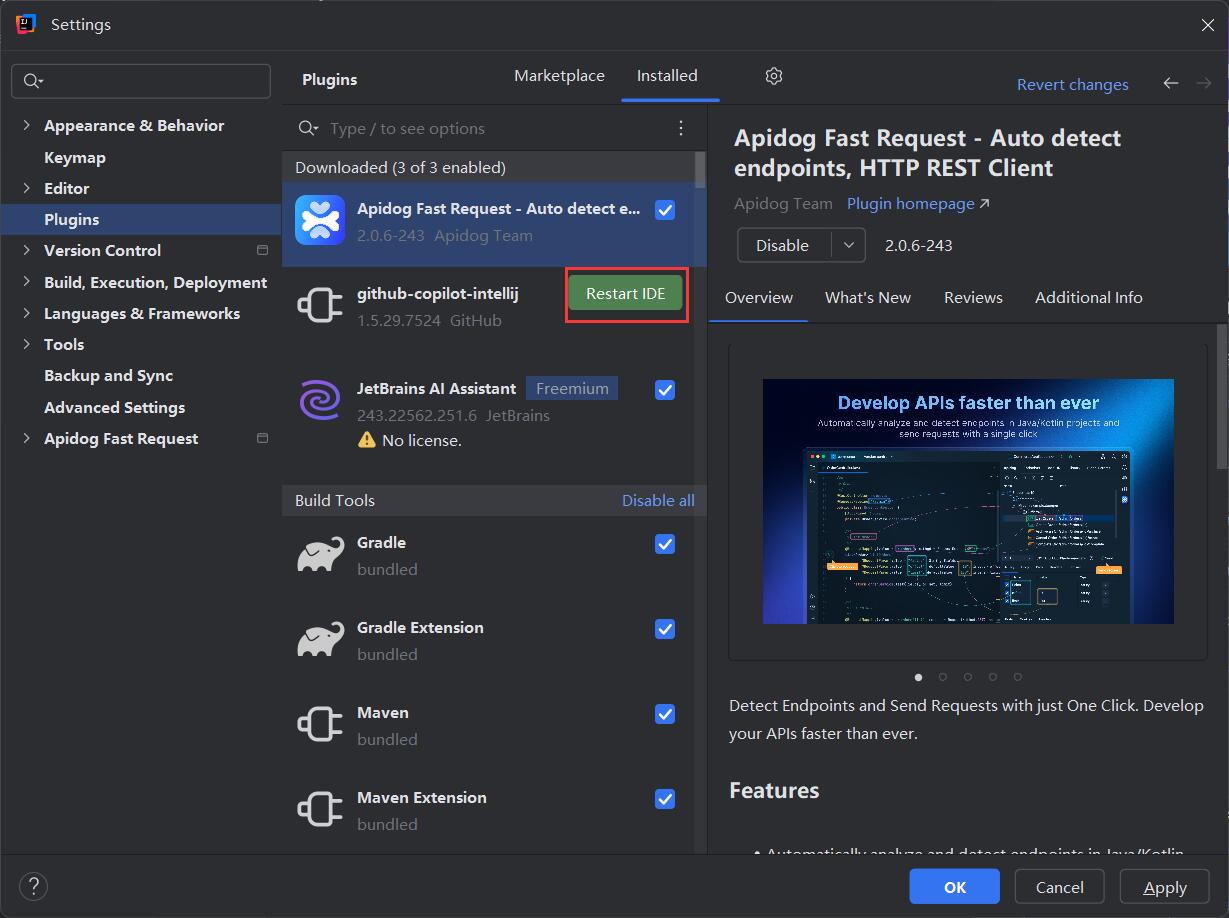
- After GitHub Copilot is installed, click
Restart IDE.
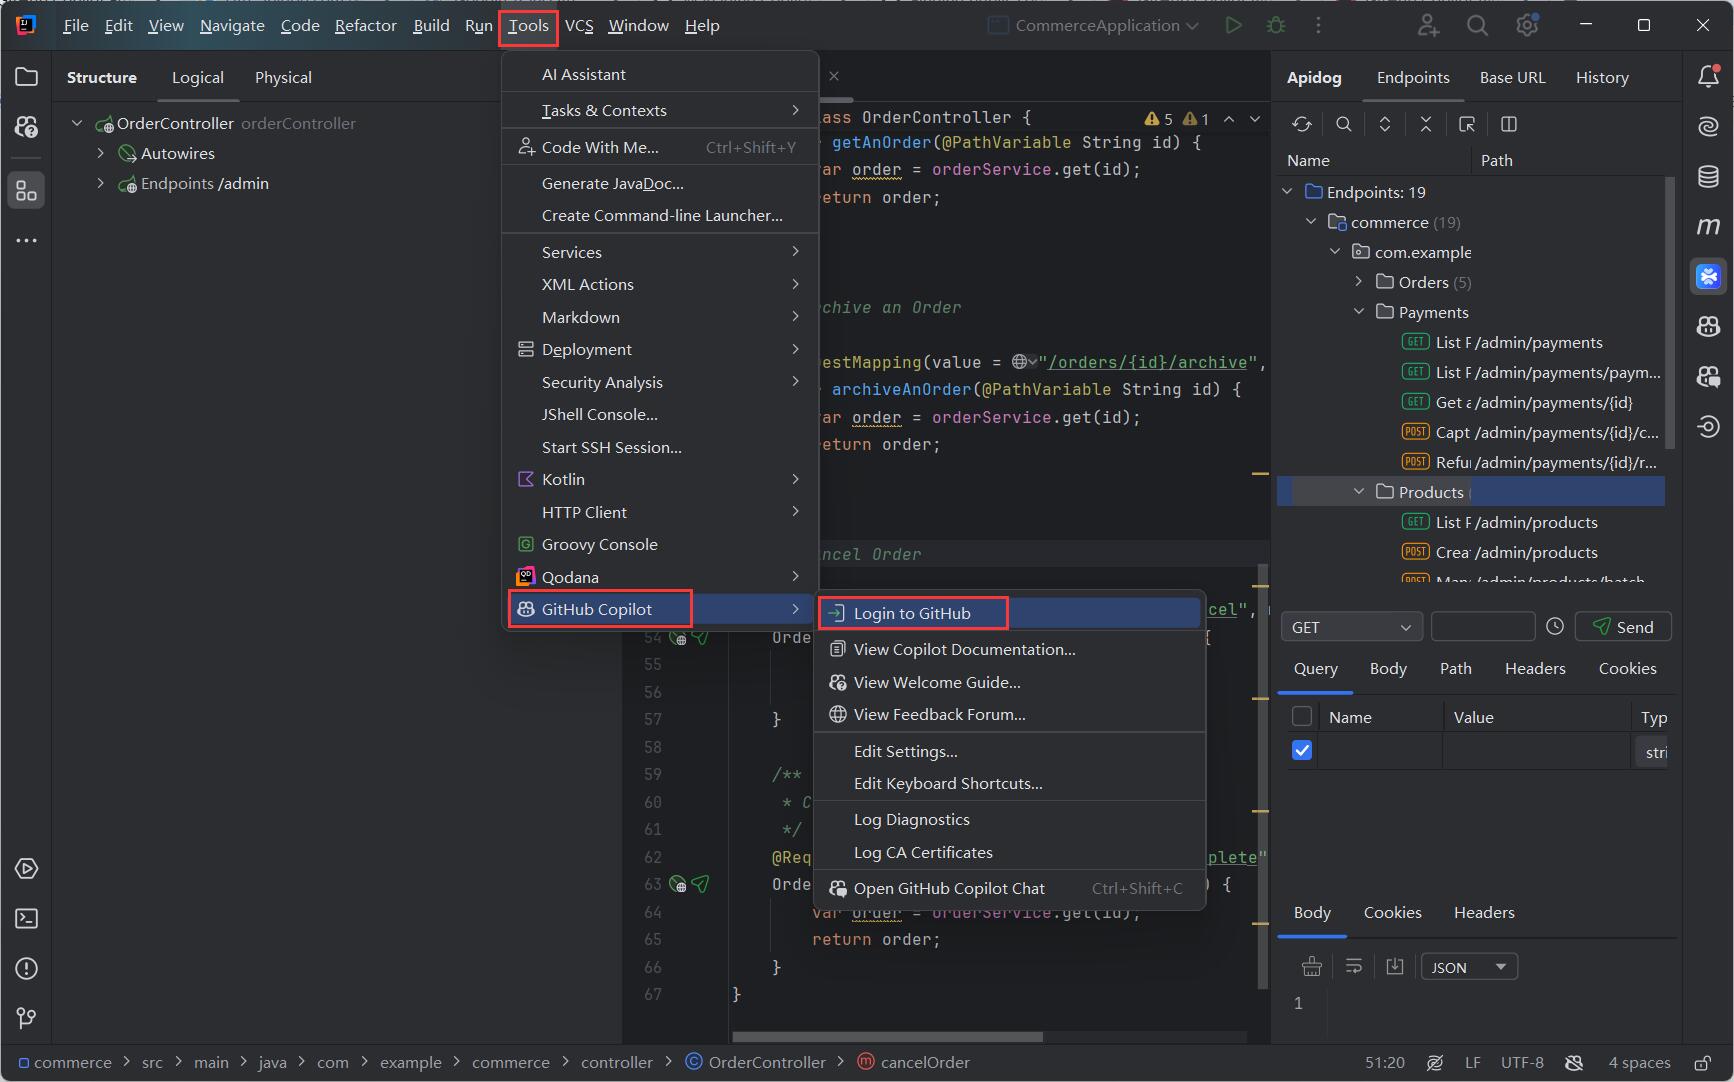
- After your JetBrains IDE has restarted, click the
Toolsmenu. ClickGitHub Copilot, then clickLogin to GitHub.
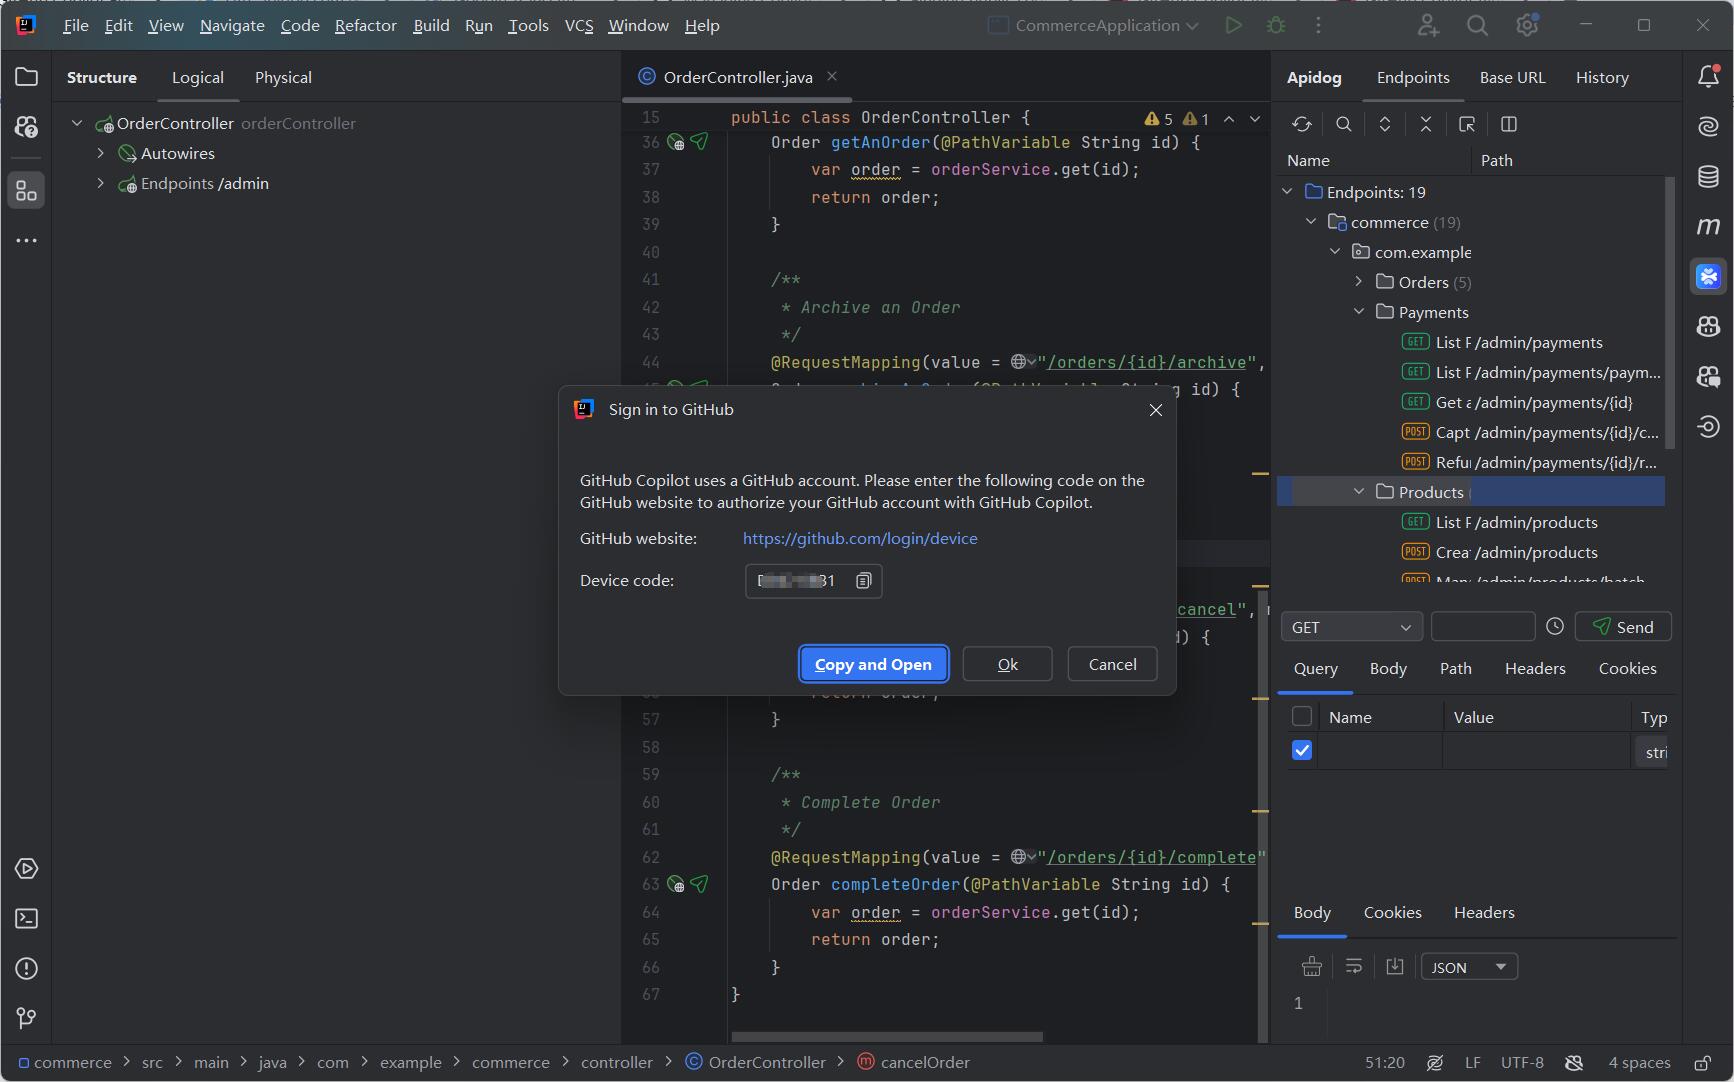
- In the "Sign in to GitHub" dialog box, to copy the device code and open the device activation window, click
Copy and Open.
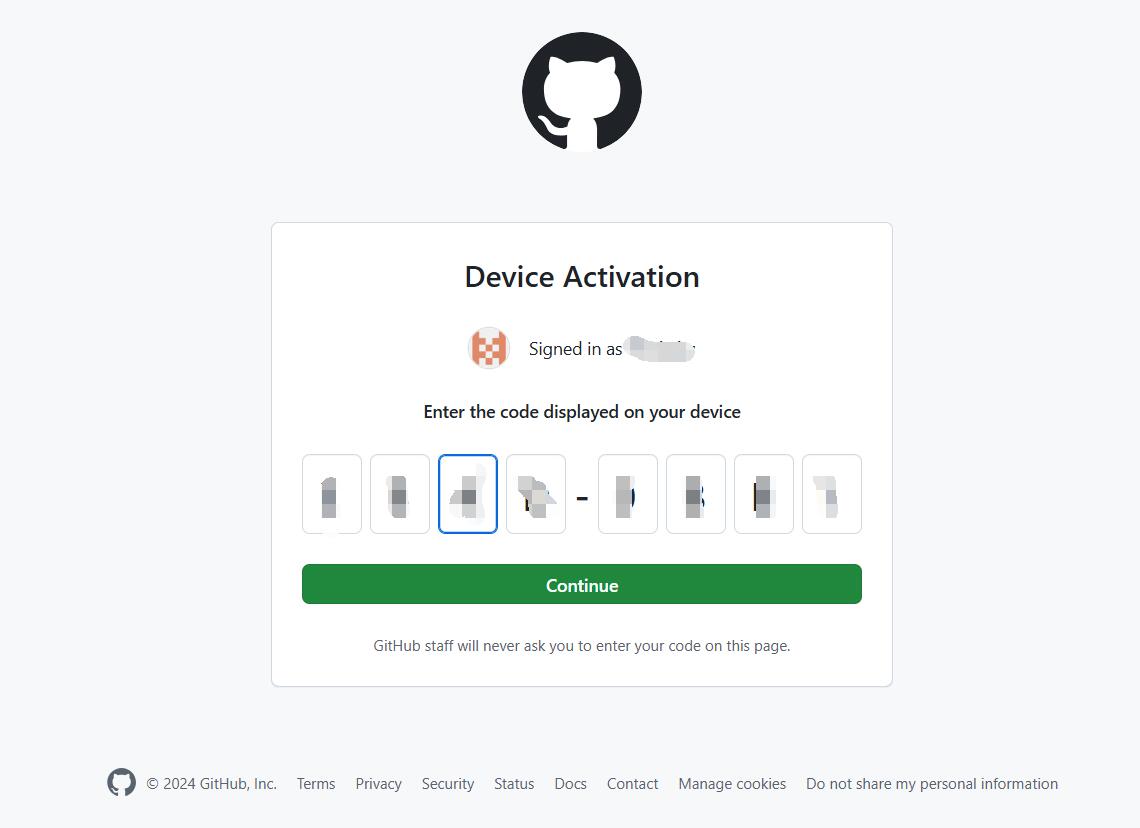
- A device activation window will open in your browser. Paste the device code, then click
Continue.
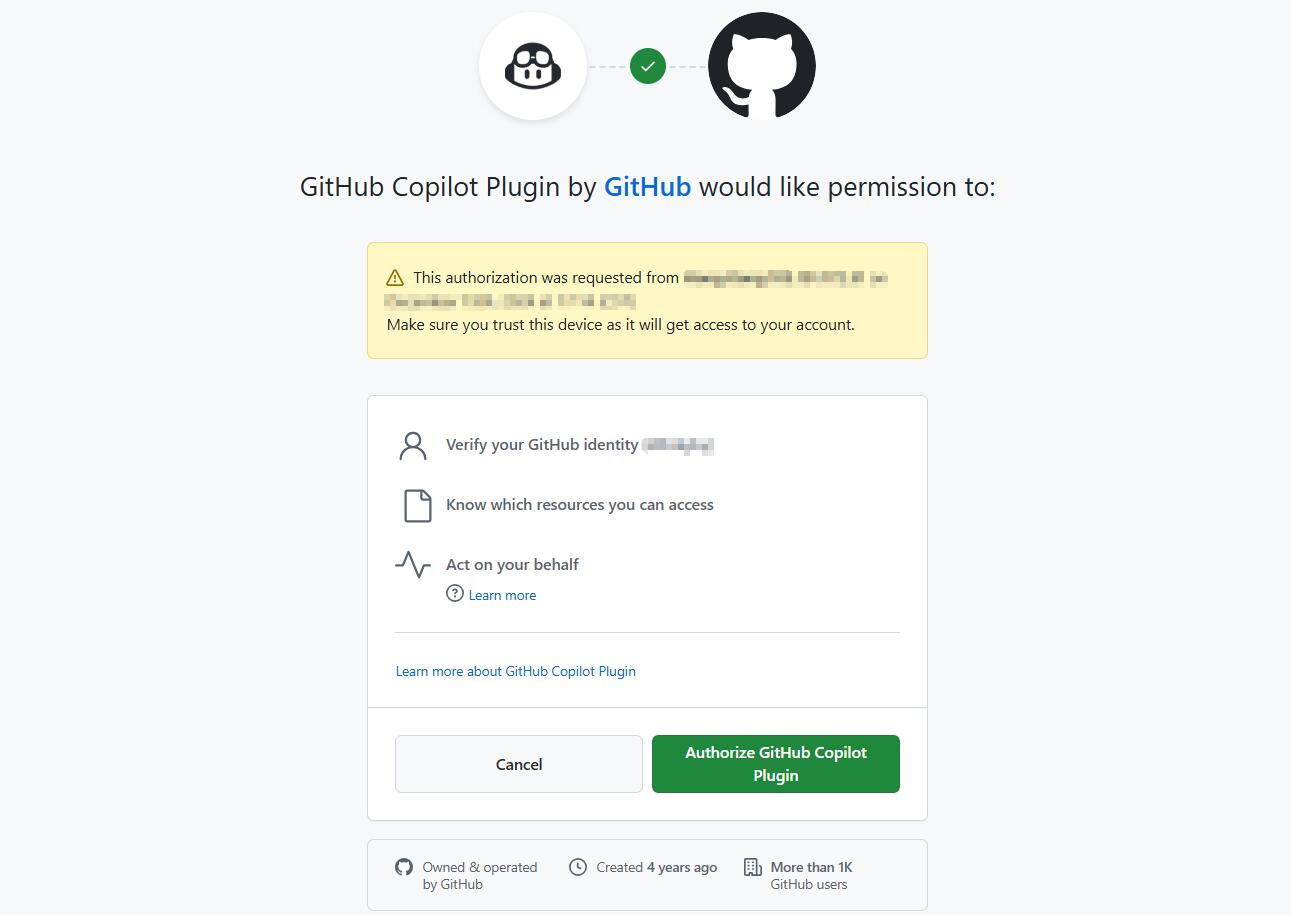
- GitHub will request the necessary permissions for GitHub Copilot. To approve these permissions, click Authorize GitHub Copilot Plugin.
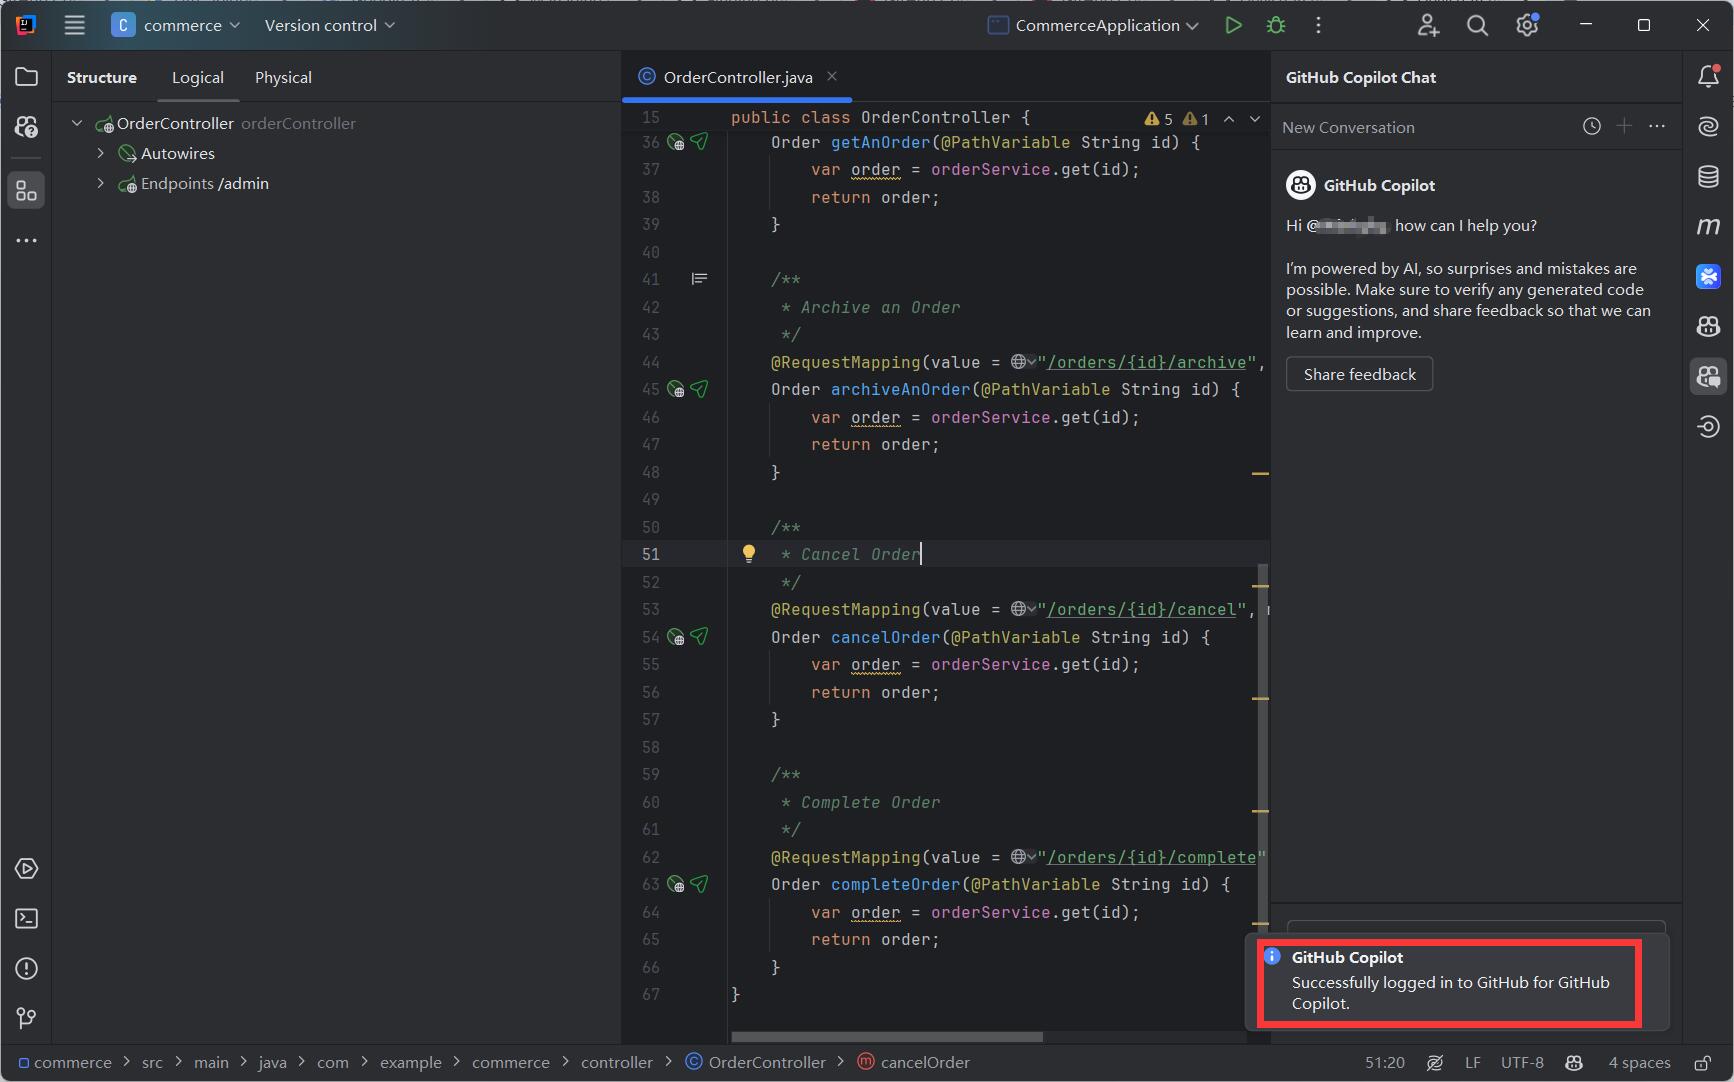
- After the permissions have been approved, your JetBrains IDE will show a confirmation. To begin using GitHub Copilot, click OK.
Step 3: Enjoy GitHub Copilot's Suggestions for Free
GitHub Copilot in JetBrains will offer intelligent code completions and suggestions, helping you write code faster and with fewer errors.
The Limitations of GitHub Copilot Free
While GitHub Copilot Free is a great tool, it comes with some limitations that developers should be aware of:
- Code Completion Limit: You’re allowed up to 2000 completions per month. After hitting this limit, you’ll need to upgrade to Copilot Pro to continue receiving suggestions.
- Copilot Chat Limit: You’re limited to 50 chat messages per month. Once you reach this limit, chat functionality will be disabled until the next month or until you upgrade.
- Not Enterprise-Ready: GitHub Copilot Free lacks enterprise-level features like access management, audit logs, and indemnification coverage, making it unsuitable for larger teams or organizations.
Apidog: The Perfect Companion for GitHub Copilot in JetBrains IDEs
While GitHub Copilot Free is an exceptional tool for code completion and assistance, developers building APIs can benefit from an integrated approach using Apidog — an all-in-one API development tool.
In the rapidly evolving world of software development, Apidog enhances your API workflows by combining API design, documentation, debugging, testing, and mocking into a single platform. When used alongside GitHub Copilot, Apidog can significantly streamline your development process. Lear more about Apidog here.
How Apidog Integrates with JetBrains IDEs
Apidog offers a JetBrains plugin called Apidog Fast Request, which allows developers to integrate API debugging, testing, and documentation directly into their development environment. Follow these easy steps to start using it:
Step 1: Install the Plugin
- Open IntelliJ IDEA and navigate to
File > Settings > Plugins. - Search for “Apidog Fast Request” and click “Install.”
- Alternatively, download it directly from the JetBrains Marketplace.
Step 2: Auto-Detect API Endpoints
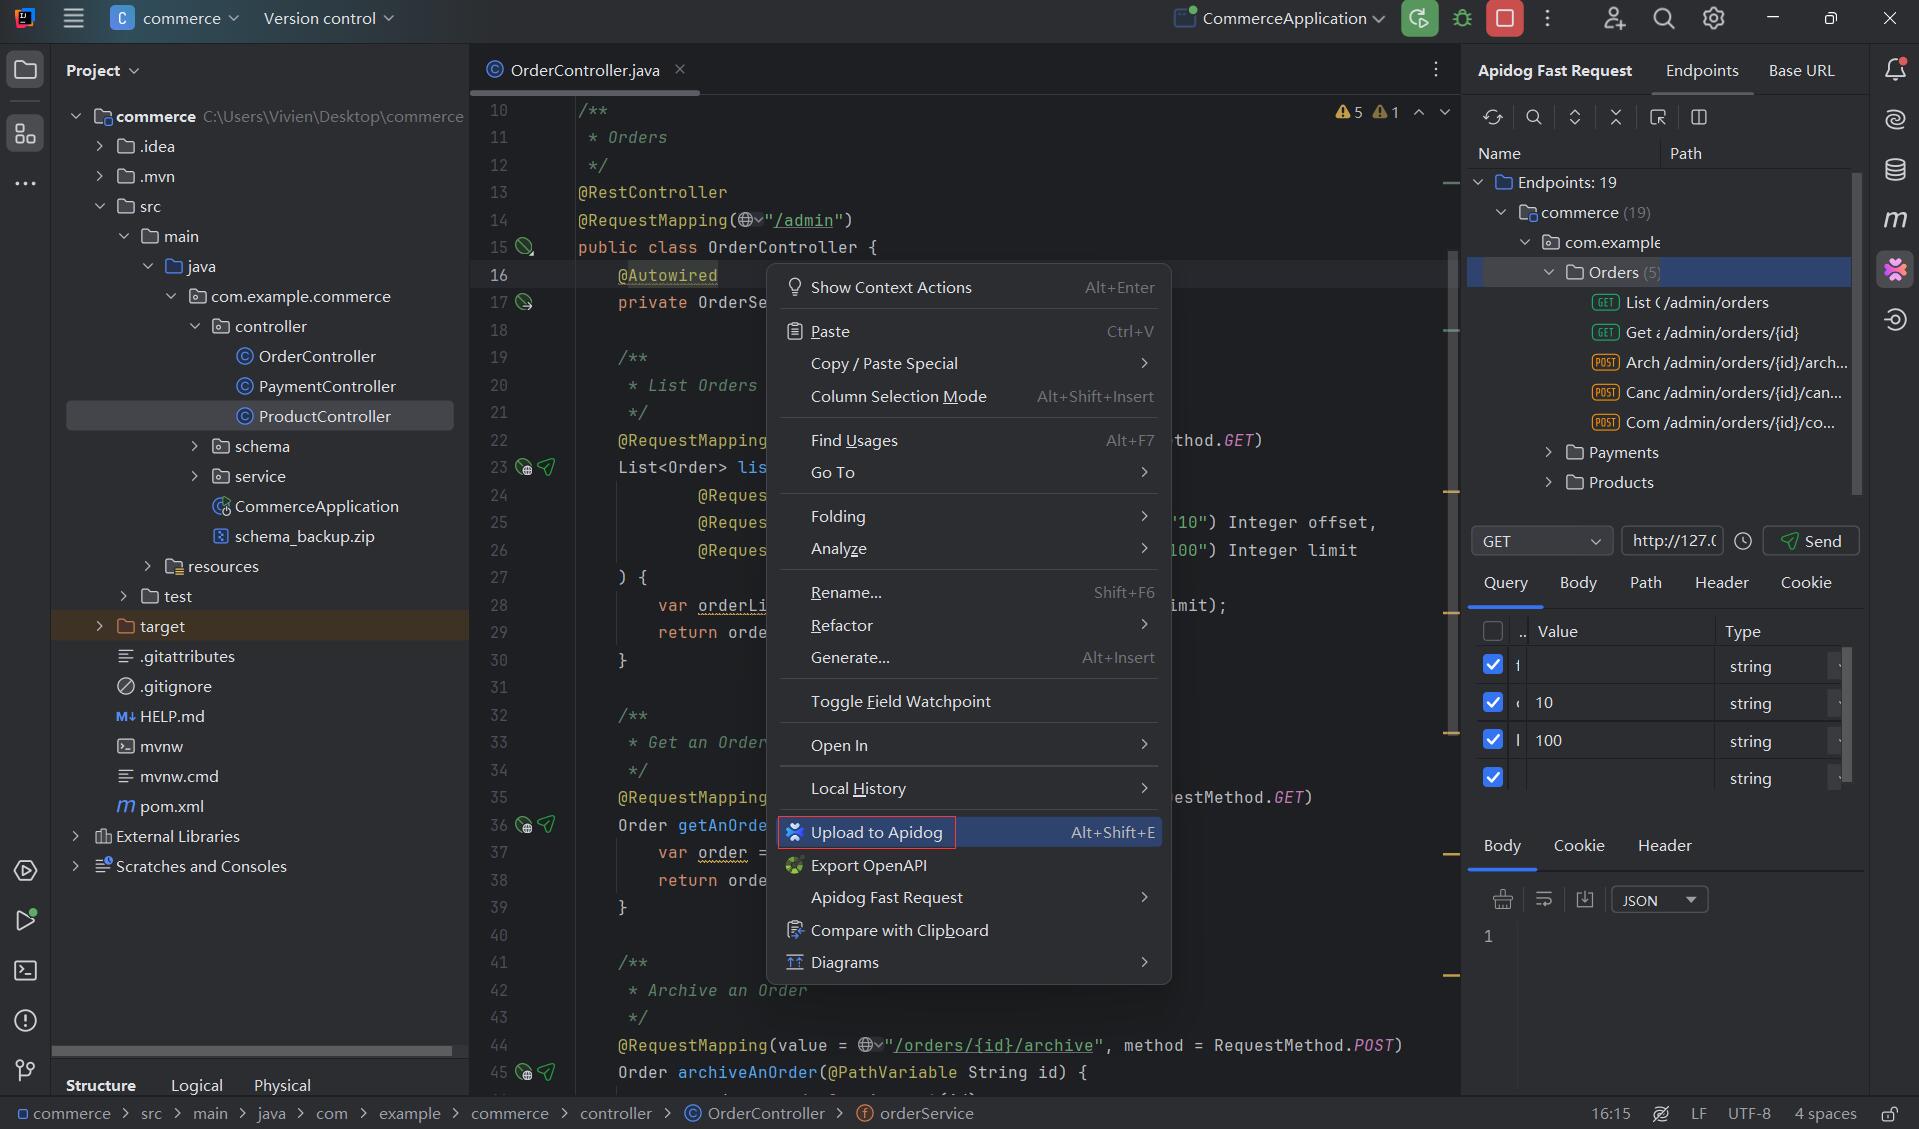
- Apidog Fast Request will scan your project, listing endpoints in the right panel with a clear folder structure.
- You can test each endpoint and view the formatted API responses for quick debugging.
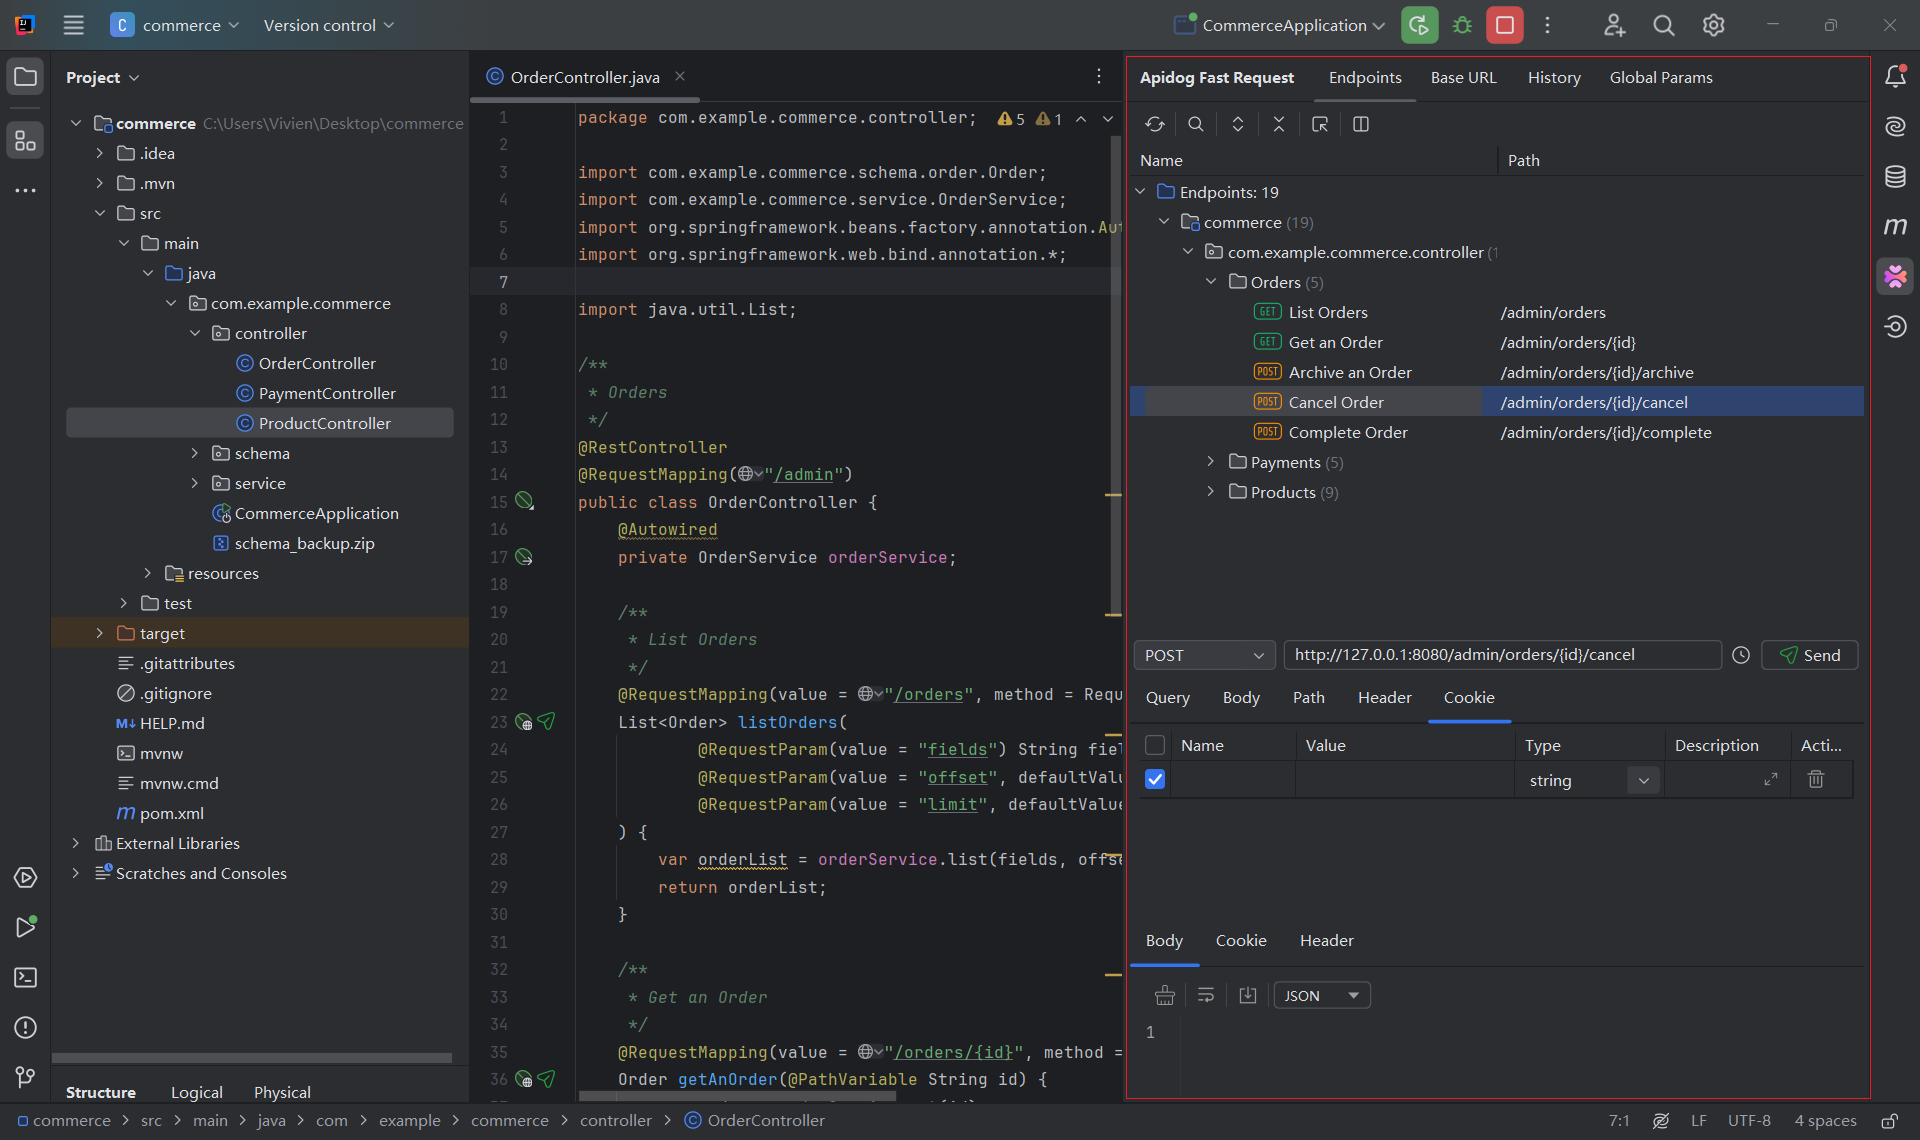
Step 3: Test Endpoints with One Click
- The plugin automatically populates request parameters. You can customize them, along with headers, paths, cookies, and more, and send requests with just one click.
- Configure different environments by configuring the base URL under "Base URL".
- Set up reusable global parameters like tokens under "Global Params" for faster API testing.
- Manage cookies and check your request history via the "Cookies" and "History" tabs.
Step 4: Upload the Generated API specification to Apidog(Optional)
Apidog is an all-in-one API development tool designed to streamline the processes of designing, documenting, testing, and managing APIs. It is a comprehensive platform that helps developers and teams collaborate more efficiently throughout the entire API lifecycle. You can easily upload your generated API specification from IDEA to Apidog using Apidog Fast Request. To do that, follow these steps:
- Download Apidog and sign up for an account (if you don't have an account yet).
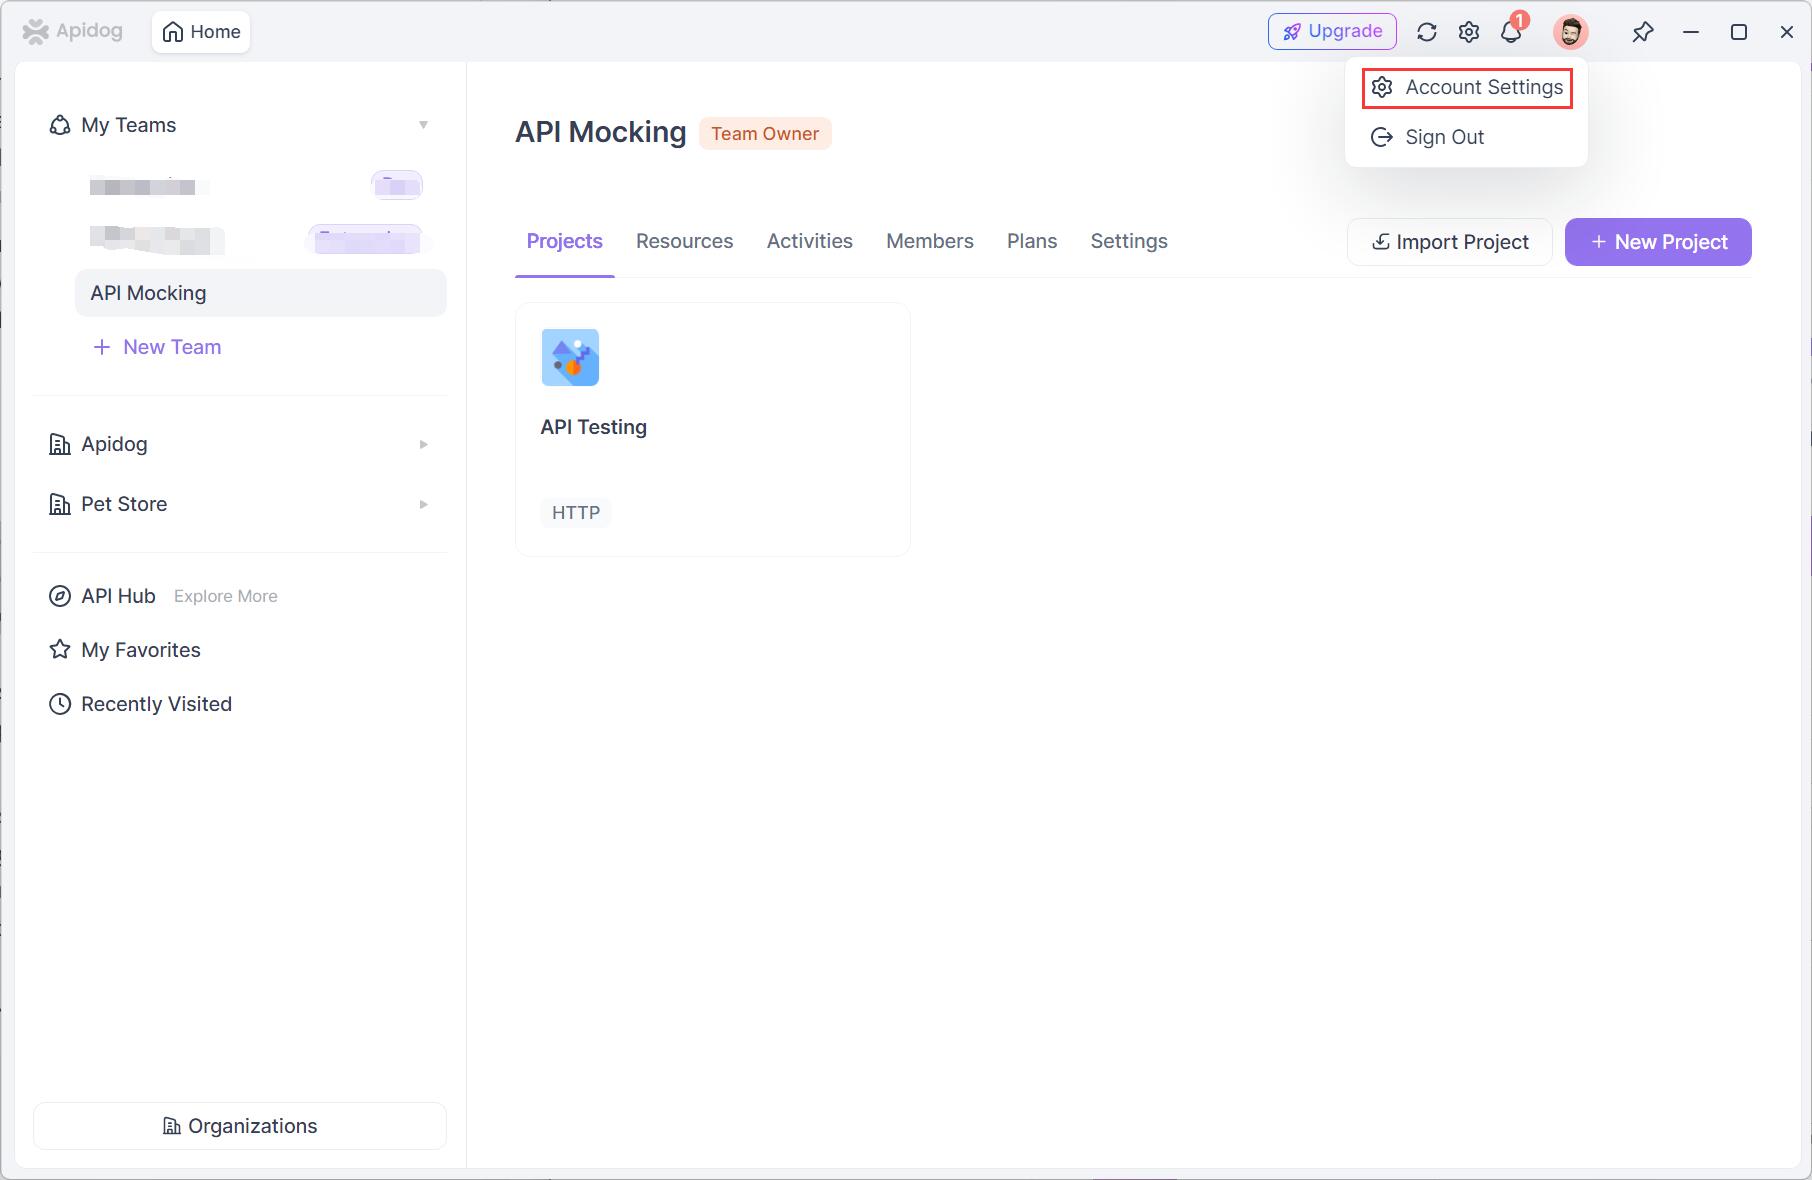
- Login into your Apidog account, then go to the account settings.
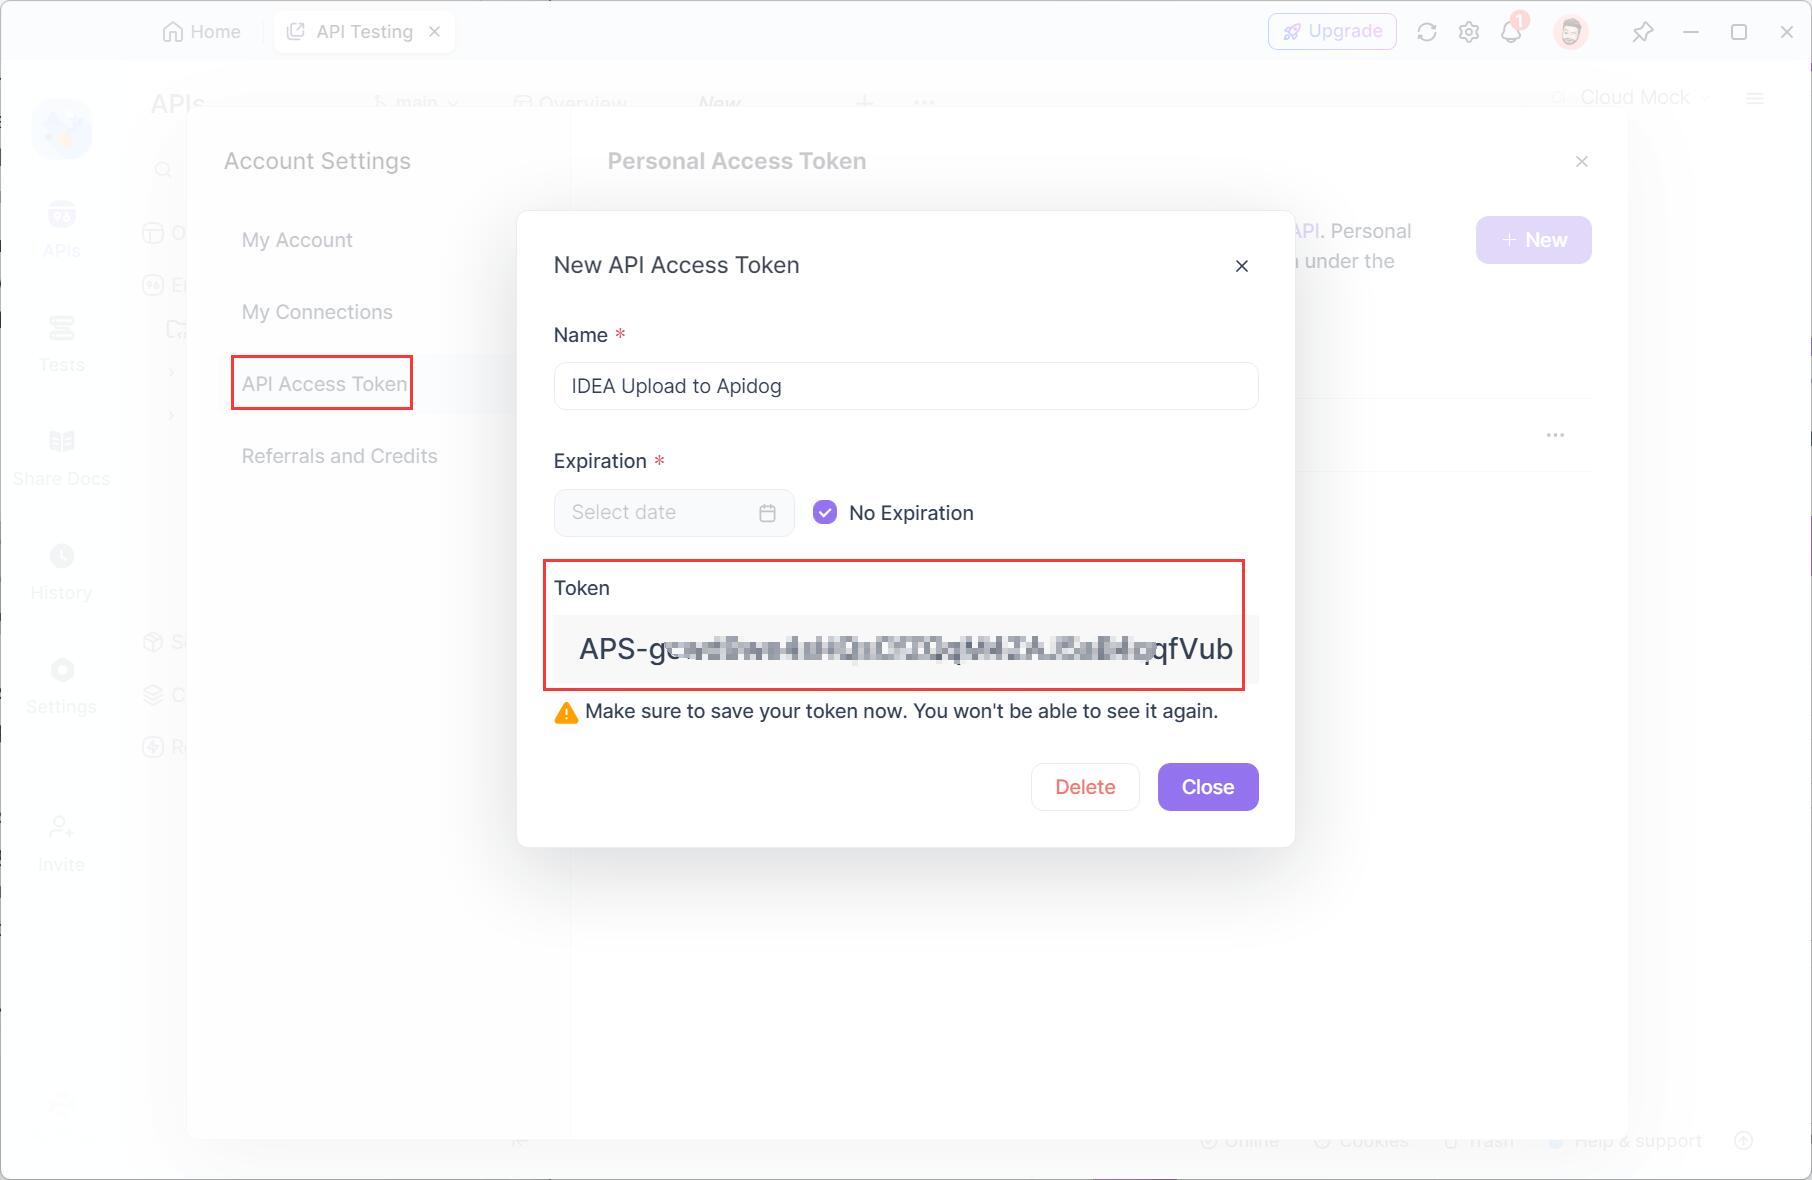
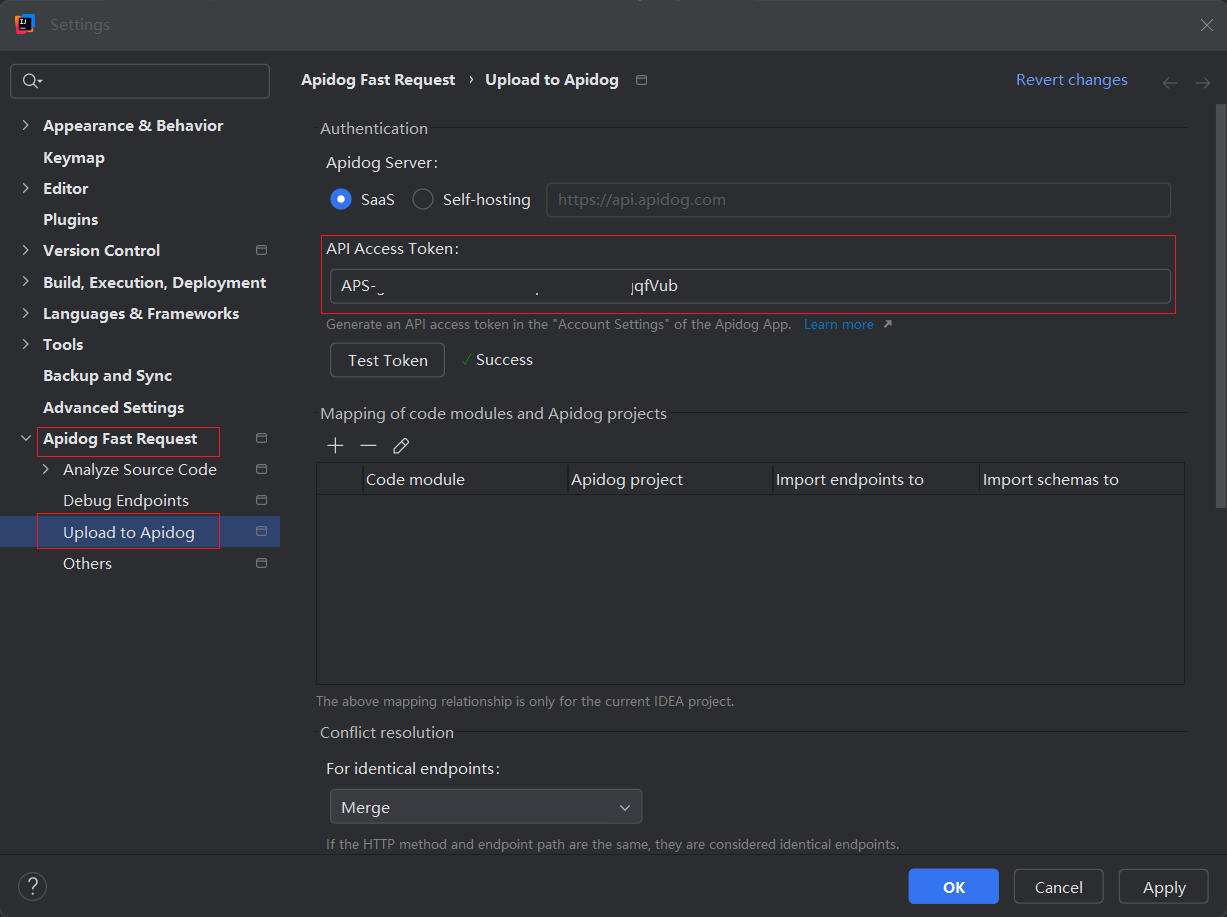
- Find "APl Access Token" to create a new token. Copy the token.
- Go back to your IDEA. In project settings(Ctrl+Alt+S), find "Apidog Fast Request". Click on "Upload to Apidog“>"API Access Token". Paste the copied token and click "Apply".
- Navigate to your IDEA project, right click and you will see an option "Upload to Apidog".
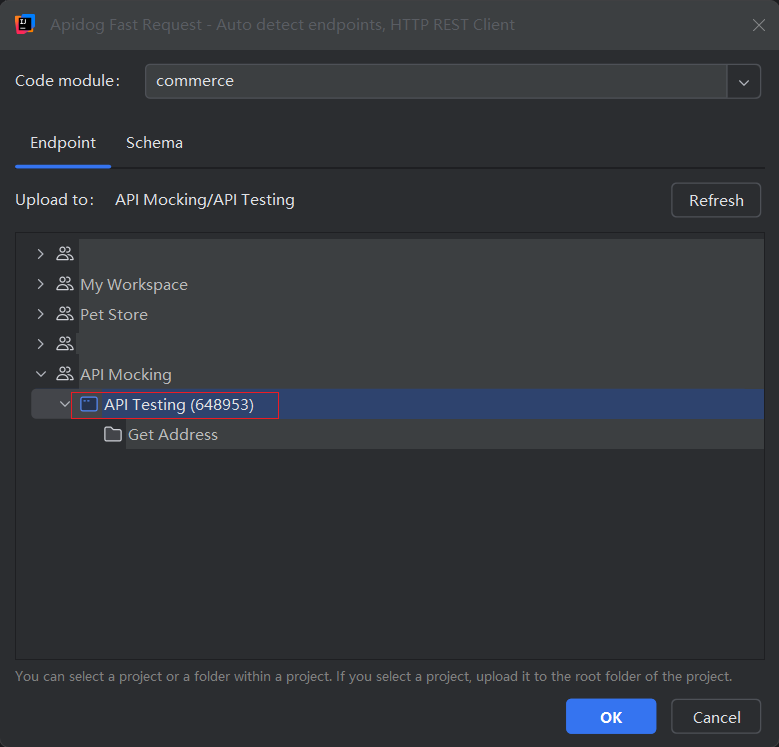
- On the pop-out window, choose the upload destination.
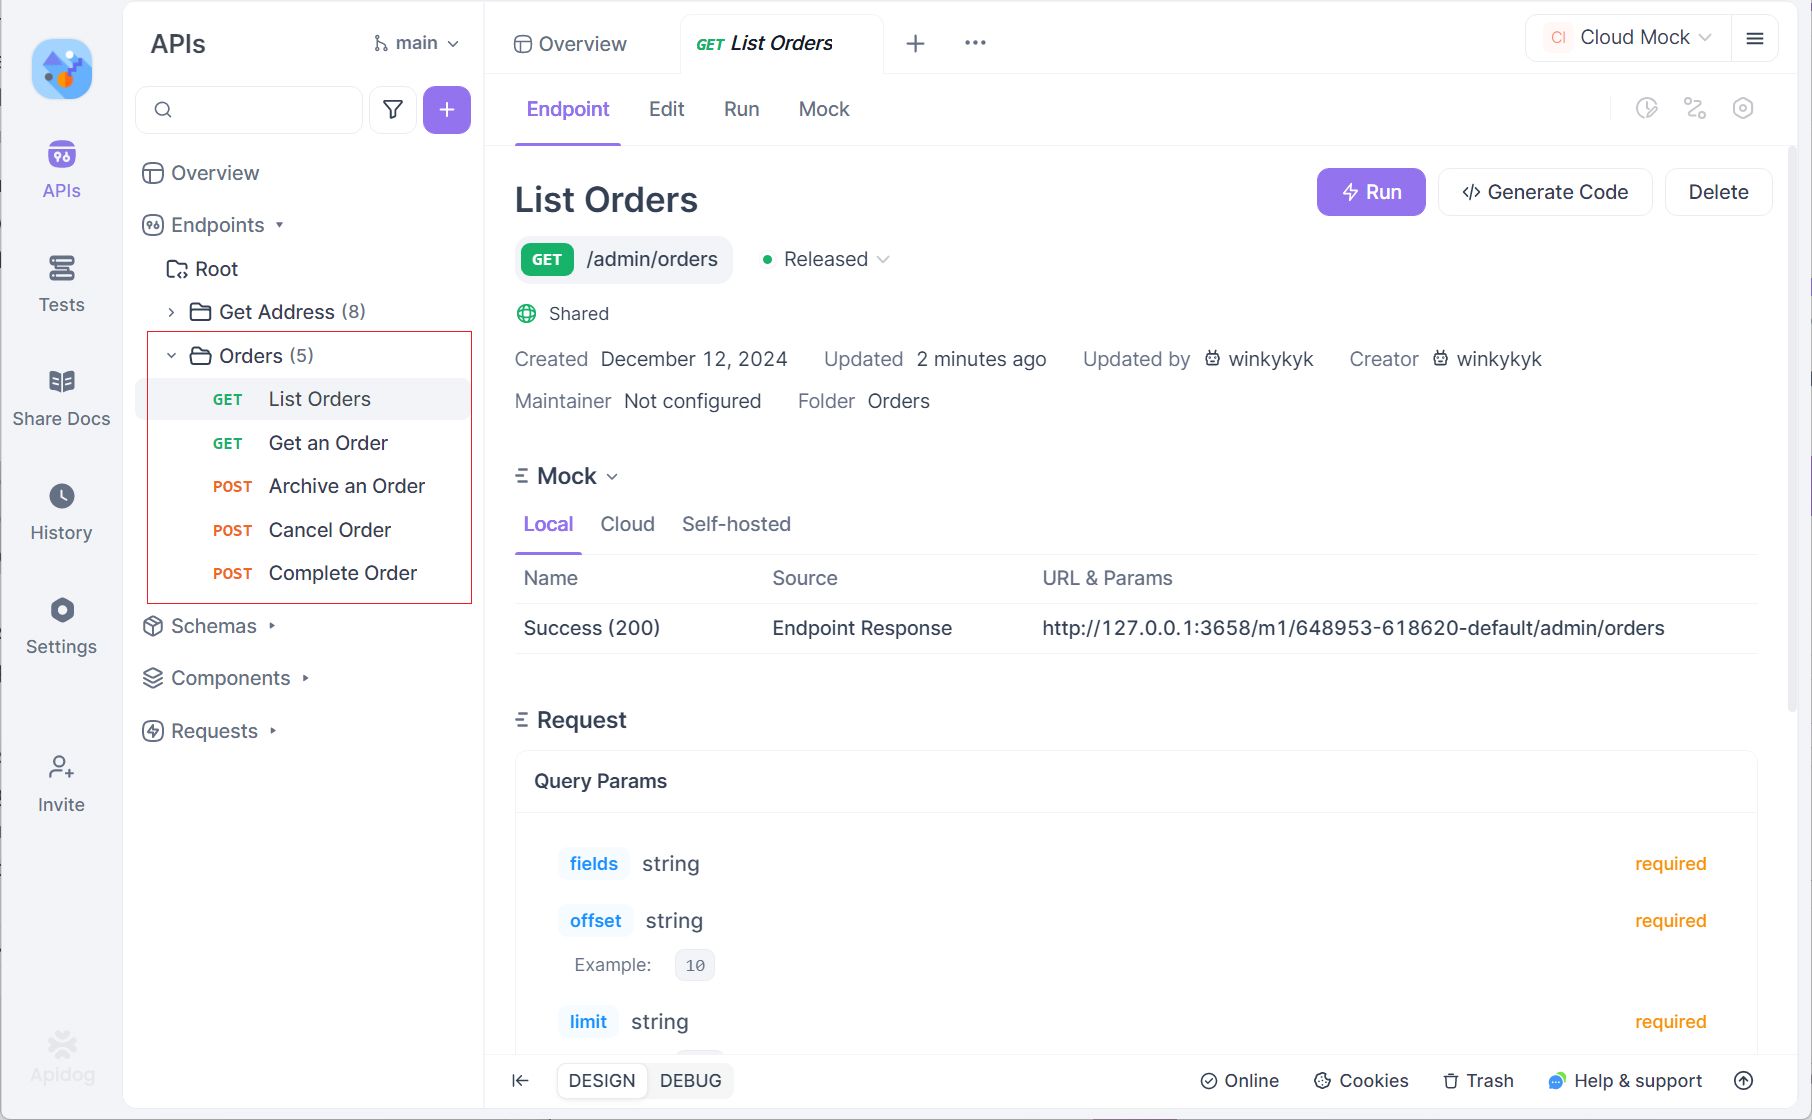
- Back to the Apidog app, you will see the endpoint from your IDEA project has been documented with a well-organized structure, and you can publish it online easily. (Tip: You can debug or test the endpoints directly on Apidog, or set up test scenarios to run automatically.)
Step 5: Publish API Documentation(Optional)
- To make your API documentation available online, go to "Share Docs" within your Apidog dashboard and click "Publish Docs Sites".
- Customize your domain and any other settings, then hit "Publish right now".
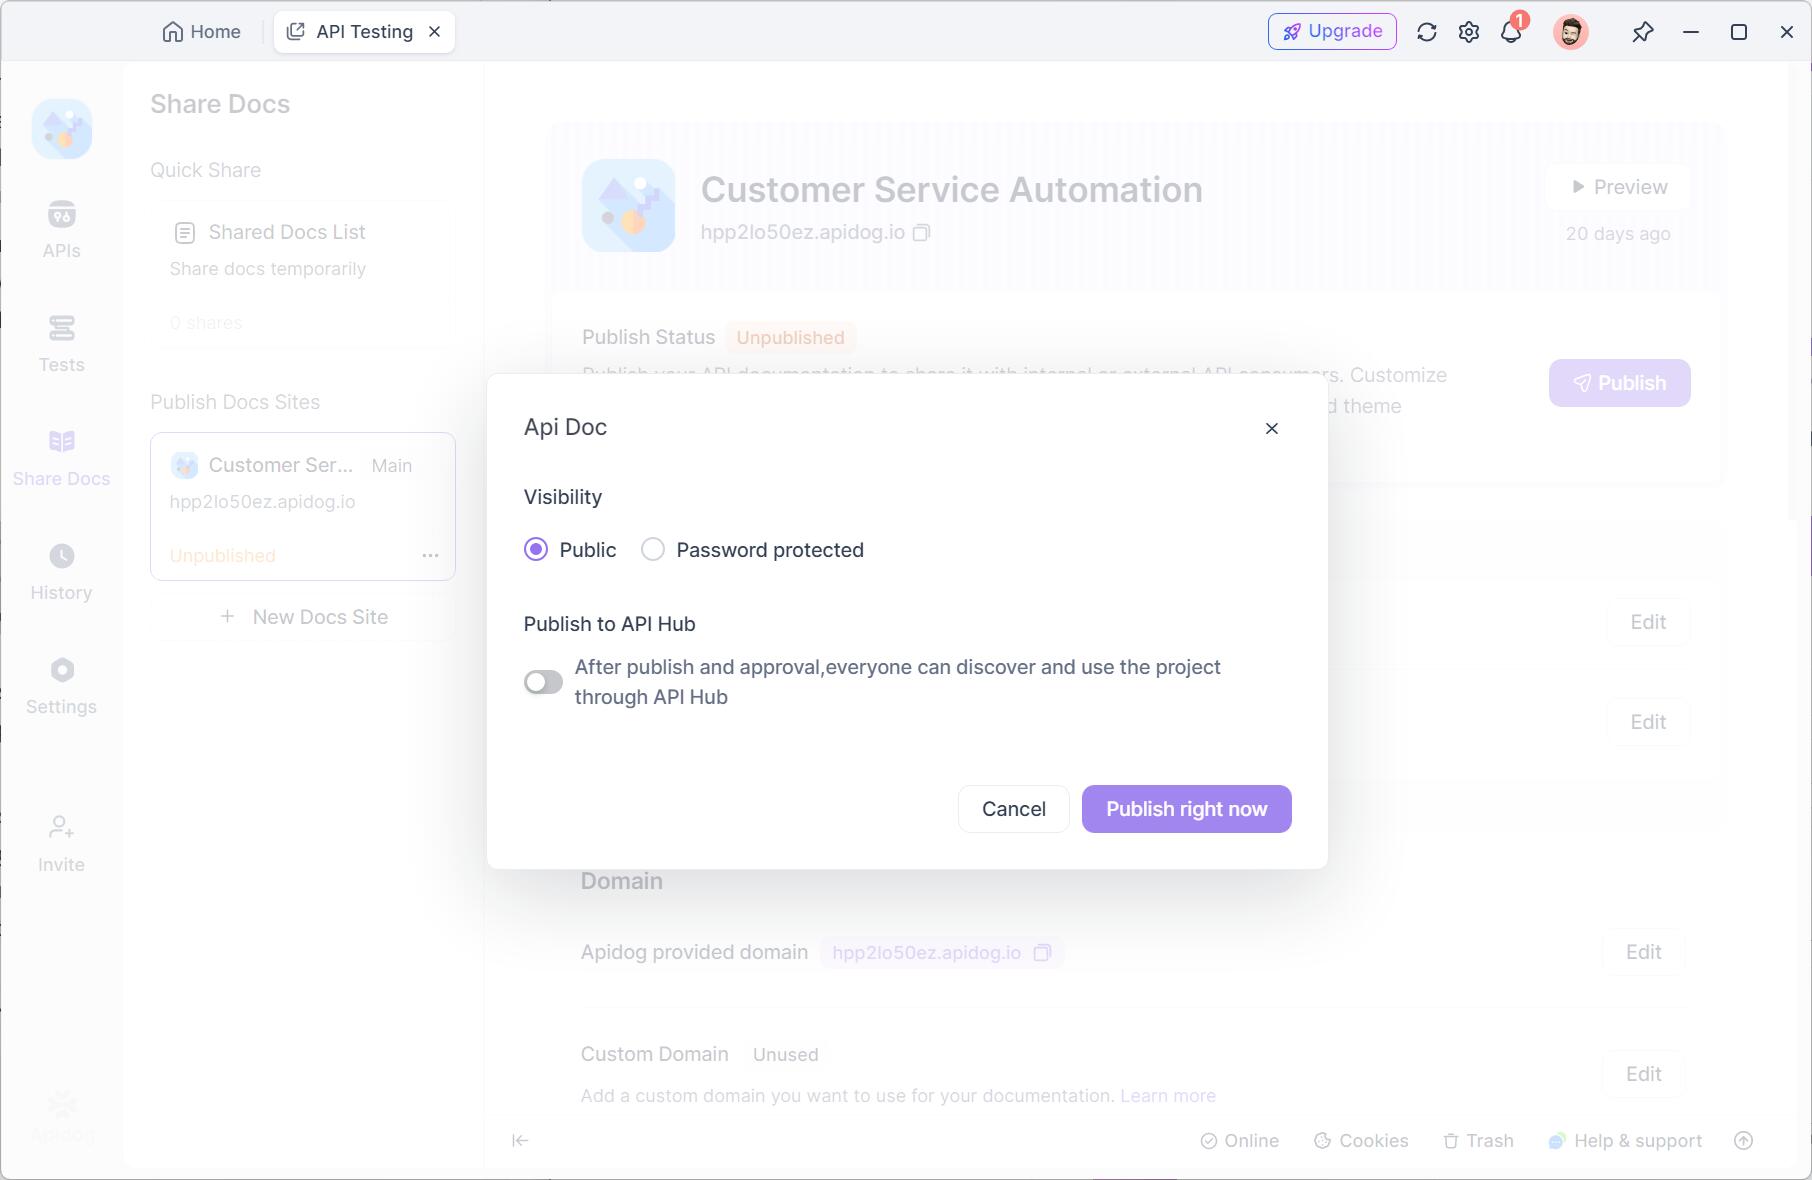
- When published, you’ll get a link that you can share with your team for easy collaboration or with anyone needing access to your API documentation.

Why Use GitHub Copilot Free with Apidog?
The combination of GitHub Copilot and Apidog offers numerous advantages for developers:
- Effortless Integration: The Apidog Fast Request plugin seamlessly integrates into JetBrains IDEs, allowing you to develop and test APIs directly within your coding environment. This eliminates the need to switch between tools, while GitHub Copilot assists by generating helpful code suggestions.
- Faster API Development: GitHub Copilot’s AI-driven code completions, combined with Apidog’s comprehensive API management features, help you build high-quality APIs more efficiently, saving time and effort.
- Enhanced Productivity: With Copilot automating repetitive coding tasks and Apidog simplifying API design, testing, and management, you can focus on what matters most—delivering excellent APIs.
- All-in-One Solution: Apidog offers a complete suite of features for API design, documentation, testing, and mocking. When paired with GitHub Copilot’s intelligent assistance, you gain a powerful toolkit for creating robust APIs with ease.
Together, GitHub Copilot and Apidog create a streamlined development experience, helping you work smarter, faster, and more effectively. And the good news is: They are both free tools!
Conclusion
With GitHub Copilot’s new free tier, developers can enjoy powerful AI-assisted coding in VS Code and JetBrains IDEs without breaking the bank. While Copilot accelerates code completion and debugging, integrating Apidog as your API development companion will enhance your workflow even further. Whether you’re testing APIs, generating client code, or mocking services, Apidog’s JetBrains plugin works hand-in-hand with Copilot to provide an all-in-one development experience that boosts efficiency and quality.
Don’t let this opportunity pass — take advantage of GitHub Copilot Free and Apidog’s powerful features to elevate your coding game.


