In this guide, we'll explore the different methods for calling REST APIs from Node.js applications. We'll go over core concepts, show example code snippets, and provide best practices for working with REST APIs in your Node.js projects.
REST (Representational State Transfer) APIs have become the standard for API development and integration. Their simple, lightweight design makes REST APIs easy to build, scale, and consume from any programming language.
In this guide, we'll explore the different methods for calling REST APIs from Node.js applications. We'll go over core concepts, show Node.JS API call example, and provide best practices for working with REST APIs in your Node.js projects.
Node.js has a built-in HTTP module for making REST API calls. Third-party libraries like Axios offer more features. Apidog simplifies API testing by creating mock servers and sending requests.
button
What are REST APIs?
First, let's briefly recap on some key aspects of REST APIs:
REST APIs access and manipulate data using standard HTTP methods like GET, POST, PUT, and DELETE.
Resources are accessed via endpoints - URLs that expose data entities.
REST uses status codes like 200, 401, 404 etc to indicate API response status.
JSON is the standard format for sending and receiving data.
REST is stateless, so requests must contain all necessary information.
Authentication is via tokens, API keys, etc.
These principles make REST APIs simple, lightweight, and easy to consume from any language like Node.js.
Call API Using Built-in HTTP Module in Node.js
Node.js provides the HTTP core module for making HTTP requests, which you can use to make requests to a server. To quickly demonstrate, here's an example code for a GET request using the HTTP module. This script is designed for Node.js to execute an API call to JSONPlaceholder.
The HTTP module allows making all kinds of requests including POST, PUT etc. However, it's quite low-level and requires manually handling callbacks, JSON parsing, authentication etc.
Here are some detailed steps for using Node.js to call REST APIs:
Step 1: Performing API Calls in Node.js with the HTTP Module
In the realm of Node.js, the absence of XHR objects or the XHR API is noticeable. Instead, Node.js equips us with the HTTP module, enabling us to carry out API calls and interact with servers through HTTP.
Step 1.1: Creating a Node.js Script for an API Call
To embark on your journey of making API calls in Node.js, let's craft a straightforward GET request to the JSONPlaceholder API using the HTTP module. Here are the steps:
Step 1.1.1: Crafting a Node.js Script
Start by crafting a file named "api-call.js," and inject the following code snippet into it. This script will be the linchpin for our API calls in Node.js.
Assuming that you've already installed Node.js, execute the script with the following command: node api-call. This will trigger the execution of the JavaScript file using Node.js and make an "API call in Node.js" to JSONPlaceholder, ultimately fetching an array of objects.
Step 2: Adapting to Different Scenarios
As you delve into the world of "API calls in Node.js," you'll notice that configuring these calls in Node.js demands more setup compared to the simplicity of browser-based XHR objects. Thankfully, numerous external libraries exist to streamline these tasks. One such library is Axios, which we'll explore in our upcoming article.
In the above code, we retrieve all posts at the "/posts" resource from the JSONPlaceholder API. Should you desire to fetch a single post, a URL such as "https://jsonplaceholder.typicode.com/posts/1" will suffice. The key distinction is the inclusion of "/1" at the end of the URL.
Step 3: Modifying the Code
Let's make some alterations to our code to fetch only a single item:
Now, let's delve into creating a POST request using the HTTP module. The crucial difference here is the need to structure a request body and transmit it to the request object:
So for most API tasks, developers use higher level libraries as covered next.
Call an API Using Apidog
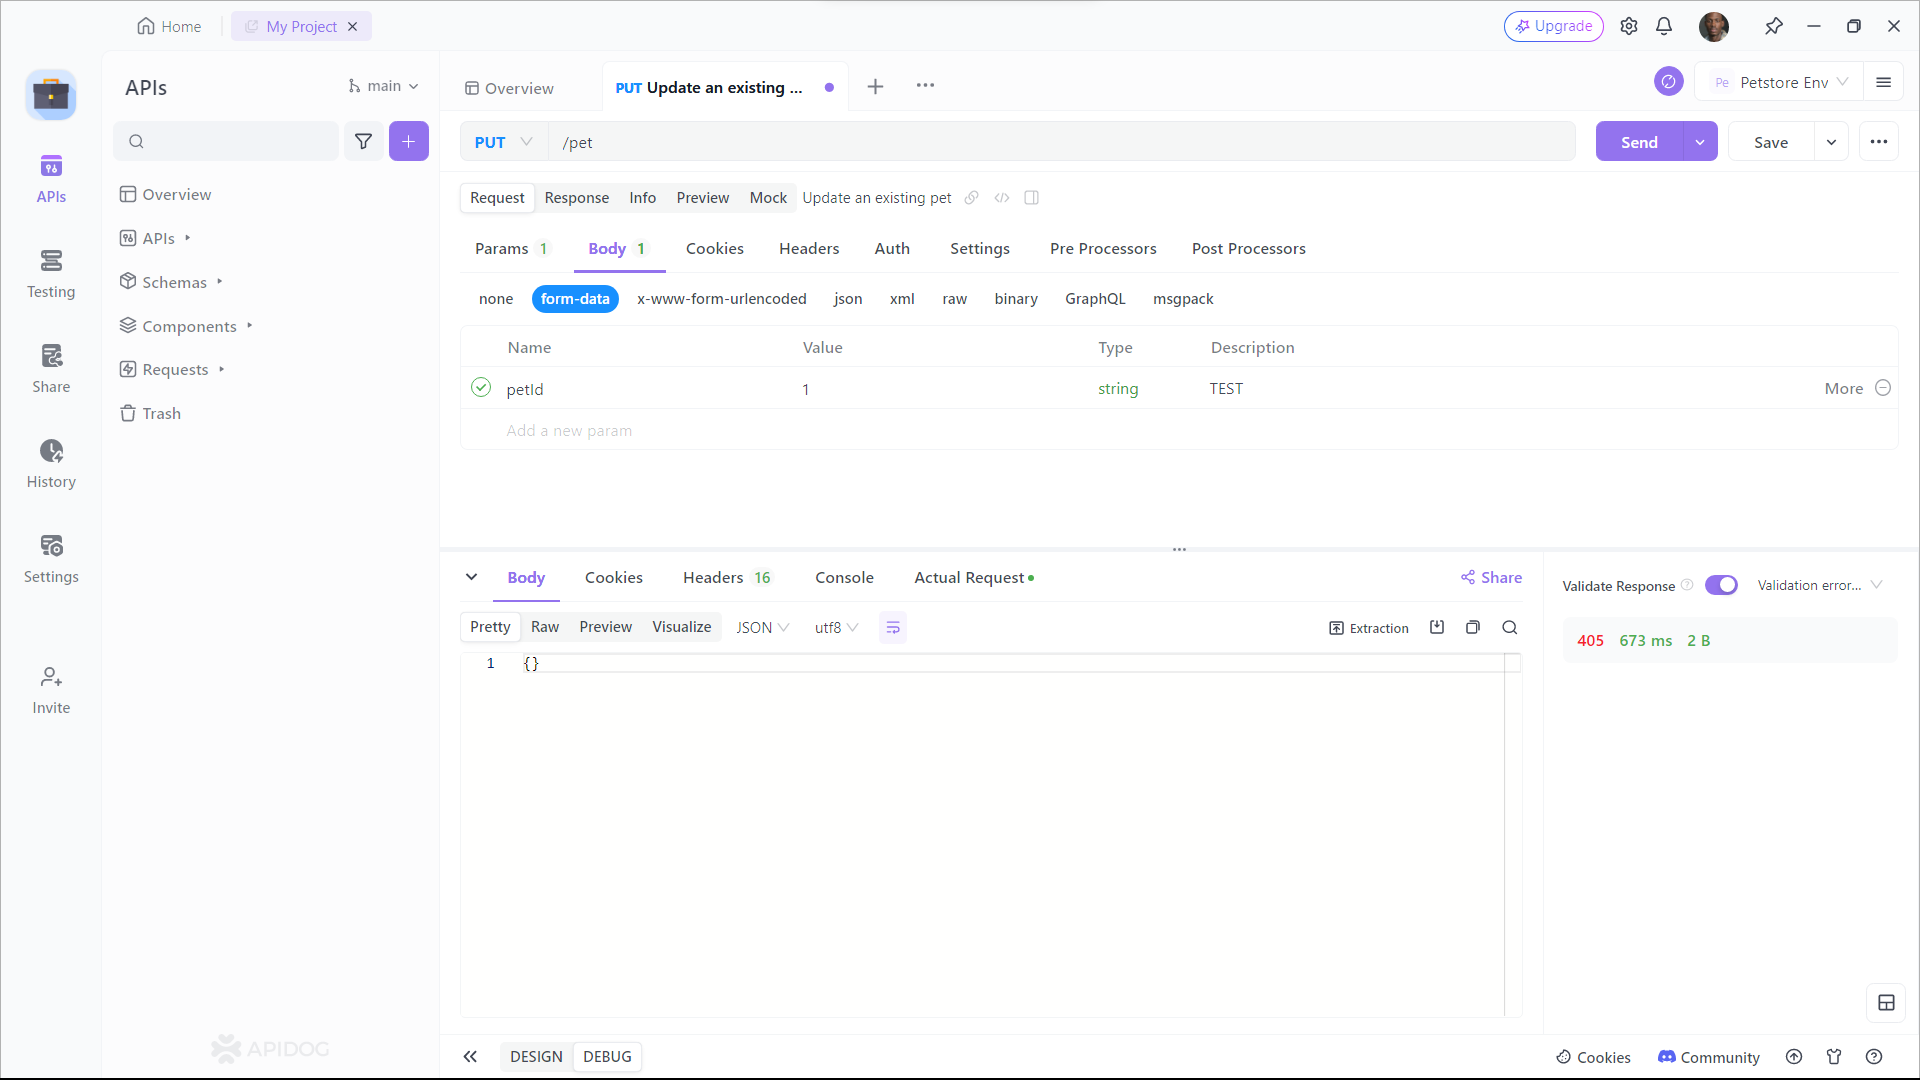
One way to test your put request in Node.js is to use a tool called Apidog . Apidog is a web-based tool that allows you to create and test APIs in a simple and interactive way. You can use Apidog to create mock servers, define endpoints, send requests, and view responses.
button
Here is how you can use Apidog to call your API request:
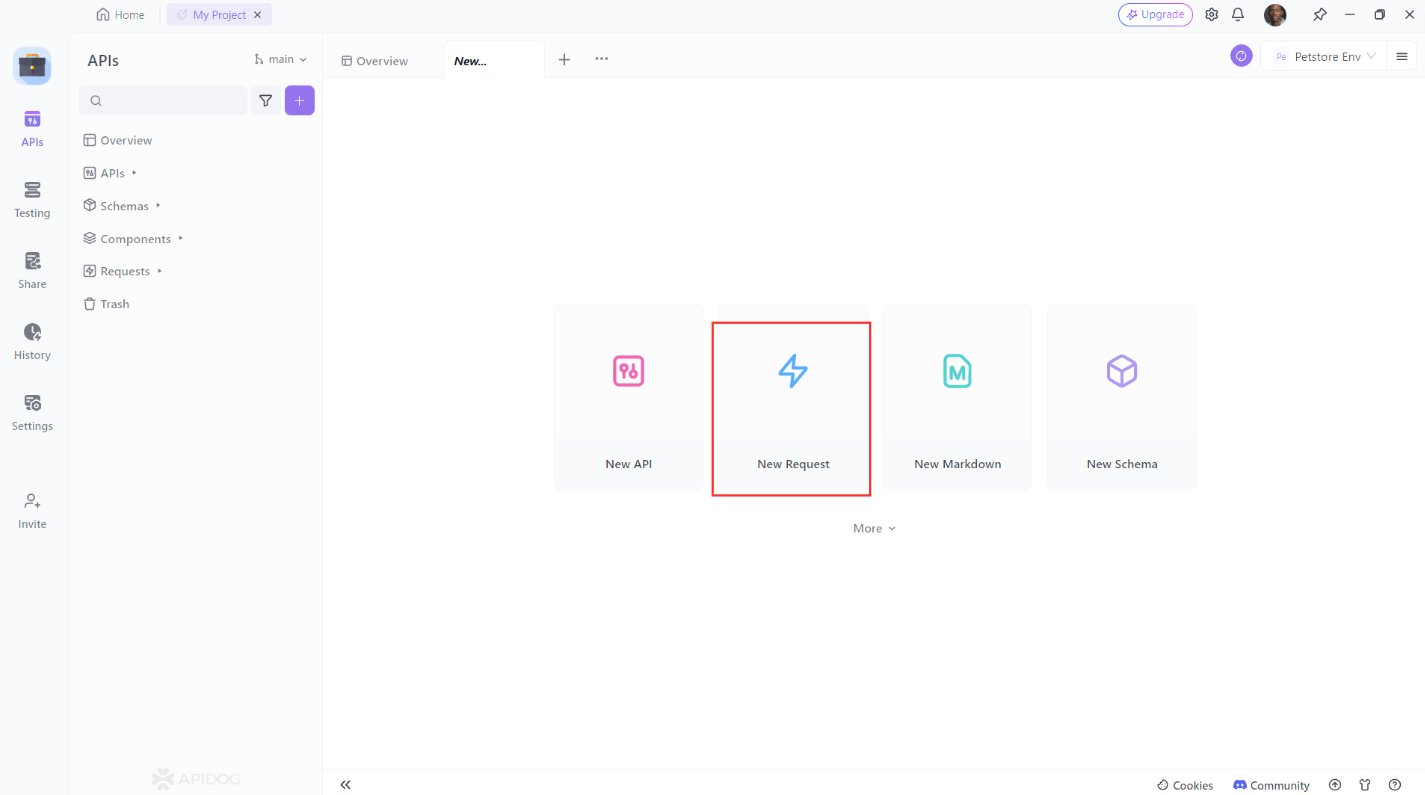
Open Apidog and create a new request.
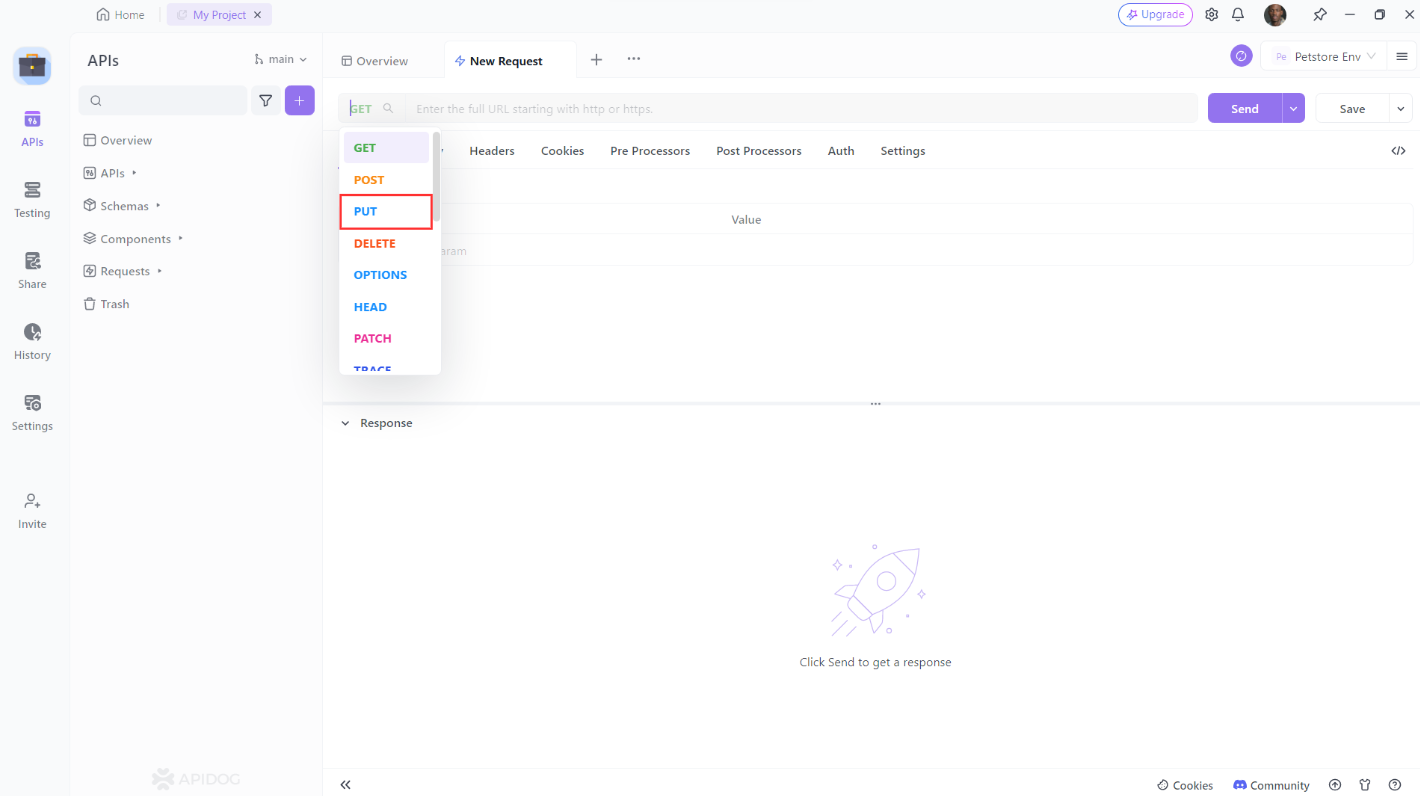
2. Set the request method to PUT.
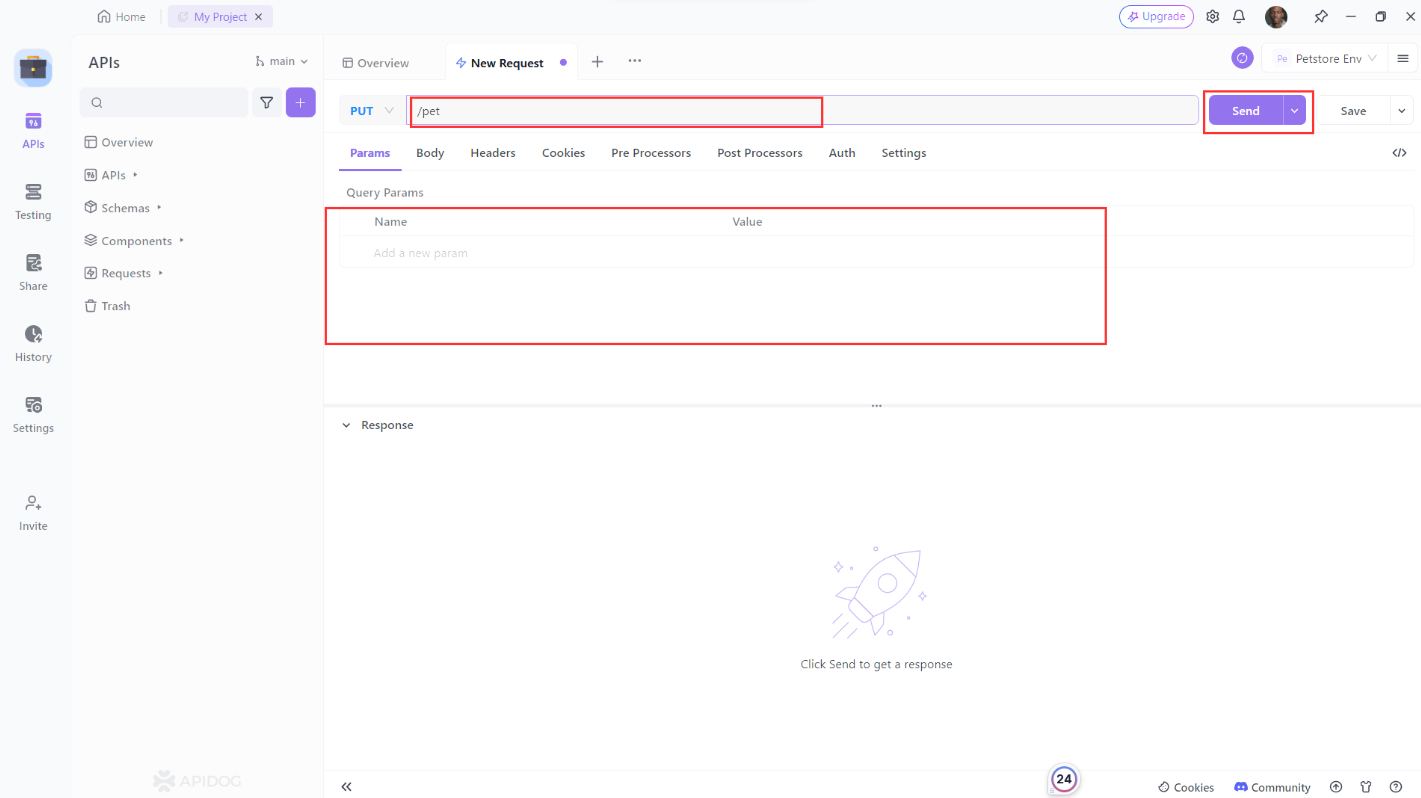
3. Enter the URL of the resource you want to update. Add any additional headers or parameters you want to include then click the “Send” button to send the request.
4. Verify that the response is what you expected.
Conclusion
Node.js allows making REST API calls using its built-in HTTP module. Third-party libraries like Axios provide a more convenient and feature-rich way to interact with APIs. Apidog is a useful tool that simplifies testing APIs by enabling the creation of mock servers and sending requests with ease.
Using Apidog to call and test your API requests is a good choice, as it provides a user-friendly web interface for defining endpoints, sending requests, and inspecting responses without the need for writing additional code.